Have you ever wanted to build a unique single-page scrolling website yet didn’t know where to start? If so, don’t worry! Today we’re going to create together such a website. To achieve this, we’ll take advantage of Locomotive Scroll, a small and easy-to-use JavaScript library for cool scrolling effects.
Plus, to speed up the development process (and to create a responsive layout with minimal effort) we’ll put Tailwind CSS into play.
What We’re Building
As usual, before moving on, let’s examine the final result (scroll or view the demo on a large screen and check the effects):
What is Locomotive Scroll?
Locomotive Scroll is one of the many JavaScript scrolling libraries that exist today. You might have already used some other ones in your projects, like ScrollTrigger.js and ScrollMagic.js. In actual fact, I covered a ScrollMagic example in a previous tutorial.
Here’s its definition as used on the Locomotive Scroll site:
“A simple scroll library used by developers at Locomotive. Built as a layer on top of ayamflow’s virtual-scroll, it provides smooth scrolling with support for parallax effects, toggling classes, and triggering event listeners when elements are in the viewport.”
Are you curious enough to explore the capabilities of this library? Let’s begin!
Getting Started With Locomotive Scroll
To get started with Locomotive Scroll, you have to include the following files in your project:
- The
locomotive-scroll.cssfile or its minified version - The
locomotive-scroll.jsfile or its minified version
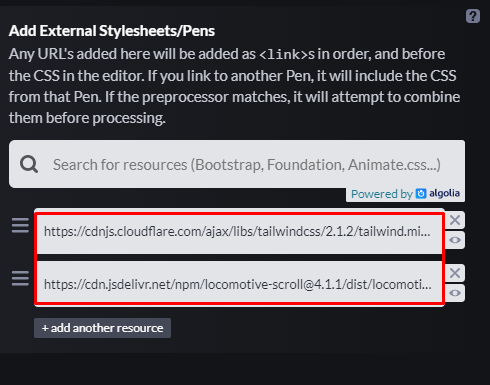
You can download them by visiting its GitHub repo, using a package manager (e.g. npm), or loading the necessary assets through a CDN (e.g. jsDelivr). For this tutorial, we’ll choose the last option.
As discussed in the introduction, for this demonstration, beyond the Locomotive files, we’ll also incorporate Tailwind CSS to create the page layout.
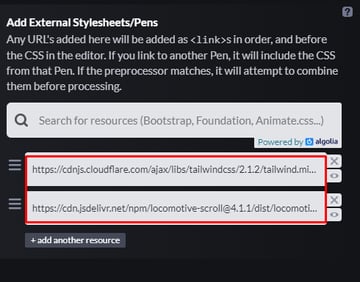
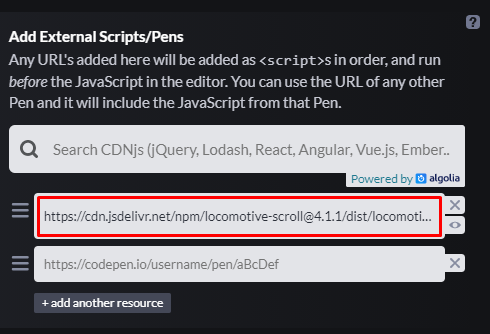
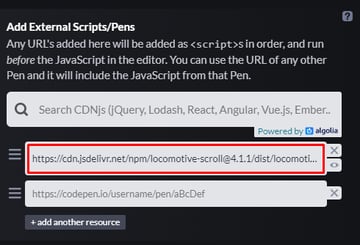
With that in mind, if you look under the Settings tab of our demo pen, you’ll see that there are two external CSS files and one external JavaScript file.


1. Structuring the Page
Locomotive Scroll comes with several different data attributes for manipulating the elements. We’ll use a lot of them, so at the end of this tutorial you’ll have a good grasp of what they do and how you can use them.
Let’s start by specifying a wrapper element with the data-scroll-container attribute. Inside it we’ll place the page sections and a back-to-top link. Later on, we’ll initialize the plugin by targeting this wrapper.
All page sections will have the data-scroll-section attribute. Plus, almost all of them will have an id attribute. This attribute will help us smoothly navigate to target sections through the menu and back-to-top links.
Here’s the initial page structure:
<div data-scroll-container>
  <section id="intro" class="h-screen flex items-center justify-center text-center bg-green-200" data-scroll-section>...</section>
  <section class="py-40" data-scroll-section>...</section>
  <section id="about-section" class="py-40 bg-green-50" data-scroll-section>...</section>
  <section id="office" class="py-20" data-scroll-section>...</section>
  <section id="services" class="relative py-60 bg-green-50" data-scroll-section>...</section>
  <section id="clients-section" class="py-40" data-scroll-section>...</section>
  <section id="contact" class="py-80 border-t-2 border-solid border-gray-50" data-scroll-section>...</section>
  <section class="h-screen flex items-center justify-center text-center bg-green-200" data-scroll-section>...</section>
  <a class="back-to-top fixed bottom-24 right-4 text-red-500 hover:text-red-600 focus:text-red-600 transition opacity-0 invisible" href="#intro" role="button" aria-label="Back to top" data-scroll-to>
    <svg aria-hidden="true" xmlns="https://www.w3.org/2000/svg" width="40" height="40" viewBox="0 0 24 24">
      <path d="M12 0c-6.627 0-12 5.373-12 12s5.373 12 12 12 12-5.373 12-12-5.373-12-12-12zm0 7.58l5.995 5.988-1.416 1.414-4.579-4.574-4.59 4.574-1.416-1.414 6.006-5.988z" />
    </svg>
  </a>
</div>
At this point, we’re ready to have a closer look at the important page sections.
Section #1
The first section will include a heading and a paragraph.
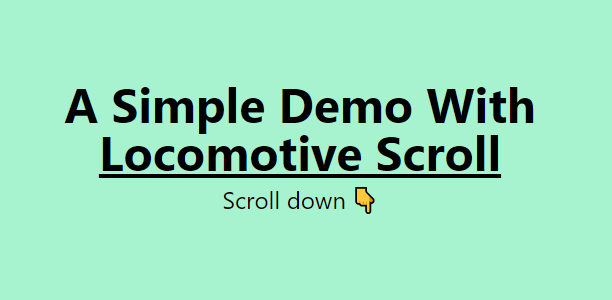

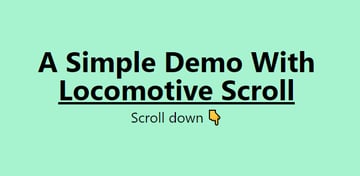
Another important thing here: by default, the back-to-top link won’t appear. As we scroll:
- If the heading is in view, the link will be/remain invisible.
- It will appear only when the heading isn’t in view.

To implement this functionality, we’ll pass the data-scroll, data-scroll-repeat, and data-scroll-call="toggleBackToTop" attributes to the heading. Let’s now discuss a little further the role of these attributes:
The job of the data-scroll attribute is to check if the element is in view. As soon as it appears for the first time, the plugin will add the is-inview class to it. This class won’t be removed any more. Notice also how the plugin modifies the element’s CSS transform property to apply the different effects.


The job of the data-scroll-repeat attribute is to check repeatedly if the element is in view. The plugin will toggle the is-inview class depending on the element’s position. In our case, we’ll use this attribute only in pair with the data-scroll-call attribute that needs it to work properly.
The job of the data-scroll-call attribute is to trigger Locomotive’s call event. The attribute value that can be anything we want is passed as a parameter to the event callback and allows us to do stuff when the target element enters or leaves the viewport. It’s a bit hard to explain it with words, so it’s better that you see the JavaScript code. We’ll work with it again in the upcoming sections. As said, remember that we’ll use it together with the data-scroll-repeat attribute.
Here’s how we structure this section:
<section id="intro" class="h-screen flex items-center justify-center text-center bg-green-200" data-scroll-section>
  <div class="container px-5 mx-auto">
    <h1 class="text-5xl font-bold" data-scroll data-scroll-repeat data-scroll-call="toggleBackToTop">A Simple Demo With <a class="underline" href="https://locomotivemtl.github.io/locomotive-scroll/" target="_blank">Locomotive Scroll</a></h1>
    <p class="text-2xl mt-2">Scroll down 👇</p>
  </div>
</section>
Section #2
The second section will include the menu links.


To navigate smoothly to page sections upon clicking a link, we have to give the data-scroll-to attribute to the links.
Note: we’ll pass the same attribute to the back-to-top link.
Keep in mind that this attribute isn’t part of the docs at the time of this writing. If you’re wondering how I know about its existence, the answer is that I found it by checking the source code of the plugin’s GitHub Page.


Alternatively, if you don’t want to use this attribute, you can achieve this functionality using some JavaScript scrolling methods.
Here’s how we structure this section:
<section class="py-40" data-scroll-section>
  <div class="container px-5 mx-auto">
    <nav>
      <ul class="grid md:grid-flow-col gap-8 lg:gap-16 justify-center text-center">
        <li>
          <a class="inline-block text-2xl font-medium px-4 py-2 border-4 border-double border-transparent hover:border-green-400 focus:border-green-400 rounded-md transition" href="#about-section" data-scroll-to>
            About
          </a>
        </li>
        <li>
          <a class="inline-block text-2xl font-medium px-4 py-2 border-4 border-double border-transparent hover:border-green-400 focus:border-green-400 rounded-md transition" href="#office" data-scroll-to>
            Office
          </a>
        </li>
        ...
      </ul>
    </nav>
  </div>
</section>
Section #3
The third section will include a heading and some text.
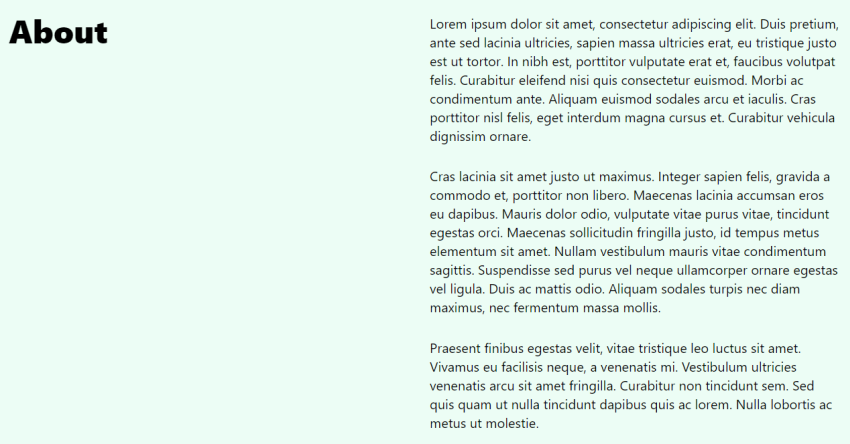
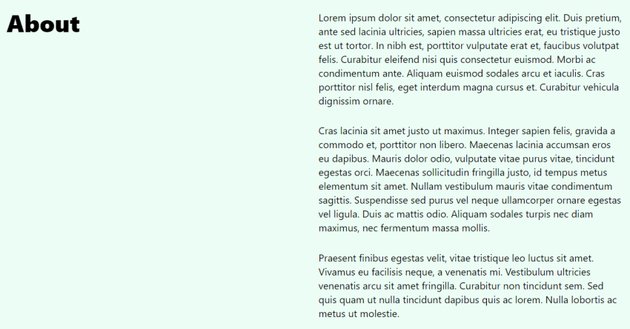
As we scroll, we’ll pin the heading to the top. But, for how long? Well, until we scroll past its parent. At that point, the element will disappear as it will then be part of the normal document flow.
To implement this functionality, we’ll assign the data-scroll, data-scroll-sticky, and data-scroll-target="#about" attributes to the heading. Some notes:
- As we already know, the
data-scrollattribute will detect if our element is in view. - The
data-scroll-stickyattribute will make it sticky in pair with thedata-scroll-targetattribute. - The value of the
data-scroll-targetattribute will determine the element’s initial and final sticky positions.
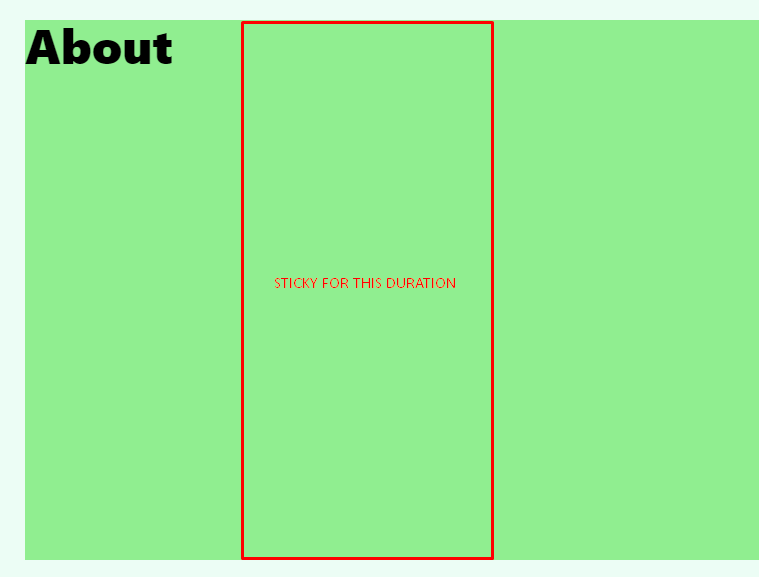
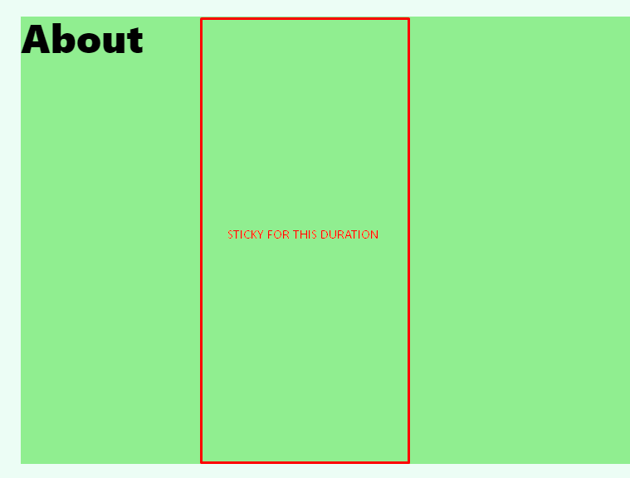
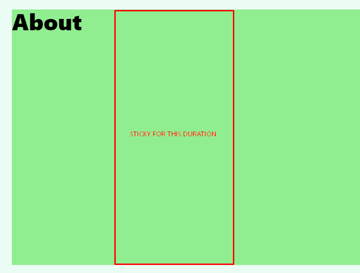
Here’s how we structure this section:
<section id="about-section" class="py-40 bg-green-50" data-scroll-section>
  <div class="container px-5 mx-auto">
    <div id="about" class="lg:grid grid-cols-2 gap-4 items-start">
      <h2 class="text-5xl font-extrabold" data-scroll data-scroll-sticky data-scroll-target="#about">About</h2>
      <div class="text-xl pt-4 lg:pt-0">...</div>
    </div>
  </div>
</section>
Section #4
The fourth section will include two Unsplash images.
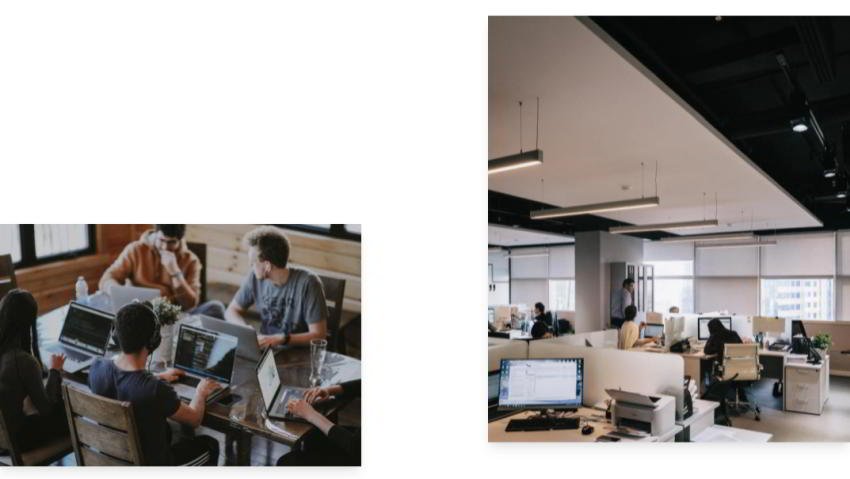
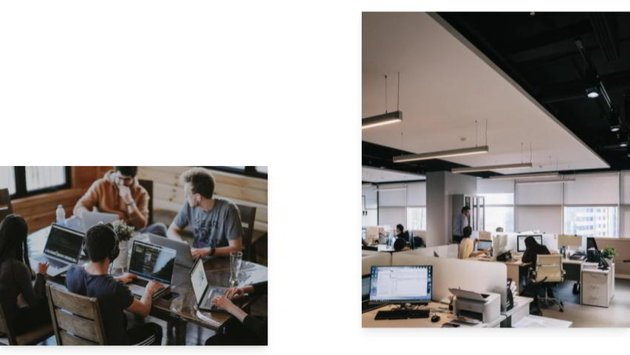
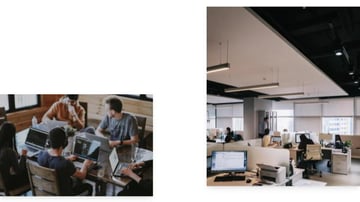
As we scroll, a parallax effect will happen. To be more specific, the first image will move four times faster than the second one.
To implement this functionality, we’ll pass the data-scroll and data-scroll-speed attributes to the images. The value of the second attribute will determine their scrolling speed. Here we’ll give data-scroll-speed="4.8" to the first image and data-scroll-speed="1.2" to the second one.
Here’s how we structure this section:
<section id="office" class="py-20" data-scroll-section>
  <div class="sm:grid grid-cols-2 gap-40">
    <figure class="flex items-end">
      <img class="shadow-lg h-auto" width="1000" height="667" src="http://webdesign.tutsplus.com/office1.jpg" alt="" data-scroll data-scroll-speed="4.8">
    </figure>
    <figure>
      <img class="shadow-lg h-auto" width="1000" height="1498" src="office2.jpg" alt="" data-scroll data-scroll-speed="1.2">
    </figure>
  </div>
</section>
Section #5
The fifth section will include a heading and two text banners explaining our services.


As we scroll, multiple parallax effects will take place:
- First, the heading’s letters will move at different speeds. Plus, each time they come into view, they will receive a random color from a list of predefined colors.
- Second, the banners will move horizontally in different directions.
To implement this functionality, we’ll do the following:
We’ll assign the data-scoll, data-scroll-repeat, data-scroll-speed, and data-scroll-call="randomizeTextColor" attributes to the heading’s letters. As we want a parallax effect, the value of the data-scroll-speed attribute will vary for each letter. Remember the role of the data-scroll-call attribute. Here we’re saying: as the letters enter the viewport and Locomotive’s call event fires, do something. If you check the JavaScript section, you’ll notice that at this point the getRandomColor() function is firing. Optionally, here we can also put into action the data-scroll-delay attribute.
We’ll also assign the data-scroll, data-scroll-direction="horizontal", data-scroll-speed, and data-scroll-target="#services" attributes to the banners. The data-scroll-direction="horizontal" will move the elements horizontally on scroll. Next, by giving them opposite values for the data-scroll-speed attribute, we ensure that they will move in different directions (from left to right or right to left). Finally, the data-scroll-target="#services" attribute will determine when the horizontal animations should start. To understand it, try to put the id of another section e.g. data-scroll-target="#office" and reload the page. Notice that the animations start much sooner than they should be.
Here’s how we structure this section:
<section id="services" class="relative py-60 bg-green-50" data-scroll-section>
  <h2 class="absolute top-1/2 left-1/2 transform -translate-x-1/2 -translate-y-1/2 -skew-x-12 whitespace-nowrap text-6xl sm:text-9xl font-extrabold py-4">
    <span class="inline-block" data-scroll data-scroll-repeat data-scroll-speed="3" data-scroll-call="randomizeTextColor">S</span>
    <span class="inline-block" data-scroll data-scroll-repeat data-scroll-speed="2" data-scroll-call="randomizeTextColor">e</span>
    <span class="inline-block" data-scroll data-scroll-repeat data-scroll-speed="3" data-scroll-call="randomizeTextColor">r</span>
    <span class="inline-block" data-scroll data-scroll-repeat data-scroll-speed="2" data-scroll-call="randomizeTextColor">v</span>
    <span class="inline-block" data-scroll data-scroll-repeat data-scroll-speed="3" data-scroll-call="randomizeTextColor">i</span>
    <span class="inline-block" data-scroll data-scroll-repeat data-scroll-speed="2" data-scroll-call="randomizeTextColor">c</span>
    <span class="inline-block" data-scroll data-scroll-repeat data-scroll-speed="3" data-scroll-call="randomizeTextColor">e</span>
    <span class="inline-block" data-scroll data-scroll-repeat data-scroll-speed="2" data-scroll-call="randomizeTextColor">s</span>
  </h2>
  <div class="transform rotate-6 skew-x-12">
    <div data-scroll data-scroll-direction="horizontal" data-scroll-speed="20" data-scroll-target="#services">
      <span class="text-3xl sm:text-4xl md:text-6xl 2xl:text-7xl bg-green-400 p-5 whitespace-nowrap">Social Media — Email Marketing — Digital Advertising</span>
    </div>
  </div>
  <div class="transform -rotate-6 -skew-x-12 mt-40">
    <div data-scroll data-scroll-direction="horizontal" data-scroll-speed="-20" data-scroll-target="#services">
      <span class="text-3xl sm:text-4xl md:text-6xl 2xl:text-7xl bg-green-400 p-5 whitespace-nowrap">Web Development - Motion Design - Graphic Design</span>
    </div>
  </div>
</section>
Section #7
The seventh section will include a call-to-action heading.


As we scroll, two things will happen:
- First, each time the heading comes into view, it will receive a random color, like the previous example.
- Second, we’ll animate each letter by creating another parallax (lerp) effect.
To implement this functionality, we’ll do the following:
We’ll assign the data-scoll, data-scroll-repeat, and data-scroll-call="randomizeTextColor" attributes to the heading. Remember that we’ve already met the data-scroll-call="randomizeTextColor" attribute. It’s perfectly fine to use it here as well.
And we’ll assign the data-scroll, data-scroll-delay, and data-scroll-speed="5" attributes to each letter. All letters will move five times faster than normal scrolling, yet with different delays. For example, the first letter will have data-scroll-delay="0.15" while the second one data-scroll-delay="0.095". This will create the lerp/staggering effect. Again you can see lerp effects in the plugin’s showcase example.
Here’s how we structure this section:
<section id="contact" class="py-80 border-t-2 border-solid border-gray-50" data-scroll-section>
  <div class="container px-5 mx-auto text-center">
    <h2 class="text-2xl sm:text-5xl font-extrabold py-4" data-scroll data-scroll-repeat data-scroll-call="randomizeTextColor">
      <span class="inline-block" data-scroll data-scroll-delay="0.15" data-scroll-speed="5">h</span>
      <span class="inline-block" data-scroll data-scroll-delay="0.095" data-scroll-speed="5">e</span>
      <span class="inline-block" data-scroll data-scroll-delay="0.085" data-scroll-speed="5">l</span>
      <span class="inline-block" data-scroll data-scroll-delay="0.075" data-scroll-speed="5">l</span>
      <span class="inline-block" data-scroll data-scroll-delay="0.065" data-scroll-speed="5">o</span>
      <span class="inline-block" data-scroll data-scroll-delay="0.055" data-scroll-speed="5">@</span>
      <span class="inline-block" data-scroll data-scroll-delay="0.045" data-scroll-speed="5">g</span>
      <span class="inline-block" data-scroll data-scroll-delay="0.035" data-scroll-speed="5">e</span>
      <span class="inline-block" data-scroll data-scroll-delay="0.035" data-scroll-speed="5">o</span>
      <span class="inline-block" data-scroll data-scroll-delay="0.045" data-scroll-speed="5">r</span>
      <span class="inline-block" data-scroll data-scroll-delay="0.055" data-scroll-speed="5">g</span>
      <span class="inline-block" data-scroll data-scroll-delay="0.065" data-scroll-speed="5">e</span>
      <span class="inline-block" data-scroll data-scroll-delay="0.075" data-scroll-speed="5">.</span>
      <span class="inline-block" data-scroll data-scroll-delay="0.085" data-scroll-speed="5">c</span>
      <span class="inline-block" data-scroll data-scroll-delay="0.095" data-scroll-speed="5">o</span>
      <span class="inline-block" data-scroll data-scroll-delay="0.15" data-scroll-speed="5">m</span>
    </h2>
  </div>
</section>
2. Initializing the Plugin
We’ve talked about many of the plugin’s features, yet we haven’t initialized it. Let’s do that now.
Here’s all the required JavaScript code:
const backToTop = document.querySelector(".back-to-top");
const opacityClass = "opacity-0";
const visibilityClass = "invisible";

const scroll = new LocomotiveScroll({
  el: document.querySelector("[data-scroll-container]"),
  smooth: true,
  tablet: { smooth: true },
  smartphone: { smooth: true }
});

const arrayOfColors = [
  "#0a9396",
  "#005f73",
  "#ae2012",
  "#3d405b",
  "#003049",
  "#bc6c25",
  "#ff006e",
  "#ef476f",
  "#1982c4",
  "#ee964b",
  "#0ead69",
  "#390099",
  "#f6aa1c",
  "#54101d",
  "#2b2c28",
  "#85c7f2",
  "#e15a97",
  "#2b70e3",
  "#b36a5e"
];

function getRandomColor() {
  const arrayLength = arrayOfColors.length;
  const randomValue = Math.random() * arrayLength;
  const roundedNumber = Math.floor(randomValue);
  const color = arrayOfColors[roundedNumber];
  return color;
}

scroll.on("call", (value, way, obj) => {
  if (value === "randomizeTextColor") {
    if (way === "enter") {
      obj.el.style.color = getRandomColor();
    }
  } else if (value === "toggleBackToTop") {
    if (way === "enter") {
      backToTop.classList.add(opacityClass, visibilityClass);
    } else {
      backToTop.classList.remove(opacityClass, visibilityClass);
    }
  }
});
Some quick notes:
- We’ll keep its smooth behavior across all devices.
- Notice the parameters of the
callevent callback. The first one (i.e.value) holds the values of thedata-scroll-callattributes. Using anifcondition, we check to see which values are active each time, then whether the associated elements enter or leave the viewport, and finally, we perform the desired actions.
Conclusion
Congrats, folks! We managed to build a parallax scrolling website thanks to Locomotive Scroll. Hopefully, this exercise has revealed the power of this tiny library and motivated you to start creating advanced scrolling effects effortlessly.
Here’s a reminder of what we built:
Don’t forget to give it some love ❤️!
Before closing, let me leave you with a few thoughts:
- As with every technology/tool/library, the best way to learn Locomotive Scroll is through its docs. Go ahead, check the published example and use your browser tools to inspect its source code. Also, check its GitHub repo for issues, how active the project is, how other people use the library, or just for taking some ideas. If you feel more adventurous, check the plugin’s native code. Here you’ll learn things like what parameters a function (e.g. the callback of the
callevent) can accept, etc. - Scrolling effects can decrease a website’s performance. Besides this fact, the more the complex the effects, the more risk there is they will encounter issues across different browsers/devices. For example, on a live website, I would avoid using the horizontal animations we covered.
- For even more powerful effects, you can combine Locomotive Scroll with other animation libraries like GSAP and barba.js.
Last but not least, a big thanks to Locomotive developers for this plugin! As always, thanks a lot for reading, and be sure to share with us your Locomotive projects!
Keep on Scrolling
Check out these other tutorials to learn more about JavaScript and scrolling:


 Scroll EventsHow to Animate on Scroll With Vanilla JavaScript

 JavaScriptHow to Build a Reading Progress Bar With CSS and JavaScript

 CSSCSS Scroll Snap: What Is It? Do We Need It?

 HTMLQuick Tip: How to Create a Simple Fade Effect on Scroll

 JavaScriptJavaScript Skills: Create a Responsive Header Animation on Scroll

 HTMLHow to Hide/Reveal a Sticky Header on Scroll (With JavaScript)

 HTMLHow to Hide/Reveal Header Notification Bar on Scroll with JavaScript

 JavaScriptHow to Implement Smooth Scrolling With CSS & JavaScript
