Audacity stands as a titan in the world of audio editing, offering a vast array of tools for those eager to enhance their audio recordings. This guide, tailored for intermediate users, focuses on how to smooth out and clean up audio in Audacity. It’s an essential read for podcasters, musicians, or any audio enthusiast aiming to achieve pristine sound quality. By mastering Audacity, you can transform your audio from rough and noisy to clear and polished.


Getting Started with Audacity
To embark on your journey of audio refinement, the first step is to ensure Audacity is up and running on your device. If you haven’t installed it yet, or need a refresher, check out “How to Freely Download and Install Audacity in Windows & Mac” (How to Freely Download and Install Audacity in Windows & Mac). This guide will get you up to speed on the installation process. Once Audacity is installed, take a moment to familiarize yourself with its interface. This will make navigating the upcoming steps much smoother and more efficient.
In the next sections, we’ll delve into how to improve audio quality in Audacity, offering practical tips and techniques to clean up audio, enhance clarity, and remove unwanted silence. Whether you’re fine-tuning a podcast or polishing a musical piece, these insights will elevate your audio editing skills to the next level. Stay tuned for more in-depth guidance on leveraging Audacity’s powerful features for audio excellence.
Basic Steps to Improve Audio Quality
Level Adjustments

Improving audio quality in Audacity starts with level adjustments, a crucial step for smoothing out your audio. Here’s a step-by-step tutorial:
- Open Your Project: Launch Audacity and open your audio file or project.
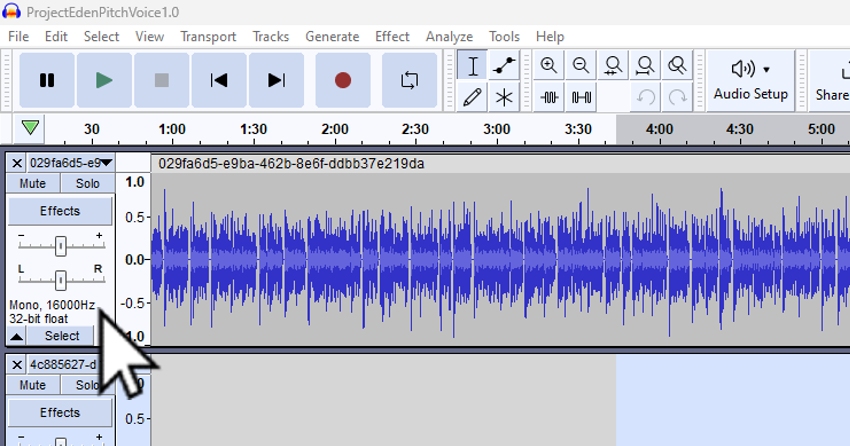
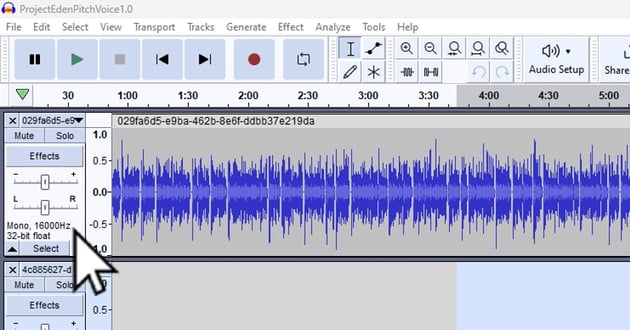
- Select the Track: Click on the track you want to adjust. If you have multiple tracks, you might need to adjust each one individually.
- Adjust the Volume Slider: Locate the volume slider on the track’s left side. Click and drag it left to decrease or right to increase the volume.
- Use the Gain Slider: For finer control, use the gain slider located below the effects button on the track control panel. Drag left or right to decrease or increase gain. Holding the Shift key while dragging allows for more granular control.
- Balancing Left and Right Channels: If you’re working with a stereo track and need to adjust the balance between left and right channels, use the Pan option located just below the gain slider.
- Listening and Adjusting: Play the track to listen to the changes. Adjust the sliders until you achieve the desired balance and consistency in sound levels.
- Finalize Your Edits: Once satisfied with the level adjustments, you can proceed with other editing tasks or export your project.
Noise Reduction


To effectively use the noise reduction tool in Audacity, follow these step-by-step instructions:
- Download and Install Audacity: Ensure you have the latest version of Audacity downloaded from its official website. It’s free, as Audacity is an open-source tool.
- Import Your Audio File: Once Audacity is installed, launch the tool and import the audio file you wish to clean up.
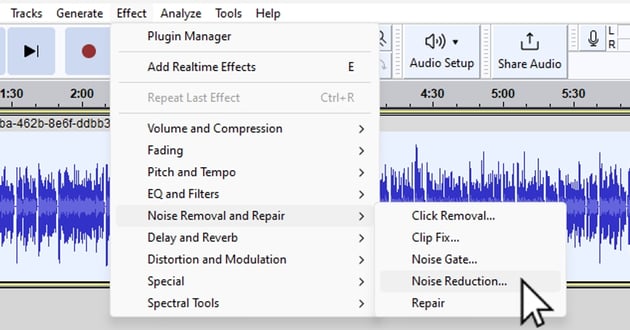
- Selecting the Noise Profile: Identify a segment of your audio where only the background noise is present. This will be used as a reference for the noise reduction process. Go to the “Effects” tab, scroll down to “Noise Reduction,” and choose “Get Noise Profile.”
- Applying Noise Reduction: After setting the noise profile, select the entire audio clip. Return to the “Effects” tab and click on “Noise Reduction” again. Here, you will need to adjust the settings to balance between noise removal and maintaining audio quality. This step is crucial for effective noise reduction.
- Preview and Apply: Before finalizing, use the Preview option to listen to a segment of the audio post-noise reduction. This helps you gauge the effectiveness of the noise reduction. If satisfied, click on “OK” to apply the noise reduction to the entire file.
- Save the Edited File: Finally, save your edited file. This file is now ready to be imported into any editing software for further work or use.
Equalization


Here’s a step-by-step tutorial on using Audacity’s new equalization effects to improve audio quality:
1. Open Audacity: Launch Audacity and load the audio file you want to edit.
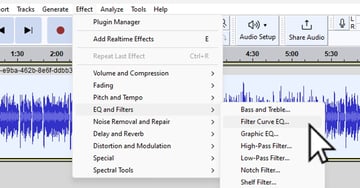
2. Accessing Equalization: Navigate to the “Effect” menu in Audacity. Now, you have two options:
– Select “Filter Curve EQ” for drawn curve equalization.
– Choose “Graphic EQ” for slider-based equalization, similar to hardware equalizers.
3. Adjusting Settings: Each tool offers different methods of adjusting the audio.
– In Filter Curve EQ, draw curves to adjust frequencies.
– In Graphic EQ, move the sliders to tweak various frequency bands.
4. Experiment and Listen: With both tools, the key is to experiment. Adjust the settings, listen to the results, and tweak as needed for your desired sound quality.
5. Applying Changes: After fine-tuning, apply the changes to your audio file. You can preview the effects before finalizing.
6. Save Your Work: Ensure to save your edited file after applying the equalization.


For more in-depth guidance on these steps, consider exploring one of our other articles; “How to Edit Audio for a Podcast in Audacity (Complete Guide)” (How to Edit Audio for a Podcast in Audacity (Complete Guide)), which provides comprehensive insights into advanced audio editing techniques. Remember, the key to successful audio editing is patience and practice. By mastering these basic steps, you’ll be well on your way to producing high-quality audio content.
Advanced Techniques for Audio Cleanup
Spectral Editing


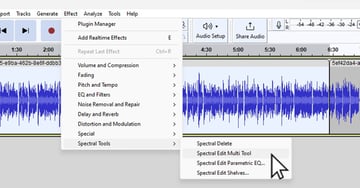
Spectral editing in Audacity is an advanced technique that allows you to visually identify and target specific unwanted sounds, like clicks, pops, or background hums, in your audio recordings. Here’s a step-by-step guide to using spectral editing in Audacity:
- Open your audio file in Audacity and switch to the Spectrogram view by clicking on the track name and selecting ‘Spectrogram’ from the dropdown menu.
- Identify the unwanted noise in the spectrogram view. This will typically show up as distinct lines or patterns that differ from the rest of the audio spectrum.
- Make a rough selection around the unwanted noise. Use the mouse to click and drag around the area where the noise is visible in the spectrogram.
- Zoom in on the offending frequencies by clicking and dragging on the vertical scale of the spectrogram. This allows you to see the frequencies in more detail and make a more precise selection.
- Adjust the selection to precisely cover the unwanted noise. Hover over the center frequency line or the upper/lower boundary of your selection until the double-triangle cursor appears, then click and drag to adjust. This step ensures that your filter will target only the noise without affecting the desired audio.
- Apply a notch filter effect by selecting ‘Effect’ > ‘Spectral edit multi-tool’. This effect will remove or reduce the noise in the selected frequency range.
- Listen to the audio to confirm that the unwanted noise has been successfully removed or reduced. If necessary, you can undo the effect and make adjustments to your selection before reapplying the filter.
Compression


To use the compression tool in Audacity to achieve consistent audio volume, follow these steps:
- Open Your Track: Load the audio track you want to work with in Audacity.
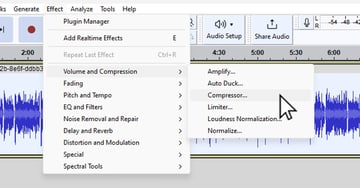
- Access Compression Tool: Navigate to the ‘Effect’ menu and select ‘Compressor’.
- Adjust Threshold: Set the threshold level. This determines the volume level at which compression begins. A lower threshold will apply compression to more of your audio.
- Set Noise Floor: The noise floor setting helps in avoiding amplifying noise during quiet sections. Adjust it to avoid raising the volume of background noise.
- Ratio Settings: The ratio determines how much compression is applied. A higher ratio results in more compression. A good starting point can be a ratio of 2:1 or 3:1.
- Attack and Release Times: Adjust the attack time (how quickly compression starts) and release time (how quickly it stops). Shorter attack times are good for consistent volume, while longer release times avoid abrupt changes.
- Preview and Apply: Use the ‘Preview’ button to listen to a sample of the compression effect. Adjust settings if needed and then click ‘OK’ to apply the compression to your track.
For those interested in diving deeper into the nuances of audio editing, “How to Edit Audio & Sound in Audacity Software (Complete Guide)” (How to Edit Audio & Sound in Audacity Software (Complete Guide)) is an excellent resource. It covers a range of topics, from basic adjustments to more advanced techniques, making it a must-read for anyone passionate about mastering Audacity.

Tips, Shortcuts, and Common Solutions
Shortcut Keys
One of the best ways to speed up your audio editing process in Audacity is to get familiar with shortcut keys. These little time-savers can significantly streamline your workflow. For example, pressing ‘Ctrl + R’ quickly repeats the last used effect, saving you the hassle of navigating through menus. Learning these shortcuts is a practical step in improving your efficiency, especially when working on complex projects where time is of the essence.
Solving Hissing Sounds
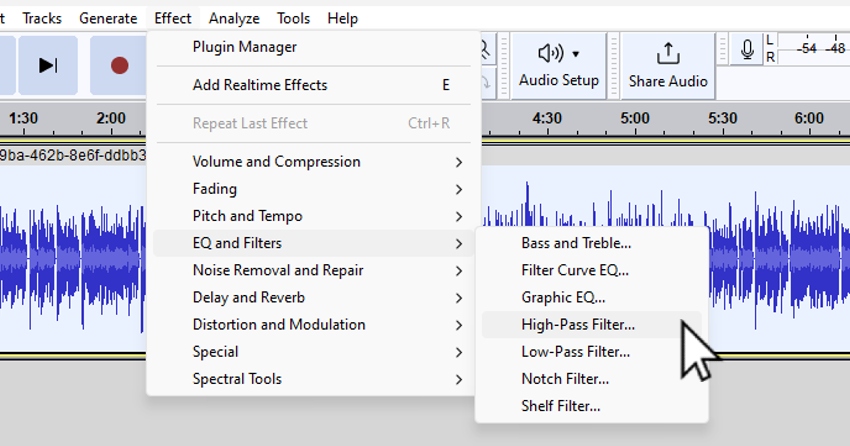
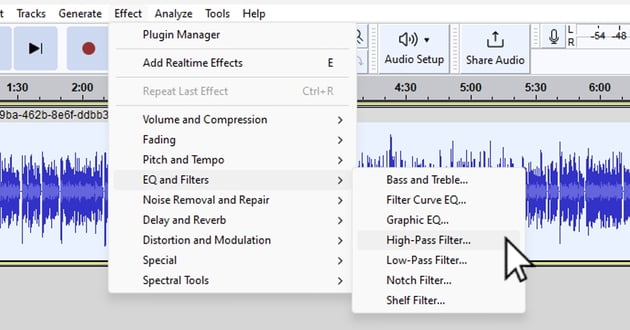
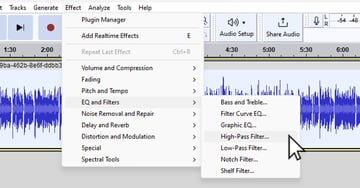
Hissing sounds are a common challenge, particularly in vocal recordings. In Audacity, a simple yet effective way to clean up audio that contains hissing is to apply a high-pass filter. This tool allows you to target and reduce the high-frequency hissing noises, leaving you with clearer, more professional-sounding audio. It’s an essential technique for anyone looking to improve audio quality in Audacity, especially for podcasters and vocal artists.
For those interested in exploring more sound effects and how to utilize them effectively in Audacity, be sure to check out “10 Top Sound Effects in Audacity (& How to Use Them)” (10 Top Sound Effects in Audacity (& How to Use Them)). This resource offers valuable insights into enhancing your audio projects with various sound effects, further expanding your audio editing skills. Remember, the key to mastering Audacity lies in exploring its myriad features and practicing regularly. With these tips and tools at your disposal, you’re well-equipped to tackle common audio issues and elevate the quality of your projects.
FAQs and Troubleshooting
Q: How can I fix clipping in my audio?
A: Audacity’s ‘Clip Fix’ effect is a great tool for repairing clipped sections in your audio. It’s especially helpful for audio recorded too loudly, causing distortion. This feature helps in smoothing out audio, restoring its quality.
Q: What if the noise reduction effect makes my audio sound underwater?
A: To prevent your audio from sounding unnatural, adjust the noise reduction settings. Apply the effect multiple times with less intensity. This approach allows you to effectively clean up audio in Audacity while maintaining its natural tone.
Q: How do I remove silence or pauses in my audio?
A: Audacity can help streamline your audio by removing unnecessary silence or pauses. Use the ‘Truncate Silence’ feature, which detects and eliminates these silent parts, making your audio more concise and professional.
Q: Can I enhance the vocal quality in my recordings?
A: Yes, Audacity offers several tools to improve vocal quality. The ‘Equalization’ and ‘Compressor’ effects are particularly useful. They help in balancing frequencies and maintaining consistent volume levels, respectively, enhancing the overall clarity and quality of vocals.
Q: Is it possible to repair damaged audio files in Audacity?
A: While Audacity has limitations in repairing heavily damaged audio files, it does offer features like ‘Noise Reduction’ and ‘Click Removal’ that can mitigate minor issues like background noise and clicks.
For more detailed solutions and guidance, “How to Troubleshoot Audio Recording Issues In Audacity” provides an in-depth look into resolving common audio problems (How to Troubleshoot Audio Recording Issues In Audacity). This resource is invaluable for those regularly encountering issues in Audacity.
Start with quality Audio for your Audacity Project


Enhance your audio editing experience with Envato Elements. Access millions of high-quality digital assets, including sound effects and audio clips, perfect for your Audacity projects. Learn more about Envato Elements and its offerings.
Conclusion
With Audacity, smoothing out and cleaning up audio becomes an achievable goal. By applying these techniques and tips, you can significantly enhance the quality of your audio recordings. For further exploration, delve into the wealth of resources available on Envato Tuts+, where you can find tutorials and guides to advance your audio editing skills.