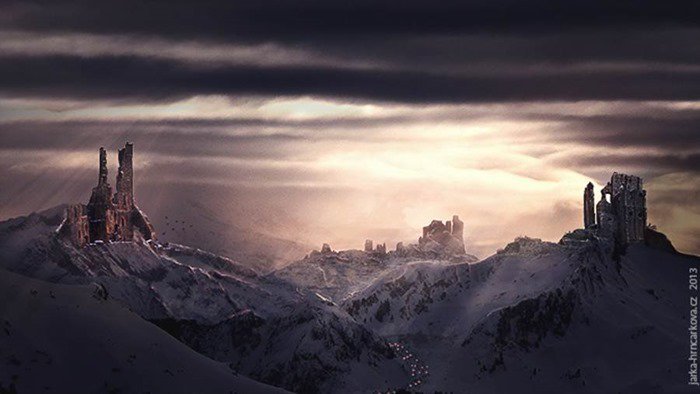
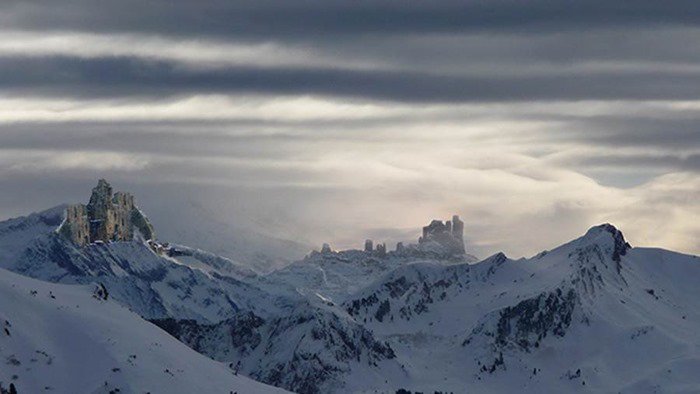
Learn how to create this beautiful ruins landscape with magical shafts of light. This Photoshop tutorial will show you how to add ruined buildings to the peaks of a snowy mountain landscape, add mystical light shafts, and a marching army.
Final Results
Tutorial Resources
Some resources may not be available anymore – this is one of the downsides of free stock photos. If that happens, use the “Alternative” link instead. These tutorials can typically be recreated with lower-res or similar-looking stock photos.
Step 1 – Preparing Background
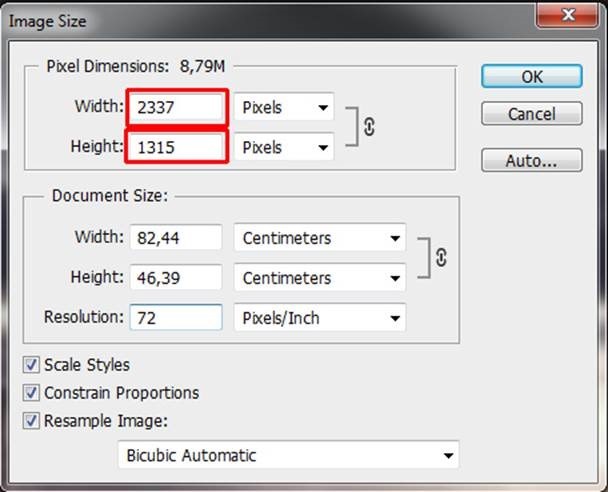
Create a new document in Photoshop. Set its dimensions on 2337x 1315 pixels and press OK. The aspect ration of this photo manipulation is 16:9 to create more movie like feel. Press OK.
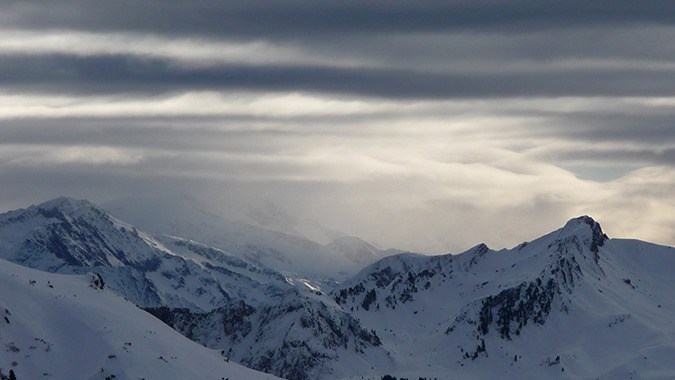
Download the background photo listed in the beginning of the tutorial and drag it into your new file. Name this new layer BACKGROUND.
Tip: It’s a very useful habit to name all your layers. It’s very time effective once you work with many layers and need to find something quickly to adjust it.
Step 2 – Adding the Ruin in the Background
Download the photo of the ruin (Ruin #1) listed in the beginning of the tutorial and drag it into your photo manipulation. Name this the layer RUIN IN BACKGROUND and drag it on the top of all layers. (If you don’t see the layer palette press F7 on your keyboard or go to Window > Layers to activate it).

Press Ctrl + T to activate the Free Transform Tool and resize the ruin on the proper size (see the preview image to get the example). Press Ctrl while doing it to preserve the same proportions. After you’re done press Enter on your keyboard to apply the changes.
Cut out the background of the ruins. There is plenty of ways how you can do it (e.g. with the Lasso Tool (L), the Pen Tool (P), the Brush Tool (B)). Just choose the one you’re the most comfortable with.
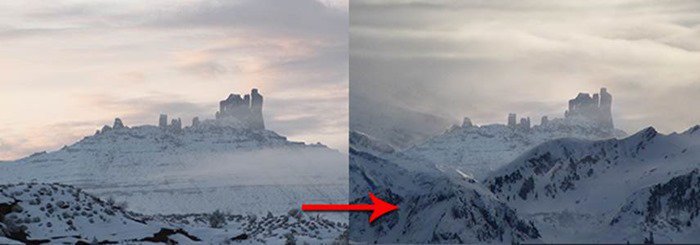
Step 3 – Darkening the Ruin
To make it more realistic looking you need to make the ruin bit darker. You can adjust that very easily by adding new adjustment layer Curves on the top of all layers. Click on the button Create a new fill or adjustment layers on the bottom part of your layers palette.
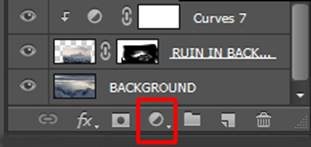
Choose the option Curves and set it same as on the following image.
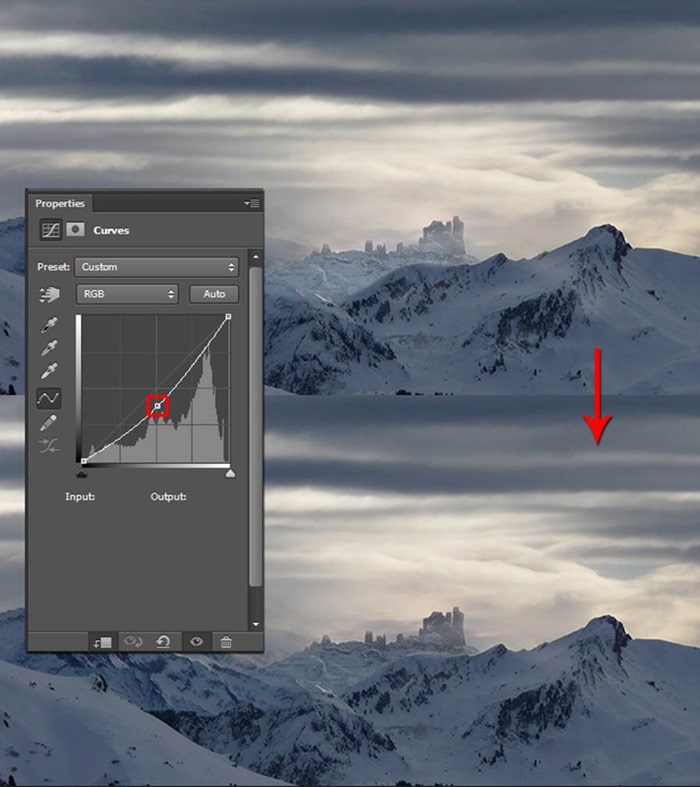
Create Clipping mask from this adjustment layer to adjust only one layer below (=RUIN IN BACKGROUND) and not the rest of the image. To do that right click on the adjustment layer Curves and simply choose the option Create Clipping Mask.
Step 4 – Adding Ruin on the Left
Download photo of the ruin (Ruin #2) listed in the beginning of the tutorial and drag it into your photo manipulation. Place it on the top of all layers and name it LEFT RUIN. Cut out the unwanted background.
There are couple steps which need to be done to blend the building properly. Let’s start with colors. Make sure the layer LEFT RUIN is active (just click on it in the Layers palette). And then go to Image > Adjustments > Match Color… . Set the dialogue window as on the following picture and press OK.
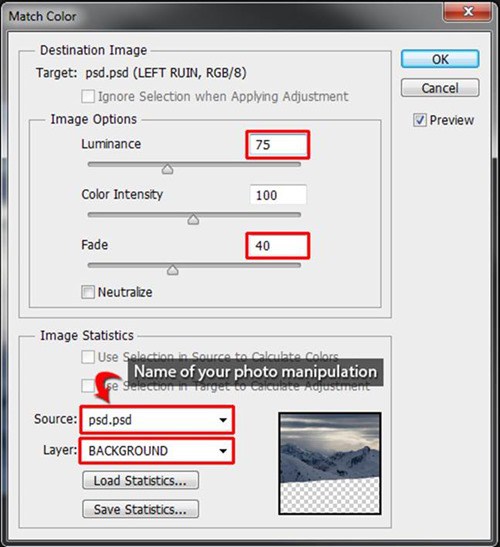
After this step your photo manipulation should look like the one on the following image.
Step 5 – Blending the Ruin
In this step you’ll add two more adjustments to create the ruin bluer and less saturated. Let’s start with making it bluer.
Add new adjustment layer Color Balance on the top of all layers and set it as on the following image.
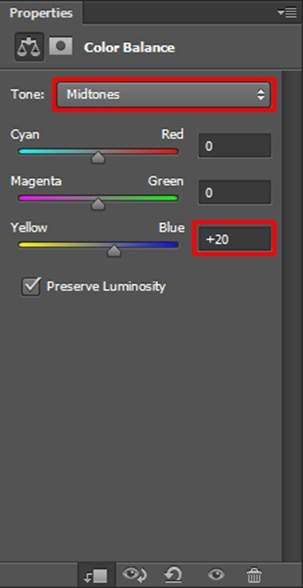
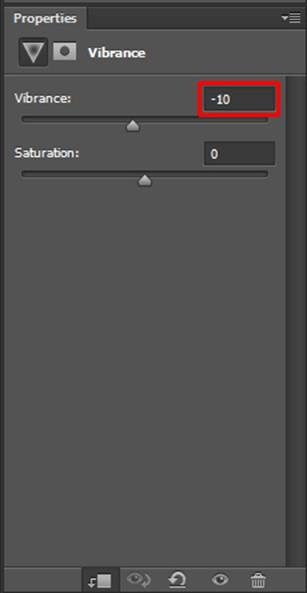
Create clipping mask from this adjustment layer. To lower the saturation of LEFT RUIN add new adjustment layer Vibrance on the top of all layers and set the value Vibrance on -10. Create clipping mask from this adjustment layer too.
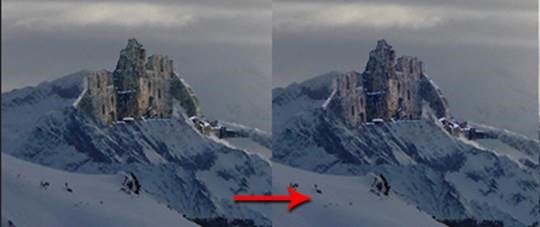
On the following photo you can compare how the ruins look before and after the adjustments.
Step 8 – Adding Tower
As you can see on the preview picture there is a tower on the left ruin. You’ll add it in this step.
Download the photo of tower listed in the beginning of the tutorial and drag it into your photo manipulation. Place in on the top of all layers and name it TOWER. Press Ctrl + T and resize it on proper size. Cut out the background.
To make it more 3D looking, add new adjustment layer Curves on the top of all layers and set it as on the following image.
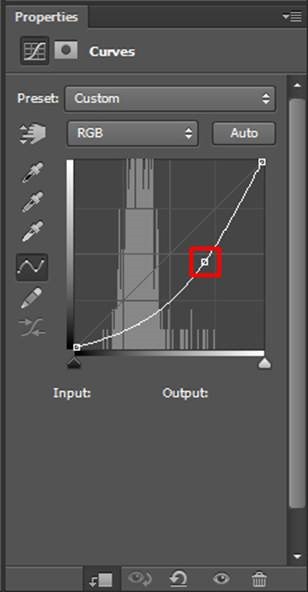
Create clipping mask from this adjustment layer to adjust only TOWER.
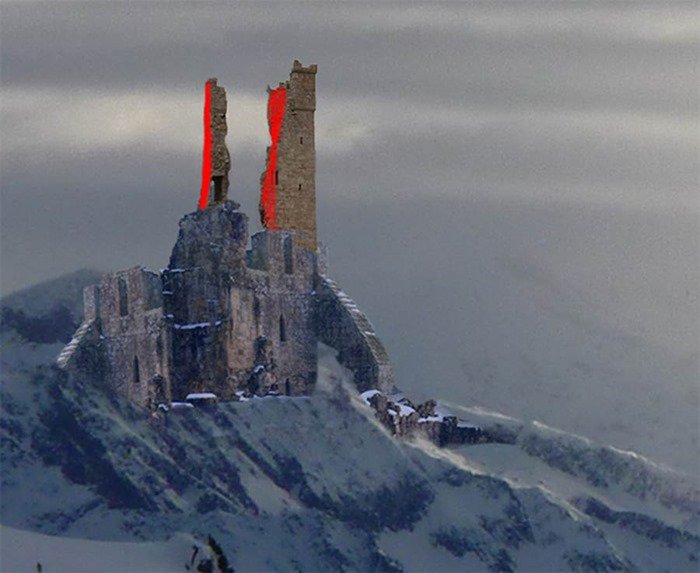
You want to make only some parts of the tower darker. Not the whole photo. To do that grab the Paint Bucket Tool (G) and fill the layer mask of this adjustment layer with black color.
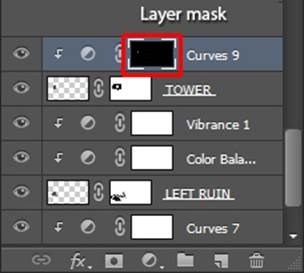
Grab the Brush Tool (B). Select some soft round brush and set the Diameter on about 20px. Lower the Opacity on 50% and start painting over the areas of the tower which should be on the opposite side from the sun. Take a look at the following image where you should paint. These parts are highlighted with red color.
