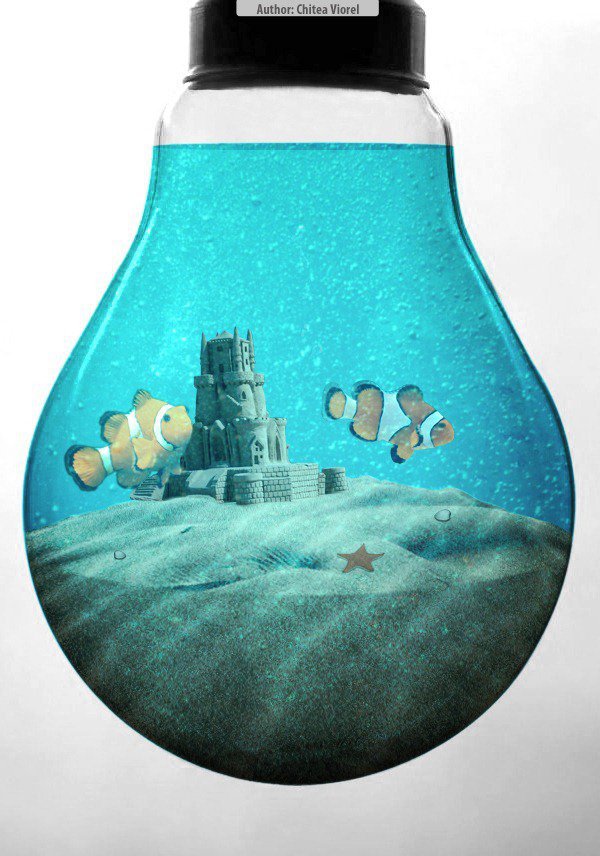
Learn how to combine stock photos to create a saltwater aquarium inside a light bulb. This Photoshop tutorial will show you how to combine and warp images and apply easy color correction.
Final Results
![final-results[1] final-results[1]](https://cdn.idevie.com/wp-content/uploads/2016/07/final-results1.jpg)
Tutorial Resources
Free stock photography can sometimes disappear. If one of the link is broken, try using the “Alternative” link instead. Many tutorials can be completed with similar stock photos.
Step 1 – Modified the lightbulb.
Open the photo with lightbulb.Make a copy of the Background layer, press Shift + T and then Flip Horizontal. Go to: Image > Adjustaments > Brightness/Contrast and set the Brightness at +25.
![001[1] 001[1]](https://cdn.idevie.com/wp-content/uploads/2016/07/0011.jpg)
Step 2 – Clear the lightbulb.
Pick the Brush tool (B) and with this color #f1f1f1 put the color in the area shown in the picture .
![002[1] 002[1]](https://cdn.idevie.com/wp-content/uploads/2016/07/0021.jpg)
Step 3 – Create the water inside the lightbulb
Open water texture 1 and paste in the document .Go to Edit > Transform or press Ctrl+T for transform the water texture (Flip vertical and make smaller) and position the water texture to the position as seen in the image below.
![003[1] 003[1]](https://cdn.idevie.com/wp-content/uploads/2016/07/0031.jpg)
Hide the layer with water texture 1 and make a path with Pen Tools (P) like in the photo .Right-click and select Make selection and set Father selection to 0,5px .
![004[1] 004[1]](https://cdn.idevie.com/wp-content/uploads/2016/07/0041.jpg)
Go to Select > Inverse or press Shift+Ctrl+I to inverse the selection and hit Delete button.Set Blending Mode to Color Burn and opacity at 41%
![005[1] 005[1]](https://cdn.idevie.com/wp-content/uploads/2016/07/0051.jpg)
Step 4 – Adding second water texture.
Let’s adding the second water texture so open the water texture 2 and move in the our document . Go to Edit > Transform or press Ctrl+T and transform texture like me .
![006[1] 006[1]](https://cdn.idevie.com/wp-content/uploads/2016/07/0061.jpg)
Press Ctrl+Click on the thumbnail of the previous layer and go to Select > Inverse or press Shift+Ctrl+I to inverse the selection and hit the Delete button . Change Blending Mode on Multiply an Opacity 45%
![007[1] 007[1]](https://cdn.idevie.com/wp-content/uploads/2016/07/0071.jpg)
Step 5
Make a new eliptical selection with Eliptiqual Marquee Tool on the layer with water texture 2 like in the photo and press Ctrl+C to copy and Ctrl+V to paste and move this up like in the photo .
![008[1] 008[1]](https://cdn.idevie.com/wp-content/uploads/2016/07/0081.jpg)
Step 6 – Adding the sand
Open the sand texture 2 picture and press Ctrl+A and then Ctrl+C . Open the document with light bulb and press Ctrl+V to paste the texture. Go to Edit > Free Transform or press Ctrl+T to transform the texture and make it small like in the photo.
![009[1] 009[1]](https://cdn.idevie.com/wp-content/uploads/2016/07/0091.jpg)
Press Ctrl+Click on the thumbnail of the “aqua background” layer and press Shift+Ctrl+I or go to Select > Inverse to inverse the selection and then go to Edit > Clear
![010[1] 010[1]](https://cdn.idevie.com/wp-content/uploads/2016/07/0101.jpg)
Step 7 – Adding shadow on sand
Pick the Burn tool and set size of brush at 83px , exponsure on Shadows . Use the settings show in the photo , and burn the bottom margin of the sand like me .
![011[1] 011[1]](https://cdn.idevie.com/wp-content/uploads/2016/07/0111.jpg)
Step 8 – Make the sand more look 3D
Open the sand texture 1 picture and select Pen Tool (P) and make a new path like me . Right-click and select Make Selection with father 0,5 .
![012[1] 012[1]](https://cdn.idevie.com/wp-content/uploads/2016/07/0121.jpg)
Copy the sand dune pressing Ctrl+C and paste it in our project pressing Ctrl+V . Go to Edit > Free Transform or press Ctrl+T and transform the sand dune like me.
![013[1] 013[1]](https://cdn.idevie.com/wp-content/uploads/2016/07/0131.jpg)
Step 9
Select Eliptical Marque Tool and make an eliptical selection with father 0 . Go to Select > Inverse or press Ctrl+Shift+I and press Delete button .
![014[1] 014[1]](https://cdn.idevie.com/wp-content/uploads/2016/07/0141.jpg)
Step 10
Go to Edit > Free Transform or press Ctrl+T for transform , go to Edit > Transform > Warp . Transform the sand dune like me and pull the point exactly in this order.
![015[1] 015[1]](https://cdn.idevie.com/wp-content/uploads/2016/07/0151.jpg)
Step 11
Select the light bulb pressing Ctrl+click on the “aqua background” layer thumbnail . Press Ctrl+Shift+I or go to Select > Inverse and press Delete button .
![016[1] 016[1]](https://cdn.idevie.com/wp-content/uploads/2016/07/0161.jpg)
Press Ctrl+click on the thumbnail of the sand dune layer an then pick the Rectangular Marquee Tool an set like me and make a new selection like me and go to Select > Inverse and press the Delete button.
![017[1] 017[1]](https://cdn.idevie.com/wp-content/uploads/2016/07/0171.jpg)
And now light bulb should look like this
![018a[1] 018a[1]](https://cdn.idevie.com/wp-content/uploads/2016/07/018a1.jpg)
