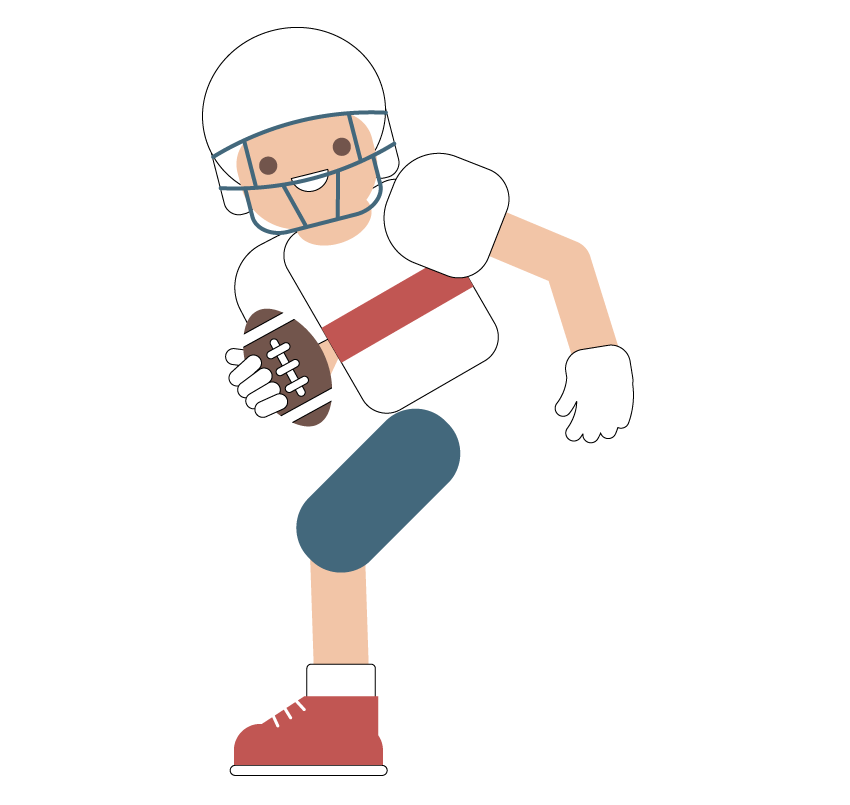
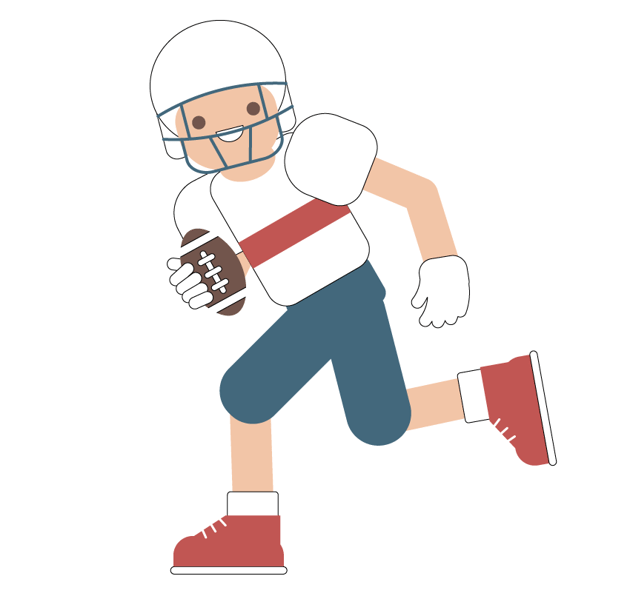
Are you ready to create something fun and exciting? In this tutorial, we’ll dive into how to draw a Super Bowl player using Adobe Illustrator, step by step. Whether you’re a sports fan or simply love exploring character design, this guide will help you create a football vector hero with simple shapes and clean details. Grab your tools and let’s get started— with a few simple steps, you’ll have your own football hero ready to shine!
If you’re looking for even more creative resources to elevate your designs, don’t miss out on exploring Envato. From ready-to-use templates to versatile assets, it’s the perfect platform to find inspiration and save time. You’ll discover endless possibilities to take your projects to the next level!
What you’ll learn in this Super Bowl player tutorial
- How to create a Super Bowl graphic
- How to create a vector football player in Illustrator
- How to create a character using basic shapes
- How to create a Clipping Mask in Illustrator
- How to use Warp Effects
- How to use Corner Widgets
1. How to create the Super Bowl player’s head in Illustrator
Step 1
Football graphics are a creative way to capture the energy and excitement of the game while showcasing your design skills.
Begin by opening Adobe Illustrator and setting up your canvas: create a new document (File > New), enter 850 px Width and 1000 px Height in the dialogue window, and press OK to create your artboard.
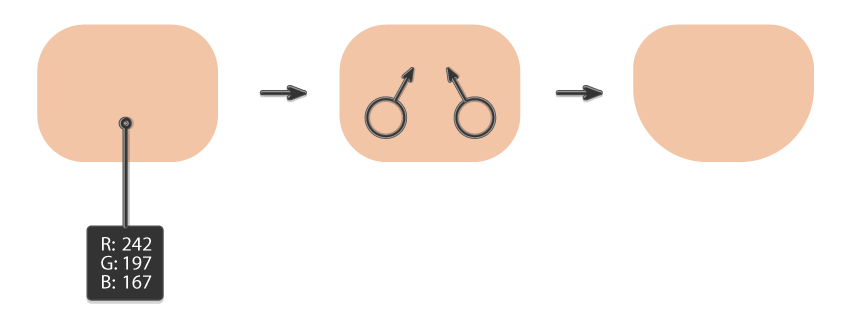
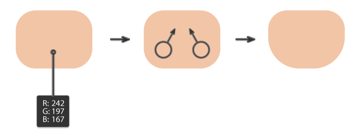
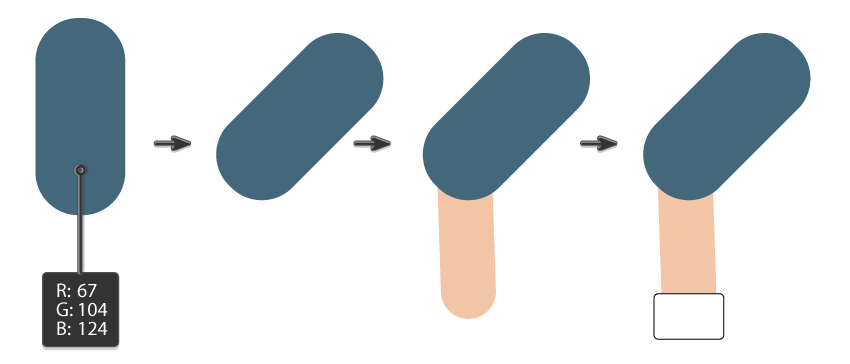
We’ll start by creating the Super Bowl player‘s head. Using the Rounded Rectangle Tool, draw a rounded rectangle. This will be the head of the player. Delete the stroke color if you have one, and set the fill color to R=242, G=197, B=167.
Now, you want to go to View > Show Corner Widget. When you do this, small circles inside of the rounded rectangle appear in every corner, which you can use to modify it further. Use the Direct Selection Tool (A) to select just the two bottom anchor points of the rounded rectangle, and drag them inwards. That’s the face.

Step 2
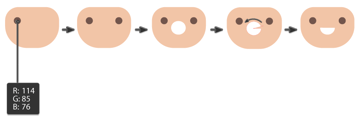
Next, choose a fill color to R=114, G=85, B=76 for the eye. Hit the Ellipse Tool (L) and draw a tiny circle. To create an even circle, hold the Shift button while making it.
To create another eye for our football player, select the circle and drag it to the right while holding the Shift and Alt keys. Shift will move it straight, and Alt will create a copy. Be sure the eyes are placed symmetrically.
Now, let’s create the mouth. Take the Ellipse Tool (L) and draw a white ellipse with no stroke color. If you have the newer version of Adobe Illustrator, you’ll notice a handle on the right side of the selected ellipse. Use this handle and move it counterclockwise until you get half of the ellipse, which we will use as a mouth.


Step 3
Take the Ellipse Tool (L) and draw a white ellipse with no stroke on the player’s head—now we’re creating a football helmet vector. I added the black stroke so you can see it better. Be sure the white ellipse stays behind the head. For this, you need to cut it (Control-X) and then place it behind everything (Control-B).
Use the Rounded Rectangle Tool to draw a small rounded rectangle on the left side of the football helmet vector.
Then, while holding the Shift and Alt buttons, move it to the right. The Alt button will create a copy, and the Shift button will help you move it in a straight line.


Step 4
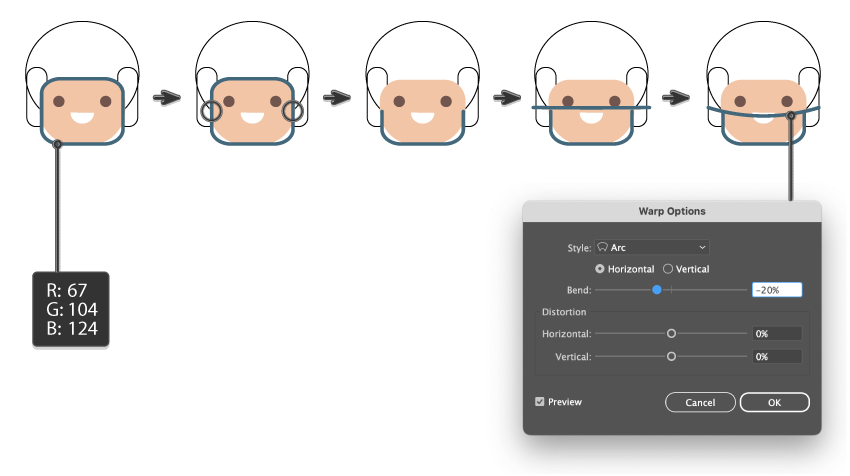
Now delete the fill color and set the stroke color to R=67, G=104, B=124. Take the Rounded Rectangle Tool once again and draw a rounded rectangle on the football player’s face. We are creating the face mask.
Use the Scissors Tool (C) to cut off the upper part of the rounded rectangle. To do this, you need to click on the stroke on its left and right sides. Delete the upper part.
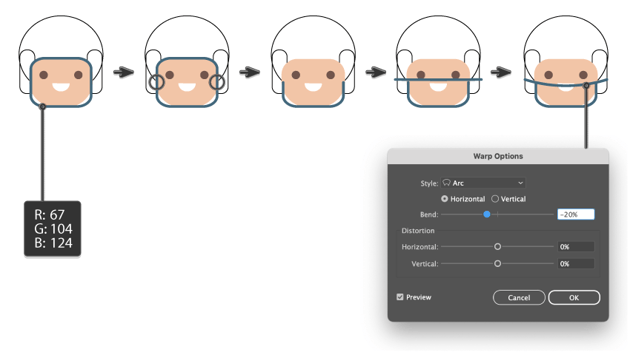
Use the Line Segment Tool (\) to draw a horizontal line on top of the rounded rectangle. Then, while keeping the line selected, go to Effect > Warp > Arc and enter the options you see below in the new dialogue window. Then press OK. Expand this curve (Object > Expand Appearance).
This is the first part of the face mask.

Step 5
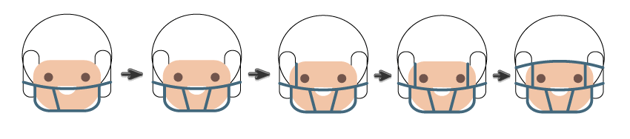
Now, let’s create the other part of the facemask. Once again, use the Line Segment Tool (\) to draw a diagonal line like in the image below.
To create the other line, take the Reflect Tool (O), or just press the O button on your keyboard and then the Enter button. It will bring up a new Reflect dialogue window. Make sure to enter Axis Vertical, Angle 90 degrees, and press Copy. After this, you will have another line which you need to place symmetrically.
Then, use the Line Segment Tool (\) to draw a vertical line on the left side of the facemask while holding the Shift key. Create a copy of this line using Shift and Alt, as we did for the eyes.
Lastly, use the Reflect Tool (O) to create a horizontal reflection of the curve, or just press the O button on your keyboard and then the Enter button. It will bring up a new Reflect dialogue window. Make sure to enter Axis Horizontal, Angle 90 degrees, and press Copy. After this, you will have another curve. Place it symmetrically on top of the facemask.


2. How to create the body of the Super Bowl player in Illustrator
Step 1
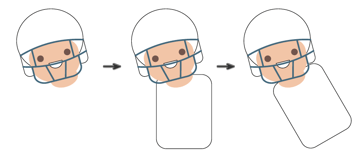
Use the Eyedropper Tool (I) to take the fill color from the face, and then, using the Ellipse Tool (L), draw an ellipse with no stroke under the player’s head. To do this, just cut it (Control-X) and place it behind everything (Control-B). This will be the neck.
After that, choose the Rounded Rectangle Tool and make its fill color white. Remember, the black stroke is simply for better visibility—you don’t actually need it. Draw a rounded rectangle and place it under the neck. This is the player’s body.
Using the Selection Tool (V), rotate the body to the left so that the football player will have an angled body.


Step 2
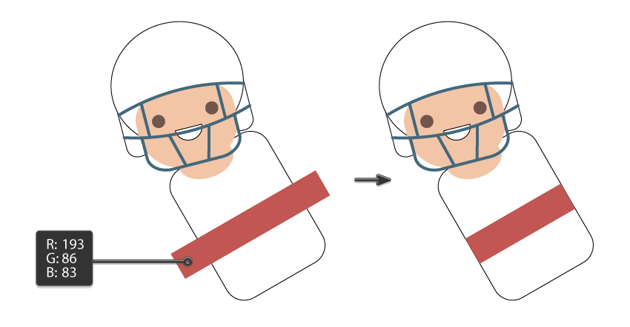
Let’s add a red stripe to the football player’s uniform. Using the Rectangle Tool (M), draw a horizontal rectangle across the body—the fill color is R=193 G=86, B=83. Rotate it diagonally to match the angle of the player’s body.
Select the body and make a copy of it in front (Control-C, Control-F). Now this body shape is in front of the original shape, but we want to place it in front of everything (the body and the red stripe). So cut it (Control-X), and then place it in front (Control-F).
Keep the selection, and select the red stripe while holding Shift. Go to Object > Clipping Mask > Make (Control-7). Your result should be similar to the image below.


Step 1
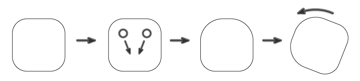
Create a white rounded square. Make sure you have the Corner Widget on (View > Show Corner Widget). Now, select the two upper anchor points using the Direct Selection Tool (A), and slide them inwards. You should end up with a shape that has two very smooth upper corners and two not-so-smooth bottom corners.
Using the Selection Tool (V), rotate it to the left.


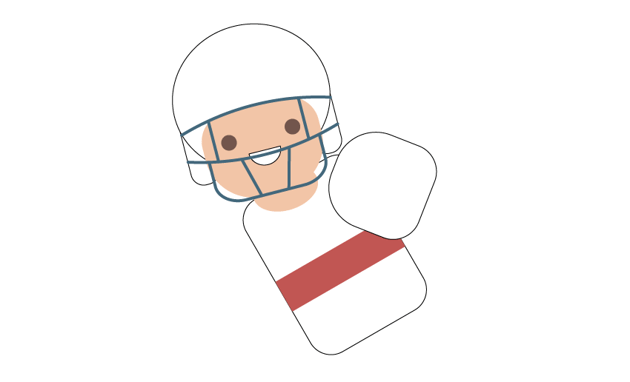
Place this shape on the player’s shoulder.


Step 2
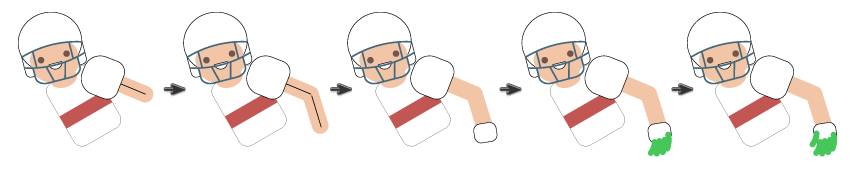
Using the Eyedropper Tool (I), click on the player’s face to get its color. Then, press the Swap Fill and Stroke (Shift-X) button on the Tools panel. After that, take the Line Segment Tool (/) and check Round Cap on the Stroke panel (Window > Stroke). Increase the stroke Weight on the Stroke panel—we need it to be very thick because we’re drawing the arm up to the elbow. Draw a line as shown below. This line should stay under the shoulder. Then draw a new line to finish off the arm.
Let’s make the football gloves. Using the Rounded Rectangle Tool, draw a small rounded rectangle. Change the fill color to white.
Once again press the Swap Fill and Stroke (Shift-X) button because we are going to draw his fingers using the Arc Tool. Draw the first four fingers. Adjust the Weight of the stroke accordingly. Then, add the thumb to complete the left arm.


Step 1
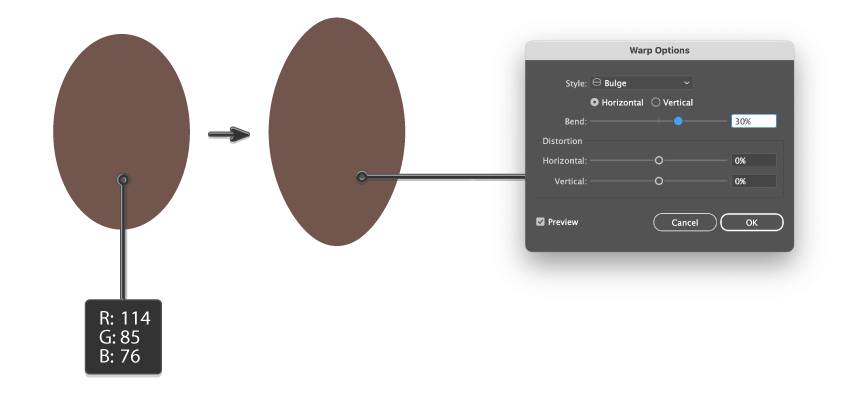
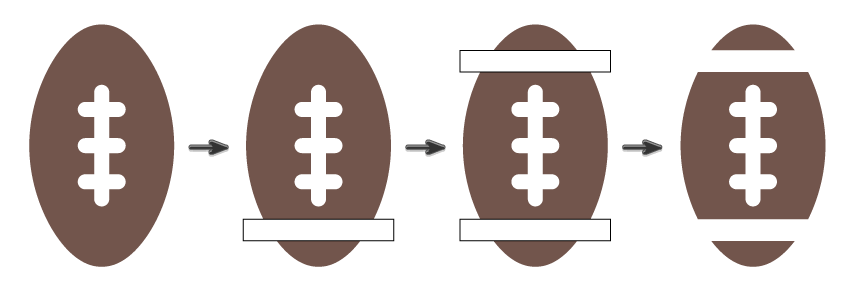
Now, let’s draw the football. Create an ellipse using the Ellipse Tool (L). The fill color is R=114 G=85, B=76.
While keeping the ellipse selected, go to Effect > Warp > Bulge. In the new dialogue window, enter the options you see below and press OK. Expand this shape (Object > Expand Appearance).


Step 2
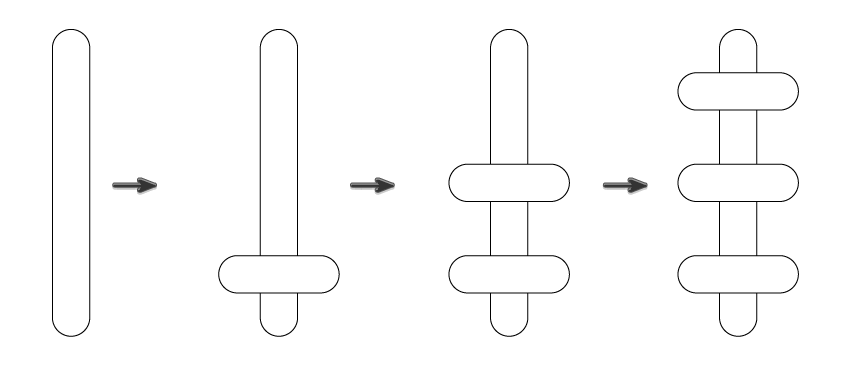
Using the Rounded Rectangle Tool, draw a long, thin rounded rectangle. Change the fill color to white. We want to create the stitching laces.
Draw a smaller, perpendicular rounded rectangle on the bottom. While holding the Shift and Alt buttons, create two more. Be sure they stay symmetrical and even.
Step 3
Place the stitching laces on the ball.
Using the Rectangle Tool (M), draw a white rectangle across the ball on the bottom. Create a copy of the white rectangle on top.
Select the ball and make a copy of it in front (Control-C, Control-F). Then cut it (Control-X), and place it in front of everything (Control-F).
Keep the selection, and while holding the Shift key, select the two white rectangles. Go to Object > Clipping Mask > Make (Control-7).
Now that the ball is ready, group it (right-click > Group).


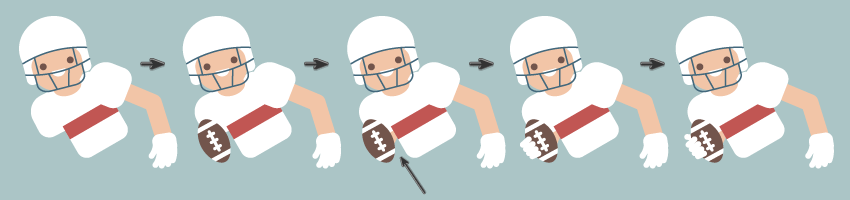
Now, let’s create the second arm, starting with the shoulder. Make a copy of the first shoulder, and place it behind the body. Place the ball close to the second shoulder.
Using the Eyedropper Tool (I), click on the player’s other arm. Create a line, and then make sure it stays behind the ball.
Using the Eyedropper Tool (I), click on the player’s fingers from the first arm. Use the Line Segment Tool (\) to draw four fingers holding the ball. Those four fingers should stay on top of the ball.
Add the thumb, making sure it stays behind the ball. The player’s second arm is ready.

6. How to create the lower body of the football player vector in Illustrator
Step 1
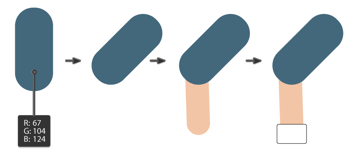
Now, let’s create the leg. Using the Rounded Rectangle Tool, draw a rounded rectangle. Change the fill color to R=67, G=104, B=124, and rotate it to the right. This is the first leg of the shorts.
Using the Eyedropper Tool (I), click on the player’s arm. Make the stroke Weight a little bit bigger and use the Line Segment Tool (\) to draw the line that stays behind the blue rounded rectangle.
Then, create a white rounded rectangle on the bottom of the leg, to create a sock.

Step 2
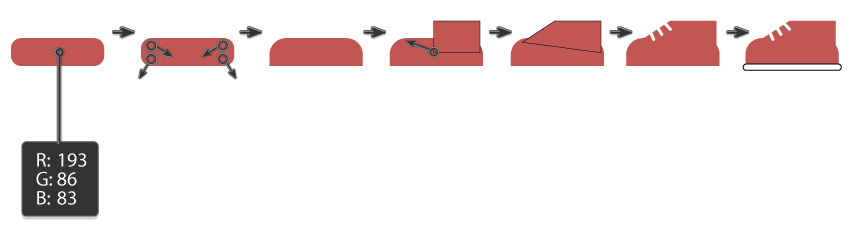
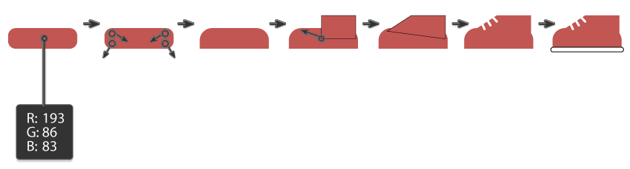
Using the Rounded Rectangle Tool, draw a horizontal rounded rectangle. Change the fill color to R=193, G=86, B=83. We’re creating football cleats.
Now, select the two bottom anchor points using the Direct Selection Tool (A), and slide them out until they become sharp. Select the top two anchor points of the red rectangle, and slide them in until they become very smooth.
Using the Rectangle Tool (M), create a rectangle on the top right. The fill color stays the same. Using the Direct Selection Tool (A), move its bottom left anchor point to the right diagonally. Do you see a simple shoe shape?
Switch to a white stroke color with no fill color. Using the Line Segment Tool (/), create three small lines for the shoelaces. Then grab the Rounded Rectangle Tool and draw a long, thin, white rounded rectangle on the bottom. Be sure this shape has a white fill color and no stroke. The football cleat is ready.

Place the football cleat on the leg.


Place the leg on the bottom of the football player.


Step 3
Draw a rounded rectangle connecting the leg and body. Use the Eyedropper Tool (I) to take the blue fill color from the shorts.


Step 4
To create another leg, we will simply create a copy of the first one. Feel free to rotate and adjust this leg to make it look as if the player is running.


Step 5
Grab the Ellipse Tool (L) and draw an ellipse with the same fill color as the shorts. Again, the stroke shown here is just for better visibility—you don’t need it.


Step 1
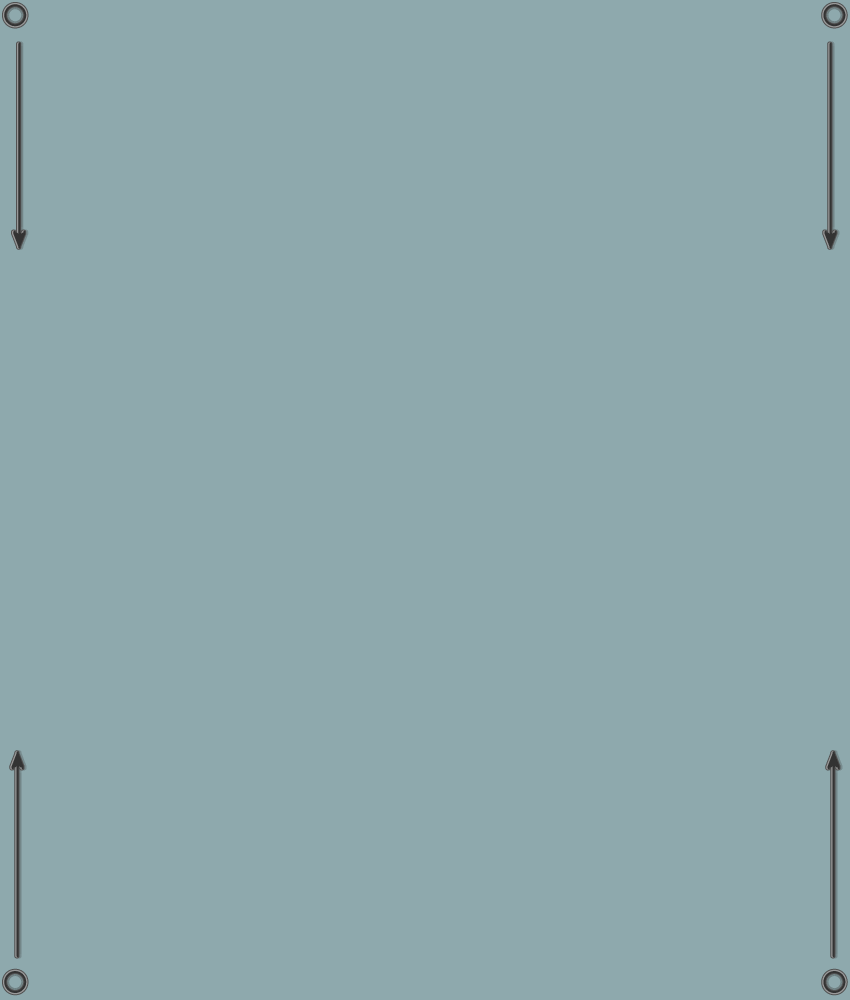
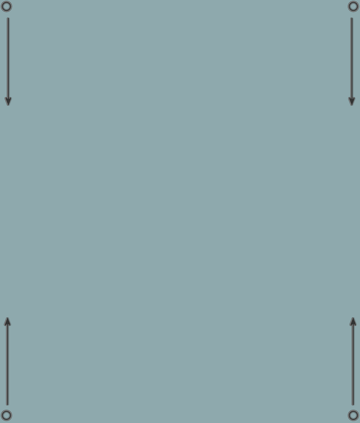
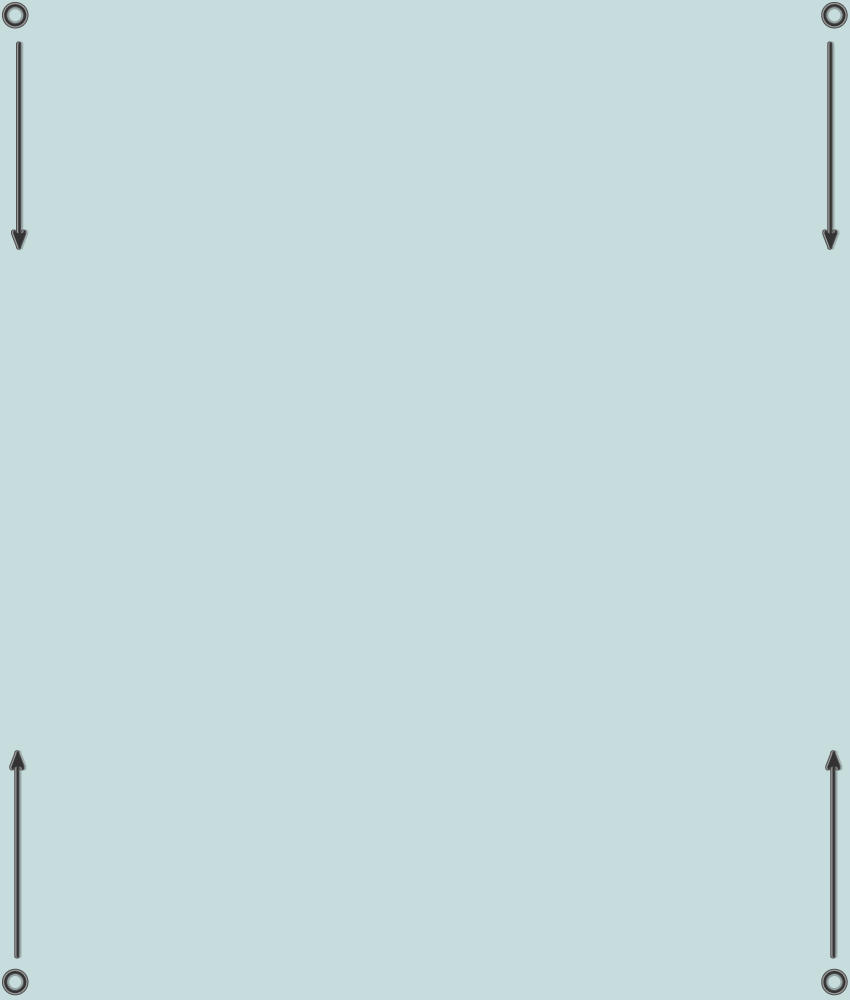
Delete the stroke color and set the fill color to R=171, G=197, B=198. Take the Rectangle Tool (M) and click on your artboard. In the new dialogue window, enter 850 px Width and 1000Height. This will be our background.
To place the background behind, cut it (Control-X) and put it behind everything you’ve created so far (Control-B). Make sure your background stays in the middle of your artboard.


Step 2
Create a copy of the background in front (Control-C Control-F). Make the fill color darker: R=142, G=169, B=173. Now we are creating those stripes on the background.


Take the Direct Selection Tool (A), select the upper right and left anchor points of the new rectangle, and move them down slightly using the Arrow key on your keyboard.
Take the Direct Selection Tool (A), select the bottom right and left anchor points of the new rectangle, and move them upwards slightly using the Arrow key on your keyboard. You don’t have to move them at the same time.
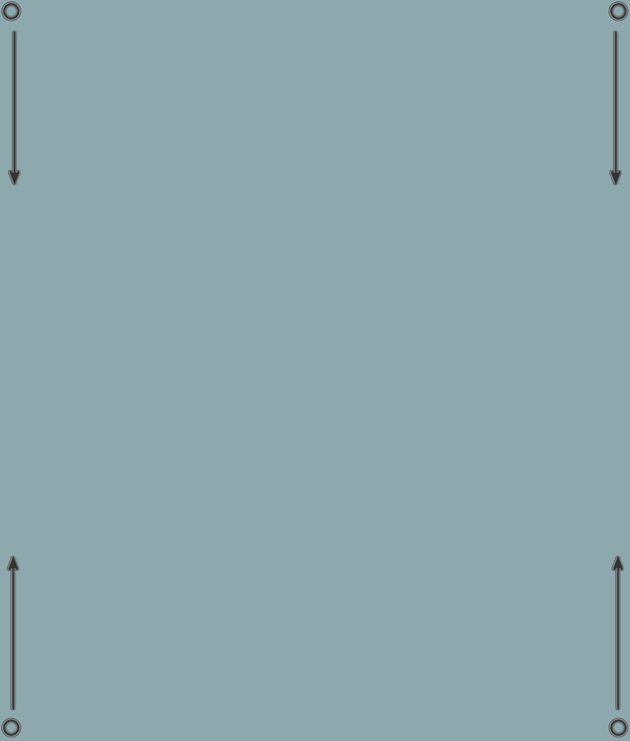
Your result should be similar to this.


Step 3
Once again create a copy of the background in front (Control-C Control-F). Make the fill color lighter: R=199, G=221, B=221. Now we are creating light stripes on the background.


Move the upper anchor points a bit down, and the bottom anchor points up.
Your result should be similar to this.


Step 4
Finally, create the third diagonal stripe in the same way.


Step 5
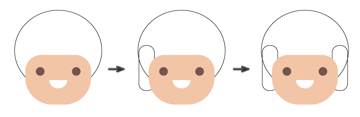
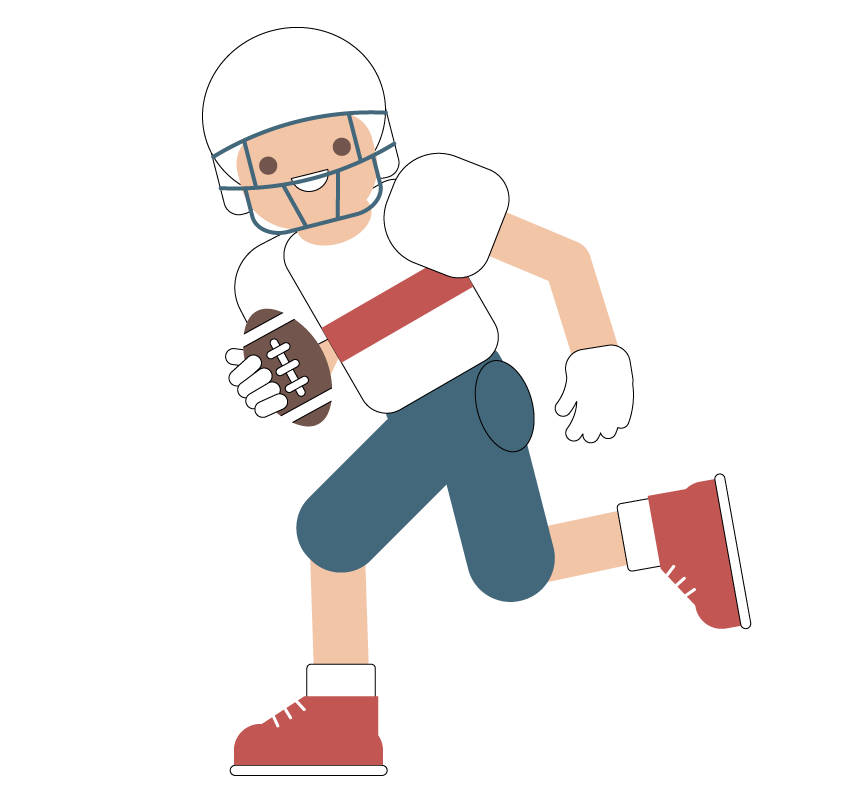
Be sure your whole Super Bowl player is grouped together, and place him in front of the background to complete the football aesthetic.


Step 6
Let’s add some final touches. Grab the Star Tool and create a star. The fill color is the same as the football cleats.
Use the Direct Selection Tool (A) to slide the anchor points of the star inwards or outwards depending on how you want the star to look. I made mine with smooth inner and outer corners.
Then, make two more stars. One is white, and the second one is the same fill color as the shorts.


Step 7
Finally, place stars around the Super Bowl player. Your illustration is ready!


Congratulations!
What a nice Super Bowl illustration! I hope you enjoyed drawing with me, and that this tutorial taught you something new. When the playing teams in the Super Bowl are announced each year, you can recolor your artwork with the team colors, or simply the colors of your favorite team, to create the football aesthetic you want. Thanks for following this tutorial with me! Keep experimenting with what you’ve learned and exploring more possibilities. Looking forward to our next session!
Popular NFL resources from Envato
Envato offers thousands of high-quality templates and design assets. It’s perfect for branding, presentations, and digital content. Save time and create professional results effortlessly. Check it out and start creating today!
1. American Football Icons Set (AI, EPS, FIG, PNG, SVG)

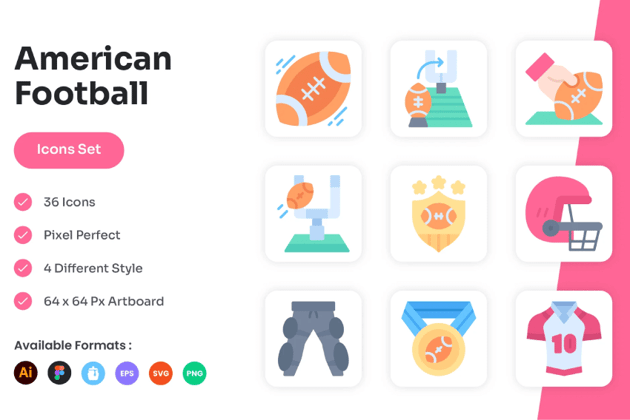

Elevate your designs with this versatile American Football Icon Set! Featuring multiple styles and formats, these pixel-perfect icons are easy to edit, resize, and use in any project. They’re perfect for websites, apps, illustrations, and more. Download them and bring your ideas to life.
2. American Football Vector Character Set (AI, EPS, JPG, PNG)

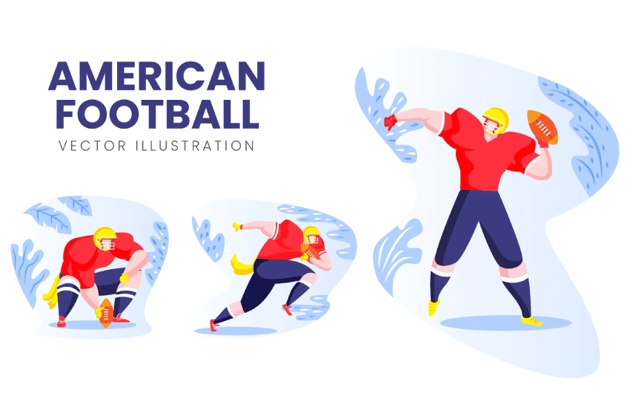

Bring energy to your projects with the American Football Vector Character Set. These stunning vector assets are perfect for web, social media, banners, or infographics, and you can resize them without losing quality. With editable files and high-resolution formats, they’re ready for any creative idea. Get this set today and make your designs stand out.
3. American Football 3D Icon (PNG)
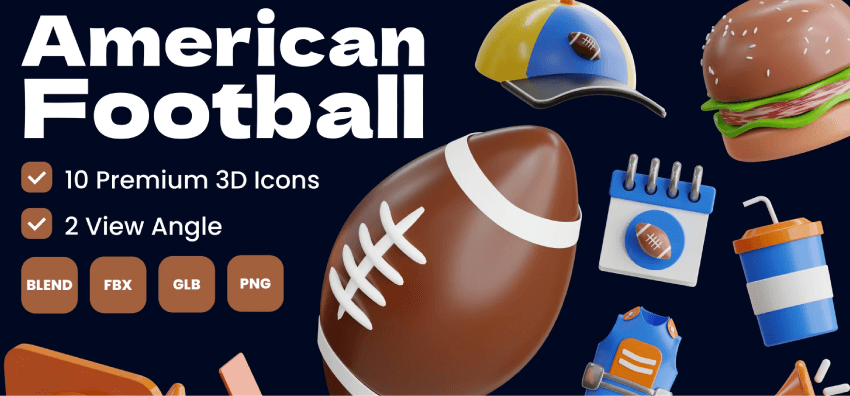

Add depth to your designs with the American Football 3D Icon pack! Perfect for presentations, websites, and creative projects, these carefully crafted icons bring a unique touch to your work. Discover fresh ideas and unleash your creative potential.
4. Football Match Instagram Story Templates (PSD)


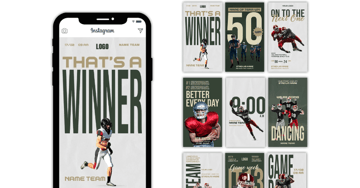
The Football Match Instagram Story Templates make promoting sports events quick and easy. With customizable, well-organized files, you can create stunning social media posts in no time. These templates are perfect for showcasing your event in style and grabbing attention online.
5. Man Playing American Football (PNG)

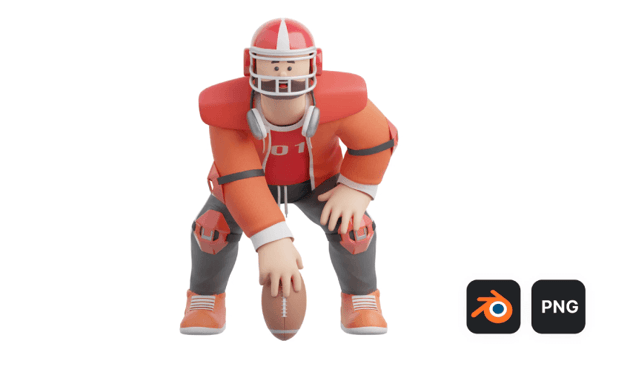

Man Playing American Football is a high-quality, fun illustration designed to add personality and color to your projects. Perfect for presentations, social media posts, or UI/UX designs, it brings a sporty and playful vibe. The included files are easy to use and are adaptable to various creative needs. Bring your ideas to life with this unique asset.
If you want to learn more, take a look at these tutorials
Explore your creative potential with our Illustrator tutorials. Whether you’re just starting or looking to master advanced techniques, you’ll find everything you need to bring your ideas to life. Start designing now!