

Fill and Stroke is the heart and soul of Inkscape – it’s all just lines and nodes until some style is applied. In this quick tip, we’ll check out some of the best stuff Fill and Stroke has to offer!
1. Fill Colors in Inkscape
Step 1
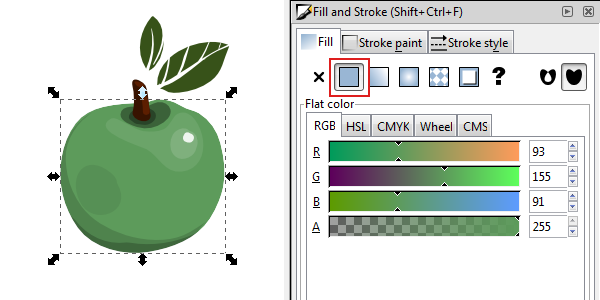
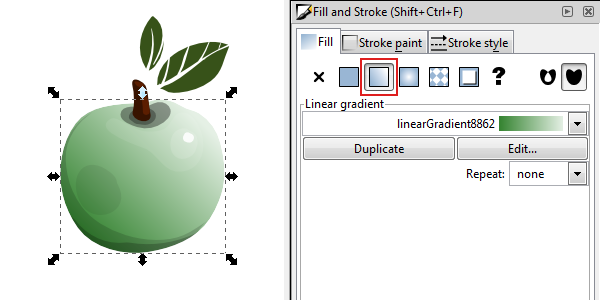
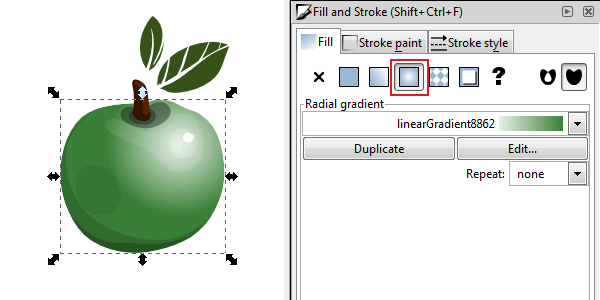
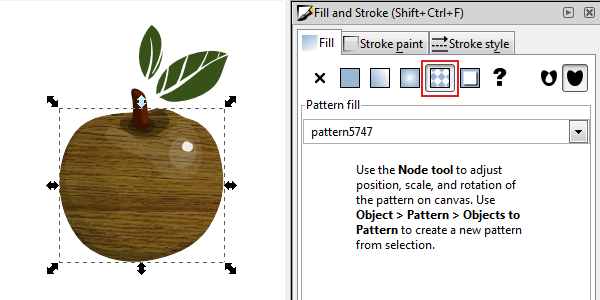
There’s four main types of Fill styles that Fill and Stroke offers. Keep in mind that all of these are also valid for Stroke paint colors.
Flat Color
Linear Gradient
Radial Gradient
Pattern
Step 2
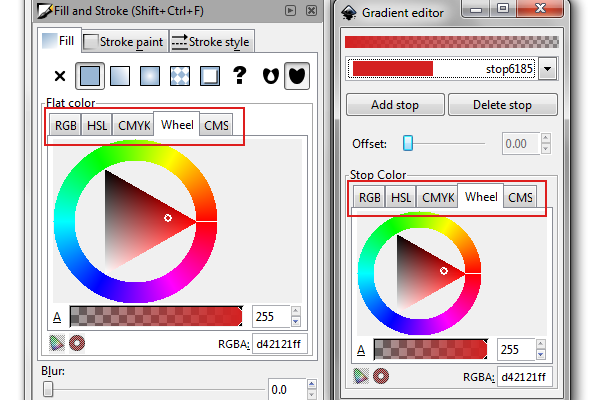
Along with this, Fill and Stroke has five ways of achieving these colors:
- Red, Green, Blue
- Hue, Saturation, Lightness
- Cyan, Magenta, Yellow, Key
- Wheel (a more visual, user friendly method)
- Color Management Systems (mostly for serious color accuracy applications, such as printing)
These also show up the same in the Gradient editor.
Step 3
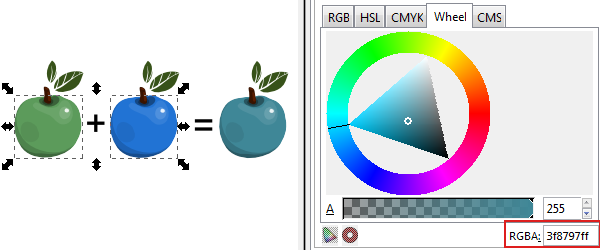
One more neat thing Fill and Stroke seems to do with colors is average/blending. If you select two or more objects with different colors, Fill and Stroke will display the combined blend color from those objects. This one is fun to play around with.
2. Working With Pattern Fills
I’ll bet you want to know how to do that awesome pattern fill. Unfortunately, the current stable release of Inkscape (0.48.4) seems to have a few issues with rendering these pattern fills, but let’s go over it anyway!
Note: If you’re wondering, the 0.49 Inkscape release notes state a fix for this issue, so the future looks good.
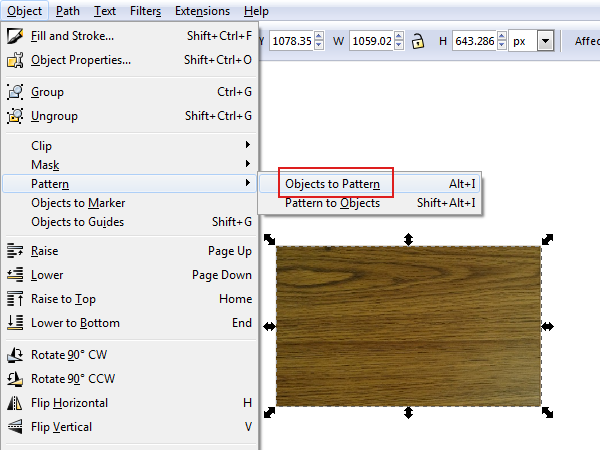
Step 1
In my example above, I created an apple with a wood grain pattern on it (because everybody loves a wooden apple). I’ll show you how to accomplish this. First, we need an object to use as our pattern. I’ve imported my wood grain bitmap, but you could also use vector objects as patterns. Either way, select your object and head up to Object > Pattern > Objects to Pattern. This will add your object to the patterns list.
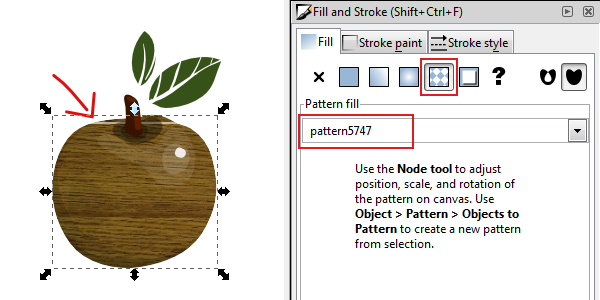
Step 2
Now, select your object to receive the pattern fill and go to Fill and Stroke to click the Pattern button. It should apply your pattern automatically, but you may have to use the drop-down menu to find it.
Do you see that white line? These are the sort of rendering glitches you’ll most likely come across, but it’s still a really cool feature.
3. Blur and Opacity
Step 1
Another convenient set of features that Fill and Stroke offers is Blur and Opacity values. Say we wanted to add some depth to our little fruit scene down there. Let’s blur those back apples!
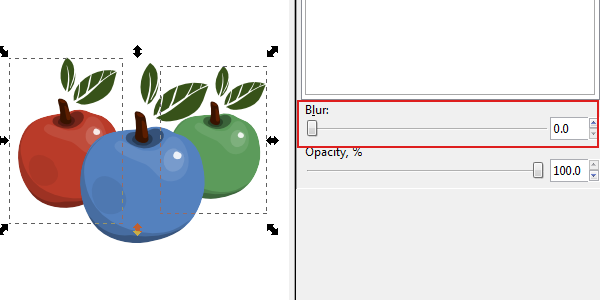
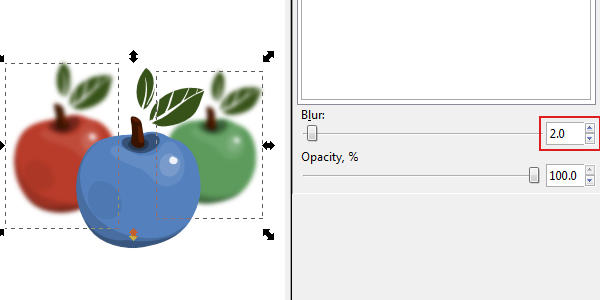
Step 2
After selecting the back apples and changing Fill and Stroke’s Blur value to 2, you can see it certainly blurred those objects. This is more simple and convenient than going into Filters and applying a blur (although, you’ll have more graphical settings that way).
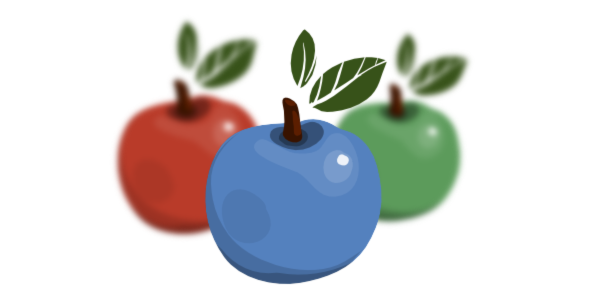
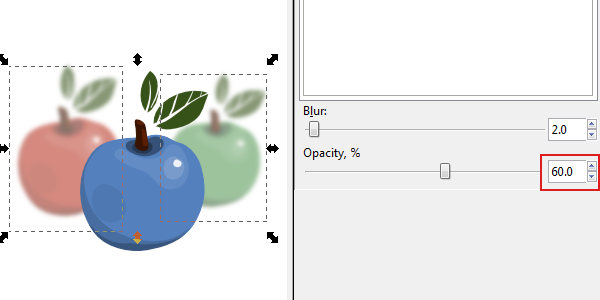
Step 3
Opacity is just as simple. Let’s go ahead and fade those same apples into the background. 60% should do the trick.
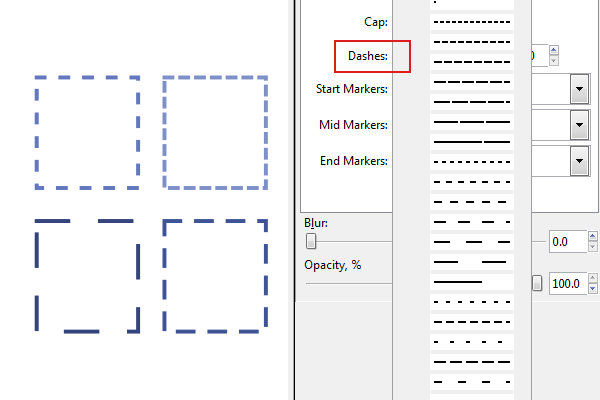
4. Cool Stroke Design
Step 1
When you start messing around with stroke stuff, you’ll run into Dashes. These are pretty neat and useful for many applications (and there’s a ton of dash styles).
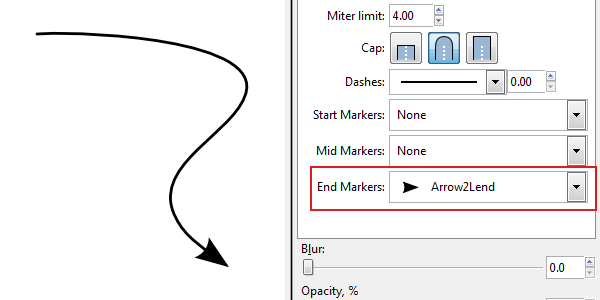
Step 2
And then there’s markers, which are awesome. Simply select any stroke and just specify the position and style of your marker (there’s a bunch of these as well).
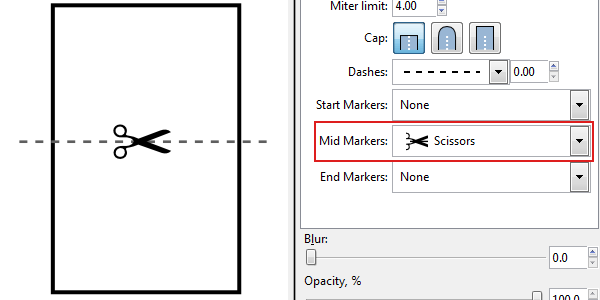
Step 3
Mid markers work the same, but you need to made sure there’s a middle node. For example: if you just draw a line, there’s only two nodes (no middle node). A simple work around would be to just to select your line and click Insert new nodes from the Nodes menu.
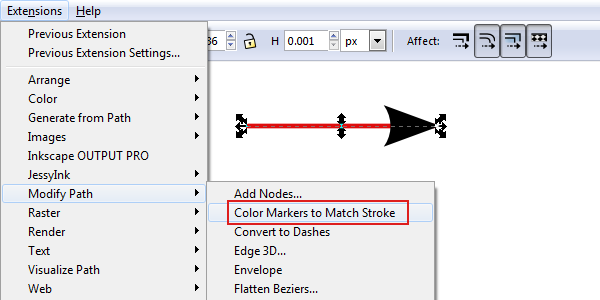
Step 4
Later, you’ll find out that the markers don’t change color when the stroke does. There’s no standard method for this in Fill and Stroke, so extensions will have to be used. Head up to Extensions > Modify Path > Color Markers to Match Stroke.
There You Have It!
There’s just so much to Fill and Stroke, it would take hours to go over it all. Hopefully these simple concepts and neat tricks will get you on track for utilizing the most out of Inkscape’s Fill and Stroke. Thanks for reading