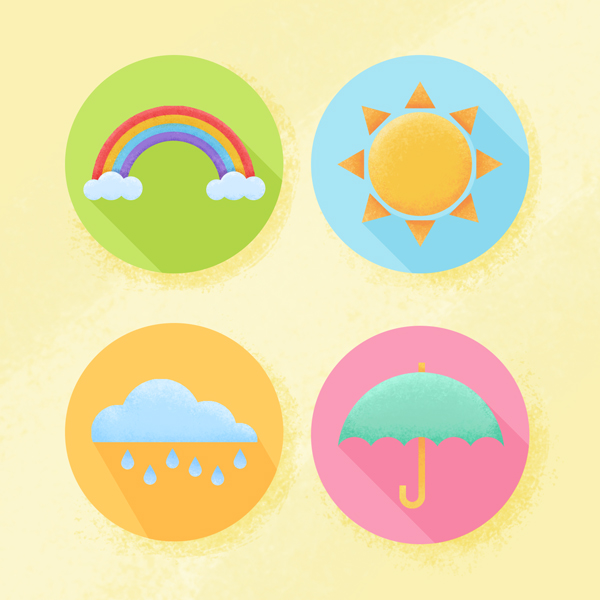
April showers bring May flowers! It is traditionally known that April is quite a rainy period, when the weather changes unexpectedly from the sun shining in a clear sky to raining cats and dogs. However, any weather has its own beauty, so let’s get inspired and prepare for springtime with this fun tutorial! We’ll be working in Adobe Photoshop to create a set of April weather flat icons, using basic shapes and texturing with artistic brushes.
Adobe Photoshop has plenty of great tools
and tricks for creating icons in a fast and convenient way. You
can use the following techniques to create not only a weather icon set, but also
any other kind of flat icons, like travel or camping icons, nature flat icons and others.
Let’s begin!
1. Create a Colorful Rainbow Icon
Step 1
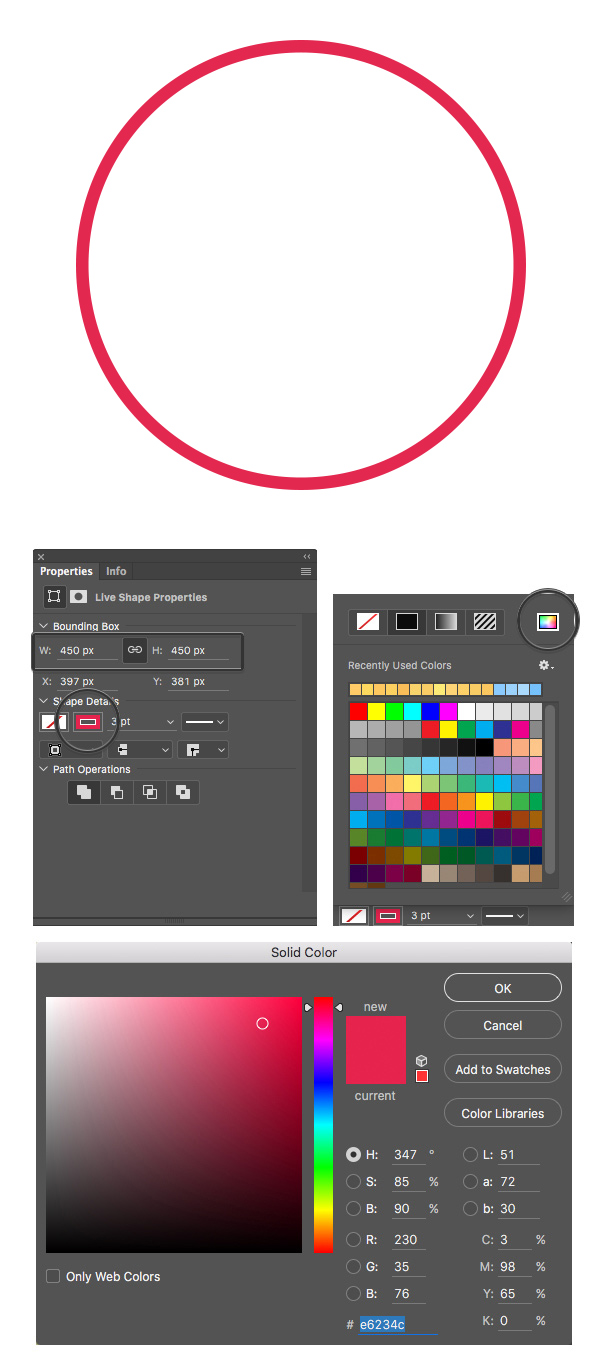
We’ll start by making the outer red stripe of
our rainbow. Take the Ellipse Tool (U)
and make a 450 x 450 px circle. Head
to the Properties panel (Window > Properties) and from here
we can change the size of the shape, its position colors and other settings.
Set the thickness of the Stroke to 3 pt, Fill color to None, and let’s adjust the Stroke color. Click the Stroke icon to open the options window
with color swatches, and either select one of the swatches or click the colorful
icon in the top-right corner to open the Solid
Color window and select the color more precisely.
Step 2
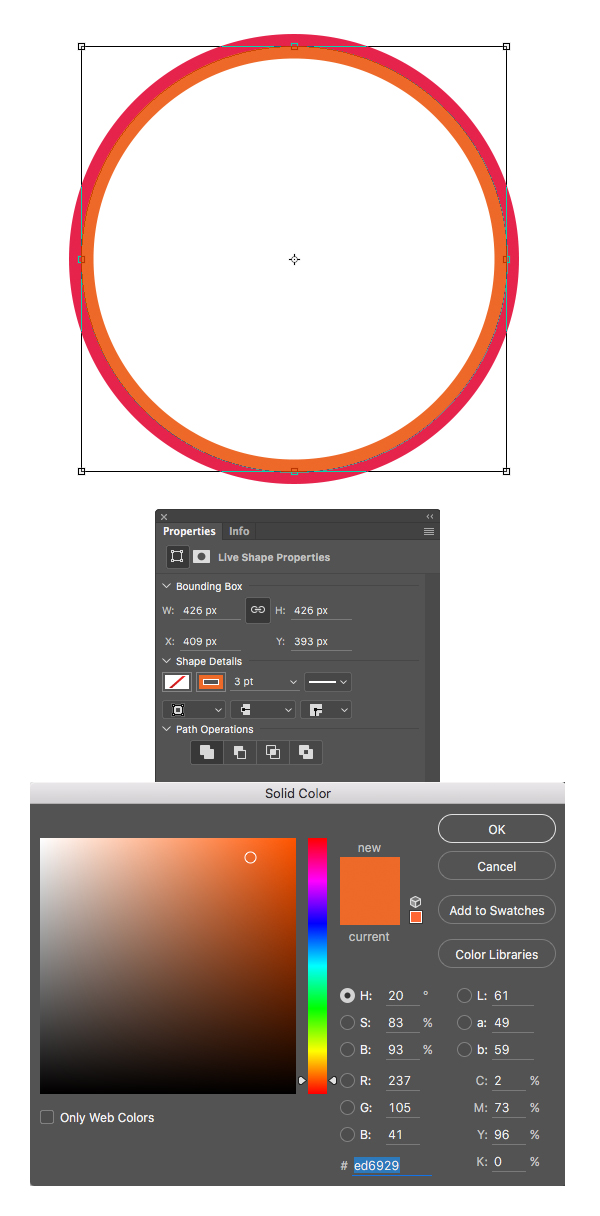
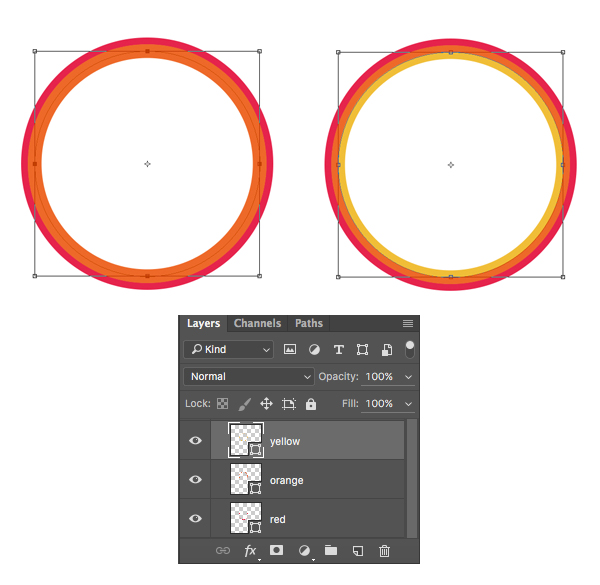
Let’s add another ring. Select the red
circle in the Layers panel and press Control-J to make a
copy of the layer. Press Control-T to transform
the shape and make a copy a bit smaller, placing it inside the red circle.
Switch the Stroke color to orange in
the Properties panel.
Step 3
Make another copy (Control-J) to add a third circle of
a smaller size, switching the Stroke
color to yellow.
Step 4
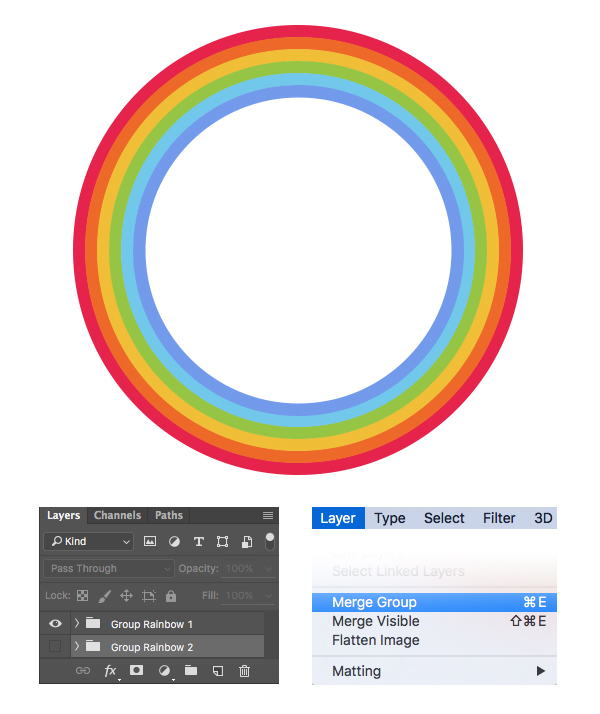
Continue adding circles, filling them with
rainbow colors. You can add all seven colors or fewer, as we don’t need to make
our rainbow super-realistic and detailed, because our icon will be quite small.
Even if you add only three or four rings of different colors, it will still resemble a
rainbow.
When you’re happy with the result, select
all the rings using the Move Tool (V)
and unite them into a Group (Control-G).
Head to the Layers panel and Duplicate the group by either pressing Control-J or by dragging and dropping it over the Create a New Layer icon in the bottom of the panel. This way we make a
“backup” copy in case we decide to change some details of our rainbow during
the work.
Select the first group and go to Layer > Merge Group, uniting all the
separate rings into one rasterized layer.
Step 5
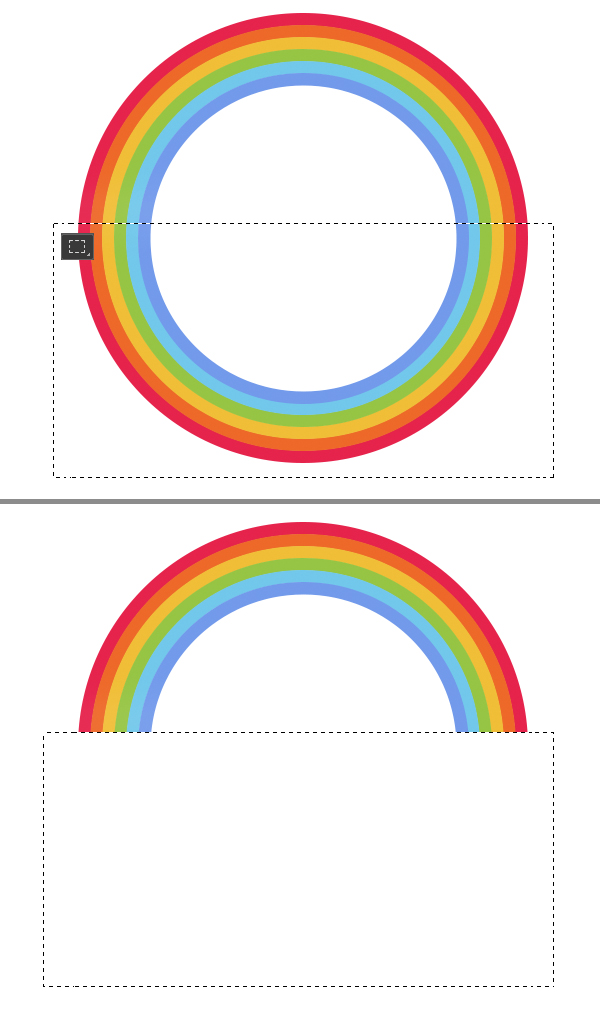
Now let’s take the Rectangular Marquee Tool (M), select the bottom half of the rainbow
circle and delete it.
Step 6
Let’s create a couple of puffy clouds at
the tips of our rainbow. Take the Ellipse
Tool (U) and make a small blue circle at the bottom-left corner of the
rainbow. Add a few more circles, varying the size. Group (Control-G) the elements of the cloud and duplicate (Control-J) the cloud. Attach the copy to the opposite
side of the rainbow.
![]()
Step 7
If you wish to change something, you can
always use our “backup” copy and adjust the appearance of the rainbow to your
liking. In my case, I’ve decided to reduce the number of stripes, this
way making them thicker.

Step 8
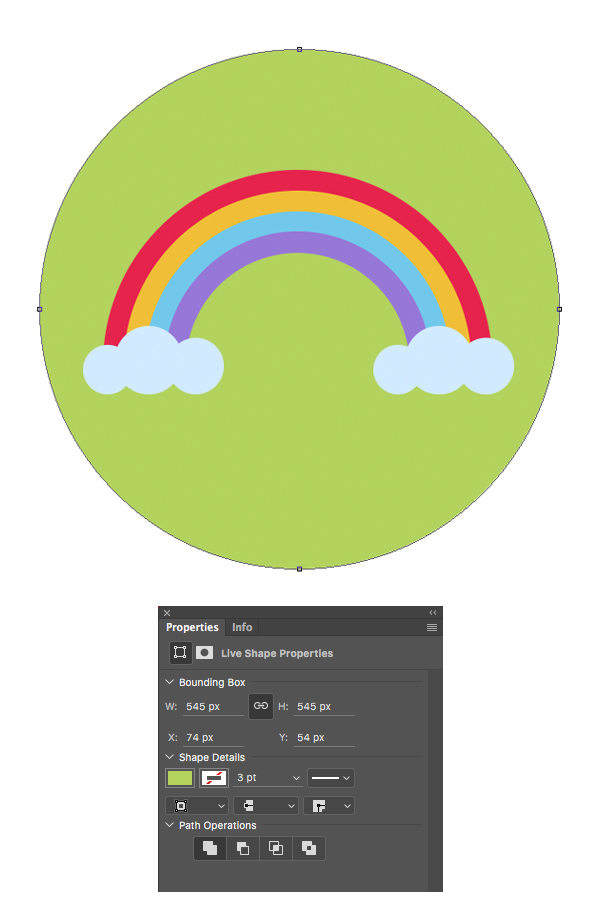
Now let’s create the base of our icon.
Let’s make the icon round by creating a 545 x 545
px circle with the Ellipse Tool (U).
Use the Properties panel to set the Fill
color to grass-green and the Stroke
color to none.
Step 9
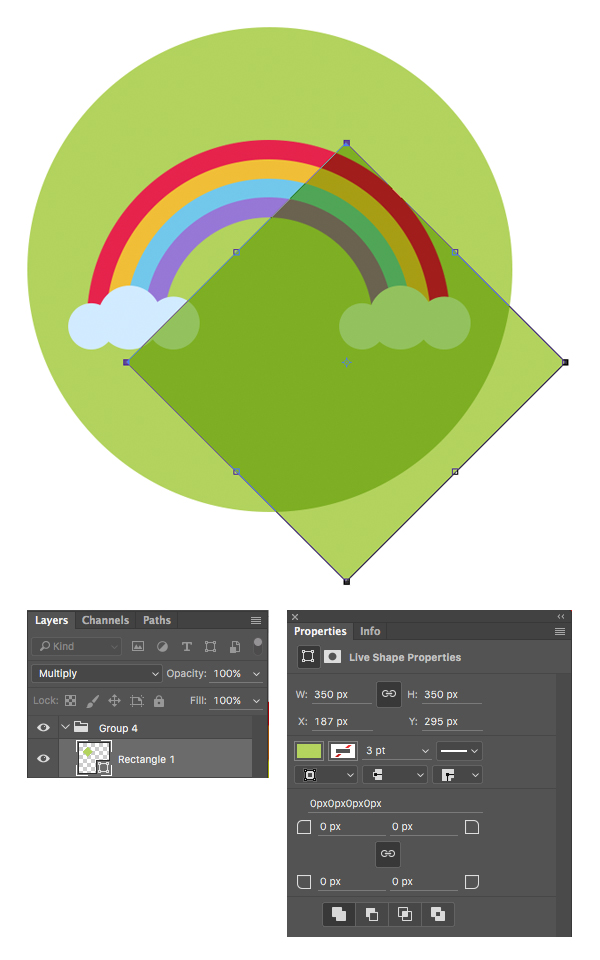
Let’s add a trendy long shadow effect to
our icon. Make a 350 x 350 px green square
with the Rectangle Tool (U) and
rotate it 45 degrees with the Move Tool (V). Head to the Layers panel and set the Blending Mode to Multiply to make the square darker. If it looks too dark, try
lowering the Opacity a bit.
Step 10
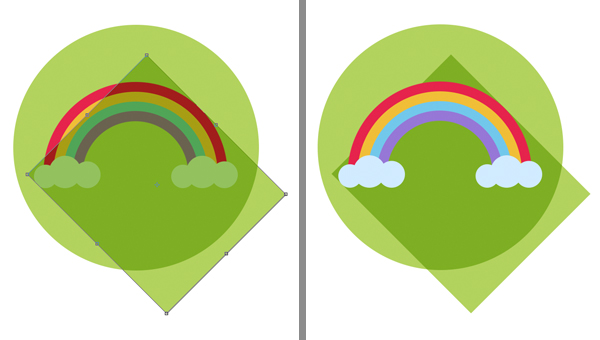
Adjust the size and the position of the
rectangle to make it fit the sides of the rainbow as shown in the screenshot
below. Place the rectangle beneath the rainbow either by dragging it down manually
in the Layers panel or by pressing Control-[
several times.
Step 11
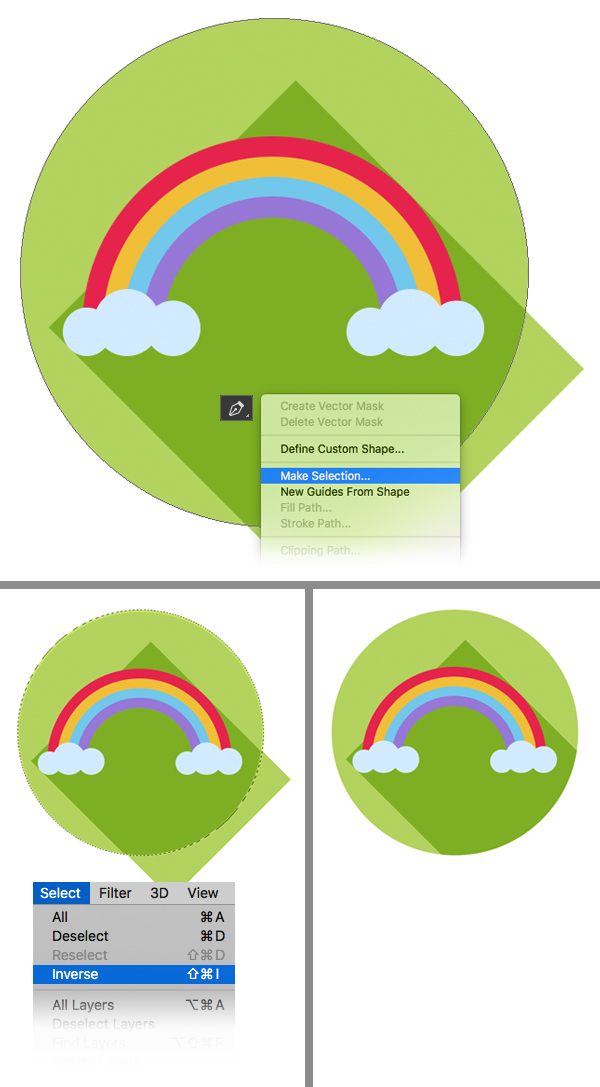
Now we need to cut off the part of the
rectangle outside the circle base of the icon. Select the circle and take the Pen Tool (P), click the circle with the right mouse button, and Make Selection. Leave
the Make Selection options in the
pop-up window as default and go to Select
> Inverse.
Now we can select the shadow layer in the Layers panel and delete the unwanted piece
outside the circle.
Step 12
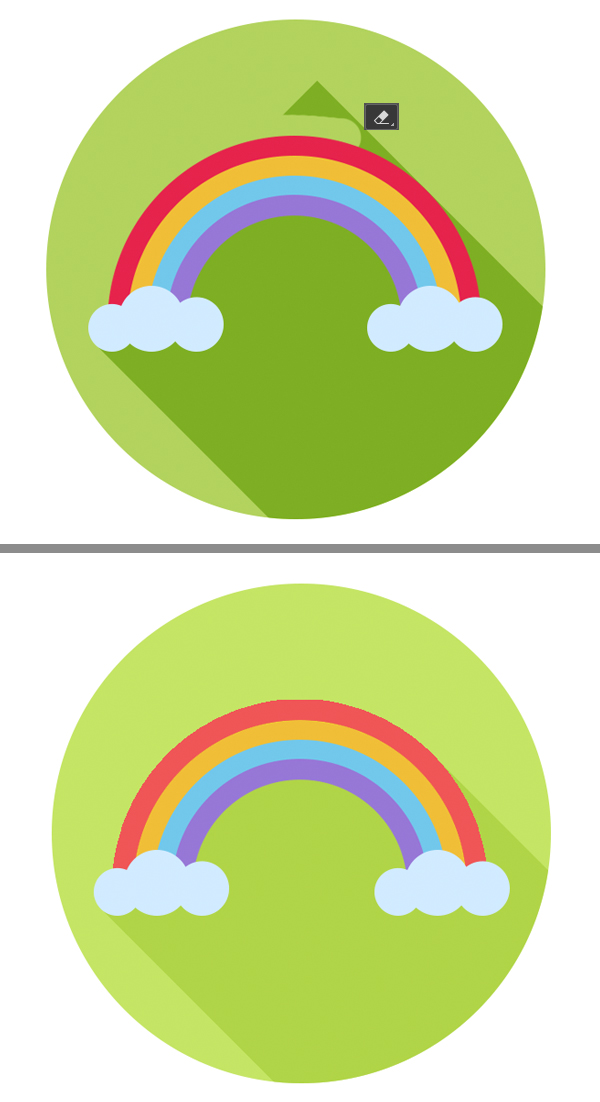
Let’s use the Eraser Tool (E) to erase the unneeded pieces of the shadow inside
the icon as well.
Make the base of the icon and the shadow a
bit lighter, and voila! Our flat rainbow icon is ready! Let’s move to the
next one.
2. Create a Spring Sun Icon
Step 1
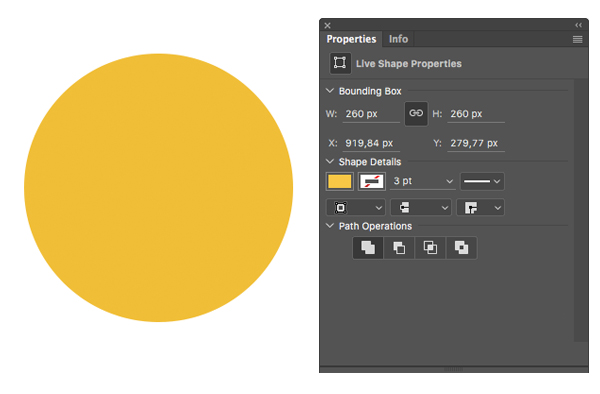
This time we’ll make a sun icon. Start by
making the base of the sun from a 260 x 260
px yellow rectangle.
Step 2
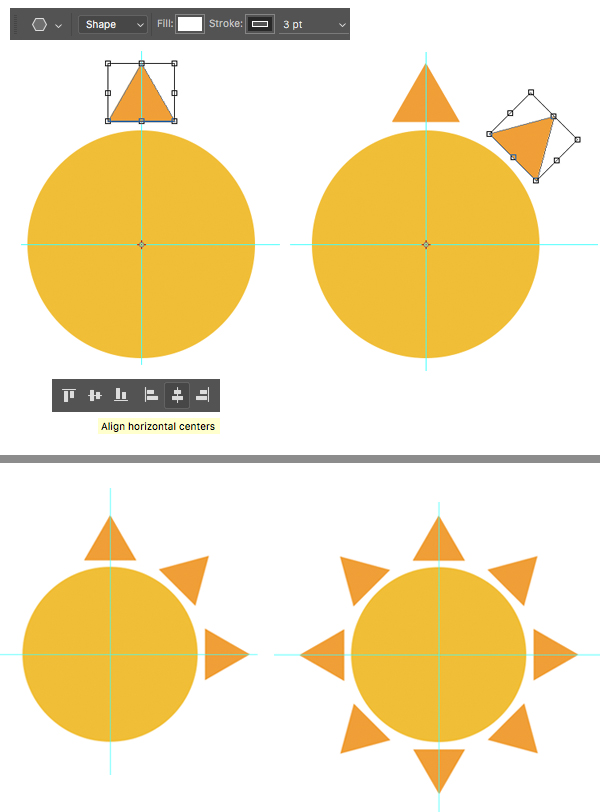
Now let’s add some stylized sunbeams.
Switch to the Polygon Tool (U) and
set the number of Sides to 3 in the control panel on top. Make an
orange triangle and place it on top of the sun. Select both the circle and the
triangle and click Align horizontal centers
in the upper control panel to make the shapes perfectly centered.
We can also use the Guides to mark the center of the sun. To do this, press Control-R to make the Rulers visible, click on the upper
ruler and drag the horizontal Guide
down onto the Artboard. Do the same for the vertical guide, making the lines
cross.
Now let’s add more beams around the sun. It
might seem tricky, but it is the easiest way to create repeating shapes with
transformation.
Select our triangle and press Alt-Control-T for Free Transform Path mode. Find the pivot point in the center of the triangle and drag it down,
placing it at the center of the yellow sun circle. You will notice that a copy of
the triangle layer was created automatically in the Layers panel (this works only when you use the Alt-Control-T keys for transformation). Rotate the
triangle 45 degrees by holding Shift, and apply the transformation.
Now press Shift-Control-Alt-T several times to create six more copies around the sun.
Great! The sunbeams are ready.
Step 3
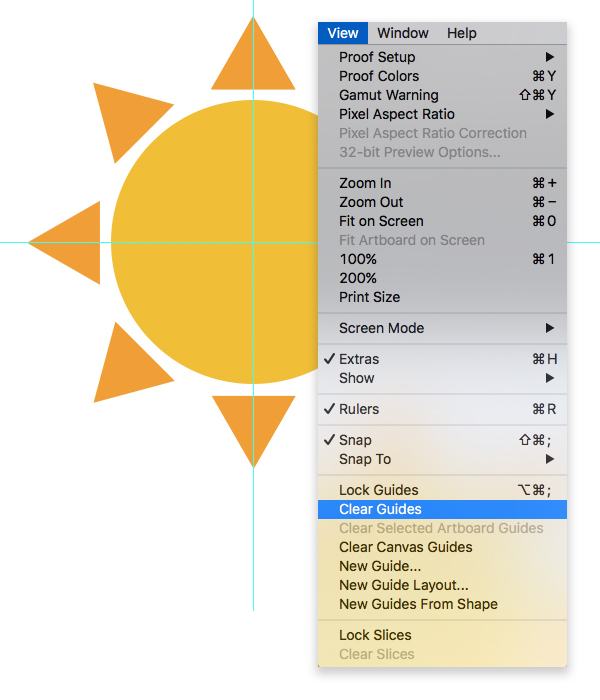
We don’t need the Guides any longer, so we can turn them off in View > Clear Guides.
Step 4
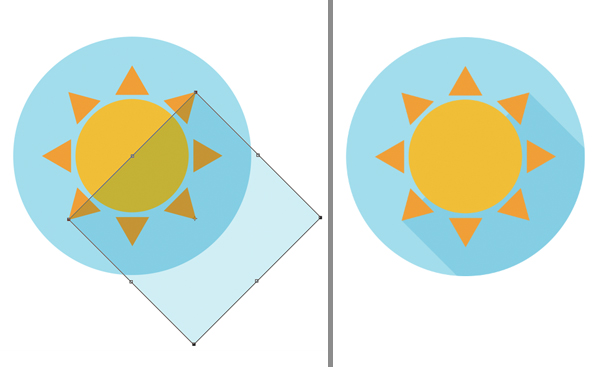
Let’s copy the circle base of our first
icon and switch its Fill color to
sky-blue. Add a semi-transparent long shadow beneath the sun.
Step 5
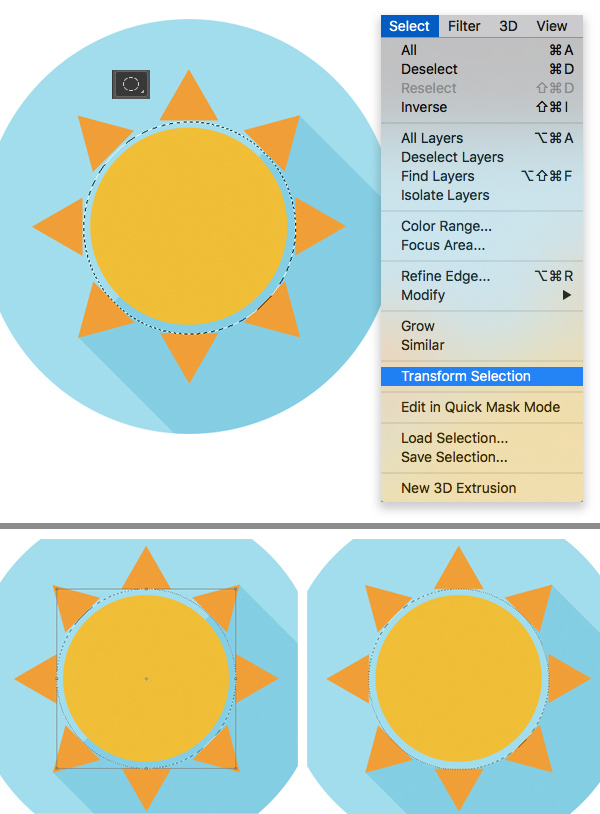
Let’s erase that part of the shadow around
the yellow sun circle. For this purpose, take the Elliptical Marquee Tool (M) and make a selection around the yellow
circle. Go to Select > Transform
Selection and modify the selection to make it fit the space between the
yellow circle and the sunbeams.
Apply the transformation and select our
shadow layer in the Layers panel.
Delete the part of
the shadow around the sun.
Done! Our sun icon is ready! Let’s move on.

3. Draw a Rainy Cloud Icon
Step 1
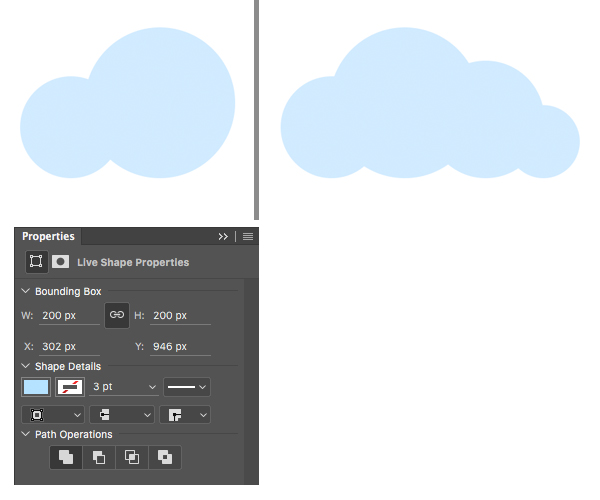
Start forming our cloud from a 200 x 200 px blue circle, using the Ellipse Tool (U). Add smaller circles
on both sides, making a fluffy cloud.
Step 2
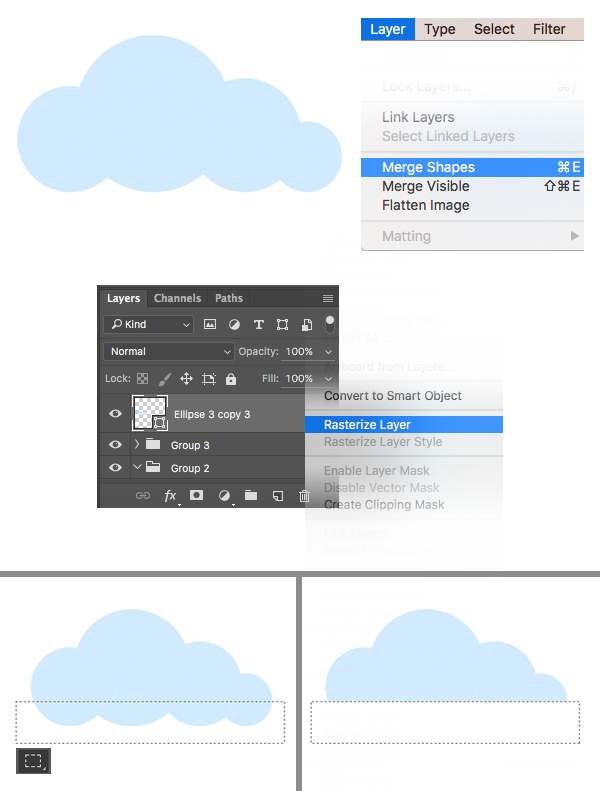
Select all the circles and go to Layer > Merge Shapes. Head to the Layers panel, click the merged cloud layer with the right mouse button and Rasterize
Layer to make it editable.
Now we can use the Rectangular Marquee Tool (M) to select the lower
part of the cloud and delete, making the bottom of the cloud flat.
Step 3
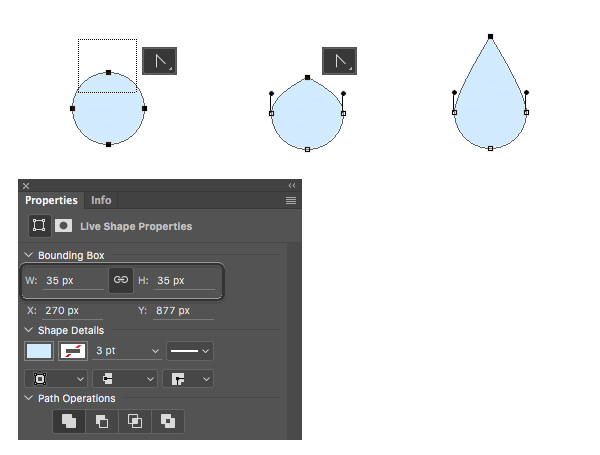
Now let’s shape the raindrops. Use the Ellipse Tool (U) to make a 35 x 35 px blue circle. Take the Convert Point Tool (you can find it in
the same drop-down menu as the Pen Tool
(P)) and select the top anchor point of the circle. Single-click the anchor
point to make a sharp corner. Finally, drag the point up, shaping a raindrop.
Step 4
Press Control-J
several times to make more copies of the drops and spread them beneath the
cloud, depicting the rain.

Step 5
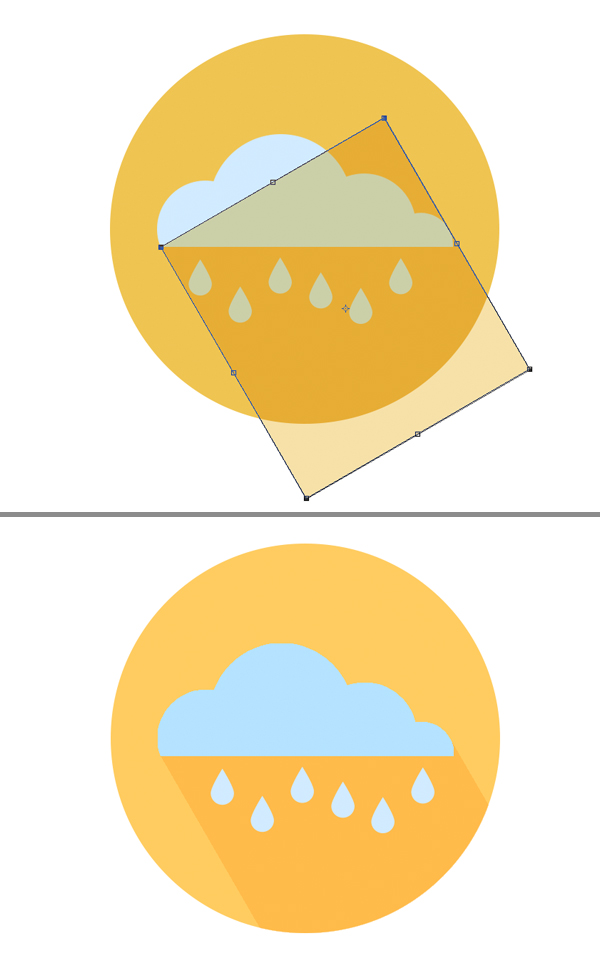
Add a yellow circle base to our icon and
form a long shadow. Our rainy cloud icon is done! We’ve got only one icon left!
4. Make an Umbrella Icon
Step 1
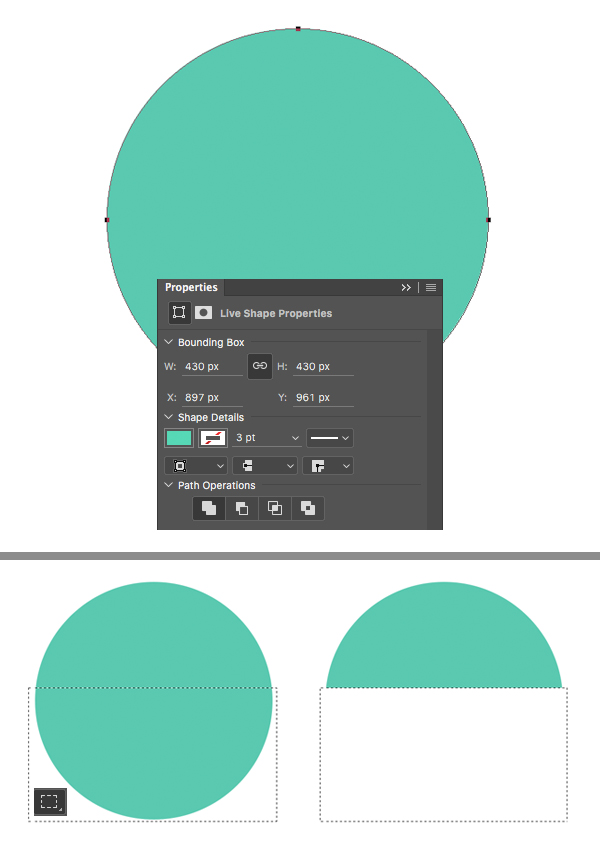
Let’s start forming our umbrella from a 430 x 430 px circle of turquoise color. Rasterize the layer in the Layers panel and delete the lower half
of the circle, using the Rectangular
Marquee Tool (M).
Step 2
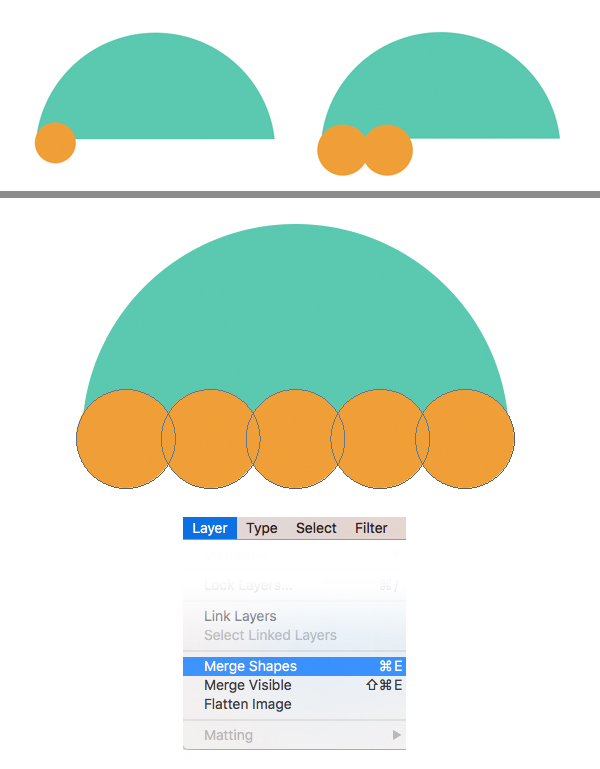
Use the Ellipse Tool (U) to form a row of circles in the bottom part of the
turquoise shape. Adjust the size of the circles group to make them fit the
umbrella. Finally, select all the circles and unite them into a single shape
in Layer > Merge Shapes.
Step 3
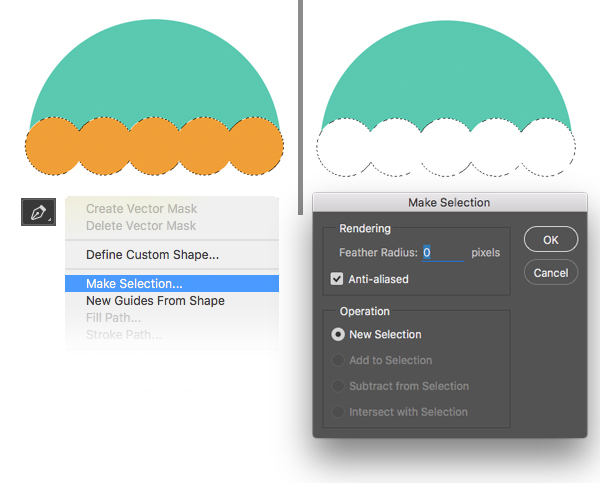
Switch to the Pen Tool (P) and right-click the circles to Make Selection. Select the turquoise
shape layer in the Layers panel and
delete the selected area to form the pointed bottom part of the umbrella.
Now that we don’t need the orange circles anymore, we can delete this layer as well.
Step 4
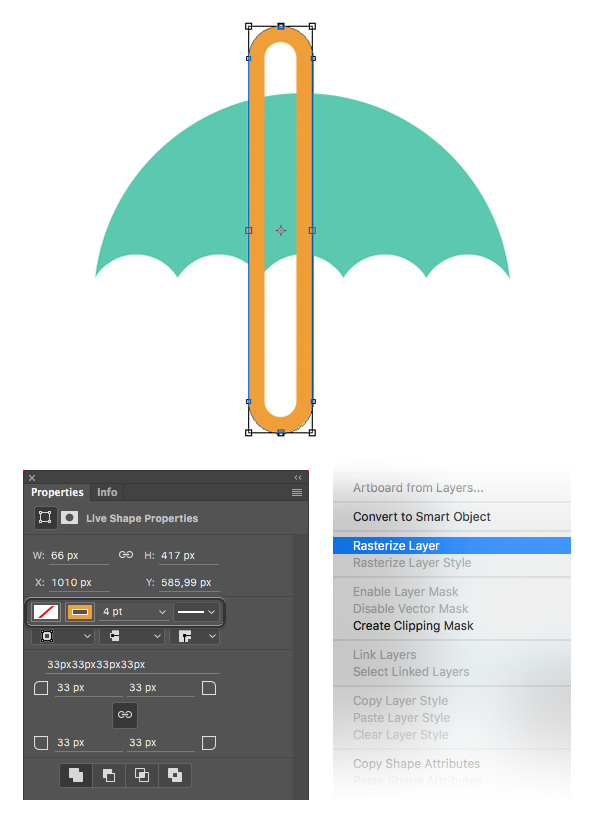
Let’s create the stick of the umbrella with
a wooden crook handle. Take the Rounded
Rectangle Tool (U) and make a shape with no Fill and a thick 4 pt
orange Stroke, as shown in the image
below.
Right-click in the Layers panel and Rasterize Layer to make the handle
editable.
Step 5
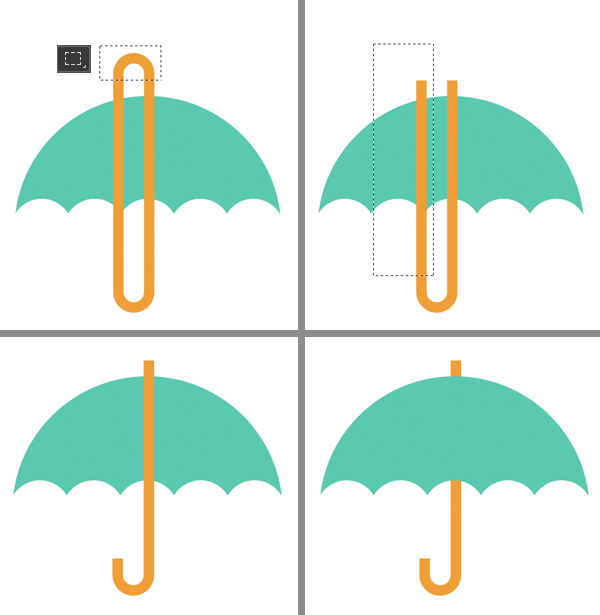
Take the Rectangular Marquee Tool (M) and delete the upper piece of the
handle, leaving only the short tips above the turquoise shape. Then select and
delete the left half of the shape, forming a crook handle.
Keeping
the handle layer selected, press Shift-Control-[
to place it beneath the turquoise umbrella shape.
Step 6
Finish up with the umbrella icon by making
a pink circle base and adding a gentle flat shadow.

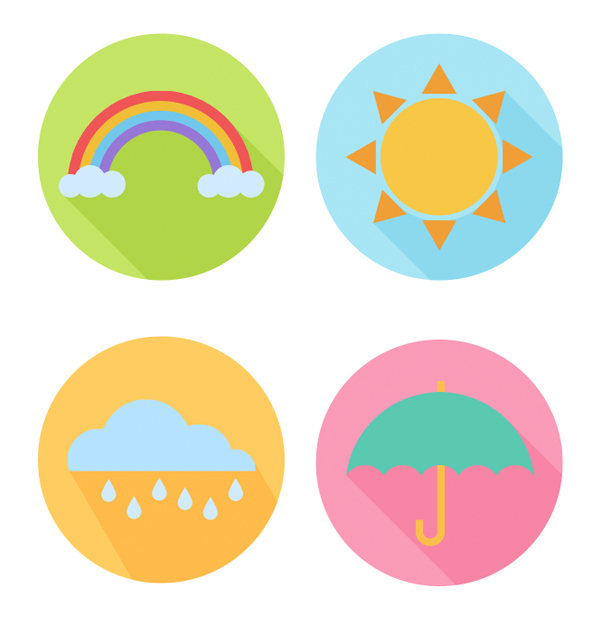
Wonderful! Our flat April weather icon set
is ready.
However, this is not the end of this tutorial. You can stop at this
step if you like this clean and minimalistic look of the icons. Otherwise, if
you want to make them a bit more detailed and textured, let’s proceed and see
how we can adjust the icons, using some of Adobe Photoshop’s artistic
brushes.
5. Apply Grungy Textures Using Brushes
Step 1
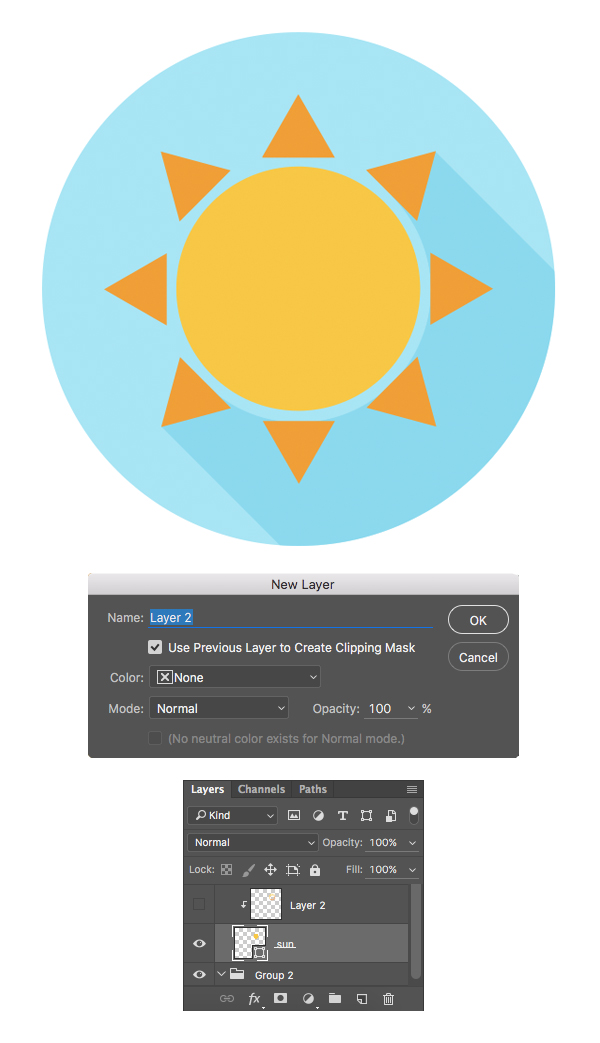
Let’s start with our sun icon. Head to the
Layers panel and select the yellow circle base of the sun. Hold Alt and click Create a new
layer. In the pop-up window, check the box saying Use Previous Layer to Create Clipping Mask.
In this way we bind our
new layer to the selected sun layer (you will see a tiny arrow next to the new
layer). What it does is allow you to draw only inside the boundaries of the
yellow sun.
Step 2
Now let’s pick a nice textured brush to
create a grungy effect. You can use one of your favorites or some of the
default Adobe Photoshop brushes. You can also find plenty of textured artistic brushes on Envato Market and try them out to create a new fancy look.
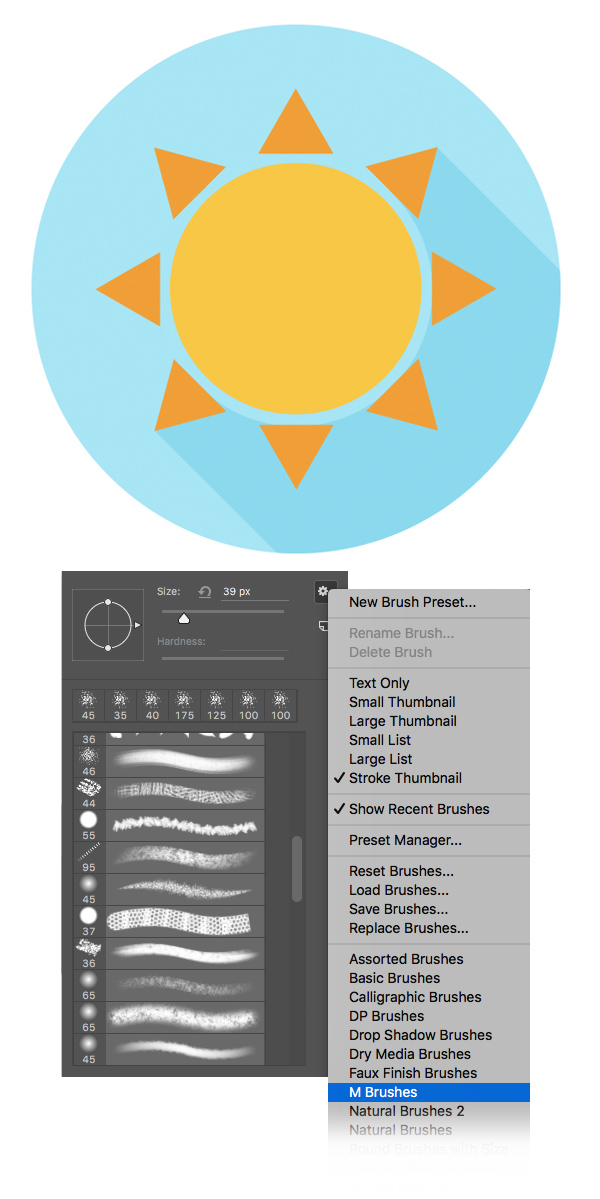
Take the Brush Tool (B) and right-click to open the list of brushes (or go to Window > Brushes). Click the tiny cog icon in the top-right corner
of the pop-up menu and select M Brushes
from the list below. Either Append
the brushes to your existing list or Replace them.
Step 3
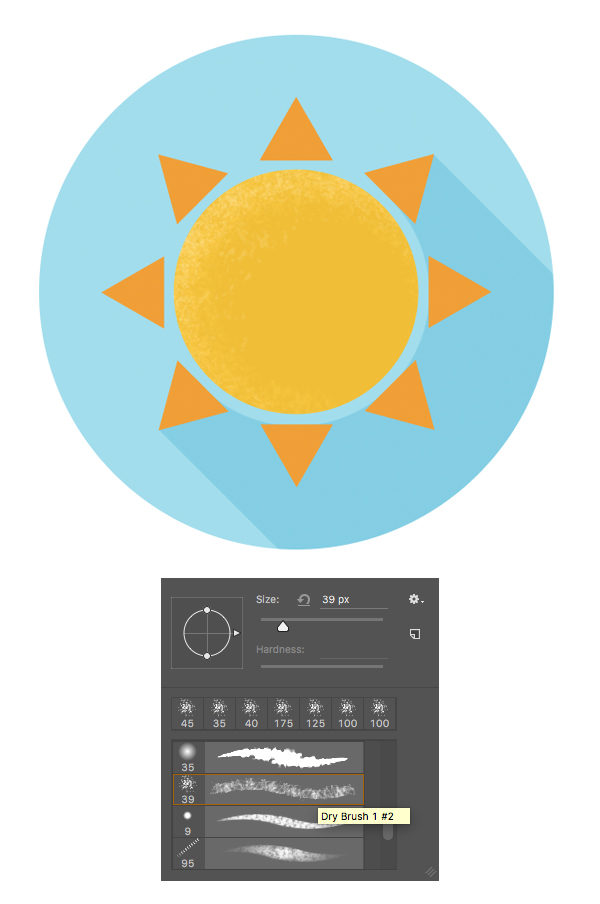
Find the Dry Brush 1 #2 in the list and select it. If you don’t have such
brush set in your version of the program, try opening other default sets, such
as Dry Media Brushes or others to
find a similar grungy brush.
Step 4
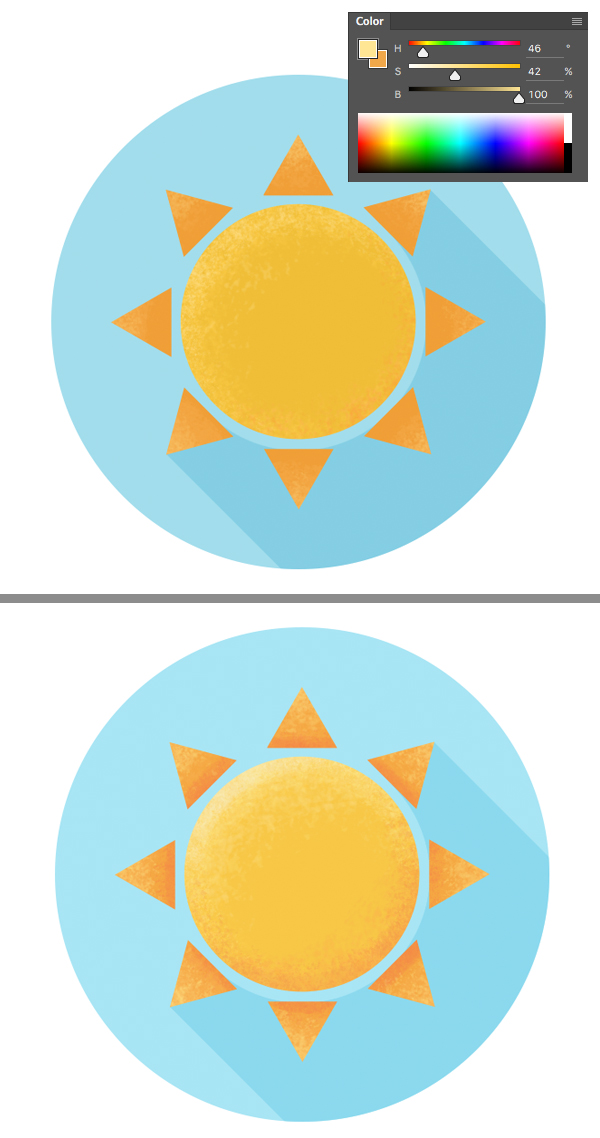
Select a lighter-yellow color in the Color
panel and use our linked layer to draw above the sun, adding a gentle, grungy
texture. Use a darker orange color to add a subtle shadow in the bottom part of
the sun.
Merge the sunbeams into a single shape
and add a linked layer to make them textured as well.
Step 5
Let’s move to the rainbow icon and make it
textured as well. Created a few linked layers for the rainbow arc and for each
cloud and use the same technique with the artistic brush.

Step 6
Continue using the brushes to apply grungy textures to every icon.
Step 7
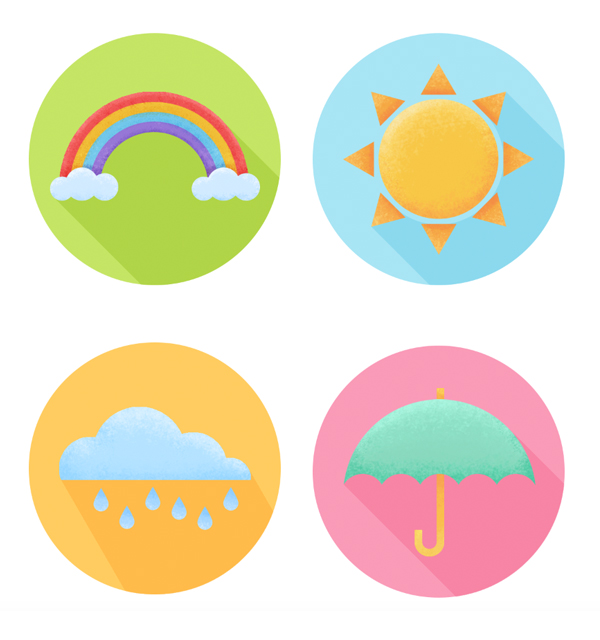
Create a New Layer above the Background
layer and draw subtle textured shadows of light-yellow color beneath each icon.
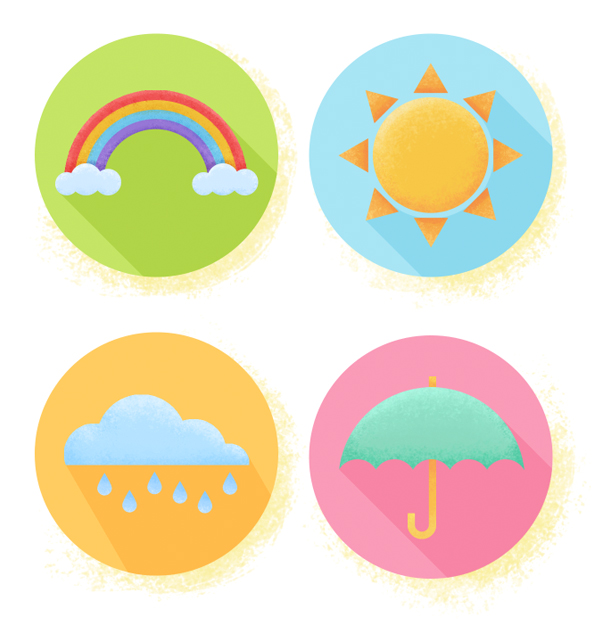
Wonderful! Our April Weather Icons Are
Ready!
Great job! We’ve learned to draw flat weather icons using basic shapes and applying simple textures, with the help of the default brushes of Adobe Photoshop to make our icons look more detailed and
creative.
You can use these techniques to expand our
set, creating more icons, or make a new set of a different theme.
Good luck!
