Hello dear visitor, and Welcome to Ice Text Effects Tutorial.
Today, we’re going to practice a dozen methods of: how to archive a frozen look on a desired text in Photoshop.
So let’s get started, right away!
First of all, create New Document with sizes of: 720×700 px and color the Background in #434343.
Grab the Horizontal Type Tool of the Tools Palette and add some text on the blank sheet.
Grab the Horizontal Type Tool of the Tools Palette and add some text on the blank sheet.

Rename that newly created text layer in – “Main” and enter the Properties of the Layer.
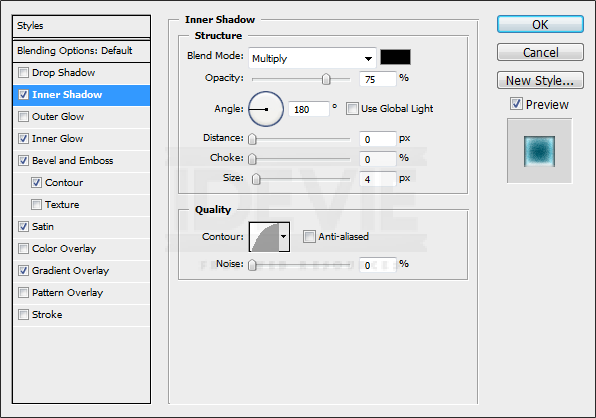
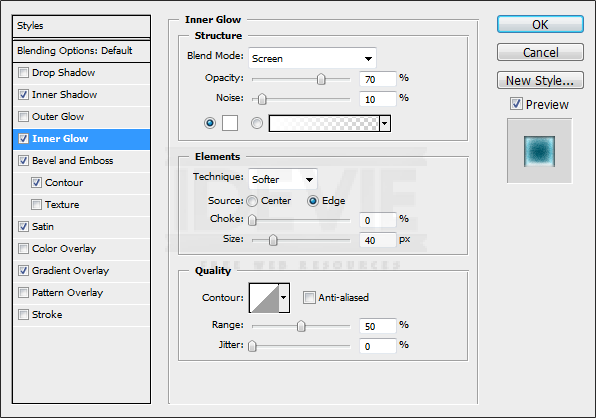
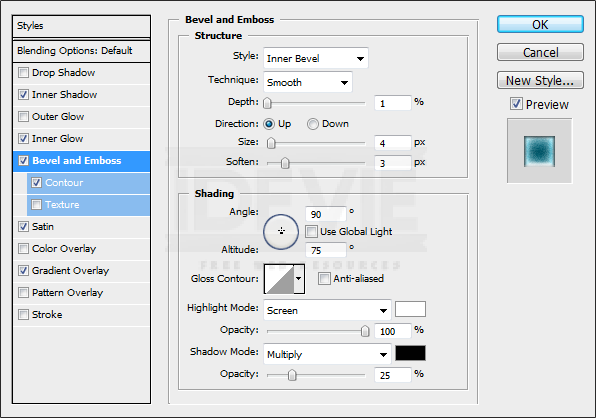
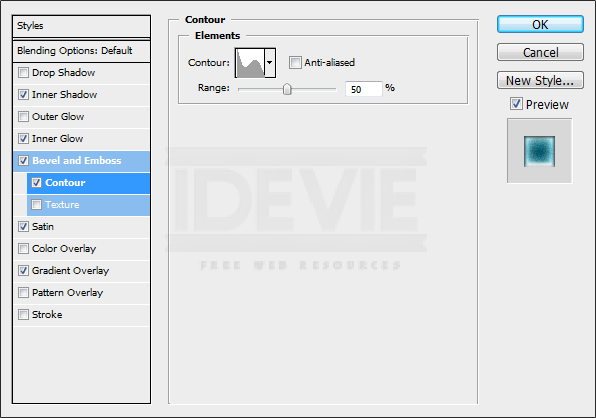
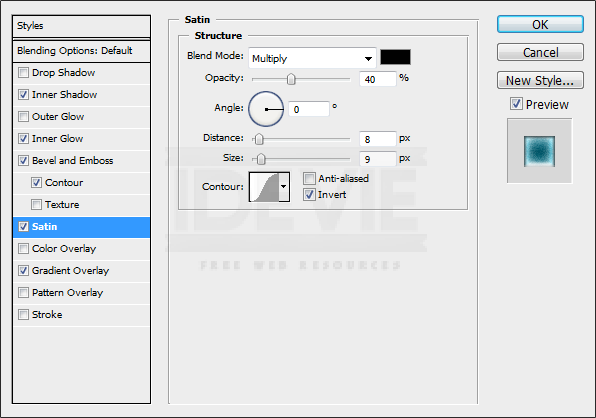
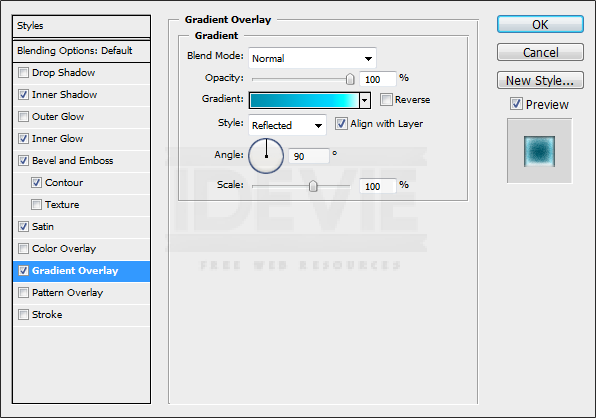
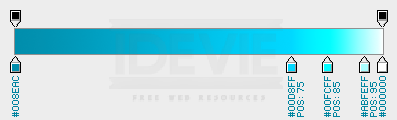
In the Layer’s Properties, use the following settings:
In the Layer’s Properties, use the following settings:
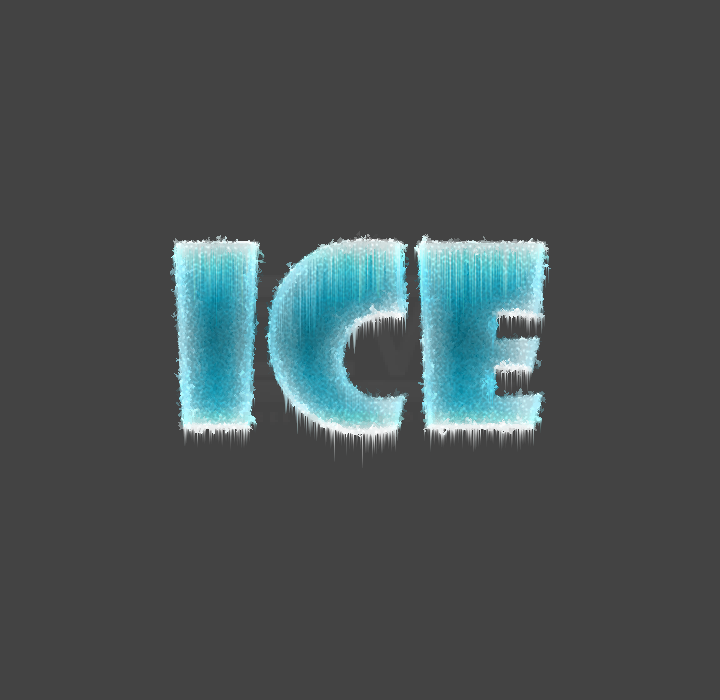
…and so far, you’ll need to have something like this.

Now, compress the Style of the layer by creating New Layer and merging it with the layer – “Main”. After the merge – DO NOT FORGET TO RENAME THE LAYER IN – “Main”, over again.
Duplicate the layer “Main” and rename the duplicated layer in – “Diffused”.
Select the “Diffused” layer of the Layers Panel and go to: Filter > Stylize > Diffuse.
Re-apply the same filter for like – 10 times more. (you can easily do the re-applying by simply pressing the CTRL+F comb. on your keyboard).

Now, duplicate the layer “Diffused” and rename the copy in – “Windy”.
Then, go to: Image > Rotate Canvas > 90 (degrees) CW.
Then, go to: Image > Rotate Canvas > 90 (degrees) CW.

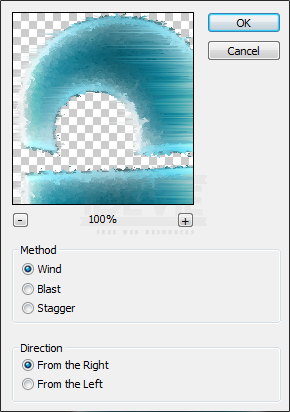
So, having your image rotated, apply some wind effects on it.
Go to: Filter > Stylize > Wind.
Go to: Filter > Stylize > Wind.
After that, rotate the image in the primary position once again.
(Image > Rotate Canvas > 90 (degrees) CCW).
(Image > Rotate Canvas > 90 (degrees) CCW).

So far, so good!
Alright, now let’s add some extra frozen details and make the text even more realistic.
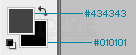
Firstly, adjust the Foreground and the Background color on the program interface.
Alright, now let’s add some extra frozen details and make the text even more realistic.
Firstly, adjust the Foreground and the Background color on the program interface.
Then, duplicate the layer “Main” and rename the copy in – “Reticulated” and move the layer to the top scale on the Layers Panel.

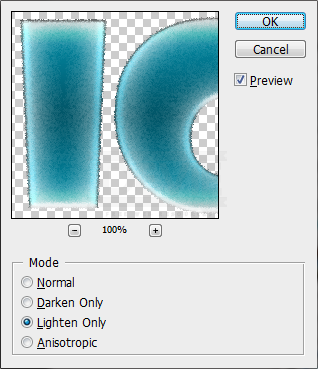
Go to: Filter > Sketch > Reticulation …and use the following settings:
Density: 40;
Foreground Level: 40;
Background Level: 05;
Density: 40;
Foreground Level: 40;
Background Level: 05;

If you’re done with that, change the blend mode of the layer to Color Dodge and reduce the opacity to 80%.
Now, duplicate the layer “Diffused” and rename that copy in – “Diffused & Sprayed”.
Set it above the “Diffused” layer on the Layers Panel.
Set it above the “Diffused” layer on the Layers Panel.

Go to: Filter > Brush Strokes > Sprayed Strokes and apply these settings:
Stroke Length: 12;
Spray Radius: 07;
Stroke Direction: Right Diagonal;
Stroke Length: 12;
Spray Radius: 07;
Stroke Direction: Right Diagonal;

Set the blend mode of this layer to Color Dodge as well and reduce the opacity down to 25%.

Alright, now duplicate the “Windy” layer and move the layer down to the bottom on the Layers Panel.
Go to: Filter > Blur > Radial Blur.
Go to: Filter > Blur > Radial Blur.
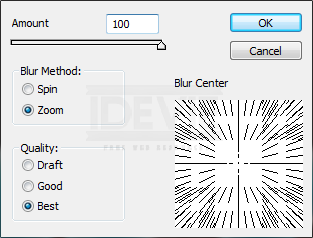

e-apply the blur x3 times more.

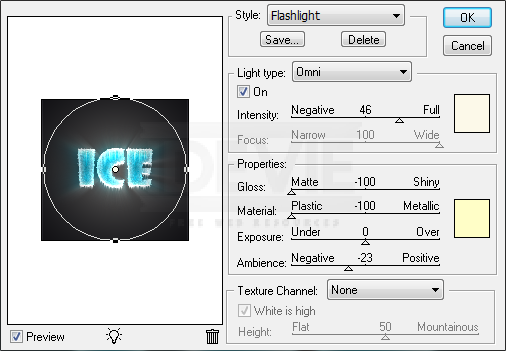
For the end, you can merge all of the layers – along with the background and add some lightning on it.
In this example I am using the Omni Light which can be found in Filter > Render > Lightning Effects.
In this example I am using the Omni Light which can be found in Filter > Render > Lightning Effects.

That’s it, you’re done. Congratulations!
source:http://urly.us/d4