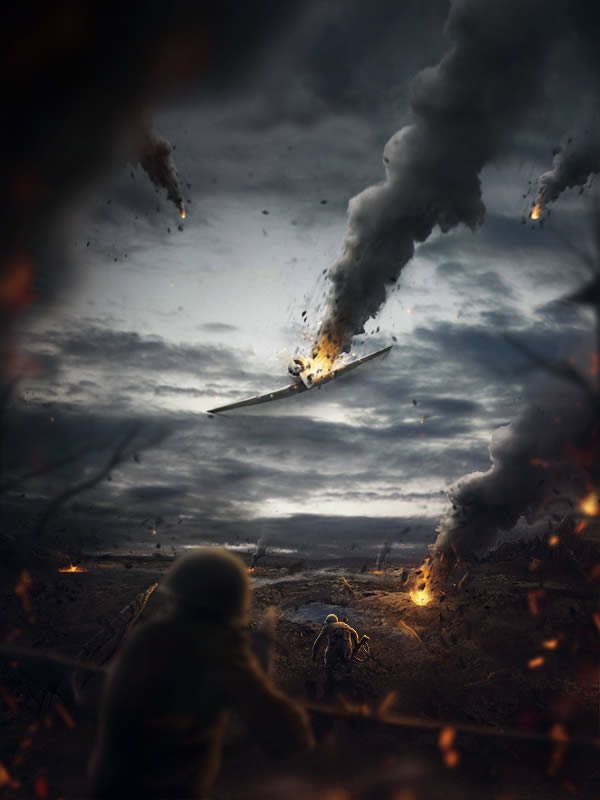
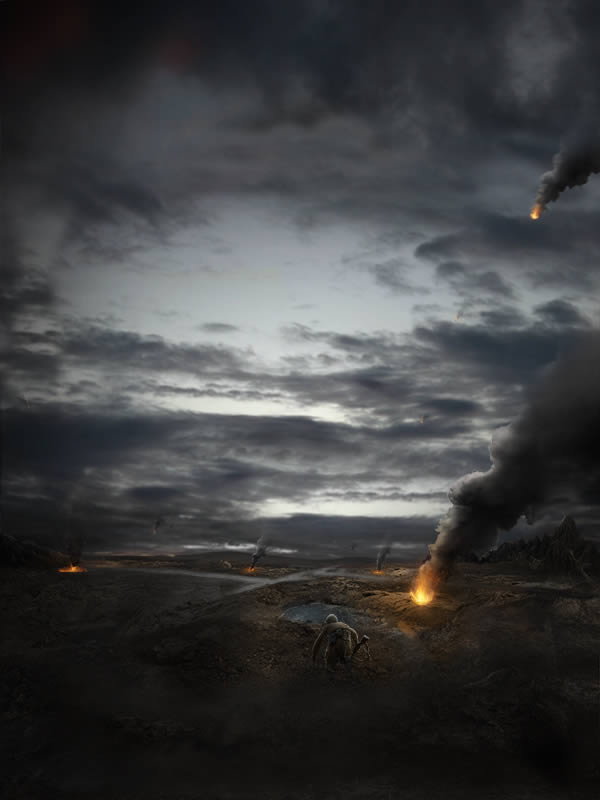
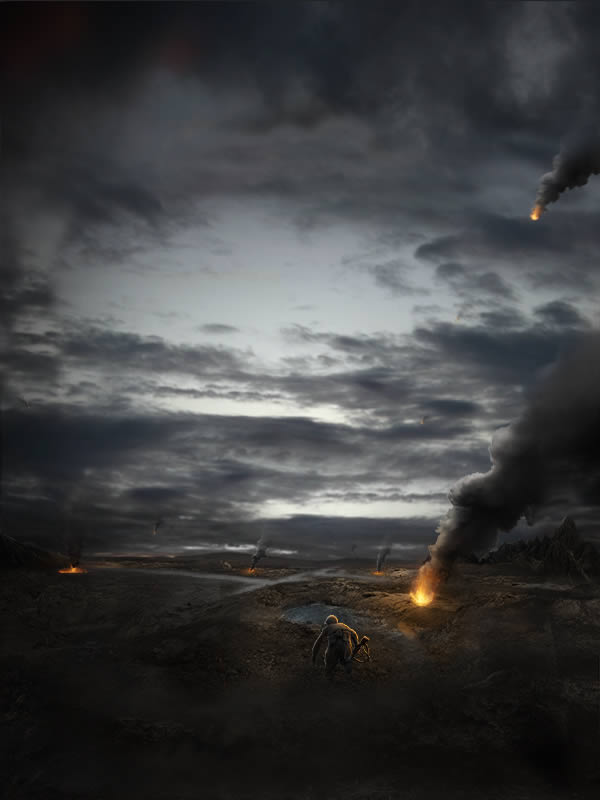
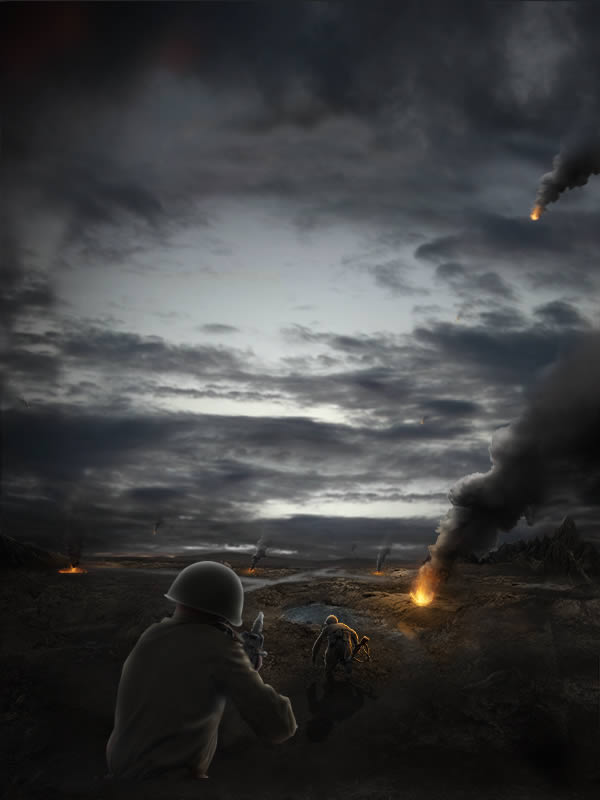
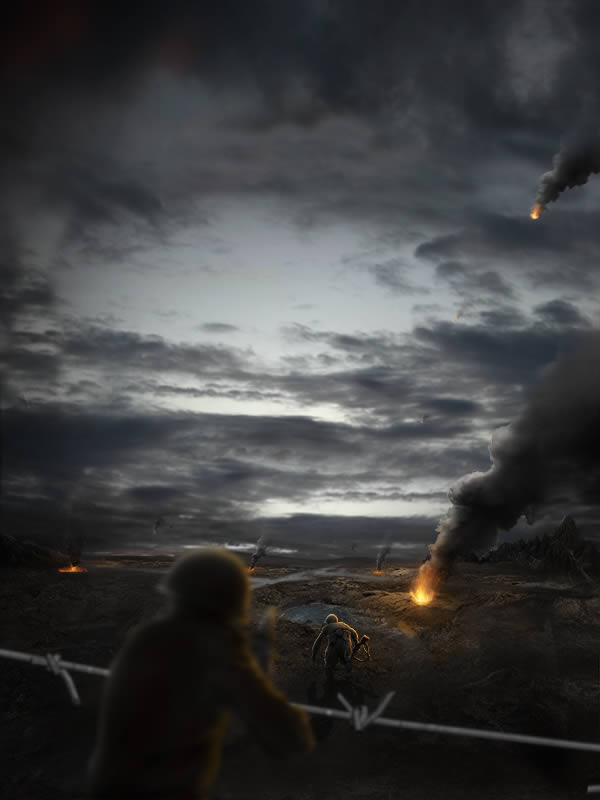
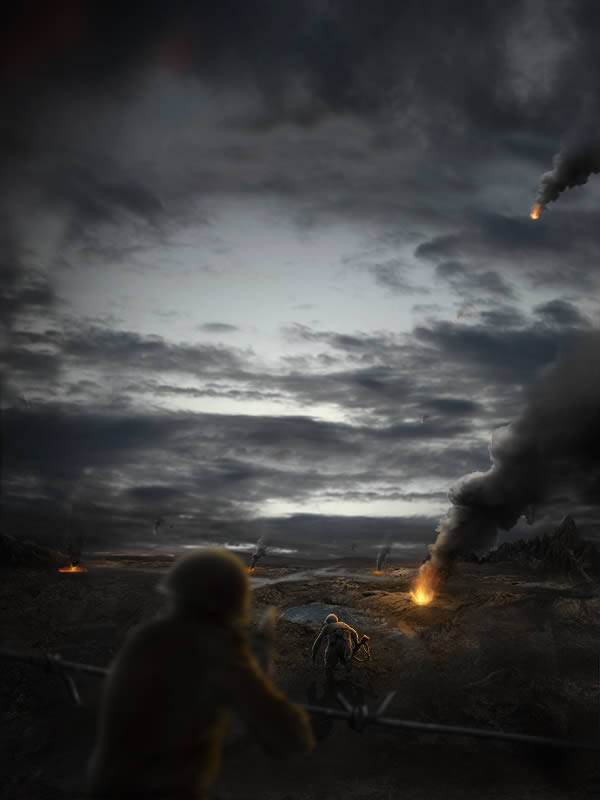
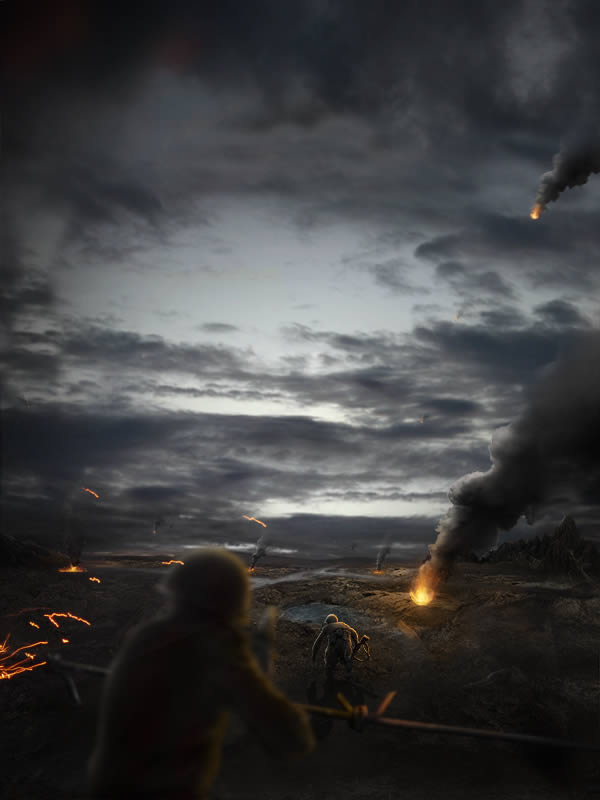
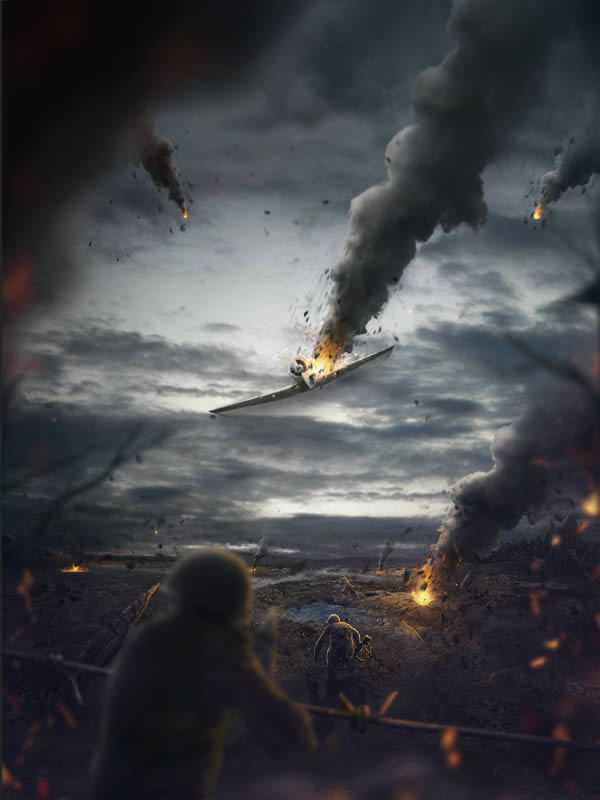
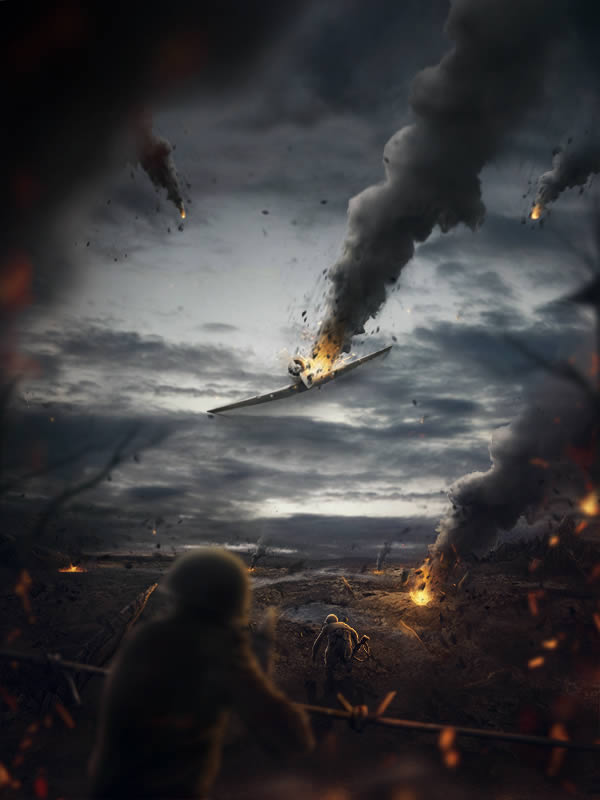
By combining the right photography in Photoshop you can create just about any scene that you want. In this tutorial, we will create a battlefield using several stock photographs. Let’s get started!
Tutorial Assets
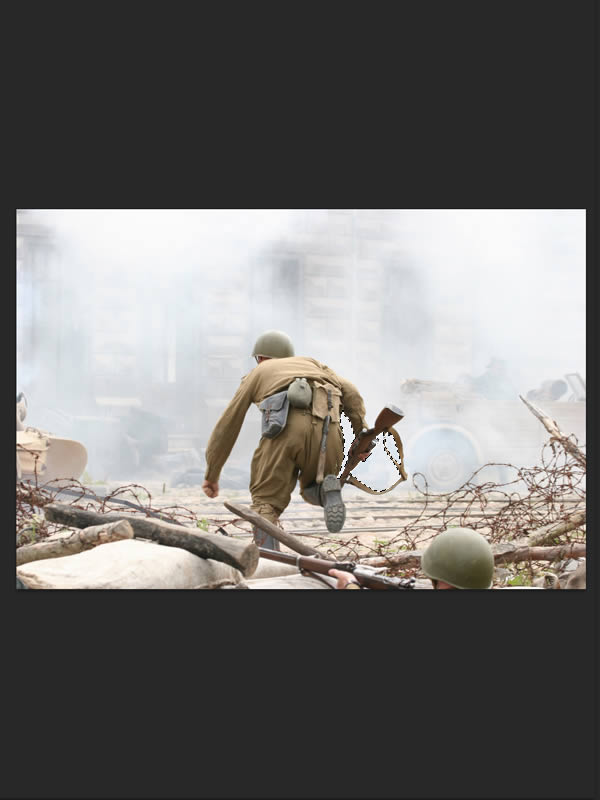
Here are the stocks used to complete the image.
Step 1
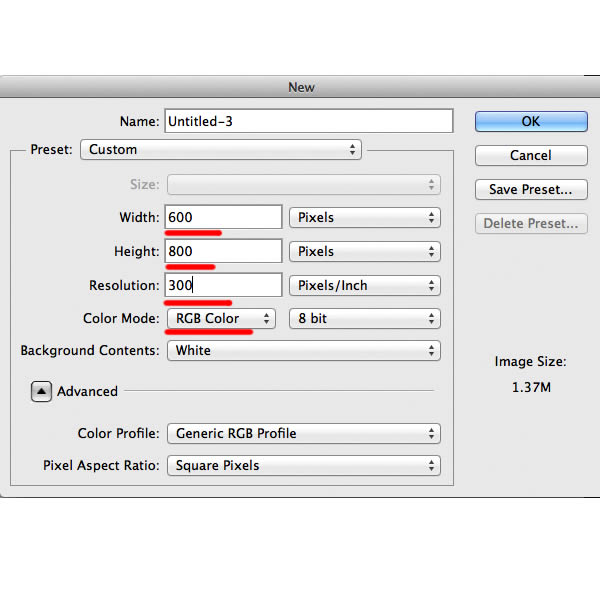
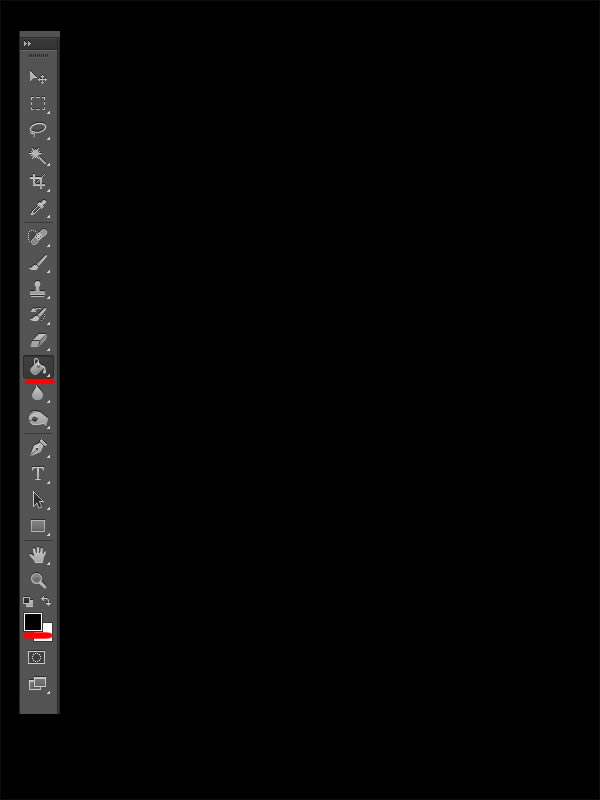
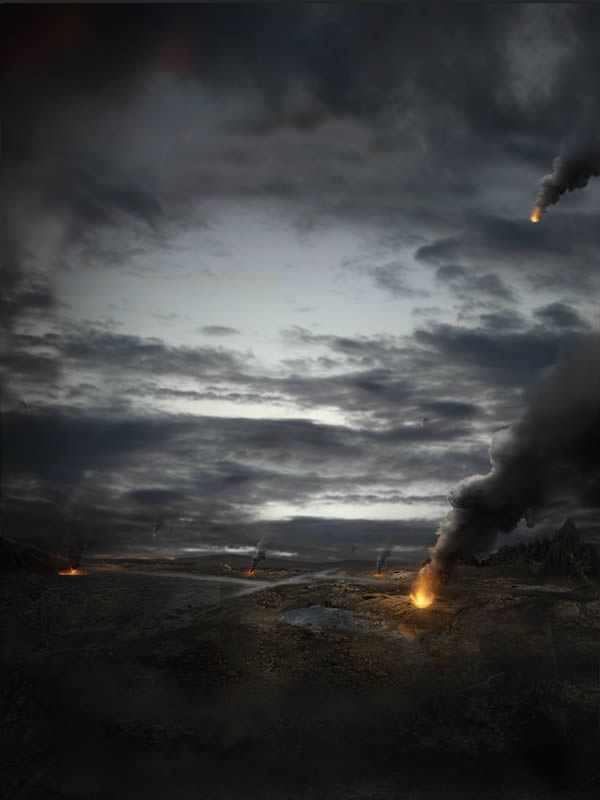
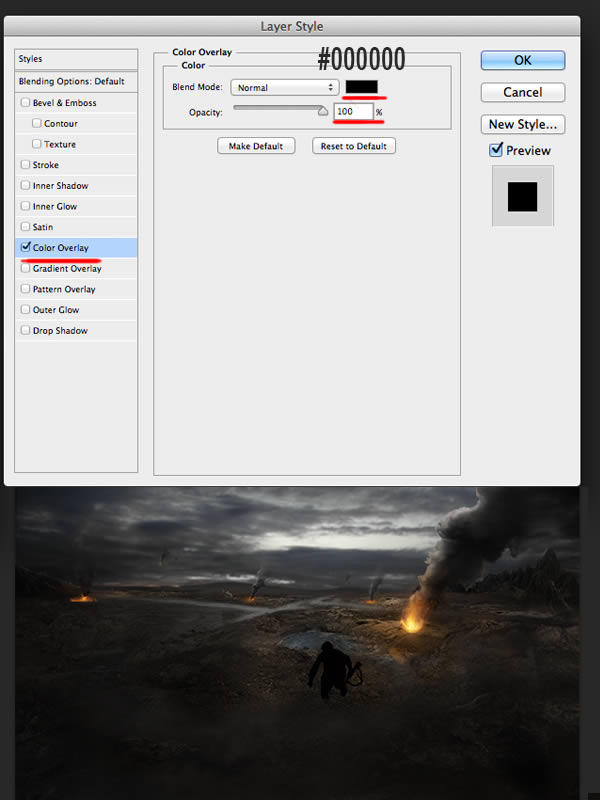
Start by creating a new canvas, doesn’t matter the size of it, but we will work on 600 width by 800 height on 300 dpi. Fill the canvas with pure black using Paint Bucket Tool (G) – #000000.
Step 2
Fill the canvas using Paint Bucket Tool (G) with pure black set to Foreground color (#000000).
Step 3
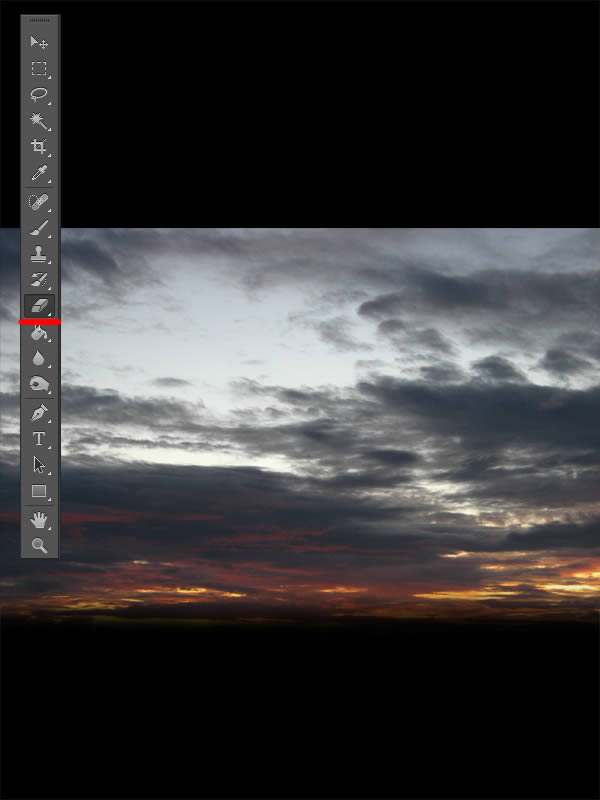
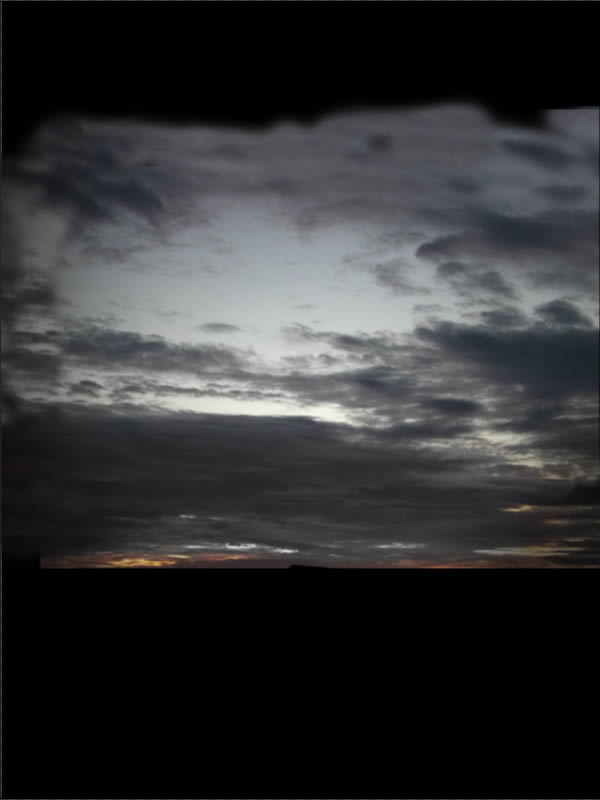
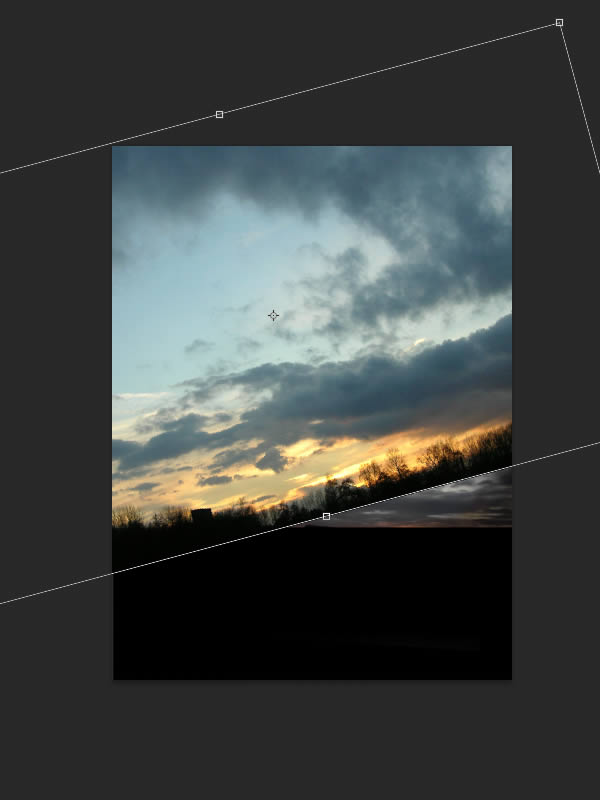
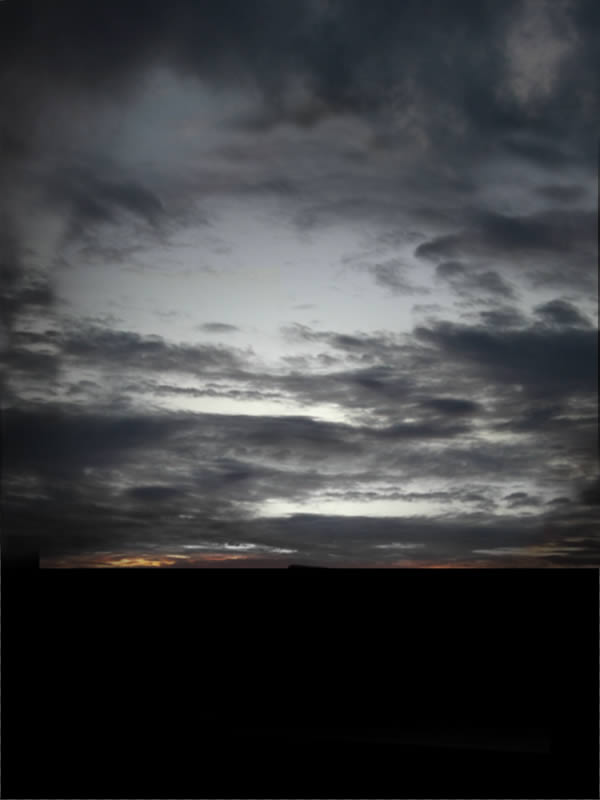
Open the "Sky 2" stock photo provided for this tutorial and drag it on your working document. Using Transform Tool (Cmd/Ctrl + T) place it as shown in the image below. Name this layer Sky.
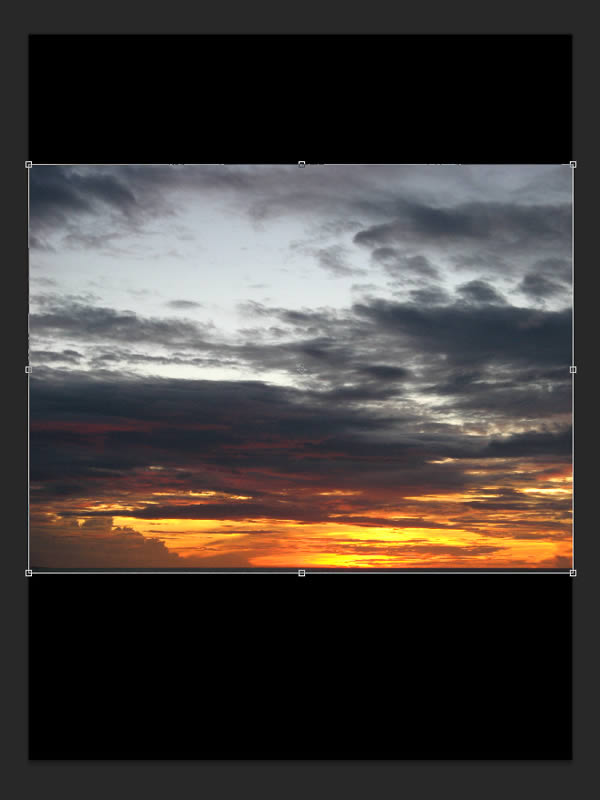
I’m not fully satisfied the way our sky looks, so using Erase Tool (E) erase the lower orange part of our photo and move it down a bit.
Step 4
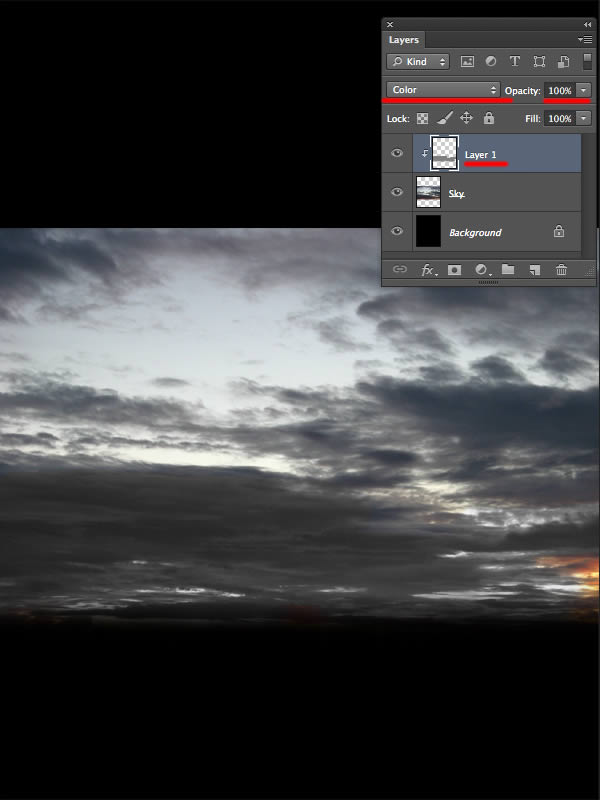
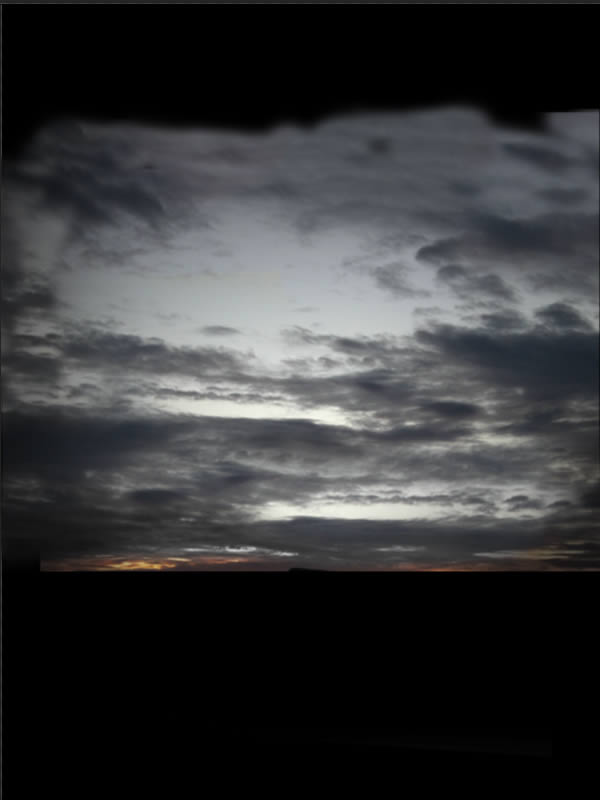
Now its time to adjust our sky colors. Create a new Layer, right click on it and go to Create Clipping Mask. Hit B key to open the Brush Tool, select black (#000000) for the Foreground Color and with a soft round brush around 50-60px start painting in the lower part of your sky to desaturate that orange color Set this Layer Mode to Color.
Step 5
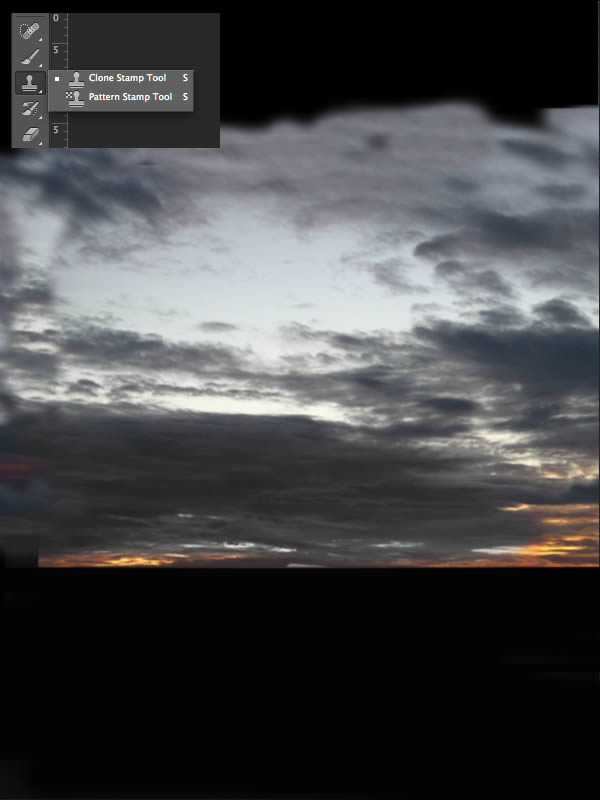
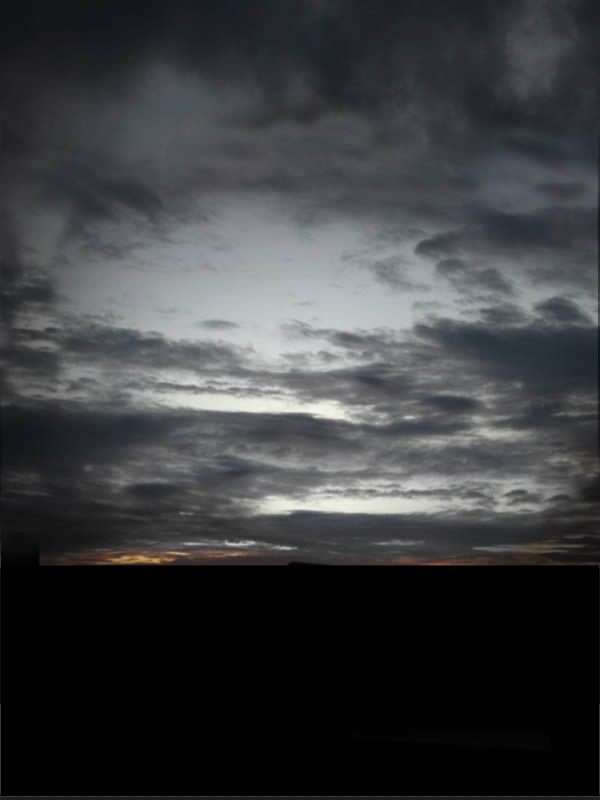
Select the Sky layer, hit S on the keyboard to open the Clone Stamp Tool and by hitting Alt key (on your keyboard) select from which part would you like to clone and start cloning parts of the sky to make it look more interesting. When you’re done move the sky a bit upward.
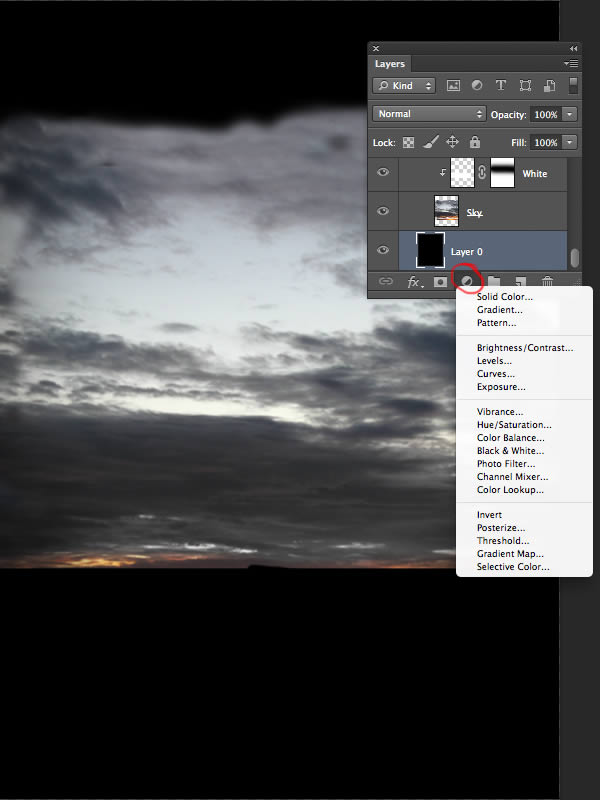
Tip: Remember the icon shown in the image below because we are going to use a lot of Layer Adjustments in order to create as much as possible a nondestructive work.
Step 6
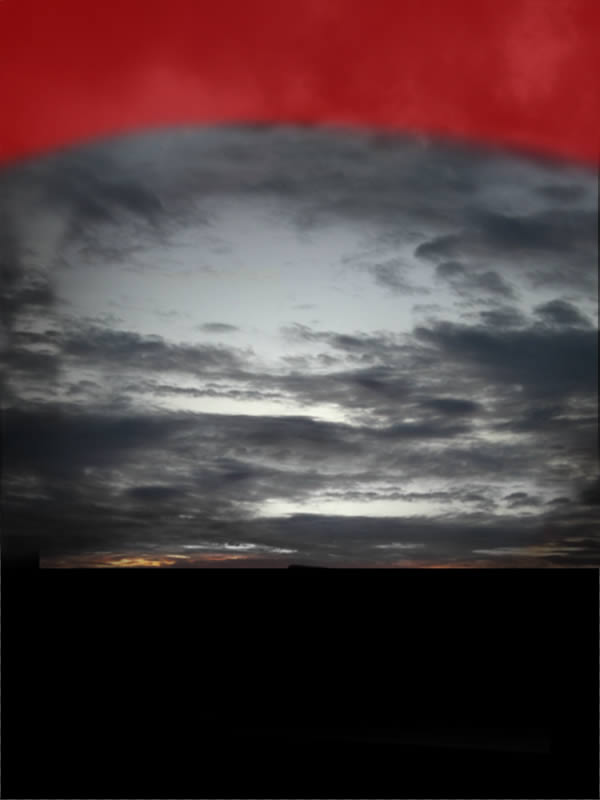
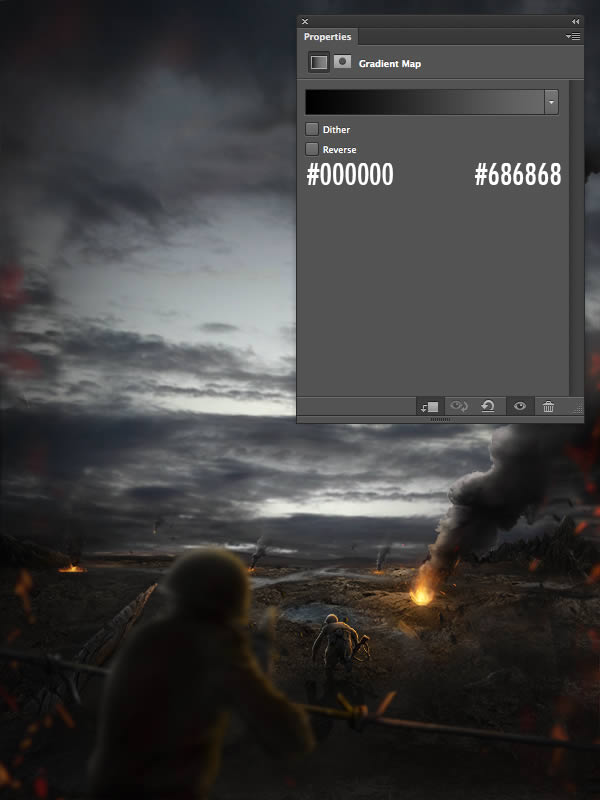
Create a new Gradient Map layer fill adjustment as shown in Step 5 using the colors the following colors – Black #000000 to Dark Grey – #686868. Reduce the Opacity of the Gradient Map to 80-90%.
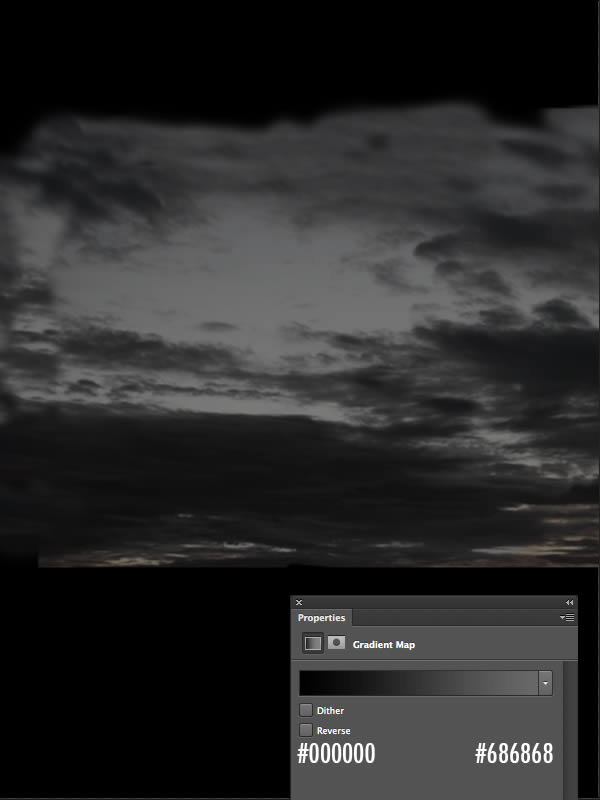
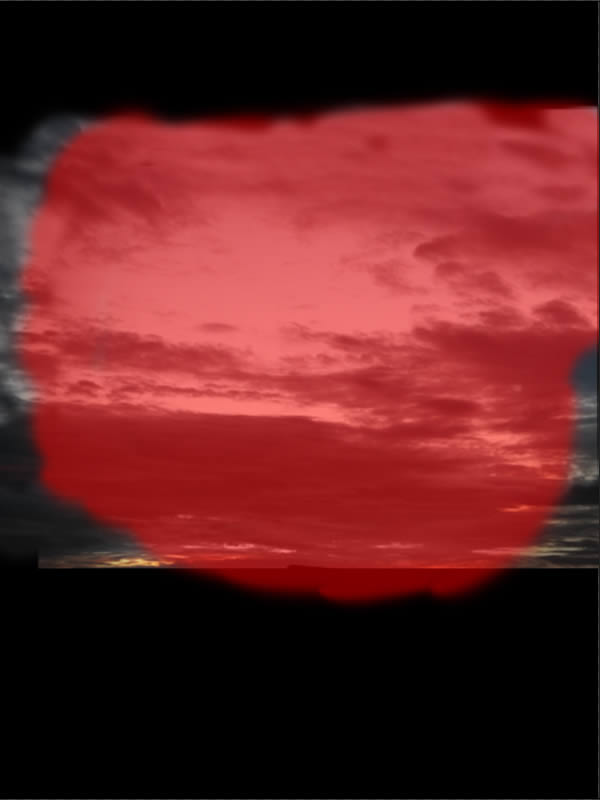
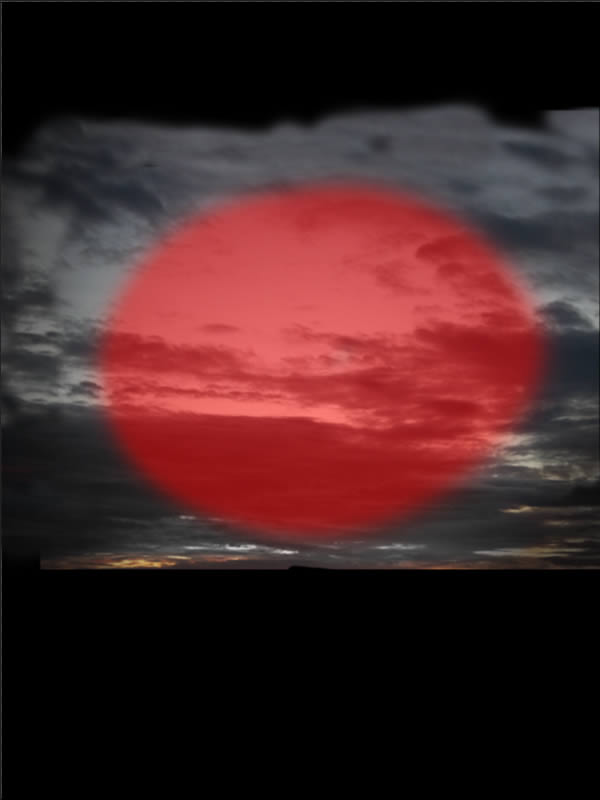
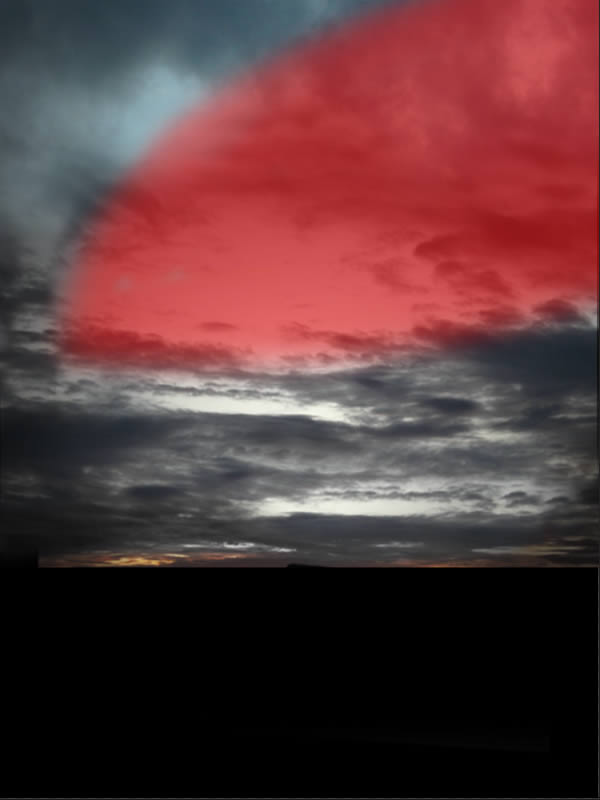
In the Layer Mask of the Gradient Map hit B key to open the Brush Tool and with a soft round brush set to black (Foreground Color set to black – #000000) and 100% Opacity start revealing parts of the sky as shown in the image below. (The red color shows where do you need to paint over with the Brush Tool)
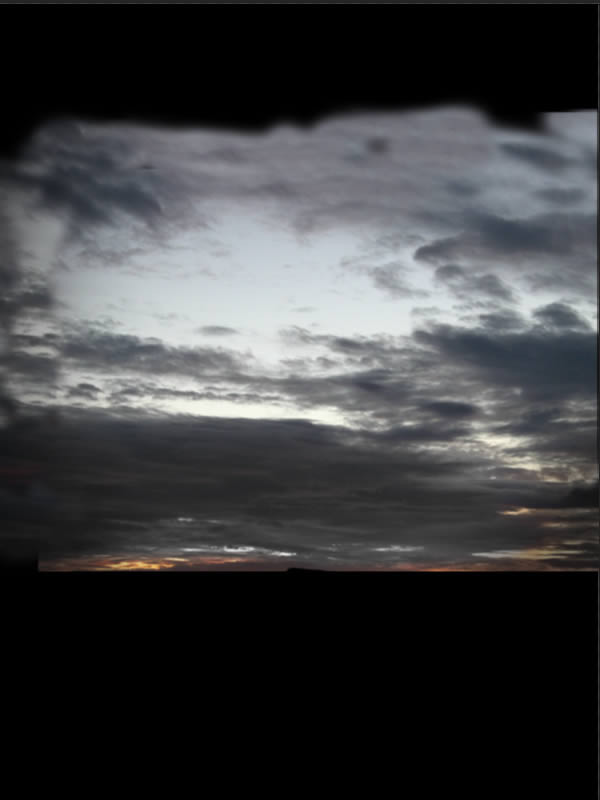
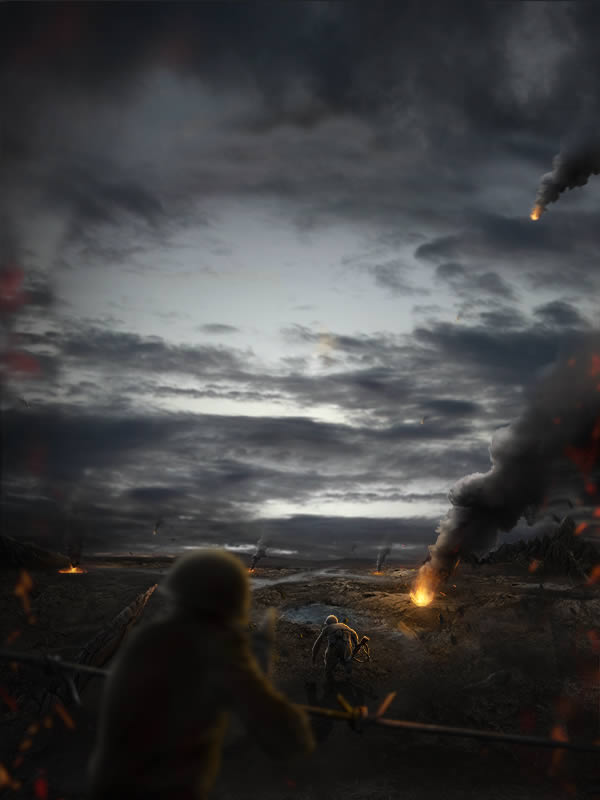
When you’re done, select the Gradient Map layer right click on it and go to Create Clipping Mask and clip it to your Sky layer. You’re image should look like this.
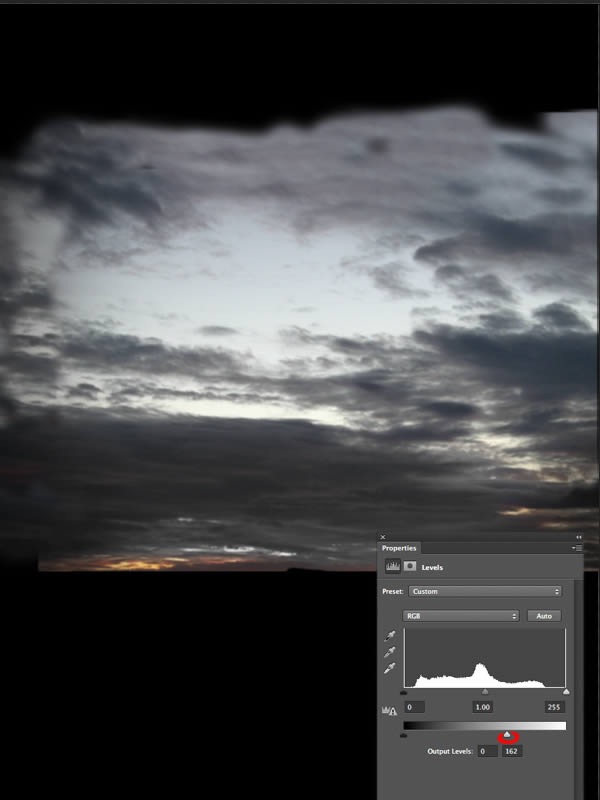
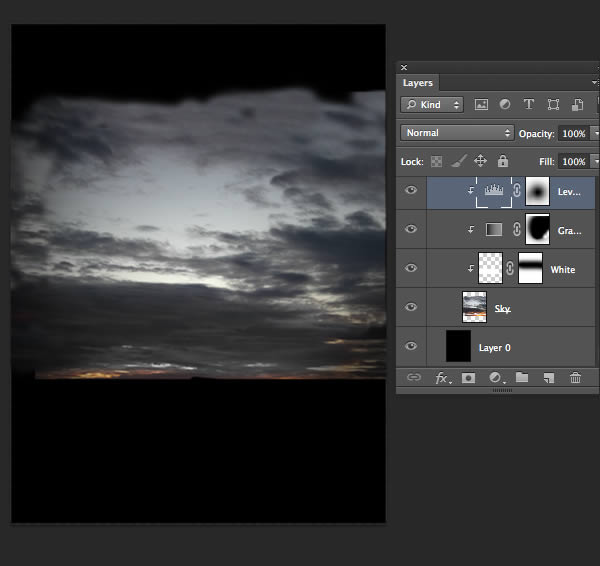
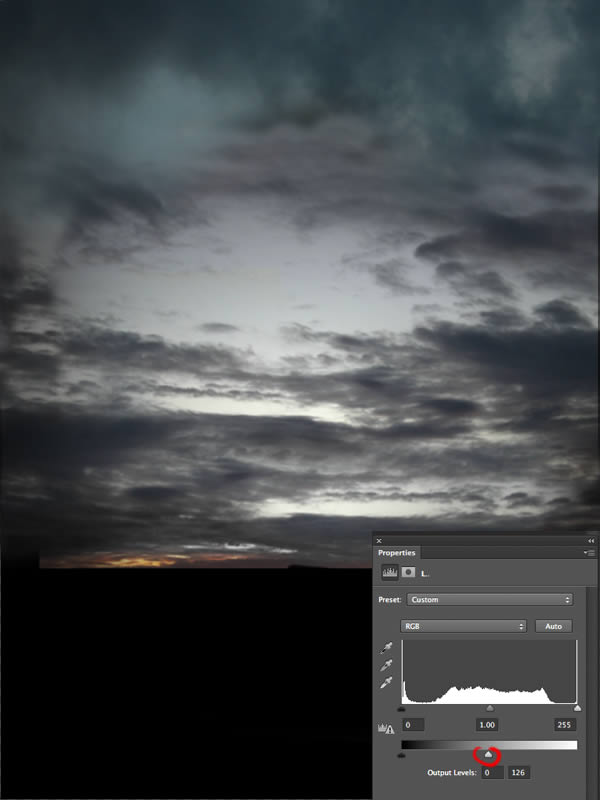
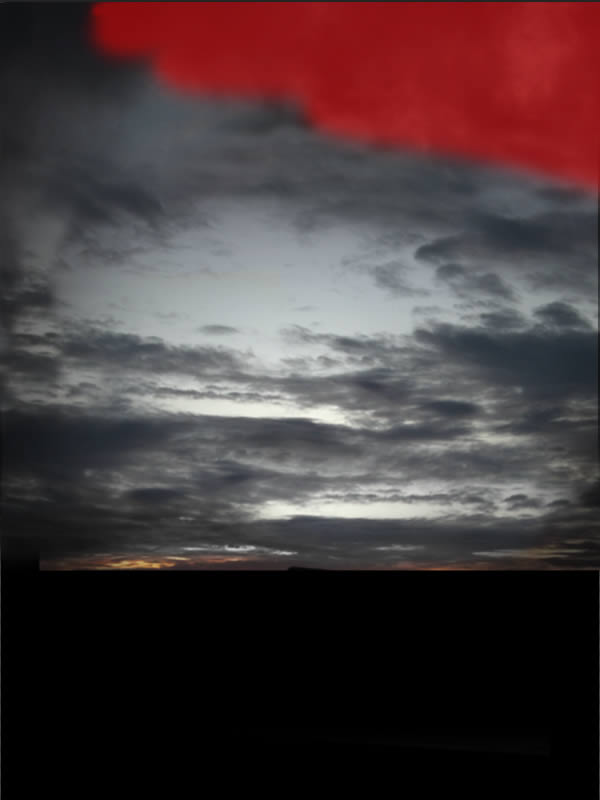
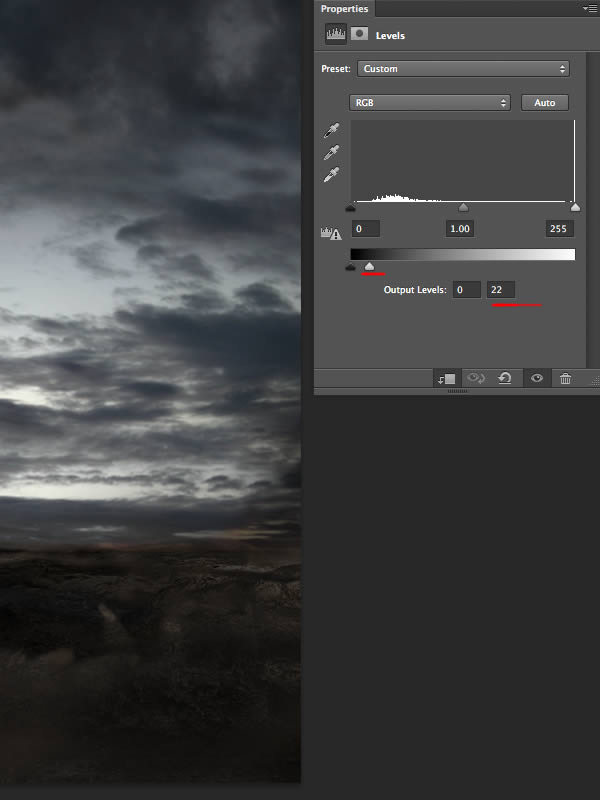
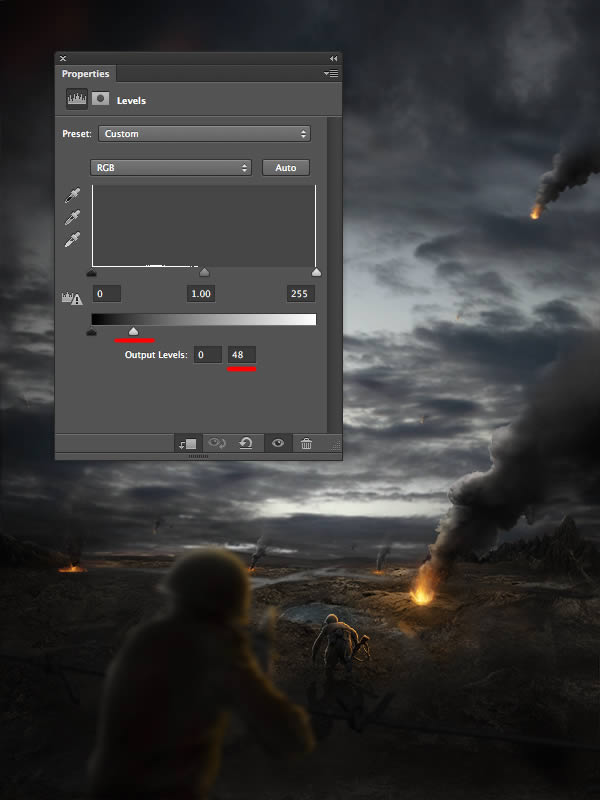
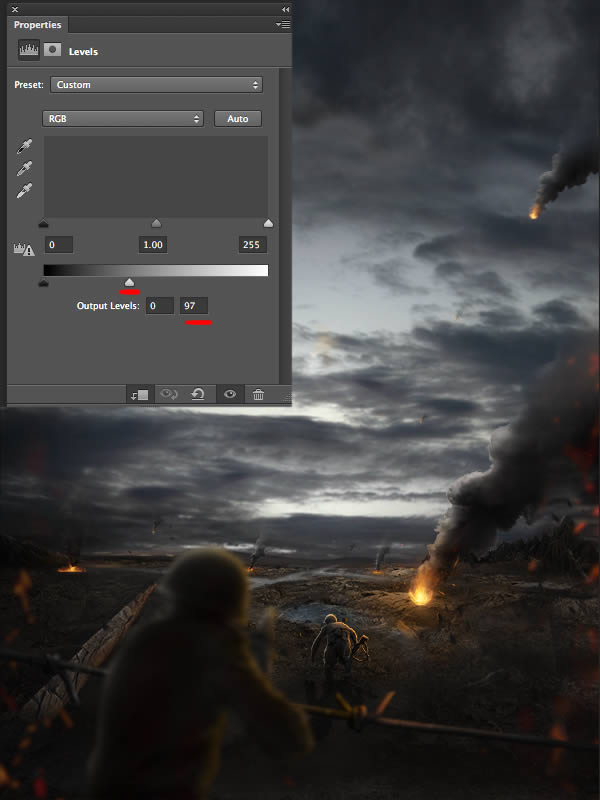
Create a new Levels adjustment layer and follow the settings shown in the image below.
In the Levels’ Layer Mask start painting with a soft round brush (Brush Tool – B) as we did to our Gradient Map adjustment. (The red color shows where do you need to paint over with the Brush Tool)
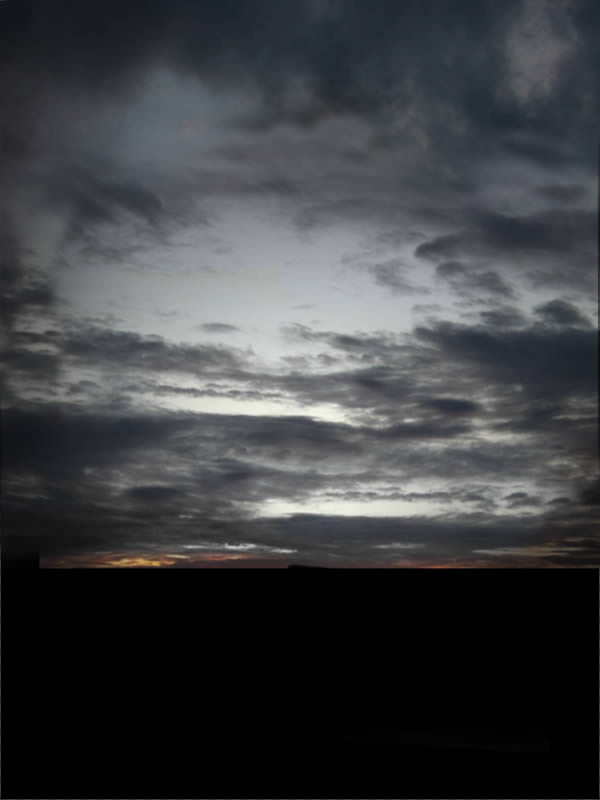
When you’re done, select the Levels adjustment layer right click on it and go to Create Clipping Mask and clip it to your Sky layer. You’re image should look like this.
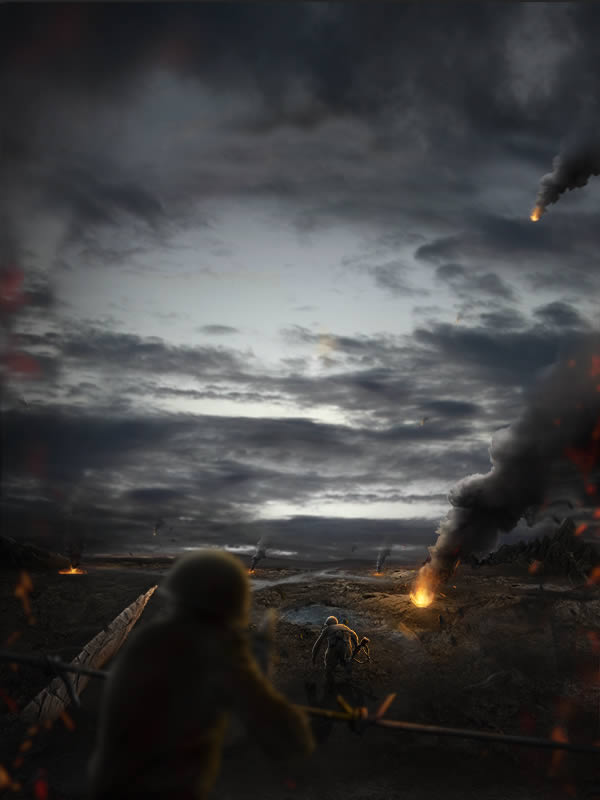
Your screen should now look like the image below.
Step 7
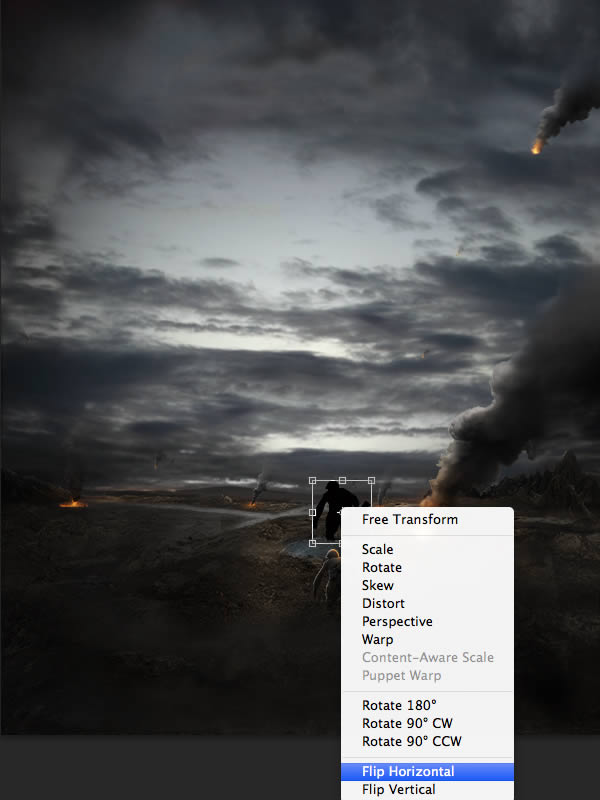
Select all the layers created so far (without the Background layer) duplicate them using Cmd/Ctrl + J. Hit Cmd/Ctrl + T to open the Free Transform Tool go to Edit > Transform > Flip Horizontal. Merge the layers that we’ve duplicated using Cmd/Ctrl + E. Open the Erase Tool (E) and start erasing parts of the sky that you don’t like. When you’re done, you’re image should look like this.
Open “Sky 1″ stock provided, drag it on your working document and using Transform Tool (Ctrl/Cmd + T) place it as shown in the image.
Using the Erase Tool (E) follow the image below on how the image should look like after the erasing.

Next step is to color correct our second sky photo to match the rest of our sky. As we did for the first sky layer, we are going to do the same thing here. Add a new Gradient Map layer adjustment from black (#000000) to dark-grey (#686868) and in Gradient Layer’s Mask paint as shown in the image below with a soft round brush set to black as Foreground color. Reduce the Gradient Map layer Opacity to 60%. When you’re done right click on the Gradient Map layer and go to Create Clipping Mask in order to clip it to the second sky layer.
Add a new Levels adjustment layer and follow the settings show in the image below. Reduce Levels’ Opacity to 70%. When you’re done, clip it to the second sky layer as we did with the Gradient Map.
Add a new Color Balance adjustment layer and use the following settings: Midtones ( + 93 / + 16 / + 23) – Shadows ( + 4 / 0 / 0) – Highlights ( + 16 / + 9 / + 2). Clip this layer to the second sky layer. When you’re done, reduce the Opacity of Color Balance layer to 35-40%.
Add a new Hue/Saturation adjustment layer with the following settings: check the Colorize Box – Hue: 28 / Saturation: 6 / Lightness: -20. Clip Hue/Saturation layer to the sky layer. When you’re done, reduce this layer Opacity to 10-15%.
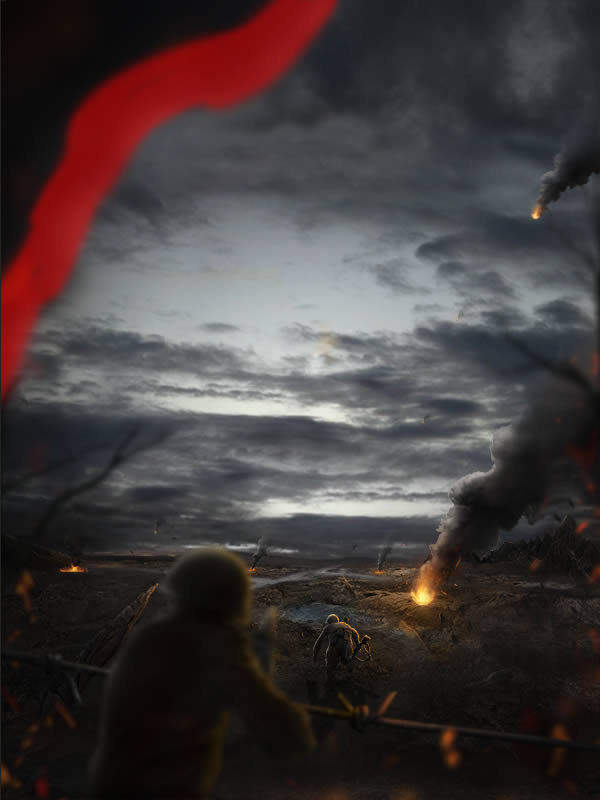
Create a new layer using Cmd/Ctrl + Shift + N and place it above all layers. Grab a soft round brush set to black (#000000) – around 50-60px and start painting on the top part of the sky as shown in the image below. (The red color shows where do you need to paint over with the Brush Tool)
When you’re done, reduce this layer Opacity to 10-15%.
Create a new layer using Cmd/Ctrl + Shift + N place it above all and with a soft round brush paint as shown in the image with white (#FFFFFF). After that, change this Layer Mode to Color. (The red color shows where do you need to paint over with the Brush Tool)
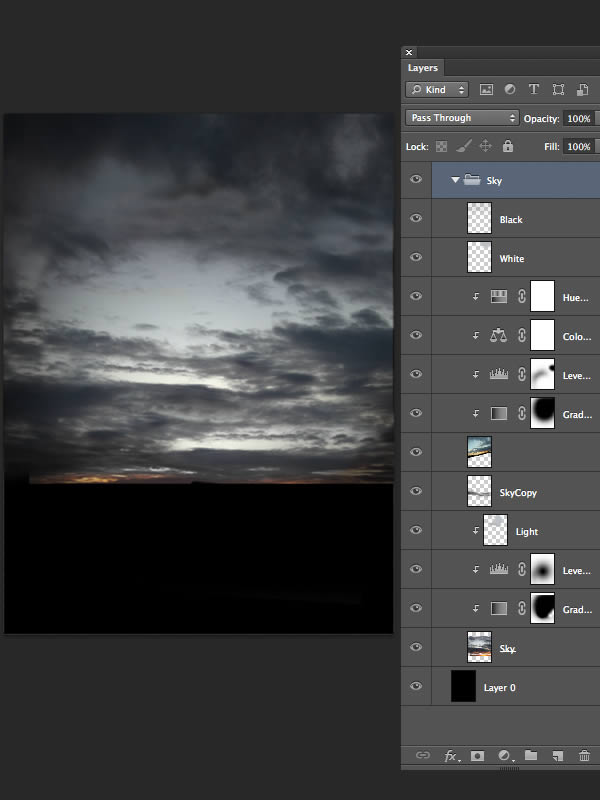
When you’re done, group all the sky layers including all of the adjustments using Cmd/Ctrl + G. Name this Group Sky.
Step 8
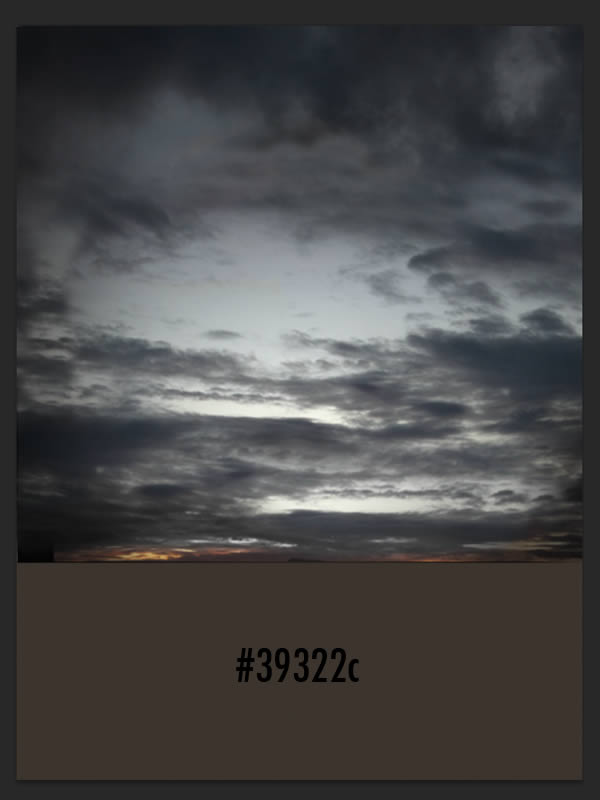
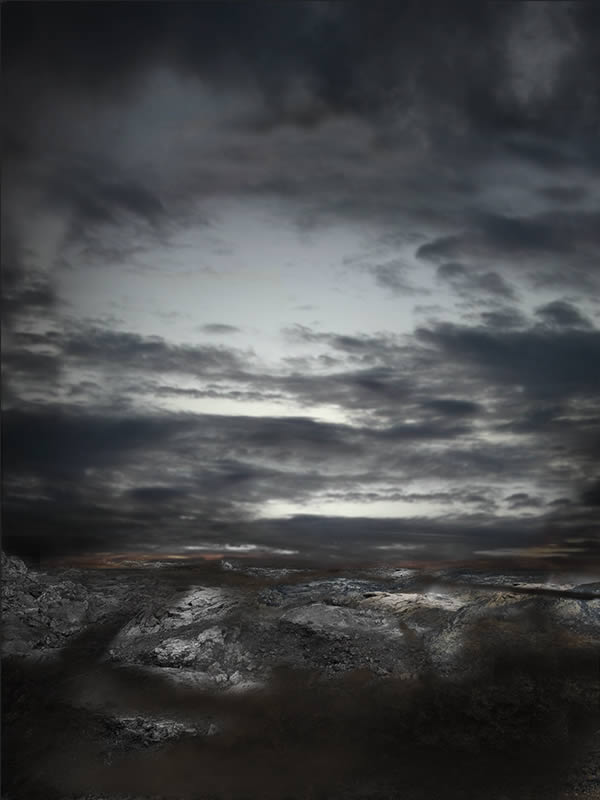
Now with the sky done, let’s move on and create our ground. Create a new layer above all and using the Brush Tool (B) around 50-60px with the Foreground Color set to a dark brown (#39322c) paint the lower part of our artwork as shown in the image below.
Open the “Group” stock photo provided on your Photoshop.
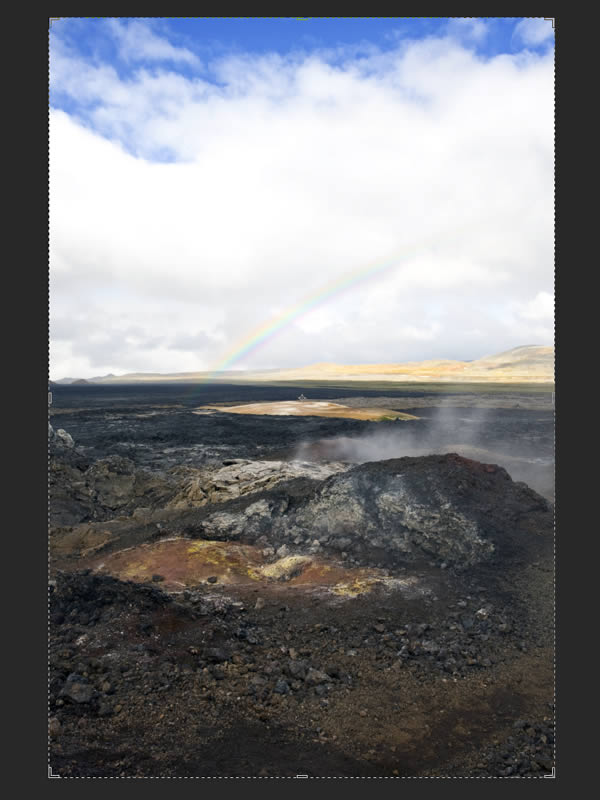
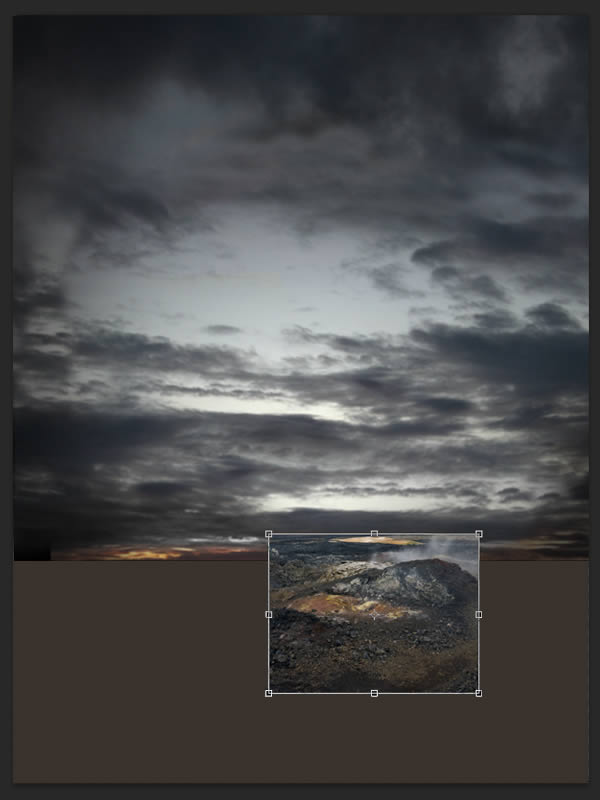
Using the Crop Tool (hit C key to open it) crop out the sky from the photo as shown below.
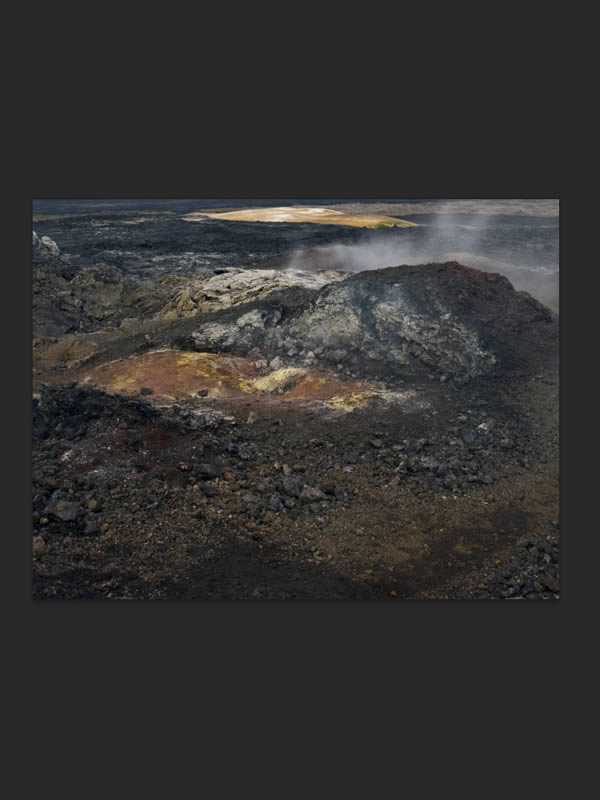
Place your cropped ground on your working place using the Free Transform Tool (Cmd/Ctrl + T) in order to resize it.
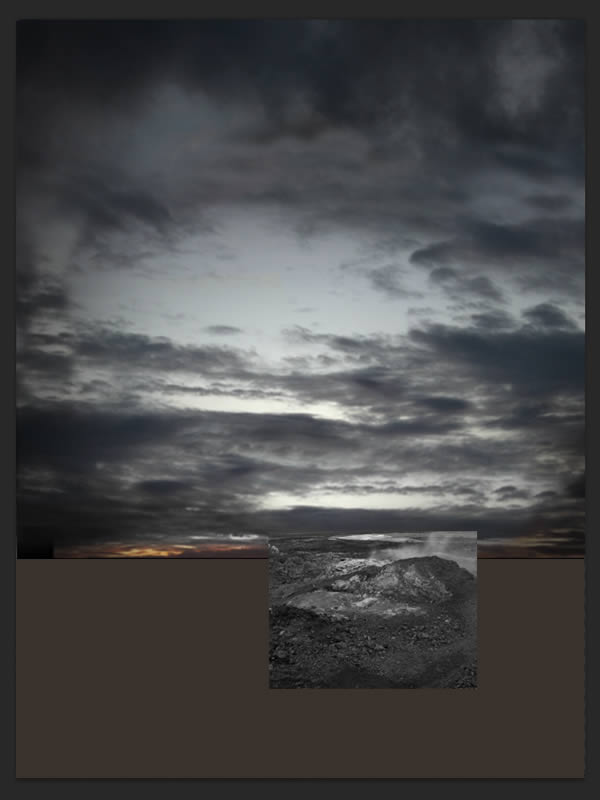
When you’re done, using Cmd/Ctrl + Shift + U make it black and white. Where making black and white in order to work later with the colors of our ground easier.
Select our ground photo that we’ve just made it black and white and the layer we’ve created to fill the ground with a dark brown color and hit Cmd/Ctrl + G to make a new group. Name this group “Ground”.
Using the Erase Tool (E) start erasing parts of the stock photo that you don’t like. There’s nothing much to explain here, its more about the way you like to look at the end and experimenting. (Use the Erase Tool with different Opacity set to the brush to get as much as natural transition between the rocks on the ground)
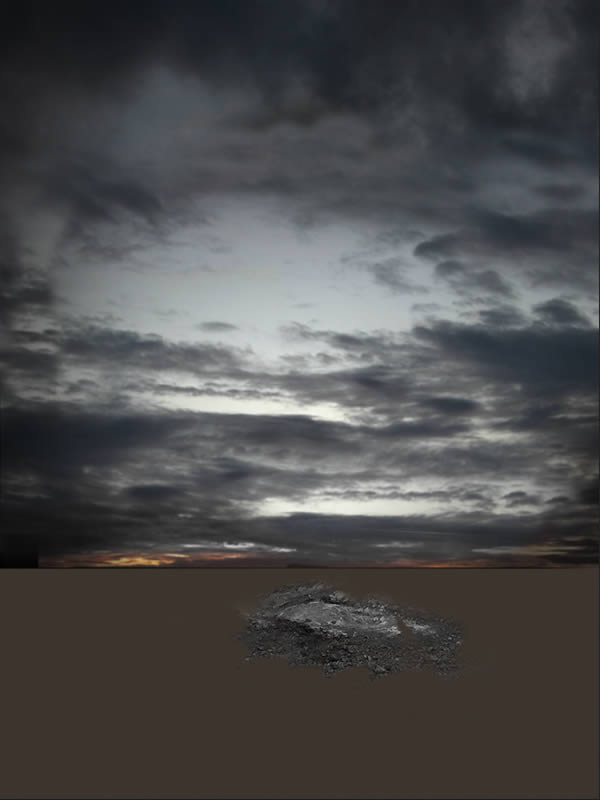
Repeat the previous step until you are happy with the final background. Keep in in mind that all the stocks need to be black and white in order to color correct them easier in the next steps. (You can convert the photo to black and white by using the following key combo: Cmd/Cltr + Shift + U).
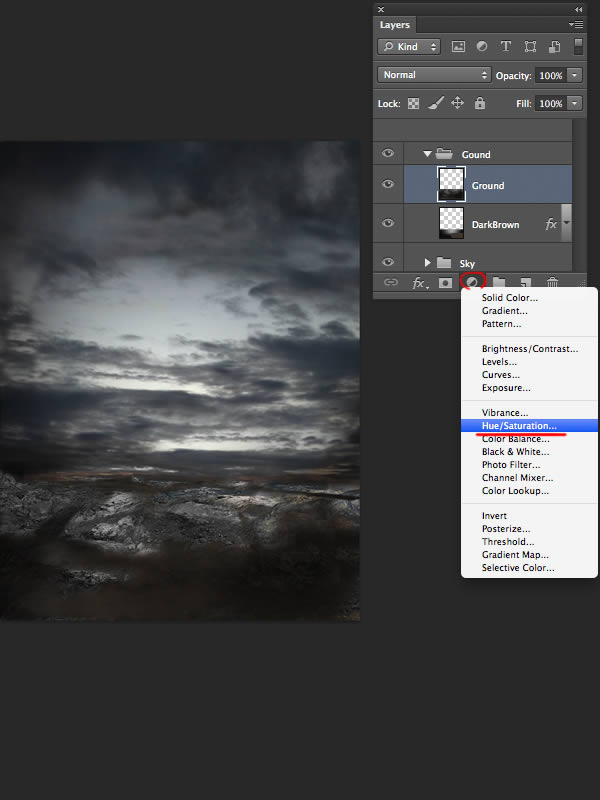
When you’ve done you’re ground its time to color correct it. Select all the layers you’ve made in order to create your ground using the stock photo provided and hit Cmd/Ctrl + E to merge them into one layer and name this layer “Ground”. Select the layer that you’ve just merged and add a new Hue/Saturation layer adjustment as shown in the image.
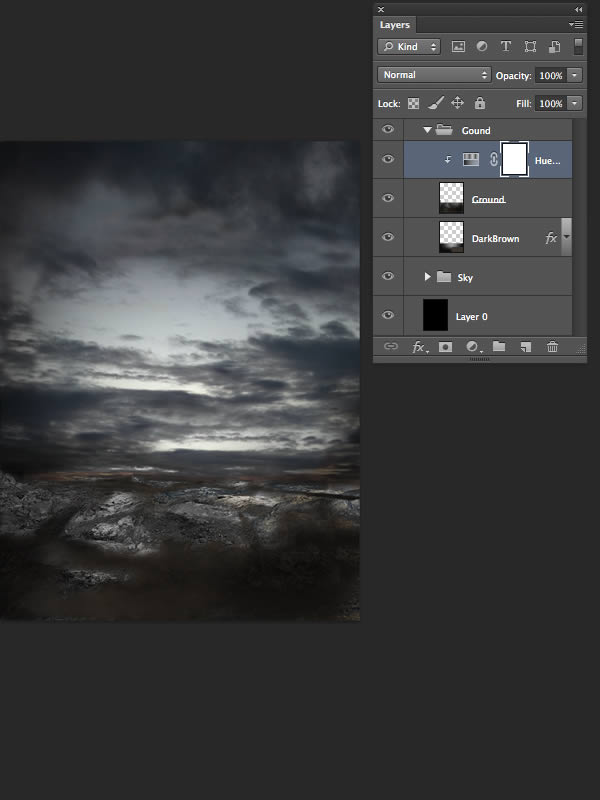
Right click on the Hue/Saturation adjustment layer and go to Create Clipping Mask.
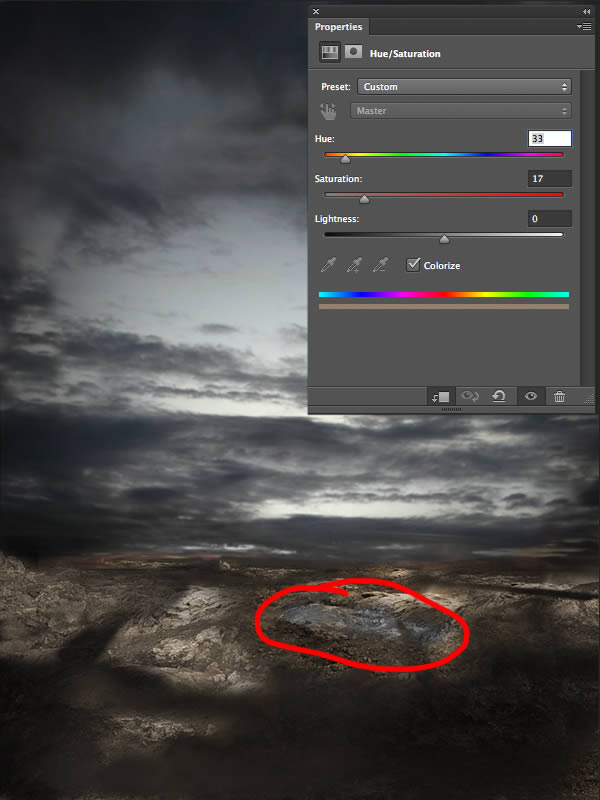
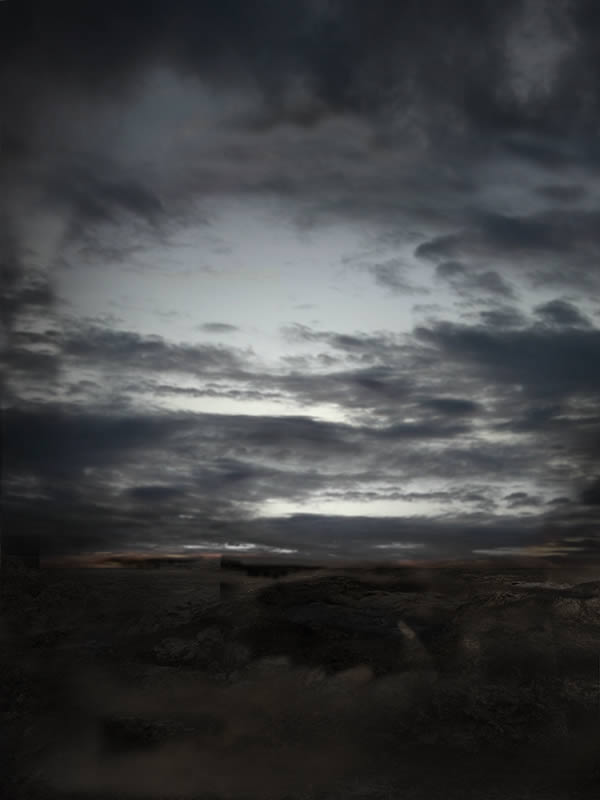
Use to settings shown in the image below for the Hue/Saturation. When you’re done, use a soft round brush around 20-30px set to black for the Foreground Color and on the Hue/Saturation’s Layer Mask Paint over the “lake” to hide the color correction added to the ground.
As we did on the previous steps, create a new Levels adjustments layer and clip it to the ground layer. Use the settings shown in the image below.
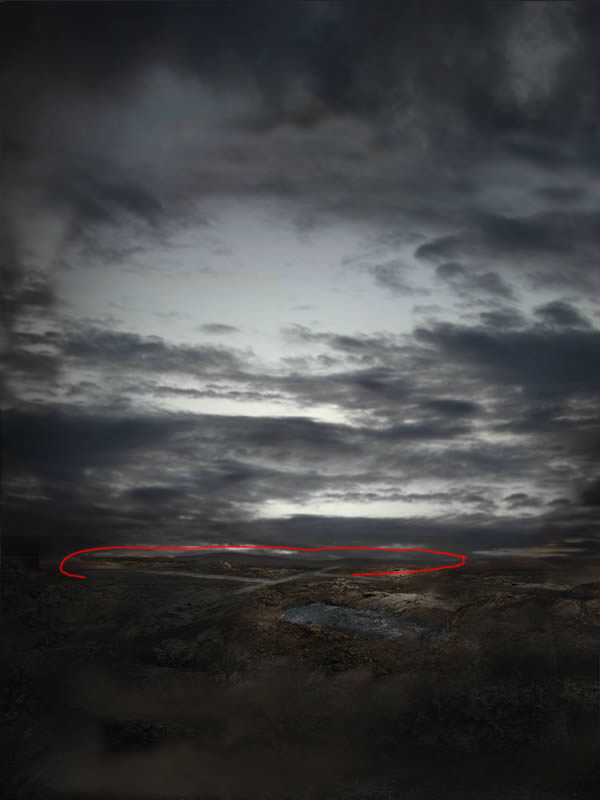
In the Levels Layer Mask, with a soft round brush around 50-60px set to black for the Foreground Color start painting in order to reveal the lights for the background. Use the first image below for the reference. (The red color shows where do you need to paint over with the Brush Tool)

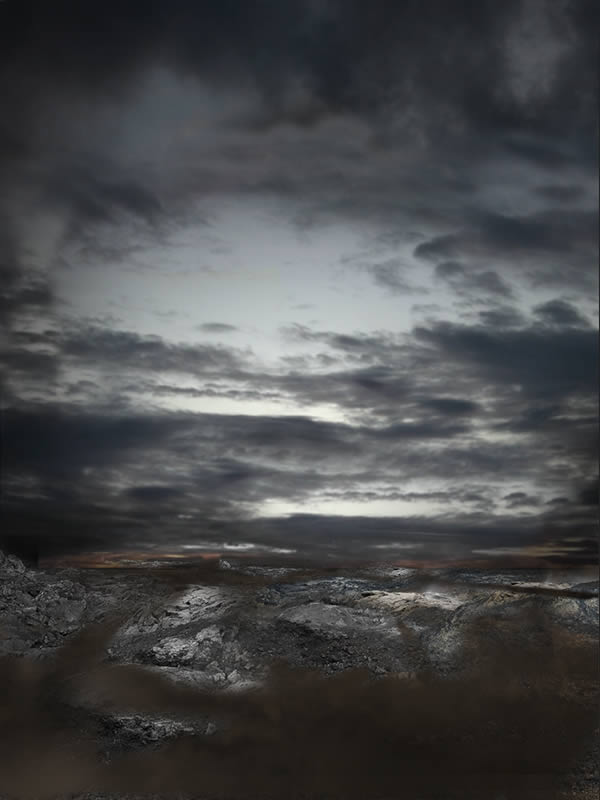
When you’re done, this is how your ground should look like.

Create a new layer above all (but in the Ground group). Select a cyan color (#00a8ff) and paint as shown in the image below with a soft round brush around 5-10px.
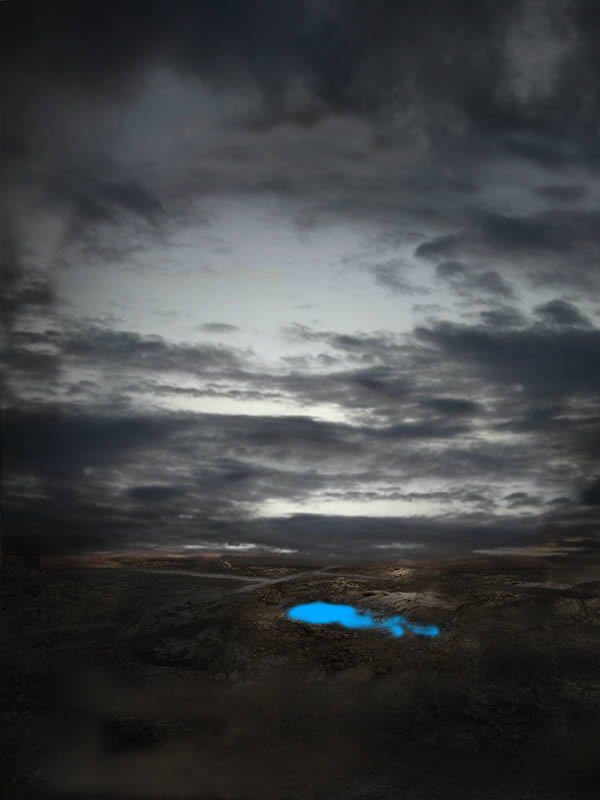
Change this layer Color Mode to Color and reduce its Opacity to 10%.

Create a new layer above all (but in the Ground group) and with a soft round brush around 5-10px set to a dark-grey (#262625) for the foreground color, start painting some mountains silhouettes as I did.
Step 9
Since we’re done with the ground and sky its time to move on to the next step. Open the first smoke layer and place it as shown. Use Cmd/Ctrl + G to group this layer and name the group “Smoke and Fire”
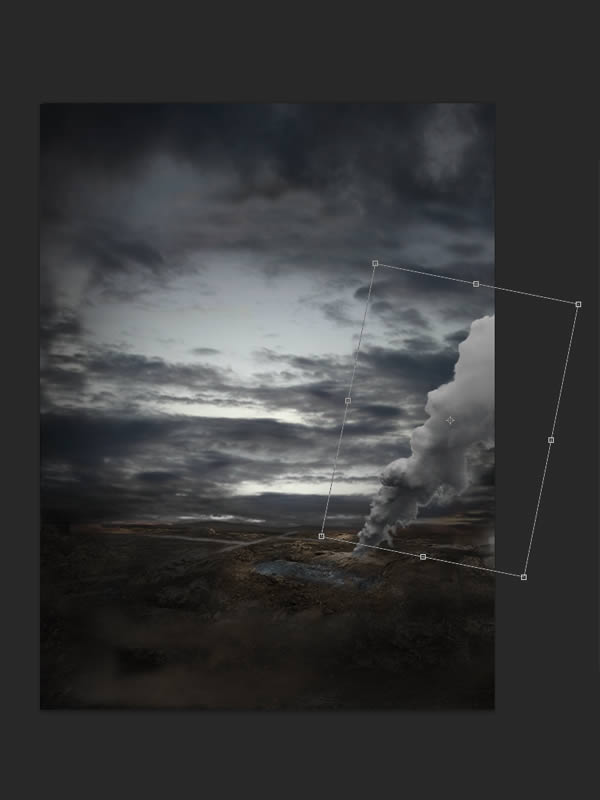
Next, using the Erase Tool (E) with a soft round brush around 30-40px erase some parts of the smoke as shown in the image below.

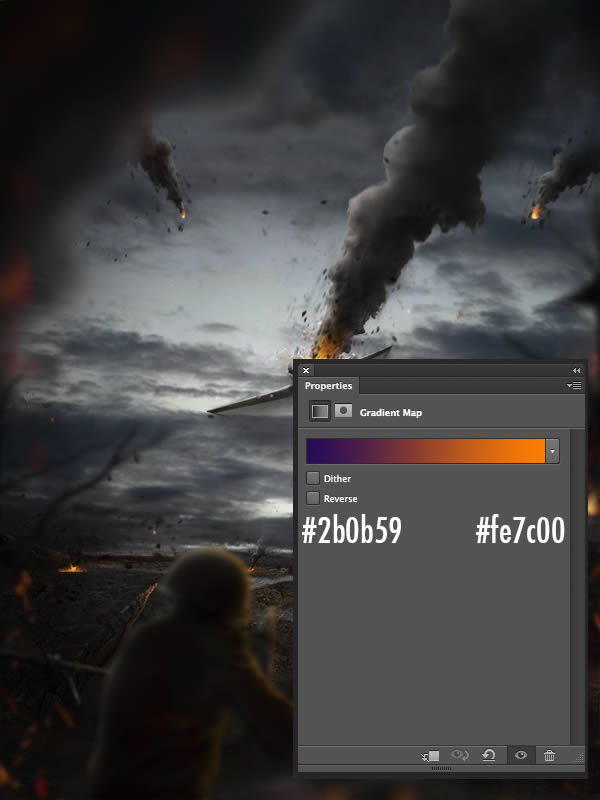
As we did for the Sky and Ground we are going to use several method to correct the source light and adjust the colors in order to work for our scene. First of all add a new Gradient Map and clip it to the smoke layer. For the Gradient use the settings shown in the image below.
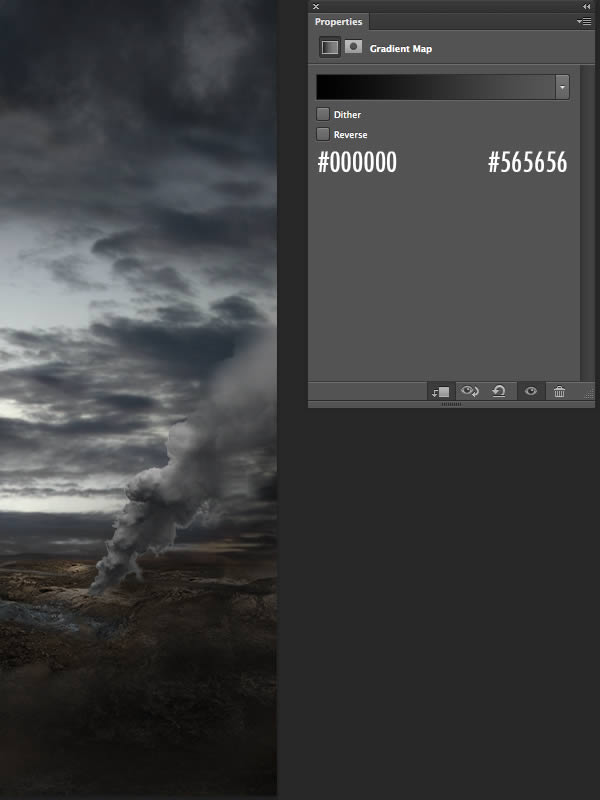
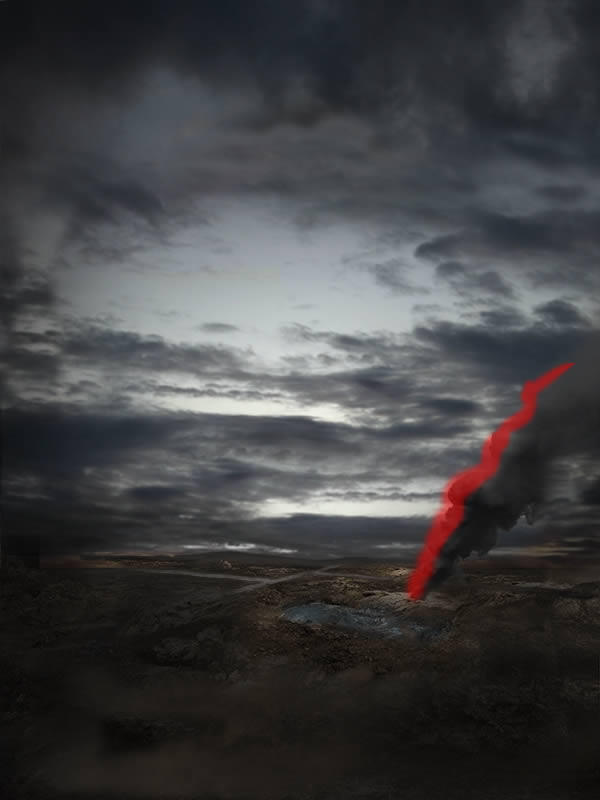
In the Gradient Map Layers’ Mask start painting with a soft round brush set to black for the Foreground color as shown below. (The red color shows where do you need to paint over with the Brush Tool)
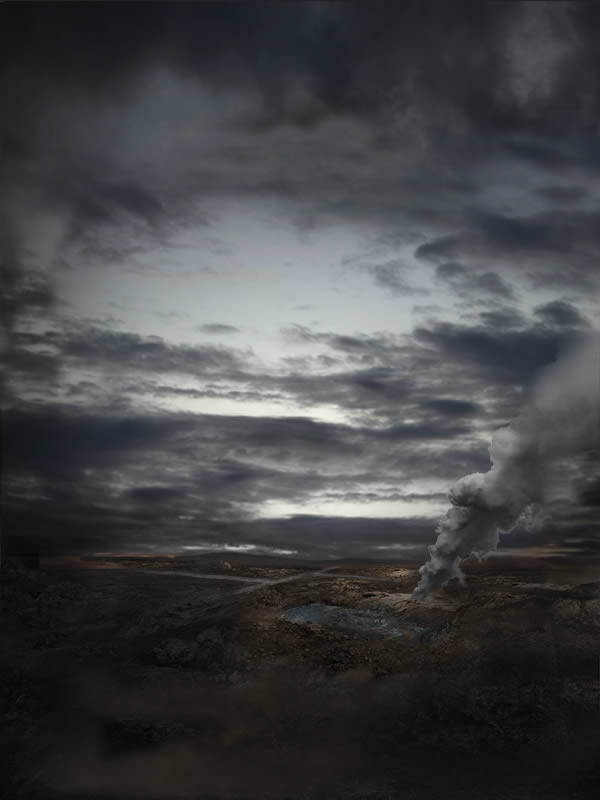
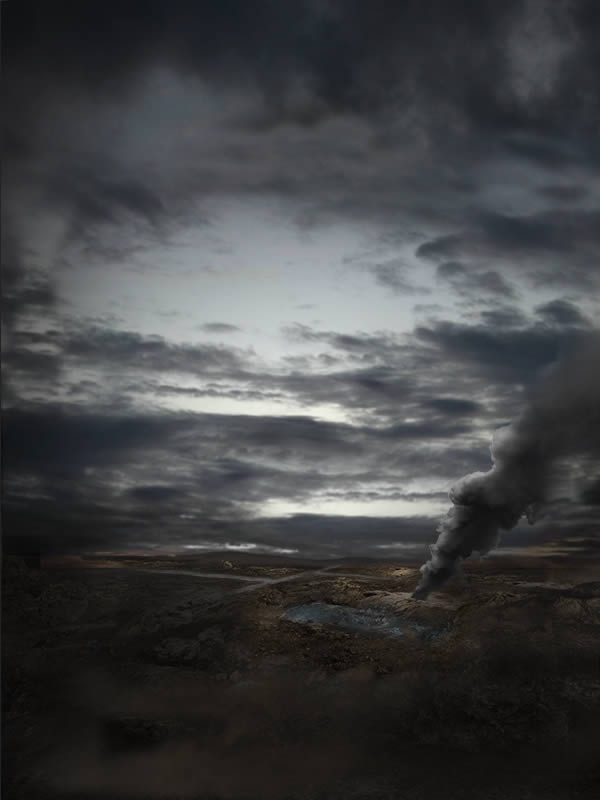
When you’re done, it should look like this.
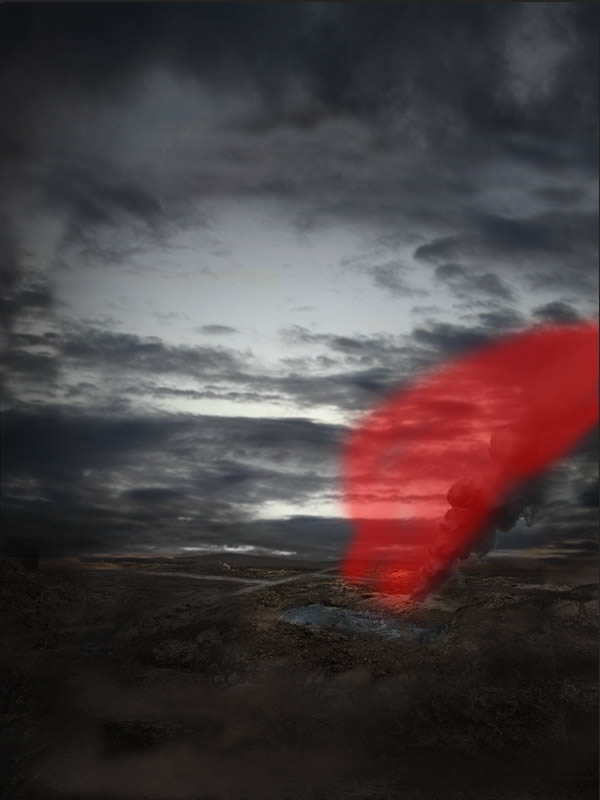
Add a new Levels adjustment layer and clip it to the smoke layer as we did with the Gradient Map. For the Levels use the settings shown below.
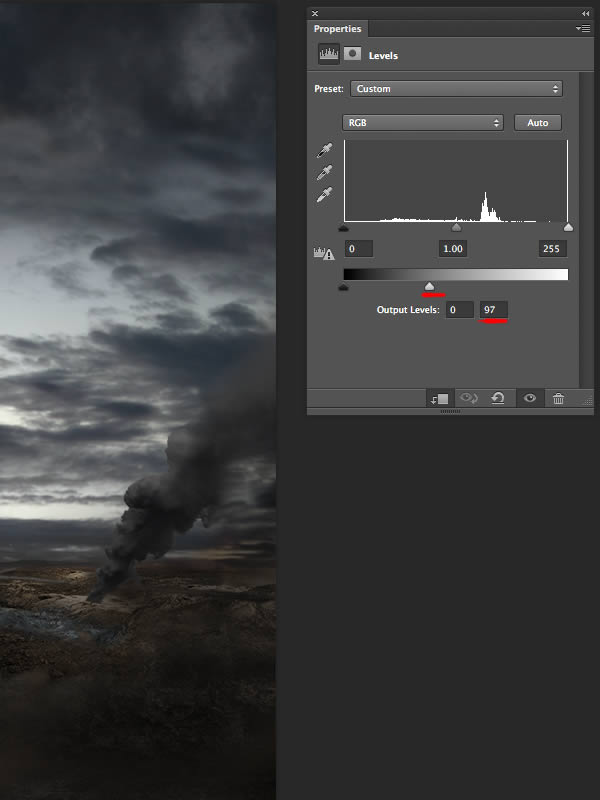
In the Levels’ Layer Mask with a soft round brush around 10-20px set to black on the Foreground Color start painting as shown below to reveal the light accordingly to our light source. (The red color shows where do you need to paint over with the Brush Tool)
When you’re done, reduce the Levels’ Opacity layer to 75-80%.
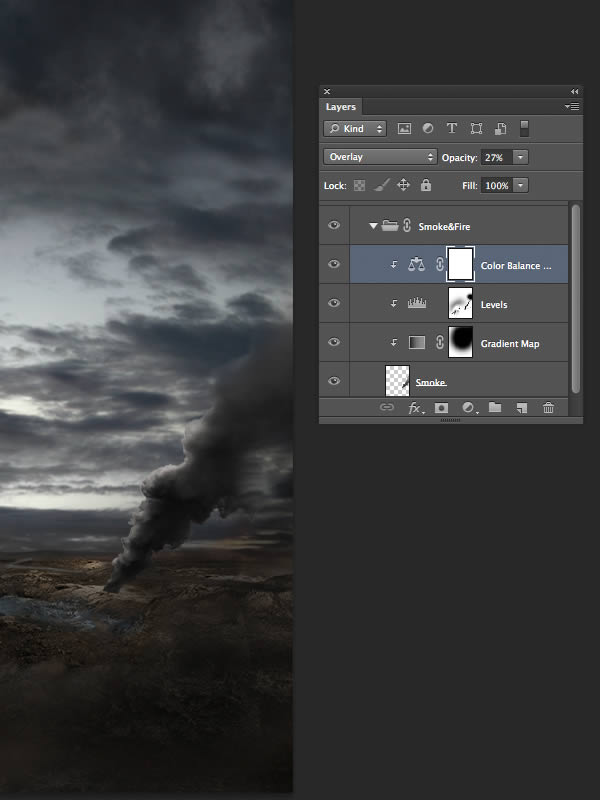
Create a new Color Balance adjustment layer and clip it to the smoke layer as we did with the Gradient Map and with the Levels. Use the following settings – Midtones: + 18 / + 1 / -6 – Shadows: + 4 / 0 / 0 – Highlights: + 16 / + 9 / + 2. Reduce the Opacity of the Color Balance adjustment layer to 27% and change its Blending Mode to Overlay.
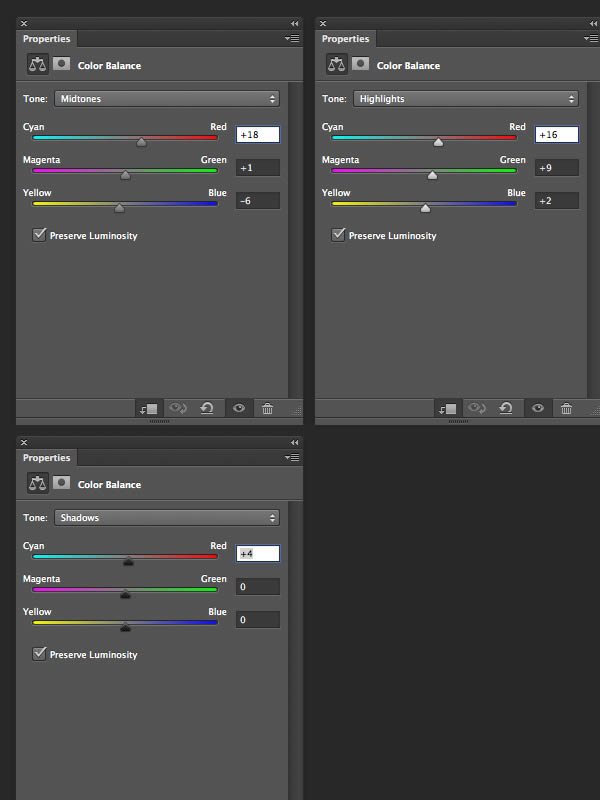
When you’re done, it should look like the image below your Layer Panel.
Create a new layer above all (but in the Smoke and Fire group) and clip it to the smoke layer. With a soft round brush set to a orange color (#be6600) start painting as shown in the image below. (The red color shows where do you need to paint over with the Brush Tool)
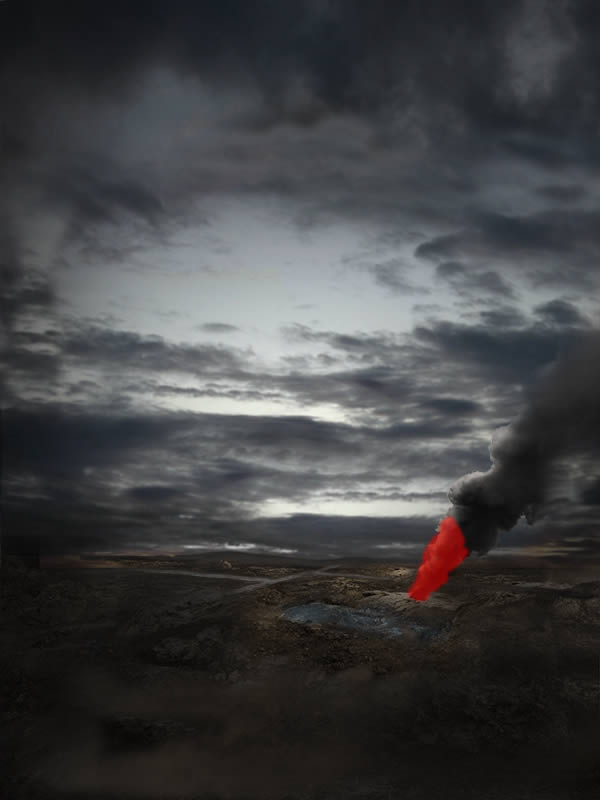
When you’re done, change the Blending Mode of this orange paint layer to Color and reduce its Opacity to 10-20%.
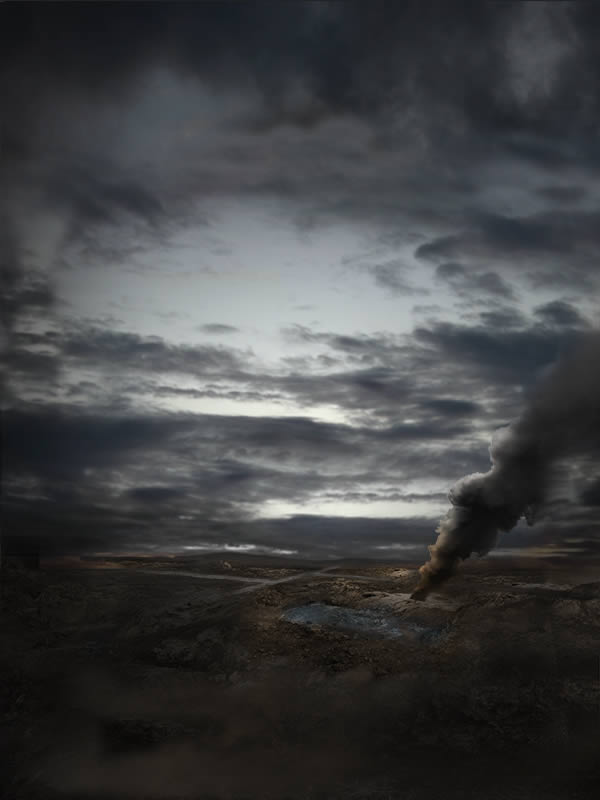
Open one of the “Fire” stocks provided for the tutorial and with Lasso Tool (L) extract a part from that stock as shown.
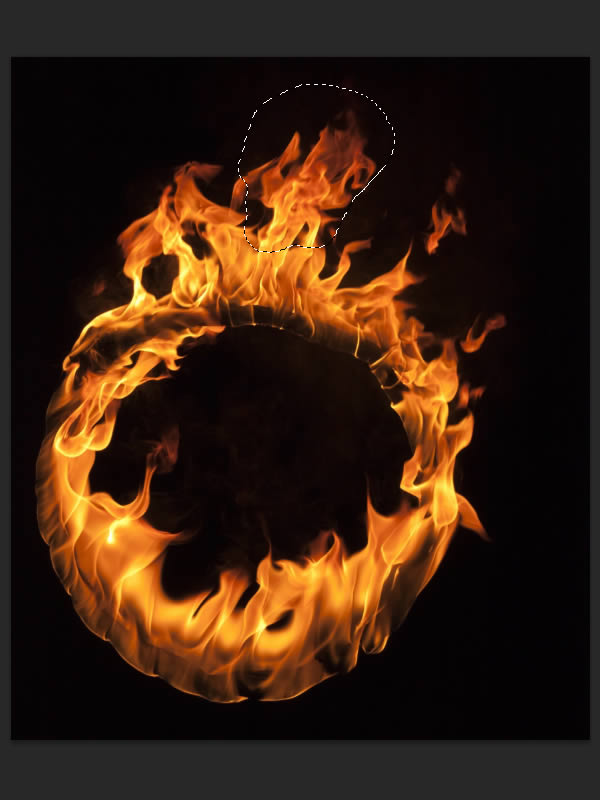
Press Cmd/Ctrl + J to copy the selected part and paste it on your artwork. Change this layer Blending Mode to Screen. Press Cmd/Ctrl + T to open the Free Transform Tool and right click and go to Warp.
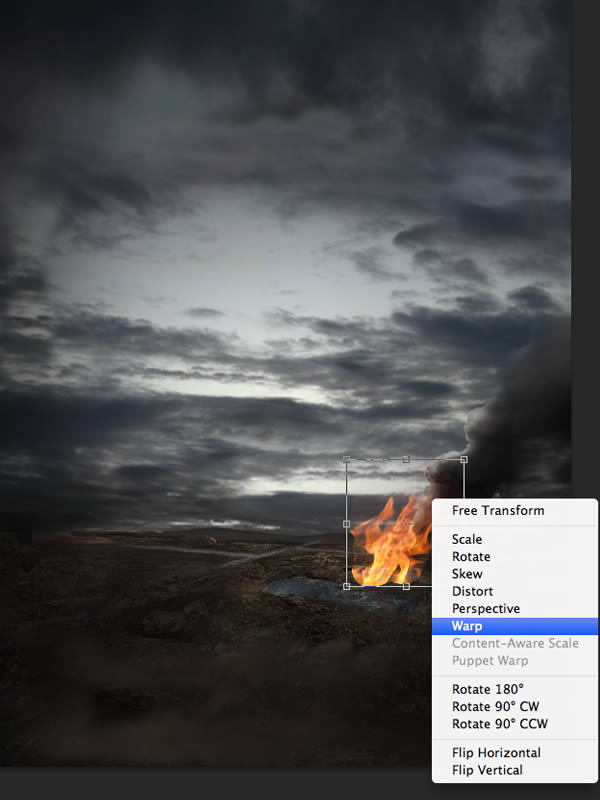
Use the Warp Tool to curve and manipulate the shape of the fire the way that you like. There’s nothing much to explain, its all about your taste. Feel free to use the Erase Tool (E) if some parts of the stock don’t fit your taste.
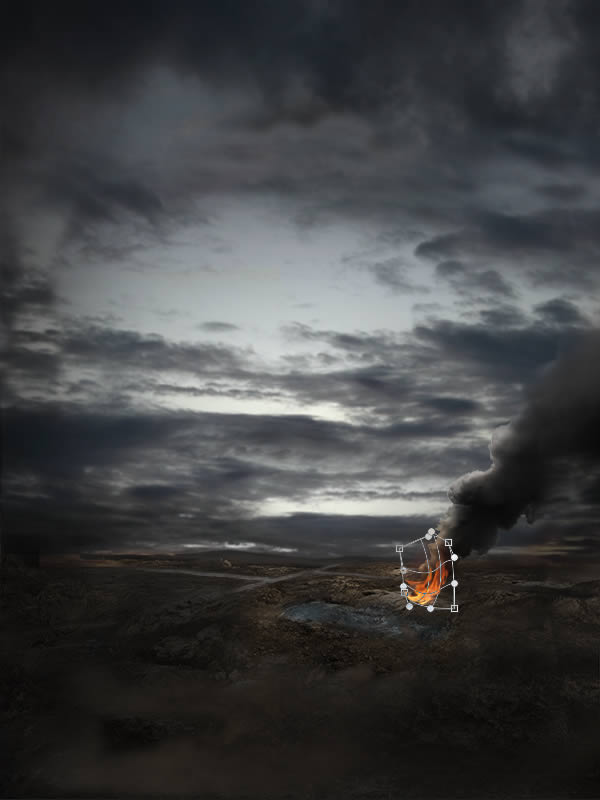
At this stage, its all about the taste and the way you want your work to look. Repeat the previous steps until you are happy with the final result.

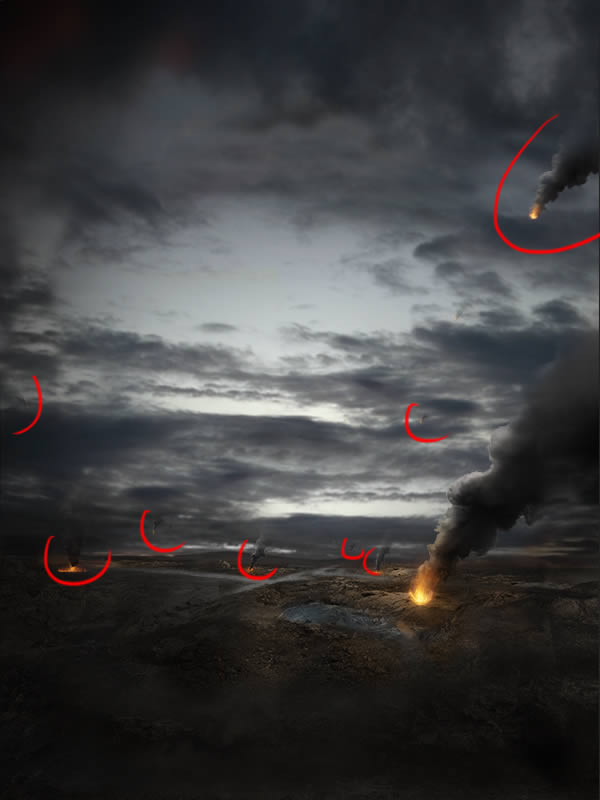
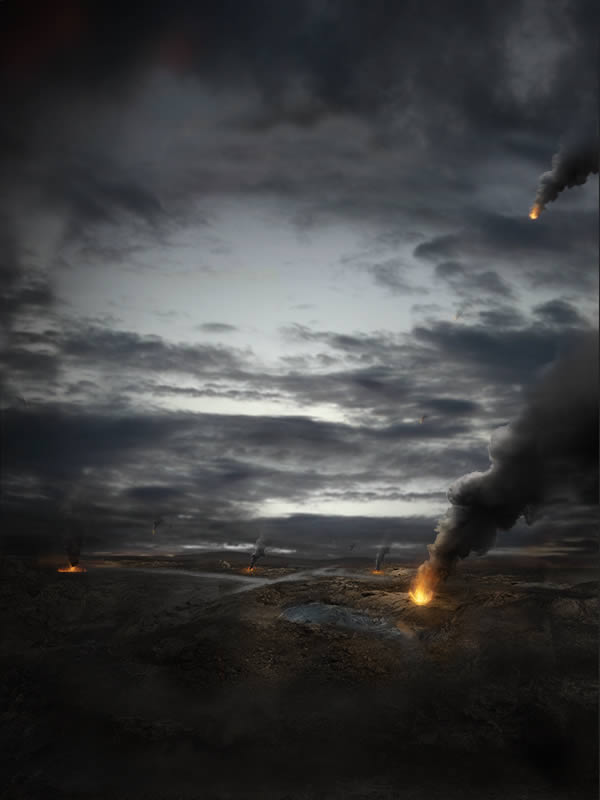
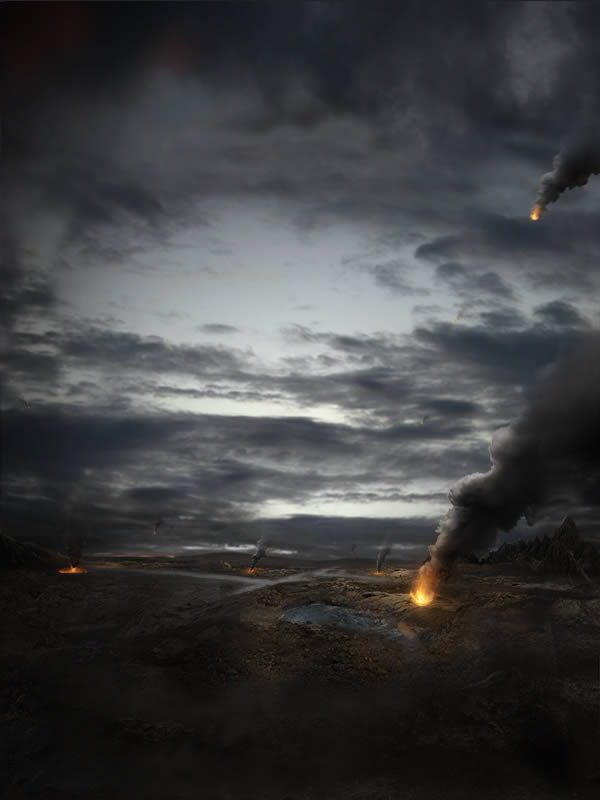
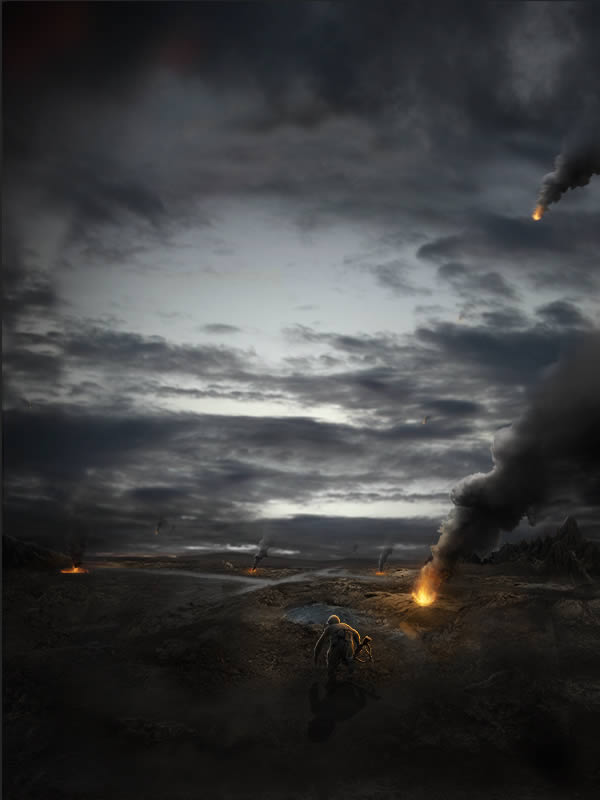
At this moment our scene looks a bit empty. Add more smoke and fires elements as I did. Repeat Step 9 to get the same result. Also, use different smoke stocks provided for the tutorial and combine them in order to get new shapes. Also, use different sizes for the smoke and also play with the Opacity in order to blend them nicely into the scene. Use the image below for reference.
Select the Brush Tool (B) using the settings shown below.
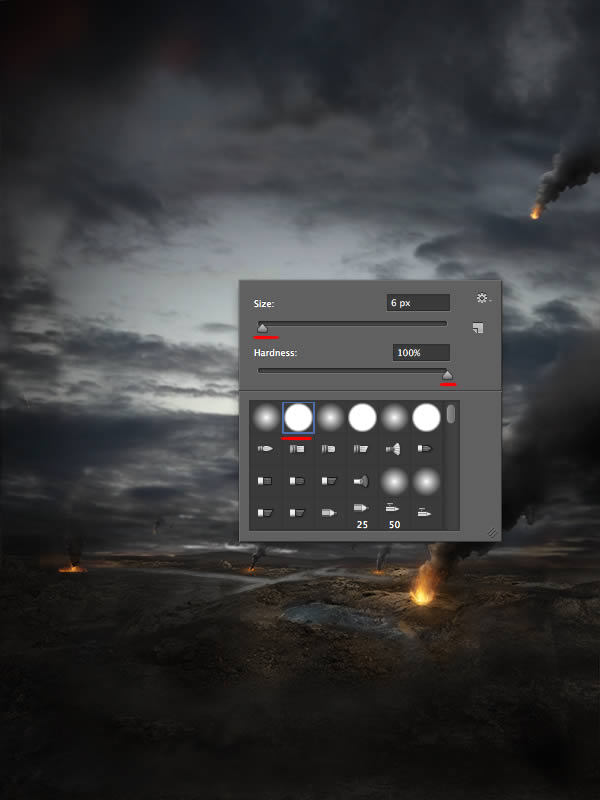
It’s time to draw some mountains. They are going to be mainly in the dark so don’t worry about details, just block some shapes in dark and respect the source light. Use black (#0d0d0d) for shadows and a very dark grey (#232322) for lights. If you think you need brighter lights for the mountain use: #35332f. This is an optional step, you don’t need to add mountains if you don’t like the idea, but if you’d like to have as much as details as possible on your work, start drawing some sharp shapes for the mountains as I did using the colors provided. Use the image bellow for references.

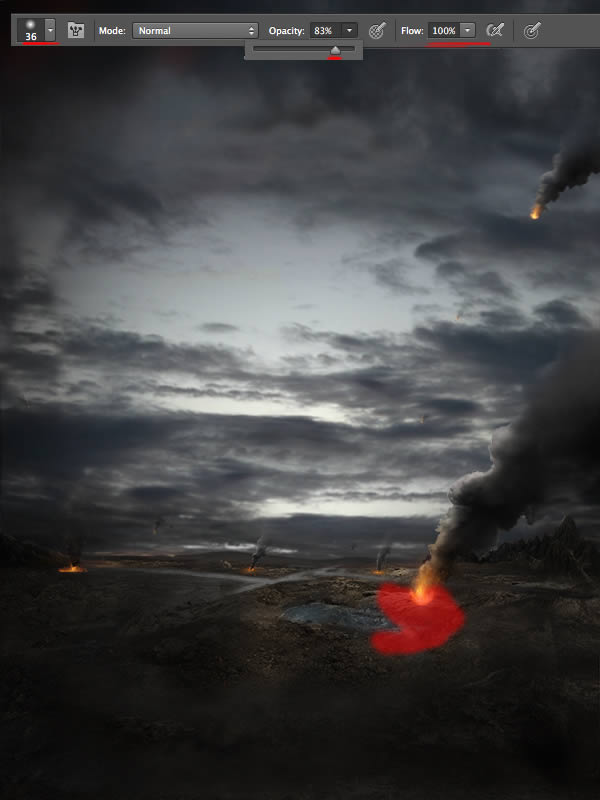
Create a new layer, open the Brush Tool (B) and select a soft round brush around 30-40px, reduce the Opacity of the Brush Tool to 60-70% and with an orange color (#e0943c) start drawing as shown in the image below. (The red color shows where do you need to paint over with the Brush Tool)
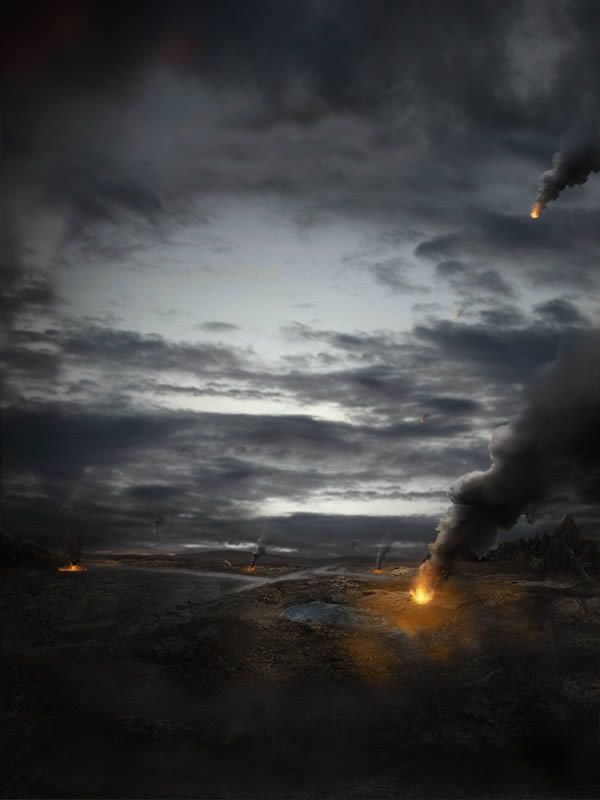
When you are done, change the Blending Mode of this layer to Color and reduce the Opacity of it to 80-90%.
Step 10
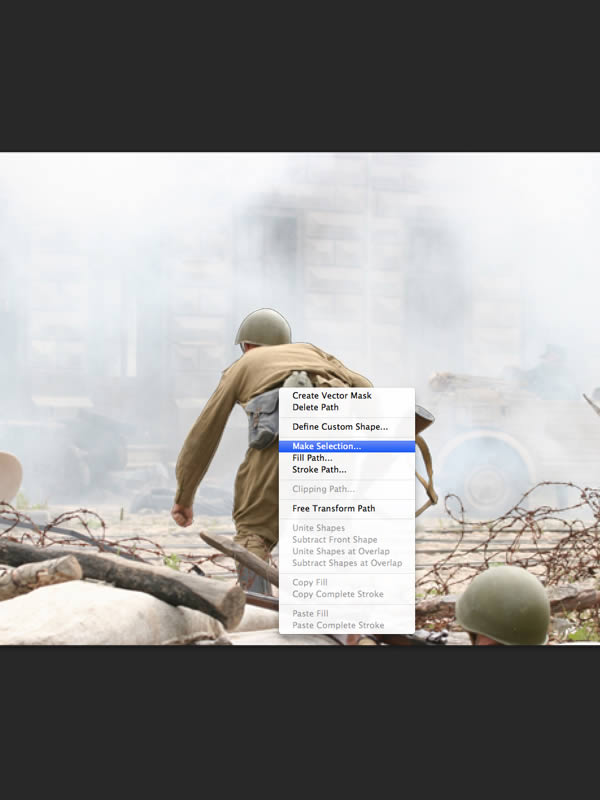
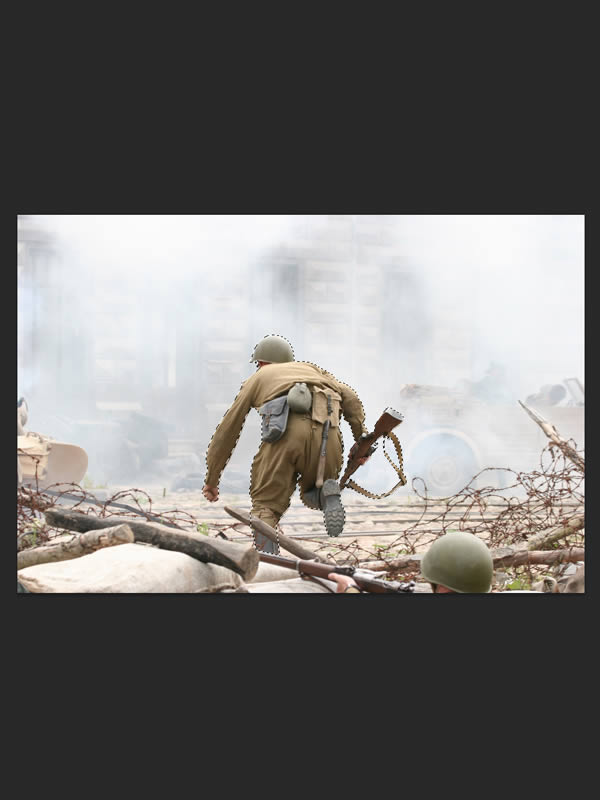
Open “Soldier 2″, select the Pen Tool (P key) and start drawing the soldier shape. When you’re done, right click and select Make Selection and hit Cmd/Ctrl + J to copy the selected part from the stock.

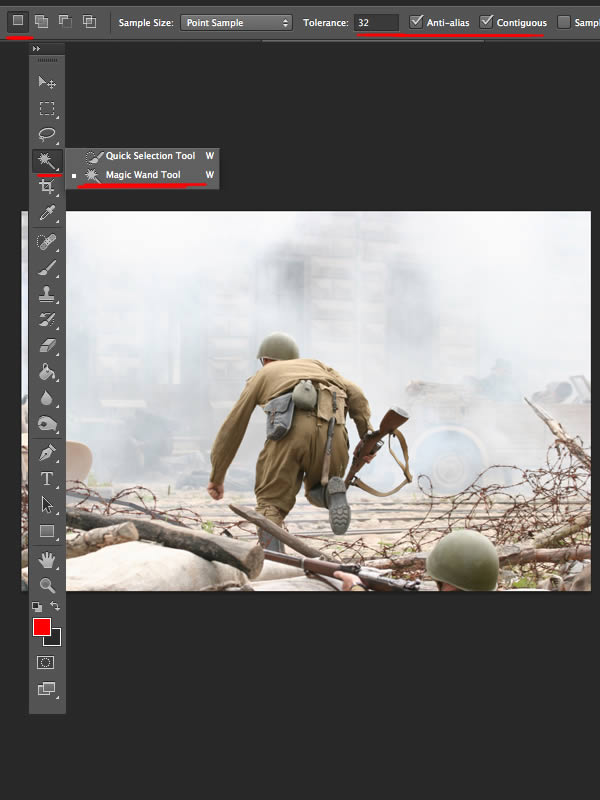
Select the layer with the copied soldier, open the Magic Wand Tool (W), set the Tolerence to 32 and check the Anti-alias and Contiguous options. Select the parts between his arm and gun as I did. When you’re done, hit the Delete key on your keyboard to delete the selected parts. See the image below for reference.
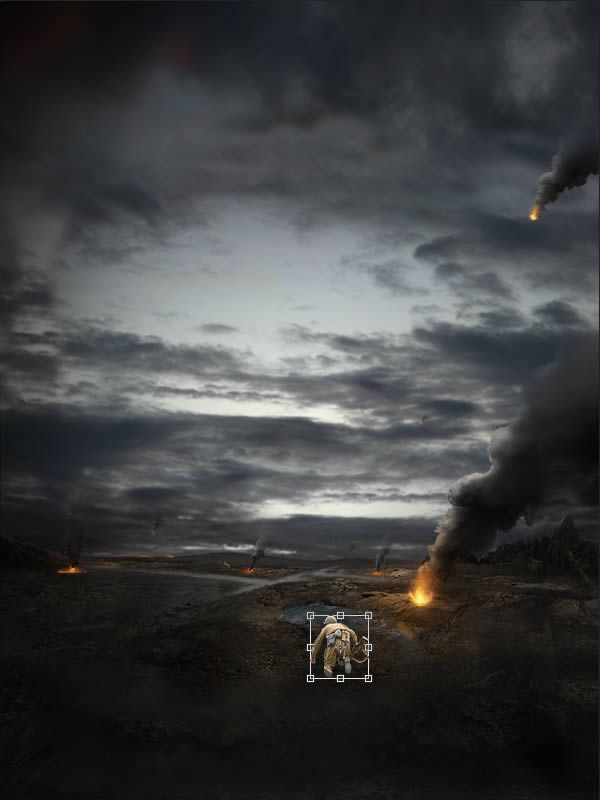
Place the first soldier on your artwork and hit Cmd/Ctrl + T to open the Free Transform Tool to reduce its size. Place it as shown below.
Select the soldier layer, hit Cmd/Ctrl + G to group it and name the group “Soldier 1″. As we did before we are going to use the Levels adjustment layer to adjust the lights and shadows accordingly to our light source. Add a new Levels adjustment layer and clip it to the soldier layer and use the settings shown below.
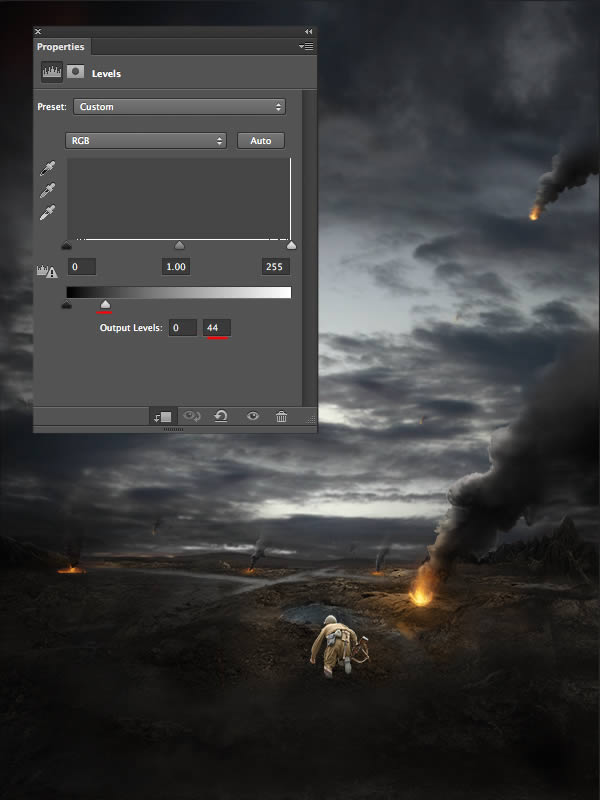
I’ve covered in red the parts where the soldier needs to be covered in shadow. In the Levels Layer Mask with a soft round brush around 5-10 start revealing parts of the soldier as showed in the second image below. (The red color shows where do you need to paint over with the Brush Tool)
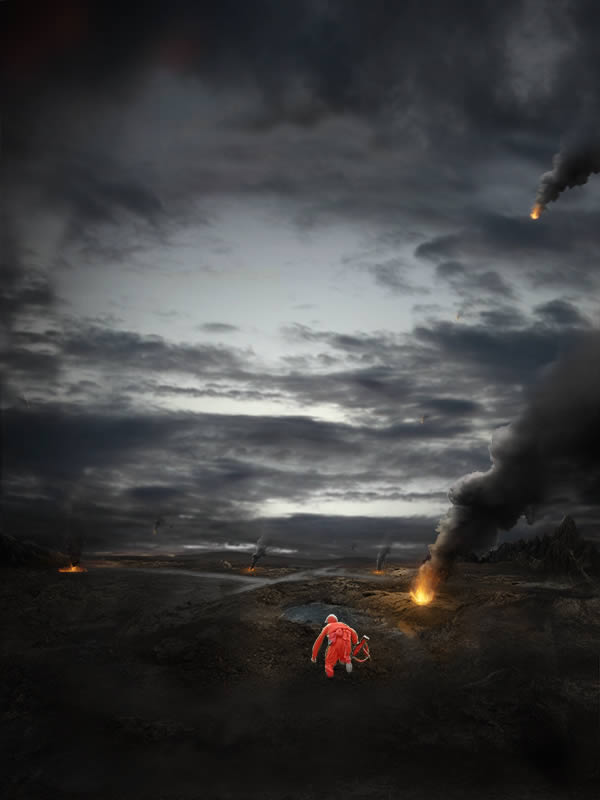
Create a new layer and clip it to the soldier layer so the settings will apply only the soldier. Select the Brush Tool (B), set its size to around 5-10px, select a soft round brush and start painting as shown below for the lights with an orange color (#d3891f). (The red color shows where do you need to paint over with the Brush Tool)


When you’re done, duplicate the orange paint layer 2 times and change their Blending Mode to Overlay. For the first layer we are going to change the Opacity to 45% and for the second one to 60%.
Duplicate all the layers created so far for the first soldier and hit Cmd/Ctrl + E to merge them all together. Right click on the merged layer and go to Blending Options. Use the settings shown below.
Hit Cmd/Ctrl + T to open the Free Transform Tool, right click and to go to Flip Horizontal and the rotate it underneath the soldier to create the shadow.
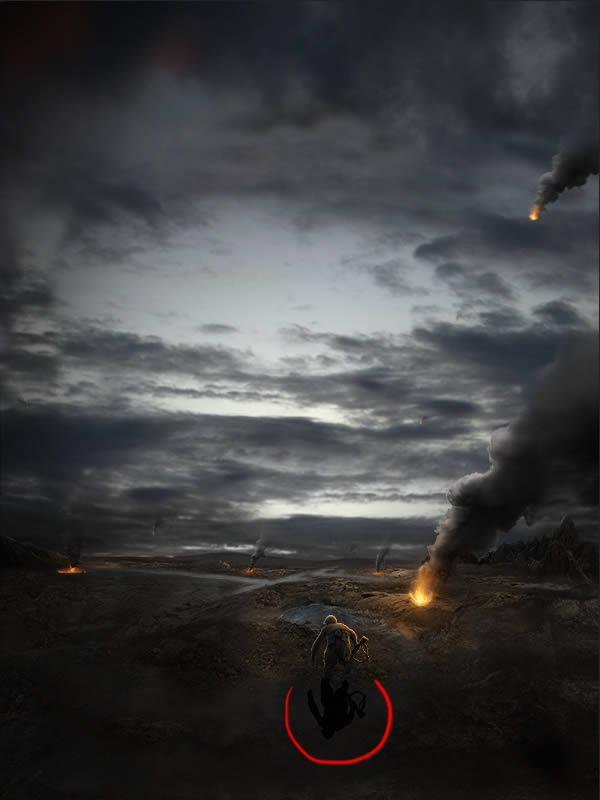
Hold down the Cmd/Ctrl key in order to be able to move the Transform Tool squares freely. (See the image below)

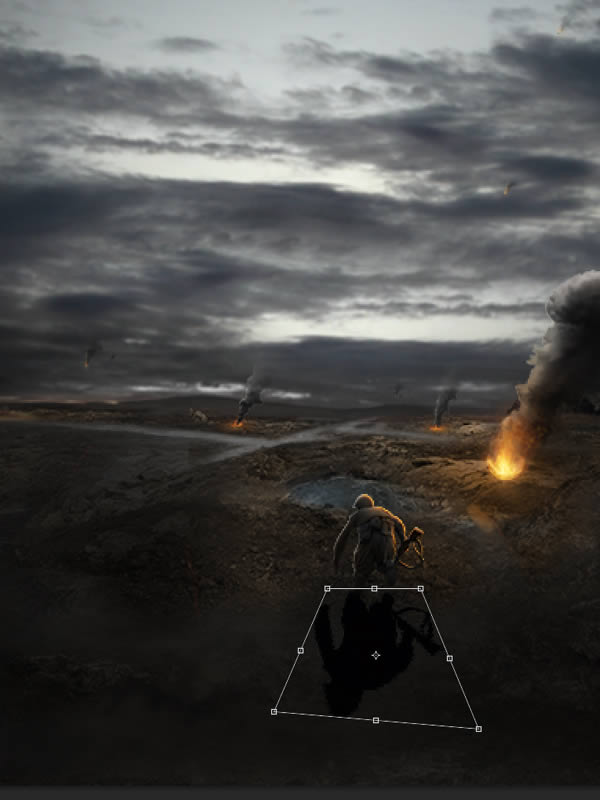
Here’s my soldier shadow. When you’re done, select the shadow soldier layer and change its Blending Mode to Multiply and reduce its Opacity to 40%.
Step 11
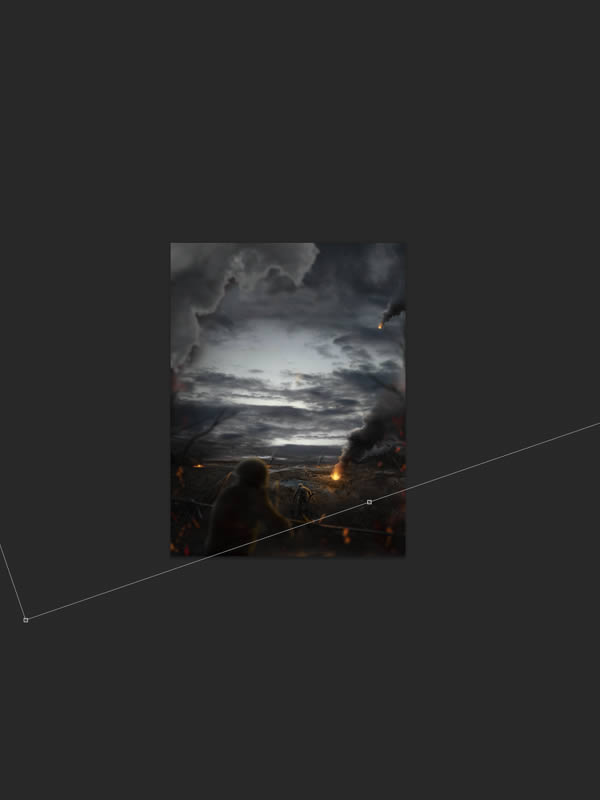
Use the Pen Tool (P key) to cut out the second soldier and place it on your artwork. Repeat Step 10 in order to color correct the light and the shadow of the second soldier. I’m not going to explain this again, there are the same techniques and setting applied to both of them.
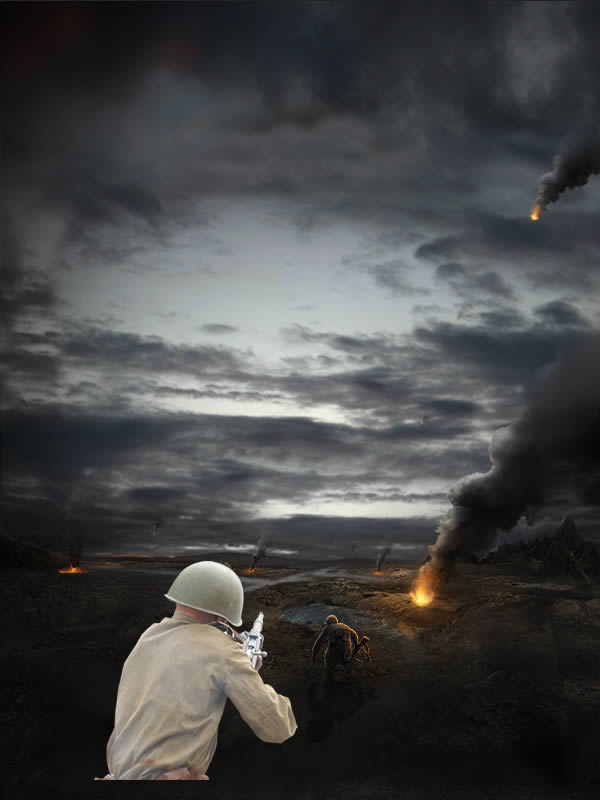
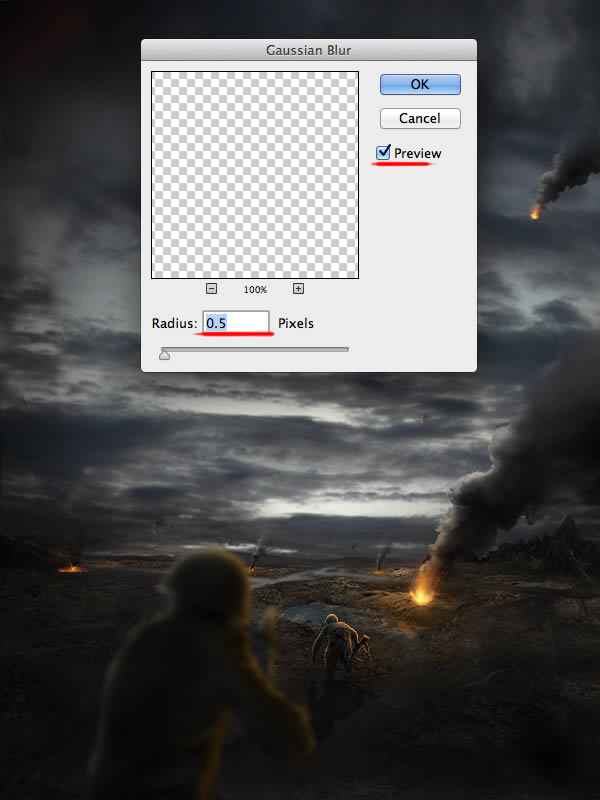
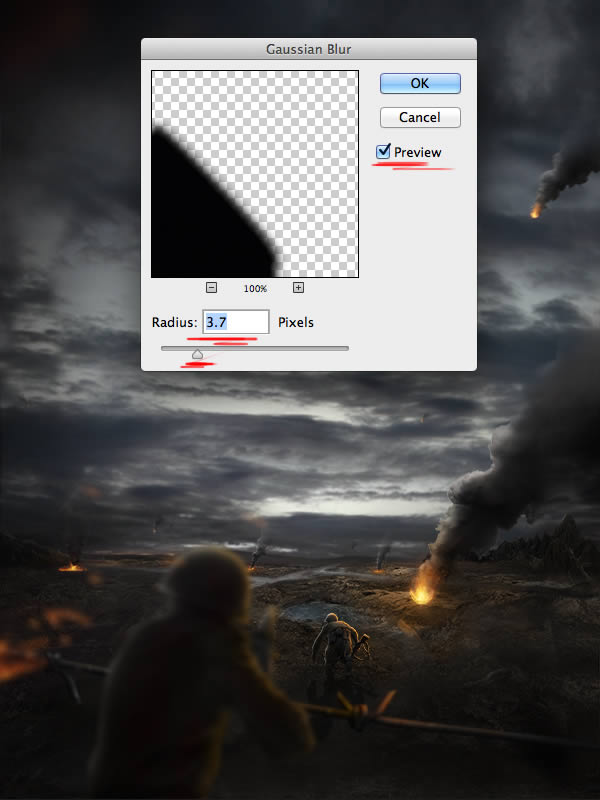
When you’re done, group all the settings made for the second soldier including the soldier stock and use Cmd/Ctrl + G to group them. Name this group “Soldier2″. Duplicate this group by using Cmd/Ctrl + J. Hit Cmd/Ctrl + E to merge the copied group into one layer. Delete the “Soldier2″ group. Now we have only one layer with the second soldier, so its easier to work with. Go to Filter > Blur > Gaussian Blur and use the settings shown below.
Step 12
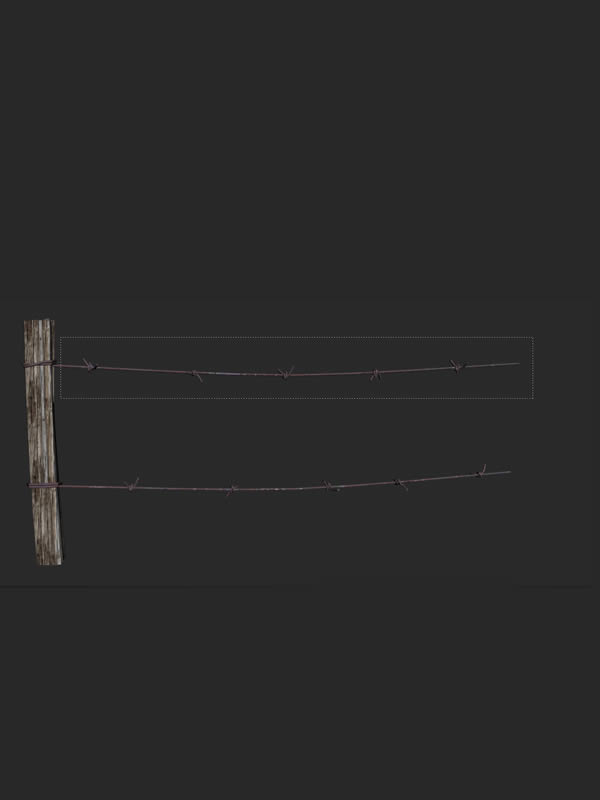
Open the “Barbed wire” (Fences_Pack_003_by_zememz.png) stock provided and with the Rectangular Marquee Tool (M) cut the wire as shown. Press Cmd/Ctrl + J to copy the select part of the wire.
Place your barbed wire as shown below. Select the barbed wire layer and hit Cmd/Ctrl + G, name this group “Barbed wire”. Place this group between the first soldier group and the second soldier layer. Select again the barbed wire layer and hit Cmd/Ctrl + Shift + U to make it black and white.
As we did before to the soldiers and smokes, we are going to use the Levels adjustment in order to darken our layer. Create a new Levels adjustment layer and clip it to the barbed wire. Use the settings below for settings.
When you’re done, select a soft round brush (Brush Tool) set to black for the Foreground color, and in the Levels’ Layer Mask start painting as shown in the image below. See the second image below how it should look like in the end. (The red color shows where do you need to paint over with the Brush Tool)
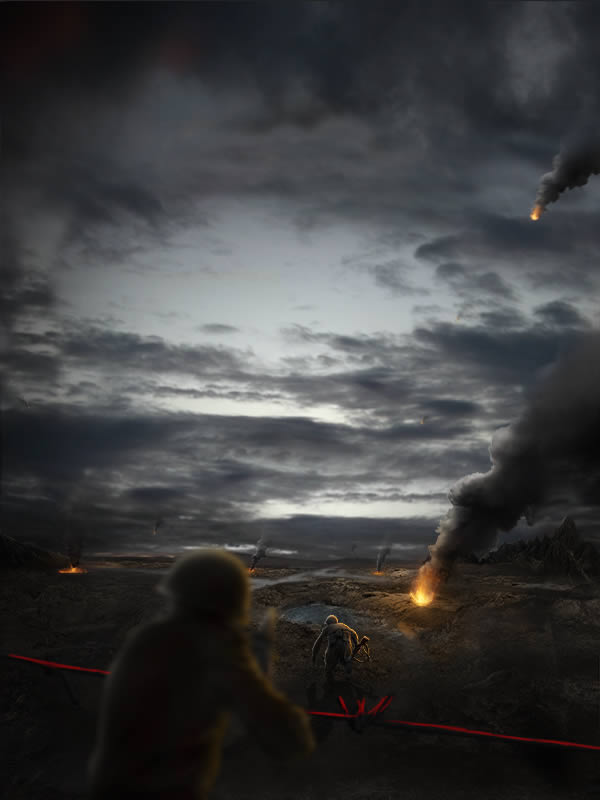
Create a new layer above all (but in the Barbed wire group) and clip it to the barbed wire layer. Use a soft round brush (#ec872f) around 5-10px and Opacity set to 60% to create the lightning from the fire as we did for the soldiers. See the image below for references where do you need to paint. (The red color shows where do you need to paint over with the Brush Tool)
When you’re done, change the Blending mode of the orange paint layer that we’ve just made to Color and reduce the Opacity to 60-65%. Duplicate this layer and change its Blending Mode to Color Dodge and reduce its Opacity to 35-40%.
Step 13
Open the “Fire 2″ stock provided and using the Pen Tool or Lasso Tool, select a part of the photo that you want to work with. After you’ve made your selection hit Cmd/Ctrl + J to copy the selected part into one new layer.
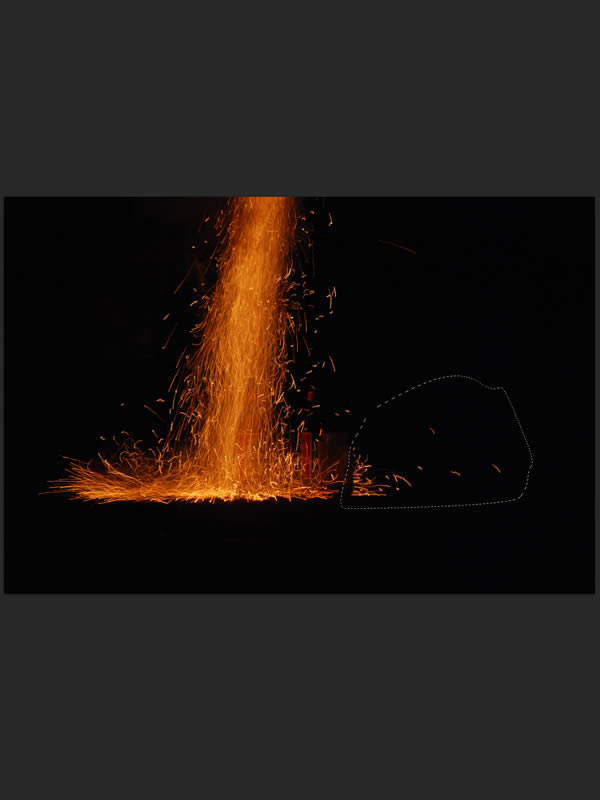
Where going to use this stock to create the blurry/flying flames on the artwork. Place it your artwork and hit Cmd/Ctrl + T to open the Free Transform Tool and place it as shown below. You can play with the size of this stock because at the end won’t matter since its going to be blurred. (Make sure you place this fire layer above all other layers and groups created so far)
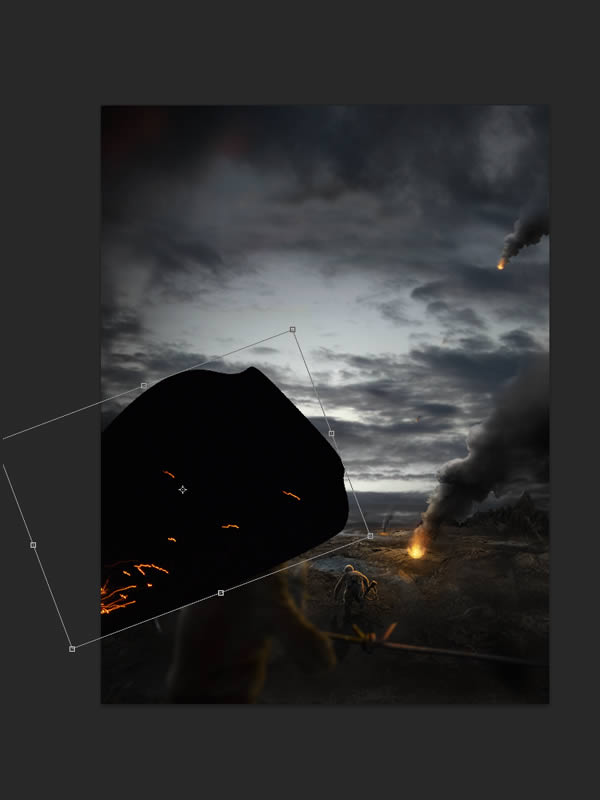
Hit Cmd/Ctrl + G to group this layer and name the new group “Fire Blurry”. Select the fire layer inside it and change its Blending Mode to Screen. If needed, use the Erase Tool (B) to erase parts that you don’t like from the layer.
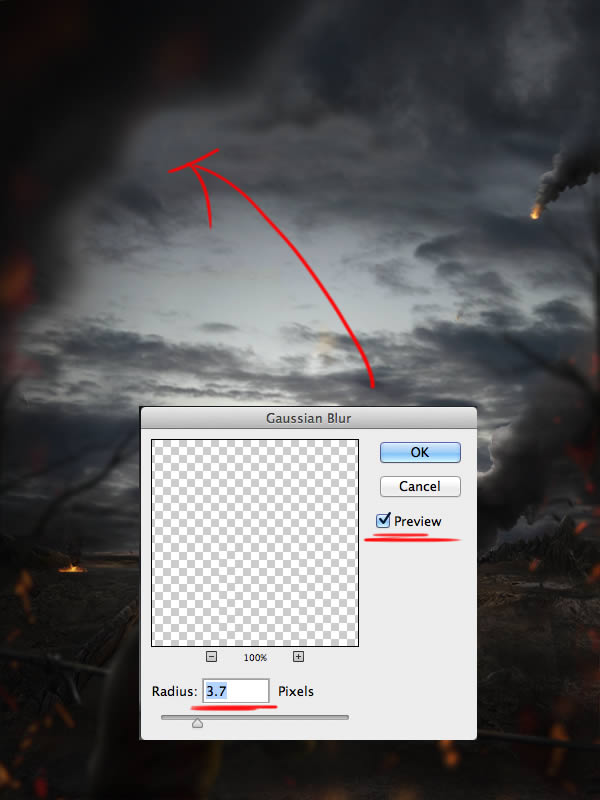
Select the fire layer that we’ve just created again and go to Filter > Blur > Gaussian Blur. Set the Radius between: 3-5px. (At this stage its all about the taste and the feel that you want to gave your artwork)
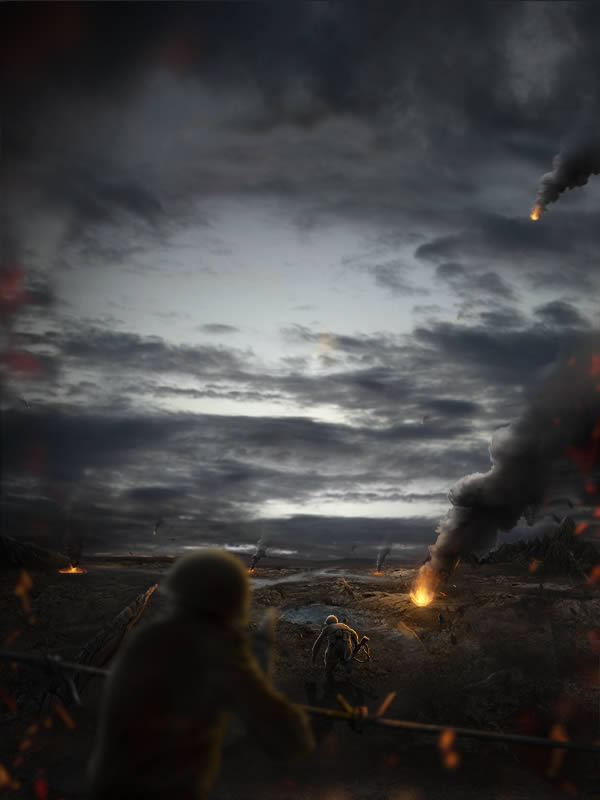
Here’s my blurred fire stocks. I’ve changed them a lil bit and added a lot of them in order to create a nice depth.
Step 14
Open the “Spike” stock provided and using the Pen Tool extract a part from the stock that you like. You can crop things as we did with the in step 9 when we cropped the soldiers.
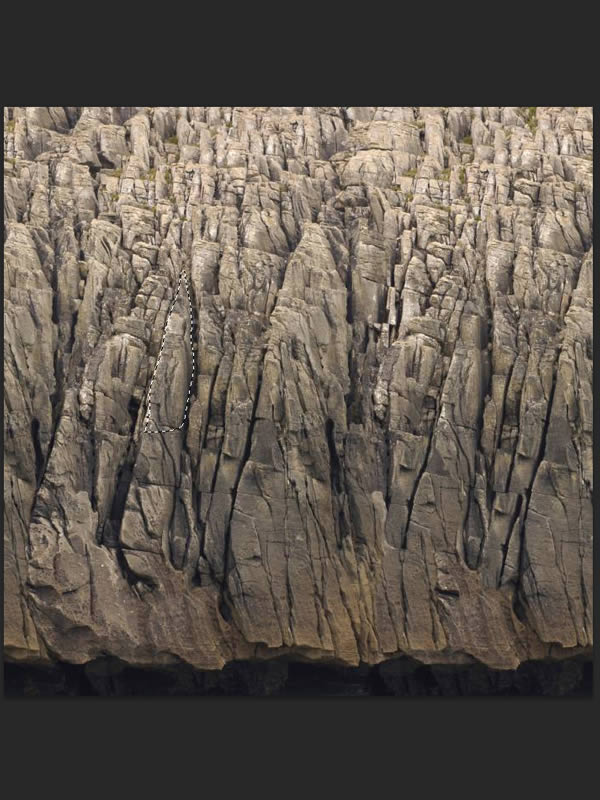
Place it above the Ground group. Hit Cmd/Ctrl + G to group the spike layer. Name this group Spike. Next step is to create a new Levels adjustment layer and clip it to the spike layer using the settings show below.
Now in the Levels Layer Mask start painting with a soft round brush around 20-30px set to black for the Foreground Color in order to reveal lights accordingly to our light source. (The red color shows where do you need to paint over with the Brush Tool) See the second image below how the light should look like.

Create a new Gradient Map adjustment layer and clip it to the spike layer. Use the settings below. When you’re done, reduce the Gradient Map layer adjustment Opacity to 80%.
Create a new Color Balance adjustment layer with the settings shown below.

When you are done change the Blending Mode of the Color Balance to Overlay and reduce its Opacity to 30-40%.
Step 15
Create a new layer above all, hit Cmd/Ctrl + G to group it and name this group Tree. Select a soft round brush around 10-12px set to black for the Foreground Color (#000000) and start drawing some branches as I did.

Select the layer that we’ve just created with the paint branches and go to Filter > Blur > Gaussian Blur. Set the Radius around 3-5px, see what works for you.
Open once again of the “Smoke” stocks provided for the tutorial, doesn’t matter which one because again, it will be blurry. Place it on your artwork as shown in the image below. Hit Cmd/Ctrl + G to group it and name the new group “Smoke Blurry”.
Right click on the new layer created with the smoke and go to Blending Options. Go to Color Overlay and follow the settings below. (Use the Erase Tool (E) if needed)

Select once again the smoke layer just created and go to Filter Blur Gausian Blur and use the settings shown below.
Create a new layer above all in the Smoke Blurry group, select a soft round brush around 20-30 and clip it to the smoke layer. Set the color to white (#ffffff) and start painting as shown in the image below. (The red color shows where do you need to paint over with the Brush Tool)
Change the Blending Mode of this layer to Lighten and reduce its opacity to 5-10%.
Step 16
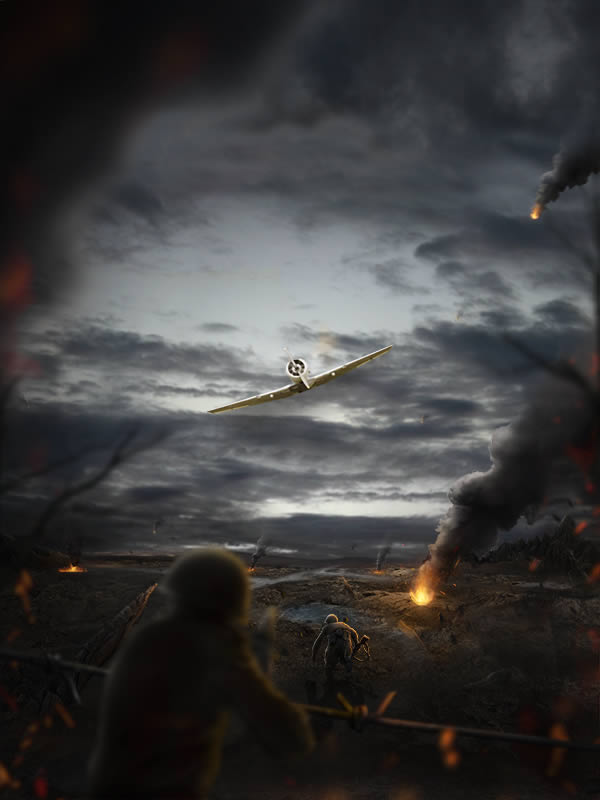
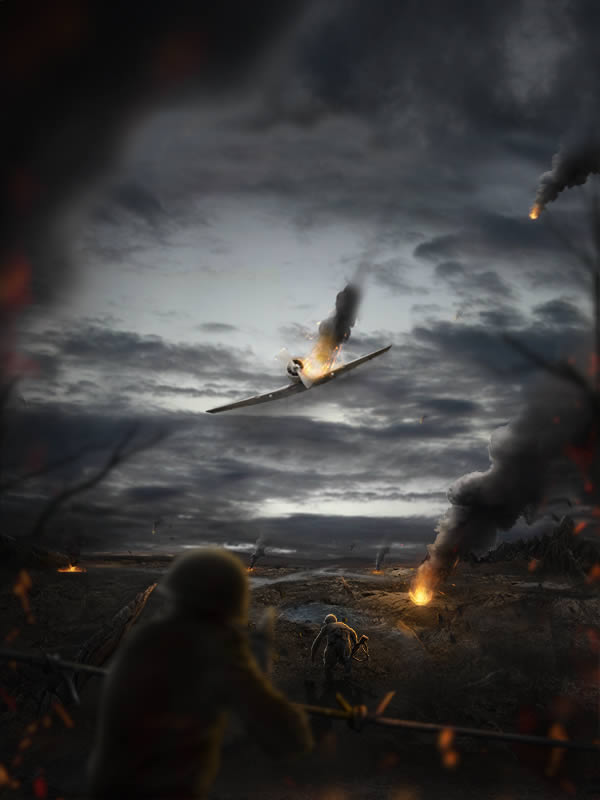
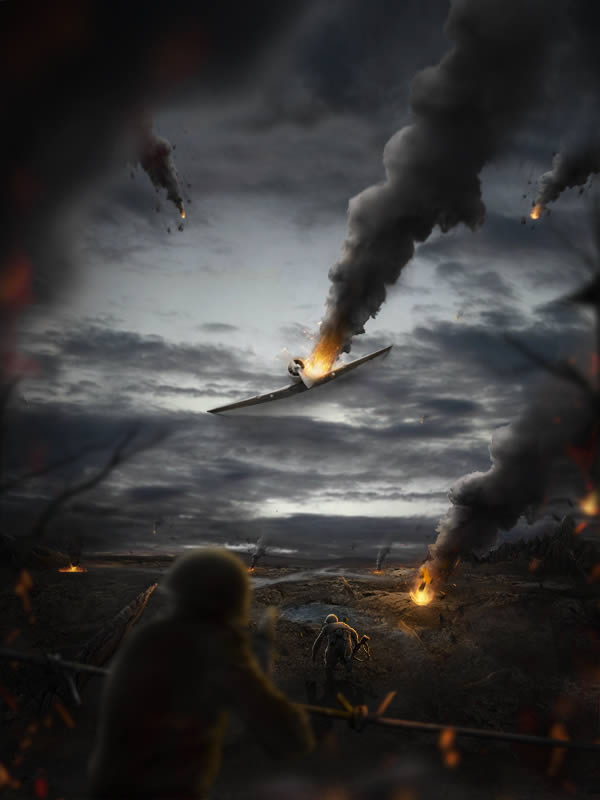
Open the “Plane” stock and crop it out using the same techniques we used to crop the soldiers on the previous steps. Place it on your artwork as shown below. Use the Free Transform Tool to resize the plane. Select the plane layer, hit Cmd/Ctrl + G to group it. Name this one Plane.
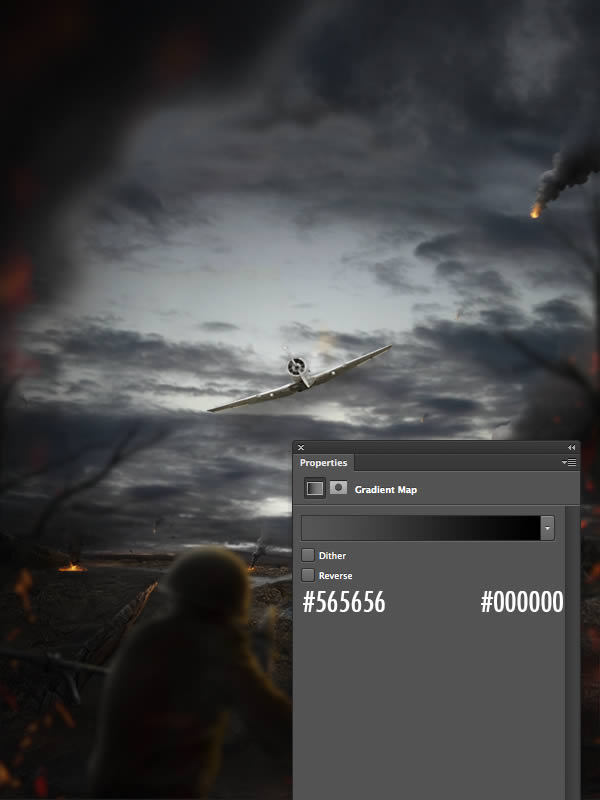
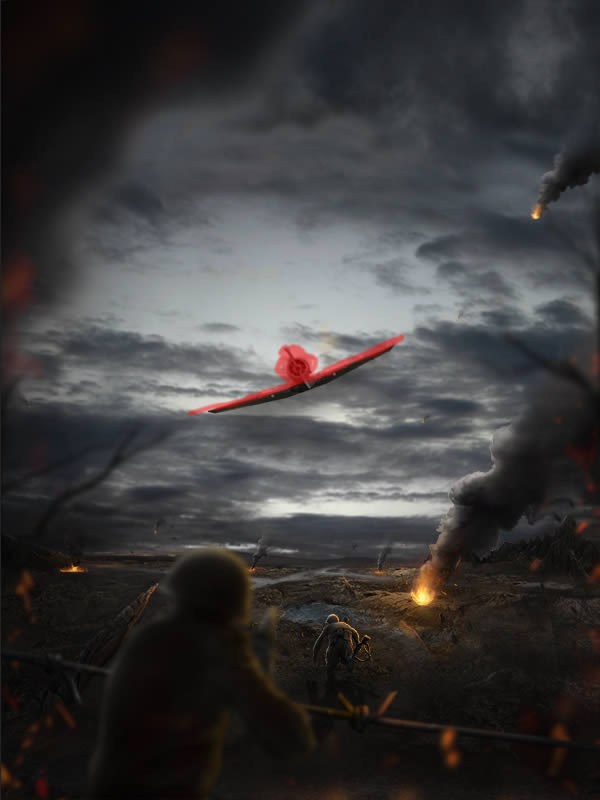
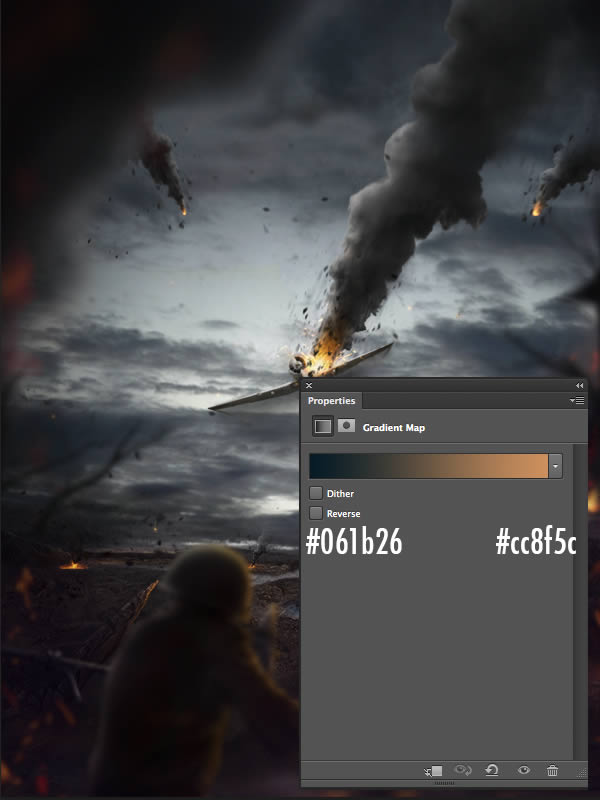
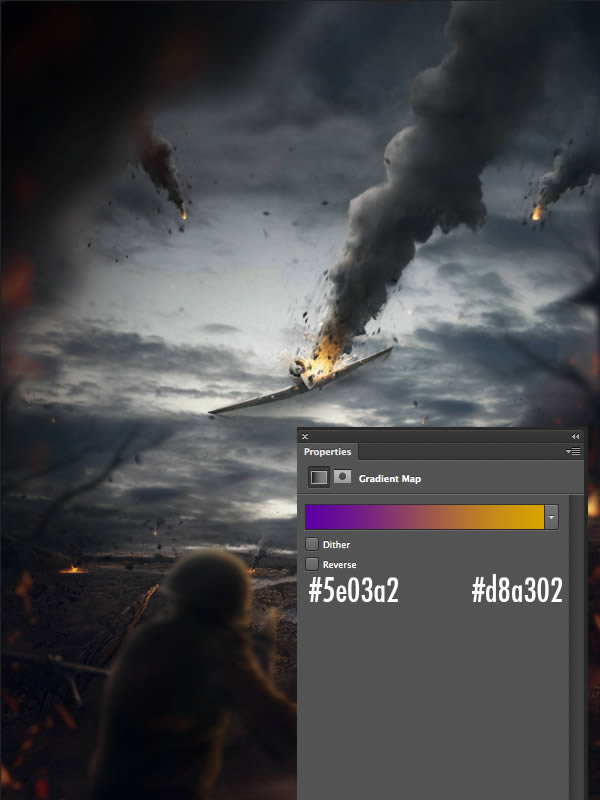
Create a new Gradient Map fill adjustment and clip it to the plane layer. Use the settings show in the image below. When you’re done, reduce the Gradient Map adjustment layer Opacity to 50-60% and change its Blending Mode to Color.
Create a new Levels adjustment layer and clip it to the plane layer. Use the settings show below.
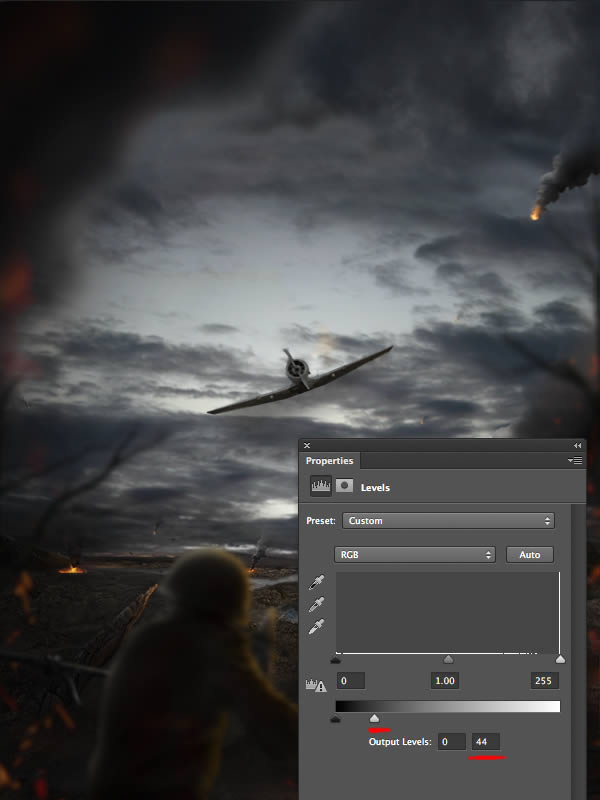
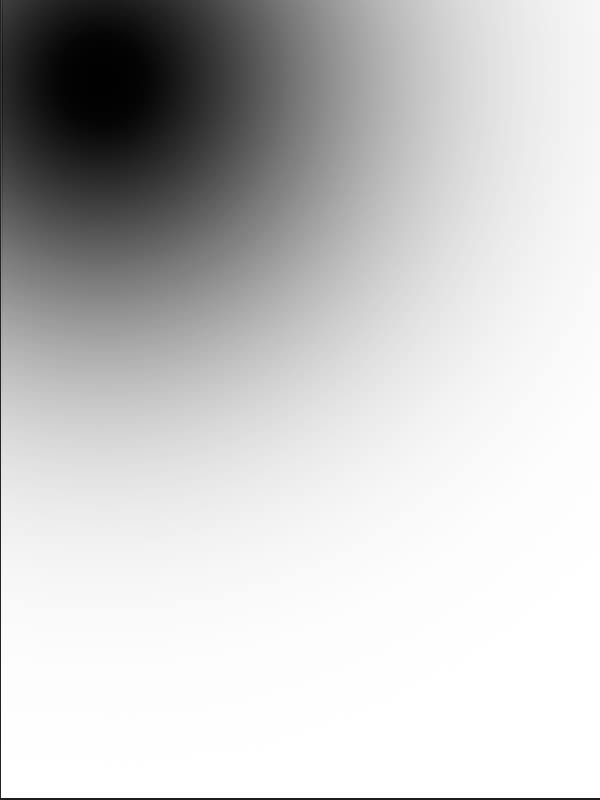
In the Levels’ Layer Mask start painting with a soft round brush set to black for the the Foreground Color (brush: 10-20px) in order to reveal the lights. When you’re done reduce the Opacity of the Levels adjustment layer to 50-60%.
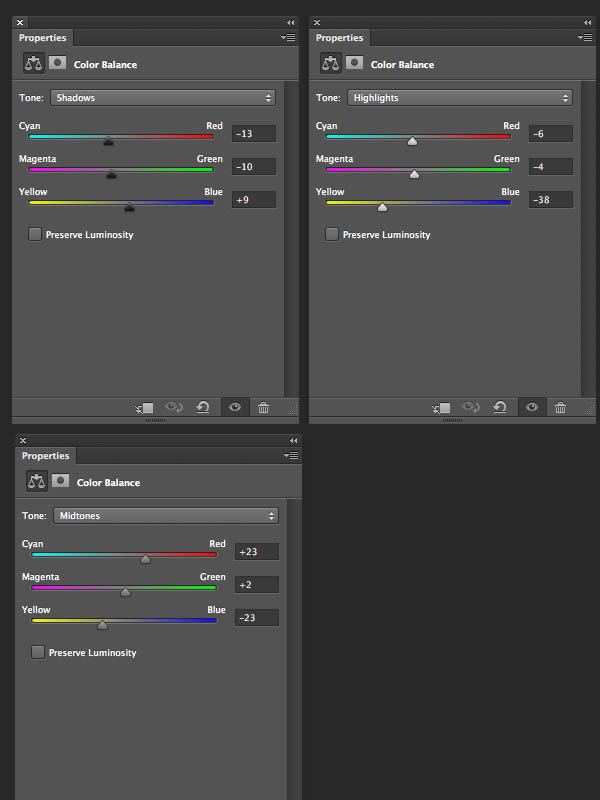
Create a new Color Balance adjustment layer and clip it to the plane layer. Use the settings below.
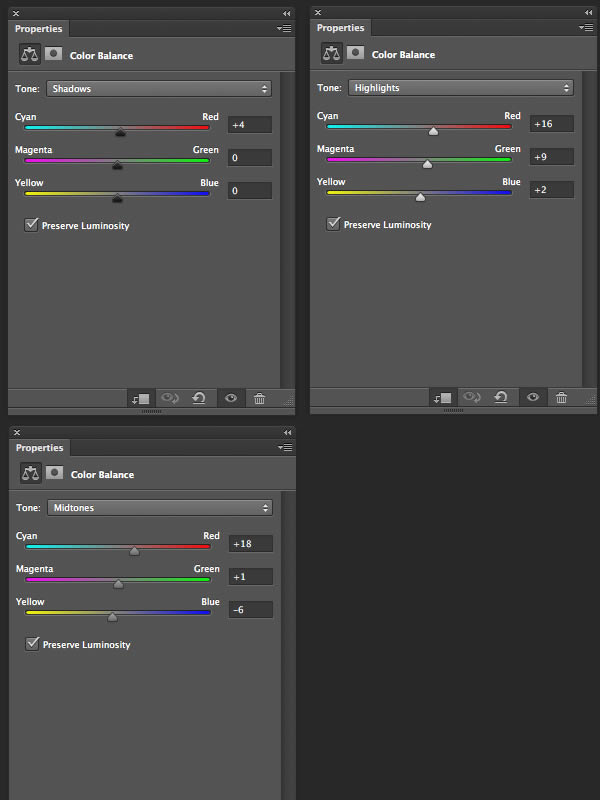
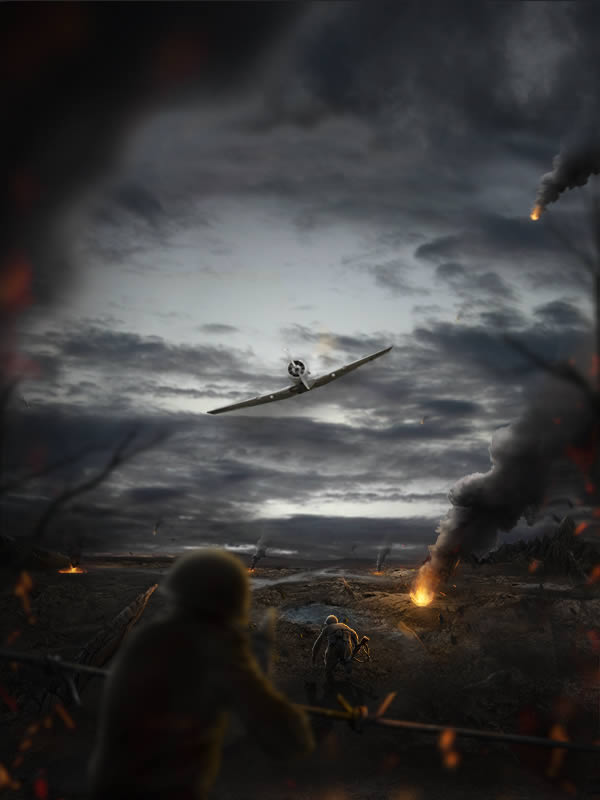
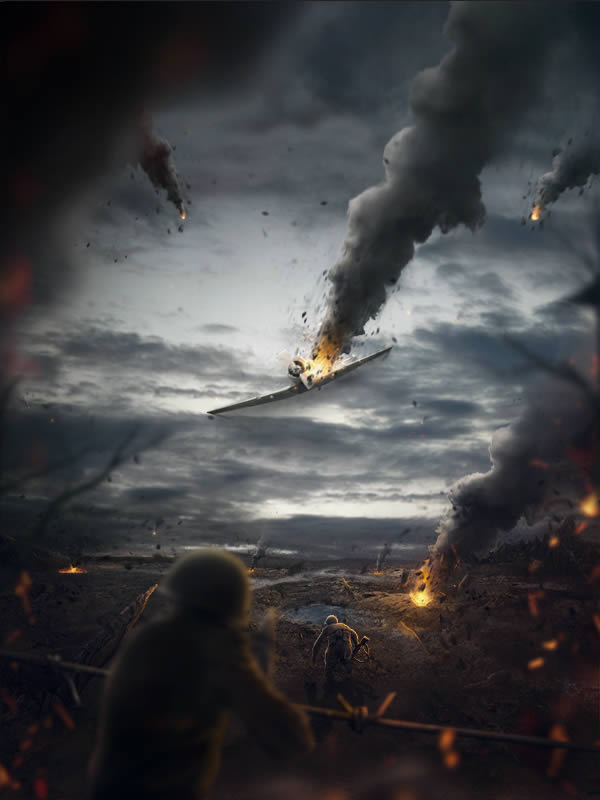
When you’re done, change the Blending Mode of the Color Balance adjustment layer to Overlay and reduce its Opacity to 20%.

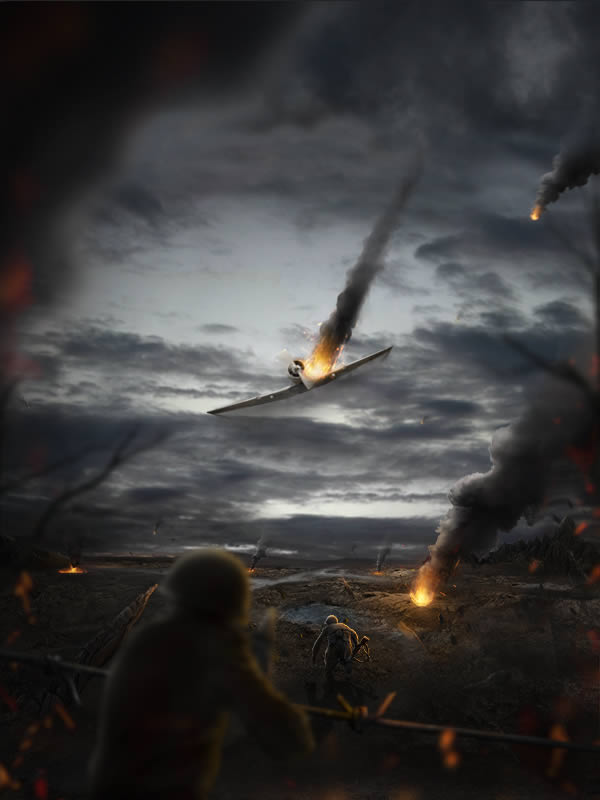
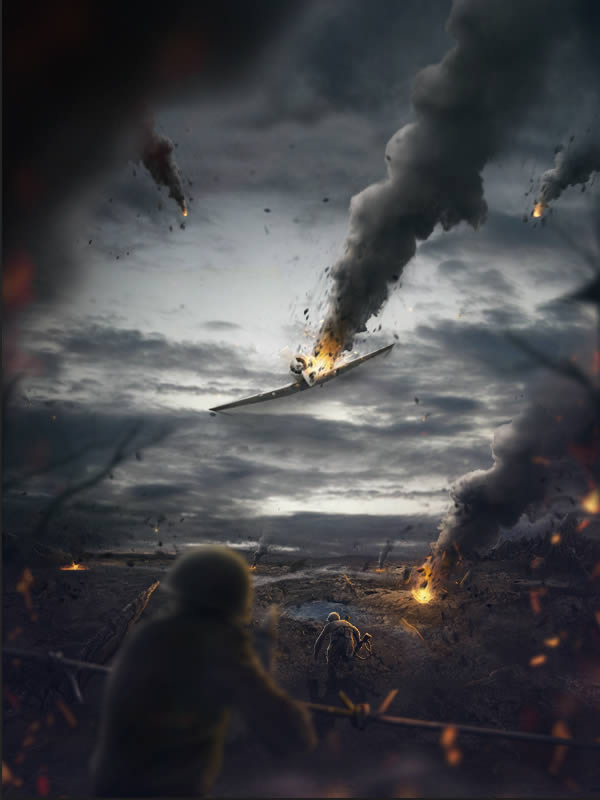
It’s time to add the explosion to the plane. Repeat Step 9 in order to get the effect. There are the same principles and techniques applied to this one, among with the same settings. Use the 2 smoke stocks provided to get a new smoke shape. Use the Erase Tool (E) the erase parts that you don’t like, use the Clone Stamp Tool (S) to clone parts of the smoke stock. In this step is more about experimenting and playing with values rather than explanation. (Keep in mind the source light)
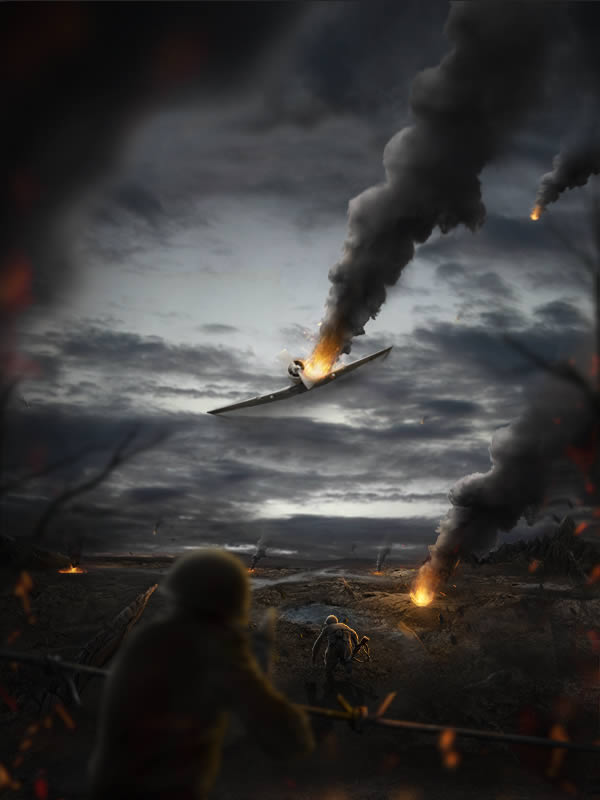
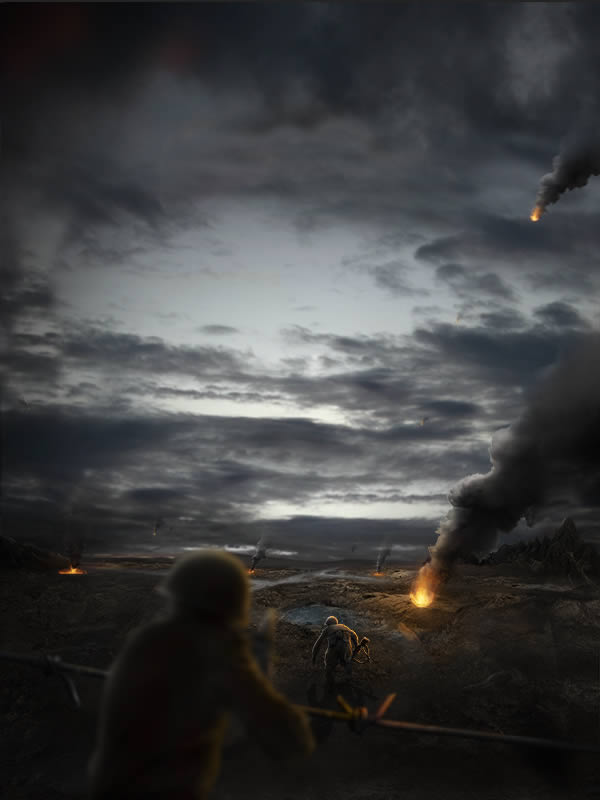
I’ve added a few more details here and there because I felt the left part was a bit to empty. Add also some blurred fire layers.

Step 17
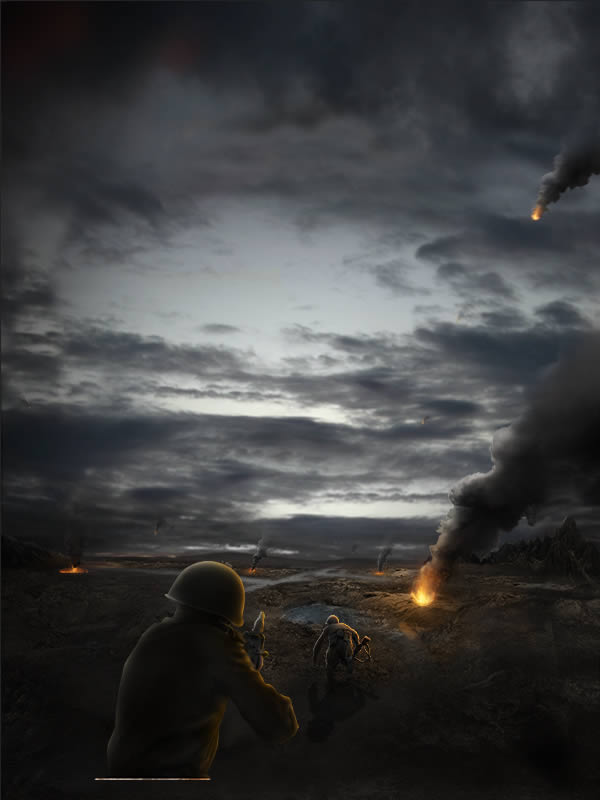
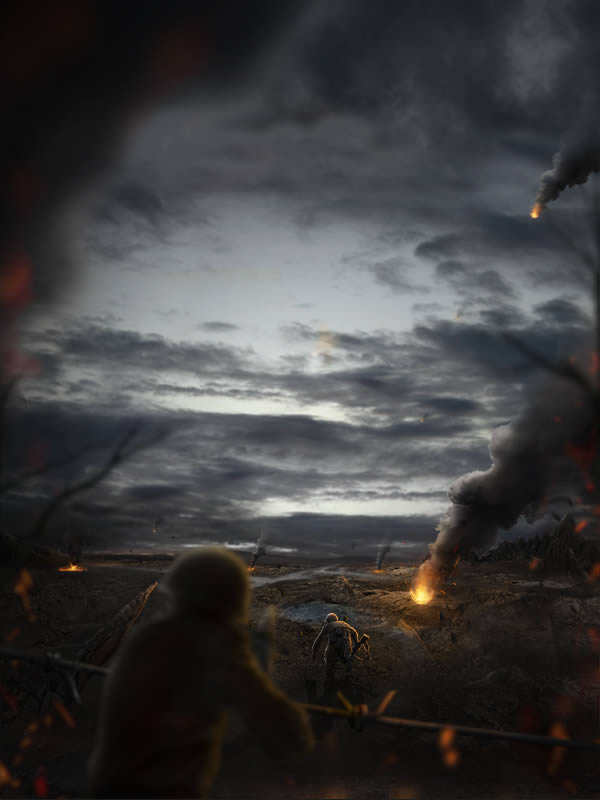
Create a new layer above the Ground group. Select a soft round brush around 50-60px and start painting as shown below. When you are done change the Blending Mode of this layer to Color and reduce its Opacity to 70-80%. (The red color shows where do you need to paint over with the Brush Tool)

Step 18
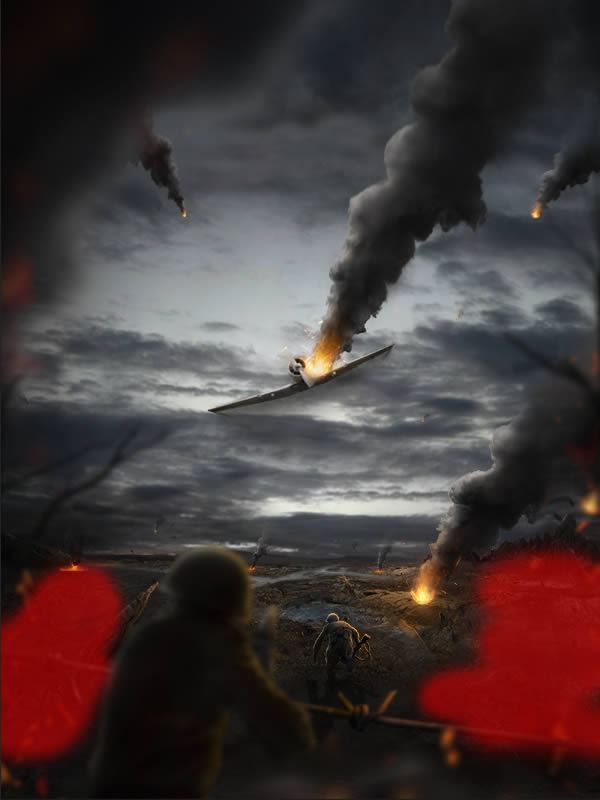
Create a new layer above all and hit Cmd/Ctrl + G to group it. Name this one Particles. Grab a hard round brush (around 2-10px) set the Hardness to 100% and draw some small shapes as I did using a dark grey (#242424). (For each explosion draw the shapes/particles in different layers in order to edit them later easier)
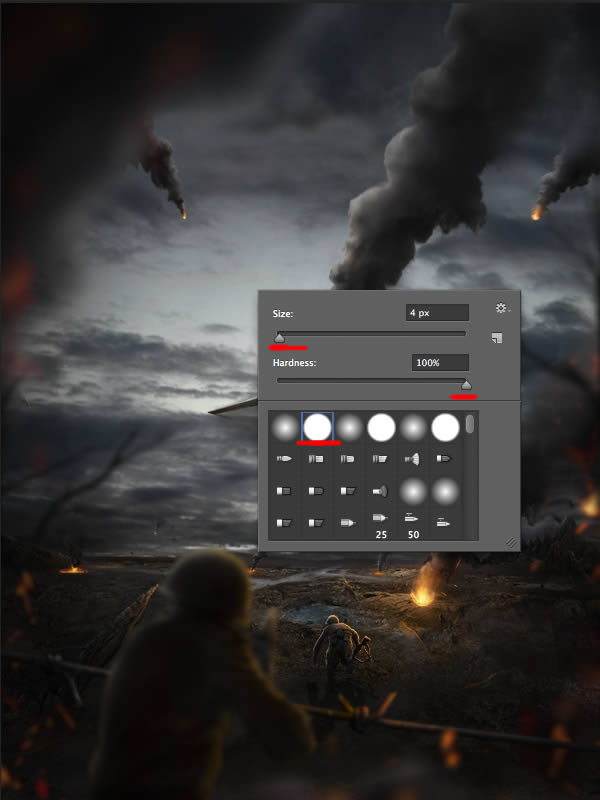

Go to Filter > Blur > Motion Blur. Play a bit with the settings. There’s nothing much to explain here, it must work for your and for your taste. If you don’t like this idea (working with Motion Blur), then select a soft round brush around 2-10px and change its Opacity to 50-60% and on a new layer above all (but in the Particles group) start drawing some light lines using the same color (#242424).
Use the same technique to create the other flying particles and shapes. It’s all about experimenting at this stage. You can Use Gaussian Blur, Motion Blur, Brush Tool – whatever you like to get the same result.

Step 19
Now that we are done creating our work its time to color correct the overall image. Create a new Gradient Map adjustment layer above all using the settings below.
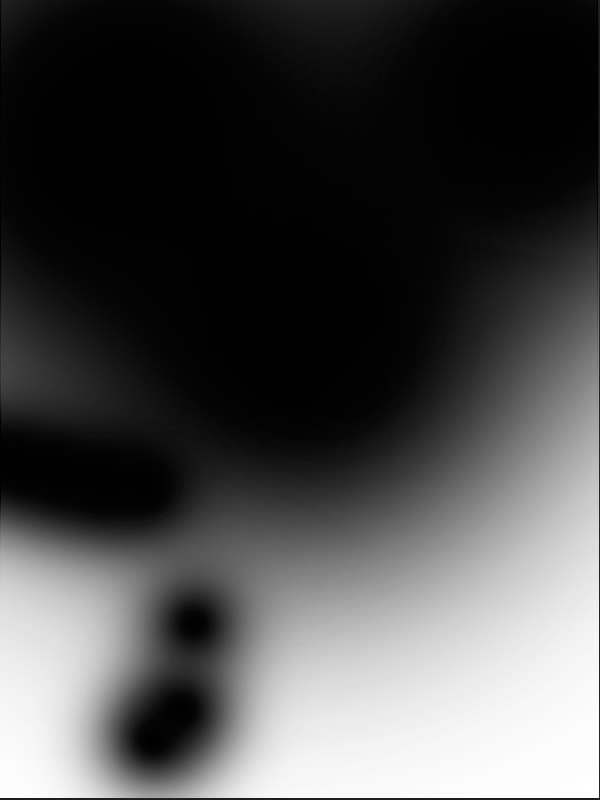
In the Gradient Map Layer Mask start painting with a soft round brush around 80-90px set to black for the Foreground Color as shown below. (The image is the Gradient Map Layers Mask – the black shows where do you need to paint)
When you are done change the Blending Mode of the Gradient Map to Screen and reduce its Opacity to 13%.

Create a new Gradient Map adjustment layer above all using the settings below.
In the Gradient Map Layer Mask start painting with a soft round brush around 80-90px set to black for the Foreground Color as shown below. (The image is the Gradient Map Layers Mask – the black shows where do you need to paint)
When you are done change the Blending Mode of the Gradient Map to Screen and reduce its Opacity to 40%.
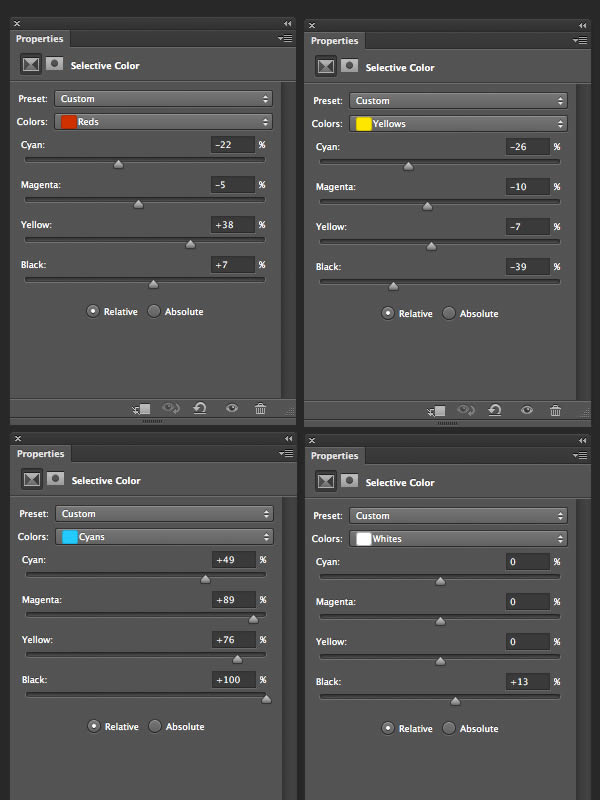
Create a new Selective Color adjustment layer above all using the settings below.
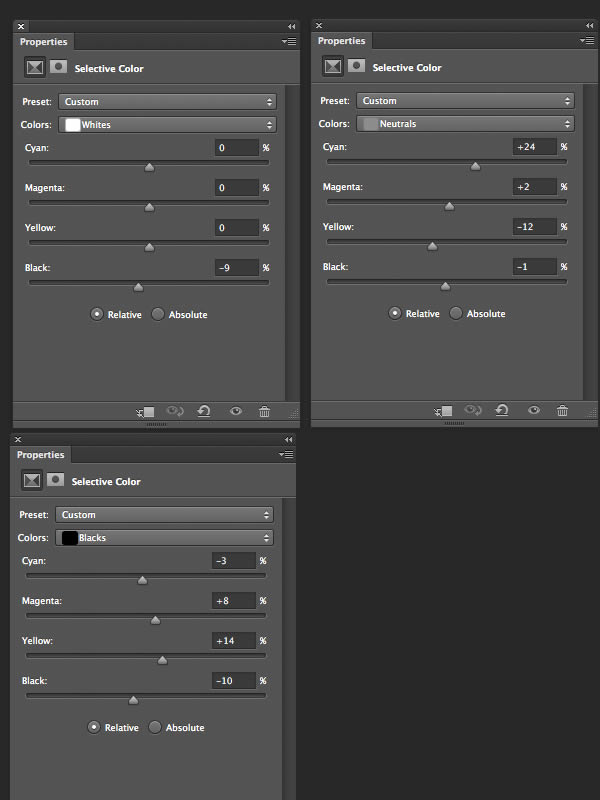
In the Selective Color Layer Mask start painting with a soft round brush around 80-90px set to black for the Foreground Color as shown below. (The image is the Selective Color Layers Mask – the black shows where do you need to paint)
When you are done change the Opacity of the Selective Color adjustment layer to 21%.
Create a new Color Balance adjustment layer above all using the settings below.
In the Color Balance Layer Mask start painting with a soft round brush around 80-90px set to black for the Foreground Color as shown below. (The image is the Color Balance Layers Mask – the black shows where do you need to paint)

When you are done be sure that the Color Balance adjustment layers Blending Mode is set to Normal and its Opacity is set to 100%.
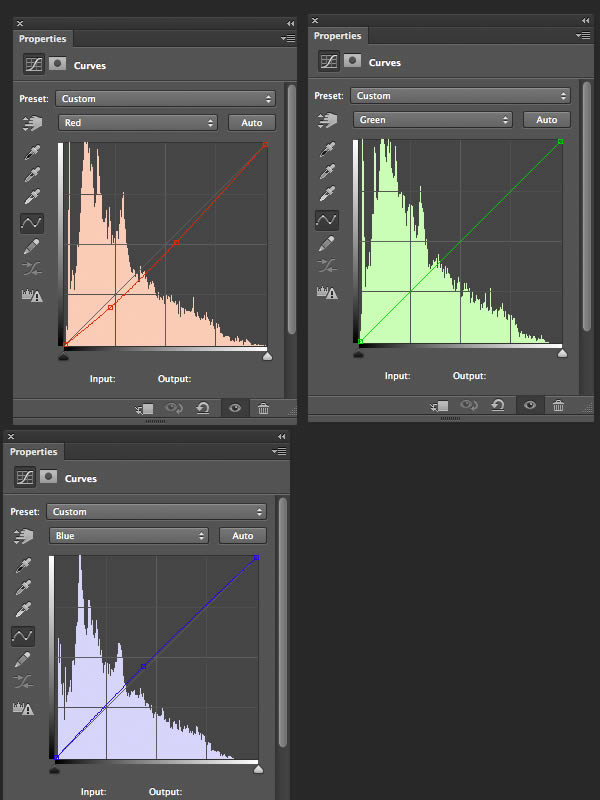
Create a new Curves adjustment layer above all using the settings below.
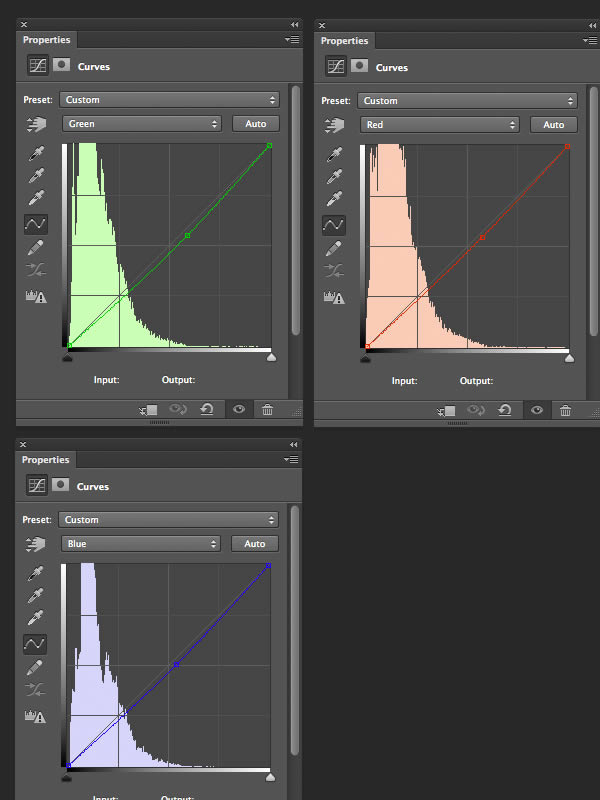
In the Curves Layer Mask start painting with a soft round brush around 80-90px set to black for the Foreground Color as shown below. (The image is the Curves Layers Mask – the black shows where do you need to paint).
When you are done be sure that the Color Balance adjustment layers Blending Mode is set to Normal and its Opacity is set to 100%.
Create a new Selective Color adjustment layer above all using the settings below.
In the Selective Layer Mask start painting with a soft round brush around 80-90px set to black for the Foreground Color as shown below. (The image is the Selective Layers Mask – the black shows where do you need to paint).
When you are done be sure that the Selective Color adjustment layers Blending Mode is set to Normal and its Opacity is set to 100%.
Create a new Gradient Map adjustment layer above all using the settings below.
In the Gradient Map Layer Mask start painting with a soft round brush around 80-90px set to black for the Foreground Color as shown below. (The image is the Gradient Map Layers Mask – the black shows where do you need to paint)

When you are done change the Blending Mode of the Gradient Map to Overlay and reduce its Opacity to 7%.

Create a new Gradient Map adjustment layer above all using the settings below.
In the Curves Layer Mask start painting with a soft round brush around 80-90px set to black for the Foreground Color as shown below. (The image is the Curves Layers Mask – the black shows where do you need to paint)
When you are done be sure that the Curves adjustment layers Blending Mode is set to Normal and its Opacity is set to 17%.
Create a new Exposure adjustment layer above all using the settings below.

In the Exposure Layer Mask start painting with a soft round brush around 80-90px set to black for the Foreground Color as shown below. (The image is the Exposure Layers Mask – the black shows where do you need to paint)
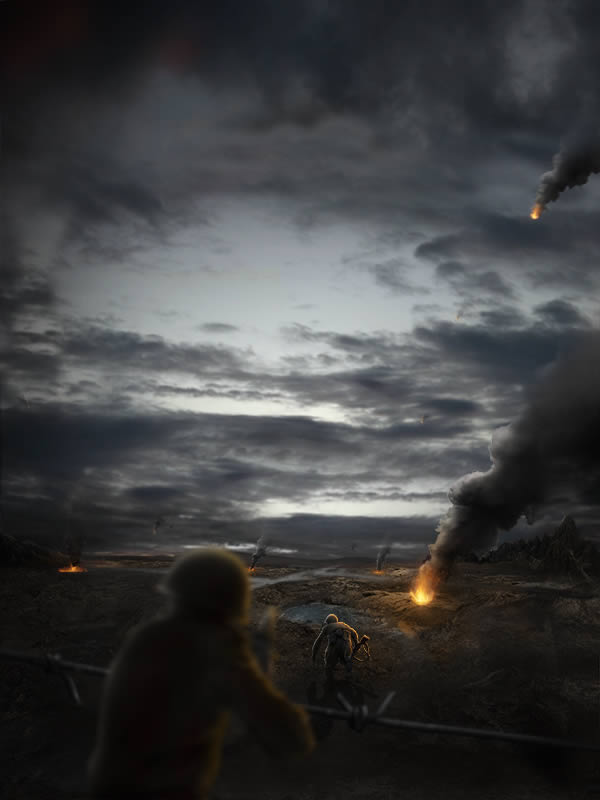
When you are done be sure that the Exposure adjustment layers Blending Mode is set to Normal and its Opacity is set to 45%.

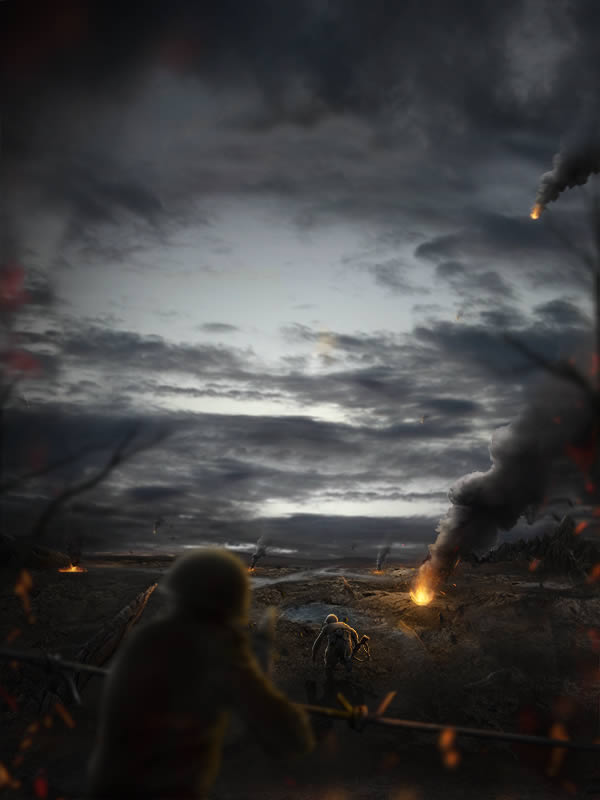
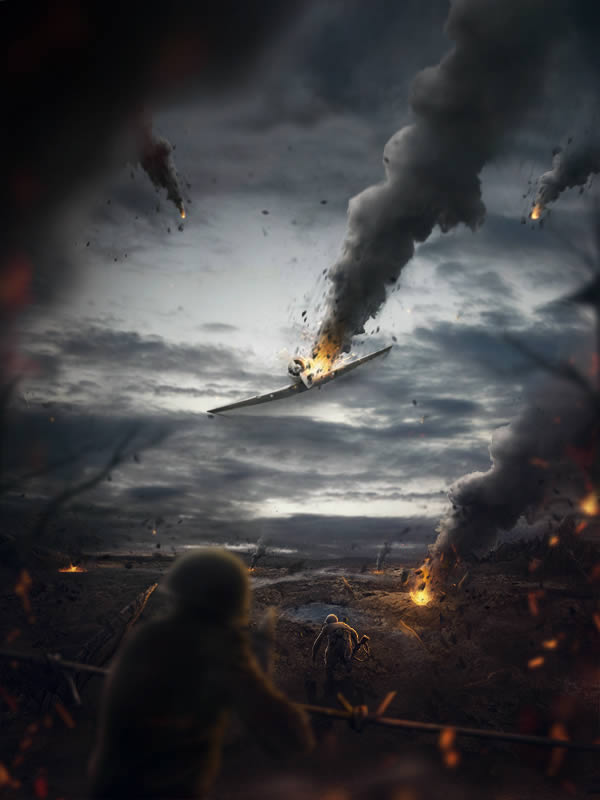
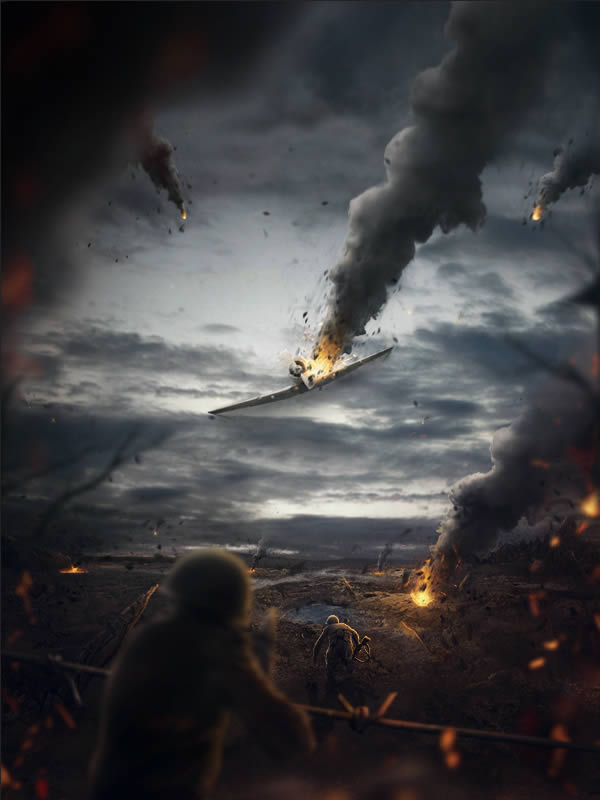
Final Image