Today we will be looking at how to remove green screen in Photoshop! Using only built-in auto-select tools and a few adjustment layers, you can perform a quick and simple background swap on any green screen photo.
In a hurry? Swap backgrounds, automate your workflow, and chroma key in Photoshop using one of the thousands of premium Adobe Photoshop green screen removal plugins and actions found on Envato Elements!


But what if you prefer to watch video tutorials instead? Don’t worry! You can watch this new video from the Envato Tuts+ YouTube channel to learn how to do chroma key in Photoshop:
What You’ll Learn in This Green Screen Photoshop Tutorial
- How to chroma key in Photoshop
- How to change a green screen background in Photoshop
- How to use green screen in Photoshop
- How to blend images in Photoshop
- How to create a color grade in Photoshop
What You’ll Need
To complete this green screen Photoshop tutorial, you’ll need the following resources:
1. How to Remove Green Screen in Photoshop
Step 1
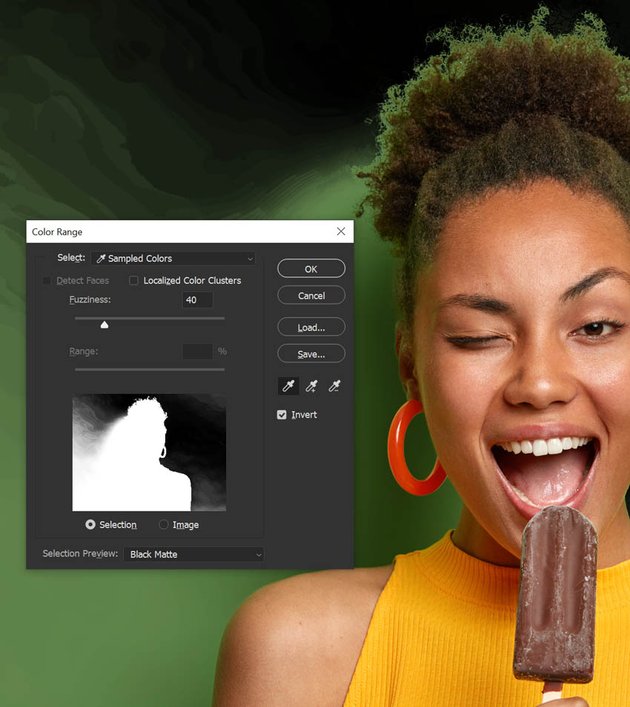
We’re going to start with how to chroma key in Photoshop.
Photoshop has several ways you can do this. A personal favorite of mine is the Select Subject button. However, a tool that works even better is Select > Color Range.
Let’s look at the settings:
- Fuzziness: 40. This can change from image to image but is a good starting point
- Selection Preview: Black Matte. This is just my personal preference.
- Invert: Checked


Step 2
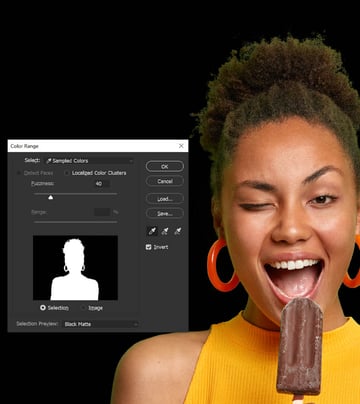
From here, we’re going to select a portion of the green screen with the Eyedropper tool.
Then hold down Shift and keep selecting all of the green background.
If you select too much, you can always hit Control-Z to undo. And once you’re happy, hit OK.


Step 3
Next, add a layer mask to your subject. The mask will auto-fill in the shape of the selection.
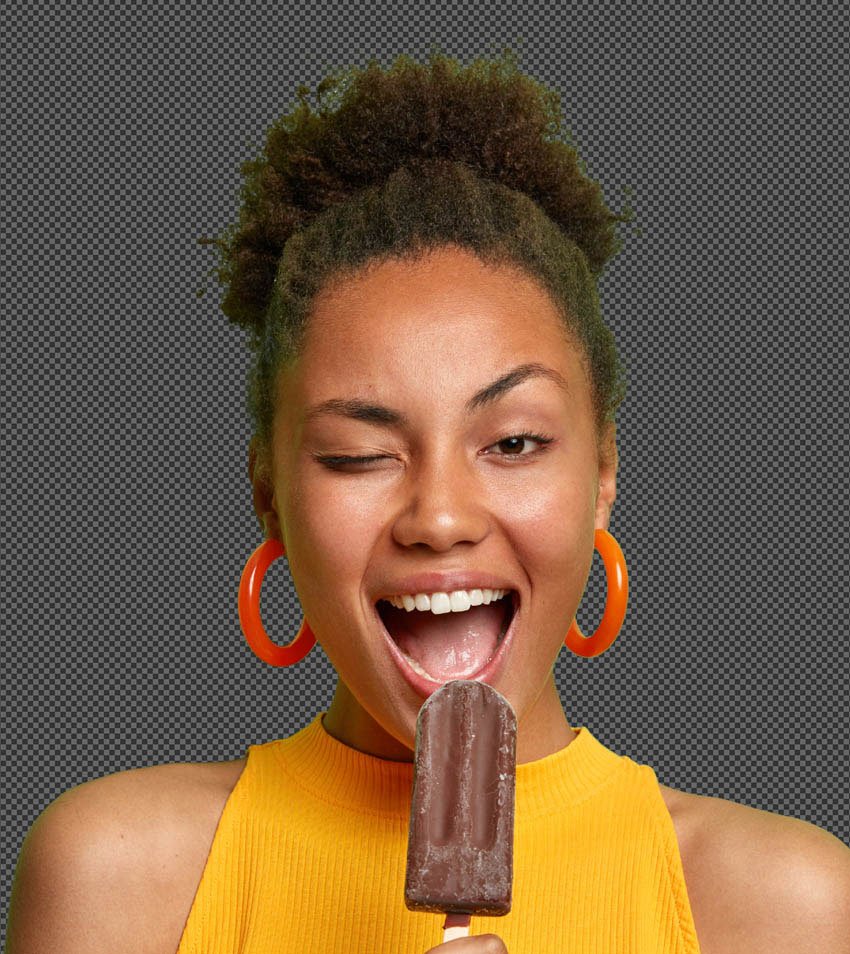

Step 4
Now that we’ve removed the green screen in Photoshop, it’s a good time to drag and drop or switch on your new background.


Step 5
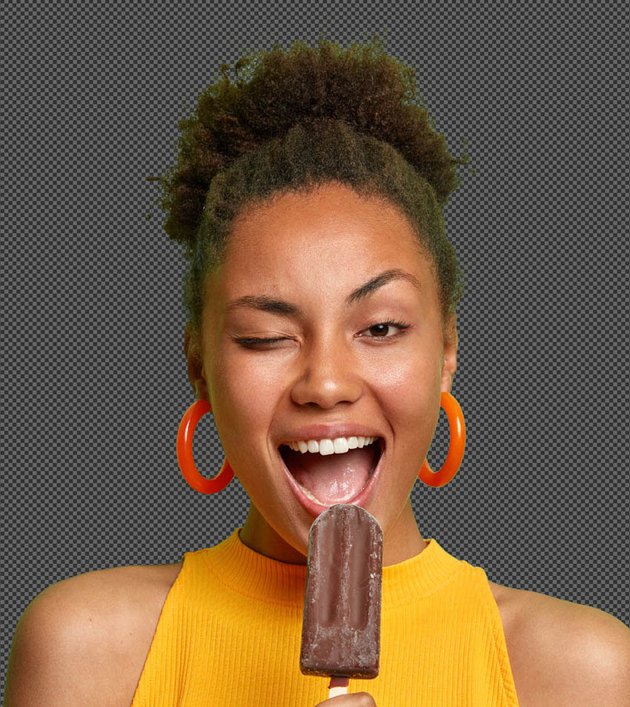
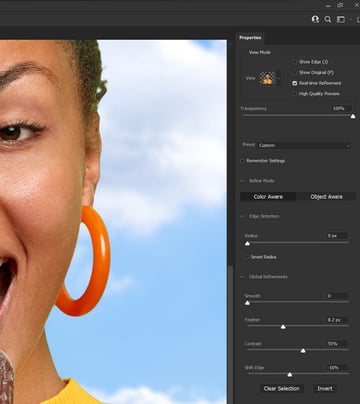
The mask is looking pretty good, but it’s definitely not perfect. Let’s double-click the layer mask and go into Select and Mask.
In Select and Mask, I prefer to use a combination of the Feather, Contrast, and Shift Edge properties to smooth out the jaggedness of a mask.
Every image will be slightly different, but you can always zoom in and mess with the sliders until your edge is looking a lot smoother.
My settings for this image are:
- Feather: 8.2
- Contrast: 55%
- Shift Edge: -16%
Keep in mind that we’re only looking at the body right now, not the hair.


Step 6
After Select and Mask, you might end up with some fringe edges left over.
We can knock those out first by holding Control and selecting the layer mask. That’ll create a selection around the subject.
Next, let’s go to Select > Modify > Contract and Contract by 2. If 2 seems too strong, you can also try 1.
And then we are going to Select > Inverse to invert the selection.
Now, we can take a soft round black Brush, and mask out any areas that might have some leftover fringe edges of the green screen. You can also hand mask without the selection—the selection is there as a safety net.


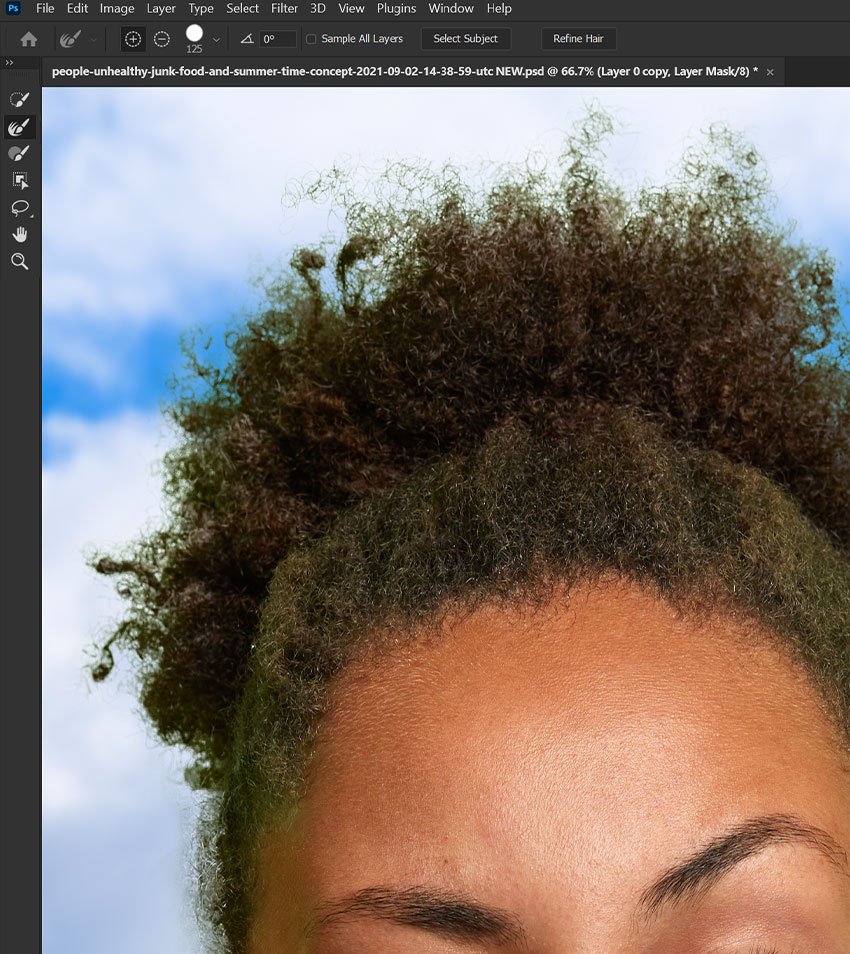
Step 7
Finally, let’s go right back into Select and Mask, choose the Refine Edge Brush, and hit the Refine Hair button found in the upper Options toolbar.
If Refine Edge takes away too much hair, you can hold down Alt, and reselect the hair with the Refine Edge Brush.
You can also add in areas that Refine Hair might have missed, but that is how you remove a green screen in Photoshop, but we still have the green cast to deal with.


2. How to Remove a Green Cast in Photoshop
Step 1
With the mask done, we can start to work on removing the green cast created by the green screen.
First, create and clip a Hue/Saturation adjustment layer into the subject.
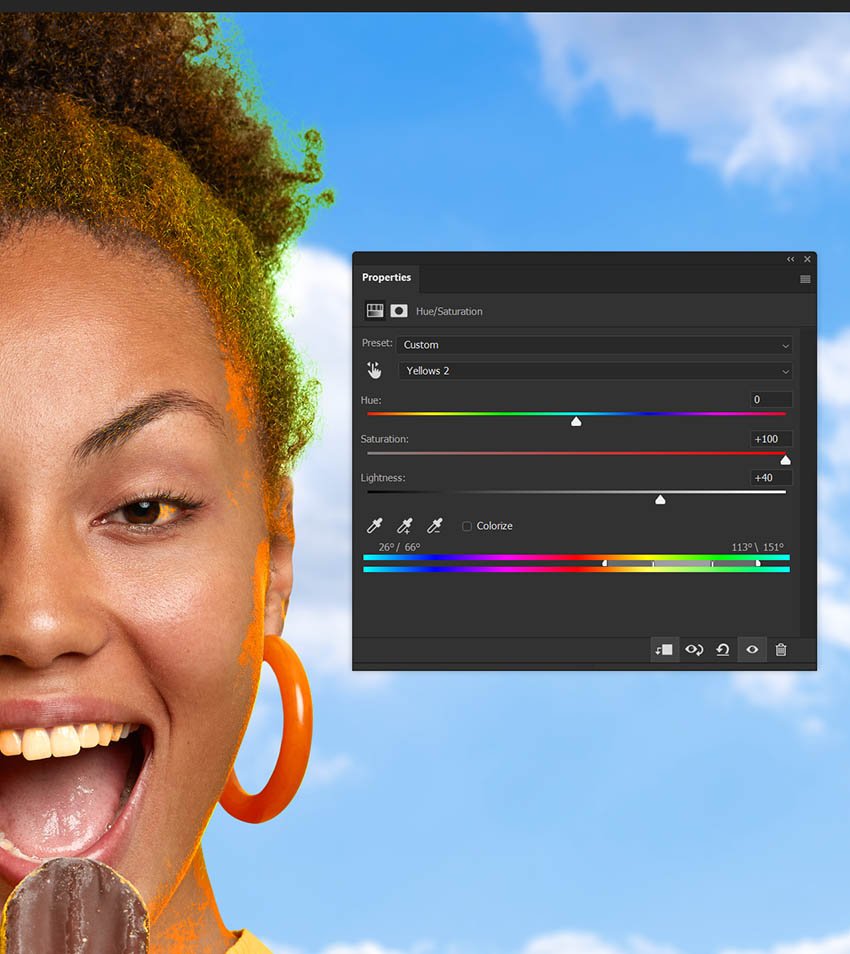
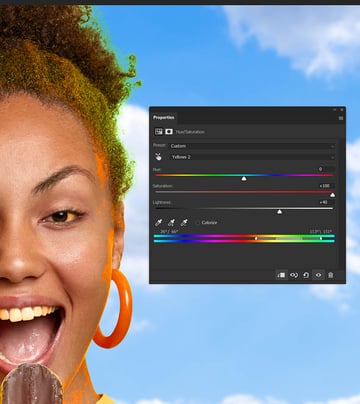
Step 2
Next, from the Master dropdown menu, select either Green or in some cases Yellow. That’s because the green cast of a green screen can lean more to yellow, especially on skin tones.
This is even more likely if the green screen is more lime green than a blue-toned green. Try both, and see which works best for your image. For this image, Yellow ended up being the way to go.
You can test which works better by setting the Hue to 100 and seeing which portions of the image are being affected.
Use the bottom Color slider to further adjust the color selection range.

Step 3
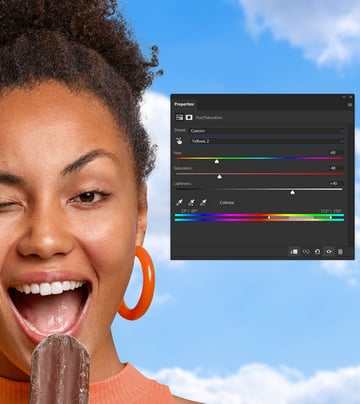
Once we know that the greens are being grabbed, we can adjust the rest of our sliders.
Each image will vary in settings, but as a general rule of thumb, I like to decrease the Saturation, increase the Brightness, and then match the Hue to the skin tone.
My exact settings were:
- Hue: -60
- Saturation:-48
- Lightness: +40


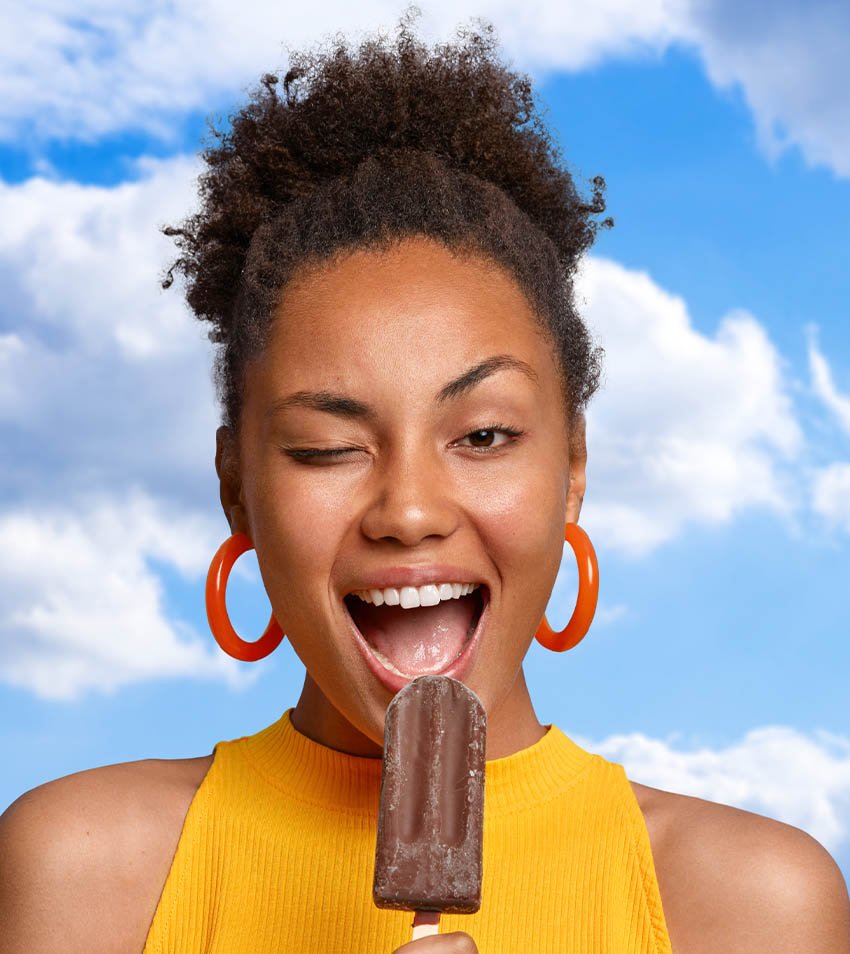
Step 4
You can finish off the adjustment layer by masking out any areas you don’t want.
In this case, the model’s shirt was turned a muted orange, but I’d like to keep that bright yellow, so I masked it out.


3. How to Blend an Image Into a Background in Photoshop
Step 1
These next steps are absolutely optional, but when looking at how to change green screen backgrounds in Photoshop, keeping the new environment in mind is a good idea.
Since we placed the subject in a much brighter environment, we can add some quick layer adjustments to help blend her into her new background.
Start with Image > Adjustments > Brightness/Contrast set to Brightness: 11 and Contrast: -18.
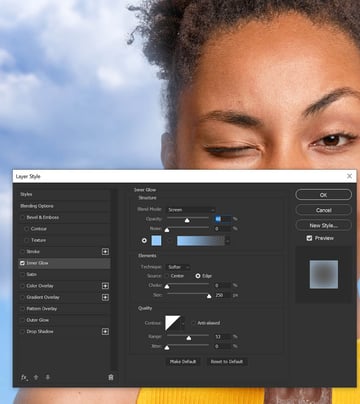
Step 2
And then add an Inner Glow layer style set to Screen and a very soft light blue #95c9f9 color. Here are my exact settings:


4. How to Add Backlit Hair in Photoshop
Step 1
Another trick for really bright environmental swaps is to add in some backlit hair. Start by Duplicating the subject, bringing the duplicate below the original.
Step 2
Turn that hair white using Image > Adjustments > Hue/Saturation with a Brightness of 100.


Step 3
And then we can enlarge and flip the hair horizontally, masking out any extra white and giving the effect of sunlit strands.


5. How to Create a Color Grade in Photoshop
Step 1
Last but not least, adding a color grade over your image can help even out tones, giving everything a more cohesive look.
I created a super quick and vibrant color grade using just two Color Lookup adjustment layers. The first is:
- 3DLUT: 3Strip
- Opacity: 40%
Step 2
And a second Color Lookup adjustment layer set to:
- 3DLUT: Fall Colors
- Opacity: 20%


You’re Done!
And that’s how to use green screen in Photoshop—also known as chroma key in Photoshop. The last few steps are not even necessary. That is how quick extracting an image from a green screen can be. Color Range will do most of the work for you, and then Refine Edge will take care of the rest. Whether you want to add lighting effects from layer styles or even layer modes is completely up to you!
In a Hurry?
If you’re wondering how to do chroma key in Photoshop even quicker, without sacrificing quality, try one of these fast masking and other helpful utility add-ons, plugins, and actions!
Subtract Background Adaptive Action (ATN)
This Adobe Photoshop green screen removal tool works on other colors as well. It’s ideal for items that are on flat simple backgrounds, and it keeps all of the item’s ordinal shadows for super easy compositing.
Easy Cut: Layer Splitting Kit (ZXP)


If you’re looking to make quick and clean cuts, try out the Easy Cut Photoshop Plugin. Create instant horizontal and vertical guides and selections in a matter of seconds.
Sky Replacer Photoshop Actions (ATN)


Have a green screen image and need to add a quick sky? Add a bright blue sky with the perfect amount of crisp white clouds to any skyline, and then drop in your newly extracted green screen image.
Image Extend: Clipping & Expansion Kit (ZXP)


This Photoshop add-on quickly creates extra space on your canvas by extending the edges. Perfect for when you want more room, but don’t need to enlarge your image!