In this tutorial, we’re going to make a Minecraft Twitch overlay template. We’ll use screenshots from the game to create a custom stream overlay that you can use on Twitch or any other platform you prefer. You will need Minecraft, Adobe Photoshop, and streaming software of your choice. The result is a Minecraft overlay OBS ready design.
What You’ll Need
Here are the assets that are used in this tutorial:
- Pixel Rand Pixel Font
- Social Media Icons
- Screenshots from Minecraft
You are welcome to download these assets and use them in your Minecraft Twitch overlay template, or use any content of your choice. You’ll also need to take some screenshots within the game. We’re going to use them to make our overlay graphics.
1. How to Use Minecraft Screenshots to Make a Custom Stream Overlay
Step 1
First, open up Minecraft. You’re going to need to take a few screenshots, as we’re going to use them to create graphics for our custom stream overlay.
Note, your Minecraft screenshots can come from any version of the game you prefer. In this tutorial, my screenshots are taken from the PC version, on Windows 10. If you don’t know how to take screenshots in Minecraft, you can check out the official guide right here.
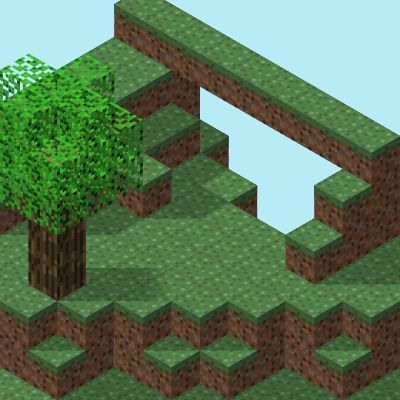
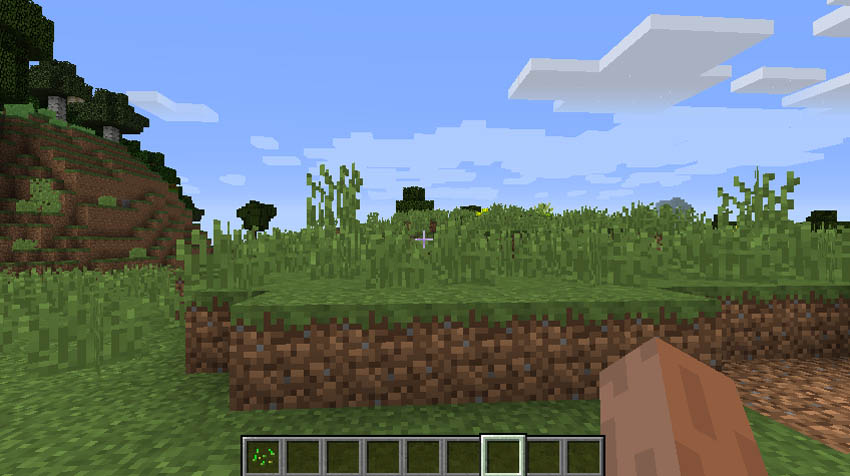
For our first screenshot, make sure to get a picture of a straight line of grass blocks, as shown in my screenshot below.
Step 2
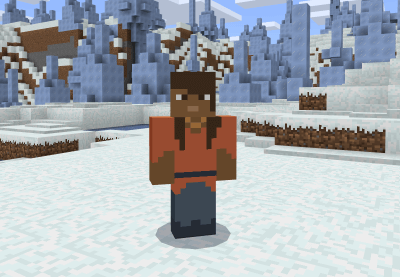
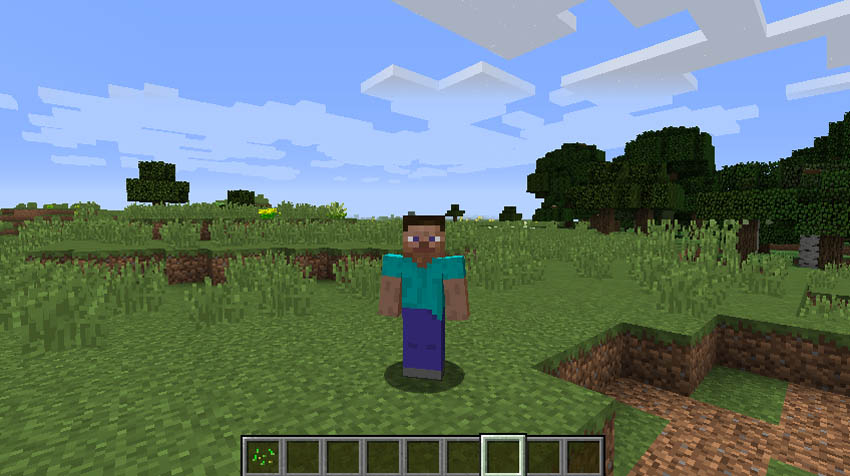
For our second screenshot, we need to get a picture of our avatar character. Change the camera view so you can see your character, before taking your next screenshot.
It will be easier to make edits here if your character is facing the front. However, you can use any angle here you prefer. Just keep in mind that you may need to make extra edits.
We’re going to use Minecraft Steve in this example—but you can go with a different skin for your avatar to reflect your taste and personality!
Step 3
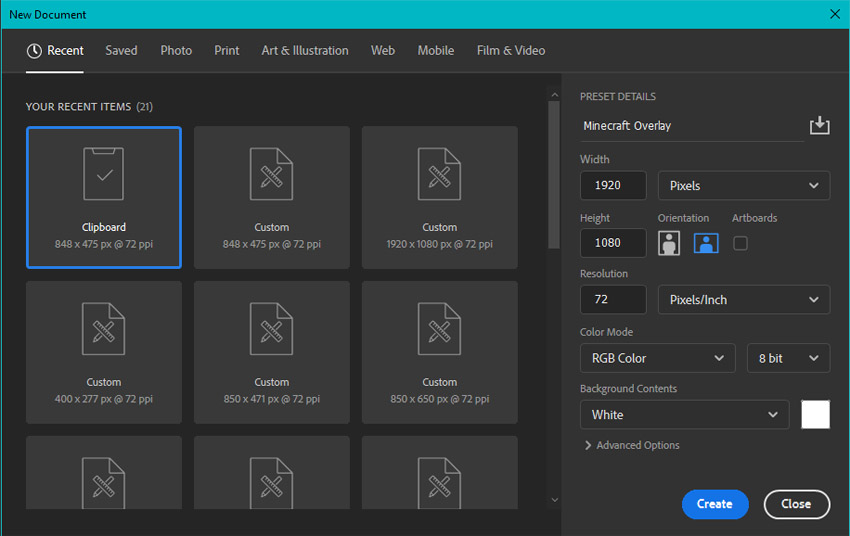
Now, create a New Document in Adobe Photoshop. We want our dimensions to be 1920 pixels wide by 1080 pixels high. This is a common recommendation for custom overlays. If you want your overlay to be a different size, put in different dimensions here.
Once you’re happy with these values, click Create to create your document.
Step 4
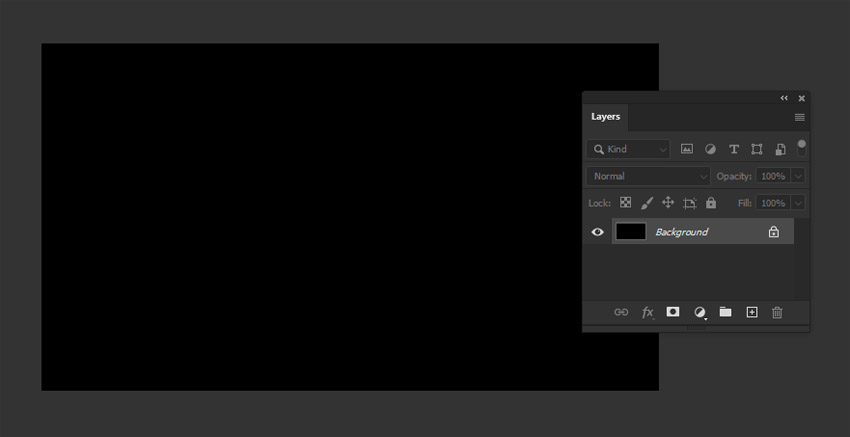
Before we add content to our new document, let’s use the Paint Bucket Tool to turn the background color Black.
Step 5
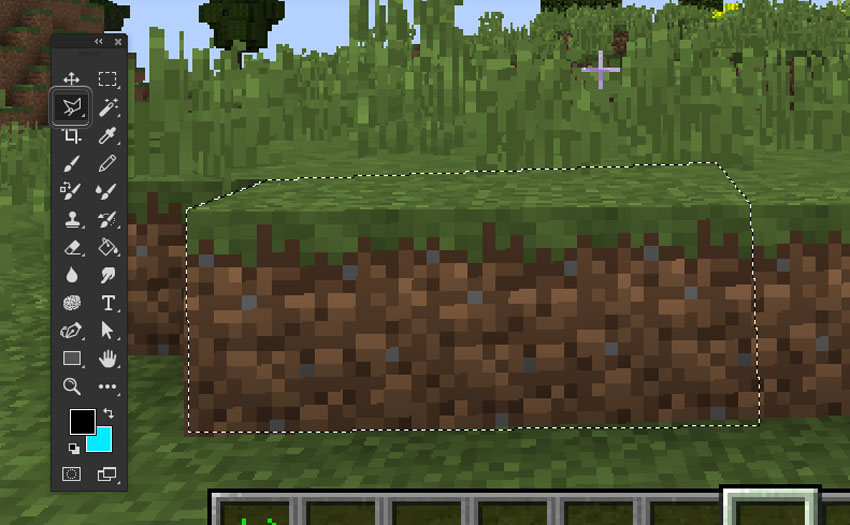
Next, open your first screenshot in Adobe Photoshop. We’re going to select the grass blocks using the Polygonal Lasso Tool.
This is a great tool for this job, because it makes it easy to make an angular selection. Just click on each corner until the grass is selected.
Once you’ve made your selection, Copy this content by going to Edit > Copy.
Step 6
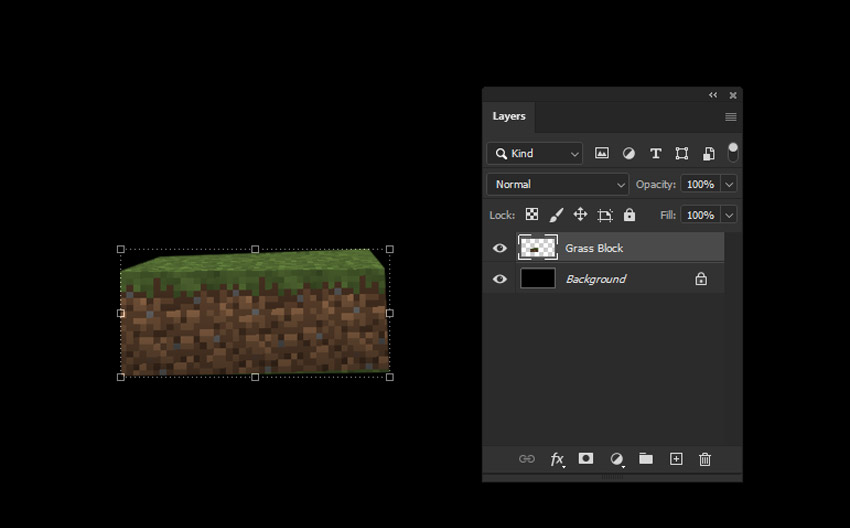
Paste our grass blocks into our New Document. You’ll notice that Photoshop pastes it onto a New Layer. If you don’t see the Layers panel, open it up by going to Window > Layers.
Tip: You can name your Layers by clicking on the Layer Name. This is optional, but can help keep things organized.
Step 7
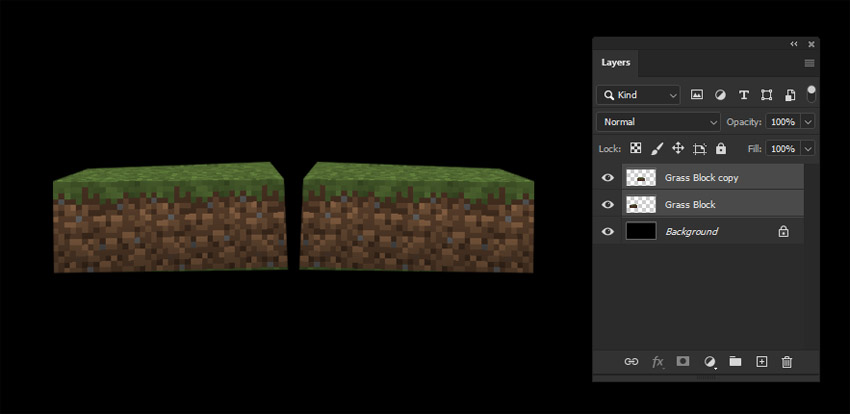
Next, duplicate the layer with our grass blocks on it. You can right-click on PC or Control-click on Mac on the layer and select Duplicate Layer.
Mirror or flip this extra grass by going to Edit > Transform > Flip Horizontal. Now, we have a mirrored copy of our original glass blocks.
Step 8
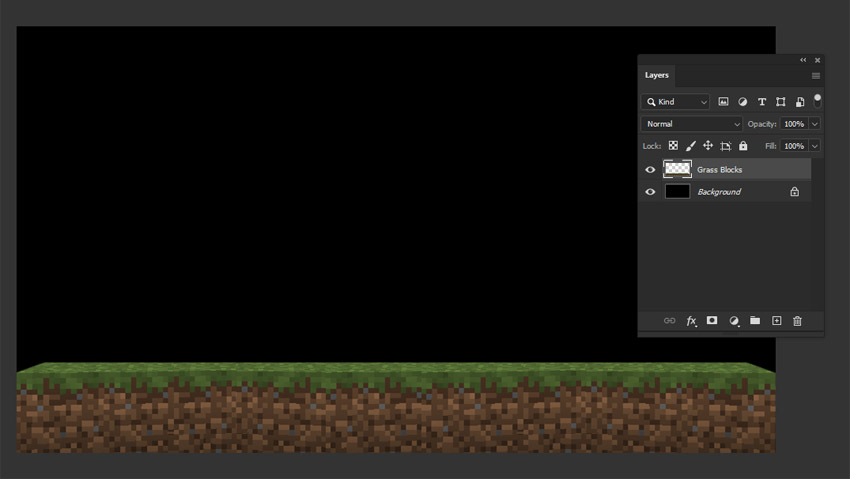
Use the Move Tool to position your grass blocks so they make a straight line across the bottom of your custom stream overlay. If you need to make more copies to fill this space, repeat Step 5. Try to make the pixels match up, so that the line of grass blocks looks seamless.
You can also select any excess content with the Rectangular Marquee Tool. With the extra content selected, press Backspace to delete.
If you’re happy with your content, you can select your layers by holding down Control on PC or Command on Mac, and clicking on them. With the multiple layers selected, you can go to Layer > Merge Layers to merge them into one layer.
Warning: Make sure you want to merge them together before you do this!
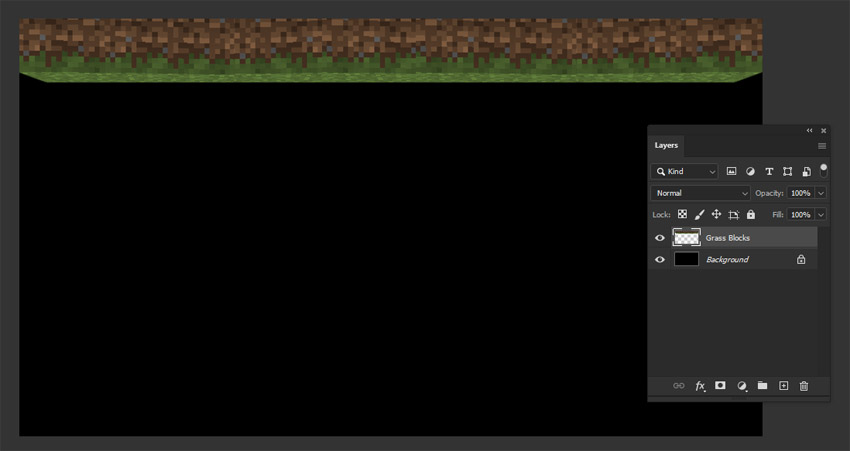
Step 9
We could leave our grass blocks at the bottom of the overlay if we wanted to. However, they might block some of Minecraft’s UI elements, and viewers will likely want to see them. Instead, let’s flip them around and move them to the top of the overlay.
With your grass blocks layer selected, go to Edit > Transform > Flip Vertical. Then, use the Move Tool to move the grass blocks to the top of your custom overlay.
2. How to Make a Twitch Overlay for Minecraft
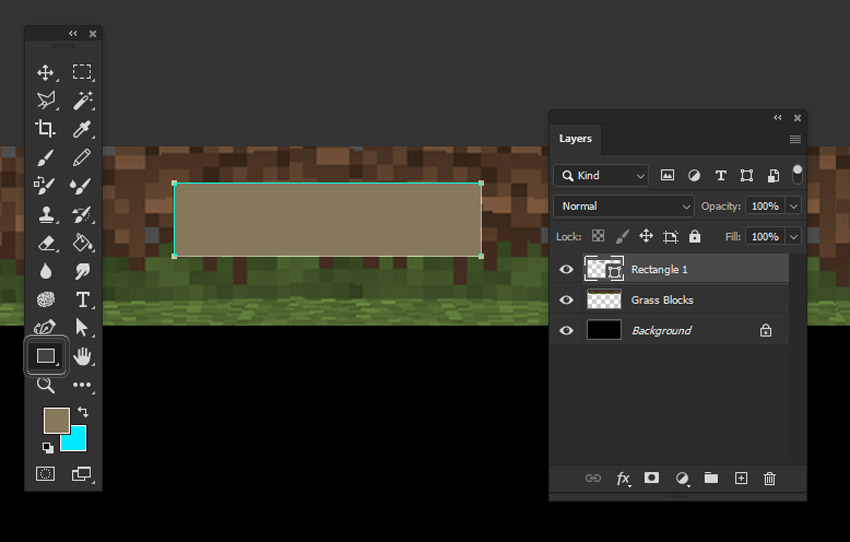
Step 1
Next, let’s use the Rectangle Tool to draw a white rectangle at the top of our overlay. Make sure your Fill Color is a light green color and your Stroke Color is off.
The light green color’s hex code is #86795a, if you would like to match it exactly.
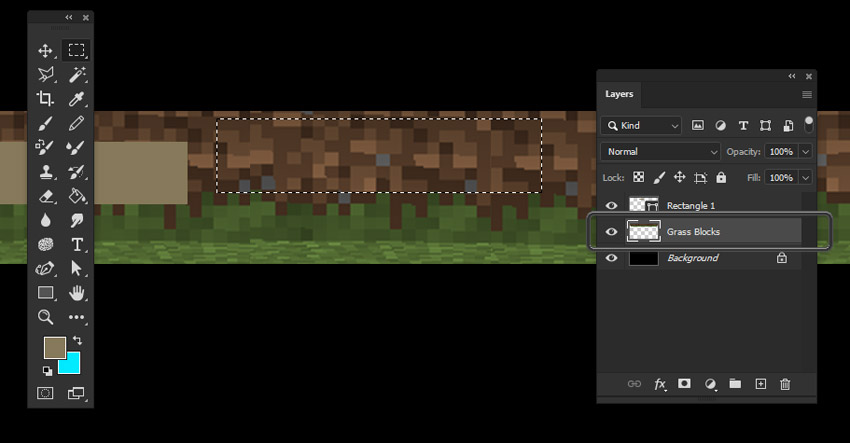
Step 2
Go back to your grass blocks layer. Select a portion of the brown dirt with the Rectangular Marquee Tool. Then, copy this content by going to Edit > Copy.
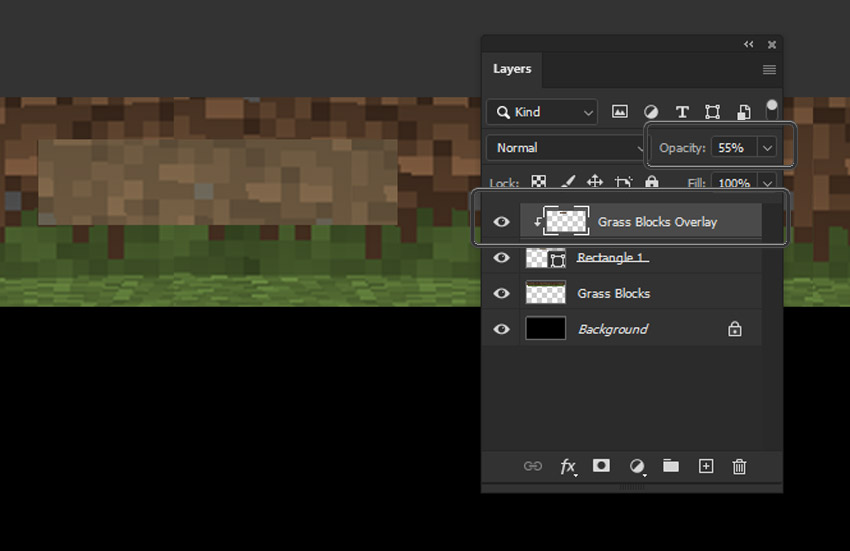
Step 3
Go to Edit > Paste to paste what we just copied. Go to your Layers panel and drag this newly pasted layer on top of our rectangle layer.
Once you’ve done so, right-click on PC or Control-click on Mac, and select Create Clipping Mask. Lower the Opacity of this layer to 55% so we can partially see through it.
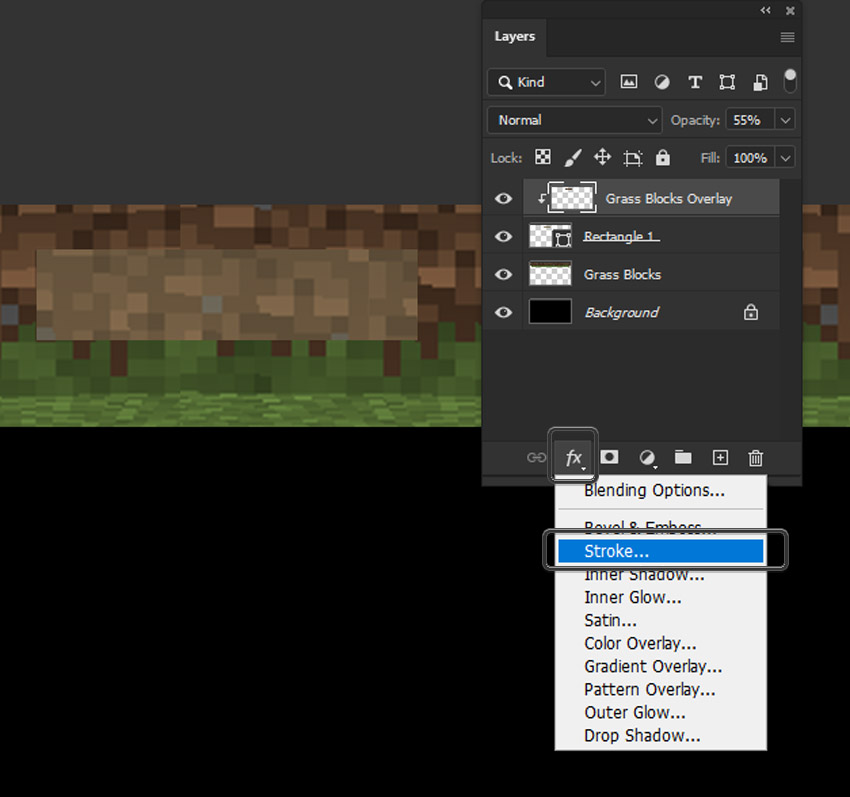
Step 4
Next, let’s add some effects to this box. In the Layers panel, click on Layer Effects, and then select Stroke.
Step 5
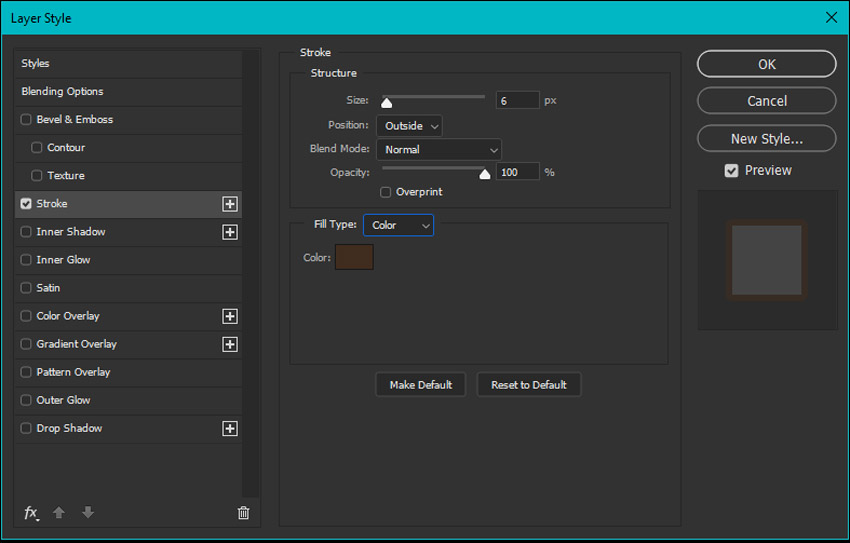
Here are some suggested values to use here:
- Size: 6 pixels
- Position: Outside
- Blend Mode: Normal
- Opacity: 100%
- Fill Color: Dark Brown (
#402c1e)
If you want to preview how this looks, remember to toggle Preview On. Once you’re happy with how it looks, click OK.
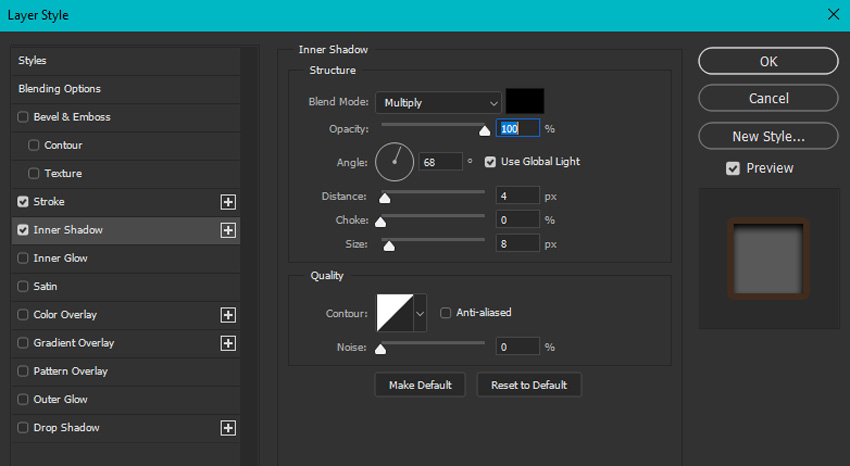
Step 6
Repeat this process, but this time select Inner Shadow instead of Stroke. Here are some suggested values to use:
- Blend Mode: Multiply
- Opacity: 100%
- Angle: 68%
- Distance: 4
- Choke: 0
- Size: 8
Again, you can toggle Preview On to see how these values look. Click OK once you’re happy with the results.
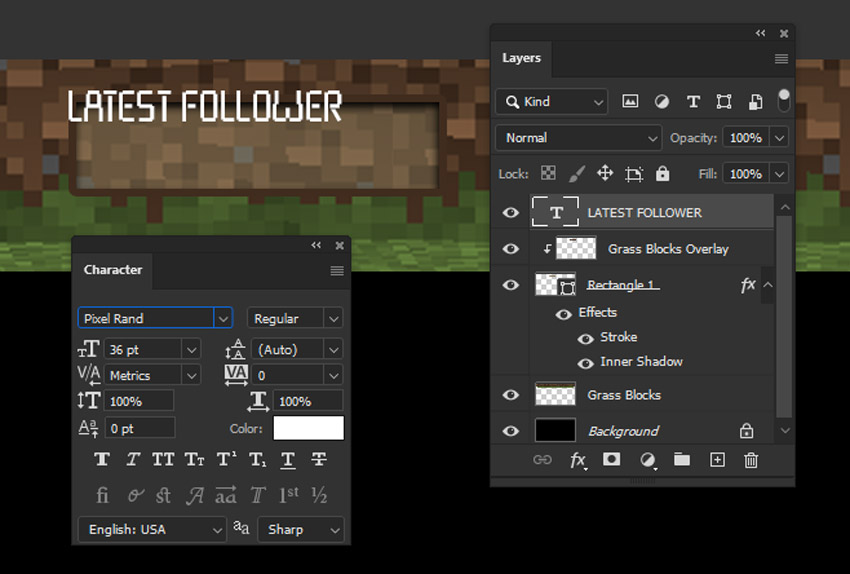
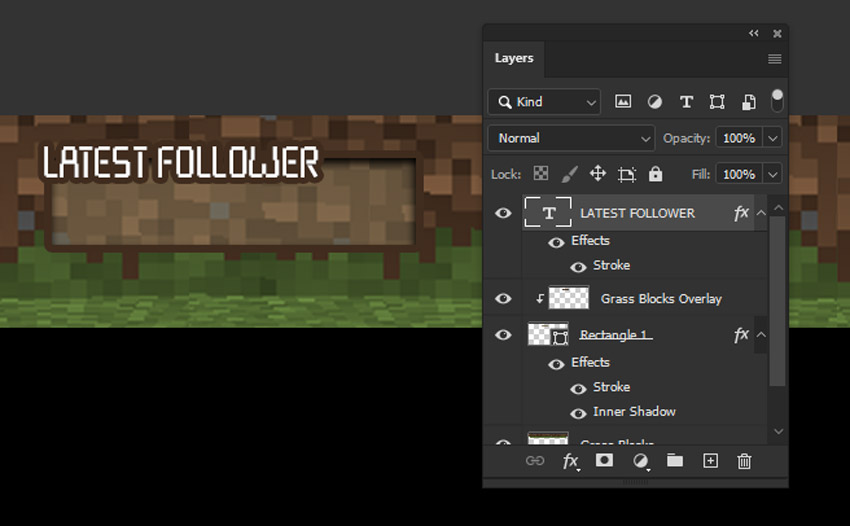
Step 7
Next, let’s add some text to the top of this box. Select the Text Tool. Then, click to begin typing. I’m going to make this a space to display my Latest Follower.
You can change the font via the Character panel. Go to Window > Character to open it up. I’m using the Pixel Rand font.
Step 8
Let’s add a matching Stroke to this text. As we did before, go to the Layer Styles and select Stroke.
Apply the following Stroke to your text:
- Size: 5 pixels
- Position: Outside
- Blend Mode: Normal
- Opacity: 100%
- Color: Dark Brown (
#402c1e)
Again, you can choose any values you like. These are just a recommendation. Once you are happy with the result, click OK. It should look something like this example:
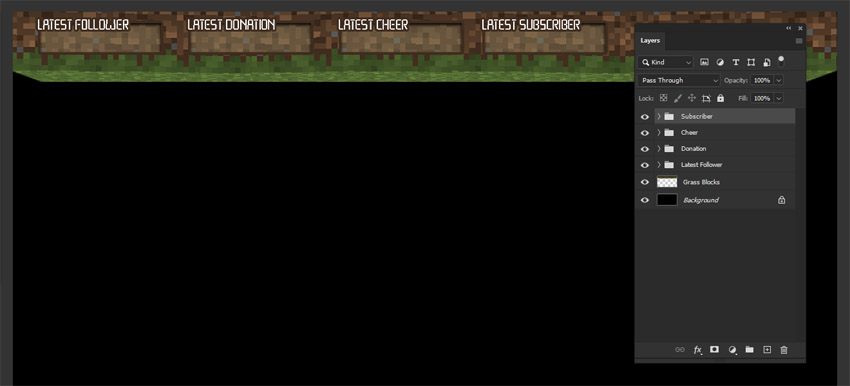
Step 9
Select the layers that make up our New Follower area. Remember, you can hold down Control on PC or Command on Mac to select more than one layer.
Then, click on the folder icon to put this content in a folder.
We can then copy the folder, by right-clicking on it on PC or Control-clicking on it on Mac and then selecting Duplicate Group. Give your duplicated group a name, and then click OK.
Now, use the Move Tool to move this copy over. We can rename and duplicate as many of these boxes as we’d like, for as many sections as we’d like. Just use the Text Tool to edit the text.
Step 10
Next, let’s use the techniques we’ve already used to create more content in our custom overlay.
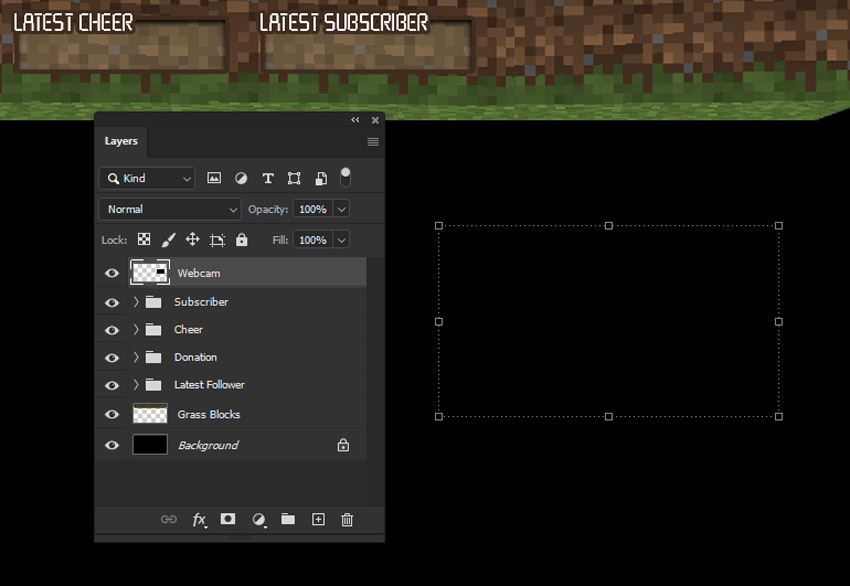
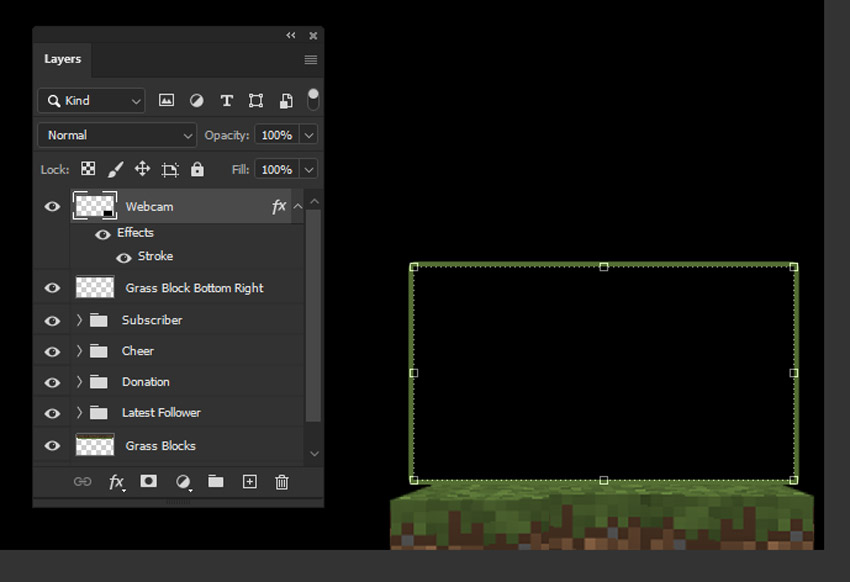
First, let’s make a space for our Minecraft webcam overlay. Many webcams are 1920×1080 pixels, but yours might vary. Make sure to check out and find this dimension.
To make sure we get just the right size, we can select our background layer. With the background layer selected, go to Select > All. Then, go to Edit > Copy. And go to Edit > Paste.
Go to Edit > Free Transform, and drag the resize handles until this pasted rectangle is the size you’d like your webcam. We know it’ll match 1920×1080, because we pasted it from that document size.
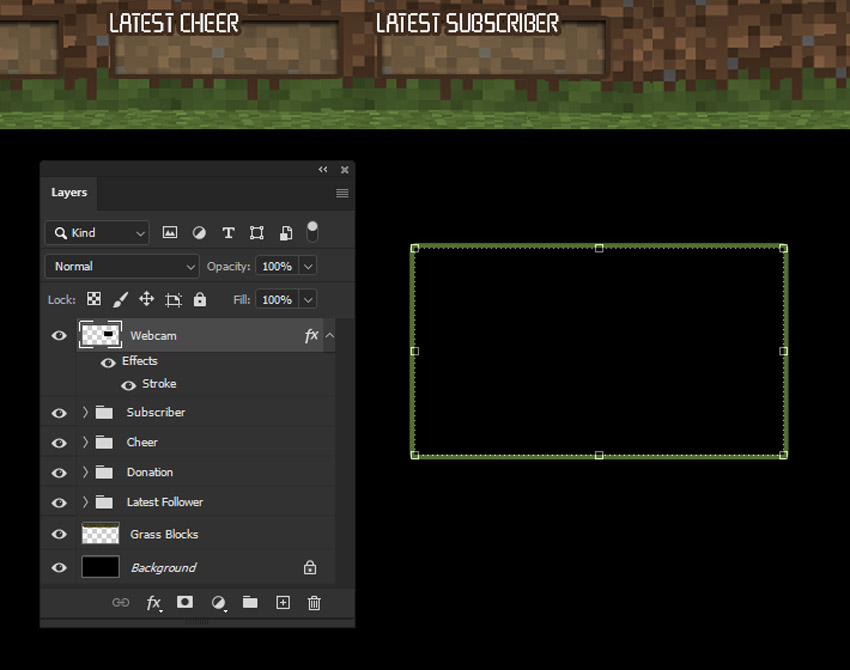
Step 11
Let’s give our webcam space a matching Stroke. Go to your Layer Effects again, select Stroke, and try out the following suggested values:
- Size: 6
- Position: Outside
- Blend Mode: Normal
- Opacity: 100%
- Color: Green (
#546e33).
Click OK when you’re happy with the results. Here’s what the end product looks like.
Step 12
Next, let’s add some grass blocks, so it looks as if our webcam is sitting on top of them. This will make it look more like a Minecraft webcam overlay, linking it to the blocky in-game aesthetic.
Go back to your grass blocks layer and select it. Use the Rectangle Marquee Tool to select part of the grass, and then go to Edit > Copy. Go to Edit > Paste to paste a copy of this content.
Then, we can flip it around by going to Edit > Transform > Flip Vertical. Use the Move Tool to reposition the grass blocks under the webcam space.
You can use the same techniques we used earlier to customize how your grass blocks look here. Copy, paste, and delete content, as needed, until you’re happy with how the grass block looks. Remember to try to make the pixels match up, so it looks natural.
Step 13
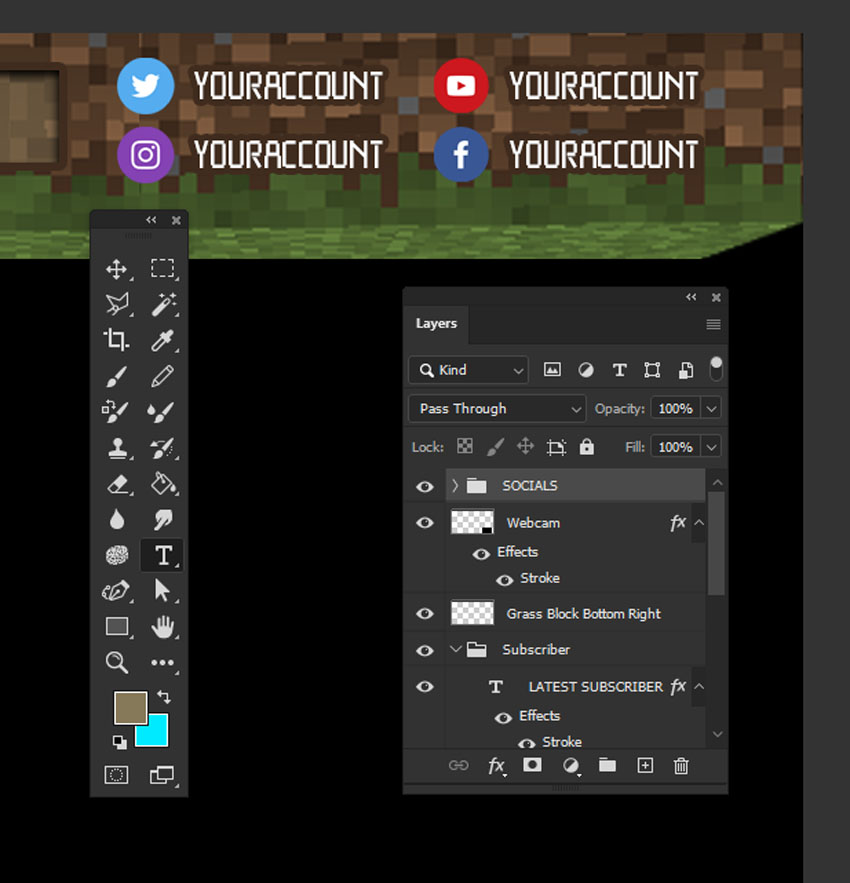
We can add other content to this upper area too. This could be a great place to share your social media, so your viewers know where to follow you.
I’m going to use these social media icons. You could use any icons you like, or you could stick with text.
Open your icons in Adobe Photoshop. Then copy and paste them into your custom stream overlay. Remember, you can find this under Edit > Copy and Edit > Paste.
Use the Type Tool to add text so your viewers know your user name.
3. How to Add Your Avatar to Your Minecraft Twitch Overlay Template
Step 1
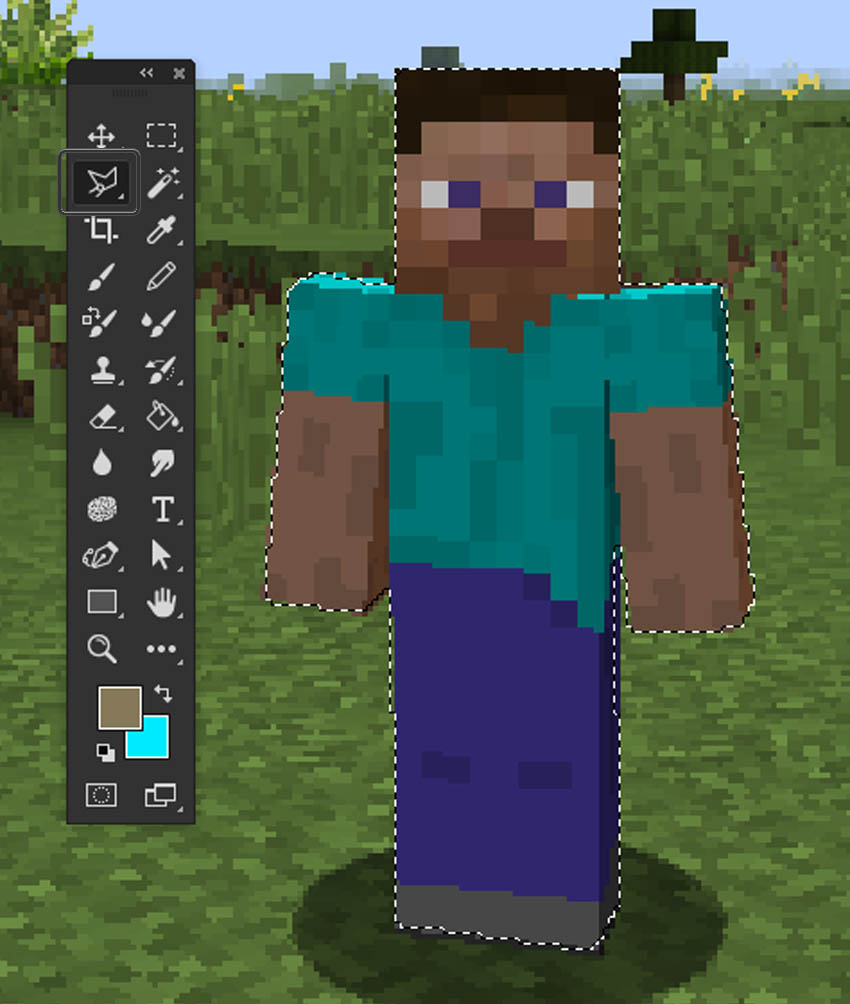
Let’s go back to our other screenshot—the one with our avatar in it. Open it up in Adobe Photoshop.
Then, let’s use the Polygonal Lasso Tool, as we did before, to carefully select our character. Remember, click on the corners of each angular shape to make a nice, straight selection.
Once you’re happy with your selection, go to Edit > Copy.
Step 2
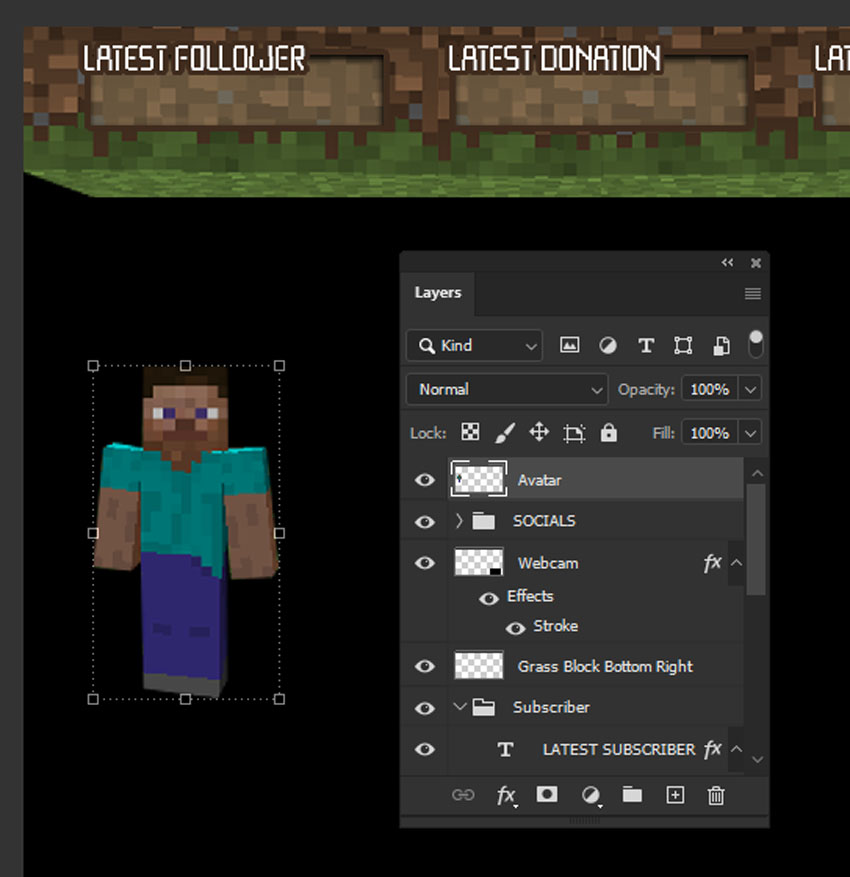
Now, go back to our custom stream overlay. Go to Edit > Paste to paste our avatar into the design.
Use the Move Tool to reposition the character. Go to Edit > Free Transform and drag the resize handles to resize the character.
Step 3
I thought it would be cute if the character was waving to the audience. We can use the Polygonal Lasso Tool to select the character’s arm.
Go to Edit > Cut, and then Edit > Paste to paste the arm on its own layer. Then we can go to Edit > Free Transform to rotate the arm so it looks as if it’s up and waving.
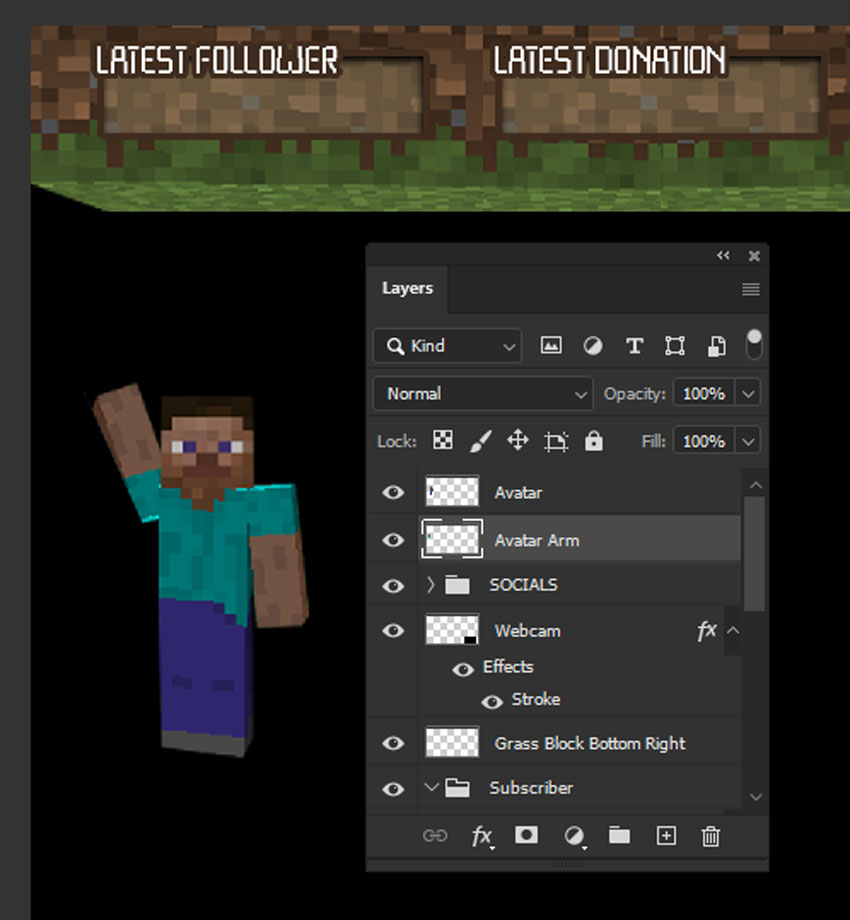
Step 4
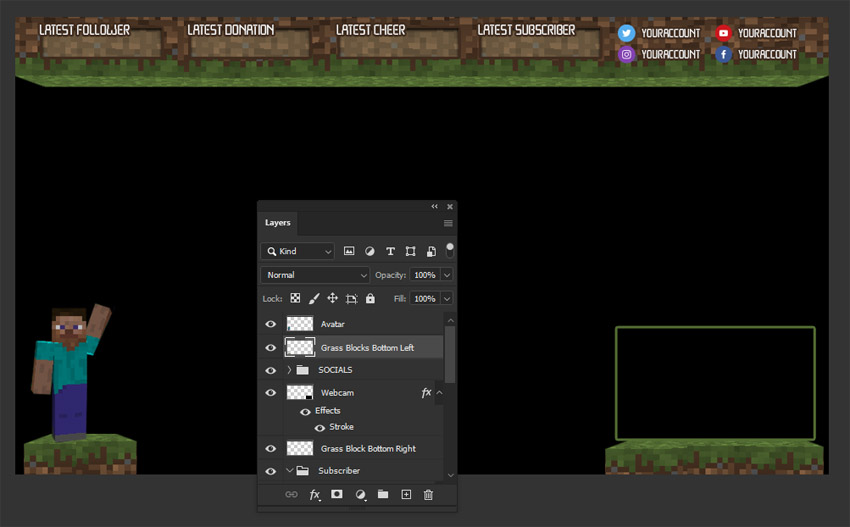
Right now, Minecraft Steve is just kind of floating there. Let’s add some grass blocks so that he has something to stand on.
Duplicate the layer with the grass blocks under our webcam space. Just right-click on PC or Control-click on Mac and select Duplicate Layer.
Then, we can use the Move Tool to reposition this layer under the character.
You can also cut, paste, and delete as you see fit to resize this content. Use your Rectangular Marquee Tool to make these selections and edits.
You can also flip the character by using a technique we already tried: Edit > Transform > Flip Horizontal.
And There You Have It!
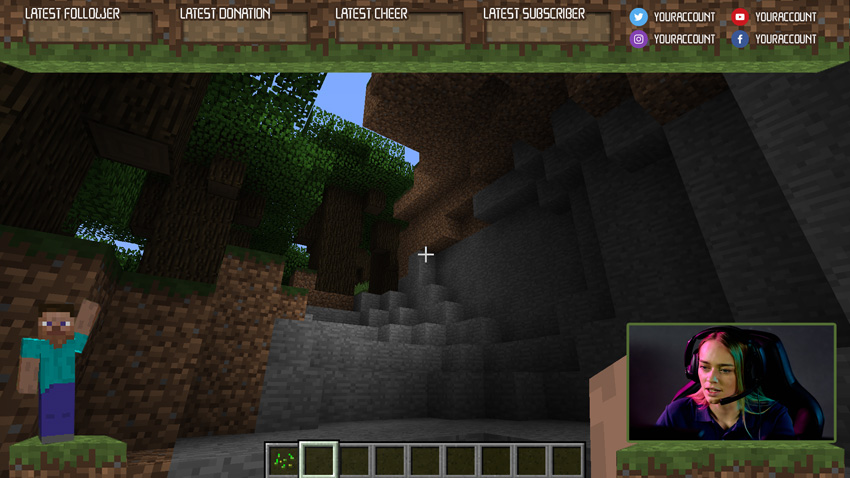
If you want to test out your overlay, paste a screenshot right above your background layer. Then, you can get a feel for how it would look in action.
If you’re unsure of how to save and export your overlay, or how to get it into OBS, Streamlabs, or other streaming software, check out this tutorial:
Looking for a Minecraft Overlay Maker?
If you don’t have Photoshop or maybe you’re just looking for something simpler, consider giving Placeit a try. It’s a web-based design tool—you can use it from the comfort of your web browser. It’s free to jump in and start designing.
Only pay if you decide to download your work. For a super low price, you can create stream overlays, Twitch panels, animated video content, and more. Best of all, you can test it out first.
Here’s a quick look at how we could use our Minecraft character to customize an overlay in this Minecraft overlay maker.
Step 1
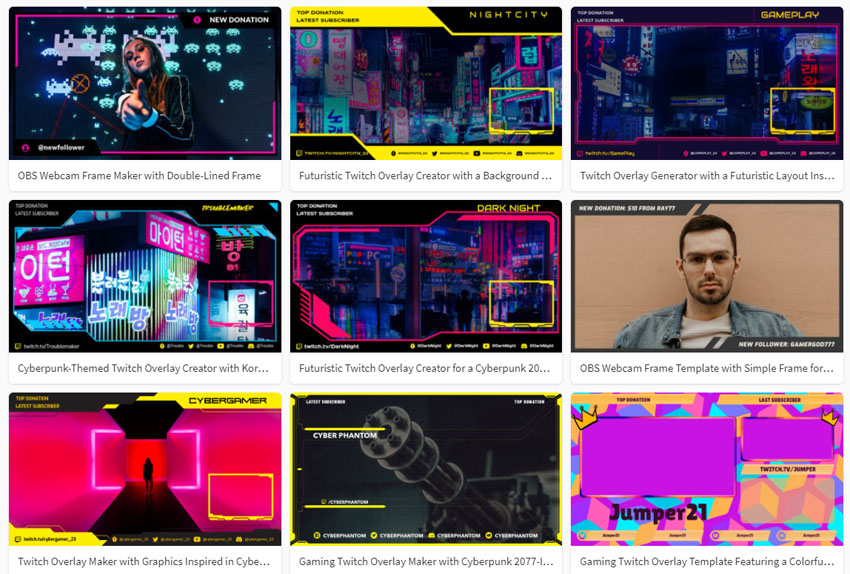
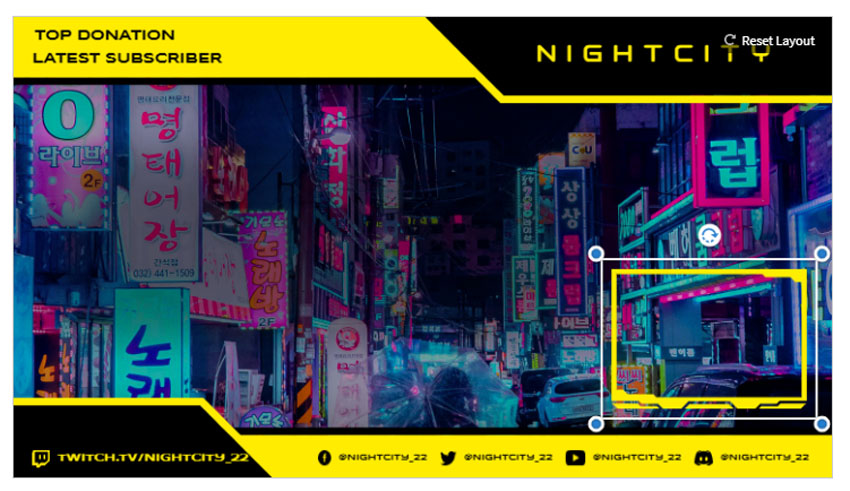
It’s easy to find an overlay to customize on Placeit. Browse through a huge collection of templates—and they’re just a starting point. Choose any one you like to get started. You can customize the text, colors, and a whole bunch of other things too.
Here’s just a sample of some of the overlays you can customize.
Step 2
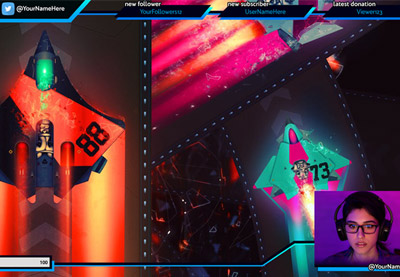
Here’s the custom stream overlay I’m going to customize. We can click and drag on design elements here, to reposition them any way we like.
Step 3
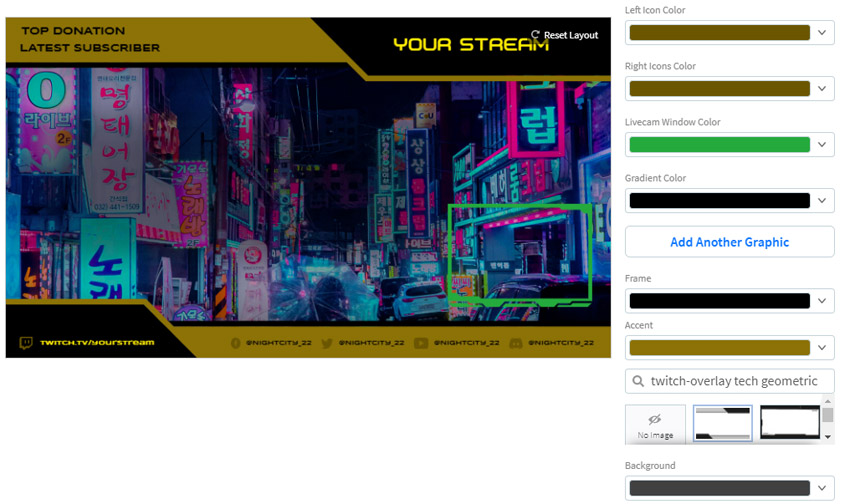
We can also change the colors of the custom stream overlay on the right-hand side. Use the color picker to change the color scheme to any colors that you prefer.
You can also change up graphical elements here too—choose an entirely different base overlay, if you prefer.
Step 4
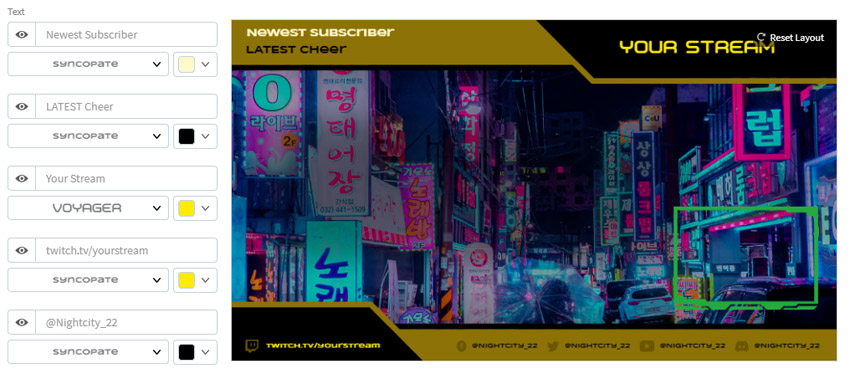
We can also change what the text says. Here on the left-hand side, we can change the text, the text color, and the font itself too. Easily click and drag to move text elements. You can also resize the text this way.
Step 5
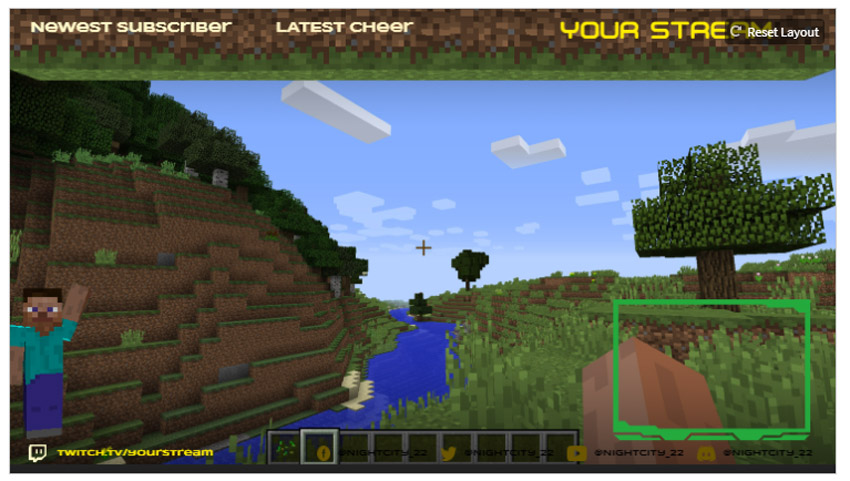
You can even upload custom images, like the Minecraft character we used in our previous overlay. If you’d like to give it a try, make sure to save your avatar on its own as a transparent PNG file.
All we have to do is click on Add Another Graphic and then Upload Image.
Then, we can crop, move, and adjust our custom image. In fact, you can replace the base template with a custom image too—like our grass block header. Check it out.
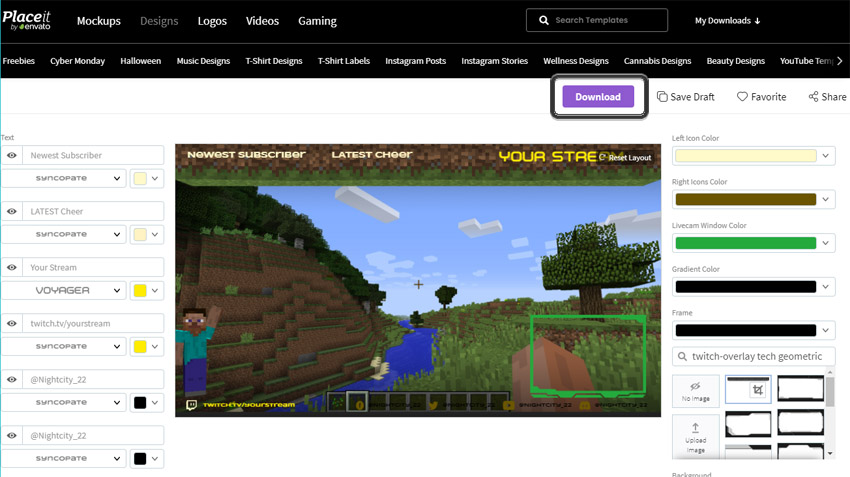
Step 6
When you’re ready to save, it’s as easy as clicking Download. Placeit prepares the image for you and provides you with a transparent PNG that you can import right into OBS, Streamlabs, or your stream software of choice. It’s another way you can create a Minecraft overlay OBS ready design.
Good Luck with Your Custom Stream Overlay!
Whether you decide to try out a Minecraft overlay maker or you make a Twitch overlay for Minecraft from scratch in Photoshop, you have plenty of options. Remember, gaming is supposed to be fun—don’t forget to have fun with it! Use your imagination and try to come up with something that’s memorable and uniquely you. These techniques and tips are just a suggested starting point.
Good luck, and happy streaming!
Looking for even more streaming tutorials and content? Check out these free tutorials and articles from Envato Tuts+.
 Adobe PhotoshopHow to Create a Twitch OBS Stream Overlay in Photoshop
-
Emoticon DesignHow to Make Twitch Emotes
-
Adobe PhotoshopHow to Make Twitch Panels
-
Banner AdsHow to Make a Twitch Banner Design Using a Banner Maker
-
twitch15 Best Free Twitch Overlays (Including a Free Twitch Overlay Maker)
-
IsometricHow to Create a Minecraft Character in Affinity Designer
-
Fan ArtHow to Create a Minecraft Skin in Adobe Illustrator
-
Text EffectsHow to Create a Quick Minecraft Text Effect in Adobe Illustrator
-
IllustrationPlaying With Isometric Projection in Inkscape to Make a Minecraft Scene