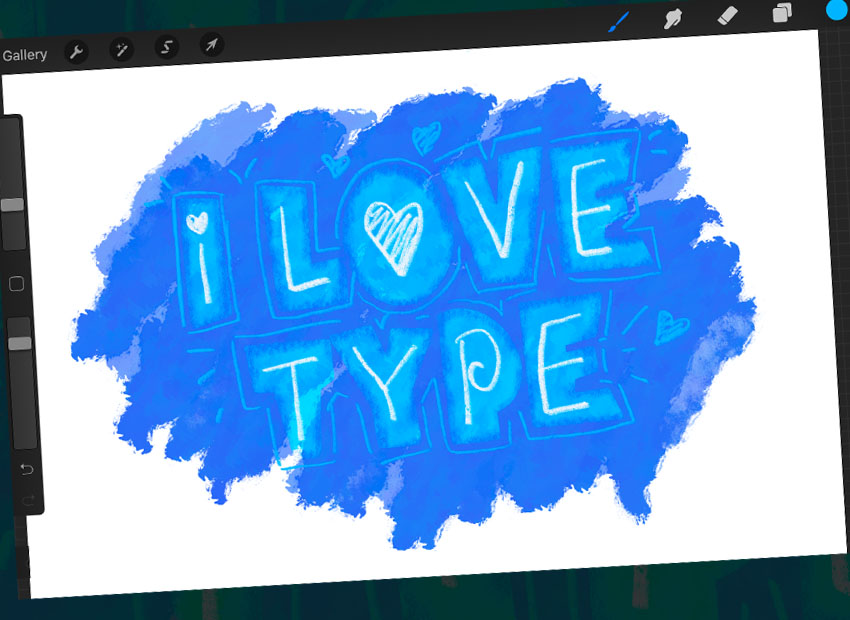
Want to learn how to download fonts for Procreate, or how to add fonts to Procreate? We’ve got you covered. From downloading to using fonts for Procreate, we’ll tackle it all in this tutorial.
What You’ll Learn in This Tutorial
- How to download fonts on iPad for Procreate
- How to add fonts to Procreate
- How to use fonts in Procreate
Ready to start adding type to your next Procreate project? Let’s dig right in.
Follow along with us over on our Envato Tuts+ YouTube channel:
What You’ll Need:
We’ll be using the Springloved font in this walk-through. Download it and follow along, or download and work with a different font of your choice. There are plenty of different ways to download fonts for Procreate, but these methods will generally apply to most of them.
Not sure what font to choose—or where to find high-quality, professional fonts, appropriate for commercial use? Looking for Procreate fonts? Check out the amazing selection over on Envato Elements.
Now, let’s dig in and start at the beginning—how to add fonts in Procreate.
1. How to Download Fonts on iPad for Procreate
Step 1
First, let’s look at how to download fonts to Procreate on your iPad. This will vary, based upon the source of the font—in this demonstration, we’ll download a font from Envato Elements.
However, you could also use fonts from your computer, using a cloud saving service. The goal is to simply get the font file onto your iPad.
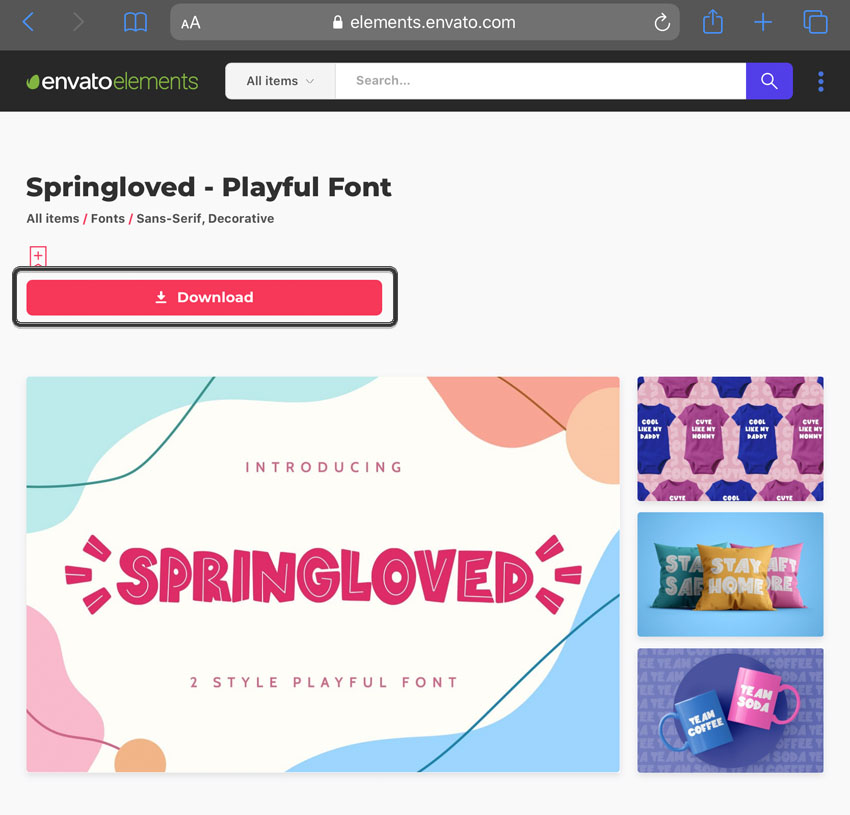
So, in this demo, we’ll tap to download, as shown below. Note that I am using the default Safari browser to do so—different browsers or services may vary.
Step 2
Then, you’ll need to navigate to the location where your iPad stored the downloaded file. By default, this is typically your Downloads folder on the iPad (although, again, this may vary, based upon your preferences).
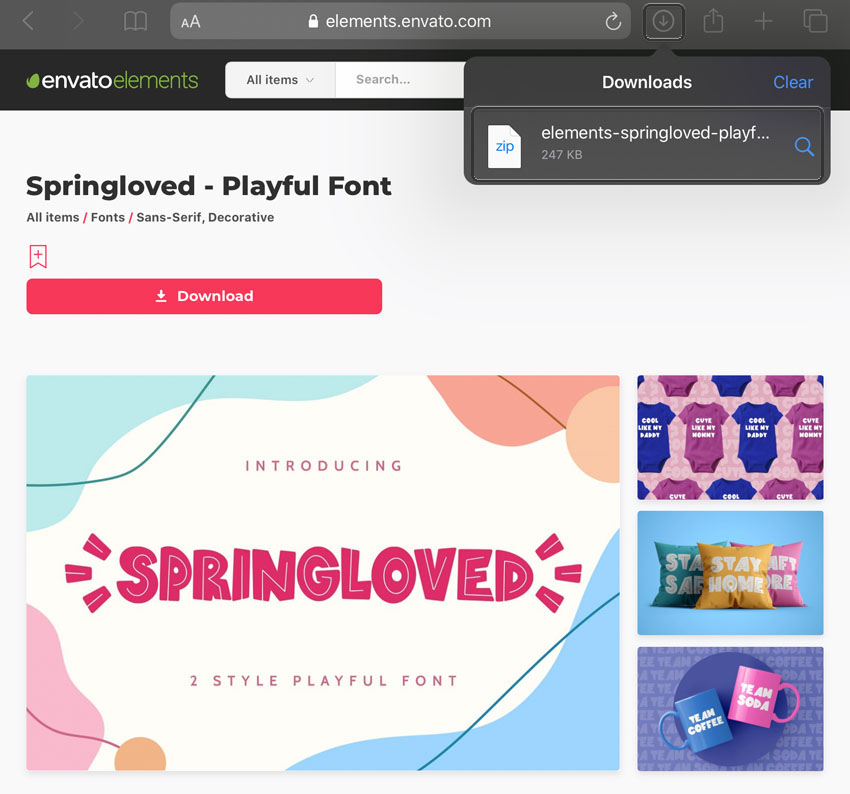
In the case of Safari, I can tap the Download Button to view my recent downloads, and then tap the file to open up the folder, as shown below.
Step 3
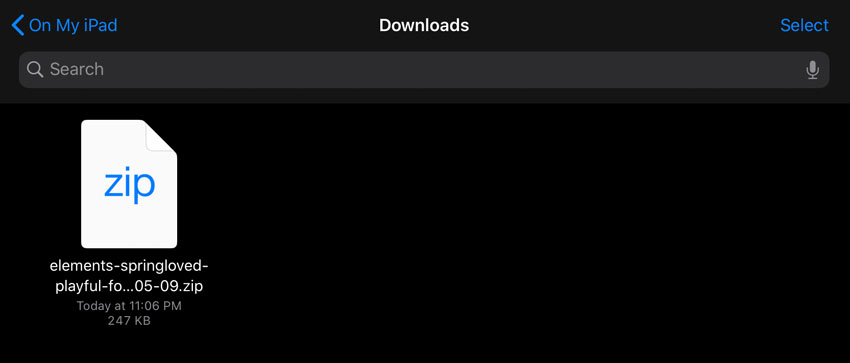
Here we are within the Downloads folder—and here’s my downloaded file.
Many fonts are distributed within a compressed zip file. This is especially the case if the font includes more than one style or type—and this is the case with the font I’ve downloaded.
So, before we can proceed, we’ll need to “unpack” this compressed file. Simply tap on the zip file to begin.
Step 4
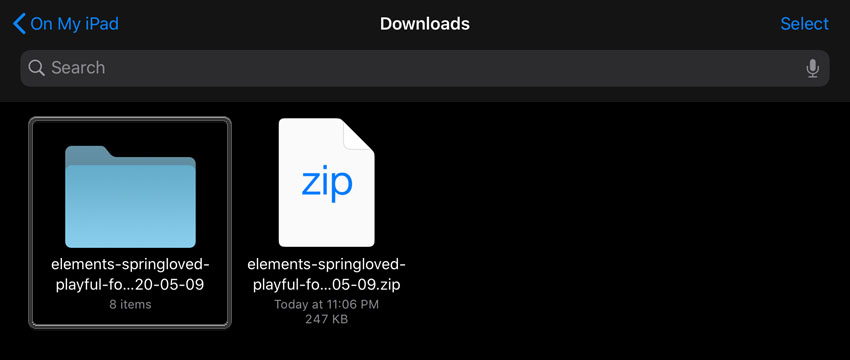
And here’s the result. Notice how my iPad created a new folder for the content that was inside the compressed zip file.
All we need to do now is tap on the folder to view its contents.
Step 5
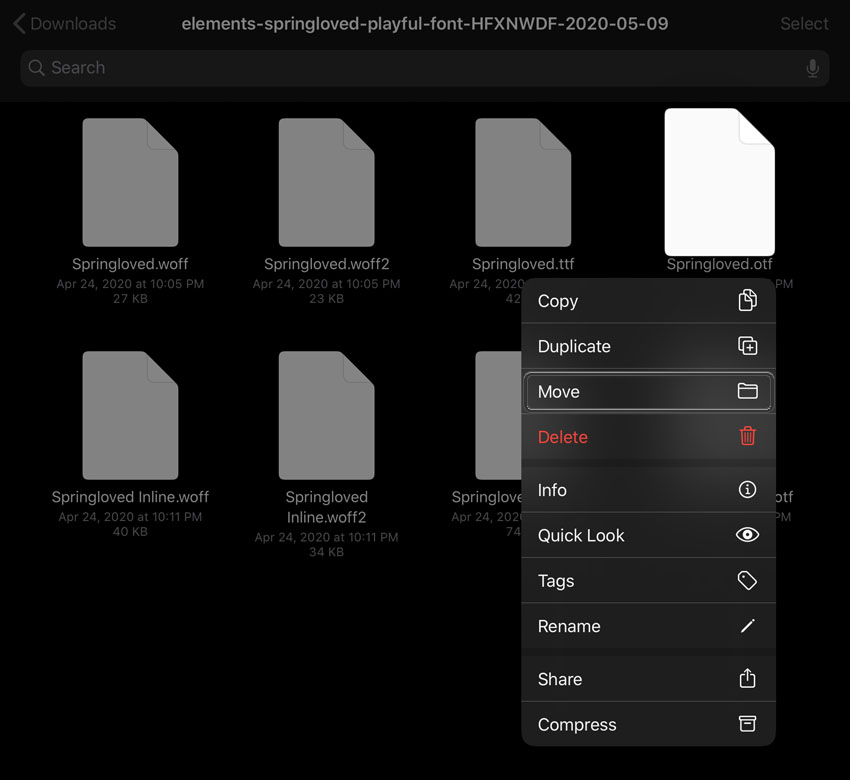
Here’s what the inside of the folder looks like. You’ll notice that multiple files were included, some with different file types.
Procreate can use TTC, TTF, and OTF font file types. In this case, I’m going to choose one of the available OTF files here in my folder.
Tap and hold on the file until you see the resulting menu. Then select Move.
Step 6
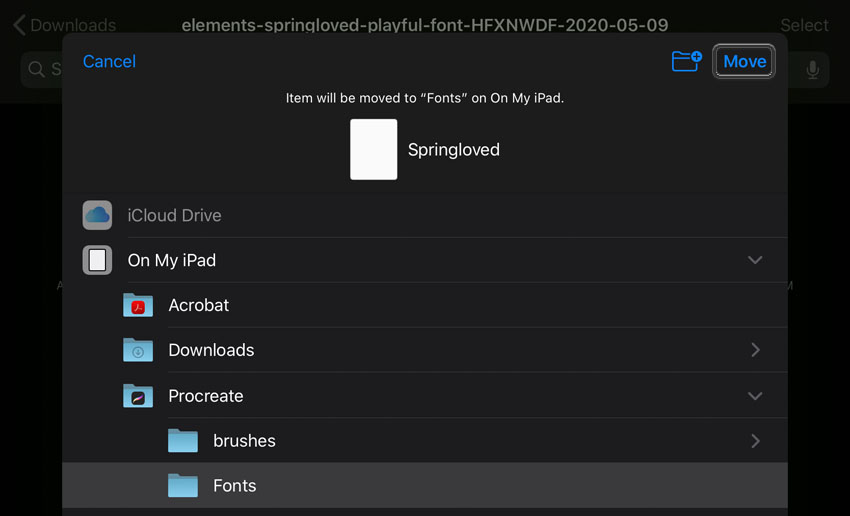
Then, select the Fonts folder in your iPad’s Procreate folder. Once you’ve selected it, tap on Move to move the file to this location.
Once you’ve done so, we’re ready to add our fonts to Procreate.
2. How to Add Fonts to Procreate
Step 1
Now, let’s turn to Procreate. Begin in a New Document, or any document of your choice.
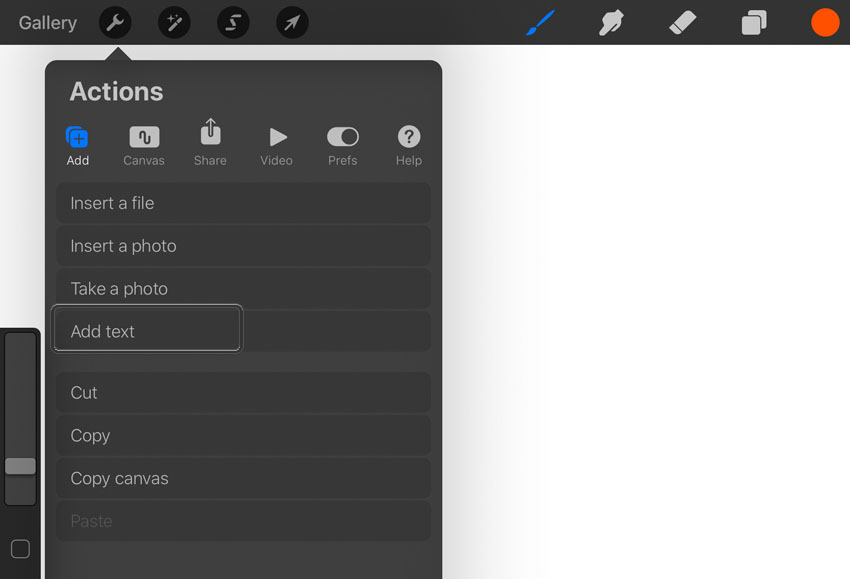
Start by tapping on Actions (the wrench icon), then Add, and then Add Text.
This will add a new text layer to our Procreate document.
Step 2
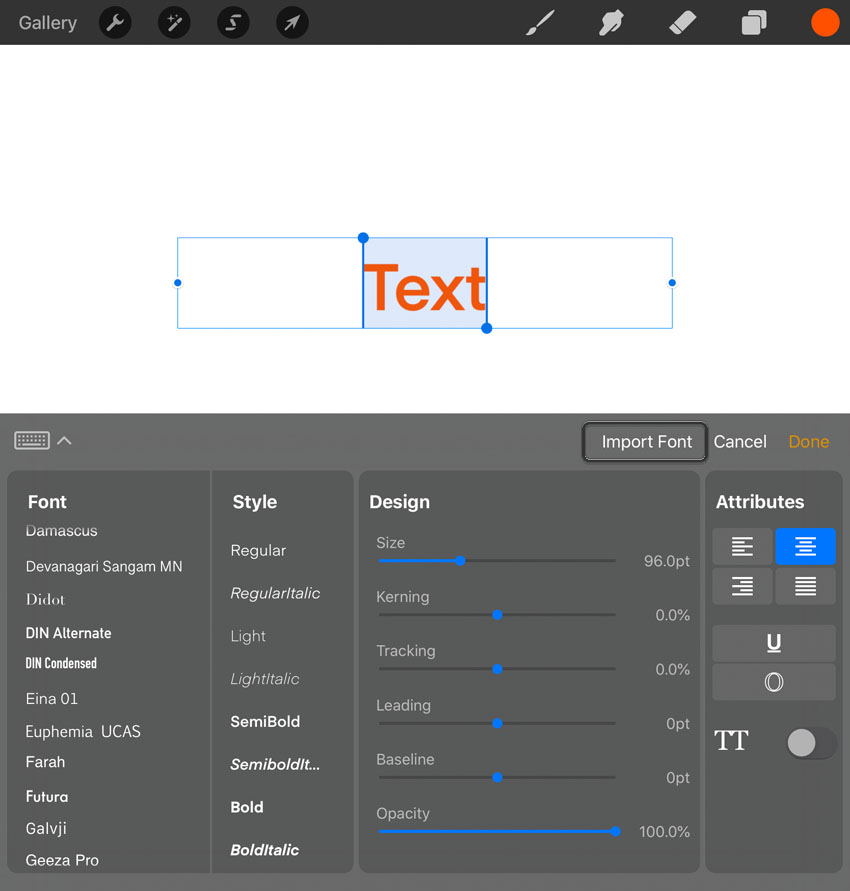
Here’s what it looks like when we’ve created our initial text layer. Notice how we’re presented with a whole host of options—we’ll take a look at them a little later.
Check the Font List, and you may already see your font listed there and ready to use. If so, awesome—you’re good to go!
However, let’s walk through manual import too, just in case you don’t see your font, or you’d like to import from a different location on your iPad.
Tap on Import Font, highlighted below, to add a new font for use here in Procreate.
Step 3
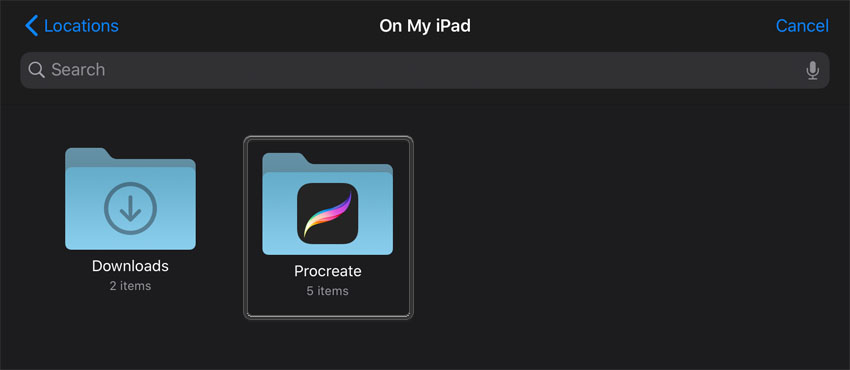
Next, we’ll need to navigate to our Procreate folder—our goal is to navigate to the location where we saved/stored our font file. Tap on the Procreate folder to go inside it.
Step 4
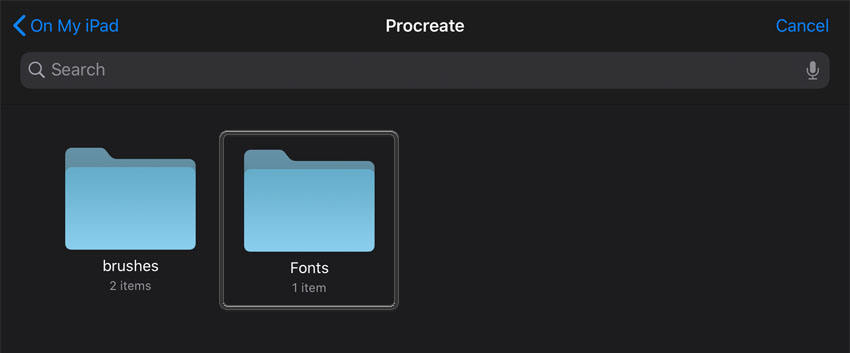
From inside the Procreate folder, tap on the Fonts folder.
Step 5
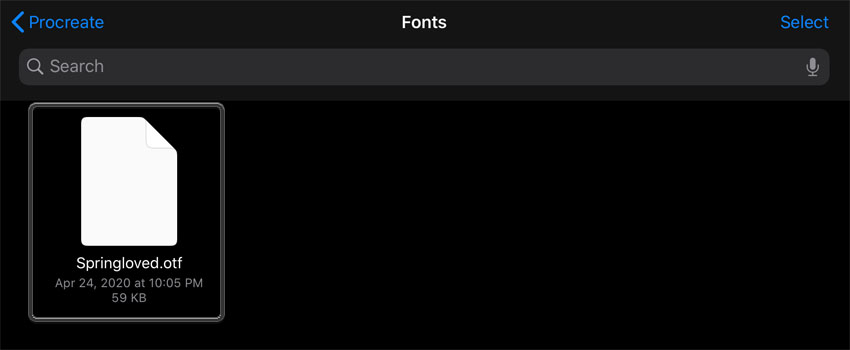
Then, from inside the Fonts folder, we should see our newly downloaded font file, as shown below. Simply Tap on the font file to import it into Procreate.
Step 6
Finally, look at the Font List, on the left-hand side of the text options at the bottom of the screen. This is what your text layer looks like when we opt to Edit Style.
Tap and Drag to page through the list of available fonts from the Font List. Then, you can select your newly imported font. It’s all ready for use.
Note, if you’d like to remove a font from Procreate, simply remove the font from your Font Folder within your Procreate Folder. It will then disappear from the list. Keep in mind, however, that this will also make the font unavailable for any existing projects that may have used it.
3. How to Use Fonts for Procreate
Step 1
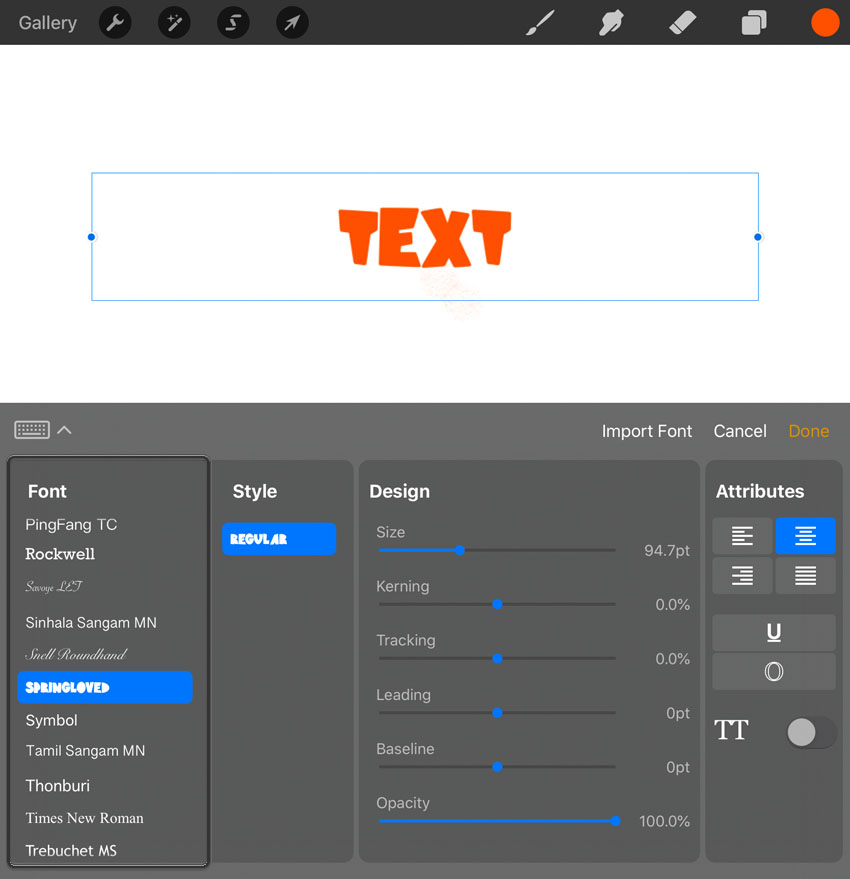
Let’s take a look at some of the things we can do here, when it comes to editing and styling our text in Procreate.
Use the Font List to browse and select from your available Procreate fonts.
The Style List lists any available style variations included with the font—like light, heavy, or italic weights and variants, again, if available.
The Design Panel contains a number of options to help you style your text, including:
- Size changes the overall size of the text.
- Kerning is used to adjust the spacing between select (often two) letters.
- Tracking adjusts the spacing between all applicable letters.
- Leading adjusts the vertical space between lines of type.
- Baseline adjusts the location of the baseline—think of it like the line the text “sits on”.
- Opacity is the text’s opaqueness, with 100% being fully visible and 0% being invisible.
Note, you can also move the text by tapping and dragging on it.
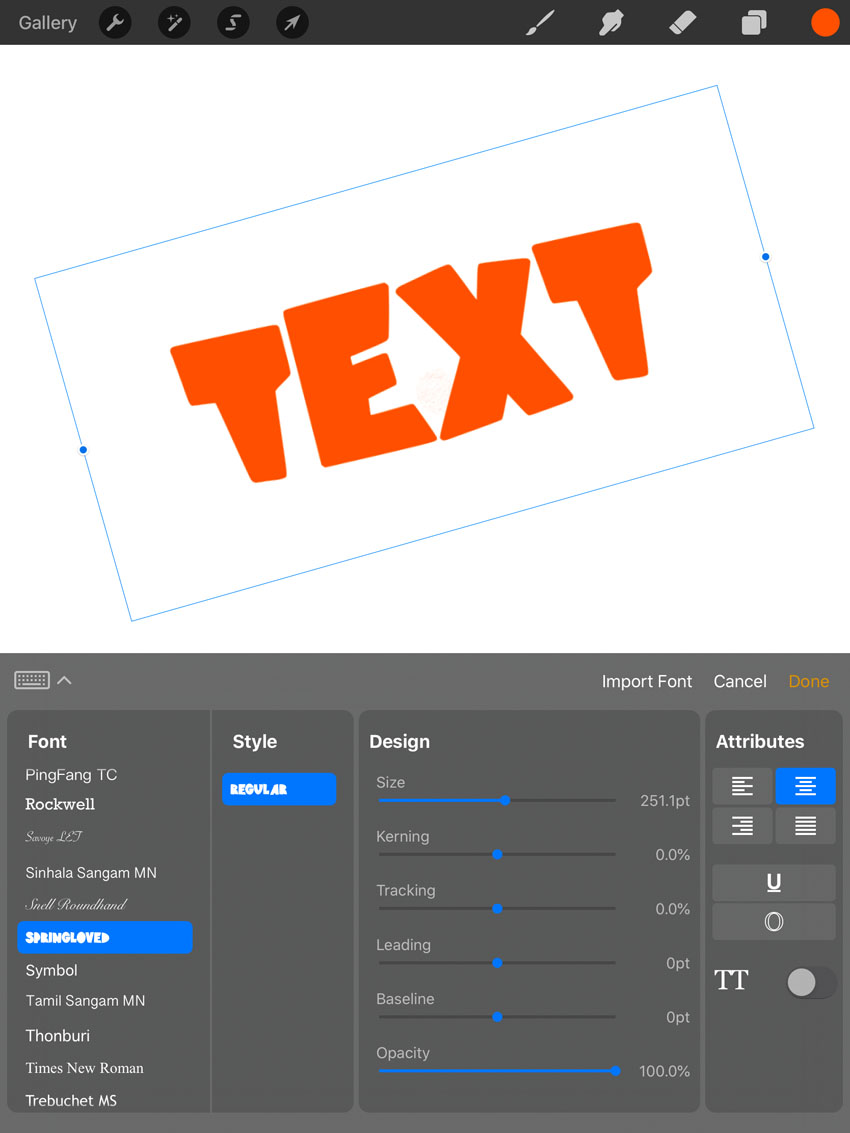
Tap and drag on the blue dots, on either side of the text box, to change the size of the text box itself.
You can also resize and rotate text using the Transform Tools, as you would artwork.
Step 2
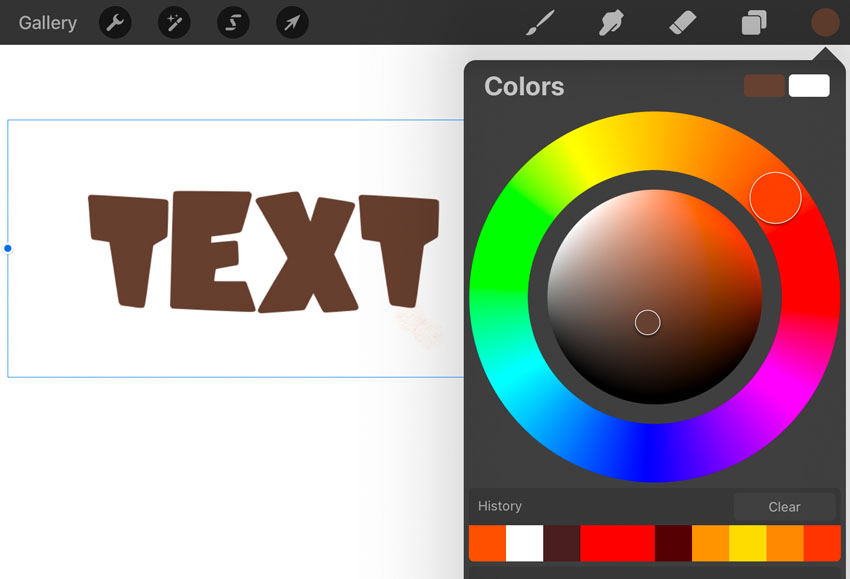
If you’d like to change the text’s color, make sure you’re in this text edit mode first—where you can see the text box.
Start by tapping on your text to open up your text options.
Then, tap on the color picker to select a new color.
Step 3
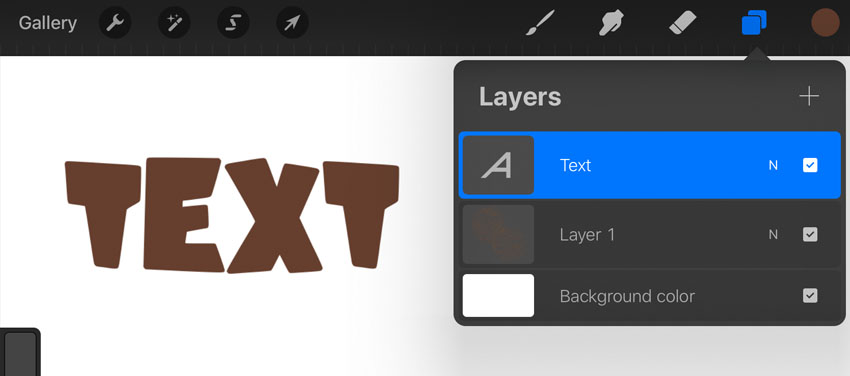
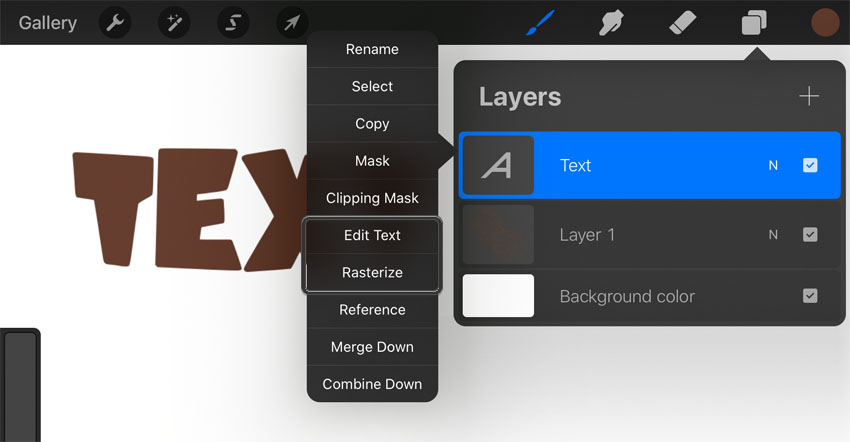
You’ll notice that our text is on a special Text Layer. Below, the Text Layer is selected, but the text itself isn’t necessarily in its edit mode.
Step 4
We get a number of familiar options here, when looking at our Text Layer—like renaming, copying, and merging.
If you aren’t familiar with Procreate Layers, check out this free tutorial:
However, take note of these two additional inclusions:
- Edit Text—you can jump right back into the Edit Text mode from this part of the Layers Panel, if you prefer.
- Rasterize—convert your Text Layer into a standard, rasterized layer, much like your standard artwork.
And There You Have it!
Using Procreate fonts is a snap—it’s easy to dig right in and employ type in your illustrative work in Procreate!
Here’s a sample that I created, below, using the type that we installed in our demonstration. If you’d like to check out how I created it, make sure to watch this tutorial’s video walk-through for a quick process video. It’s a taste of some things you could try out with Procreate fonts!

15 Best Fonts for Procreate to Try Out
There are so many beautiful fonts out there, and the best fonts for Procreate are going to vary, based on your project and even your taste. However, here’s a collection of versatile and beautiful fonts that would make an awesome addition to anyone’s tool kit.
Take a look, and consider adding one to your font collection today.
1. Leah Gaviota Decorative Font
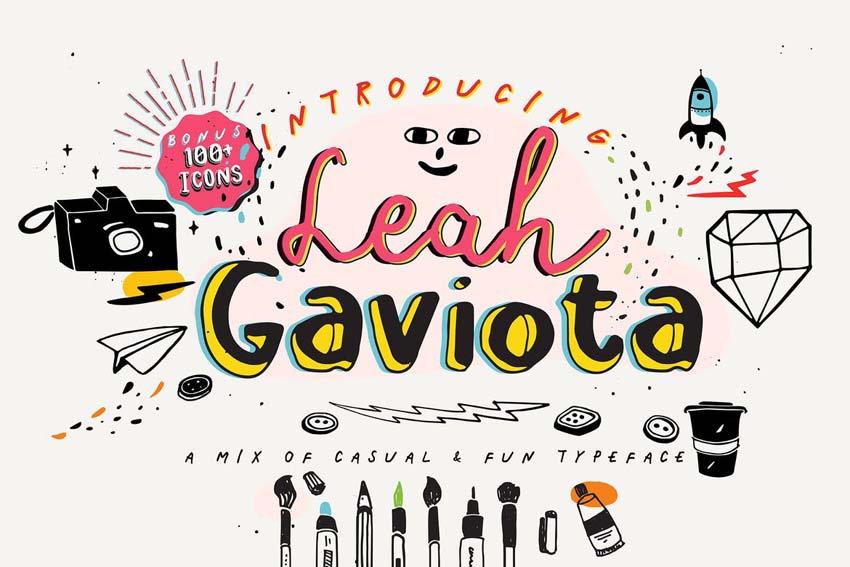
Looking for a fun, quirky, visual mix of hand-drawn type? Look no further—Leah Gaviota is such a whimsical font. It includes six different looks to experiment with, making for so many fun combinations.
2. DJADOEL Quirky All Caps Font
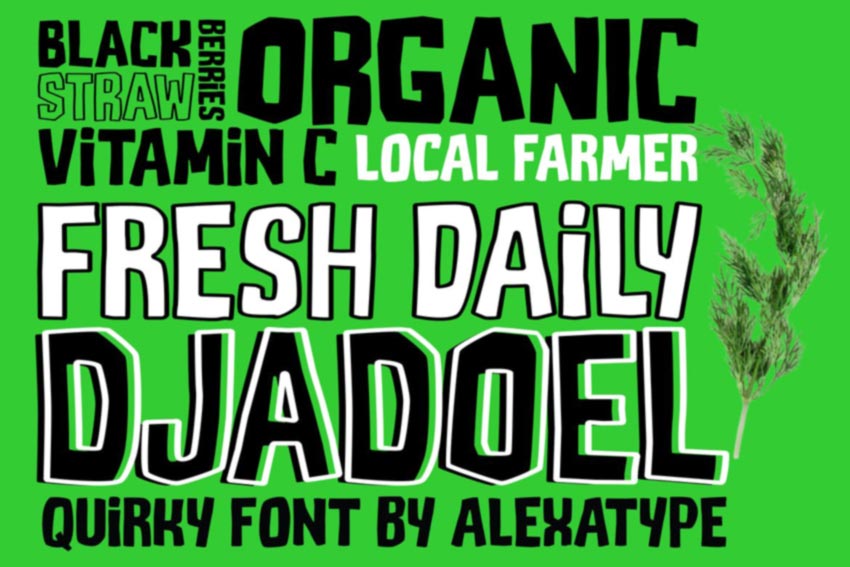
This typeface could be a wonderful fit for illustrative projects. It has two styles to choose from, and it’s easy to import it right into Procreate. Download it today and try it out in your next project.
3. Strong West Retro Tattoo Font
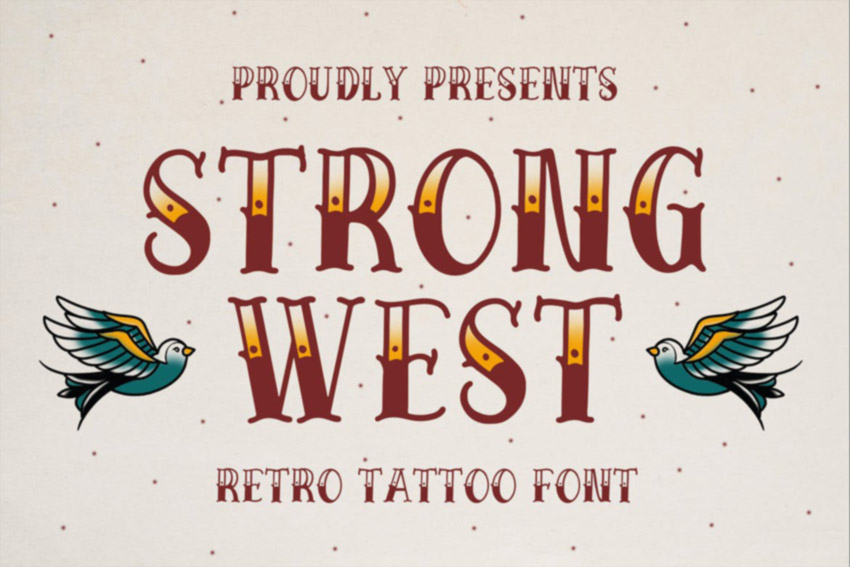
Love working with tattoo design or maybe a tattoo inspired aesthetic? Well, then this font might be right up your alley. Check out the beautifully drawn characters and give them a shot in your next Procreate design.
4. Oatmeal Jack Serif and Script Font
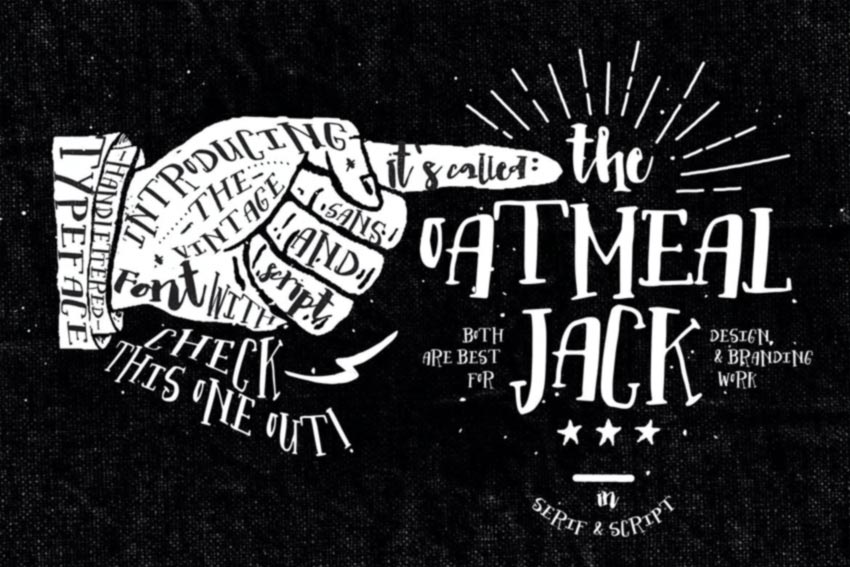
This stylish typeface has a lot of interesting visual variation to experiment with. You get both a serif and a script typeface to play with in this font—mix and match them for a whole host of creative combinations.
5. Catalina Avalon Drawn Type Family Font
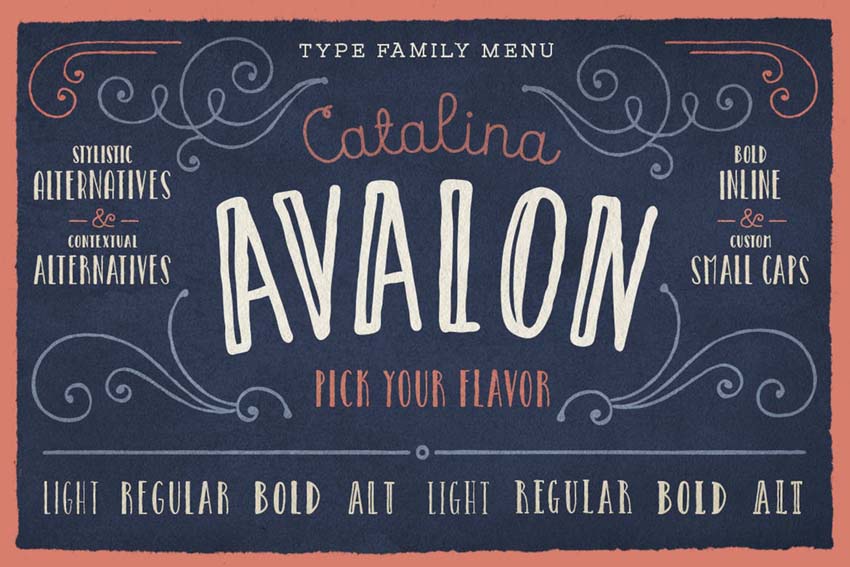
If you’re looking for a beautifully hand-drawn typeface, take a look at this one. It comes with eight variants, as well as some really lovely alternative characters, too!
6. Avaline Script Sketch
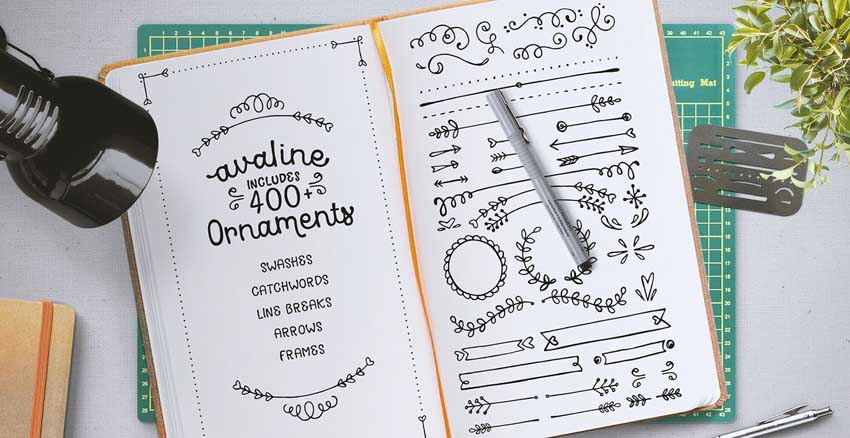
If you love hand-drawn type, this script font is definitely worth a look—it even includes 400 elements to work with too! There are flourishes, wreaths, banners, dividers, and more!
7. My Dear Script Font Typeface
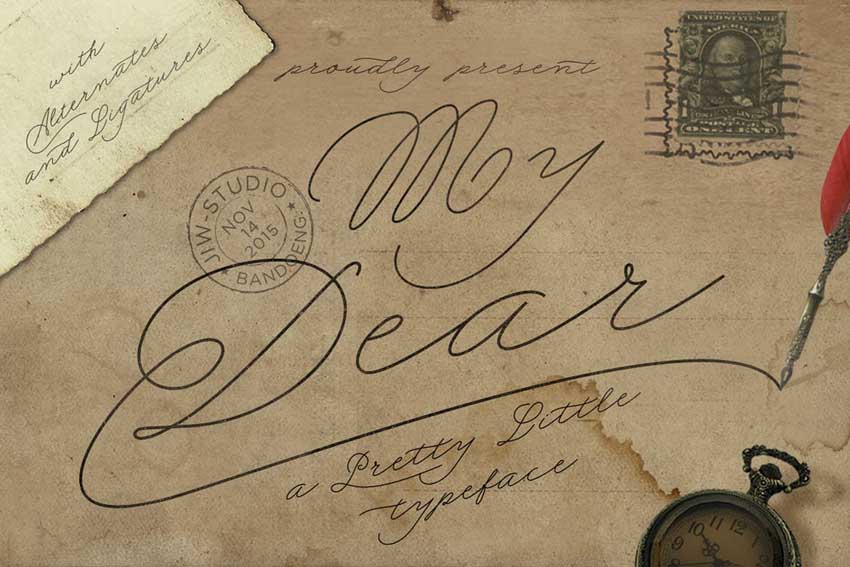
Isn’t this a beautiful hand-drawn typeface? It has alternate characters too—this one could be a perfect fit for any project that would benefit from an elegant script font. Use it in projects like illustrations, digital collage, and more.
8. Neverland Fantasy Display Serif Vintage Font
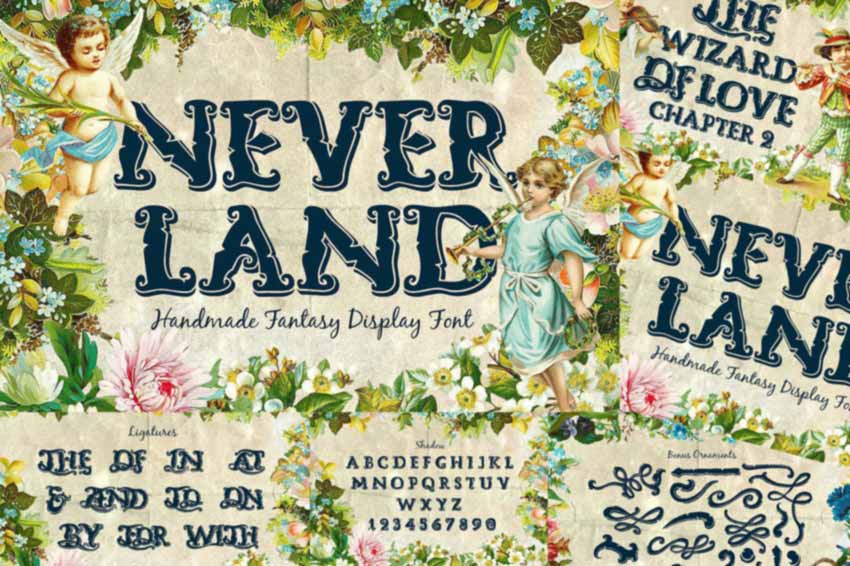
This decorative typeface is super illustrative. It could work great for fairy tales, children’s books, and so much more! Try it out with your illustrations, or experiment with it in a number of ways in Procreate.
9. American Traditional Tattoo Font
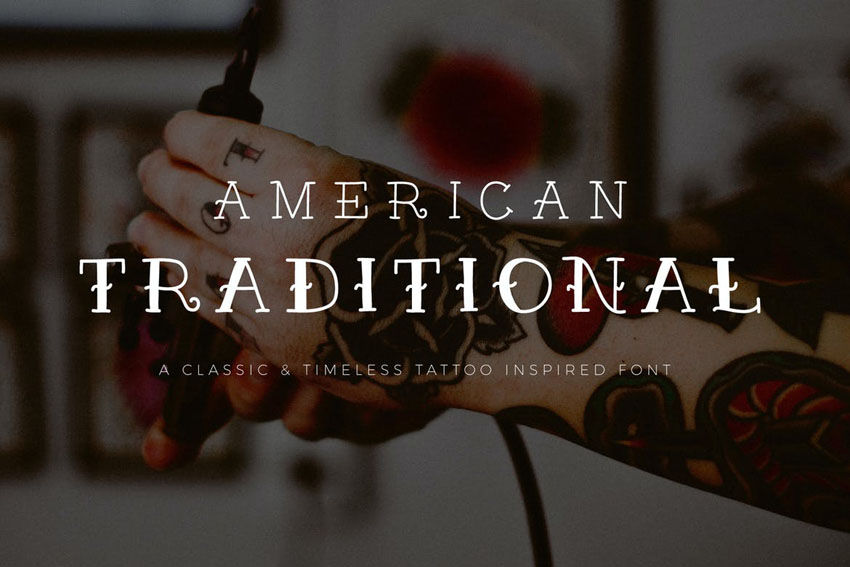
Here’s a classic tattoo-inspired font—perfect for experimenting with tattoo design concepts in Procreate. Or use it in any project that would benefit from a stylistic, decorative, hand-drawn feel.
10. Robofor Mechanical Engineering Font
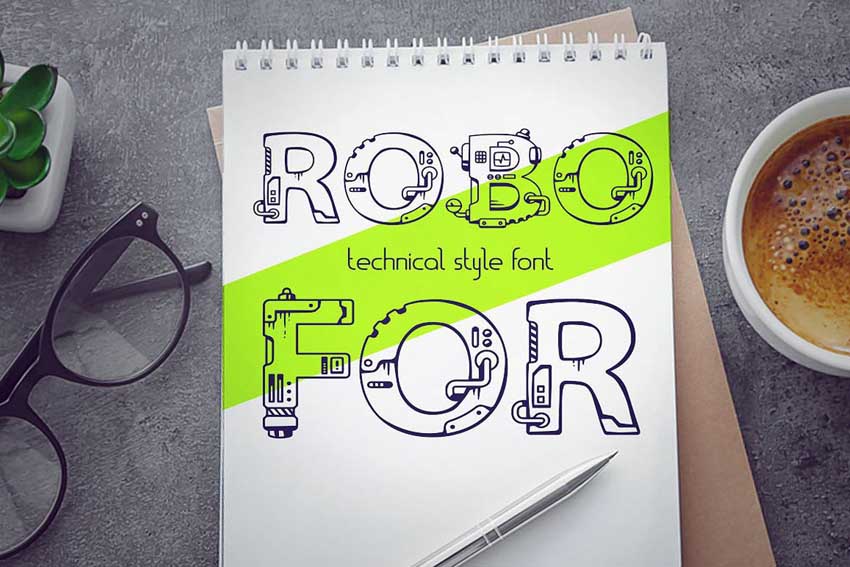
Decorative typefaces can be a lot of fun to work with, and this one is no exception. There’s a mechanical influence here, but mixed with a hand-drawn, organic quality. It could be an awesome one to experiment with in Procreate.
11. Lonssa Ornament Cute Symbol Font
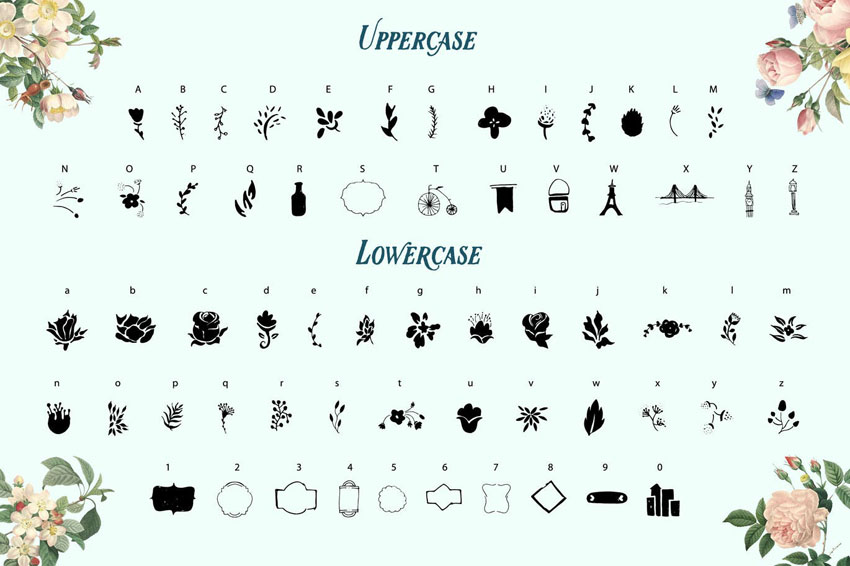
Now, let’s look at something a little different! This font is all about symbols, graphics, and borders, rather than numbers and letters. Use these pretty, hand-drawn assets as embellishments and additions in your next Procreate drawing.
12. Lineat Creative Decorative Font
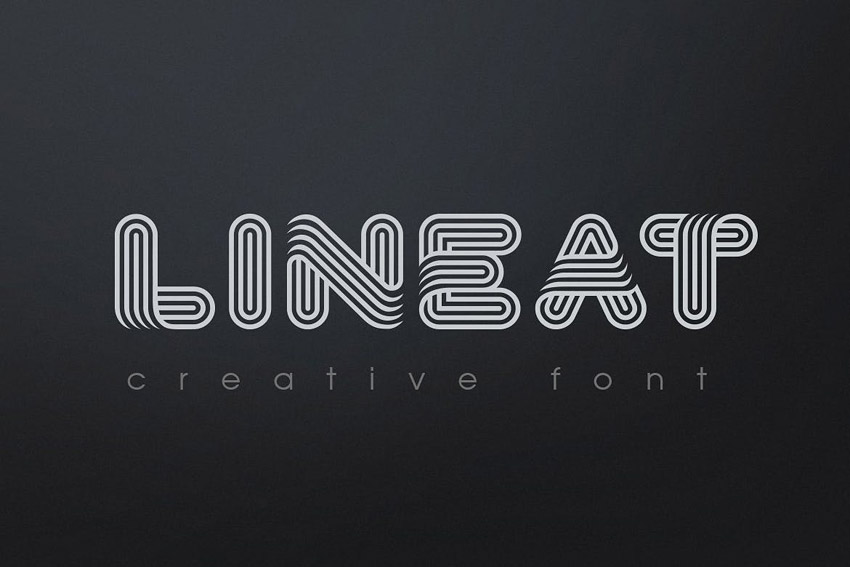
If you love working with line, check out this decorative typeface. The letters are composed of decorative line—and this could be such a fun one to try out in Procreate, especially if intricate line art is an aesthetic you enjoy.
13. Dazey Display Font
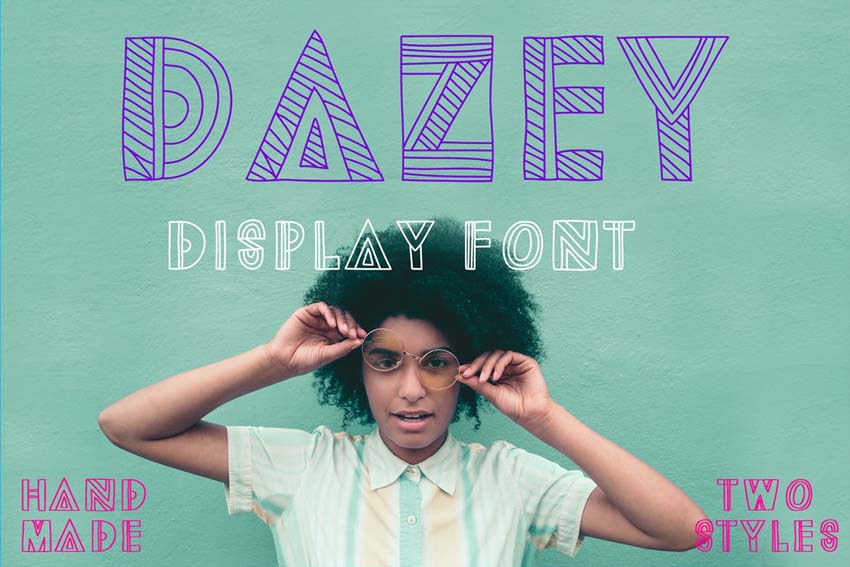
Isn’t the line width variation in this font fun? This one is such a fun fit for any project that benefits from whimsical line work. Use it as the title on your next zine or as an addition to your next illustrative project.
14. Grocery Rounded Hand Drawn Font

If an organic look is your project’s style, this font delivers. It also includes some lovely vegetable and fruit glyphs that you can use to finish off your type inspired design—or add them to your design.
15. Tall & Tiny Font Duo
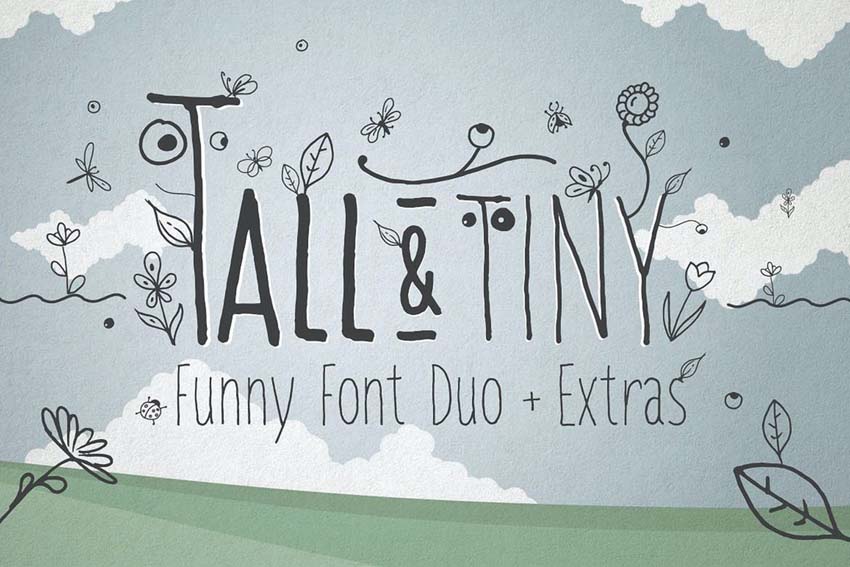
This font duo has so much potential—and it even comes with 52 illustrated extras too, like the leaves and other natural elements shown above! Mix and match these two fonts for a fun, whimsical, hand-drawn look.
Want to Learn More About Procreate?
Check out some of these other, free Procreate tutorials on Envato Tuts+ for more Procreate walk-throughs, tutorials, and more!

