Introduction: The Rise of Podcasting and the Importance of Quality Audio Editing
Podcasting has experienced an unprecedented surge in popularity in recent years. This growth can be attributed to the medium’s unique blend of accessibility, intimacy, and the ability to deliver content to an engaged and dedicated audience. However, the rise in podcast popularity also means an increase in competition, making quality audio editing more important than ever.
Precise audio editing is crucial for creating a professional-sounding podcast that stands out from the crowd. It helps eliminate unwanted noise, balance sound levels, and ensure a smooth flow of conversation. In essence, good audio editing enhances the overall listener experience, encouraging them to return for future episodes and recommend your podcast to others.
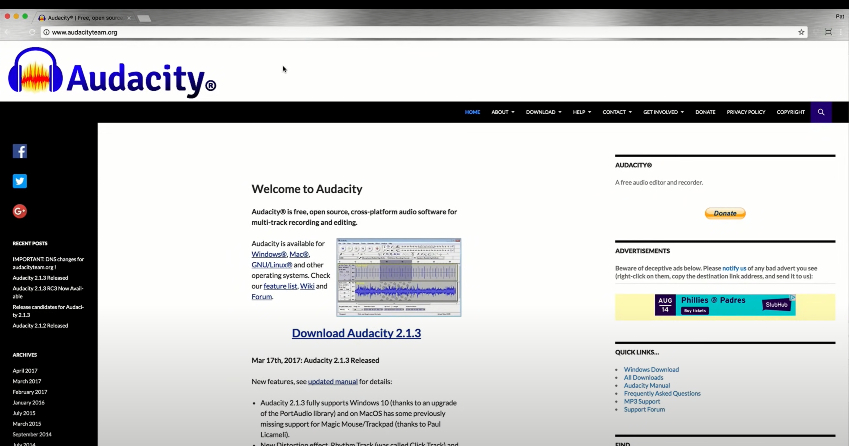
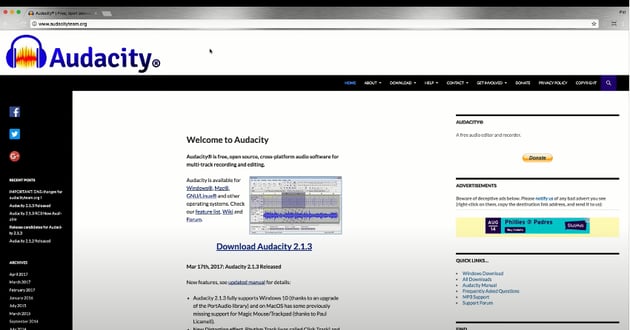
Among numerous audio editing tools available today, one name that consistently resonates with podcast enthusiasts is Audacity. This free, open-source software delivers a comprehensive suite of recording and editing features that are both powerful and user-friendly, making it an ideal choice for beginners and seasoned podcasters alike.
Audicity website thumbnail
Audacity offers a range of capabilities from basic recording and editing to complex multi-track mixing, similar to premium tools like Garage Band. It’s compatible with both Mac and PC, ensuring accessibility for all users. Whether you’re recording your first episode or tweaking the audio for your hundredth, Audacity provides the tools needed to produce high-quality audio content.
To start using Audacity for your podcast, simply visit audacityteam.org to download the software. As we delve deeper into the world of podcast audio editing, we’ll explore how to utilize Audacity’s features effectively to generate professional-grade podcasts.
This tutorial is specifically designed for those who intend to use Audacity for their podcast audio editing needs. So let’s dive right in and learn how to edit a podcast, and mastering the art of podcast audio editing with Audacity.
Jump to content in this section
Getting Started with Audacity
When you’re ready to dive into the world of podcast audio editing, Audacity is an excellent place to start. Available for Windows, Mac, and Linux users, this software can be downloaded for free from audacityteam.org. Let’s guide you through the initial steps of using Audacity for your podcast.
Setting Up Your Microphone
- Importance of correct microphone setup
- Steps to select the right input
- Tips for troubleshooting undetected microphones
- Understanding Mono vs. Stereo Input Channels
Conducting Your First Test Recording
- Navigating Audacity’s user interface
- Recognizing and interpreting audio waveforms
- Preventing audio “clipping”
Setting Up Your Microphone
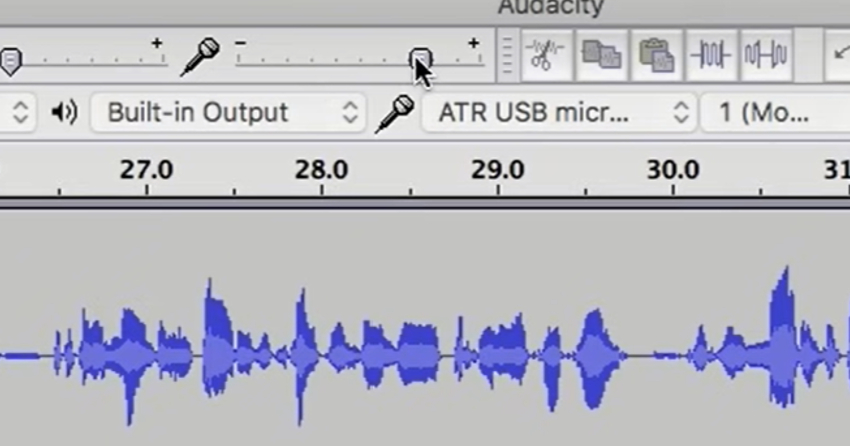
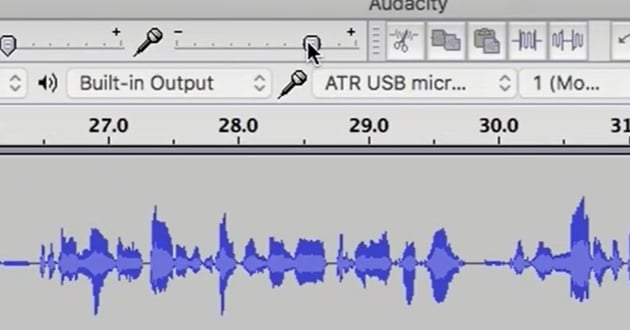
Before recording, ensure your desired microphone is selected as the input device. This step is crucial because it guarantees that Audacity captures audio from the correct source. To select your microphone, navigate to the Input Device area, represented by a small microphone icon. Click on the drop-down menu and choose your preferred microphone.

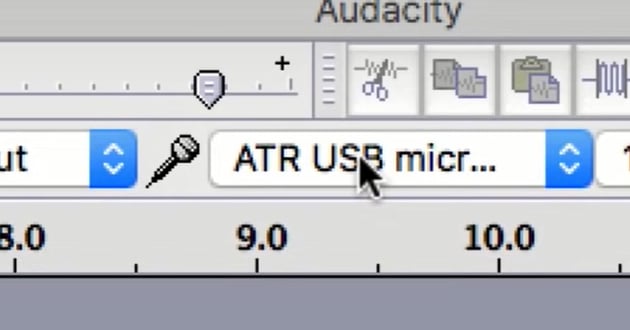
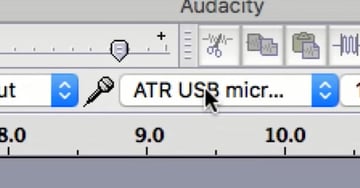
Mic Input selection area
If your microphone doesn’t appear in the list, try troubleshooting. Check if the microphone is turned on, properly plugged in, and functioning correctly. Once these conditions are met, your microphone should be available for selection.
Understanding Mono vs. Stereo Input Channels
Audacity offers two types of input channels: Mono and Stereo. For podcasting, recording in Mono is usually recommended. Mono means your voice will be heard equally in both the left and right speakers, providing a balanced listening experience for your audience. In contrast, Stereo can cause your voice to pan between left and right or be heard only in one ear, which can be disconcerting for listeners.
However, when importing external files, such as an interview recorded on Skype or background music, they may be in Stereo format. Don’t worry about this; what matters is that upon playback, the audio is heard equally on both sides.
Conducting Your First Test Recording
Now, you’re ready to conduct your first test recording. To begin recording in Audacity, simply click on the ‘red‘ button.
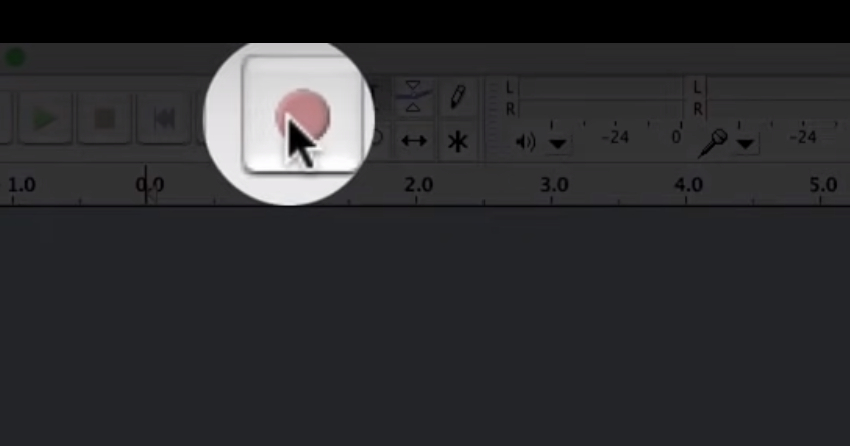
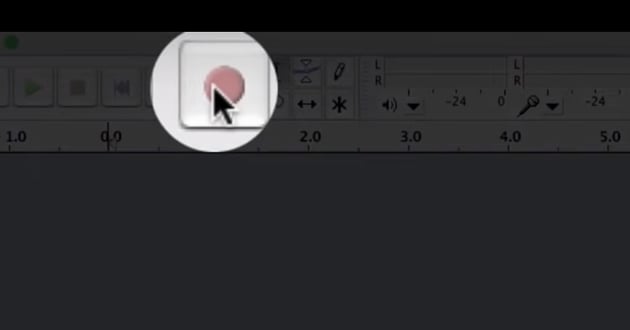
Showing the red record button
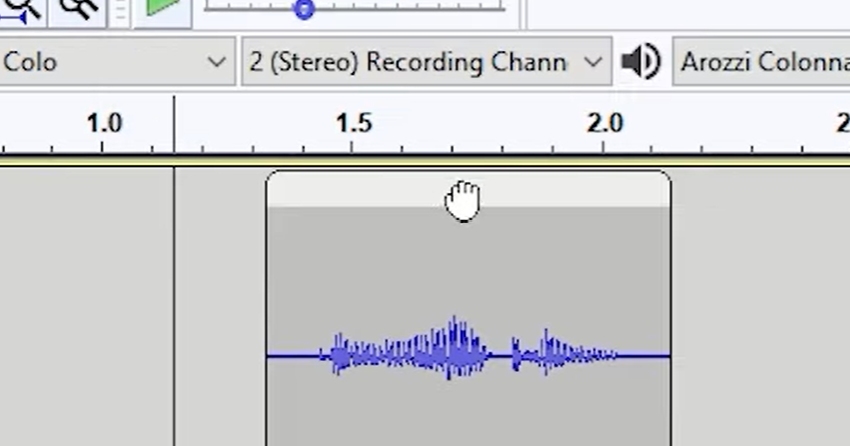
As you speak, pay attention to the audio waveforms that appear. These waveforms represent the sound waves of your voice, and understanding them can be useful for editing your podcast later on.
One essential aspect to keep an eye on during recording is audio clipping. Clipping occurs when the volume level exceeds the maximum limit, leading to distortion in your audio. To avoid this, ensure your volume levels stay within the safe range.

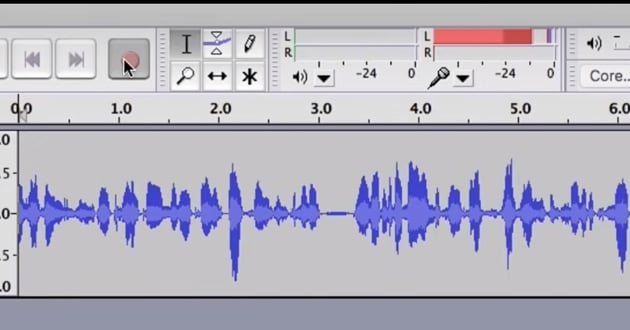

Showing wave forms
Now, with these basics at your fingertips, you’re ready to embark on your podcast audio editing journey with Audacity. In the next sections, we’ll delve deeper into mastering audio levels and other podcast editing essentials.
Mastering Audio Levels for Optimal Podcast Audio Quality
A critical aspect of podcast audio editing is mastering audio levels. Properly managed audio levels ensure your podcast sounds professional and is pleasant to the ear. Too low, and your audience will struggle to hear your content; too high, and you risk audio distortion. Here’s how you can master audio levels using Audacity.
When you record in Audacity, your voice is represented in the form of waveforms. These waveforms consist of peaks and valleys that correspond to the volume of your voice — the higher the peak, the louder the sound.
A common mistake beginners make is allowing their audio levels to clip. Clipping occurs when the peaks extend too high, beyond the confines of the track in Audacity. The result? Distorted audio that distracts listeners and detracts from your content’s quality.
To prevent clipping, monitor your waveforms as you record. If you notice your peaks are consistently hitting the top of the track, your audio is too loud. But don’t worry, adjusting your volume is straightforward with Audacity’s Input Volume slider.
The ideal scenario is to have your waveforms reach close to the top of the track without crossing the boundary — somewhere between 0.5 and 1 on the Audacity scale. This range ensures your audio is loud enough to be clearly heard without risking distortion.
Remember, it’s always best to get your audio levels right during the recording stage. While you can adjust volume levels during the editing process, doing so may compromise the audio quality. Strive for a balance where your normal speaking voice hits near the top of the track, but never beyond it.
Mastering audio levels might seem like a small detail, but it’s these nuances that elevate your podcast audio editing skills. In the following sections, we’ll explore more podcast editing essentials in Audacity to help you produce high-quality audio content.
Podcast Editing Essentials in Audacity
- The Art of Editing
- Incorporating External Audio
- Fine-tuning Your Imported Audio
- Juggling Multiple Tracks
- Strategizing Audio with Time Management Tools
- Advanced Track Adjustments
- Modulating Audio Intensity
- Incorporating Fresh Recordings
1. The Art of Editing
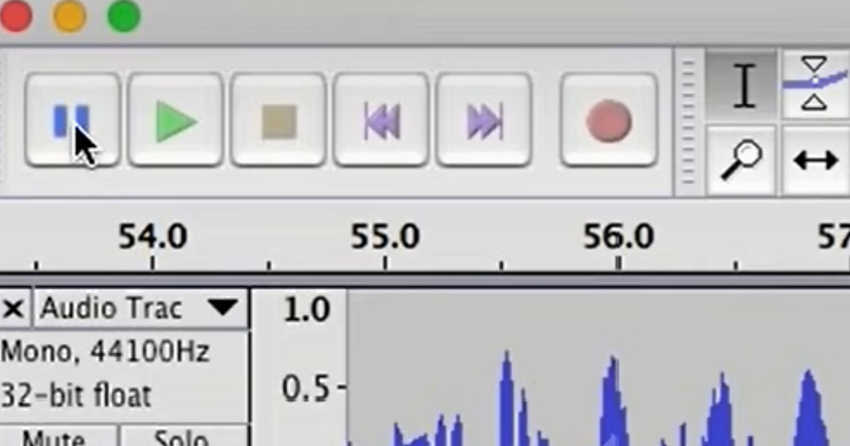
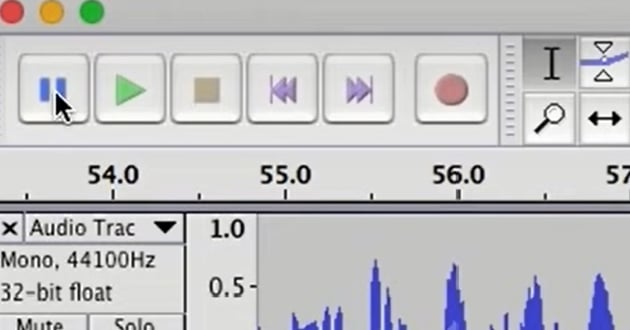
When editing podcast audio, mastering your software’s controls is crucial. In Audacity, two important buttons are “Stop” and “Pause”. They may seem similar but serve distinct functions.
Stop vs. Pause: What’s the Difference?
During recording or review in Audacity, you’ll often use “Stop” and “Pause“. When you hit “Pause“, it temporarily halts the recording or playback while preserving your spot in the track. It’s useful for short breaks where you want to resume from the same point.

Play And Pause buttons
However, if you pause the track and try to edit, you’ll find your editing tools inactive. This can be confusing and frustrating if you’re not aware of this feature. So, remember: Audacity disables editing features in “Pause” mode.
In contrast, clicking “Stop” ends the ongoing recording or playback and resets your position to the start of the track. More importantly, it reactivates the editing tools, allowing you to cut, copy, paste, or perform any other editing tasks.
So, a key tip for smooth podcast audio editing in Audacity: always use “Stop” instead of “Pause” when you’re ready to edit.
Navigating Playback and Review Mechanisms
Understanding the difference between “Stop” and “Pause” brings you closer to mastering the art of editing in Audacity. As you continue your journey in podcast audio editing, practice using these controls until they become second nature.
2. Incorporating External Audio
When crafting a podcast, external audio elements like music or sound effects can add depth and interest. In Audacity, importing these sounds is straightforward and essential to creating a dynamic listening experience.
Sourcing and Using Royalty-Free Music
Incorporating music into your podcast not only sets the right tone but also engages your listeners. However, it’s vital to use royalty-free music to avoid any copyright issues. This is where Envato Elements comes in handy.

Envato Elements website thumbnail
Envato Elements is a highly recommended resource that offers an extensive library of high-quality, royalty-free music tracks perfect for podcasts. With just a few clicks, you can browse, select, and download the ideal track that resonates with your podcast’s theme.
Once you’ve found your perfect soundtrack on Envato Elements and downloaded it, you’re all set to import it into Audacity. With the right music, your podcast will stand out, captivating your audience from start to finish.
To import your chosen music file, navigate to the ‘File‘ menu in Audacity, select ‘Import‘, then ‘Audio‘. Locate your downloaded music file on your computer and click ‘Open‘. The file will appear as a new track in your project.
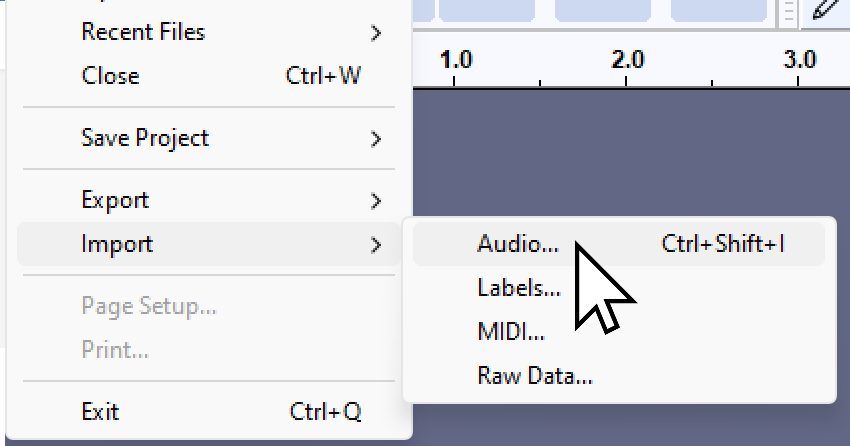
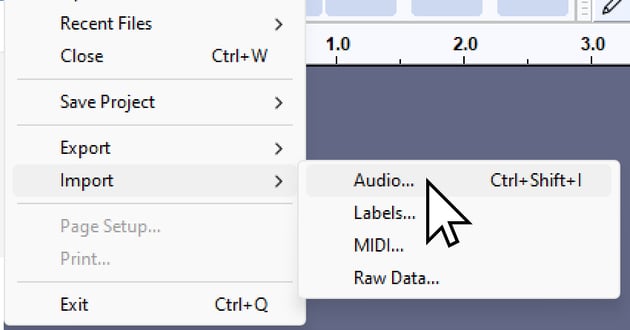
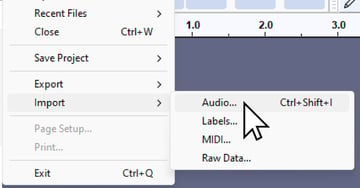
Import audio
Balancing Audio Levels
Once you’ve imported your music, you may need to adjust its volume to ensure it doesn’t overpower your voice. This balance is crucial in ensuring your message is clear and your podcast is pleasant to listen to.
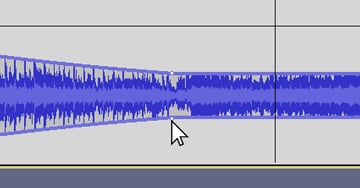
Using Audacity’s ‘Envelope Tool‘, you can manipulate the volume of your music track. Click on the ‘Envelope Tool‘ icon, then click and drag points on your music track to adjust the volume. By lowering the music volume during voice segments and raising it during silent sections, you can create a professional-sounding mix.


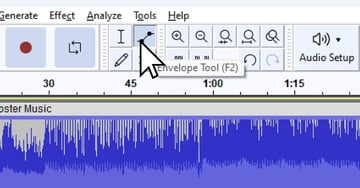
Envelope Tool button
Importing Additional Voiceovers or Interviews
In addition to music, you might want to include other audio elements, such as voiceovers or interviews. These can be imported in the same way as music files. Remember to adjust their volumes as necessary to maintain a balanced and harmonious audio mix.
By effectively incorporating external audio, you can enhance your podcast and create a captivating listening experience. Remember, practice makes perfect, so don’t be afraid to experiment with different sounds and volume levels.
3. Fine-Tuning Your Imported Audio
Editing a podcast in Audacity isn’t just about importing and arranging audio. It’s also about fine-tuning each element to create a harmonious blend. The Selection tool is your best friend for making precise edits.
Using the Selection Tool for Precise Edits
The Selection tool, typically selected by default, is your primary instrument for isolating areas of your audio track. To use it, click on the tool and then click and drag over the area you want to edit. This area will be highlighted, indicating it’s ready for manipulation.

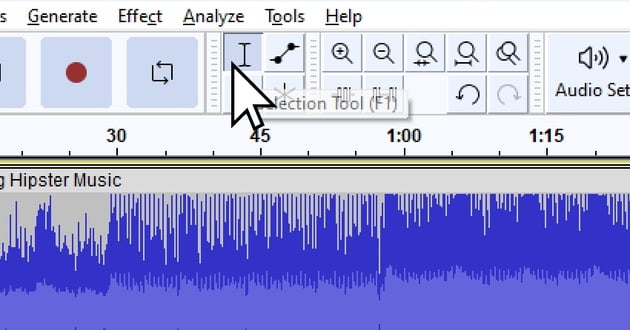

Selection Tool button
For instance, if you’ve imported a music file that’s longer than your voiceover, you might want to remove the extra portion. Simply select the area after your voiceover using the Selection tool and hit ‘Delete’ on your keyboard. The highlighted portion disappears, leaving a seamless blend of voice and music.
Techniques for a Refined Editing View
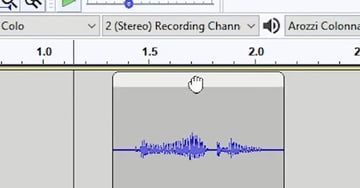
The ability to zoom in and out on your audio track can significantly enhance your editing precision. By getting a closer look at your waveform, you can make highly accurate selections, ensuring clean cuts and transitions.
In Audacity, you can zoom in by clicking the magnifying glass icon and then clicking on your track. To zoom out, hold down the ‘Shift‘ key and click. This refined view makes it easier to spot and rectify any issues, resulting in a polished, professional-sounding podcast.
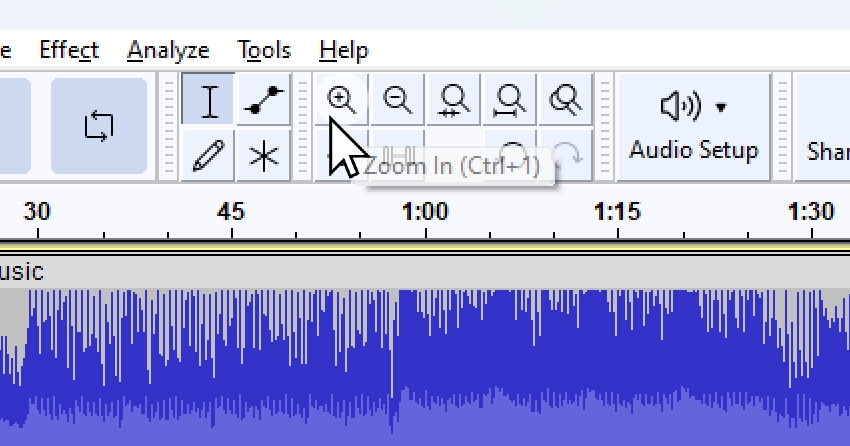
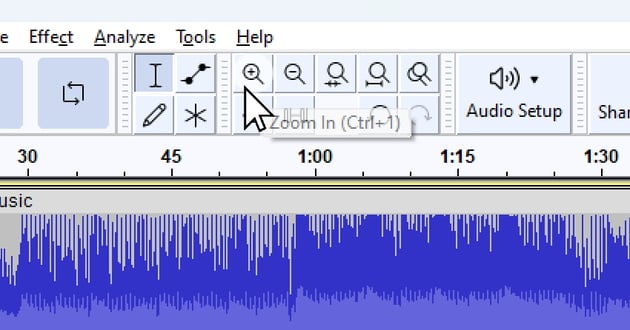

Zoom buttons
4. Juggling Multiple Tracks
When editing podcast audio in Audacity, you’ll often encounter multiple tracks. These might be your voiceover, imported music, or background sounds. Managing these elements is crucial to creating a polished, professional-sounding podcast.
Understanding Stereo and Mono Tracks
In Audacity, tracks may appear as either stereo or mono. A stereo track has two lines, representing the left and right audio channels. If both lines are equal, your listeners will hear the same sound in both ears. However, if one line is flat, the sound will only come out of one ear, creating an odd listening experience.
Using the Pan Tool for Audio Balance
To adjust which ear hears what, use the Pan tool. This tool, marked with ‘L‘ for left and ‘R‘ for right, lets you shift the audio balance. By sliding the control towards ‘L‘, the sound moves to the left ear, and vice versa.
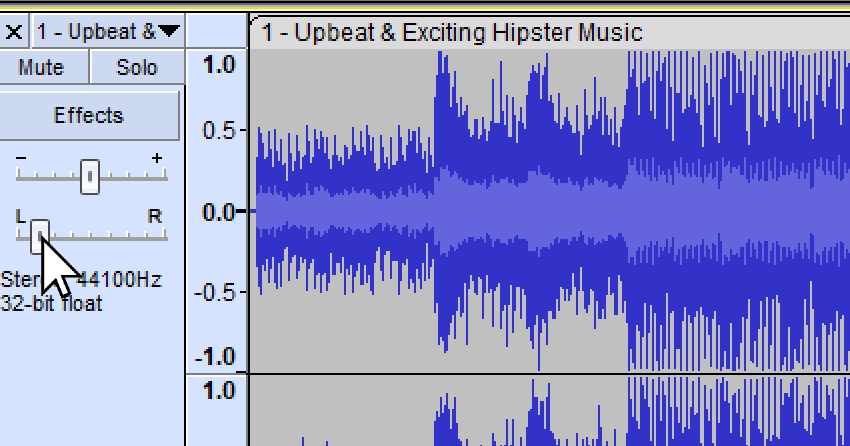

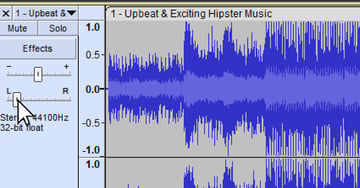
Adjusting Balance Slider to the left
While this feature is more relevant for music production, it can also add depth to your podcast. For instance, you might pan a background sound effect to one side, creating a sense of space and direction.
Adjusting Volume for a Balanced Mix
Before you hit play and review your mix, anticipate potential volume issues. If you have a loud music track alongside your voiceover, one might drown out the other. To prevent this, you’ll need to adjust the volume levels of your tracks.
5. Strategizing Audio with Time Management Tools
In the world of podcast audio editing, the strategic placement of your sounds plays a crucial role in delivering an engaging listener experience.
Adjusting and Moving Portions of Your Track
Sometimes, you might need to adjust your audio track and move certain parts around. This can be done by selecting the desired part of the track you want to move.
In previous versions of Audacity, this task was performed using the ‘Time Shift Tool’. However, in the newer versions like Audacity 3.1.3, this tool has been replaced with a more user-friendly feature – the clip handles
Using Clip Handles in Audacity
Clip handles are found at the top of every audio clip in your project. To move a portion of your track, position your mouse precisely at the top of the clip you want to move. Click and hold the left mouse button, then drag the clip to its new location.
This method allows you to slide clips around without having to switch tools, making it easier for beginners to navigate. Just keep in mind, if any part of a clip is selected, the entire clip will move.

Click and drag clip around using Clip Handles
Splitting and Moving Audio Selections
If you want to move a specific selection within a clip, you will first need to split the clip. This can be done by navigating to the ‘Edit menu, selecting ‘Audio Clip‘, and then choosing ‘Split‘. Alternatively, you can use the shortcut ‘Ctrl + I‘. Once the clip is split, you can use the clip handles to move the selection to its new position.
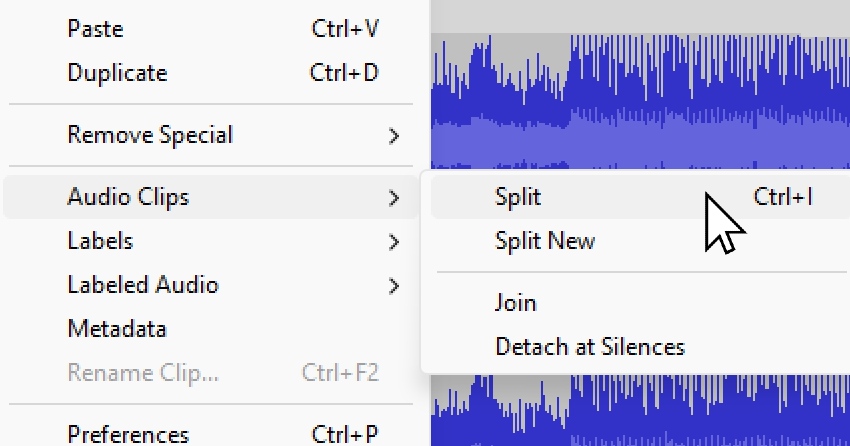


Clicking the Split menu
By understanding these changes in Audacity’s interface and functionality, you can continue creating engaging podcasts with ease. Remember, practice makes perfect. So, don’t hesitate to experiment with these tools to get a feel for how they work.
6. Advanced Track Adjustments
As you venture deeper into the world of podcast audio editing in Audacity, you’ll come across scenarios where your tracks need more advanced adjustments. One such technique involves splitting, segmenting, and restructuring your tracks to ensure a smooth, engaging audio experience for your listeners.
Trimming Excess Audio
Sometimes, after splitting and moving your tracks, you may find some excess audio that needs removal. To achieve this, simply select the excess portion using the Selection tool and delete it. This ensures a clean, even audio track that enhances your podcast’s overall quality.
7. Modulating Audio Intensity
Creating the perfect audio blend for your podcast involves more than just cutting and pasting tracks. It’s also about controlling the intensity of your audio elements to ensure they complement rather than overpower each other. In Audacity, the Envelope tool, as we’ve mentioned is an excellent feature designed to help you achieve dynamic audio adjustments.
Understanding the Envelope Tool
The Envelope tool, which could aptly be called a volume adjuster, allows you to modulate the volume of your audio tracks. When selected, it highlights specific parts of your tracks, providing you with a visual guide for volume adjustments.
This tool is particularly useful when you want to balance the volume levels between different elements of your podcast. For instance, you might have a voiceover track that needs to remain consistent, while the background music should vary in intensity.
Creating Volume Control Points
When you click on a track with the Envelope tool, it adds a little dot. This dot serves as a control point for your volume adjustments. By adding multiple control points along your track, you can create dynamic changes in volume.
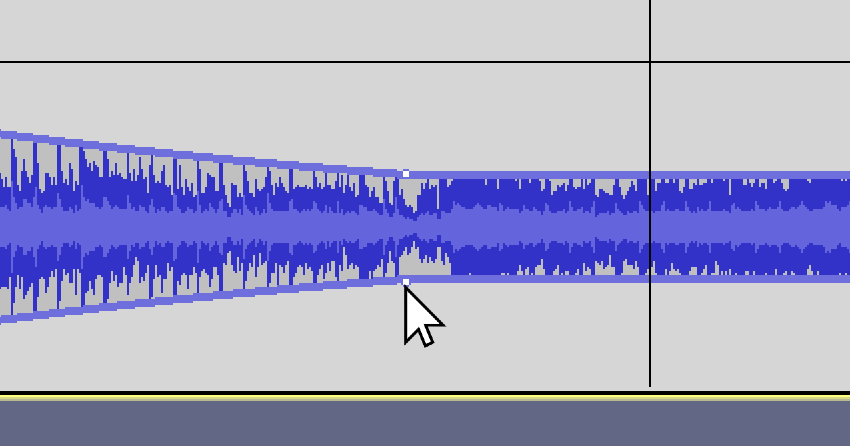
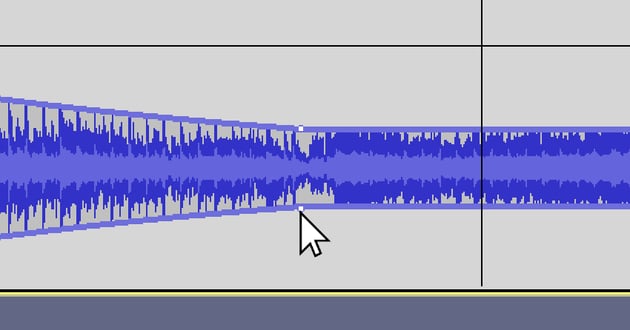
Envelope tool control points
For example, you might want your background music to start loud and then gradually soften as your voiceover begins. To achieve this, you would create a control point at the start of the music track and another at the point where your voiceover kicks in. Then, by dragging the second control point down, you can reduce the volume of the music.
Fine-Tuning Your Audio Intensity
Once you’ve set your control points, you can fine-tune your audio intensity by adjusting these points. Simply click and drag the control points to increase or decrease the volume. Remember, the goal is to create a harmonious blend of sounds, ensuring your listeners can comfortably hear all elements of your podcast.
8. Incorporating Fresh Recordings
Creating a compelling podcast in Audacity often involves incorporating fresh recordings into your existing tracks. This process can seem complex at first, but once you understand the steps, it becomes a straightforward task.
Recording New Audio Segments
To add new audio to your podcast, ensure the track you want to add to is highlighted. Click on the point where you want to start recording using the Selection Tool, then hit the Record button.
You might notice that when you record, Audacity creates a new track below your existing one. This is a default feature designed to prevent overwriting your original recordings. Don’t panic – we’ll soon learn how to blend this new recording into your existing track.
Understanding Append Record
Append Record is the default recording behavior in Audacity. You can start Append Record by holding down the Shift key and clicking the Record button in the Transport Toolbar. You can also use the keyboard shortcut ‘Shift + R‘.
If you press the Stop button, the next recording will begin on a new track. If you want to continue recording on the same track, you need to use Append Record.
The Transport Toolbar has buttons for controlling playback, recording, and moving to the project start or end. You can also control the buttons with keyboard shortcuts.
Merging New Recordings with Existing Tracks
Now, let’s say you’ve recorded a new segment that you want to insert into an existing track. To do this, you’ll first need to mute any other tracks that are playing during the part you’re recording over. You can do this by clicking on the ‘Mute‘ button next to each track.
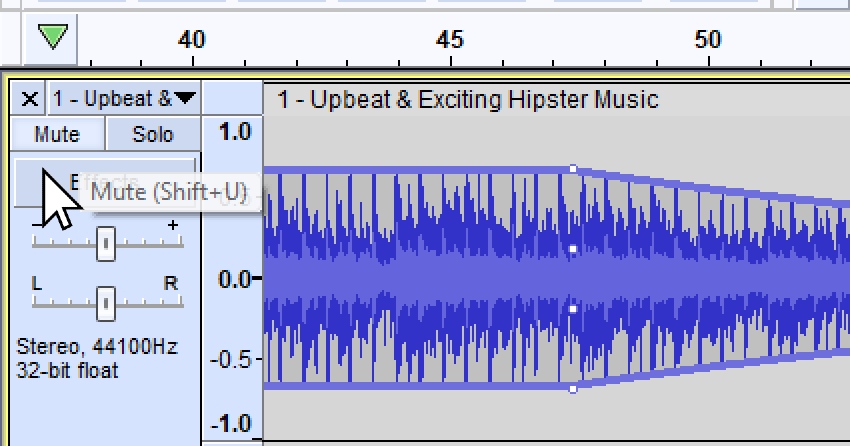


Click the Mute button
After recording your new segment, simply copy it and paste it into your desired position within the existing track. Remember, you can use the Time Shift tool to move this newly pasted segment around for precise placement.
Listening to Your Adjusted Tracks
Once you’ve incorporated your fresh recording, unmute your tracks and play them back to hear how they sound. Adjust your new segment’s position as needed until you achieve the perfect blend of your old and new recordings.
Incorporating fresh recordings into your existing tracks in Audacity allows for dynamic podcast editing. With a bit of practice, you’ll soon be blending new audio segments seamlessly into your existing tracks, creating engaging and high-quality podcasts for your audience.
Finalizing Your Podcast Episode and Exporting the Audio
After meticulous editing, blending, and adjusting of your audio tracks, you’re finally ready to finalize and export your podcast episode using Audacity. This process involves fine-tuning the arrangement of your clips, eliminating any unwanted sections, and choosing the optimal audio format and quality settings for your final output.


Perfecting Your Audio Arrangement
To begin, ensure your audio clips are arranged in the desired sequence. If you need to move a clip, simply select it with the Selection Tool, copy it, and then paste it in the desired location. You can then use the Time Shift Tool to adjust its position precisely.
If there are parts of your recording that aren’t needed, such as an accidental cough or sneeze, highlight that section and remove it. Remember, the goal is to create a seamless audio experience for your listeners, so don’t hesitate to remove any elements that disrupt the flow of your podcast.
Choosing the Right Audio Format
Once you’re satisfied with your audio arrangement, it’s time to export your podcast episode. In Audacity, click on ‘File‘, then ‘Export‘, and choose ‘Export as MP3‘.
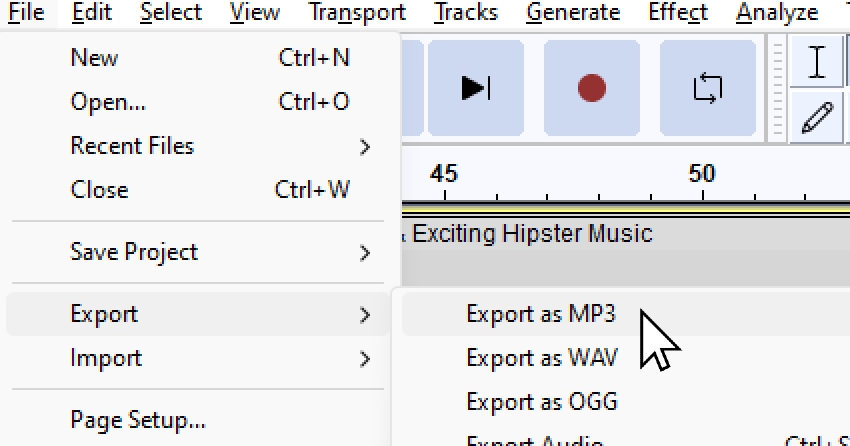


While WAV files are common, they tend to be significantly larger than MP3 files. This larger size can make uploading and sharing your podcast more time-consuming. Therefore, selecting MP3 as your export format is generally recommended for podcasting.
Setting the Optimal Audio Quality
Next, adjust the quality settings for your final output. While higher-quality settings result in larger file sizes, they also deliver better audio quality. To strike a balance between file size and quality, a setting of around 192 kbps is suggested. Lower settings might decrease the file size but can significantly affect the audio quality.
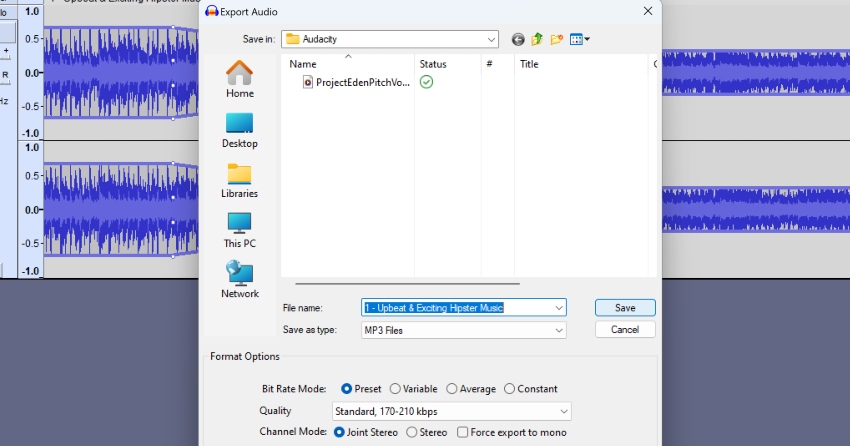


Finalizing Your Export
After setting your format and quality, click ‘Save‘. You’ll then have the option to edit your metadata, such as the artist name and track title. For now, you can clear this out – we’ll cover metadata editing in a later section.
And there you have it – your podcast episode, edited and exported using Audacity, is ready for upload and sharing with your eager audience. By learning how to edit a podcast in Audacity, you’ve taken a significant step toward producing high-quality, engaging content for your listeners.
Five Popular Additional Options for Podcast Editing
- Apple’s GarageBand: Recognized by macOS and iOS users for its vast selection of sound effects and music, GarageBand is ideal for crafting engaging intros and outros for podcasts. Its user-friendly interface makes podcast editing an effortless task for beginners.
- Audition by Adobe: This high-grade audio workstation is packed with advanced functionalities like waveform, multitrack, and spectral display. Conceived for advanced users, Adobe Audition is perfectly tailored for intricate editing tasks and sound effects applications.
- Logic Pro X by Apple: Favored in the professional realm, Logic Pro X possesses superior sound engineering capabilities. Its distinctive features such as Flex Pitch and Flex Time offer the flexibility to adjust pitch and timing in recordings respectively, making it one of the best premium options for podcast creators on Mac.
- Reaper: Created for Windows and OS X, Reaper is a comprehensive digital audio production application that includes extensive tools for recording, editing, mixing, and mastering audio and MIDI multitrack.
- Hindenburg Journalist: This editing platform offers a multitrack interface, complete with features that delight podcasters. With automatic audio leveling, crossfades made easy, and direct exporting capabilities to platforms like Libsyn and SoundCloud, Hindenburg Journalist is an effective podcasting tool.
Wrapping Up: Mastering Podcast Editing with Audacity
Throughout this guide, we’ve explored the ins and outs of podcast editing using Audacity. We began by understanding how to incorporate fresh audio recordings into existing tracks, experimenting with selection tools, and learning the importance of the Append Record function.
We then delved into the process of blending new audio into your tracks, focusing on muting and unmuting tracks and the method of copying and pasting recordings into an initial track. Completing the journey, we explored finalizing a podcast episode, removing unwanted sections, and exporting it in the optimal format and quality settings.
With this knowledge in hand, you’re now fully equipped to create engaging, high-quality podcasts that will captivate your audience. Remember, like any skill, podcast editing requires practice. Don’t be disheartened if your first few attempts don’t turn out perfect. Keep editing, keep experimenting, and before long, you’ll be producing podcast episodes that truly stand out.
As you continue on your podcasting journey, remember that Audacity is just one tool in your arsenal. Stay curious, explore other software and techniques, and continue learning and growing as a podcaster. Happy podcasting!