What You’ll Learn in This Illustrator Tutorial
- How to draw the Ghostbusters logo using the Pen Tool and Shape Tool
- What is the Ghostbusters font and how to incorporate it into the logo design
- How to illuminate the text with a glow just like the original Ghostbusters logo
- Some trivia about the Ghostbusters logo design
Tutorial Assets
You’ll need the following resources in order to complete this project and create the original Ghostbusters logo design:


About the Ghostbusters Logo
Before we grab our digital proton packs and jump into Illustrator, let’s rewind and uncover some ghostly trivia about this legendary logo. Created by Michael C. Gross, the Ghostbusters logo is more than just a symbol; it’s a beacon for ghostly adventures. Making its debut in the 1984 blockbuster, this no-nonsense ghost in a red “no” sign has captured hearts and imaginations worldwide.
Many people don’t realize that the ghost in the logo is named Mooglie, a name given by Dan Aykroyd and Ivan Reitman early in the franchise’s production. The logo we’ve come to love has evolved and changed over time, appearing in various forms across movies, cartoons, and even video games. From the classic design to slime-drenched variants, it’s a symbol that’s as versatile as it is iconic.
The logo’s simplicity and humour were key to its success, merging the supernatural with the universally recognized “no” sign. It’s a warning to all ghosts that they are not welcome… unless you’re part of the logo, of course (or Slimer from The Real Ghostbusters)!
Armed with that spectral knowledge, we’re ready to tackle our own version of this iconic emblem. So let’s not keep those ghosts waiting any longer. On to the tutorial!
1. How to Draw the “No Ghost” Sign
Step 1
Let’s get started by launching Illustrator and going to File > New to open the New Document window. There, type “Ghostbusters logo” as the name of the document and set up the dimensions as shown. Keep the units set to pixels and use the following measurements:
- Width: 1000 px
- Height: 500 px
Step 2
Select the Ellipse Tool (L) and start drawing a perfect circle by holding down the Shift key on the keyboard while clicking and dragging across the canvas with the mouse. Try to draw a circle that is 89.17 pixels wide and bright red. In this tutorial, we will be using #DD2227.
Step 3
Go to the top of the screen and select the Stroke panel to bring up some options. Here, you want to select the following:
- Weight: 16 pt
- Align Stroke: Align stroke to inside
Step 4
Now, select the Rectangle Tool (M) and create a rectangle with the following dimensions:
- Width: 70 px
- Height: 16.44 px
Step 5
Right-click on the rectangle and go to Transform > Rotate to rotate the shape by 35°, and check the Preview box so that you can see what it looks like.
Step 6
Combine the two shapes. You should now have something like the image below.
2. How to Draw the Ghosts in the Ghostbusters Logo
Step 1
Go to the Layers panel (Window > Layers) and create a new layer for the background. Make sure that it’s positioned underneath the layer with the red “no” sign.
Use the Rectangle Tool (M) and create a black background that covers the whole canvas. Rename both layers so that they’re easily identifiable.
Step 2
Lock the background layer by clicking on the square next to the eye symbol.
Create a new layer and call it “ghost”. Use the Ellipse Tool (L) to create two white shapes for the head.
Step 3
Now use the Pen Tool (P) to fill in the sides of the head. Click and drag with the mouse when creating points to create a curved shape. Try to follow the shape of the image below to create the shape of the head.
Step 4
Continue using the Pen Tool (P) to draw out the top shape for the head. Remember to click and drag with the mouse when creating points to create a curved shape. You can adjust the shape after you have created it by either repositioning the anchor points or adjusting the handles.
Step 5
To round off a corner, use the Direct Selection Tool (A) and then click and drag the corner widget that appears.
Step 6
Continue using the Pen Tool (P) to draw the shape of the ghost’s arm.
Step 7
Repeat the steps, using the Pen Tool (P) to create the left hand.
Step 8
Use the Pen Tool (P) again to draw the right hand. Try to position the shapes as close to the image below as possible. By creating separate shapes for all the limbs, we make it easier to reposition the shapes later on to make adjustments to the character.
Step 9
Use the Ellipse Tool (L) to create the body of the ghost.
Step 10
Once you are happy with the general placement of the shapes that make up the ghost, select all the shapes and group them all together by pressing Control-G on the keyboard. Place the ghost shape on top of the red sign (make sure to re-order the layers so that the ghost layer is above the red sign).
Step 11
Select the red rectangle and press Control-X to cut it. Create a new layer and position it on top of the ghost layer. Then press Control-Shift-V to paste it in place inside the new layer.
Step 12
To complete the ghost shape, create a new layer and position it underneath the red sign. Use the Pen Tool (P) to create the tail shape of the ghost.
3. How to Draw the Ghost Outlines
Step 1
Now that we have all the shapes ready, we want to create the details for the ghost logo. To make things easier to see, reduce the opacity of the background layer to about 50% using the Transparency panel (Window > Transparency).
Once you’ve done that, create a new layer, position it above all the other layers, and rename it “ghost lines”.
Step 2
Use the Ellipse Tool (L) to create the mouth of the ghost, making sure that the fill color is set to black and the stroke is empty.
Step 3
Now use the Pen Tool (P) and draw the lines for the chin and the nose. Make sure that the stroke color is set to black and the fill color is empty.
Step 4
Now select the Width Tool (Shift-W), which will allow you to create variable-width strokes.
Step 5
Under the stroke options, make sure to select Round Cap.
Step 6
Then use the Width Tool to adjust the thickness of the stroke at both ends. You can click and hold any point along the stroke path to make it thicker or thinner.
Step 7
Repeat the steps for both the nose and the chin.
Step 8
Now use the Pen Tool (P) to draw lines for the eyes and eyebrows of the ghost.
Step 9
Use the Width Tool again to vary the thickness of the strokes. To create the eyes, you need to increase the thickness of the stroke at the bottom to create a round shape. The stroke must be set to Round Cap for this to work properly.
Step 10
Use the Pen Tool to create the outlines for the head. You can use the edges of the ghost shape to guide you.
Step 11
One quick method to vary the width of your strokes is by using width profiles. Select all the strokes that you want to apply the profile to, and select Width Profile 1 to change the way they look.
Step 12
You can then use the Width Tool to make slight adjustments to the stroke, such as thickening the end of a stroke.
Step 13
Repeat this process for the rest of the outline. Make sure to use a combination of width profiles and the Width Tool to get the best results.
For the longer strokes, you usually want to thicken the middle of the stroke while making both ends thinner.
Step 14
Once you are happy with the way the Ghostbusters ghost looks, move the red rectangle layer back on top so that the ghost looks as if it’s inside the red sign. Now, let’s move on to the next section, where I’ll answer a common question: “What is the Ghostbusters font?”
4. How to Create the Ghostbusters Font and Glow Effect
Step 1
Now that we have the Ghostbusters logo ghost, let’s complete the design by adding the text. So what is the Ghostbusters font? A close match is Winsel Medium Extended, which you can get in Adobe Fonts as part of a Creative Cloud subscription.
Create a new layer for the text and use the Type Tool (T) to create the text. Adjust the text so that the Ghostbusters logo ghost is positioned where the “O” would be. Use the following settings in the Character panel to make slight adjustments to the font:
- Font Size: 107.38 pt
- Tracking for the selected characters: -45
- Color:
000000 - Stroke: 1 pt
Step 2
Select all of the text characters and press Control-C on the keyboard to copy them. Then create a new layer underneath the text layer and name it “text glow”. Select the new “text glow” layer and press Control-Shift-P to paste the text characters in place.
Step 3
Hide the text layer by clicking on the eye icon. We can also hide the other layers so that we can focus on the text glow effect.
Step 4
With the text selected, remove the fill color and make sure the stroke is empty. If you do have a stroke color selected, you’ll notice that the characters are made up of several shapes. We will need to combine them.
Step 5
With all the text shapes selected, go to Object > Expand and select both the Object and Fill. This will convert the text characters into vector shapes.
Now go to the Pathfinder tab and select Unite. This will combine all the separate shapes into a single shape, which is essential for the next step.
Step 6
Go to the Appearance panel and click on the Add New Stroke button located on the bottom left. This will add a stroke around the text. Use the following stroke options:
-
Color: #
00AEEF - Width: 5 pt
Step 7
With the stroke selected, click on the Add New Effect button and select Blur > Gaussian Blur.
Step 8
Set the following options for the Gaussian Blur:
- Radius: 25 pixels
- Stroke Width: 5 pt
- Opacity: 70%
Step 9
Now repeat the process and create a new stroke with the following options:
-
Color: #
FFFFFF - Radius: 10 pixels
- Stroke Width: 3 pt
- Opacity: 100%
Step 10
Create a third stroke with the following options:
-
Color: #
00AEEF - Radius: 30 pixels
- Stroke Width: 5 pt
- Opacity: 100%
Step 11
Create a fourth new stroke with the following options:
-
Color: #
FFFFFF - Radius: 5 pixels
- Stroke Width: 3 pt
- Opacity: 50%
Step 12
Now that we’ve completed the glow effect, we can unhide the rest of the layers to reveal the final Ghostbusters logo.
Step 13
To make the glow stand out even more, we want to place the Ghostbusters font on a dark background. So let’s increase the opacity of our background back to 100% again and see what it looks like.
Step 14
This final result, glowing on your screen, embodies a spirit of creativity and nostalgia, perfectly capturing the essence of the Ghostbusters legacy. The iconic “No Ghost” logo, a symbol of paranormal prowess since 1984, has now been successfully recreated thanks to your newfound Illustrator skills.
Congratulations! Your Ghostbusters Logo Is Done!
Congratulations, now you know how to draw the Ghostbusters logo. You’ve officially crossed the streams of creativity and skill to capture the essence of the original Ghostbusters logo in Adobe Illustrator! By now, your screen should be glowing with pride in a job well done, showcasing the iconic “No Ghost” which features the Ghostbusters logo ghost Mooglie.
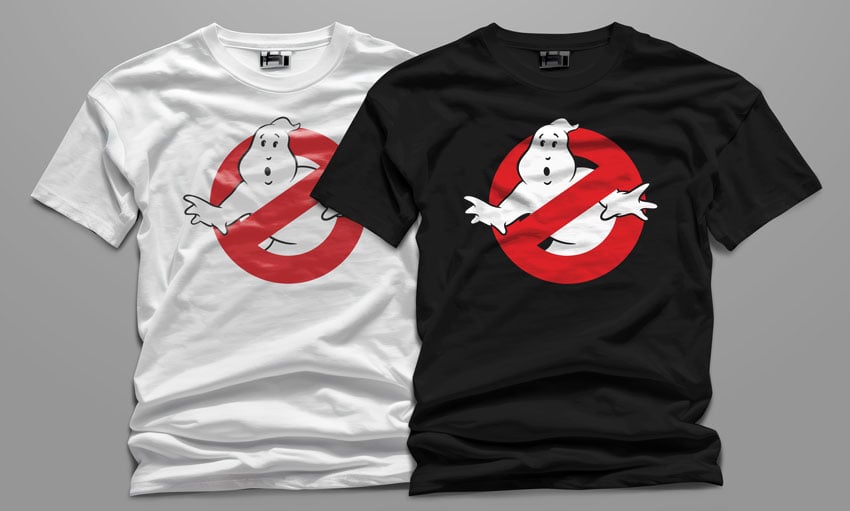
This logo is so versatile that you can place it on almost anything, from movies to toys, apparel, and even video games. Check out how the Ghostbusters logo looks on this T-shirt mockup from Envato Elements.


But remember, in the world of design (and Ghostbusting), the journey never really ends. You can reuse these skills, techniques, and text effects for the next project. So keep experimenting!
You’ve got the tools, the skills, and now the experience. Go forth and create, knowing that you’ve tackled one of the coolest logos in pop culture. Until next time, keep creating and remember… “We’re Ready to Believe You!”
Popular Fonts From Envato Elements
Ever wished you could find the perfect font for your spooky-themed project? Well, look no further than Envato Elements, where you’ll find a wide range of different and imaginative fonts, logos, graphics, and much more. You can download as many as you want with a simple subscription. Let’s take a look!
Devant Horgen Modern Typeface V3.0 (OTF, TTF, WOFF)
If you’re wondering, “What font is the Ghostbusters name tag?”, here’s a good example of what you can use. Its sleek and clean lines make it suitable for a wide range of design projects, from branding and advertising to editorial layouts.
The “Devant Horgen V3.0” typeface’s clean, modern aesthetic ensures high visibility and readability, making it an excellent choice for Ghostbusters name tags where clarity and a touch of professionalism are key.
Northden (OTF, TTF, WOFF, WOFF2)
If you’re looking for something a little rougher for a Ghostbusters name tag, check out Northden. With a touch of ruggedness and vintage appeal, it would perfectly complement the iconic, adventurous spirit of the Ghostbusters brand, ensuring that the names are both prominent and embody the essence of the franchise.
Horror Movies (TTF)
The ‘Horror Movies’ font encapsulates the essence of suspense and thrill characteristic of the horror genre. With its chilling, irregular letterforms, it evokes a sense of eeriness and foreboding, making it perfect for projects that require a touch of the macabre. This font is ideal for movie posters, Halloween events, and any design work aiming to make a spine-tingling impression.
Movie Scare Logotype Font (OTF)
‘Movie Scare Logotype Font’ is tailored for the ultimate horror experience, designed to capture the essence of fear and suspense. Its jagged, unsettling letterforms mirror the tension and thrill of horror cinema, making it an ideal choice for movie titles, promotional materials, and any design project aiming to leave a haunting impression. This font embodies the spirit of horror, ensuring your message is delivered with a truly spine-chilling effect.
Wizardry Night: Mystery Movie Font (OTF/TTF/WOFF)
‘Wizardry Night Mystery Movie Font’ is designed to weave an atmosphere of enchantment and enigma, perfect for narratives steeped in magic and mystery. Its characters are styled with a mystical flair, making it an ideal choice for movie titles, book covers, and any creative project that calls for a touch of the mystical and the mysterious.
Want to Learn More Illustrator Skills?
I hope you enjoyed our tutorial on how to create the original Ghostbusters logo. If you’re a fan of pop culture, take a look at some of these similar tutorials on Envato Tuts+ that teach you a variety of useful techniques and skills using Adobe Illustrator. Check them out!