
In this tutorial I will show you how to draw wings on the back of a human, creating an angel. Angels, though seen as spiritual rather than material, are pictured as winged humans. But wings are not simply an appendix growing out of the shoulder blades—they’re specialized arms. So a typical angel has three pairs of limbs!
So how to draw realistic angel wings? You need to dive a little into human and bird anatomy, not only mixing the bones and muscles visually, but also keeping their function in mind. So in this tutorial I will show you not only how to draw wings, or angel wings, but how to draw a realistic angel as well.
This tutorial can be complemented by the tutorials below. They dive deeper into the subject, providing terminology and more advanced knowledge.
Of course, if you simply need to draw a pair of angel wings, you can safely skip the anatomy part—the step-by-step instructions will be still easy to follow!
1. Comparative Anatomy of Human Arms and Bird Wings
Human Arm Anatomy
Let’s start with human anatomy, as you’re already quite familiar with it. Arms are attached to a structure called the pectoral girdle—the shoulder blades and the clavicles. This gives the arms a wide range of movement. A big muscle, called pectoralis, powers the shoulder—it’s attached to the sternum.


Bird Wing Anatomy
All clear? Let’s take a look at a bird now. Birds have a pectoral girdle as well, although it’s a little more complex: the clavicles are fused into a structure called the furcula (or wishbone) that works like a spring, and their function is taken over by a special bone called the coracoid (absent in humans). Because a birds need much more power in their arms than humans, their shoulders are powered by huge pectoral muscles connected to a massive sternum.
As you can see, wings are not simply arm bones—they’re a complex structure of pectoral girdle, arms, and breast muscles. That part starting at the shoulder is the most visible, but real, functional wings need more than this.


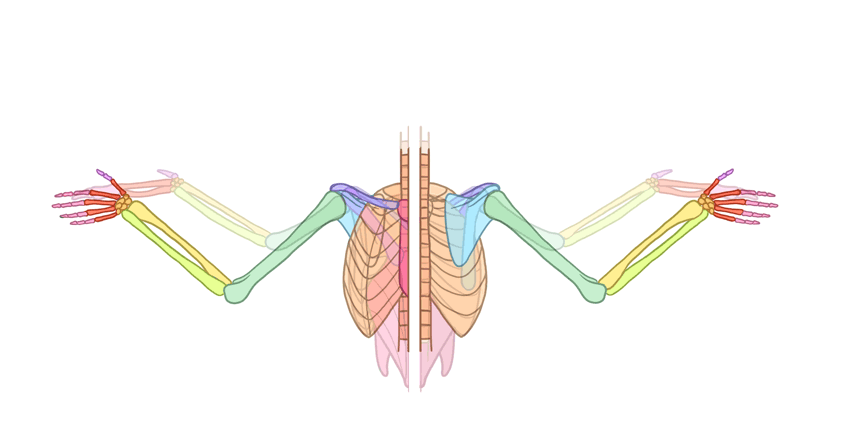
Here’s a quick visual comparison of both structures:
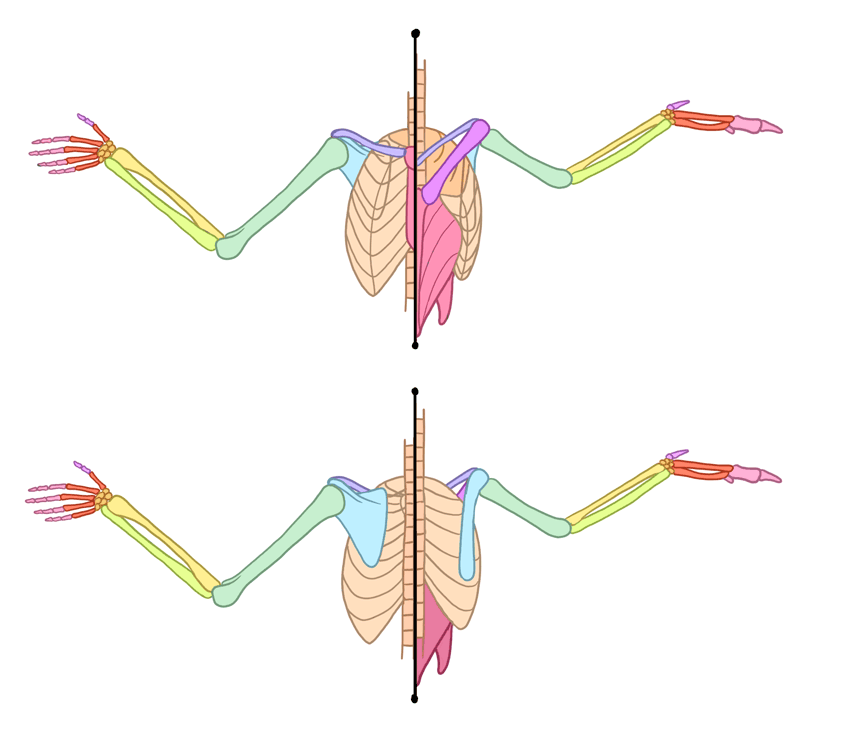
Winged Human Anatomy
You’ve probably noticed two problems here. One, we need to fit two pairs of limbs with separate shoulder blades and clavicles on one chest (if each pair is supposed to move separately). Two, the sternum must be huge, with space both for huge wing-pectorals and smaller shoulder-pectorals. So what do we do?
There are many ways to solve these problems, each equally fantastic. It’s neither possible nor useful to have two pairs of limbs so close to each other, so whatever solution we come up with, it will be only a pseudo-realistic rendition of impossible anatomy. But it’s still better than simply sticking some wings to the back!
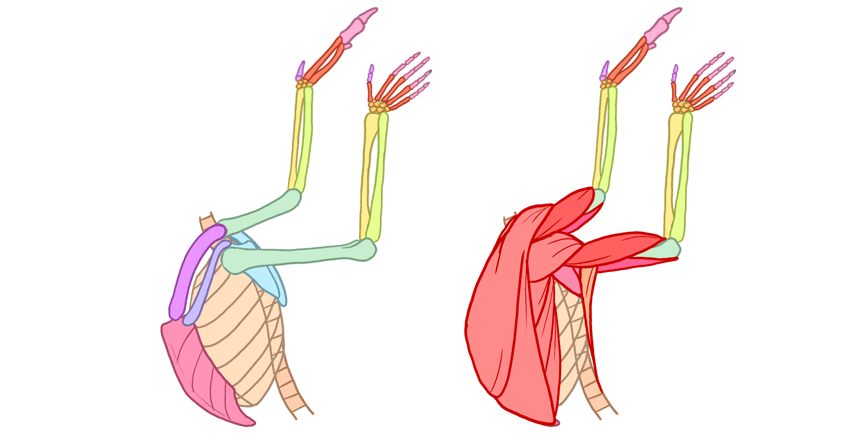
Here’s my idea: the sternum is enlarged, with two layers of pectorals attached to it. The human-clavicles reach lower and are more curved, to leave space for the coracoid of the wing. The bird clavicles are removed—not all flying birds have them, so we can assume they’re not necessary for flight. The bird-pectoral muscle is still very big, covering the front of the torso.
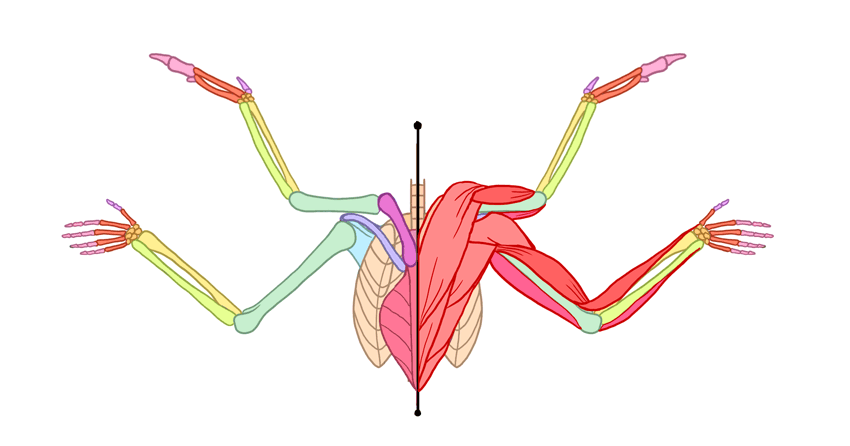
The extra pair of shoulder blades has been placed between the human ones—fortunately, bird scapulae are narrow and can be curved to fit this placement. The wings start behind the original shoulders, slightly above them.
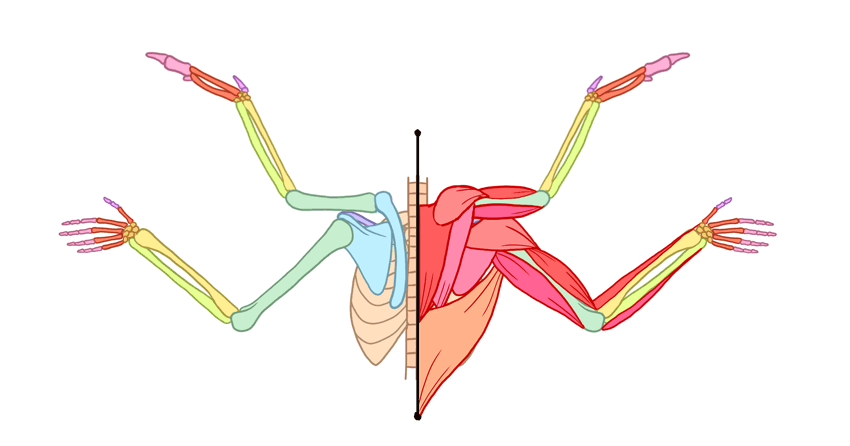
In this configuration, each pair of limbs can move separately, and the whole structure looks quite convincing—though in reality it’s not enough for a powered flight!
2. How to Draw the Anatomy of a Winged Human
If you want to draw an angel, or simply a winged human, you need to modify their chest first. It’s not necessary, of course, but it will add to the realism. I used this photo of a shirtless, muscular man as my model. He looks perfect for this purpose!
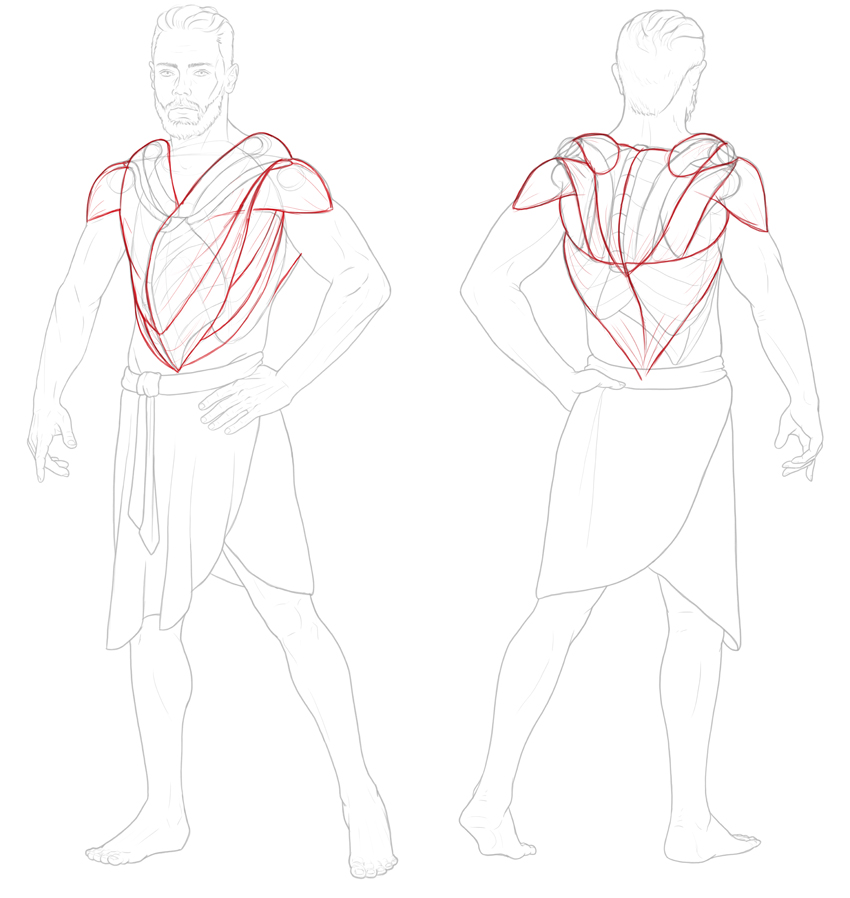
First, I added the fake bones inside the chest, with coracoids landing somewhere behind the shoulder-neck muscles. I tried to keep the sternum big, but not absurdly so (though it would be more convincing this way!).

Now, I attached the muscles to the bones, using the real muscles as a reference where possible.

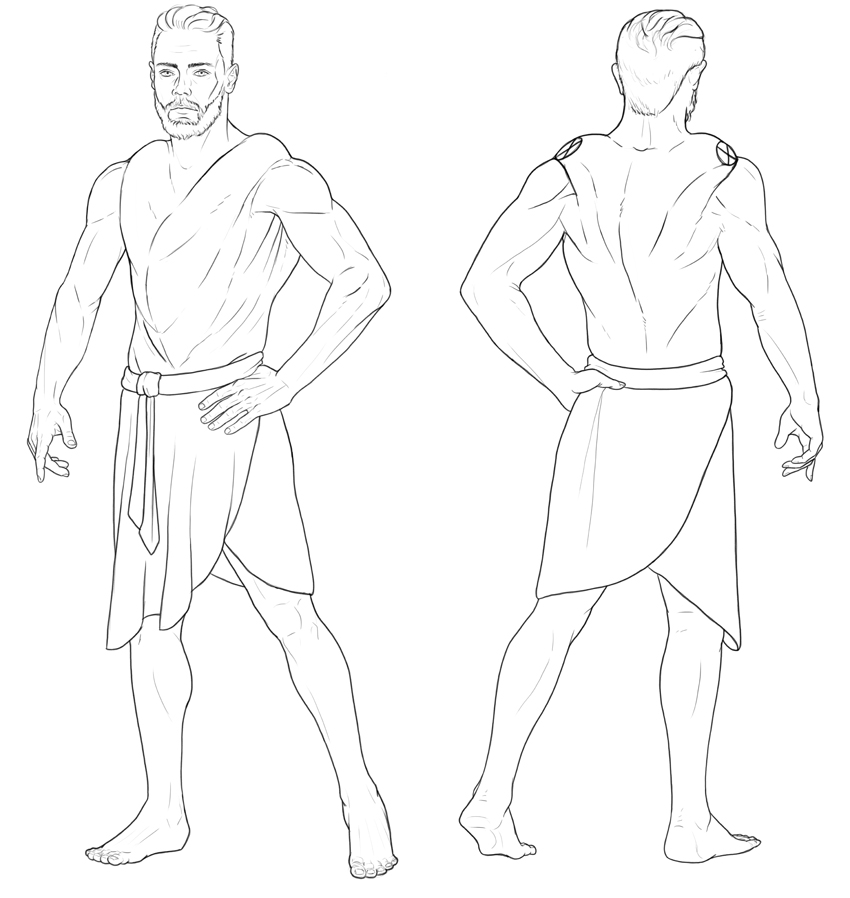
After I turned the photo into a piece of line art, the new anatomy merged nicely with the original one.

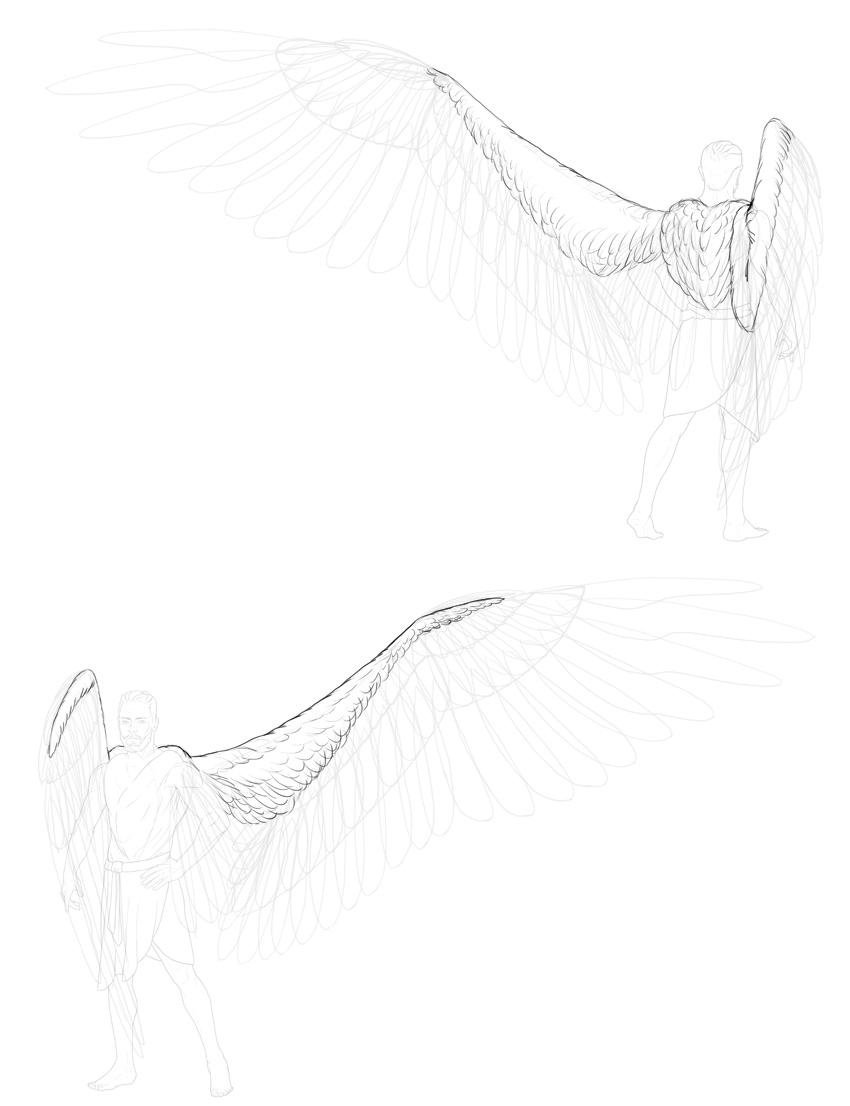
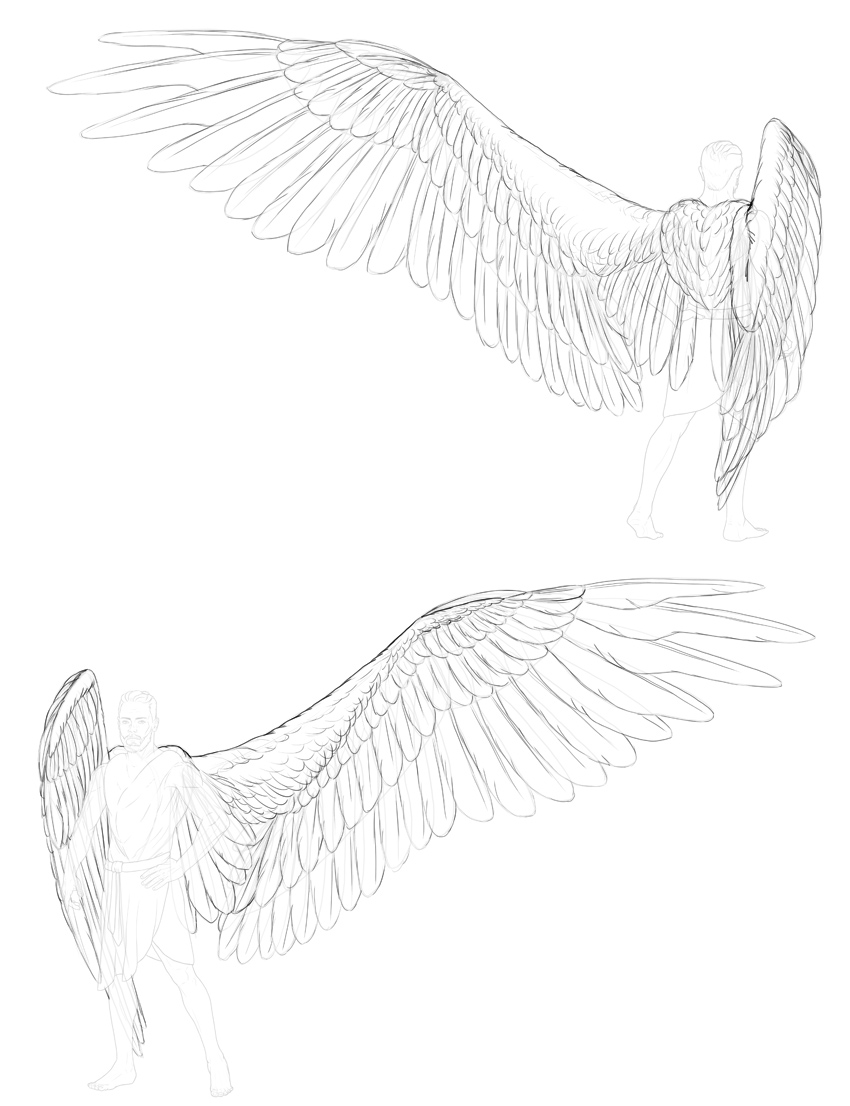
If you need a reference for both the front and back view of a winged man, feel free to use these:
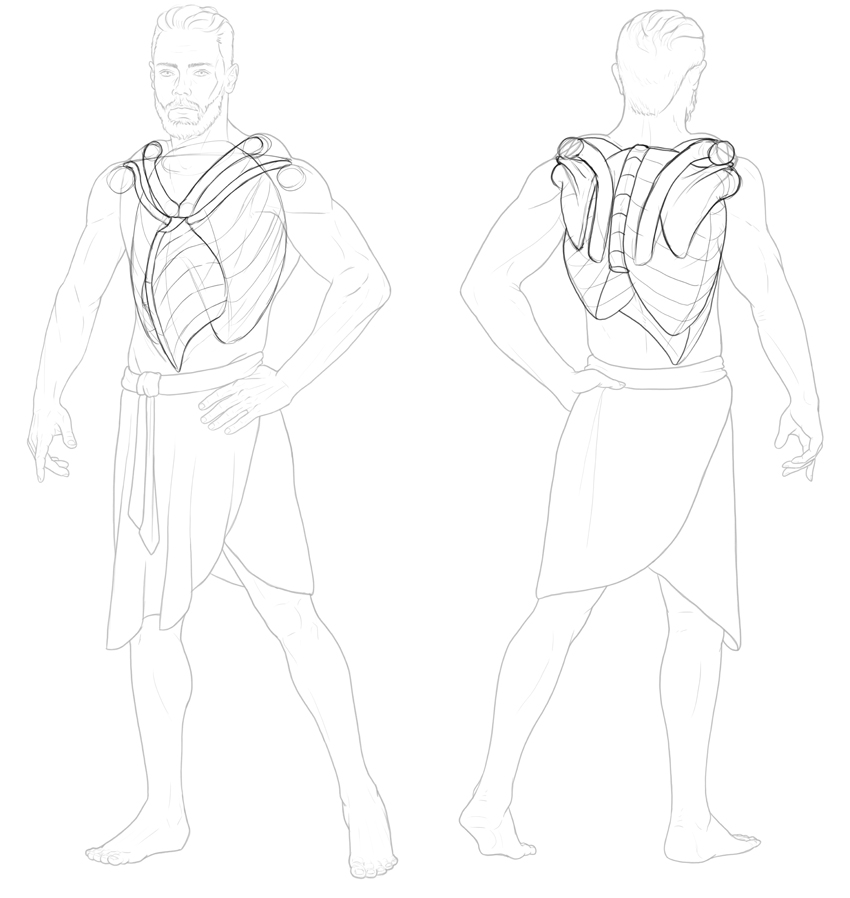
You can also simply copy these drawings to follow the rest of the tutorial.
3. How to Draw the Structure of the Wings
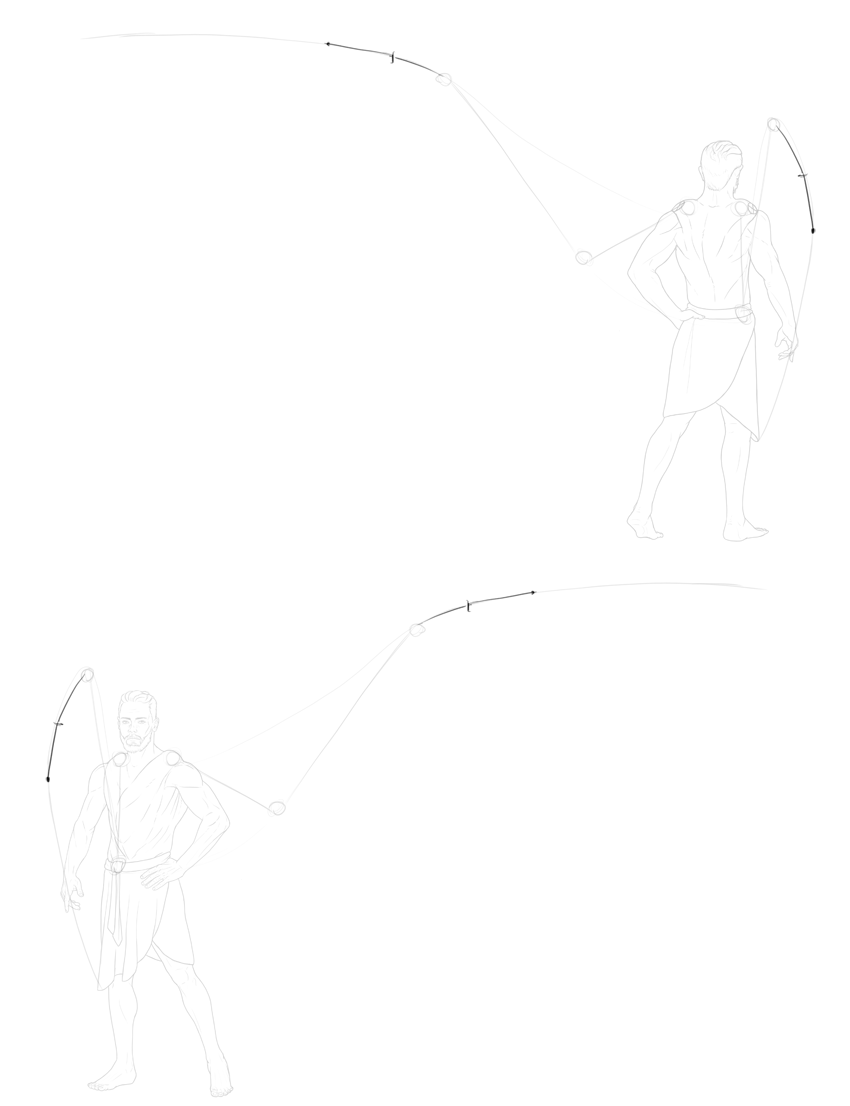
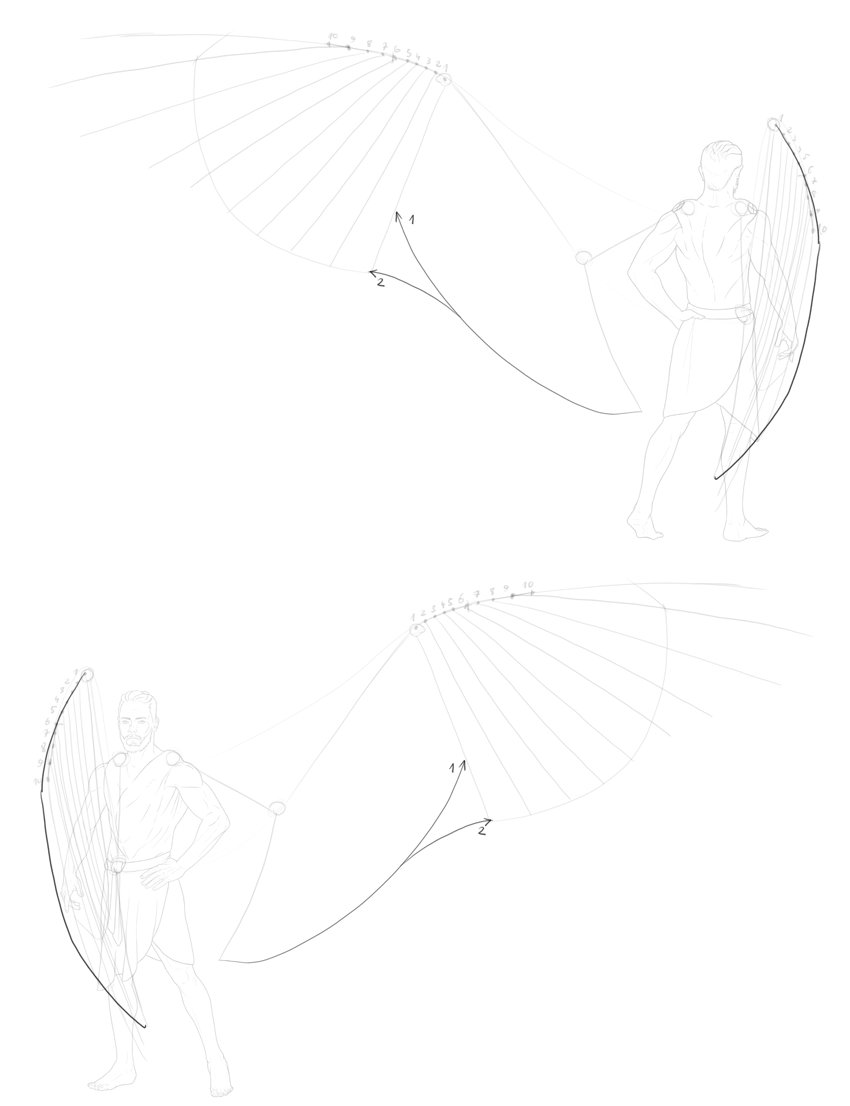
Step 1
Draw the basic rhythm of the wings. Forget the anatomy for a moment—just sketch a shadow of what the wings are supposed to look like in the end.

Step 2
Draw the arm and the forearm, creating a triangle under this basic curve.

Step 3
Add the “finger”. It bends a little somewhere in the middle, so you can use it to create the pose you need.
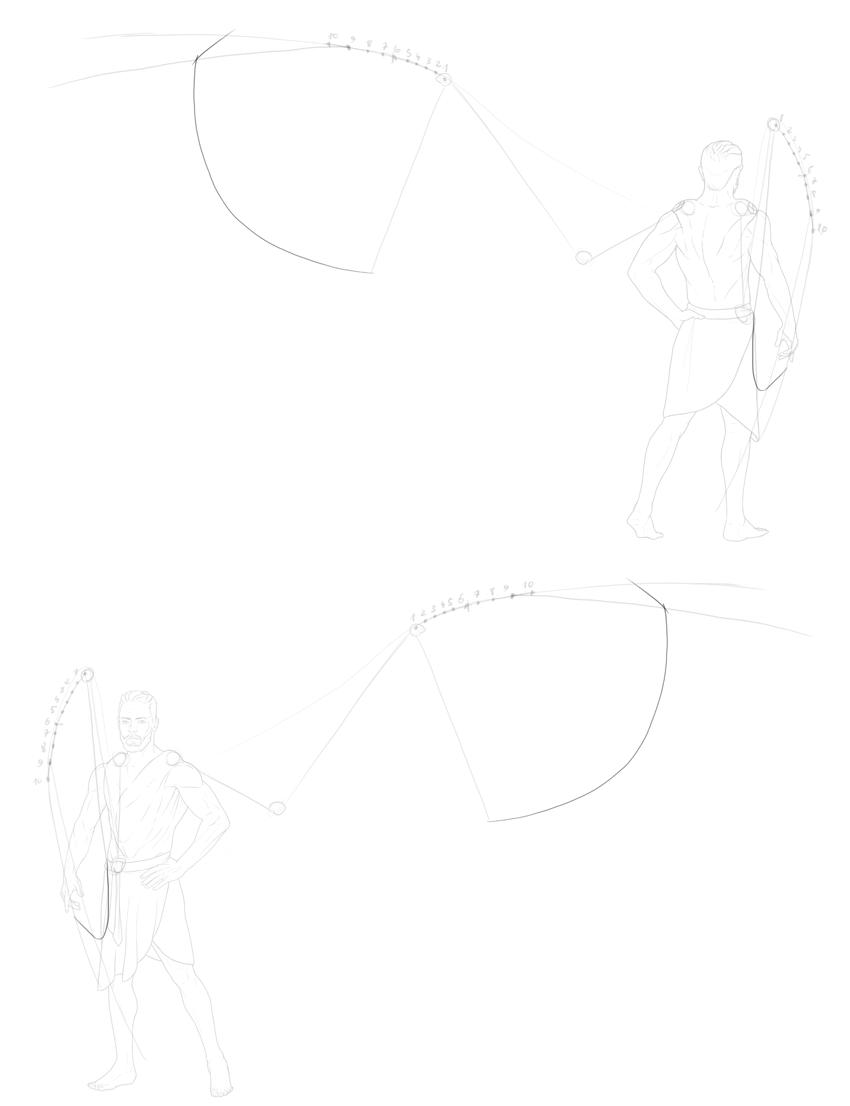
Step 4
Draw a line separating the primary feathers from the secondary ones. It should be shorter than the forearm.

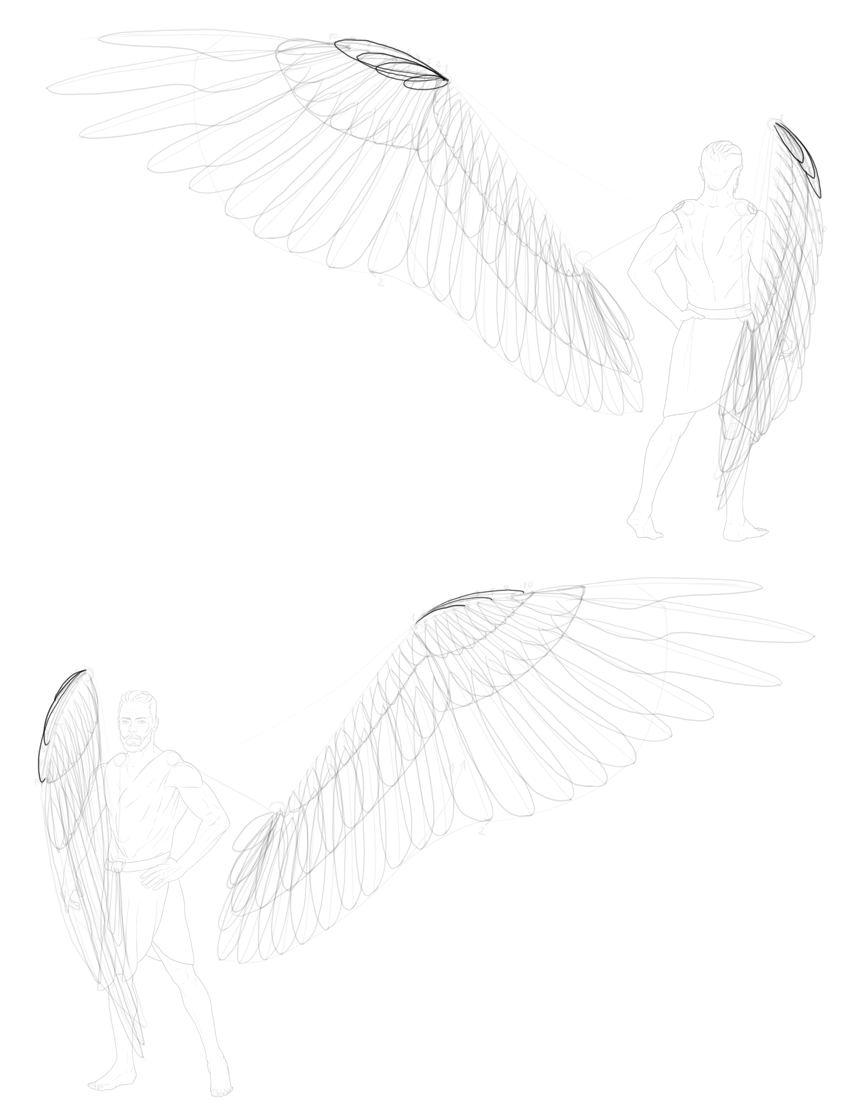
Step 5
There are usually ten primary feathers. Mark the “finger” to create space for each. Make the markings more spread out in the farther half.

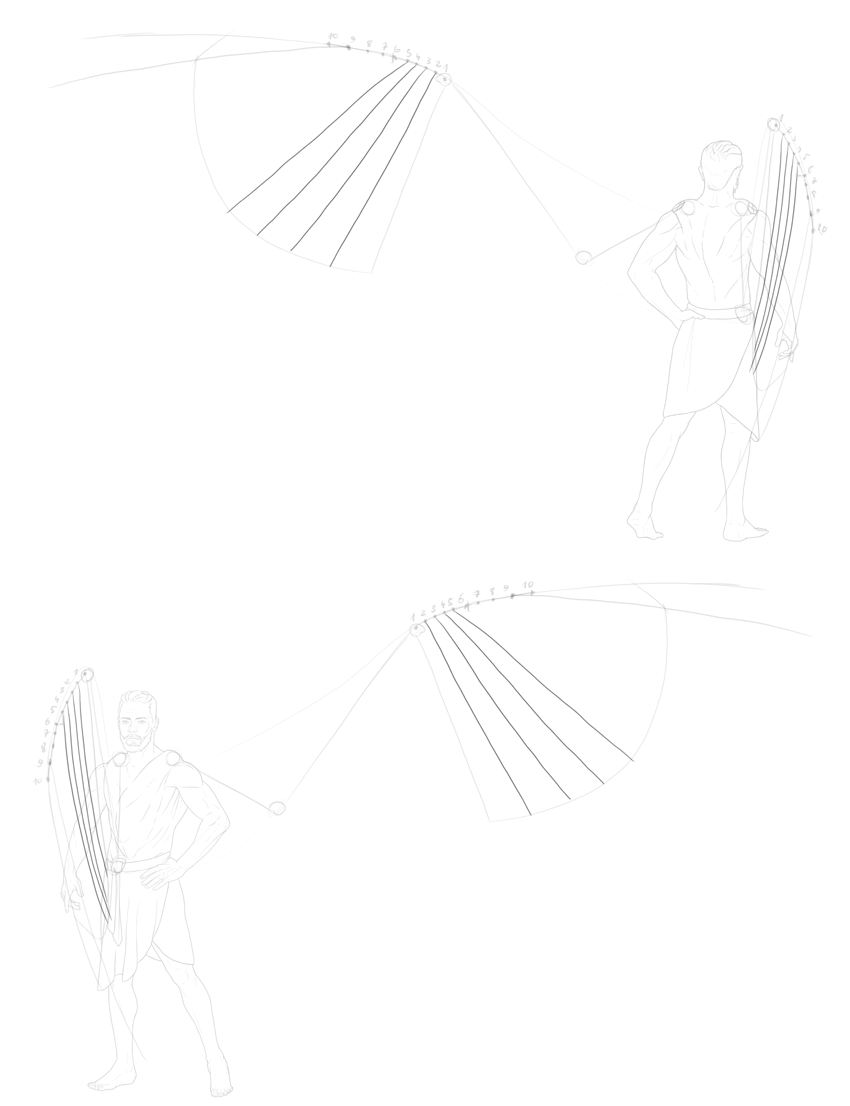
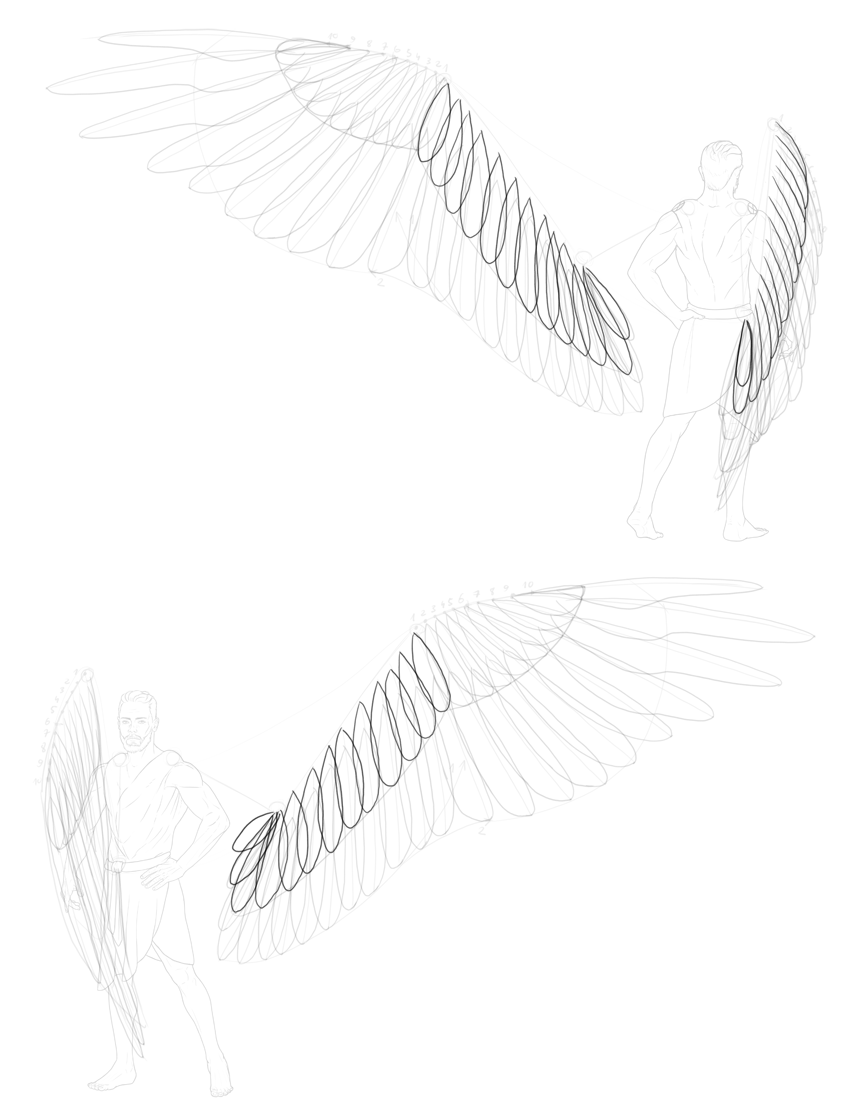
Step 6
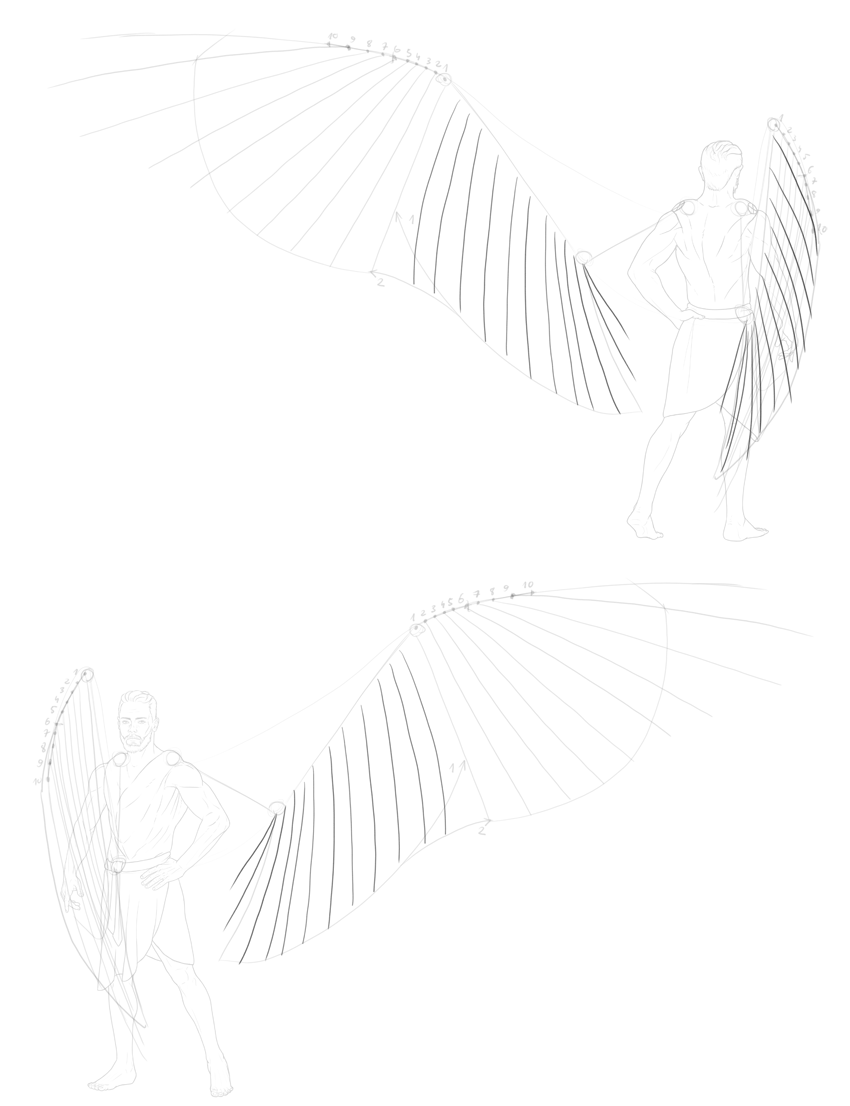
Draw the longest primary feather, starting at point 9.

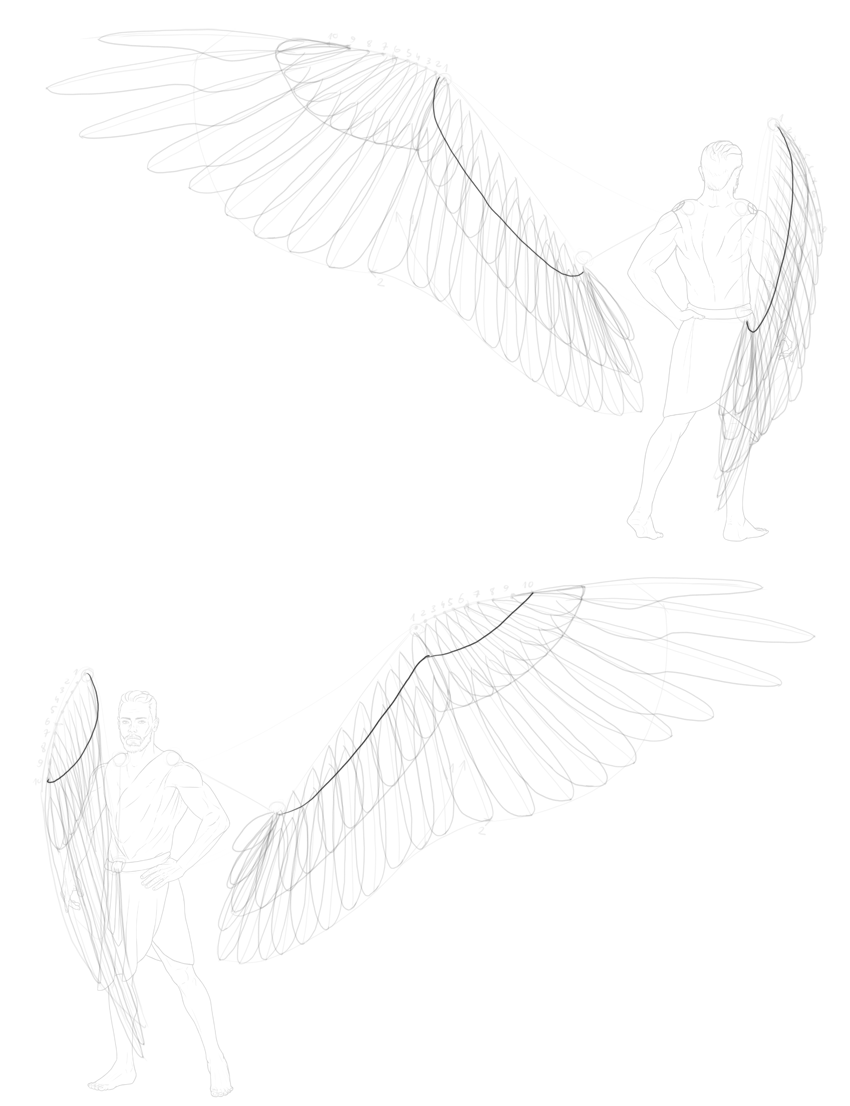
Step 7
Draw a curve that will create the basic shape of the primaries. It should be like a section of a circle, suddenly turning towards the wrist.
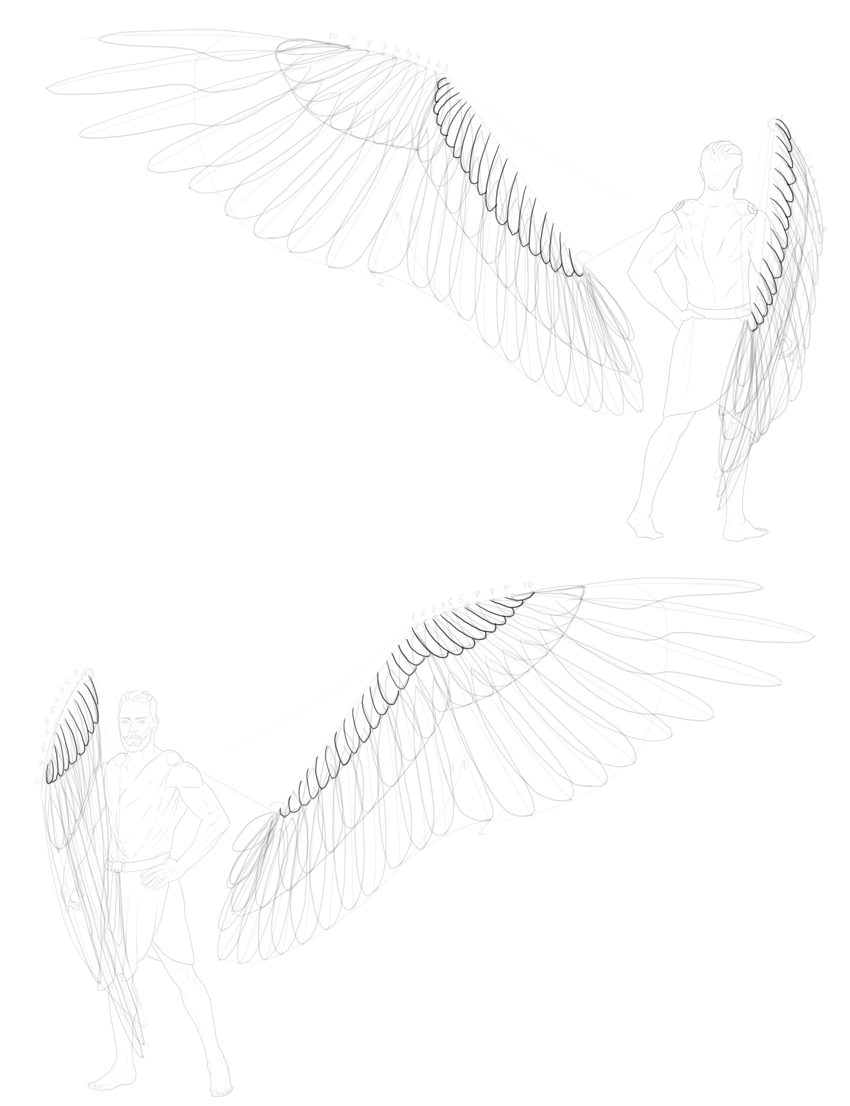
Step 8
Draw the first five primary feathers.
Step 9
Draw the other three primaries—these can go outside the curve, getting more similar to the longest primary in length.
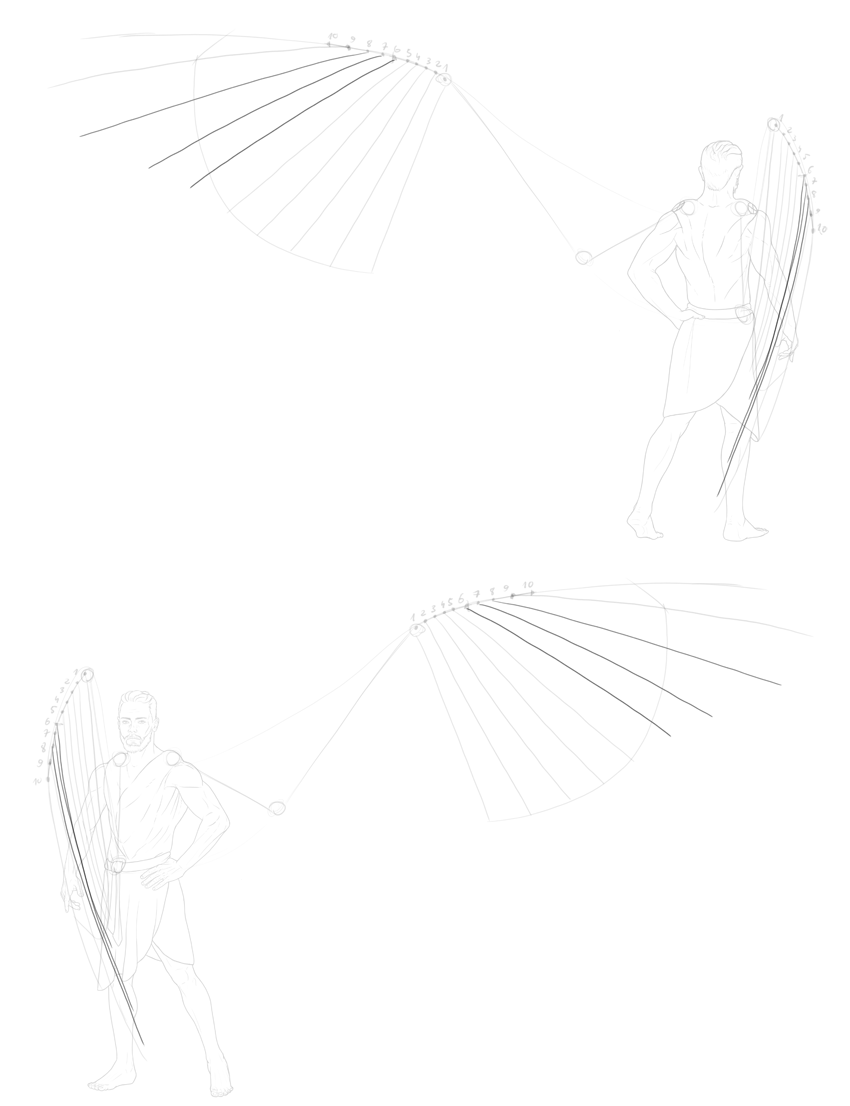
Step 10
The secondary feathers should turn towards the body. Draw the last one.

Step 11
Draw the curve of the secondaries.
Step 12
Draw the secondaries. No need to count them—just draw them in a similar rhythm, until you fill the area. No need to draw them in the front-folded view, though—they’re behind the folded primaries here.
4. How to Draw Angel Feathers
Step 1
Outline half of the primaries. The part inside the boundaries of the curve should be round, and the one outside more narrow. That’s how you create the characteristic slotted feathers.

Step 2
Draw the other half of the primaries. This part should be closer to the rachis.
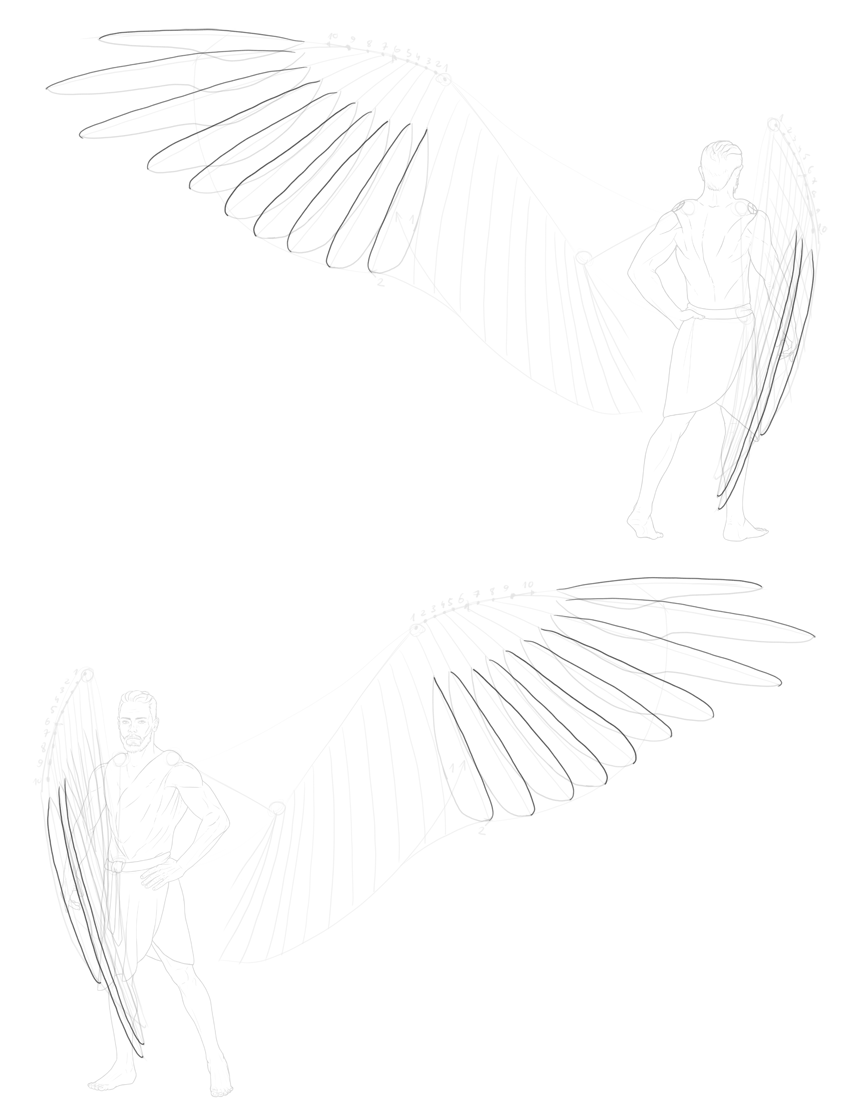
Step 3
Outline the secondaries now in a similar way. No slotting here!


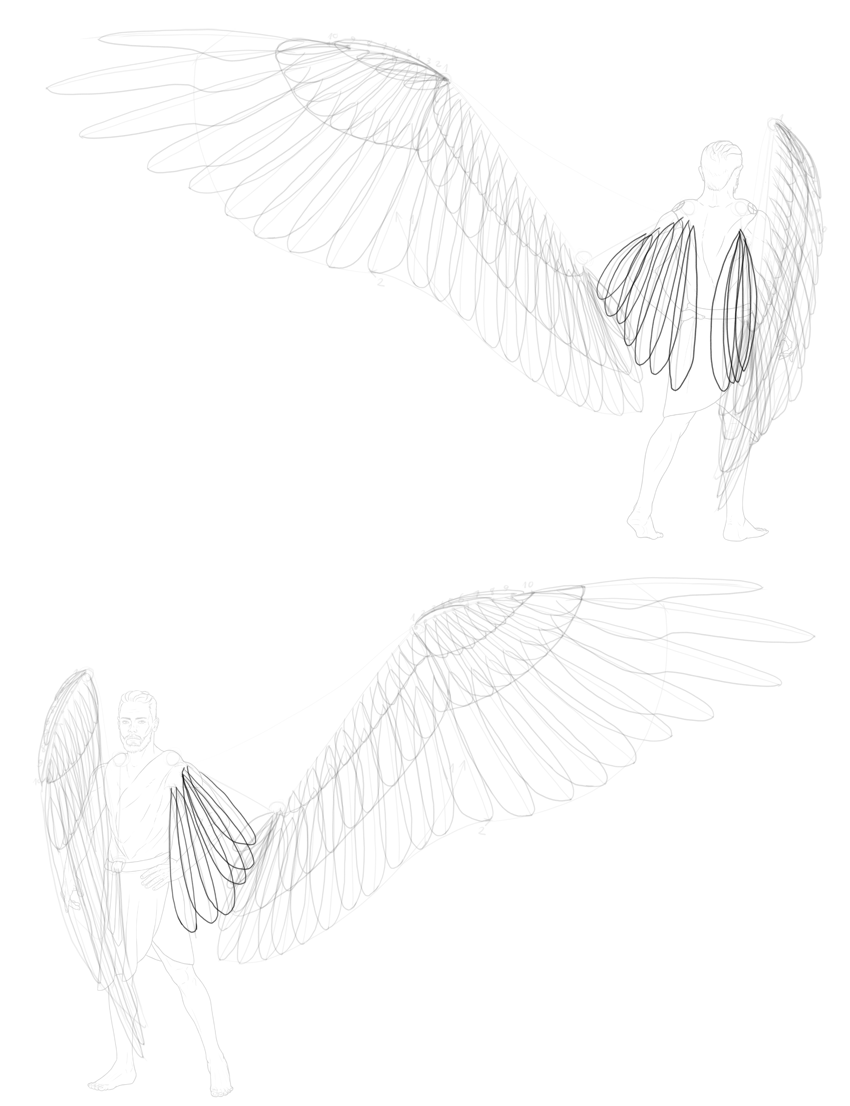
Step 4
Both primaries and secondaries are covered by greater coverts. They should cover the shafts of the feathers. Plan their length first. Keep in mind that the coverts are placed separately both in the front and in the back!
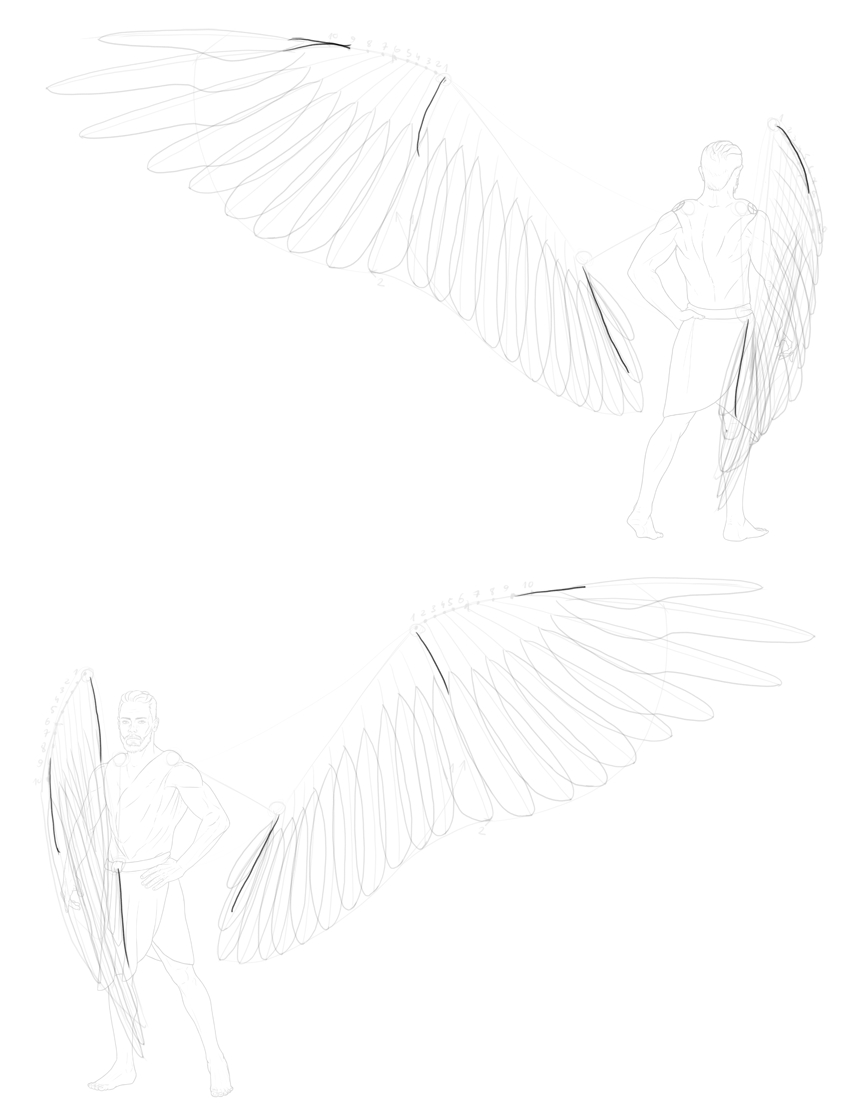
Step 5
Sketch the boundary for these coverts. It should mimic the rhythm of the feathers it covers.

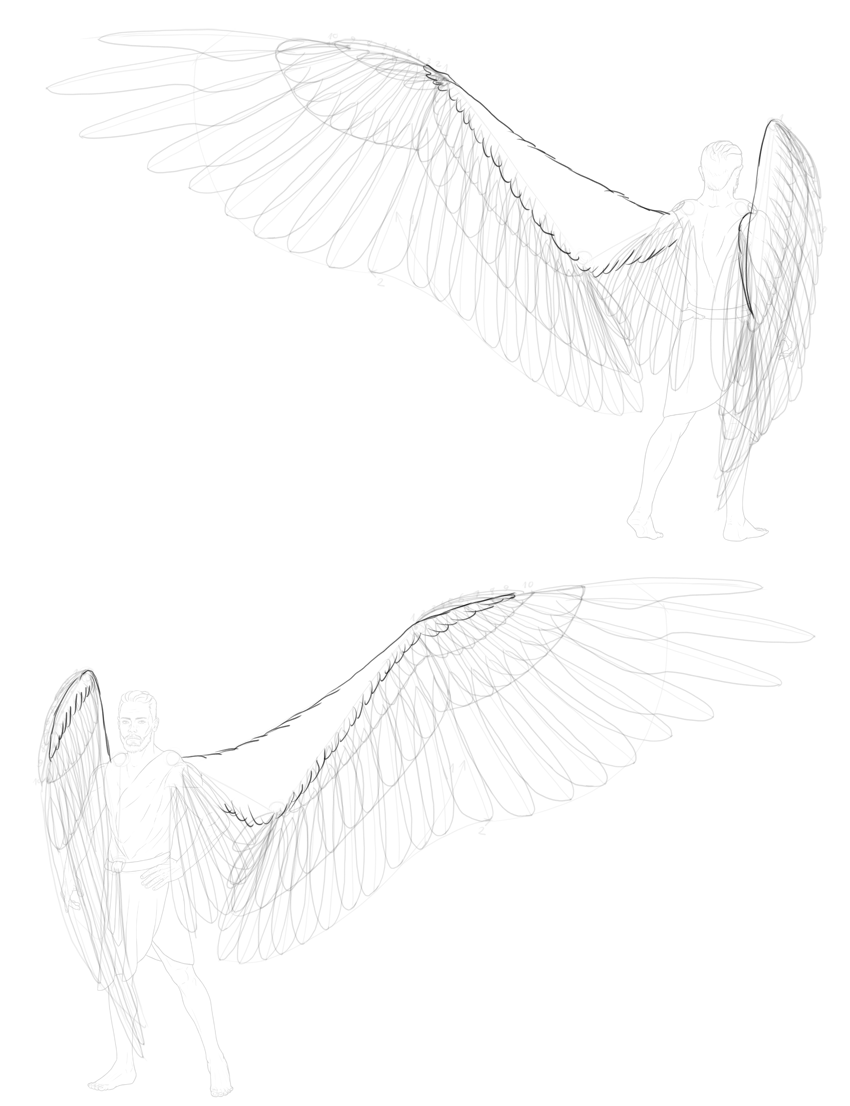
Step 6
Draw the covert feathers.

Step 7
There are also lesser coverts covering the greater coverts. Draw them the same way, except this time avoid the back of the primaries.
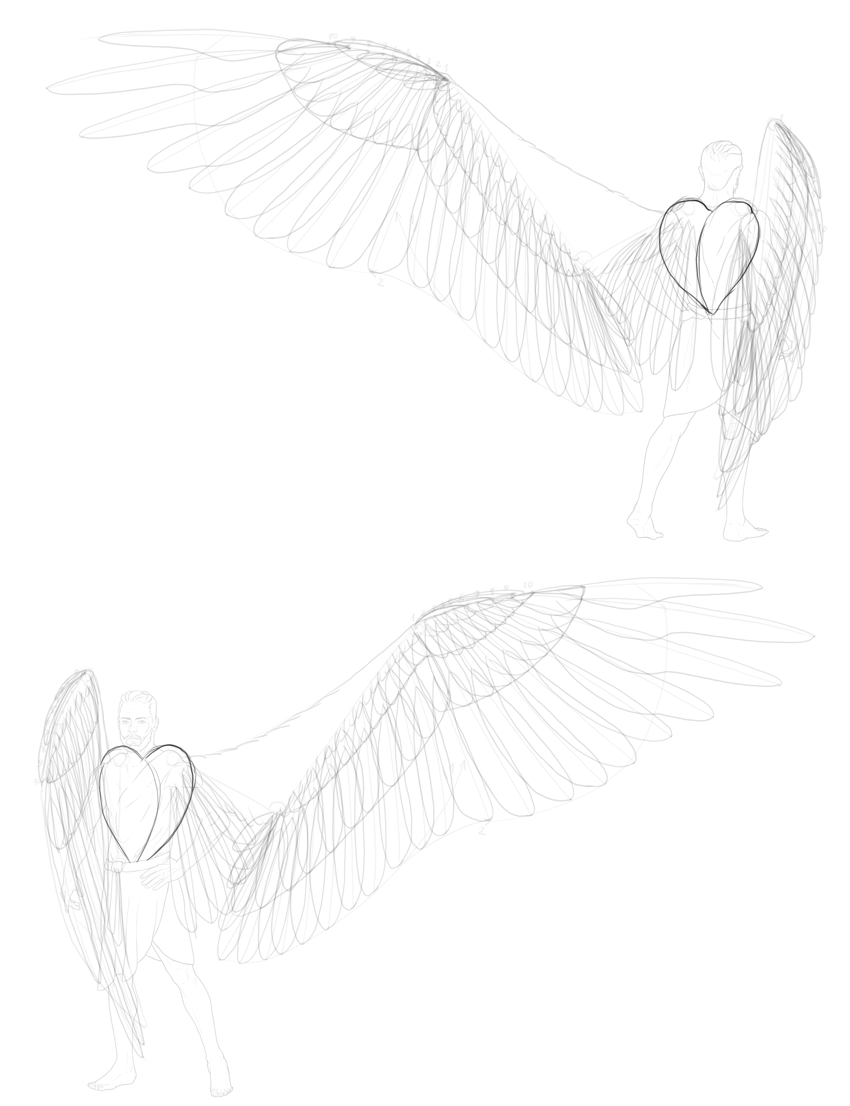
Step 8
Additionally, there’s also a structure called the alula—a clump of feathers attached to the thumb. It covers the wing in the back, but a part of it can be visible in the front as well, when the thumb is “open”.

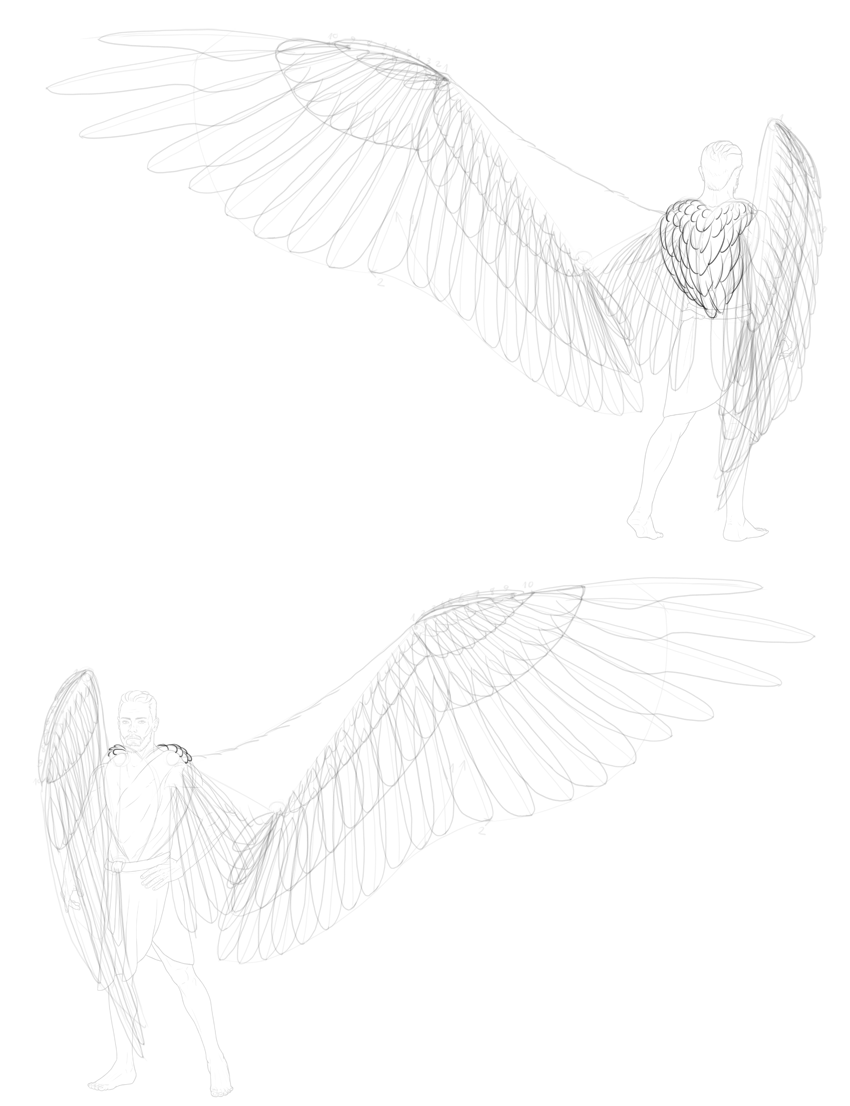
Step 9
The space between the flight feathers and the body is filled with scapulars (in the back) and tertials (in the front).

Step 10
Finally, fill the rest of the wing with tiny covert feathers.
Step 11
The wings, when folded, are put under the mantle—feathers that are a part of the bird’s body. You can leave this out if you want to show off these amazing back muscles, but they can help make the wings look like a whole.
5. How to Draw Angel Wings
Step 1
The guide lines are finished—it’s time for the real drawing now! We’re going to do it in the exact opposite order to the way we drew the structure. First, draw the mantle and the tiny coverts. Keep them fluffy! There’s no need to draw the feathers separately, as they’re not normally visible that way.
Step 2
Draw the alula and the scapulars/tertials.

Step 3
Draw the lesser coverts. Here’s where you need to start paying attention to the order of the feathers. In the back, start drawing from the elbow side, and in the front from the finger side.

Step 4
Draw the greater coverts. Keep the order!

Step 5
Finally, the beautiful primaries and secondaries. You can draw the rachis quite thick in them, but it should get thinner towards the tip.
Step 6
Once you’re done, you can outline the feathers. Just be careful: if the lines are too strong, they can look too thick and hard (unless it’s the style you’re going for, in which case go ahead!).

Simply Divine!
Now you know how to draw angel wings and the wings of a winged human. If you want to learn more about drawing humans, I recommend these tutorials:
