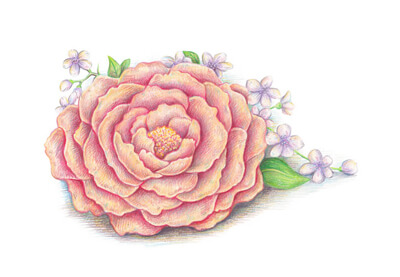
If you want to learn how to paint watercolor flowers digitally, in this tutorial I’ll show you how to make a watercolor effect in Clip Studio Paint. I’ll show you what brushes to use, how to shade the flowers, how to create a watercolor edge, and how to finish it all with a paper texture.
What You Will Learn in This Clip Studio Paint Tutorial
- How to use Clip Studio Paint
- How to paint watercolor flowers
- What are the best Clip Studio Paint brushes for creating a watercolor effect
- How to change the hue in Clip Studio Paint
1. How to Prepare the File for a Watercolor Effect
Step 1
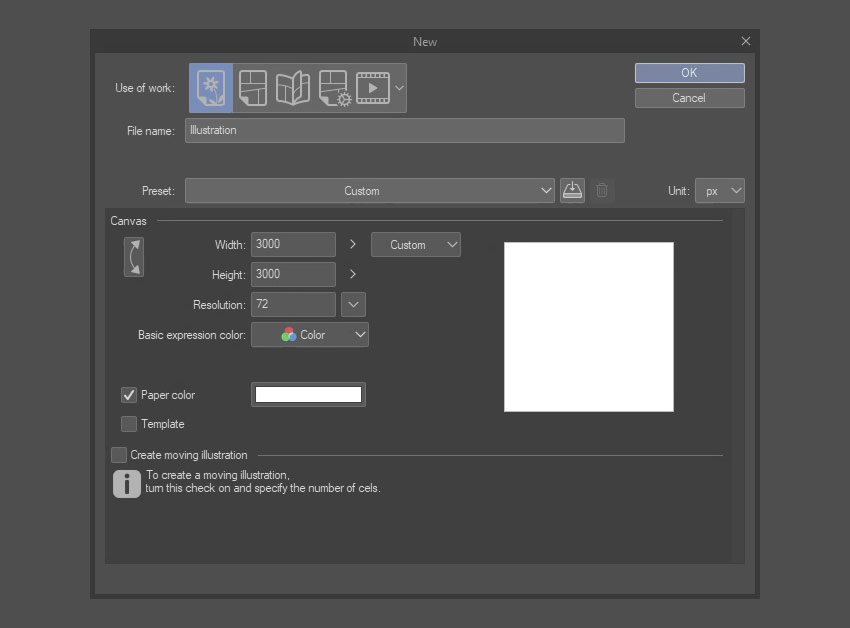
Open Clip Studio Paint. Create a New Document (Control-N) with the resolution shown below:
Step 2
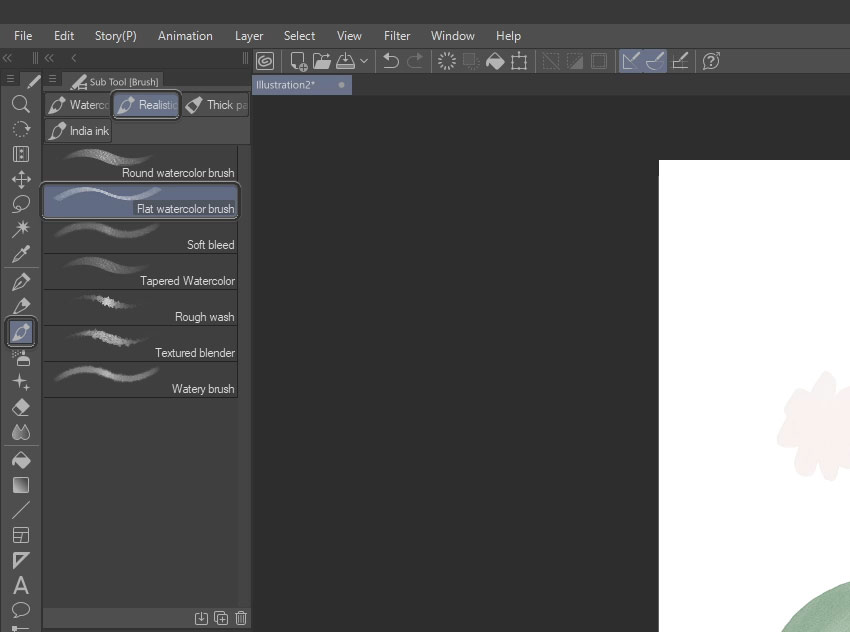
Take a Brush (B) and go to the Realistic tab. Select Flat Watercolor Brush.
Step 3
This brush is not easy to control, but that’s the point—it will make your “watercolor” strokes look less digital and more convincing. Use this brush to paint a couple of flowers and leaves, each on a separate layer. Paint each shape with a single stroke to create a uniform color. Don’t worry about the colors being too light—we’ll take care of that in a second.

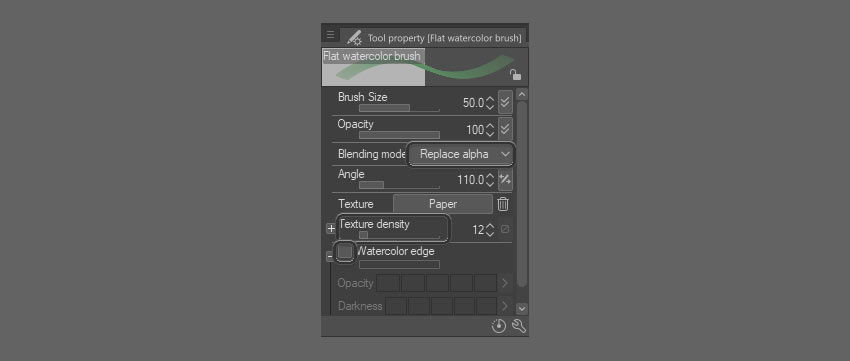
Alternatively, you can adjust the brush properties to be able to paint with multiple strokes and achieve darker colors. Change the Blending Mode to Replace Alpha, and decrease Texture Density. Turn off the Watercolor Edge. If you decide to choose this method, just hide all the layers afterwards and skip to Step 6.

Step 4
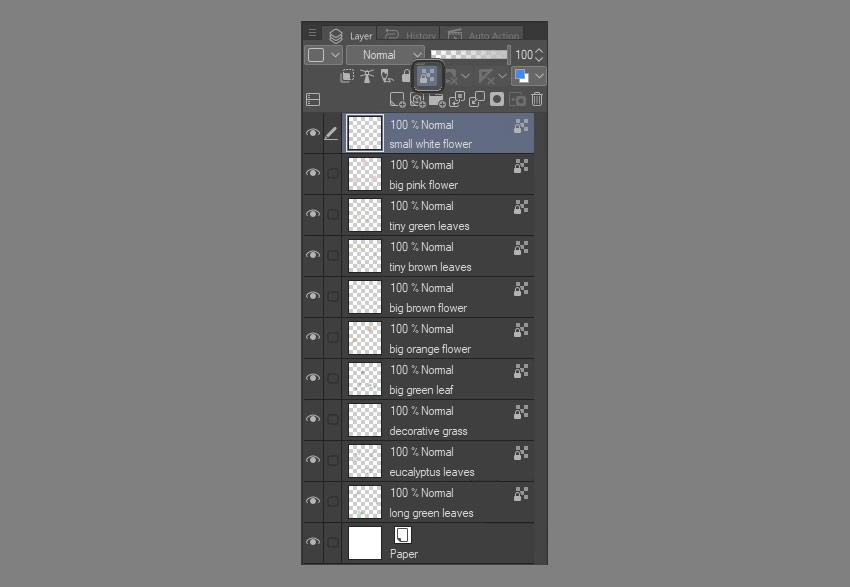
This brush creates semi-opaque strokes, so let’s make them slightly more visible. Select the layer on top, and then hold Shift and select the last one to select them all. Then Right-Click > Duplicate Layer.
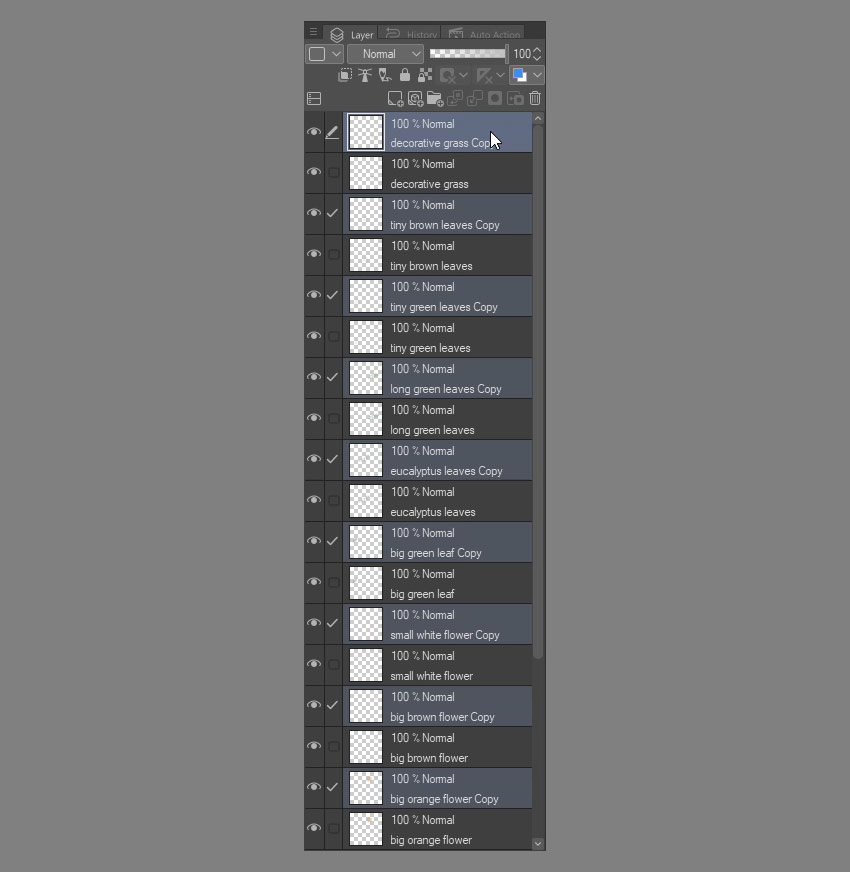
Step 5
Now merge the copies with the originals to make the colors more lively. To do this, select a copy and press Control-E—do this for every copied layer. Then hide all the layers by clicking the eye icon next to them.
Step 6
Our wreath will be based on the shape of a circle, so let’s create a circle to act as our template. Create a New Layer and select the Figure tool (U). In the Direct Draw tab, select the Ellipse. Check Aspect Type and increase the Brush Size.
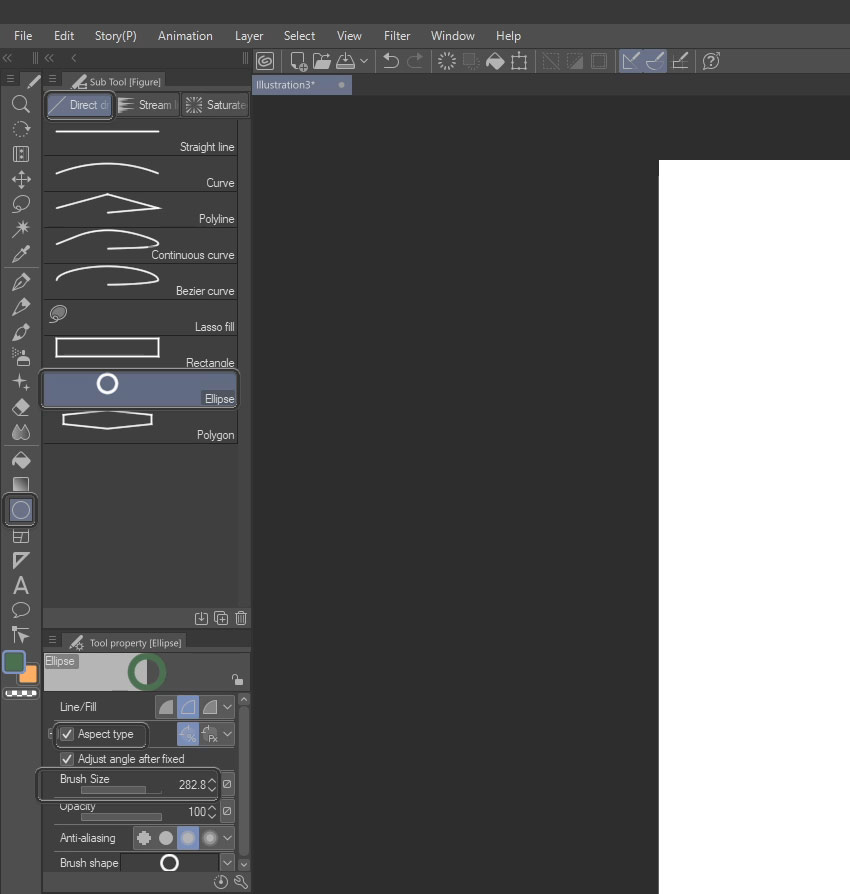
Step 7
Click and drag on the canvas to draw a thick circle. Use the Move Layer tool (K) to position the circle in the center of the canvas.

Step 8
Drag the layer under the other layers, lower its Opacity to make it barely visible, and Lock it.
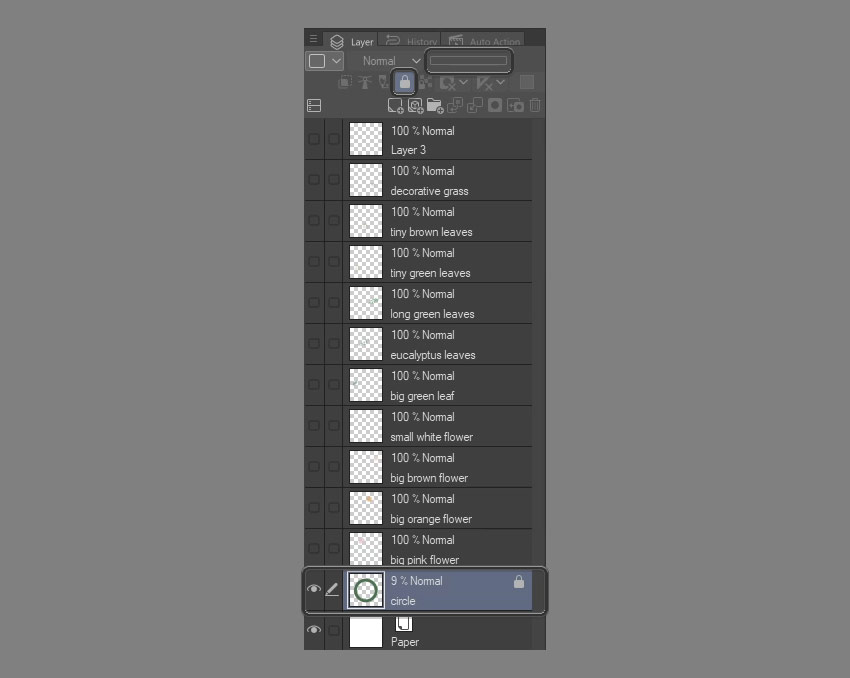
Step 9
Now show all the other layers again and use the Move Layer tool (K) to create a composition out of them. Use Control-C/Control-V to quickly duplicate the layer, and merge the copies afterward with Control-E to keep everything in order. Feel free to transform the objects with Control-T—resize and rotate them to create a nice, natural composition.
In the case of the leaves, it may be useful to flip them vertically
sometimes. To do this, go to Edit > Transform > Flip Vertical.
Also, don’t be afraid to rearrange the order of the layers to reflect the
layers of a real wreath. When you’re done, hide or remove the circle.

Step 10
Because watercolors are not fully opaque, you can see through the layers. Normally, if you painted with real watercolors, you’d be careful not to make these elements overlap, but we’re working digitally, so we can get rid of these overlapping areas with a trick!
Select the layer on top and take the Auto Select tool (W). Click the
outside area of the element to select it, and then press Control-Shift-I to
invert it.
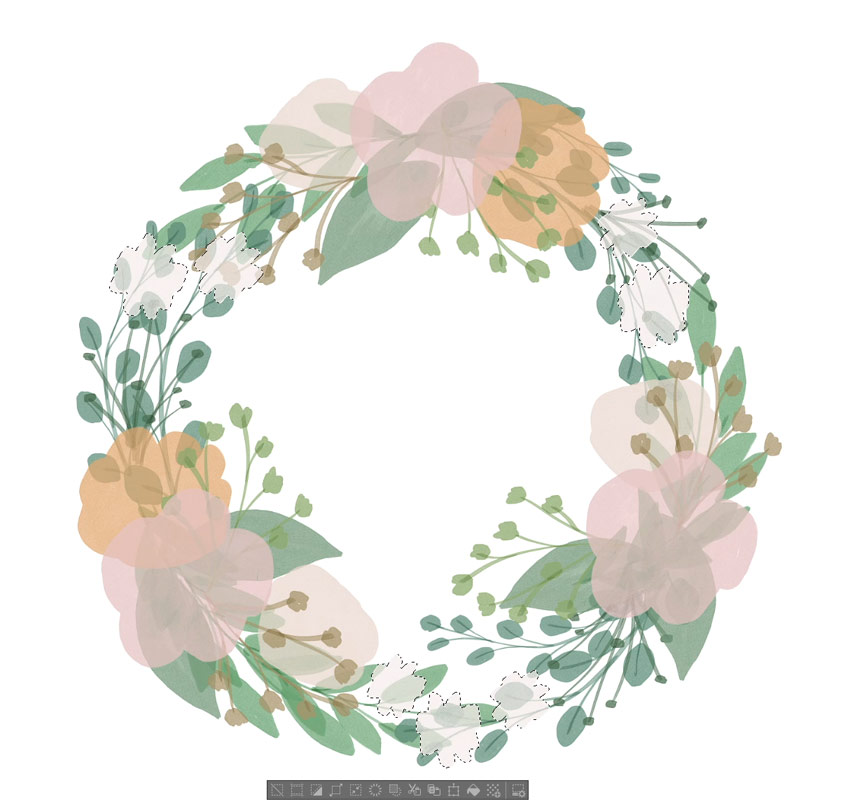
Step 11
Now select the layer below and press Backspace or Delete. Then go to another layer and repeat, until you reach the bottom of the stack. At this point, you shouldn’t see through the uppermost element anymore. Press Control-D to deselect.

Step 12
Repeat the process with all the other layers to get rid of the overlap completely.

Step 13
Now select all the layers and Lock their Transparent Pixels. Now you can paint over the layers without having to worry about staying within the lines!
2. How to Paint Watercolor Flowers in Clip Studio Paint
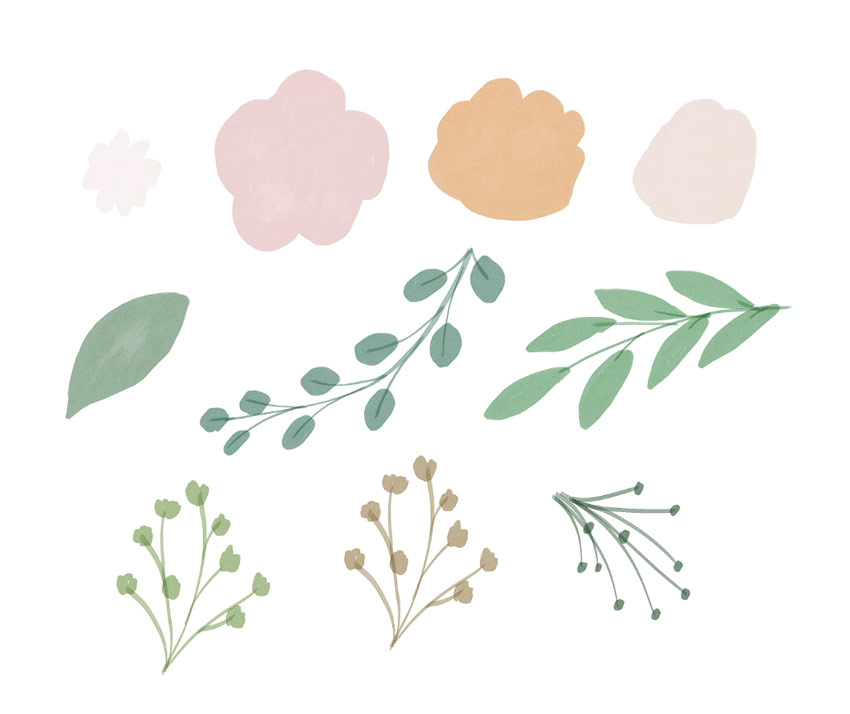
Step 1
Let’s start with the big leaves under the flowers. Take the Rough Wash brush from the Realistic Watercolor tab, pick the color of the leaves with the Eyedropper (I), and start painting. This should allow you to give the leaves a more uneven surface, characteristic of watercolor shading. Experiment with the Watercolor Edge in the brush settings to create the effect of a quickly drawing pigment.


Step 2
Now go to the Layer Property panel. Add a Border Effect and select Watercolor Edge. Experiment with the settings to create an edge that’s characteristic of watercolor strokes.


Step 3
Do the same with the other leaves, adjusting the amount of texture and the darkness of the edge of each of them individually. Splashes of paint will look better on dark colors than on bright ones.

Step 4
You can finish the little white flowers in a similar way. Add some texture to their center.

Step 5
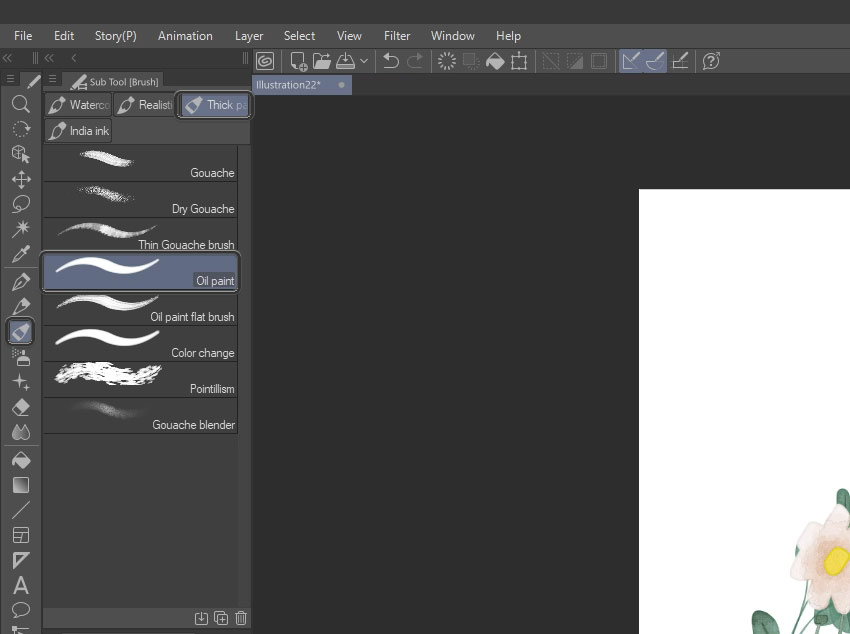
To add a yellow center to the flowers, create a New Layer and paint with the Oil Paint brush from the Thick Paint tab.

Step 6
Creating the big flowers will require a little more effort. Let’s start with the pink one. Hide its layer or lower its Opacity, and create a New Layer above it. Then take the Oil Paint brush and paint the outermost petals—draw three sets of them, each on a separate layer.


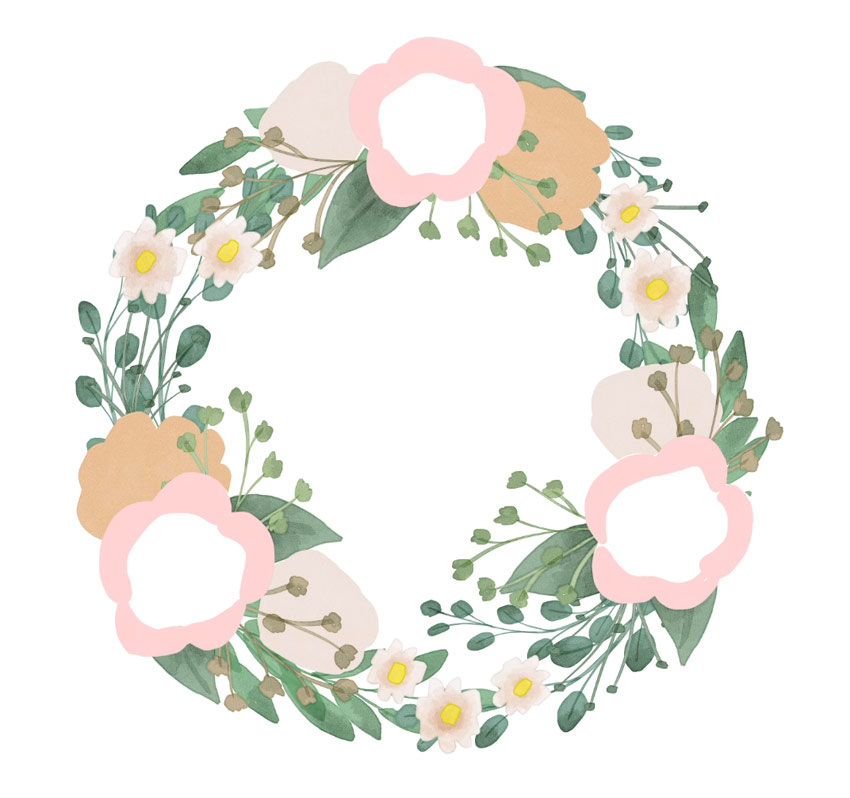
Step 7
Create another layer and paint three more petals, creating a ring and leaving some space in the center.
Step 8
Create another layer and add a few more little petals, with the ones in the center being the smallest.

Step 9
Shade the petals the same way as you did with the leaves. Don’t forget to lock the transparent pixels first! Also, because these petals are on separate layers, they won’t appear merged when you add a watercolor edge to them.
Step 10
Draw the brown flowers in a similar way. First, draw the outer petals on one layer…
Step 11
… then draw the inner petals on a New Layer.
Step 12
Shade the petals with the same technique as before.
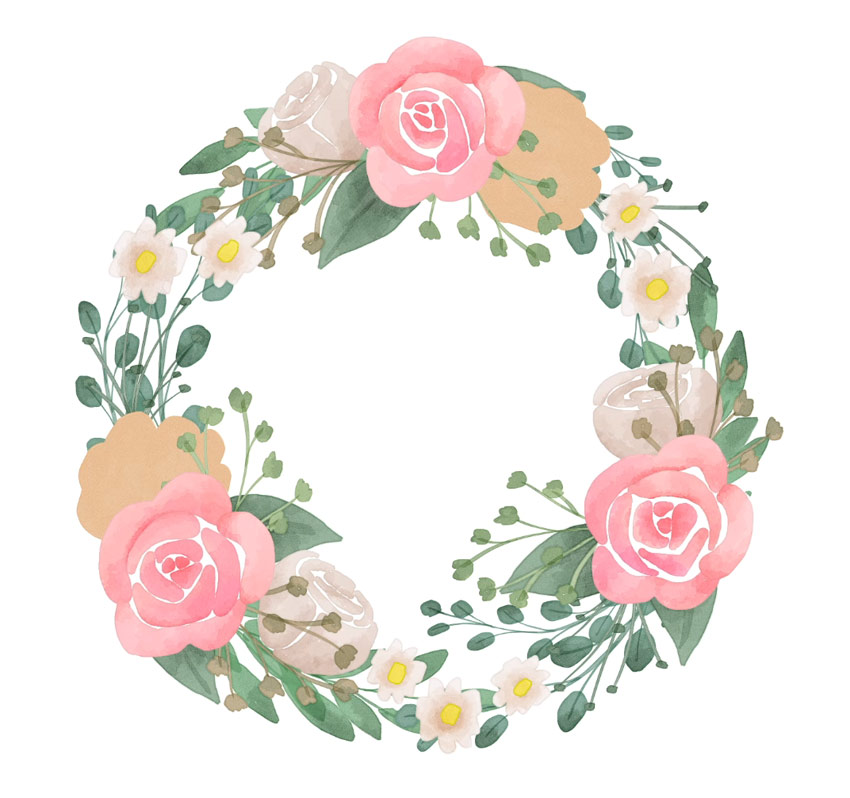
Step 13
The orange flower is no different—it can be created easily with two layers of petals.
Step 14
It’s quite difficult to create sharp, white areas in watercolor paintings, so to make the watercolor effect more convincing, create a New Layer under the flowers. Use the Rough Wash brush to paint a chaotic background behind each flower.

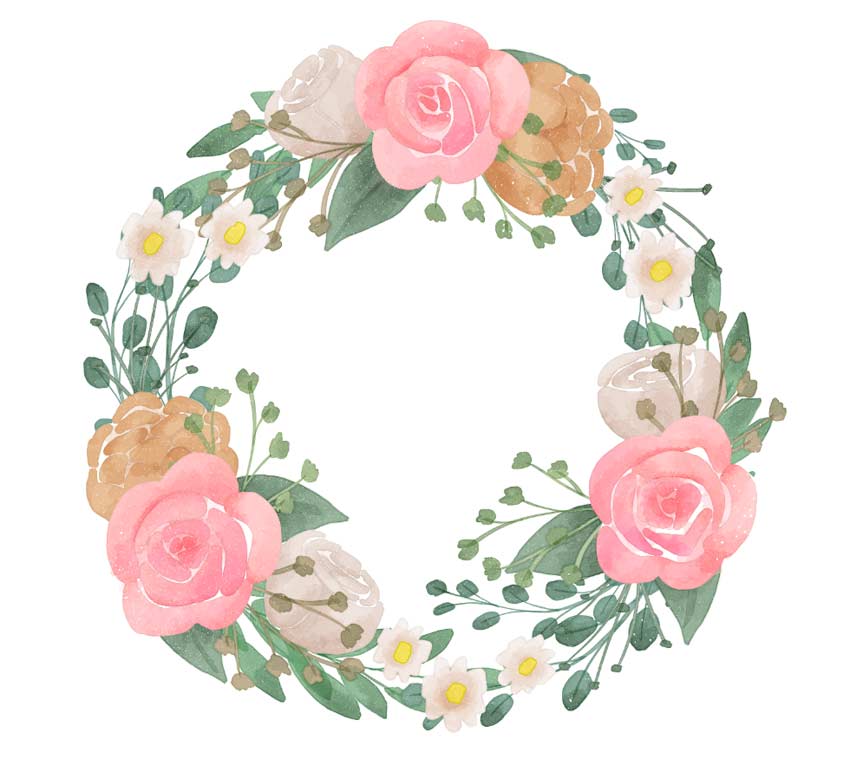
3. How to Finish the Watercolor Effect
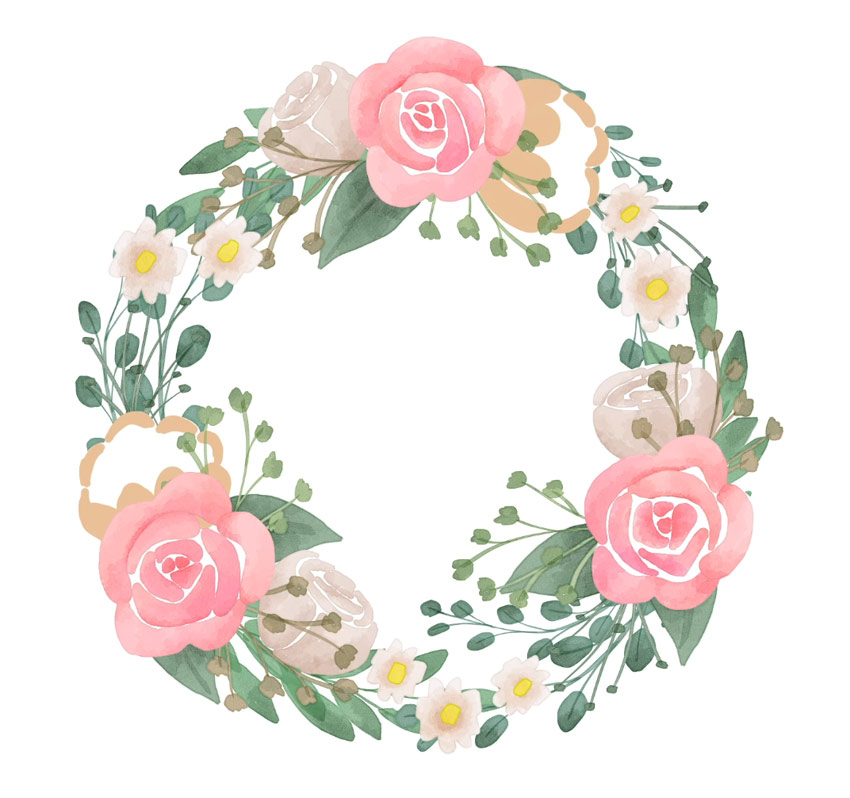
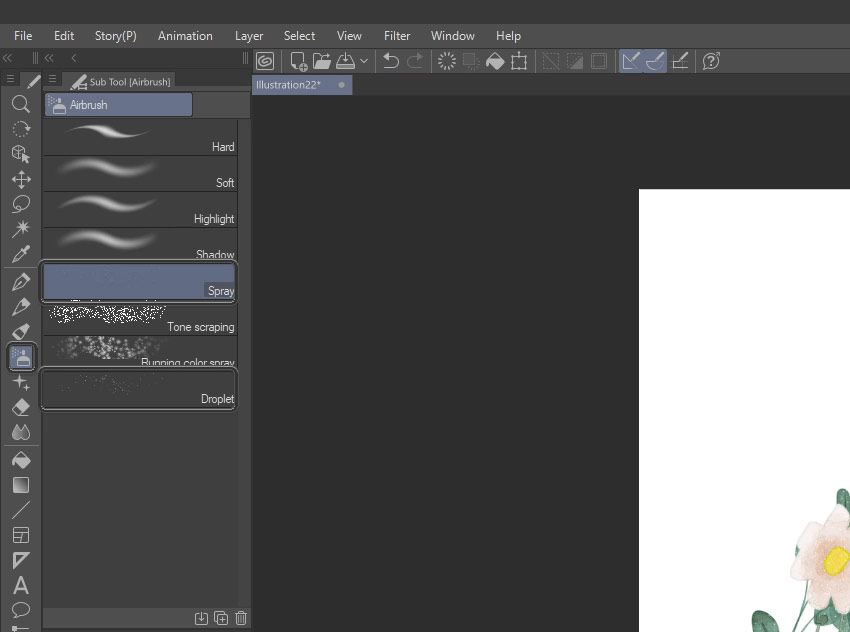
Step 1
The painting is done, but we can make it a little more convincing with a few tricks. Create a New Layer on top, switch to white, and take the Airbrush (B). Use the Spray and Droplet brushes to add some white dots here and there.
Step 2
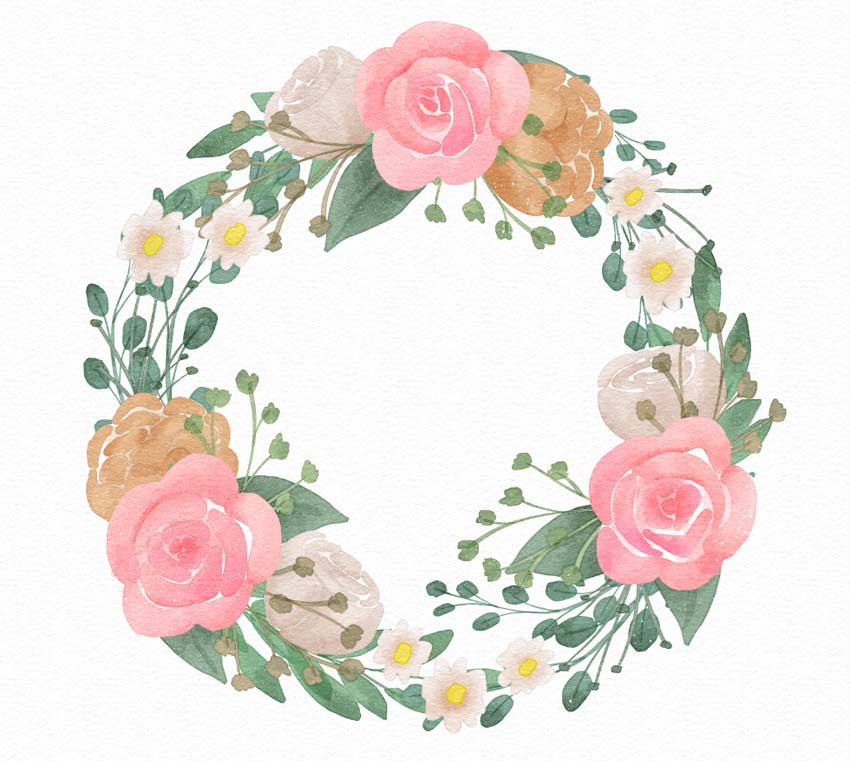
Create a New Layer and open the Texture tab in the Material panel. Pick a texture that looks the most like paper to you, and drag it to the layer.
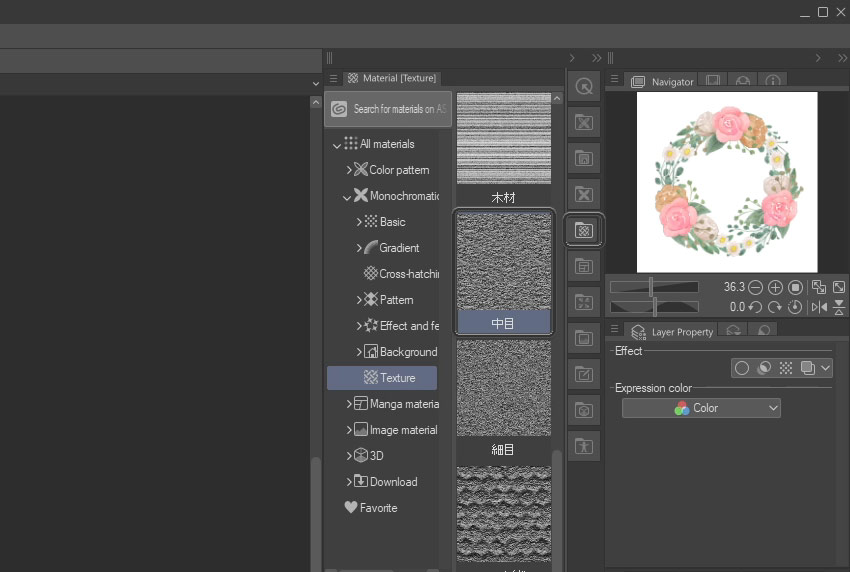
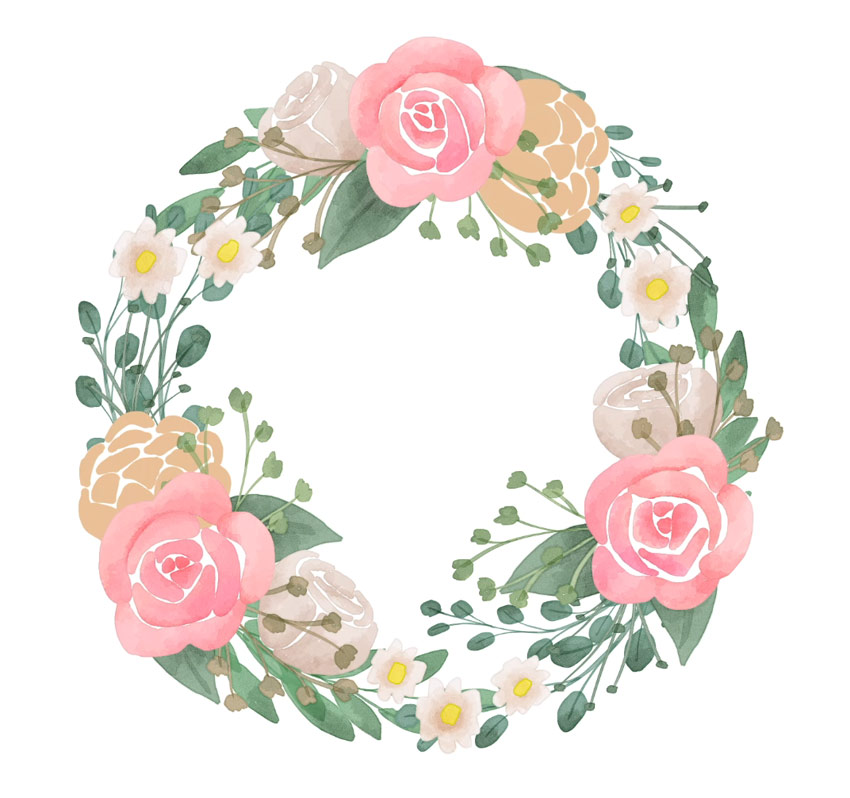
Step 3
In the Layer Property panel, select Overlay Texture to make the texture see-through. Adjust the Strength of the texture, and adjust its size.

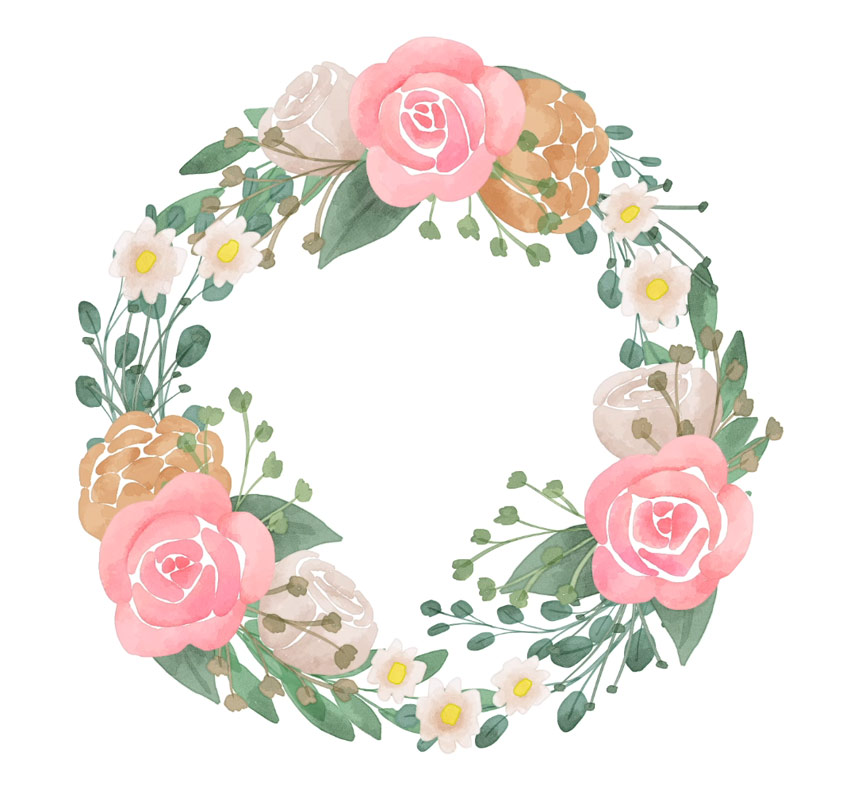
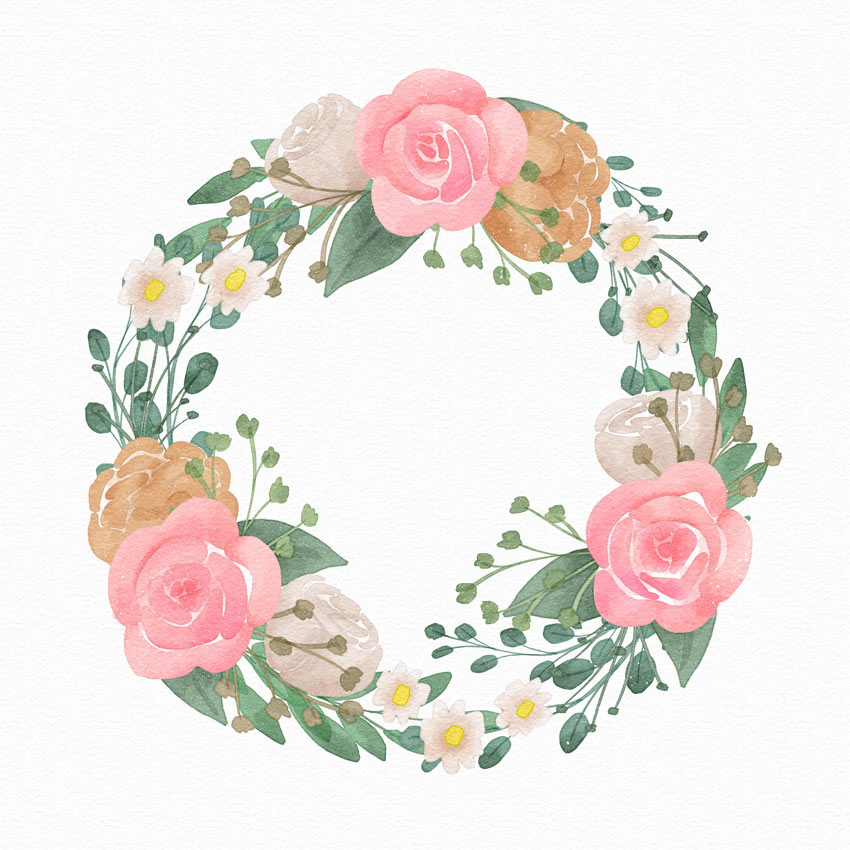
Step 4
If you’re not happy with the color scheme you’ve ended up with, now I’ll show you how to change the hue in Clip Studio Paint.
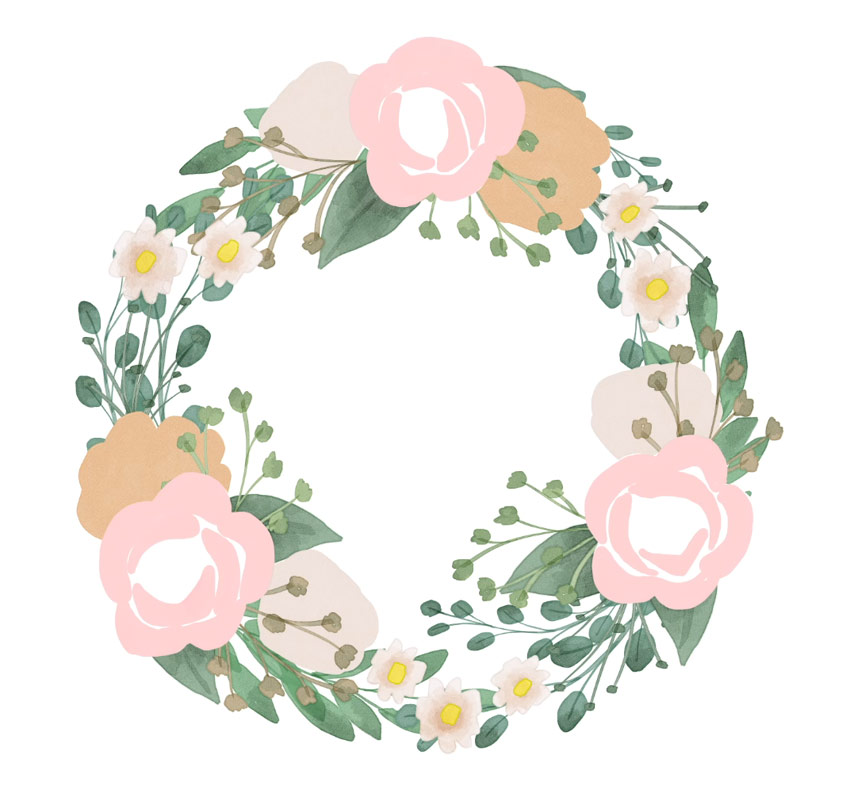
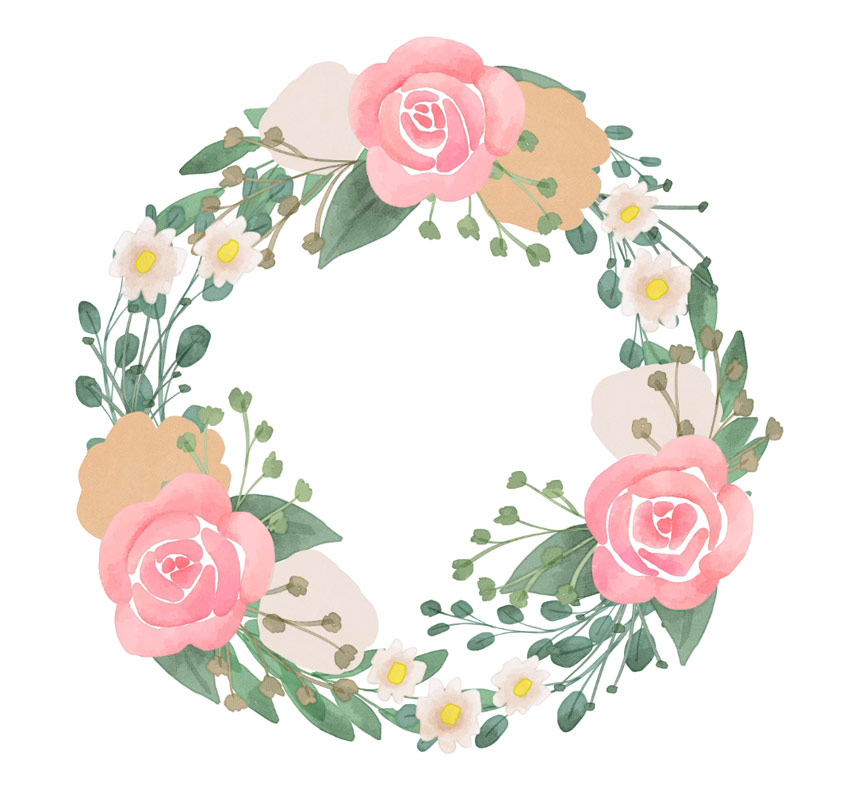
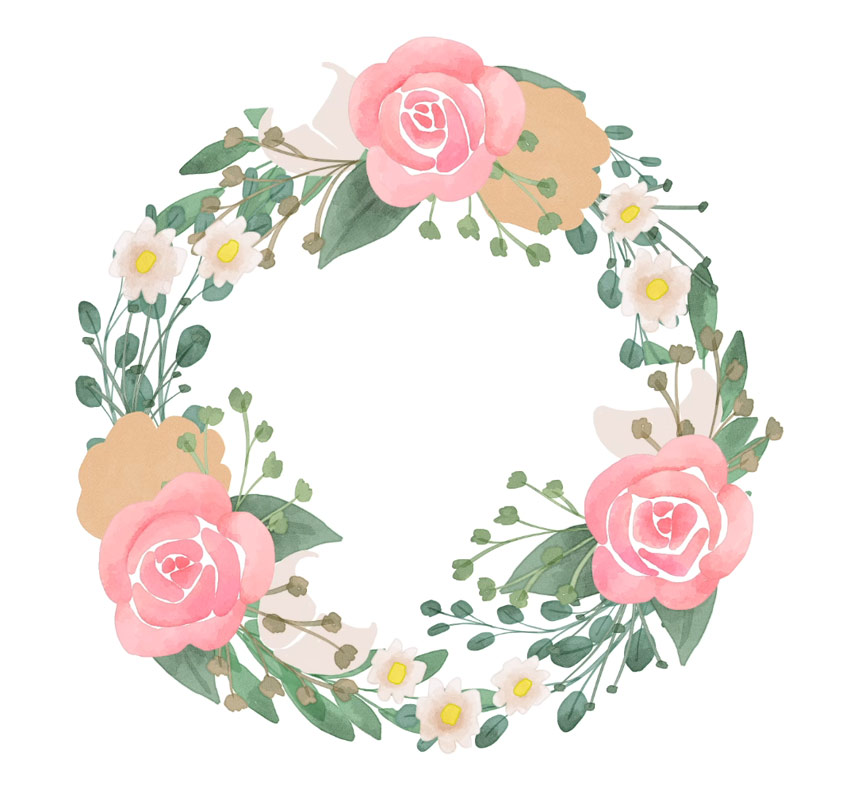
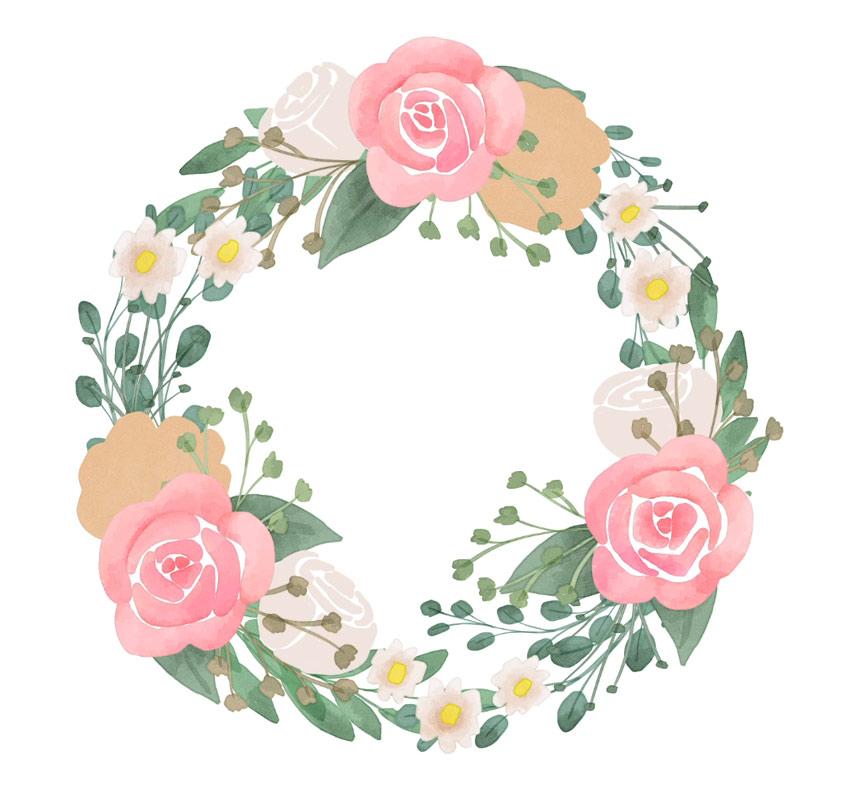
First, you need to merge the layers. To do this, create a New Layer and go to Layer > Merge Visible to New Layer. Then go to Edit > Tonal Correction > Hue/Saturation/Luminosity. Now you can drag the first slider to adjust the colors.
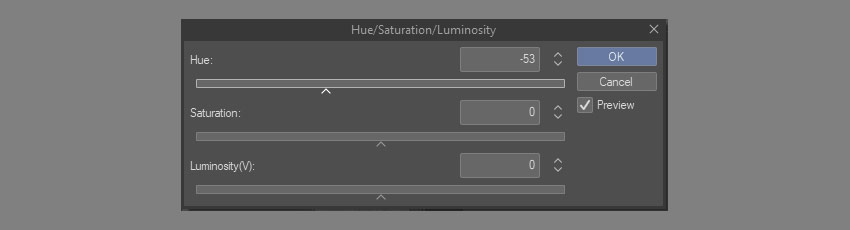
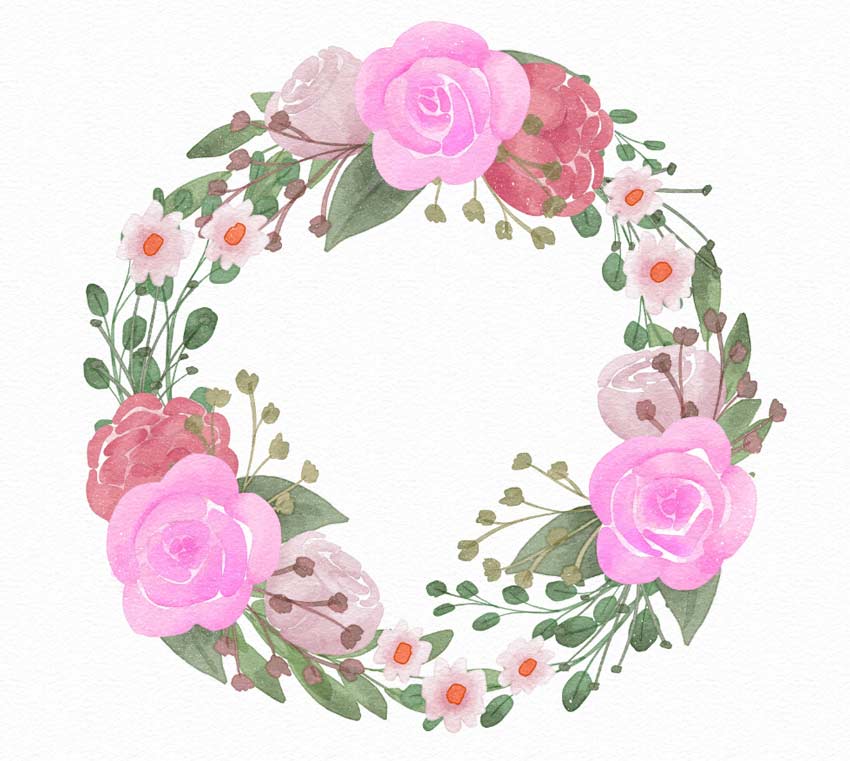
Beautiful!
Now you know how to use Clip Studio Paint and how to paint watercolor flowers in this program!
Want More?
If you want to learn more about creating flower illustrations, try these tutorials as well:
 DrawingHow to Draw a Rose
-
NatureHow to Draw Spring Flowers With Colored Pencils
-
DrawingHow to Draw a Flower
-
TypographyHow to Create Floral Typography With Ink
-
Colored PencilsLearn Colored Pencil Techniques and How to Create a Trio of Flowers