In the following Quick Tip tutorial you will learn how to use Ellipse Tool, Brush Tool, and Gradients in Adobe Photoshop CS6 to create Nexus 7 abstract background. You can use these techniques and elements to create your own abstract background for tablet or smartphone! Layered PSD file included. Let’s get started!
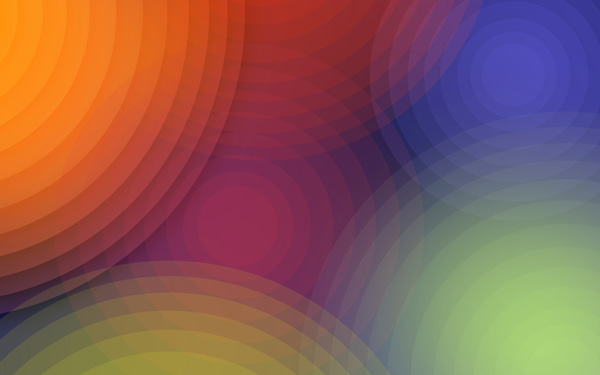
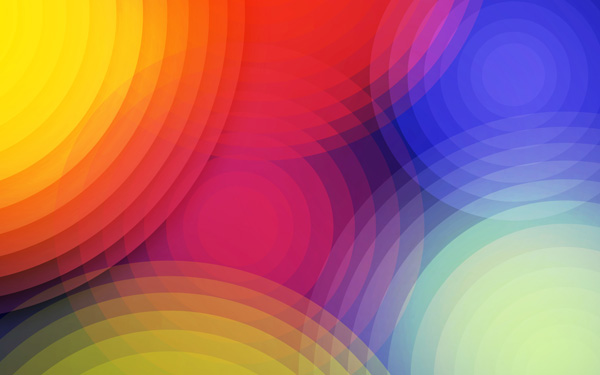
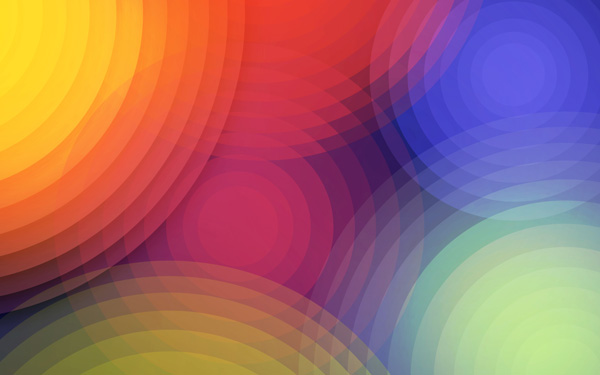
Final Image Preview

Start working by creating a new document (Ctrl+N) in Adobe Photoshop CS6 with the size 1920px by 1200px (RGB color mode) at a resolution of 72 pixels/inch. Use the Paint Bucket Tool (G) to fill with #242678 color the new background layer.

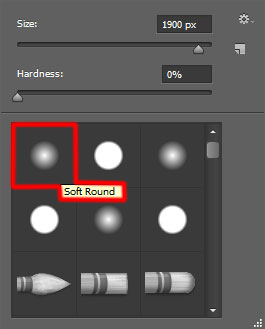
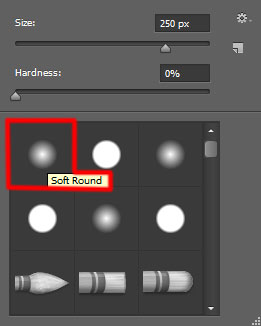
Create a new layer and select the Soft Round brush.
Use this brush to paint the canvas on its top right side and on the left one on the bottom part. The brush’s color is black (set brush’s Opacity to 15% in Options bar).

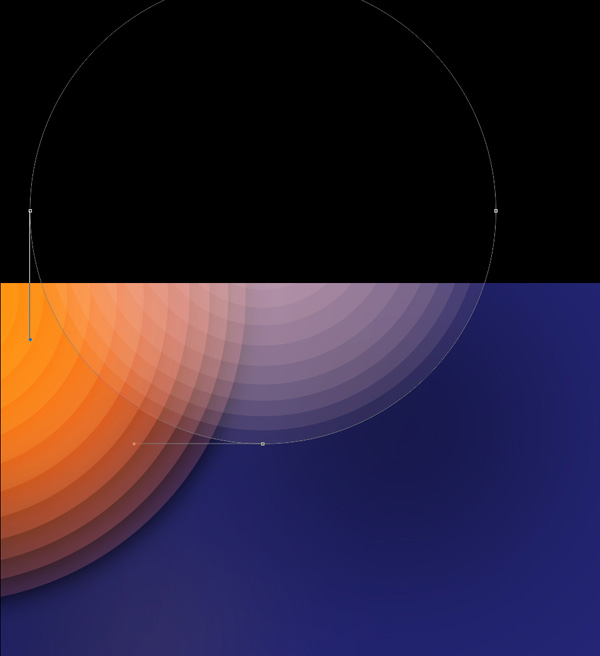
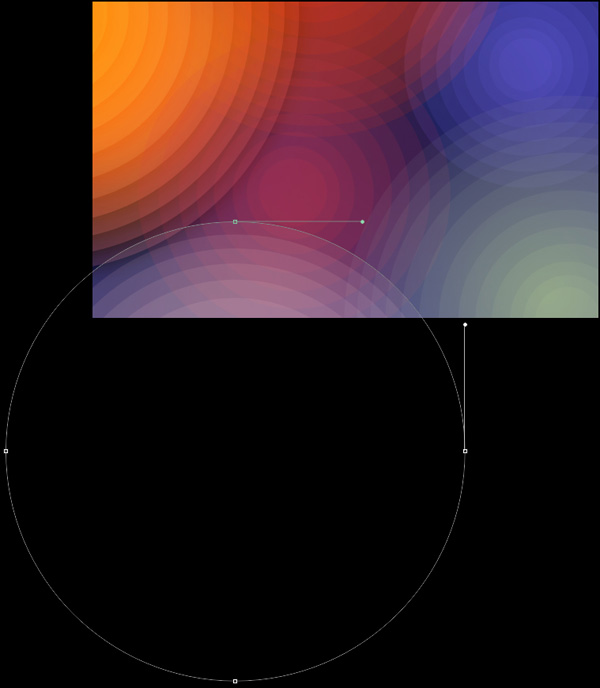
Next we’ll try drawing several small circles, use the Ellipse Tool (U) and the color #FF6C00 to draw the next ellipse:

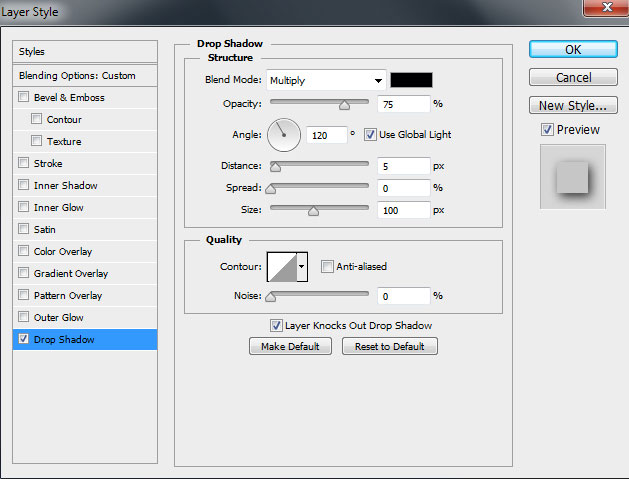
Set Fill to 13% for this layer and click on Add a layer style icon from bottom part of the Layers panel to select Drop Shadow.
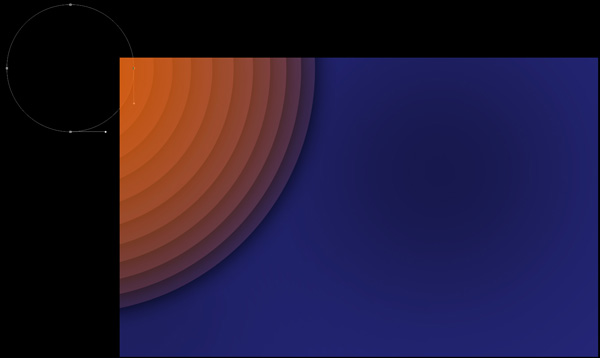
We’ve got the next result:

Next we’ll make many copies of the last drawn circle and select the Free Transform (Ctrl+T) command to make smaller each copy by turn, placing them the same way from below.
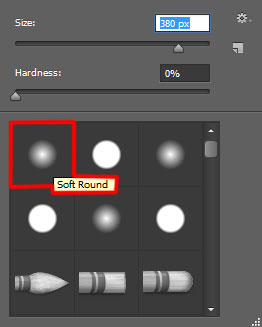
Create a new layer and select the Soft Round brush from Brush Tool (B).
Use this brush to paint the circles situated on the left side, on the top and on the bottom part. The brush’s color is #FEAC00 and brush’s Opacity – 40%.

Set the Blending mode for this layer to Overlay.

Using the same Ellipse Tool (U), we may represent several more circles on different layers. Their color is #FFCDCD. Set Fill to 10% for these layers.
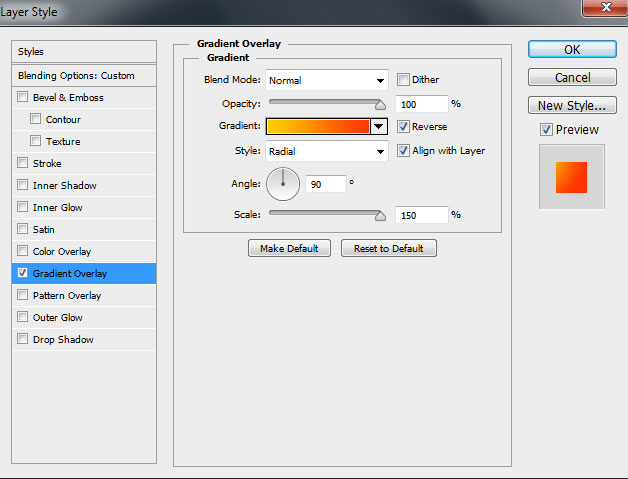
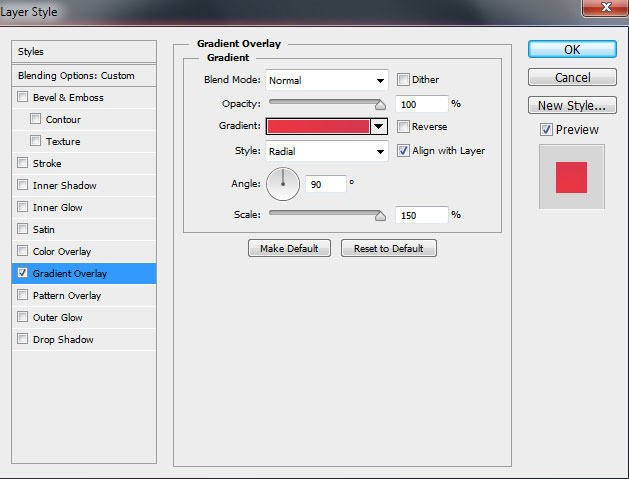
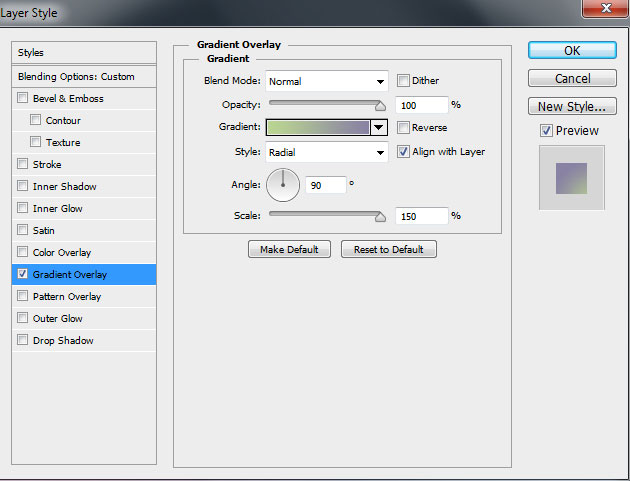
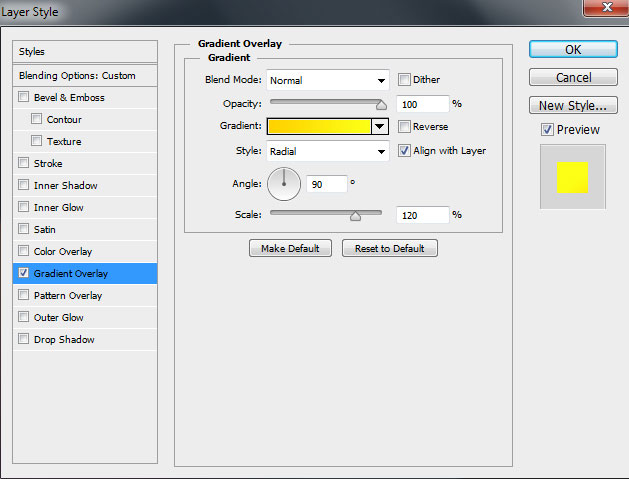
Combine in a group all the layers containing the pink circles (press CTRL button to select the necessary layers and hold on the left mouse’s button while dragging the selected layers on Create a new group icon from bottom part of the Layers panel). Set Fill to 0% for the group made and click on Add a layer style icon from bottom part of the Layers panel to select Gradient Overlay.
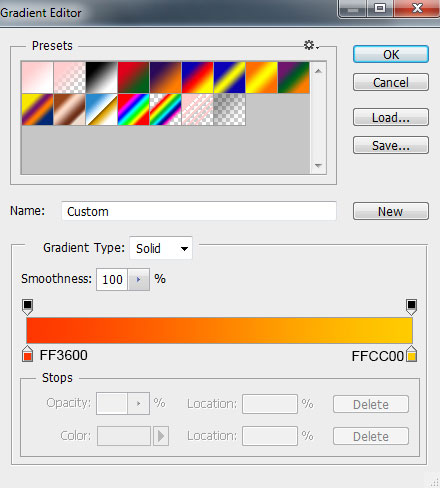
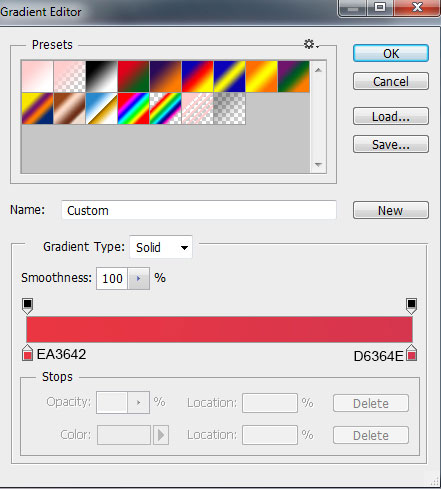
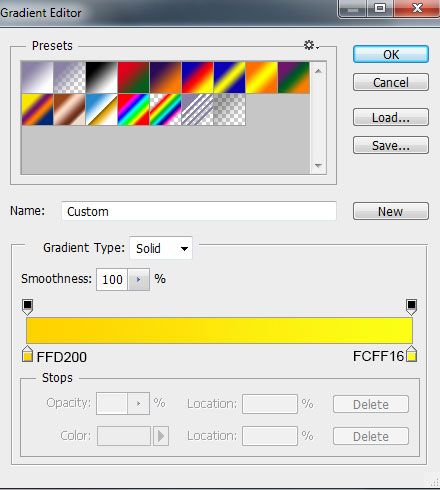
Click in the color bar to open the Gradient Editor and set the color stops as shown. Click OK to close the Gradient Editor dialog box.
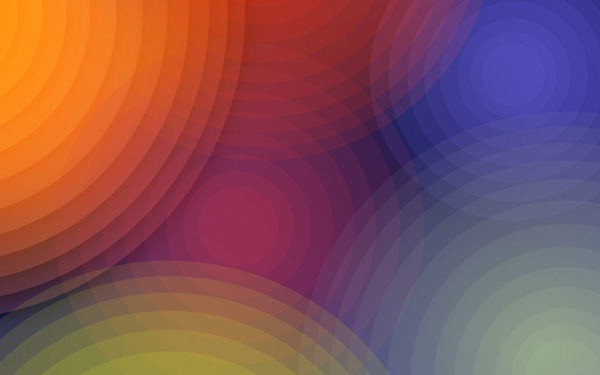
We’ve got the next result:

Insert the mask on the circles’ group by choosing Add layer mask on the bottom part of the Layers panel and choose the Soft Round brush of black color.
Paint in the mask using this brush to hide the left edge of the circles as shown.

Using the Ellipse Tool (U), we’ll continue representing the circles the same way we did with the previous ones. The color of each circle is #FFCDCD. Set Fill to 0% for these layers. Each circle must be represented on a separate layer.
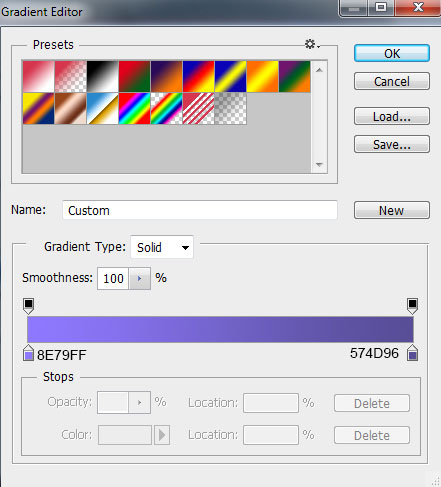
Let’s put together in a group the made circles. Set Fill to 0% for the group made and click on Add a layer style icon from bottom part of the Layers panel to select Gradient Overlay.
Click in the color bar to open the Gradient Editor and set the color stops as shown. Click OK to close the Gradient Editor dialog box.
We’ve got the next result:

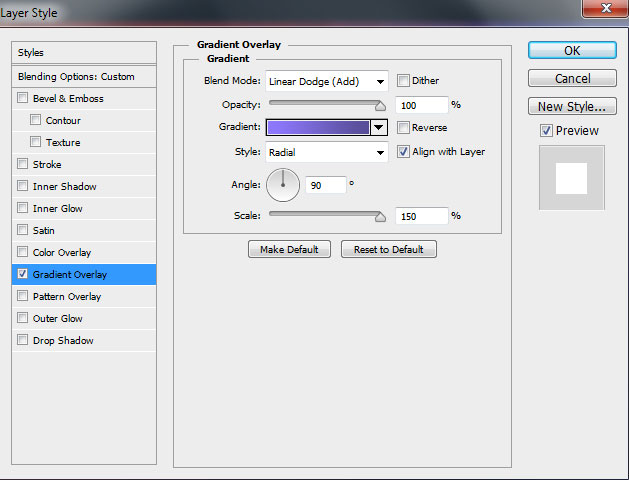
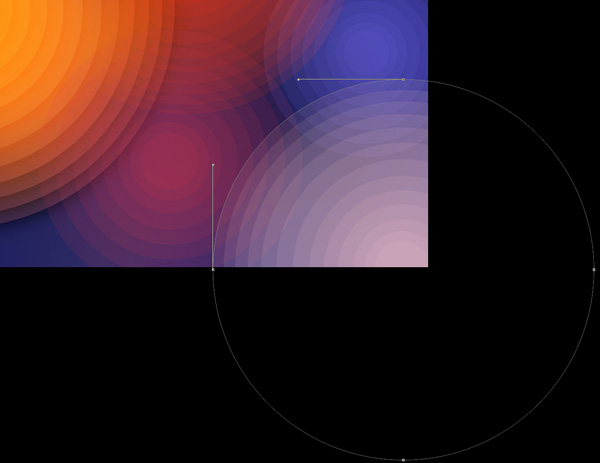
Make a copy of the group we’ve got and select the Free Transform (Ctrl+T) command to make smaller each copy by turn the same way described on the picture. Set Fill to 0% for this group. Also on the group’s copy we should apply different settings for Gradient Overlay:
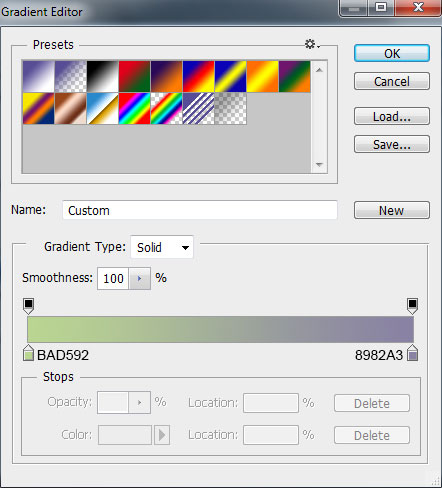
Click in the color bar to open the Gradient Editor and set the color stops as shown. Click OK to close the Gradient Editor dialog box.
We’ve got the next result:

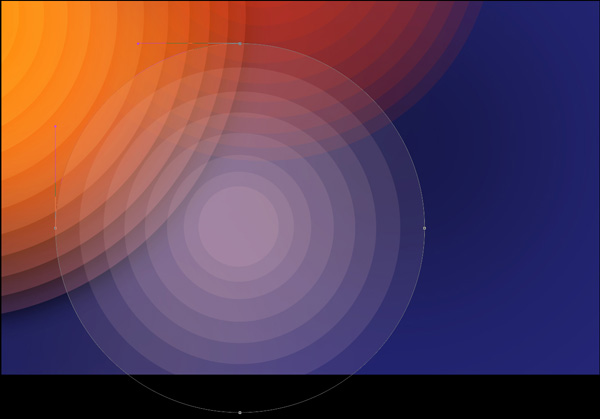
Let’s represent now a group of circles the same way we did above. The color of each circle’s layer is the same with the one from the previous groups. Select the same Ellipse Tool (U) for the operation.
Set Fill to 0% for this group and click on Add a layer style icon from bottom part of the Layers panel to selectGradient Overlay.
Click in the color bar to open the Gradient Editor and set the color stops as shown. Click OK to close theGradient Editor dialog box.
We’ve got the next result:

Next we’ll represent the last group of the circles. Each one must be represented on a separate layer, using theEllipse Tool (U). The color of the circles is #FFCDCD. Set Fill to 10% for this group.
Combine in a group all the layers containing the last drawn circles (press CTRL button to select the necessary layers and hold on the left mouse’s button while dragging the selected layers on Create a new group icon from bottom part of the Layers panel). Set Fill to 0% for this group and click on Add a layer style icon from bottom part of the Layers panel to select Gradient Overlay.
Click in the color bar to open the Gradient Editor and set the color stops as shown. Click OK to close theGradient Editor dialog box.
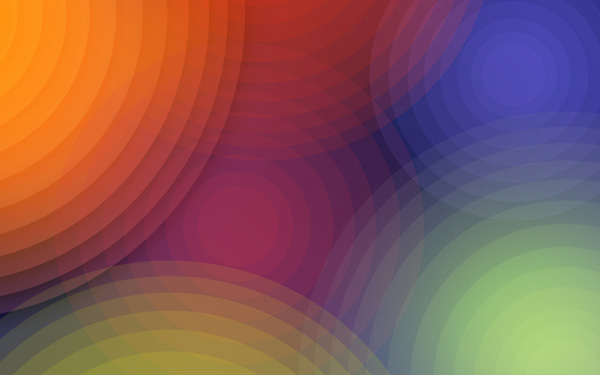
We’ve got the next result:
Create a new layer now and select on it the Soft Round brush from Brush Tool (B).

Use this brush to paint the background on the right lowest corner of the canvas. The brush’s color is #99FF00 and brush’s Opacity – 15%.
Set the Blending mode for this layer to Overlay.
Make sure that the layer containing the brush is active in Layers panel and select for the layer the next command Image > Apply Image:
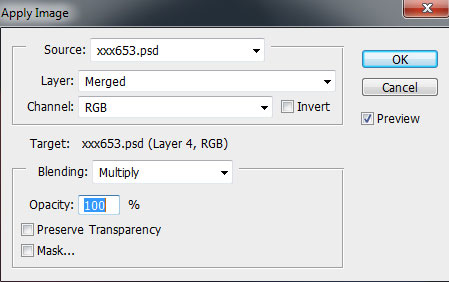
Photoshop’s Apply Image command allows us to blend layers together and gives us much more control over how the images are blended, but also opens up far more creative possibilities and gives us better overall results:
Create a new layer and select on it the Soft Round brush of white color (brush’s Opacity – 40%).

Use this brush to paint above the circles the same way demonstrated on the next image:
Set Fill to 57% for this layer and set the Blending mode to Overlay.
Click Create new fill or adjustment layer from bottom part of the Layers panel and click to Curves to adjust the curve shape as shown to make a little color corrections.

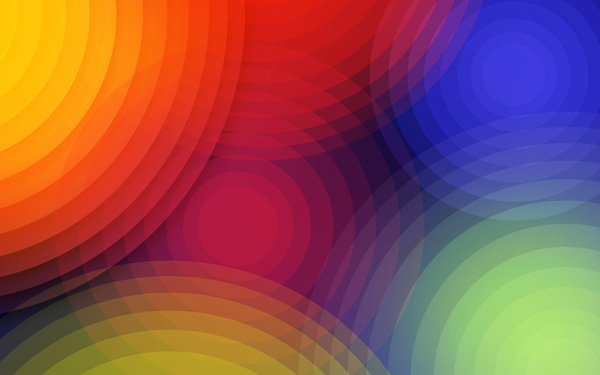
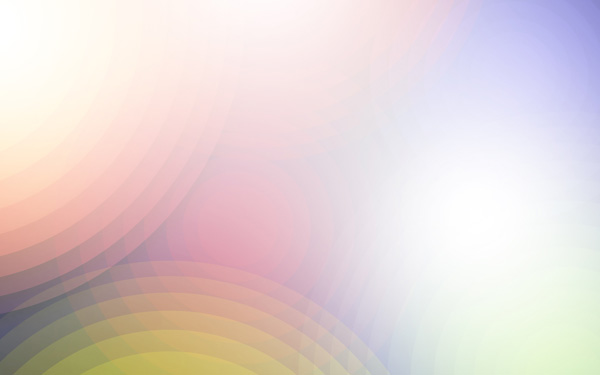
We’ve got the next result:
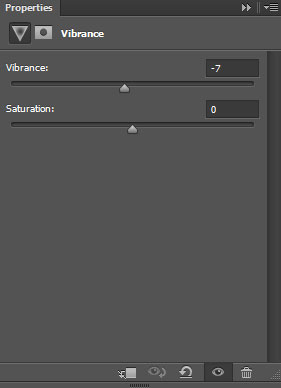
Click Create new fill or adjustment layer from bottom part of the Layers panel and click to Vibrance to improve the overall color of the image.
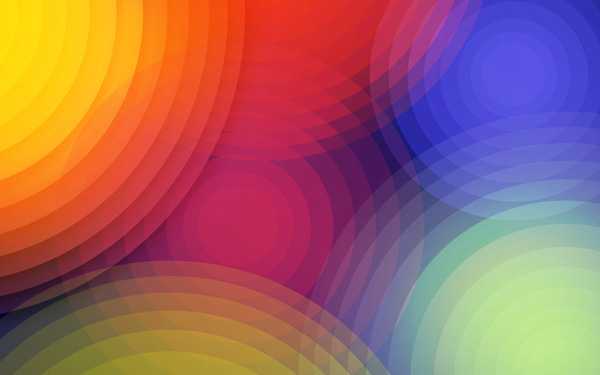
We’ve got the next result:
Now we must combine in a group all the layers (press CTRL button to select the necessary layers and hold on the left mouse’s button while dragging the selected layers on Create a new group icon from bottom part of theLayers panel). Select the group in Layers panel and press Ctrl+E to Merge Down. On the rasterized layer we’ve got we should apply the next filter: Filter > Sharpen > Unsharp mask
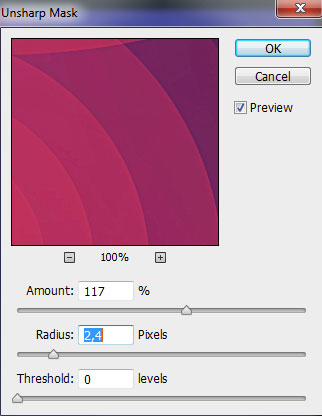
We’ve got the next result:

Our Nexus 7 Abstract Background is finished!
View full size here.
Download free Layered PSD file.