Final Image Preview

Start working by creating a new document (Ctrl+N) in Adobe Photoshop CS6 with the size 1000px by 1000px (RGB color mode) at a resolution of 72 pixels/inch. Click on Add a layer style icon from bottom part of the Layers panel and select Gradient Overlay.
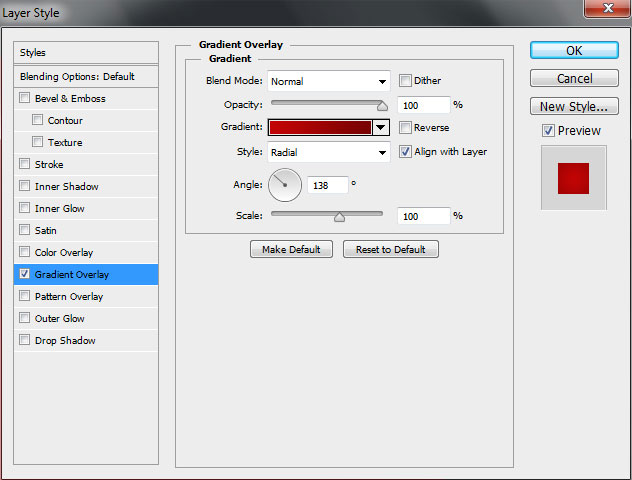
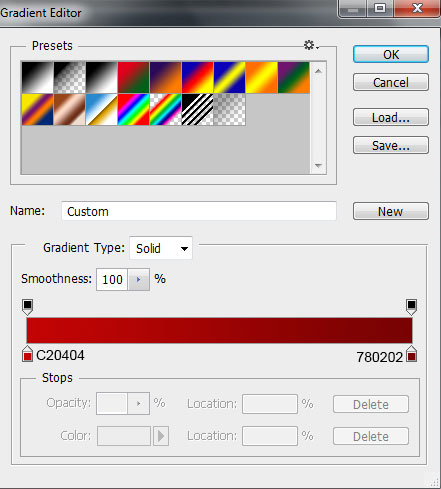
Click in the color bar to open the Gradient Editor and set the color stops as shown. Click OK to close the Gradient Editor dialog box.
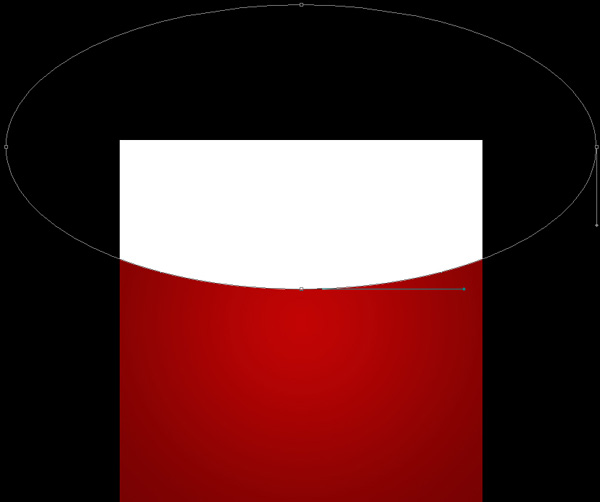
We’ve got the next background:

Use the Ellipse Tool (U) to draw the next ellipse as shown:
Click on Add a layer style icon from bottom part of the Layers panel and select Gradient Overlay.
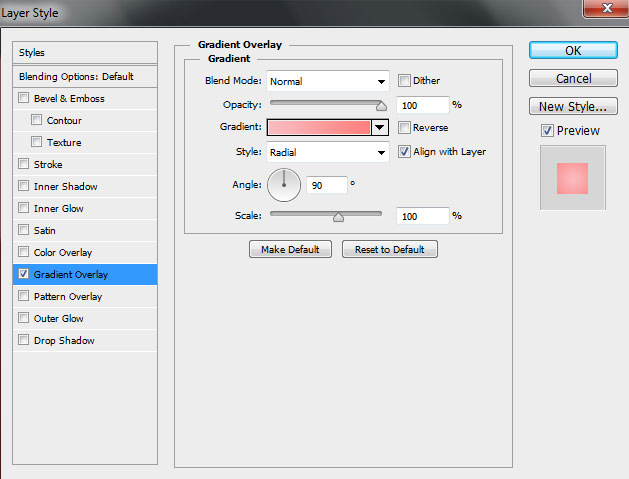
Click in the color bar to open the Gradient Editor and set the color stops as shown. Click OK to close the Gradient Editor dialog box.
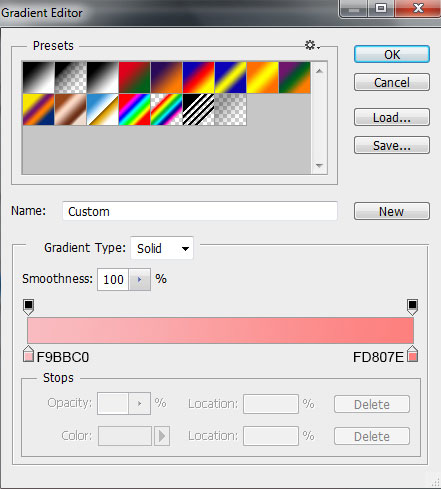
We’ve got the next result:

Select the Custom Shape Tool (U) in the Tools bar, in the Options bar click the Shape to open the selection menu. Find Heart at the bottom of the menu, and then double-click a shape thumbnail to select it.
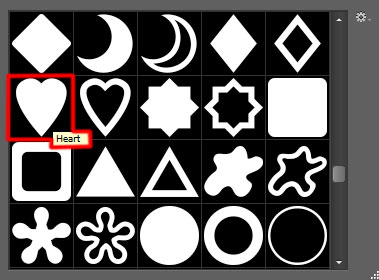
Click an drag to draw the heart shape as shown, color is #FE4E4E. Use the Convert Point Tool to correct the path of the shape.

We’ve got the next result:

Make seven copies of the last made layer containing the heart shape and choose the Free Transform (Ctrl+T) command to place the copies the same way demonstrated on the next picture.

Combine in a group all the layers with the hearts on them (press CTRL button to select the necessary layers and hold on the left mouse’s button while dragging the selected layers on Create a new group icon from bottom part of the Layers panel).
Make two copies of the last obtained group and select again the Free Transform (Ctrl+T) command to situate the copies as it is demonstrated on the next picture.

Make a copy of one of the layer containing the heart and select the Free Transform (Ctrl+T) command to make it smaller, situating them the same way from next image:

We’ve got the next result:

Make seven copies of the layer containing the heart the same way described earlier and choose the Free Transform (Ctrl+T) command to place the copies the same way from the next picture. Then put together their layers in a single group.

Make two copies of the last represented group and select the Free Transform (Ctrl+T) command to place the copies’ layers the same way demonstrated below:

Combine in a group all the hearts’ groups (press CTRL button to select the necessary groups and hold on the left mouse’s button while dragging the selected groups on Create a new group icon from bottom part of the Layers panel).
Set the Blending mode for the common last obtained group to Soft Light.

Cut out the coming out hearts’ elements. Make sure the common group is selected in Layers panel and hold CTRL button when clicking on the layer containing the ellipse on the Layers panel:

Insert the mask on the common group by choosing Add layer mask on the bottom part of the Layers panel and the coming out elements automatically cut out.

Using the Custom Shape Tool (U) and the Convert Point Tool, we may draw a big heart. Its color is #710000.

We’ve got the next result:

Click on Add a layer style icon from bottom part of the Layers panel and select Drop Shadow.
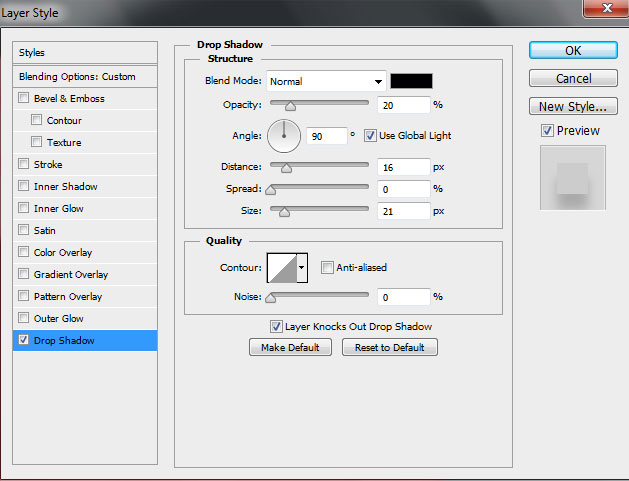
Set the Blending mode for this layer to Soft Light.

Create a new layer and choose the Soft Round brush.
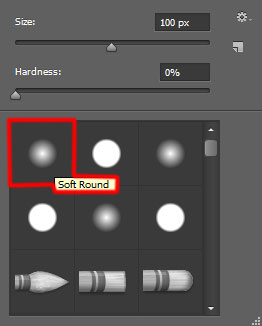
Use this brush to paint inside the heart with the color #FE0003 (set Opacity to 10% in Options bar). This layer must be situated under the layer containing the big heart.

Create a new layer again and apply the above mentioned Soft Round brush to paint inside the heart with black color (brush Opacity – 15%). The layer must be placed under the layer with the big heart on it.

Set Fill to 40% for this layer.

Cut out the inside shadow now. In this case select the layer containing the black brush in Layers panel and click on the layer containing the ellipse created earlier, holding in the same time CTRL button. We’ll get the next selection.

Insert the mask after that on the selected layer containing the black brush. Press CTRL+I in the mask to Inverse the color.

Make a copy of the earlier represented layer containing the big heart and choose the Free Transform (Ctrl+T) command to make the layer smaller to get the same result as on the picture below.

Set Fill to 0% for this layer and click on Add a layer style icon from bottom part of the Layers panel to select Gradient Overlay.
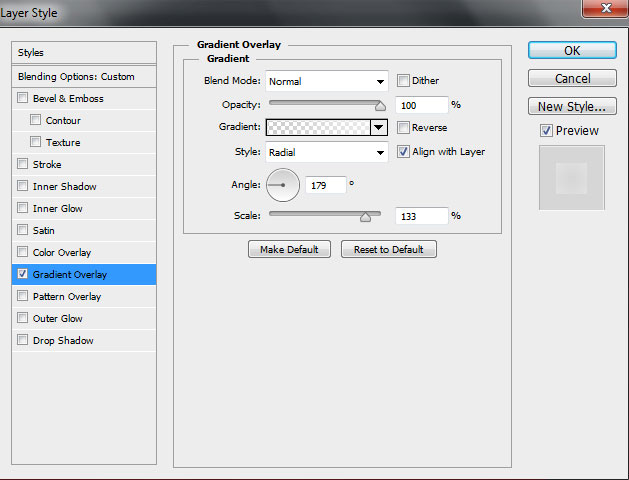
Click in the color bar to open the Gradient Editor and set the color stops as shown. Click OK to close the Gradient Editor dialog box.
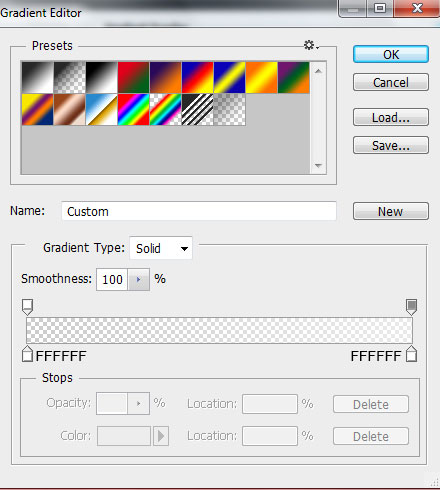
We’ve got the next result:
