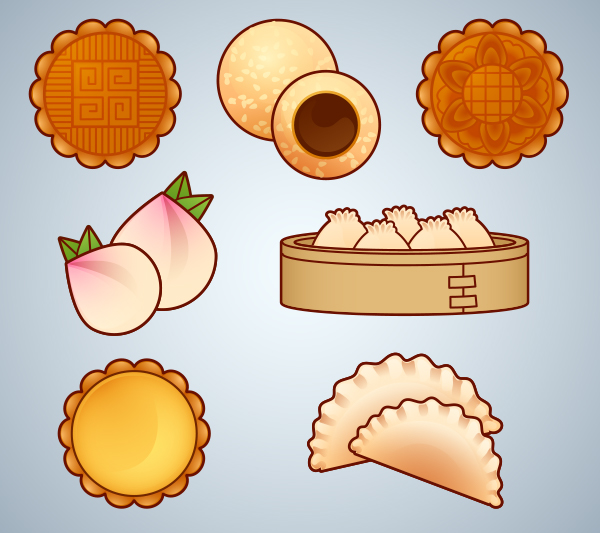
Celebrate Chinese New Year with mooncakes, steamed buns, and dumplings! In this tutorial we’ll illustrate dim sum food icons, perfect for use in a mobile game or other vector graphic needs. Start with circles and ellipses, and end with delicious food drawings.
You can also supplement your icon designs with vectors from Envato Market to create a complete set of dim sum pieces. Check out this dim sum set from Envato Market as an option to complete your final design.
1. Make a Mooncake Base
Step 1
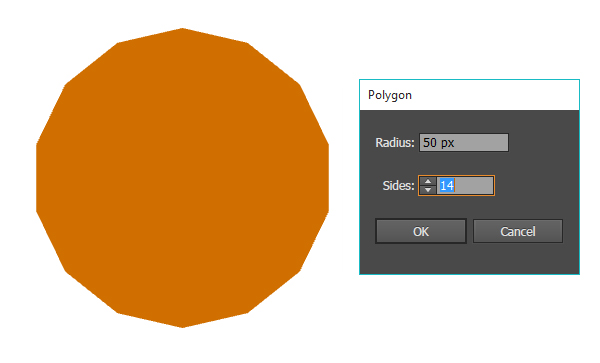
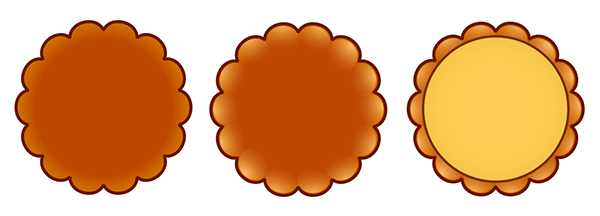
Three of our icon designs will begin with the same tart-like base design. Let’s start in a New Document with a 14-sided polygon created with the Polygon Tool.
Step 2
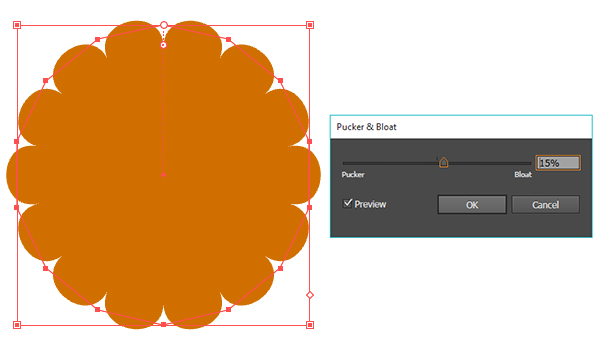
Let’s round out the shape so it resembles a flower. Select the polygon and go to Effect > Distort & Transform > Pucker & Bloat to apply a Bloat effect of 15% or so. Under Object, hit Expand Appearance to redefine the effect’s boundaries.
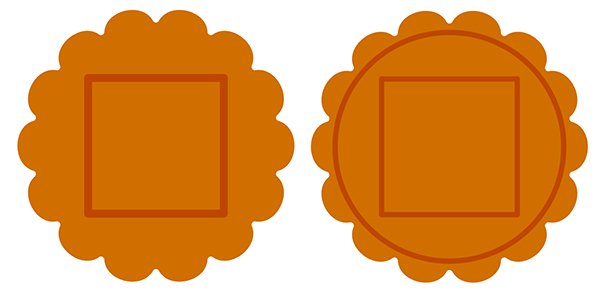
Pull the object’s Live Corners inward to round out the shape slightly and soften the look of the tart base.
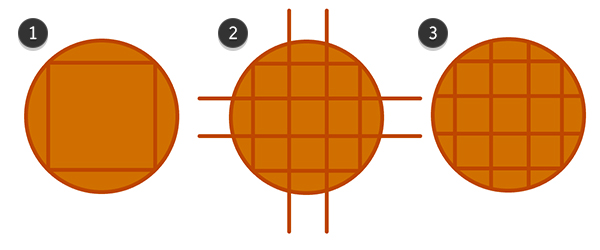
2. Create a Geometric Mooncake Design
Step 1
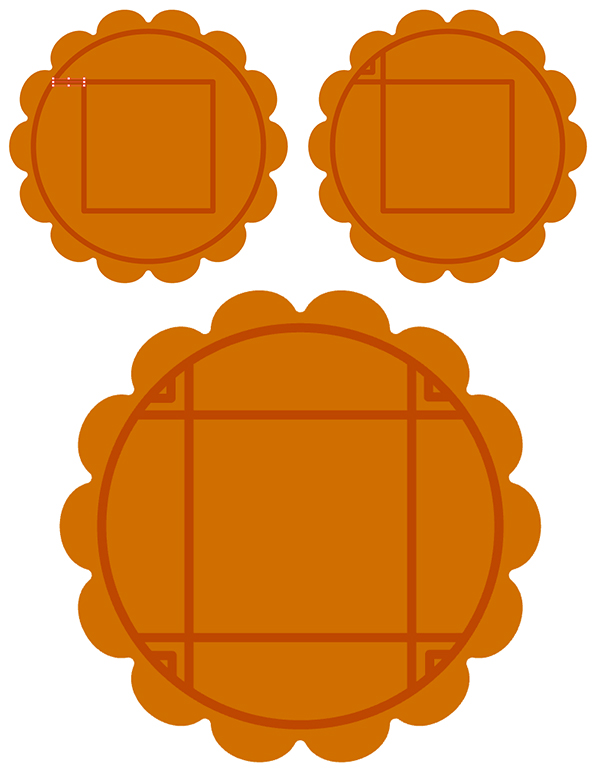
Use the Rectangle Tool (M) to draw a square in the center of the mooncake. Draw a circle in the center, below the square, with the Ellipse Tool (L). Set the fill color to match the mooncake base and the stroke color to a darker brown. I’ll be setting all thicker strokes to 4 pt weight and thin strokes to 2 pt and 3 pt weight.
Step 2
Use the Line Segment Tool (/) or the Pen Tool (N) to draw L-like shapes in the corners of the mooncake design. Make sure the lines are aligned with the square drawn earlier.
Step 3
Once again, using either the Line Segment Tool or the Pen Tool, draw several lines, this time in each of the four sections around the square. Draw ten lines in total and make sure to distribute them evenly. Repeat around the square.
When finished with the lines, add a thick brown stroke to the mooncake base object.
Step 4
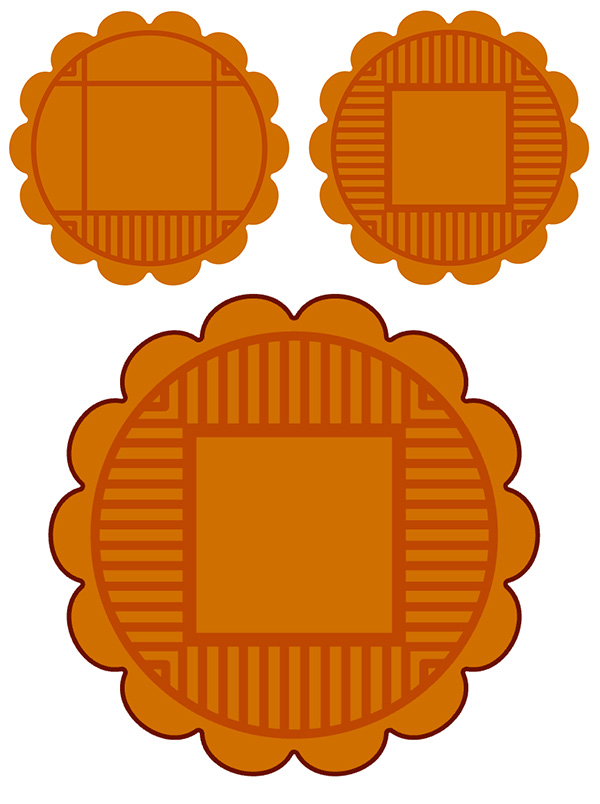
The center of the mooncake has four angled spirals. I drew mine with the Pen Tool. Try to line up their edges so they sit in the center of the square evenly.

Step 5
Draw an ellipse and apply a Radial Gradient to it, going from light brown at 100% Opacity to medium brown at 0% Opacity. Adjust the placement of the gradient’s radius with the Gradient Tool, and adjust the Opacity of the gradient in the Gradient panel.
Place a gradient shape like this on each of the 14 scallops around the mooncake. Group (Control-G) them together and place them behind the rest of the mooncake’s design but above the mooncake base in the Layers panel.

Step 6
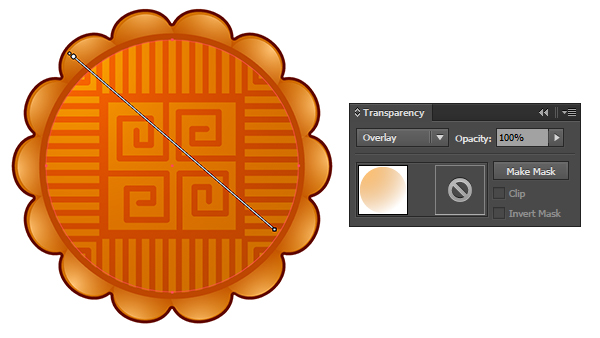
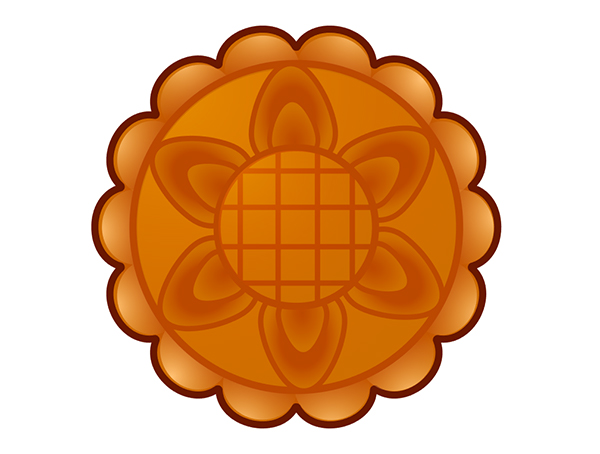
Draw a circle overlapping the center circle of the mooncake and apply the same gradient to it from the previous step. This time, however, you’ll want to set it to Linear and change the Blending Mode from Normal to Overlay in the Transparency panel. Group this entire design together.
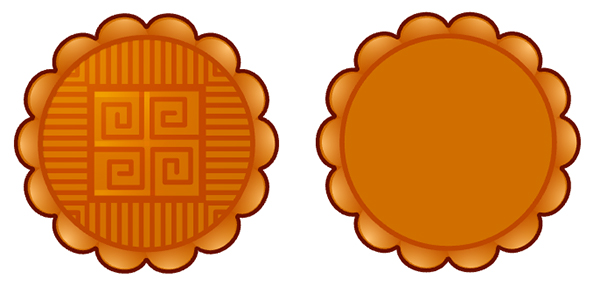
Step 7
Below you’ll see our completed mooncake and the basic design for our second icon. Copy and Paste the first mooncake and delete all of the components that make up the central design.
3. Create a Flower-Style Mooncake
Step 1
Let’s start with a circle that will be in the center of the second mooncake.
- Draw a circle with the Ellipse Tool. Draw a smaller square in the center of the circle.
- Next, draw two vertical lines and two horizontal lines in the center of the circle and square. Distribute them evenly.
- Use the Direct Selection Tool to adjust the length of the lines to stop at the edge of the circle.
Group this design together and place it in the center of the second mooncake.
Step 2
To create the first layer of flower petals, you’ll need to draw a circle with the Ellipse Tool and apply a Radial Gradient going from brown to darker brown, with the darker of the two colors in the center. Adjust the Radius of the Gradient with the Gradient Tool. You’ll want it to be more elliptical than round.
Use the Direct Selection Tool to pull the top anchor point upward to create a flower petal.
Step 3
Copy, Paste, and Rotate each copy of the flower petal around the center of the mooncake. Repeat with a smaller instance of the petal and place it above the larger petal. You should have two layers of petals arranged around a circle. Make sure to space them evenly.
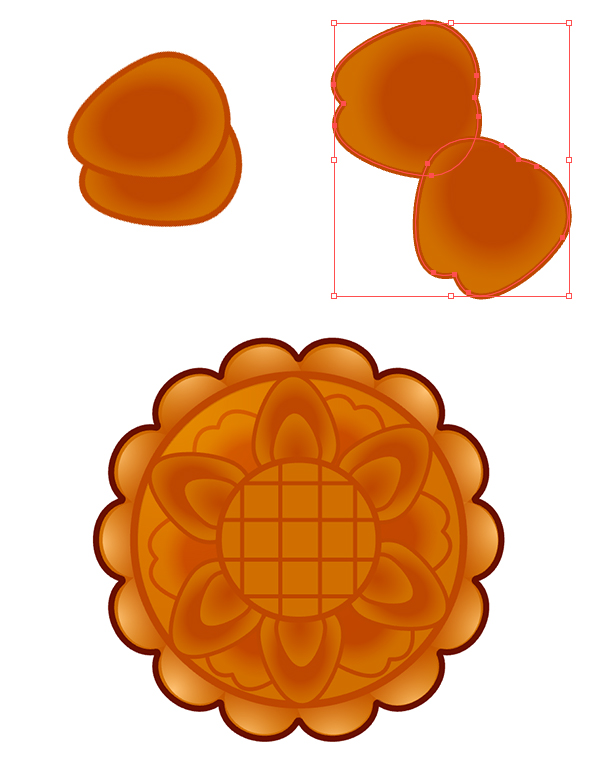
Step 4
The next layer of flower petals starts with two of the teardrop petals. Copy and Paste two instances of flower petals and Unite them in the Pathfinder panel once you’ve rotated and overlapped them slightly (in the fashion seen below).
Copy, Paste, and Rotate six instances of the larger petals and place them beneath and between the other, smaller petals within the center of the design. See below for placement within the mooncake design. Now we have two sweet mooncake designs! Group the components of the second mooncake together.
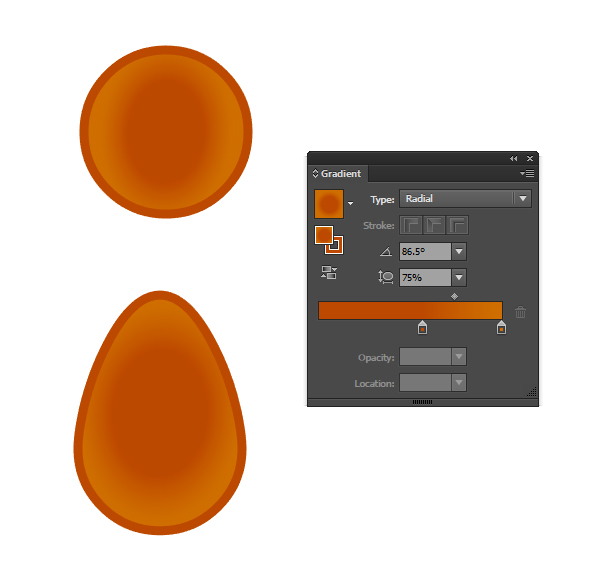
4. Create a Simple Egg Tart
Step 1
Another design can be created with the mooncake base. Start with the simple rounded-out polygon that we created at the start of this tutorial. Apply a Radial Gradient to it that keeps the darker brown in the center of the cake and the lighter brown around the edges of the tart.
As with the mooncakes before it, draw gradient highlight ellipses for each of the 14 scallop shapes. Draw a yellow circle for the center. Set the stroke color to dark brown.
Step 2
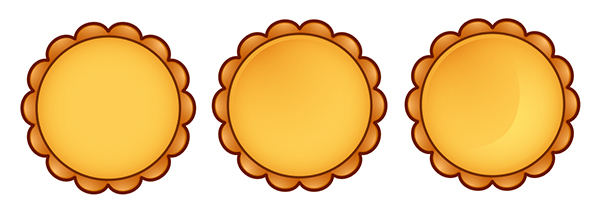
Add a Radial Gradient to the yellow circle. This one should go from dark yellow to medium yellow. As with the tart base, you want the gradient to stick close to the edges of the shape.
Draw a slightly smaller circle with the Ellipse Tool, place it in the center of the egg tart design, and fill it with a Linear Gradient that goes from dark yellow to medium yellow. You can see how the dark yellow of the gradient is concentrated in the upper left of the design.
Use the Pen Tool to draw a curving shape in the lower right of the egg tart. Apply a light yellow gradient to it and reduce the opacity of the shadow and highlight gradients as you see fit. This renders the egg tart just enough to give it some depth.
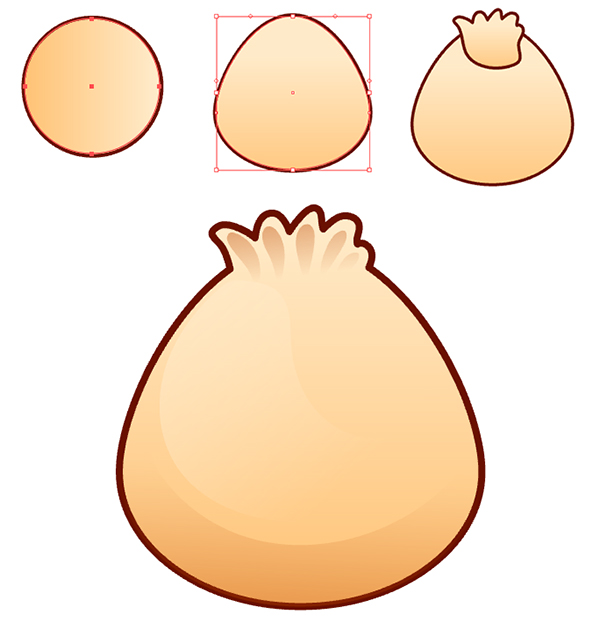
5. Create a Longevity Peach
Step 1
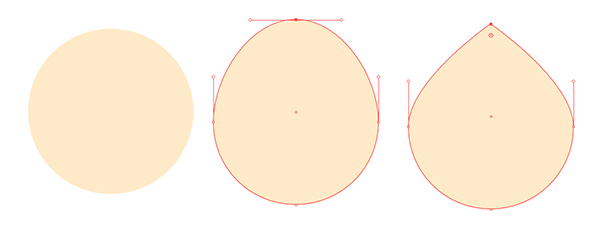
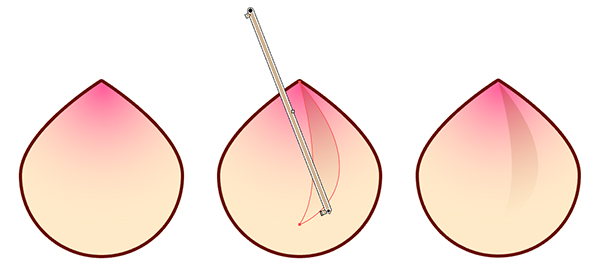
As with most of the designs in this tutorial, we’ll start again with a circle. Pull the top anchor point upward slightly with the Direct Selection Tool. Convert the top anchor point from a curve to a point with the Anchor Point Tool (Shift-C) to form the perfect peach bun shape.
Step 2
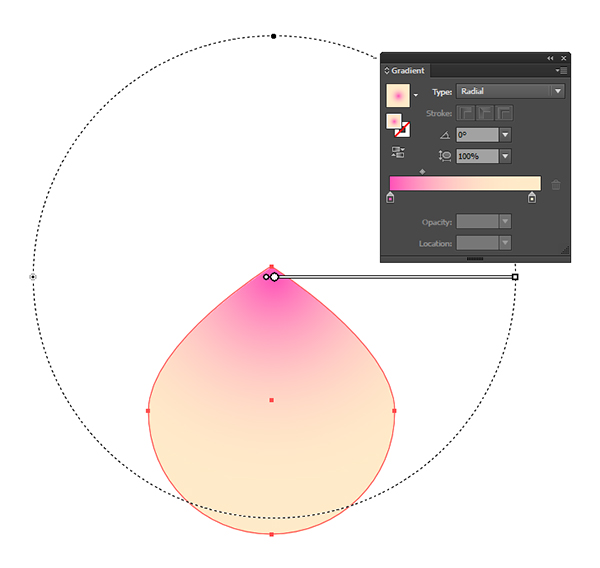
Set the fill color to a Radial Gradient that goes from cream to pink with the pink concentrated on the top of the peach bun. Adjust the gradient’s placement with the Gradient Tool.
Step 3
Draw a curved shape (using the drawing tool of your choice) in the upper center of the peach bun. You can fill it with a darker cream and reduce its opacity or fill it with a dark cream to cream gradient. Add a dark brown stroke to the peach shape.
Step 4
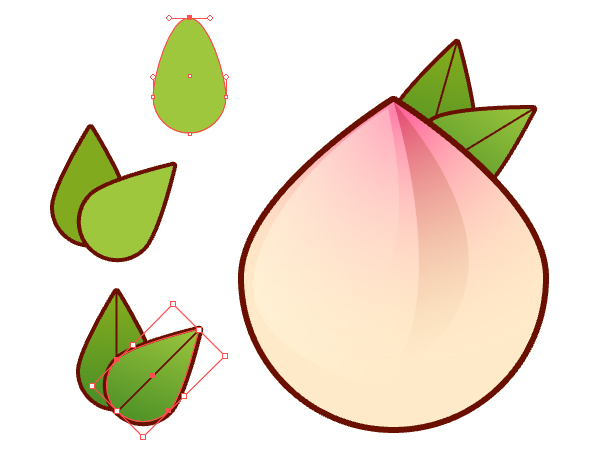
Draw a pointed teardrop for each leaf and apply a green gradient to it. Add an outline and a straight line for the leaf’s vein. Place two leaves behind the peach bun and Group the entire design together.
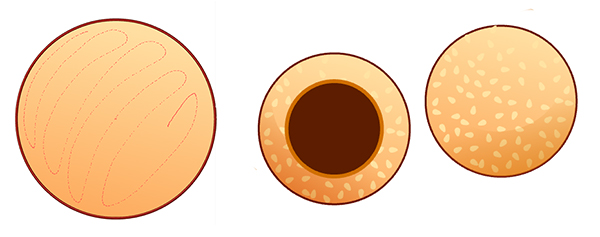
6. Create a Sesame Ball
Step 1
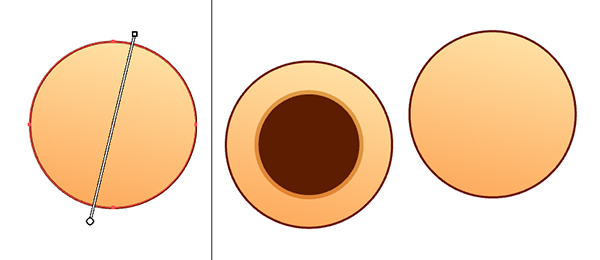
Sesame balls are not only easy to draw, but the real things are wonderful and delicious. Draw two circles and set the fill colors to Linear Gradients going from tan to dark tan. In the center of one circle, draw a dark brown circle whose stroked outline is dark tan. Add a dark brown stroke to both of the larger circles.
Step 2
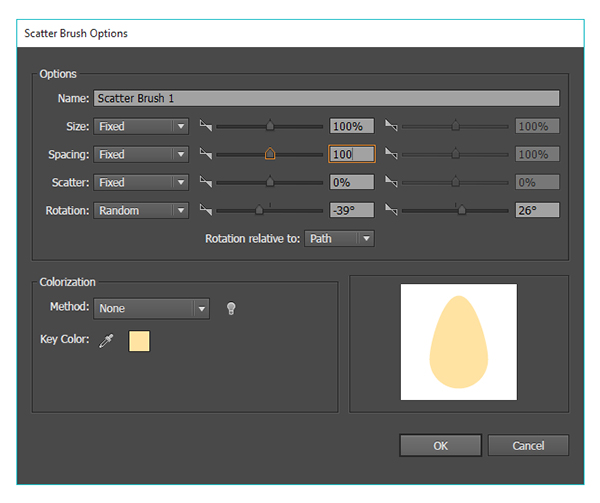
To create the sesame seeds, draw a small light-cream teardrop shape. In the Brushes panel, create a New Brush and select Scatter Brush as the type.
Play with the Spacing and Rotation settings, and make sure the Rotation is relative to the Path. Hit OK and you’ll find your new brush in your Brushes panel. Feel free to create a few copies of this brush with different Size, Spacing, Scatter, and Rotation settings.
Step 3
Use the Paintbrush Tool (B) to draw a few scribbled lines over both of the sesame balls. Instantly you’ll have perfectly scattered sesame seeds on your design! If the spacing, size, or rotation isn’t right, adjust your brush settings to your liking.
I also added some shadow gradient shapes on each ball to give them a bit more depth. Let’s move on to dumpling designs!
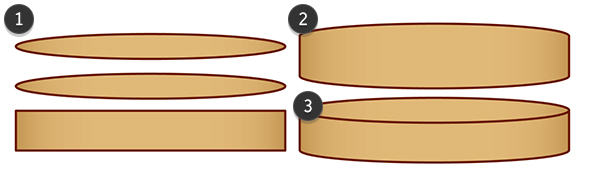
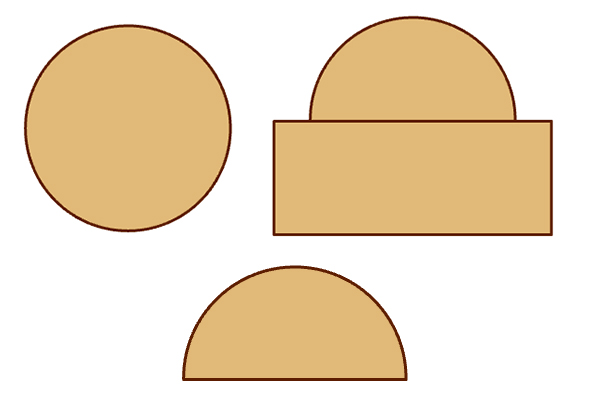
7. Create a Bamboo Steamer
Step 1
One of our designs, some cute steamed buns, needs a bamboo steamer to complete the design. Let’s create the steamer element now.
- Start with two identical ellipses and a rectangle. Make sure the length of each item is exactly the same.
- Unite all three objects together in the Pathfinder panel.
- Draw another ellipse the same size and width as the first one you drew for the steamer, and place it on top of the United design.
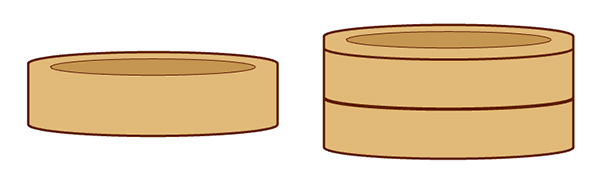
Step 2
Draw a smaller, darker brown ellipse for the center of the steamer to show the inside of it. Optionally, you can also stack these objects to form two or three tiers of simple bamboo steamers.
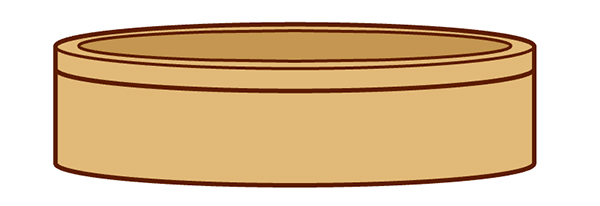
Step 3
This is the basic steamer design I’ll be using. Note how wide the inside of it is: plenty of room for dumplings, buns, or whatever else you’re filling your steamer with in your design.
8. Create Steamed Buns
Step 1
To create simple buns, draw a circle and pull the top anchor point upward as we did with other peach and teardrop shapes. Keep the anchor point as a curve, however. Using the Pencil Tool (N), draw a scalloped-edged shape at the top of the bun and Unite the two objects together in the Pathfinder panel or with the Shape Builder Tool (Shift-M).
Draw teardrop gradient shapes to show the folds in the top of the bun and use the same colors and gradients as the sesame balls to complete the bun shape.
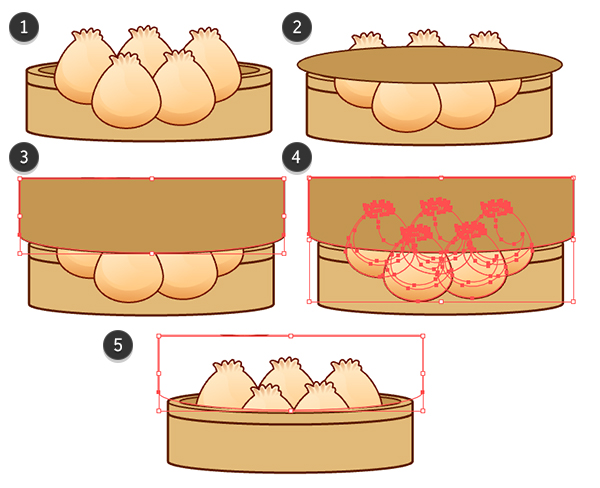
Step 2
Let’s fill the steamer with freshly steamed buns!
- Copy and Paste five instances of the buns and Group them together above the steamer. You’ll want to arrange them in the manner you’d like them to peek out of the steamer.
- Draw an ellipse that lines up with the inner ellipse of the steamer.
- Draw and Unite a rectangle over the top of the ellipse so only the top half of the bun group is covered.
- Select both the newly created shape and the steamed bun group.
- Create a Clipping Mask (Control-7) and make sure your newly clipped steamed buns fit perfectly inside the steamer. Adjust the clipping path accordingly as well as the clip group if need be.
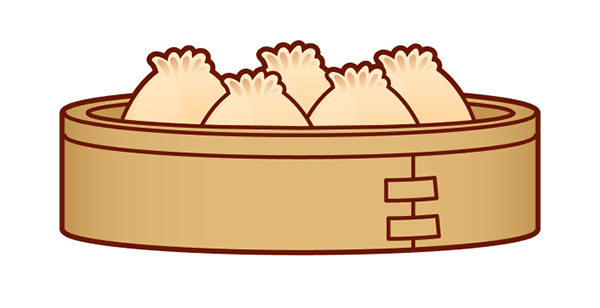
Step 3
You can create a steamer full of dumplings, buns, peach buns, or whatever you choose! Let’s complete the steamer design by drawing two curved rectangles with the Pen Tool and a line beneath them to show steam in the bamboo steamer. Group the entire steamer icon together.
9. Create Steamed Dumplings
Step 1
Let’s start by building a half circle:
- Draw a circle with the Ellipse Tool.
- Overlap the circle with a rectangle.
- Hit Minus Front in the Pathfinder panel and make sure you expand the shape.
Now you have a quick and easy half circle design!
Step 2
Using the half circle as a guide, draw a scalloped shape overlapping it. You may want to reference steamed dumplings to get an idea of how wavy the outer edge of the design is. Unite the two shapes in the Pathfinder panel. Note how imperfect my scalloped contour is. I want it to look as though it was made by hand.
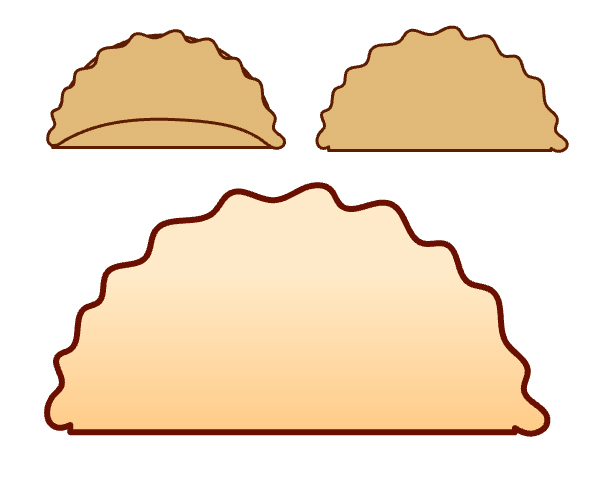
Step 3
Render the dumpling by applying a Linear Gradient to its basic shape, similar to the ones used for the steamed buns and sesame balls.
Draw gradient shapes with the Pen Tool or the Pencil Tool between each scallop shape. Add a half circle with a Radial Gradient going from dark tan at 100% Opacity to 0% Opacity to give it the look of being cooked a bit. This is optional depending on whether you want your dumpling to look steamed or fried.

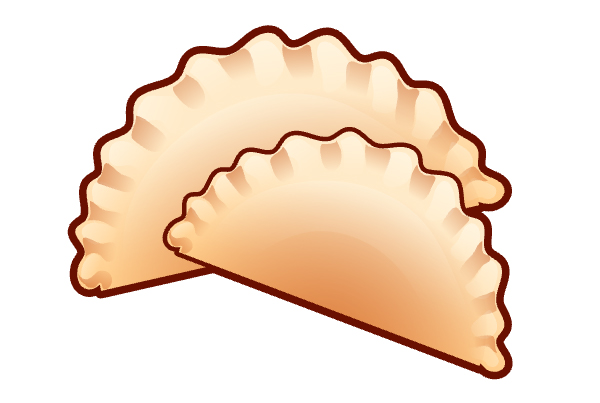
Step 4
To complete the steamed dumpling icon, I Copied and Pasted a second instance of the dumpling and Scaled and Rotated it slightly before Grouping the two together. I also completed the peach bun icon in the same way.
Great Job! Let’s Eat!
Now that you’ve completed all seven of the dim sum icons, you’re ready for quite a feast! What other dim sum favorites can you think of to add to this icon set? Share with us in the comment section below, and Happy Chinese New Year!