In this tutorial I’m going to show you how to make a WordPress shopping cart, using the BigCommerce WordPress plugin. We’ll go over the following things (in both video and written format, choose whichever you prefer!):
- What is BigCommerce (and the concept of “headless”)?
- How to download the plugin and create an account
- Setting up the WordPress store
- How to create a menu for the store
- Products on the BigCommerce platform
Watch the Screencast
Read the Tutorial
Let’s begin by answering this question:
1. What is BigCommerce?
BigCommerce is an eCommerce platform which powers over fifty thousand small and medium sized businesses, and over thirty thousand Fortune 1,000 companies (like Ford, Toyota, and Sony). BigCommerce is a SaaS product (software as a service) so is licensed and accessed via entirely online.
What makes BigCommerce different is its “headless” commerce approach. Being headless means that the presentation layer (what is seen by the user) is decoupled from the ecommerce layer. A traditional online store will usually be run on a system where the frontend is directly linked with the backend; everything is served from the same place. A headless system means that the frontend can be located wherever, and talks to the remote commerce layer via an API.
BigCommerce offer a “frontend” just like any other eCommerce service, but thanks to their headless approach you can also choose whichever CMS you’d like to plug your BigCommerce store into. And that gives you the WordPress shopping cart option.
2. How to Download the Plugin and Create an Account
The coupling of BigCommerce and WordPress is made much easier thanks to the plugin, BigCommerce For WordPress, developed by the BigCommerce team. You can download the plugin from wordpress.org and upload it to your WordPress installation, or access and install it from within the plugin page in WP Admin.
Once installed and activated you’ll need to either connect your site to an existing BigCommerce account, or a new one.
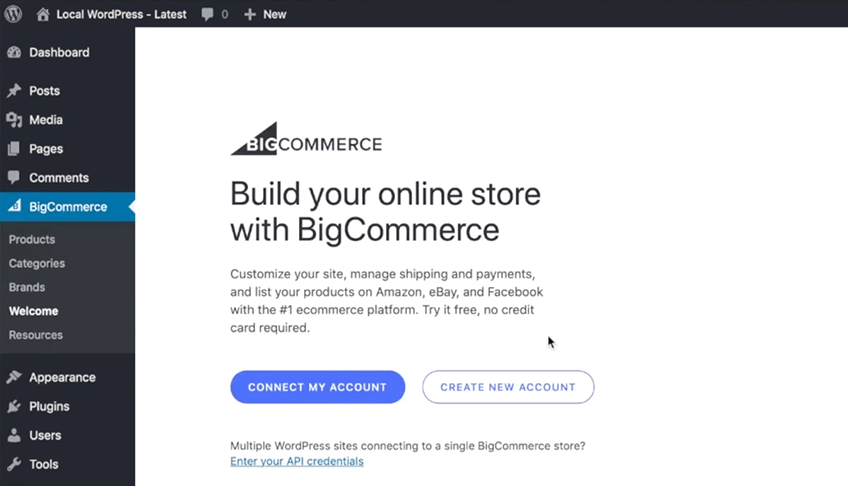
For the sake of demonstration, let’s set up a new account. Click Create New Account and the store will guide you through the whole process.
3. Setting up the WordPress Store
To begin with you’ll be asked to enter some standard details; your name, the store’s name, location, that sort of thing. Once done, the store will be created behind the scenes and you’ll be emailed when it’s done.

Then you’ll be asked to set up a “channel”. Channels define where your products are sold, so if you’re selling on a WordPress website that’s a channel. If you’re selling products via a Facebook page, that’s another channel. We’ll therefore set our channel name to something like “WordPress Website”.
You’re then given the choice to automatically add new products, when they’re added to your BigCommerce account, to your channel. We’ll select Yes.
3. How to Create a Menu for the Store
At this point you’ll be asked to create a navigation menu for the store. You can give it a name, then select (or not) any of the options you see in the screenshot below:

That’s all there is to setting up a navigation menu. If you visit Appearance > Menus in your WordPress Admin you’ll find your new menu setup and waiting for you, complete with its name and the various endpoints/menu items you chose to include.
You then need to make sure your navigation menu is associated with a location in your WordPress theme. This can be done under the Manage Locations tab and the options available to you will depend entirely on your WordPress theme.
With that done, check your frontend and you’ll see the menu in the desired location, all the required store pages, and some demo products to show you how it will work.
4. Products on the BigCommerce Platform
Let’s now add some products of our own.
Having set up your BigCommerce account via the WordPress backend you’ll have received a confirmation email, plus some login details. After you confirm your email address you’ll be asked to set a password, which you can then use to login to the BigCommerce platform.
Once in, you can add products, edit them, delete them, and apply any number of customizations you might want. If you navigate to Products in the sidebar, you’ll see all the demo products you’ll have seen appear in your WordPress website.

This is a great opportunity to play around with what’s been installed, to learn how products are managed. Click on one and you’ll see all its basic information, its description, categories, and so on. Make any change you want, then click Save. The change is automatically reflected on your WordPress site; to check, go back to your WordPress Admin, then BigCommerce > Products. You’ll see that the plugin is constantly syncing and keeping the product catalogue up to date (hit Sync Products if you want to trigger the synchronization process):

Find your product on the frontend, refresh (if the page was already open for some reason) and you’ll see the changes automatically reflected.
Adding products is as simple as you might imagine: add them to the BigCommerce account and they’ll automatically be synced with your WordPress site, making them available for purchase by your customers. Watch the video to see adding products in action.
Conclusion
This tutorial has shown you how easy it is to set up a BigCommerce store, coupled with a WordPress website.
The headless approach to BigCommerce makes it a really flexible choice for selling online. Keeping your eCommerce functionality separate from your frontend presentation can give you brilliant performance and workflow wins. And by running a single store backend, and distributing across multiple channels (including your WordPress shopping cart) you’ll have the freedom to sell how you want.