Let me show you some rapid tips and tricks in Sketch for Mac. We’ll look at 26 Sketch tips and tricks from A to Z.
Once you get familiarized with Sketch, check out Envato Elements! With one subscription, you’ll have unlimited access to numerous Sketch resources such as Sketch templates, Sketch shapes, and more. One simple commercial licensing that you can cancel at any time!


What You Will Learn in this Sketch Tutorial:
- How to Work With Vectors in Sketch
- How to Manage Sketch Layers
- How to Work with Sketch Symbols
- How to Create and Edit Shapes in Sketch
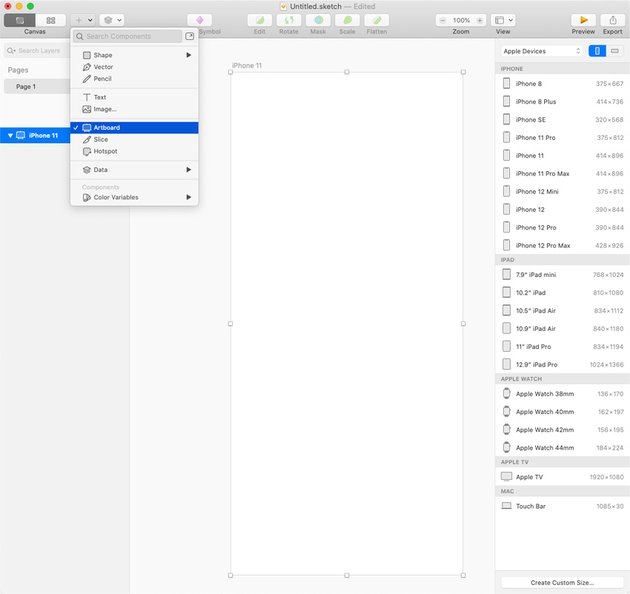
A is for Artboards
An Artboard represents the area where a screen design will be created in Sketch. By default, your starting artboard will be white, and you can have multiple artboards in one document.
Selecting the Artboard tool from the toolbar or pressing the A hotkey will open a list with the most common screen sizes in the right sidebar. You can select one of the preset Sketch templates and add the artboard to your design, or you can define your own custom size artboard.
Click the name of an Arboard to select it and use the bounding box whenever you wish to scale it.


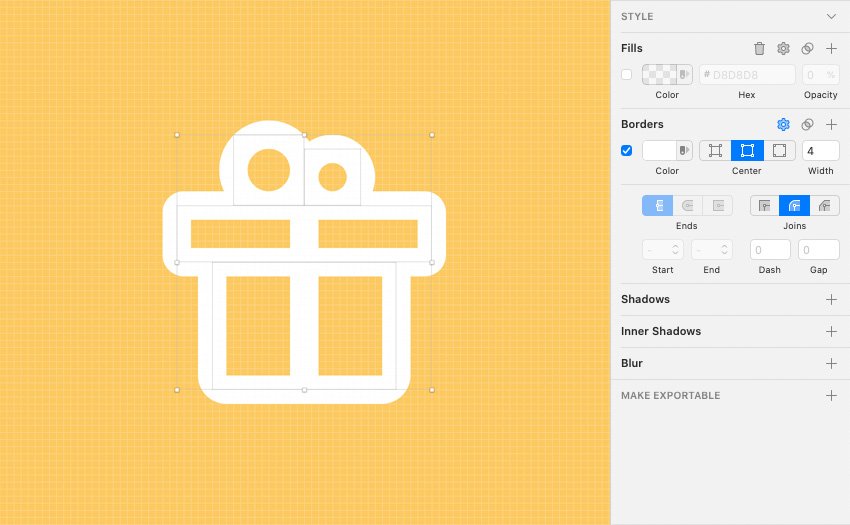
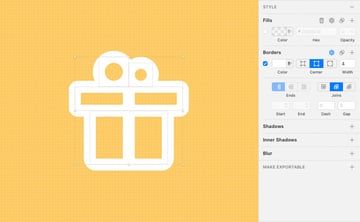
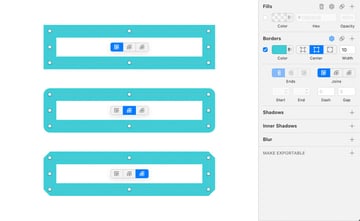
B is for Borders
A Border (stroke) can be applied on any type of layer from a Sketch document.
In the Inspector you can change the border color, adjust the style, set the alignment and the thickness, or you can select one of the cap and join border settings. When you’re working with opened paths you can add a start and end design. More about this when we get to letter L where we’ll discuss lines.
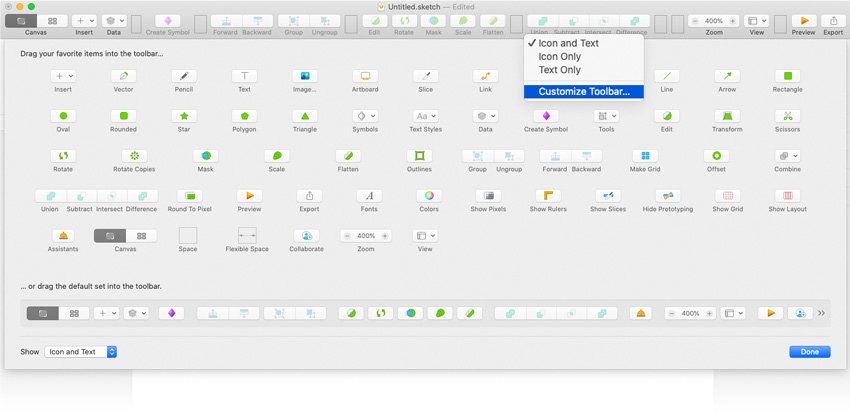
C is for Customize Toolbar
Right-click on your toolbar and go to Customize Toolbar whenever you wish to edit the buttons available on your toolbar.
Click and drag different buttons that might fit your needs for a specific project. You can easily drag the default set into the toolbar and using the drop down menu you can remove the text below your buttons.

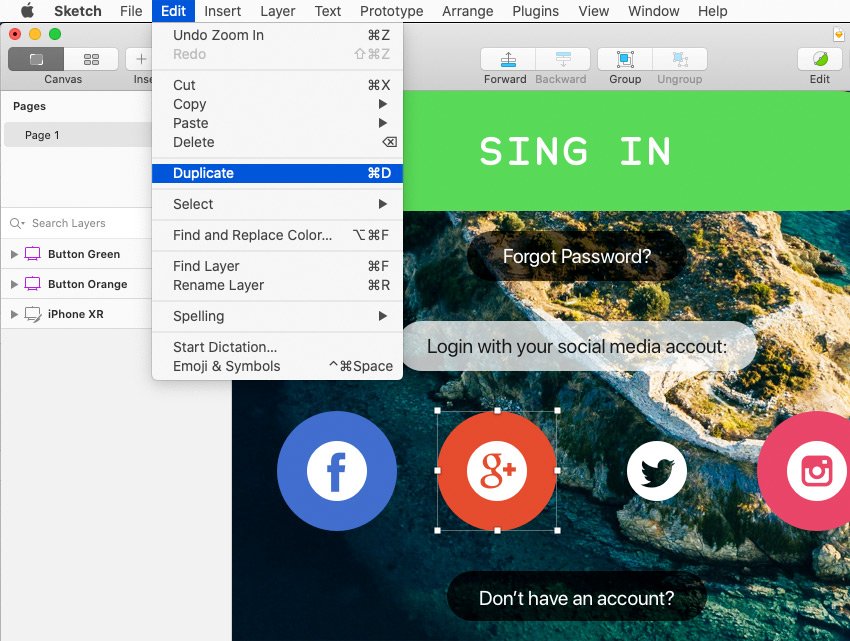
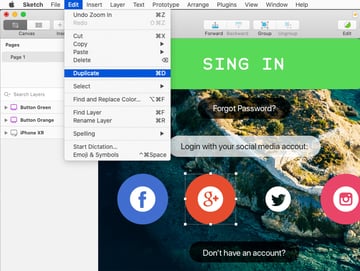
D is for Command+D
Use this Sketch shortcut whenever you wish to duplicate a selected layer from your design. Your copy will be added on top of the original Sketch layer.

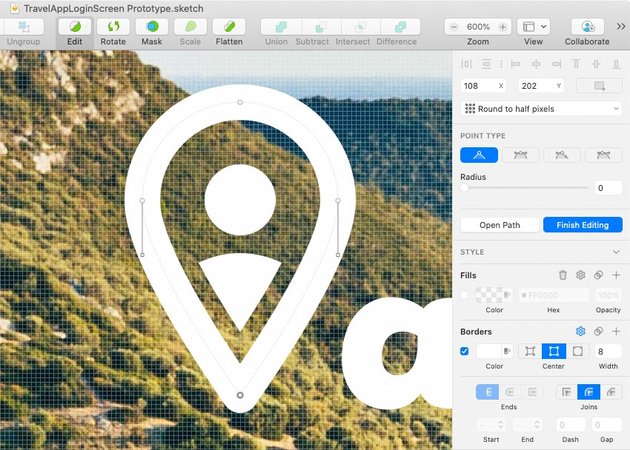
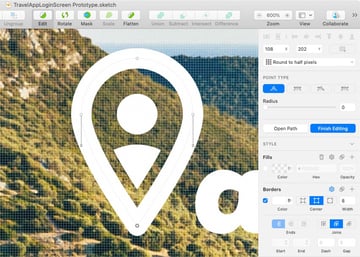
E is for Edit
Using Edit mode you can edit an existing shape. Double-click on the shape, select it and press enter, or click the Edit button from the toolbar to activate Edit mode. Keep in mind that you can also select multiple shapes and edit them at the same time.
In Edit mode you can click on any point to select and move it. Click on a path to add a new point or hold down the Command key and drag a to nicely bend your path.
Selected points can also be adjusted using one of the four point type buttons from the Inspector. Depending on the type of path you have selected, you can close or open it using the button from the Inspector and you can adjust the corner radius for any selected points using the Radius slider.
Once you’re done editing your path you can leave Edit mode by pressing the Esc key twice or by clicking the Finish Editing button from the Inspector.

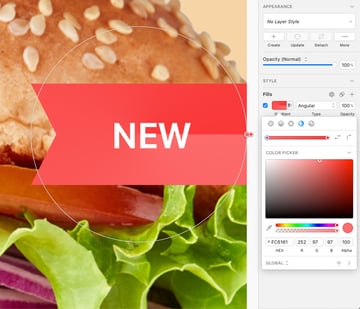
F is for Fill
A Fill sets the color for a layer in Sketch.
Clicking the Fill color from the Inspector will open the preview well. Using the top icons you can choose between five Fill types: Solid Color, Linear Gradient, Radial Gradient, Angular Gradient or Pattern/Image. Using the eyedropper button you can quickly grab a color from your design and use it for the Fill.
Lower the Opacity value whenever you wish to add a bit of transparency for your fill, add more than one fill using the + button, or use the button next to it if you wish to change the blend mode.
To disable a Fill, all you have to do is uncheck that box next to the Fill color. Alternatively, you can right-click a fill to copy, duplicate, or remove it.


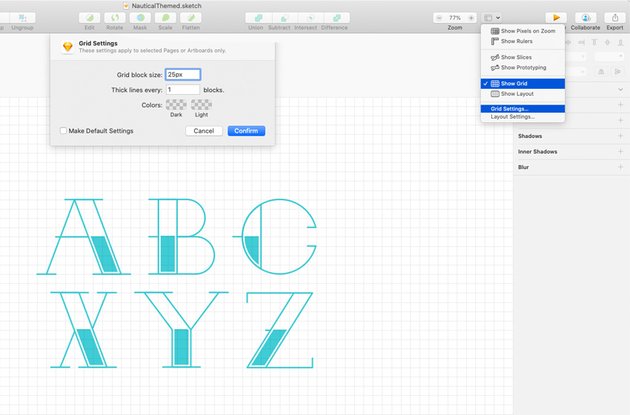
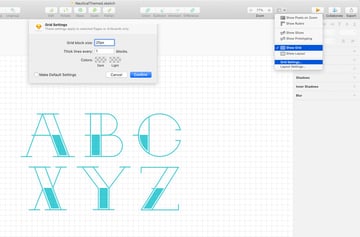
G is for Grid
To enable the Grid, click the View button from your toolbar and go to Show Grid, go to View > Canvas > Show Grid in the menu bar or use the Control+G keyboard shortcut. Grids can be used to define the main structure of a design and to measure, align or easily create pixel perfect layers in Sketch.
To edit your Grid, click again that View button from your toolbar and select Grid Settings or go to View > Canvas > Grid Settings in the menu bar. In the newly opened window you can set the grid size and color. Make sure that you lower the color opacity to make your grid less distracting.
Check out this Sketch tutorial if you wish to get better at working with vectors in Sketch as you create this Nautical Tattoo Font: How to Create a Nautical Tattoo Font.

H is for Hand Tool
Holding down the Space bar will temporarily activate the Hand tool which can be used whenever you wish to pan and move around a document without accidentally selecting or moving layers.

I is for Image
Images can be added inside a selected shape using the Fill color from the Inspector. This method might squeeze or crop your image and in some cases you will want to add your full image as a standalone layer.
To achieve this, you can manually drag the image from your desktop or you can go to Insert > Image… and double-click the image that you want to add.


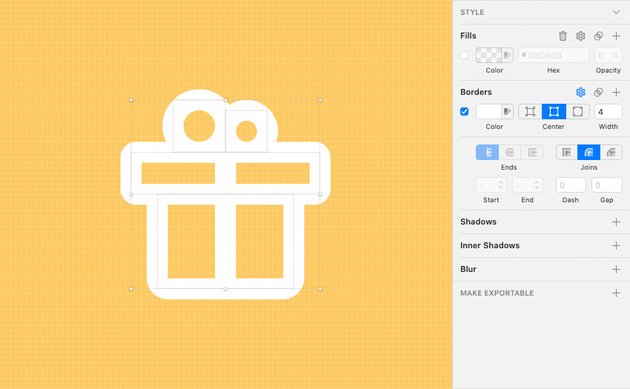
J is for Joins
Joins affect the corner points of a Border. Depending on the type of Join that you select from the Inspector, you can make the corners appear sharp (Miter Join), rounded (Round Join), or squared (Bevel Join). Click the Adjust Border Properties button if you can’t see these options.


K is for Command+K
Using this Sketch shortcut you can easily resize complex layers. Border size, shadow attributes and corner radius will be scaled accordingly. Scaling can be done proportionally or numerically, and you can set the reference point for the scaling using the Scale from button.


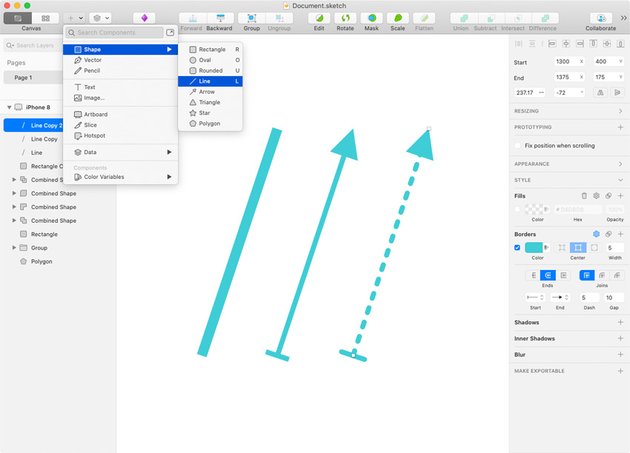
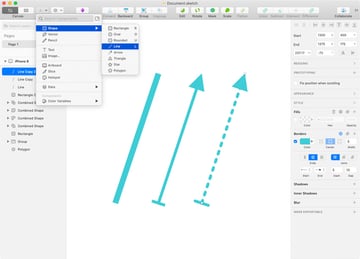
L is for Line
Select the Line tool from your toolbar or press the L hotkey whenever you wish to create a perfect straight line.
Once created, you can adjust the Border settings in the Inspector and you can easily turn it into an arrow line using the Start and End attributes.

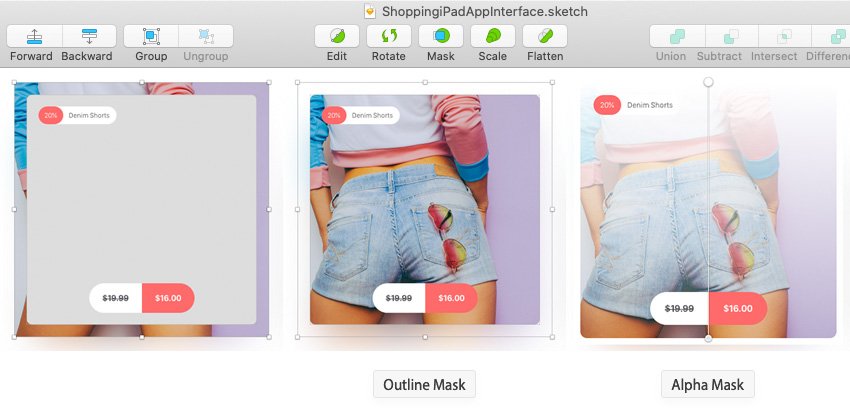
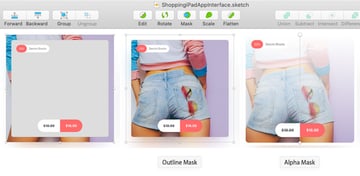
M is for Masking
Masking gives you the possibility to hide parts of your design elements. There are two types of masks that can be applied in Sketch: Outline Masks and Alpha Masks.
Select the layer that will act as the mask along with the object (or objects) that will be masked. Simply right click on your selection and go to Mask. This will create a new group inside the Layer List which contains your mask and the masked layer. Any new layer that you drag above the mask, inside that group, will also be masked. To unmask a layer, select it, right click and go to Ignore Underlying Mask.
To create an Alpha mask, start by creating the Outline Mask. Once you’re done, select the mask from the Layer List and go to Layer > Mask > Mask Mode > Alpha Mask. Head over to the Fill settings and replace the flat color with a gradient. Having a point from your gradient selected simply lower the Opacity which will adjust the transparency of your masked layer. Keep in mind that the gradient colors are not important, only the Opacity values that you set for the gradient colors affect the mask.

N is for Command+N
Use this Sketch shortcut to quickly create a new document in Sketch for Mac.


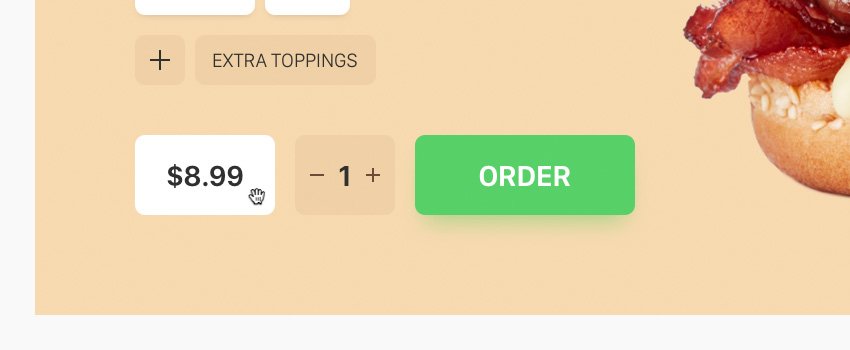
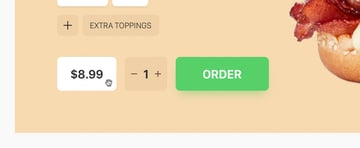
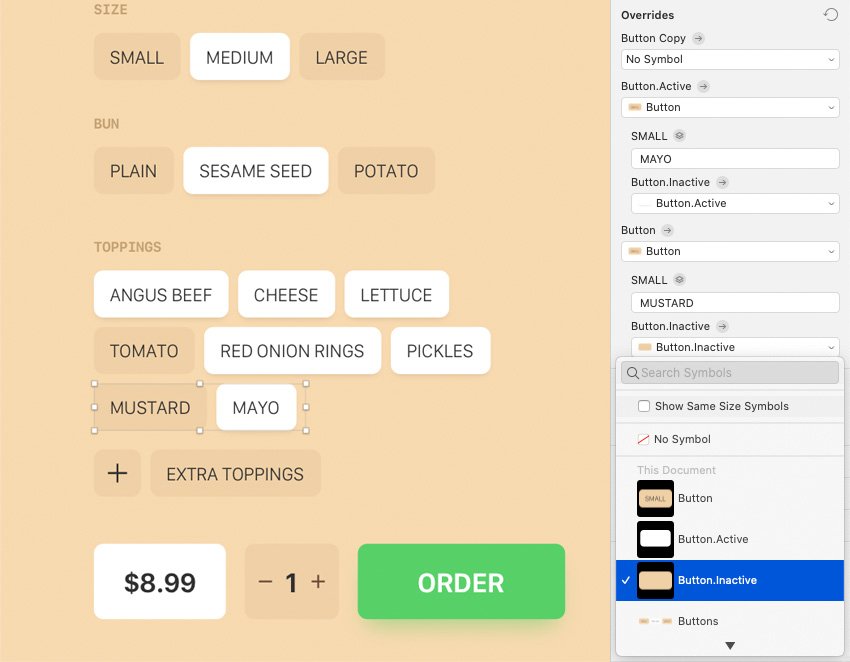
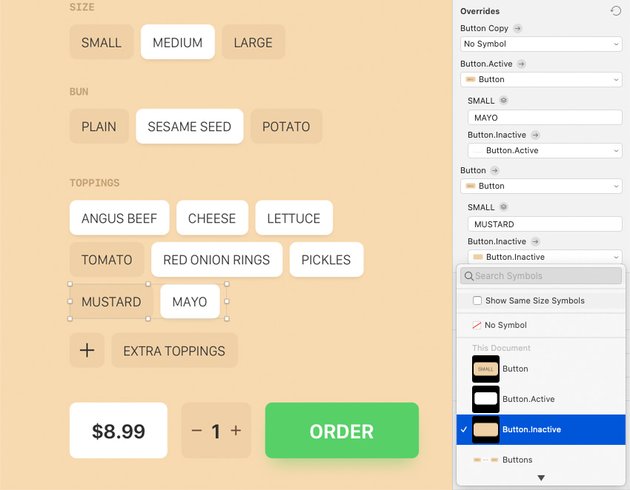
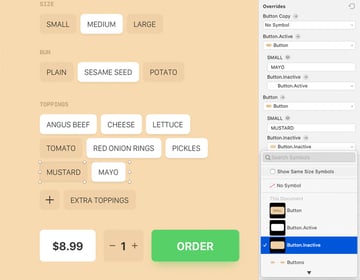
O is for Overrides
Overrides go hand in hand with Sketch symbols. Symbols are design elements that can be easily reused across your UI designs. We’ll learn more about this amazing feature when we get to letter S.
Overrides show up in the Inspector whenever you have a symbol selected. Editing an override will change the content inside an individual Symbol instance . This change will not affect the Source symbol or any other instance of it.
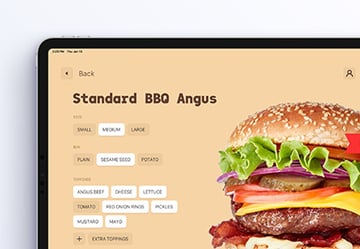
Check out this Sketch tutorial if you wish to learn more about the power Sketch symbols and overrides as you create this food ordering iPad app UI design: How to Design a Food Ordering iPad UI Design in Sketch.
P is for Prototyping
Prototyping allows you to visualize your UI design with animated interactions. To create a prototype in Sketch you need to add Links or Hotspots which connect any layer to any artboard.
To add a Link, select the layer that you want to turn into link, go to the Inspector and check the + button in the Prototyping section. Click on an artboard that you want to link your layer to and return to the Inspector panel where you can set the look for your Link’s transition using the Animation buttons.
To add a Hotspot, select Insert > Hotspot from your toolbar. Click and drag to create the Hotspot Area and then click on an artboard that you want to link your layer to. Once created, you can edit your animation in the Inspector, just like you can with a link.
When your prototype is done you can preview the animation using the Preview button from the upper right corner. In the newly opened window you can click the designated Links and Hotspots to test your animation.


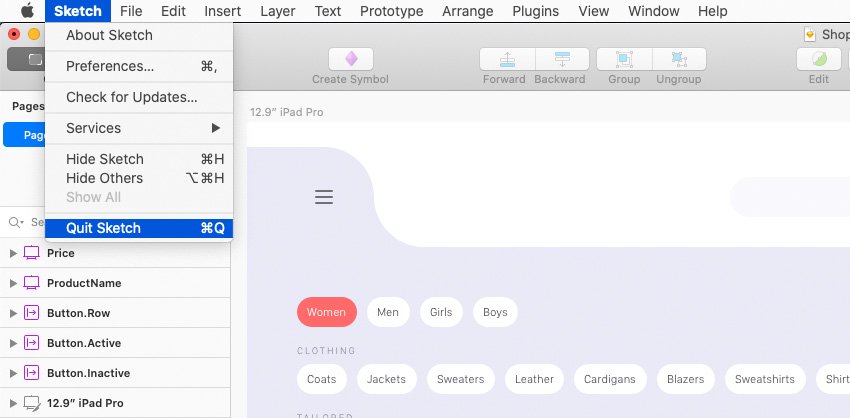
Q is for Command+Q
Use this classic Sketch keyboard shortcut whenever you wish to quickly quit your Sketch app.

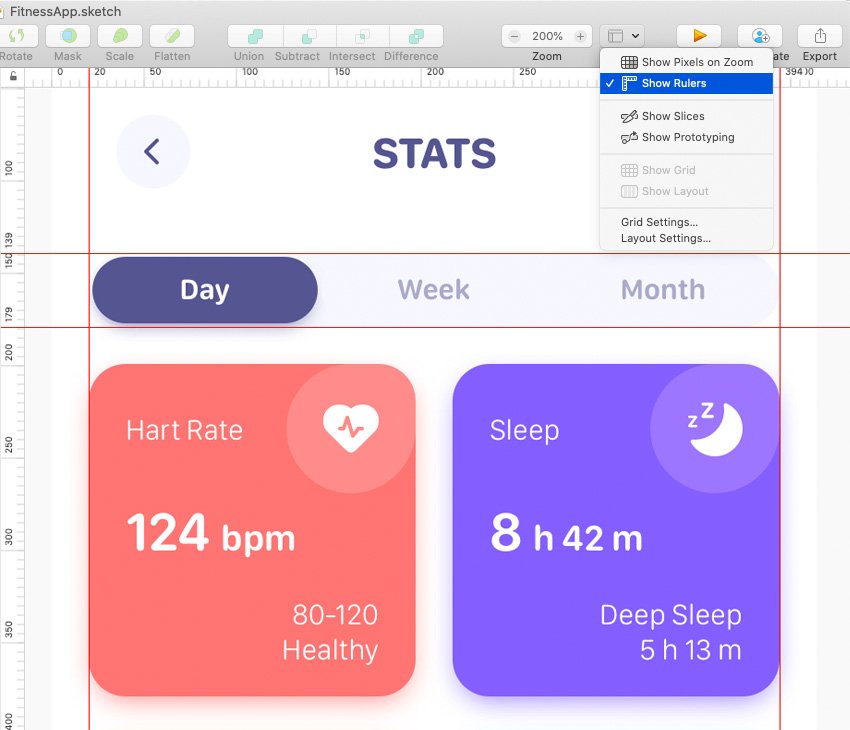
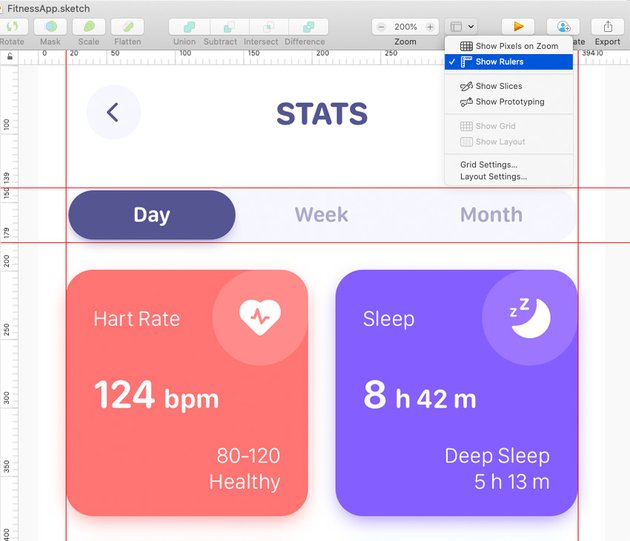
R is for Rulers
By default, Rulers are hidden. To activate your Rulers, you can click the View button in the toolbar and select Show Rulers, you can go to View > Canvas > Show Rulers in the menu bar or you can use the Control-R hotkey.
Click and drag on your rulers to set the zero origin wherever you need. To lock your rulers in place, click this lock icon. To reset your rulers, go to View > Canvas > Reset Ruler Origin.
Click anywhere on a ruler to add a guide. Disabling the rulers will also make your your guides invisible.

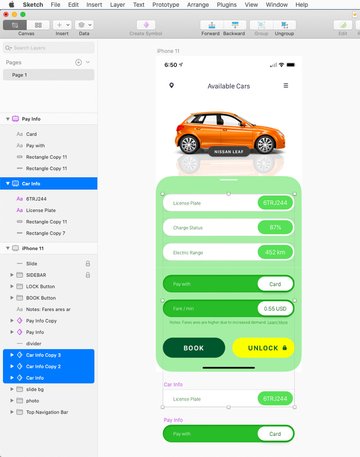
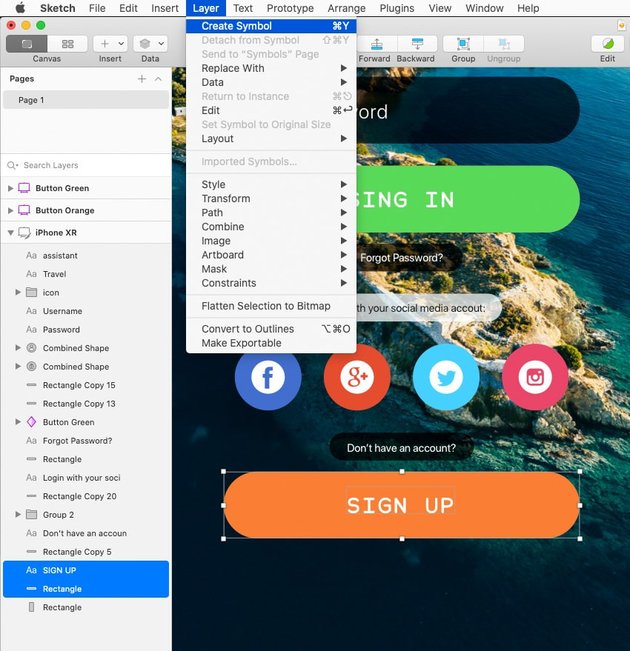
S is for Symbols
Symbols are design elements that can be easily reused across your UI designs. To turn a layer into a symbol, select it, and click the Create Symbol button from your toolbar or right click on it and go to Create Symbol.
Sketch will create a separate artboard with your symbols which is the Source. A copy of this Source is called an Instance and you can create as many instances as you wish. When you make a change to a Source the rest of the Instances modify simultaneously.
To insert an Instance of a symbol you can press the C hotkey and double click the desired symbol or you can go to Insert > Symbol > This Document and select the desired symbol.
Check out this Sketch tutorial if you wish to learn more about the power Sketch symbols as you create this car app UI design: How to Design a Car App UI Design in Sketch.


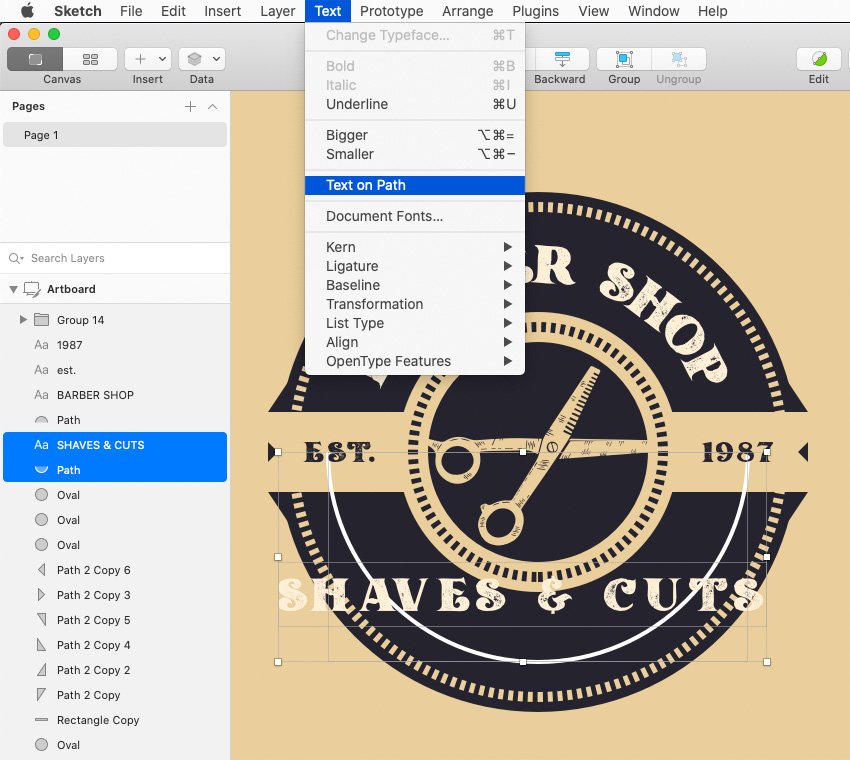
T is for Text on Path
With Text on Path you can easily place a piece of text on a path. To add your text to a vector path, make sure that you text lies above that path in the Layer List and on your artboard.
Select the text layer and then go to Text > Text on Path from the menu bar. Simply drag your text to move it along the path and go back to Text > Text on Path when you wish to detach the text from that path.
Check out this Sketch tutorial if you wish to test this feature as you create this barber shop logo: How to Create a Barber Shop Logo.


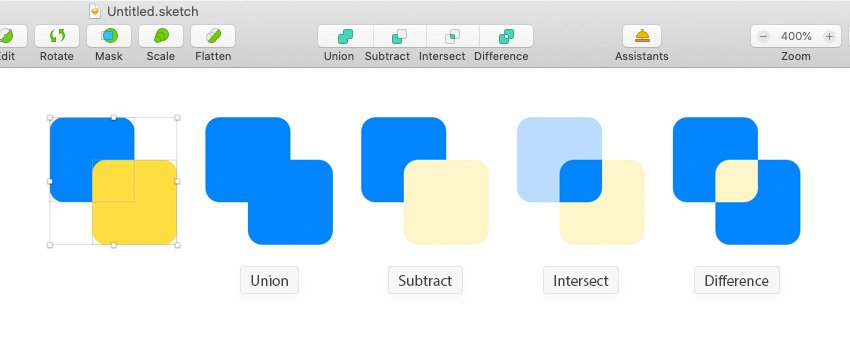
U is for Union
Use this boolean operation to easily unite shapes from your design. Just select the shapes that want to be united, go up to your toolbar and click the Union button.
Besides Union you can find another three boolean operations in the toolbar: Subtract, Intersect and Difference.

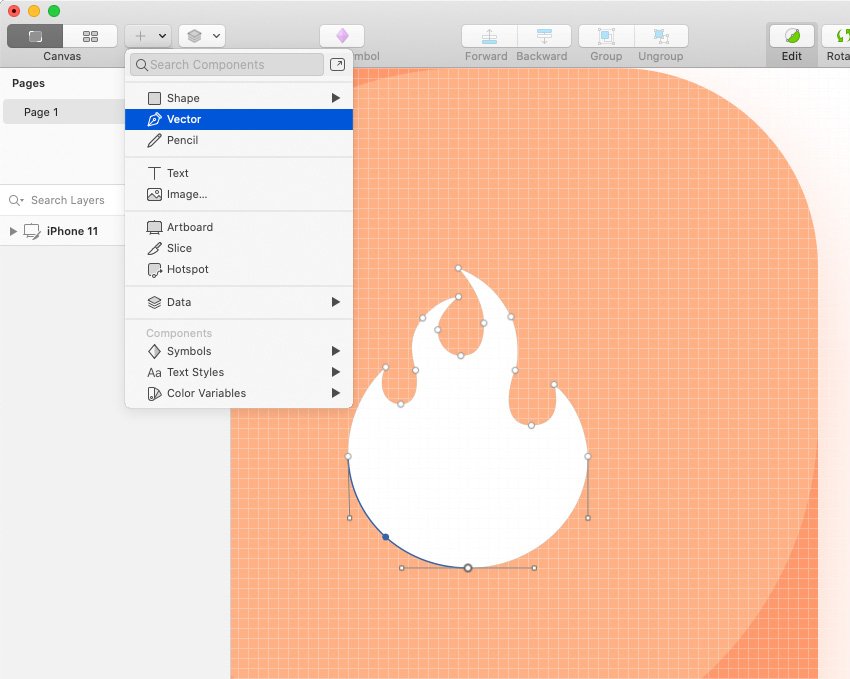
V is for Vector Tool
Select the Vector tool from your toolbar or press the V hotkey whenever you wish to draw a new shape in Sketch.
Start creating a shape with a simple click. Click again to create the second point and Sketch will create a path connecting your two points. Click and drag when creating a new point to add a curved path and click on the first point when you want to close your path. Once closed, you’re in editing mode and you can adjust the handles, select any point and move it as you wish.


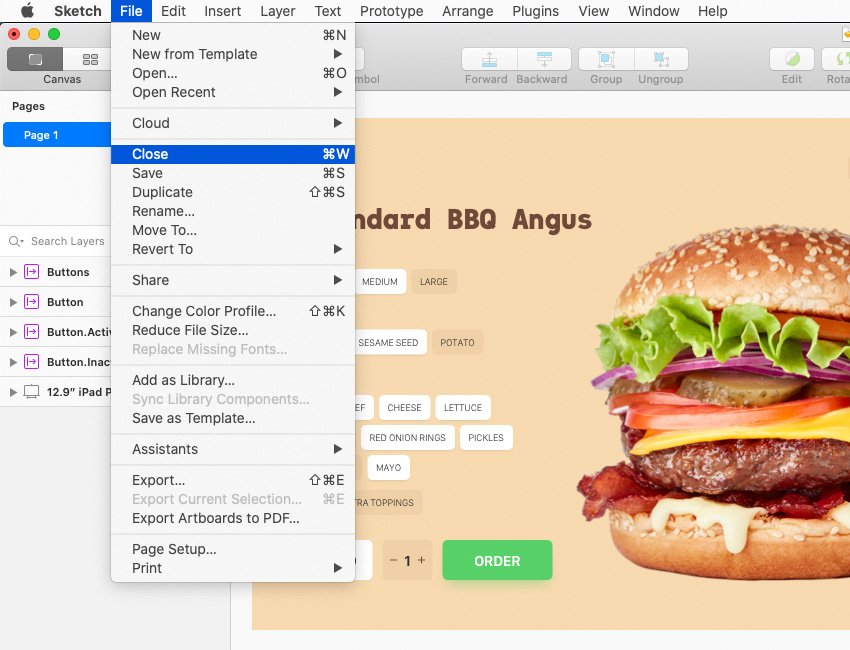
W is for Command+W
Use this Sketch shortcut whenever you wish to close your current Sketch app document.


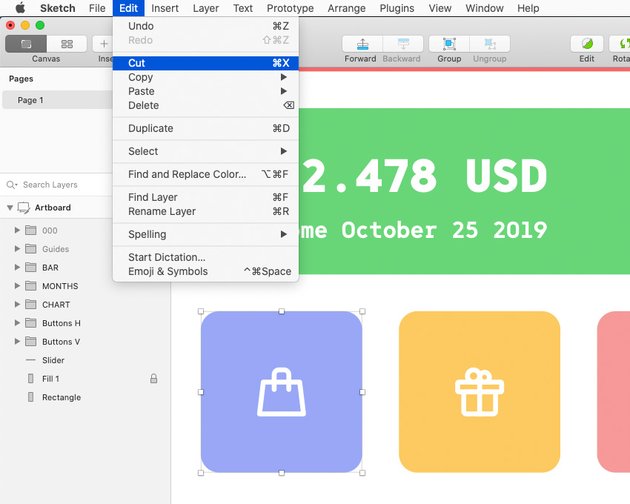
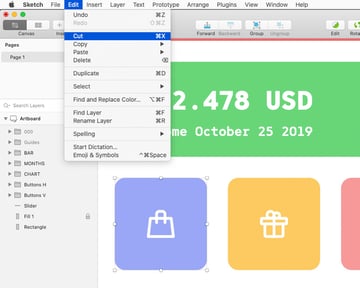
X is for Command+X
Use this Sketch shortcut whenever you wish to Cut an object from your UI design.

Y is for Command+Y
Using this Sketch shortcut you can easily save your selected element as a Sketch symbol.


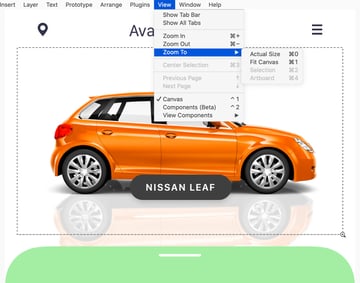
Z is for Zooming
Holding down the Z hotkey gives you the Zoom tool. This zoom shortcut can be used to zoom in or out. Click anywhere on your artboard to zoom in or click and drag to define the area on which you wish to zoom it. To zoom out, hold down the Alt key along with the Z key and click anywhere on the design.
Alternatively, you can set the zoom level from your toolbar or from the menu bar (View > Zoom) where you can find some neat zoom shortcuts.


Ready to Try Some Sketch Tutorials?
Awesome! So now that we have gone through the A to Z of the Sketch app, why not move to the next level and try one of the more in depth Sketch tutorials or Sketch courses on Envato Tuts+. Remember to check out Envato Elements where you can find plenty of sketch resources or Sketch templates to inspire you.
Whether you’re working on a simple UI design or you just want to learn more, Envato Tuts+ has you covered!
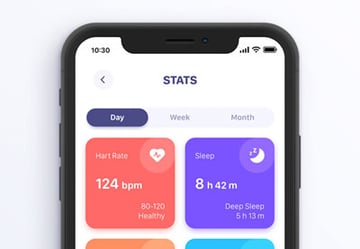
 SketchHow to Design a Fitness App UI in Sketch
-
SketchHow to Design a Car App Design UI in Sketch
-
SketchHow to Design a Food Ordering iPad App UI in Sketch
-
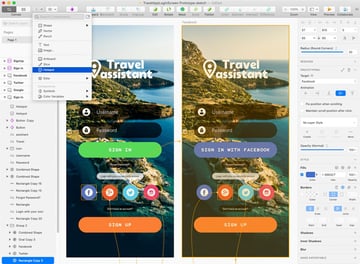
SketchHow to Design a Travel App Login Screen in Sketch
-
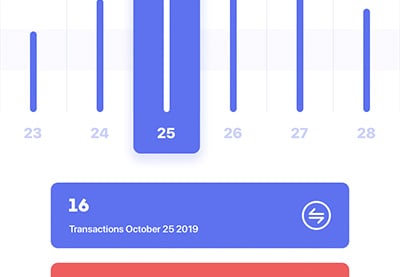
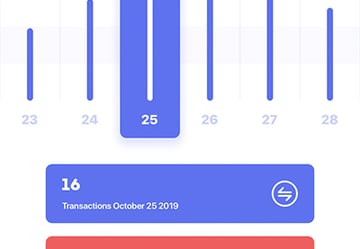
SketchHow to Design a Money Management App UI in Sketch
-
SketchHow to Create a Barber Shop Logo
-
TypographyHow to Create a Nautical Tattoo Font
-
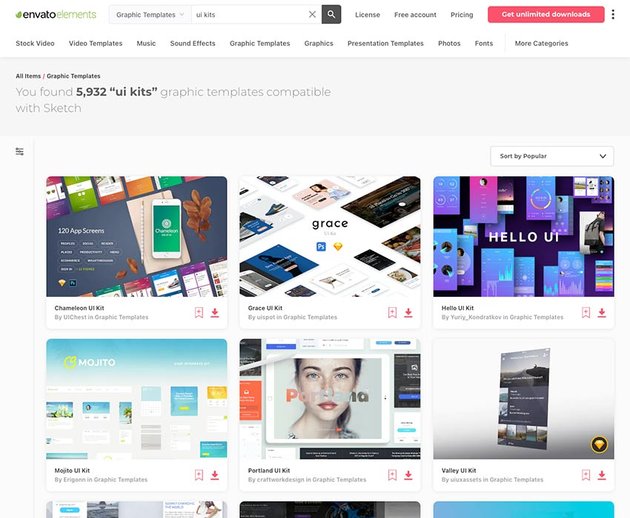
Sketch15+ Sketch UI Kits and Sketch App Resources for Designers


More A-Z Guides