
Ready to present your amazing business ideas? This InDesign presentation template will help you get what you need to launch your next project.
In this tutorial, you’ll learn how to create an InDesign presentation template. You will learn how to create a multi-page document and organize it with multiple layers. Paragraph styles will come in handy, making it easy for you to apply formats to lengthy amounts of text.
If you are looking into creating your own templates, you’ll pick up some essential tips here. By organizing your file, you’ll be making it easier for other people to use your templates and edit them. Ready to start designing your first template?
In a hurry? We’ve got amazing InDesign templates and presentation folder templates in InDesign over at Envato Elements and GraphicRiver. Go check them out!
What You Will Need for Your InDesign Presentation Template
You’ll need access to Adobe InDesign; if you don’t have the software, you can download a trial from the Adobe website. You’ll also need:
Download the assets and make sure the font is installed on your system before starting. When you are ready, we can dive in!
1. Setting Up an InDesign Presentation Template
Step 1
In InDesign, go to File > New. Name the document Presentation Template and set the file to the following dimensions:
- Width to 21 cm
- Height to 29.7 cm
- Orientation to Portrait
- Units to Centimeters
- Pages to 6
- Check Facing Pages
- Margins: 1.5 cm
- Bleeds to 0.3 cm
Click Create.

Step 2
For this open presentation template tutorial, we will work with three Layers. Organizing layers is an important practice when designing a template as they will make it easier for the user to edit.
Bring up the Layers panel by going to Window > Layers. Double-click on Layer 1 and rename it Background.
On the Layers panel main menu, select New Layer. Name it Images. Click OK.
Additionally, create a new layer named Copy. Click OK.

Step 3
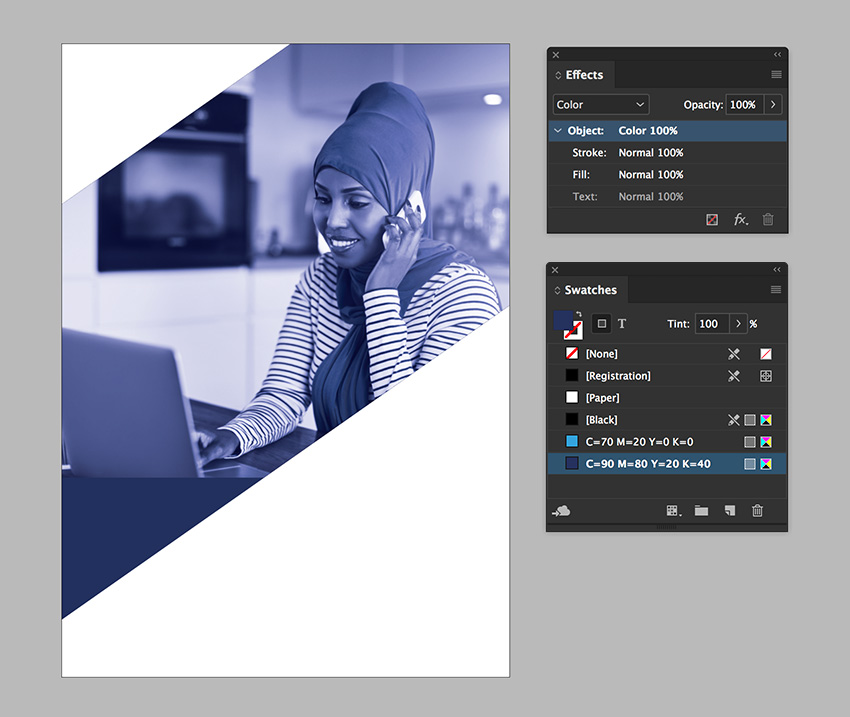
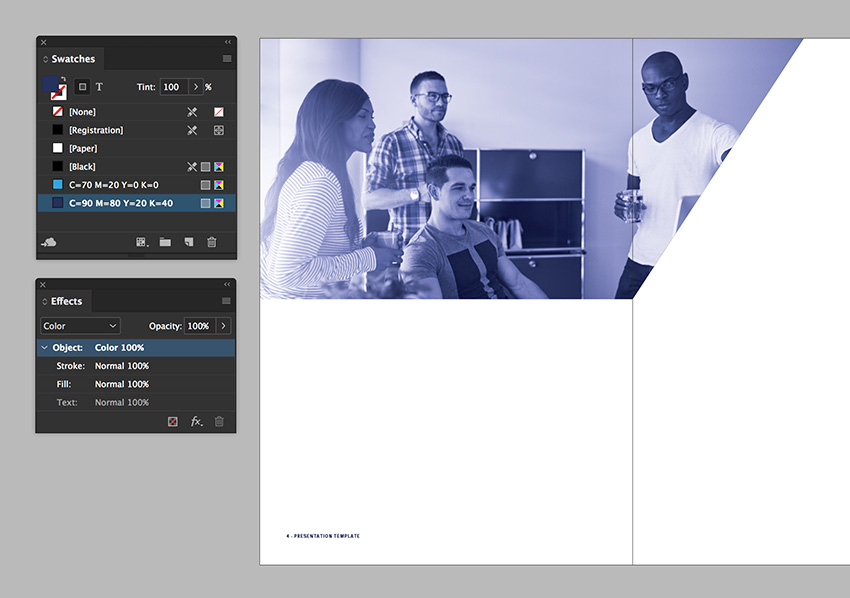
Head over to Window > Color > Swatches to expand the Swatches panel. Choose New Color Swatch button from the main menu. Set the Swatch Name and values to the following:
- Light Blue: C=70 M=20 Y=0 K=0
- Dark Blue: C=90 M=80 Y=20 K=40
Click Add and OK after you input each of the color values.

Step 4
For this tutorial, we will create a list of Paragraph Styles that we will use to format the presentation template.
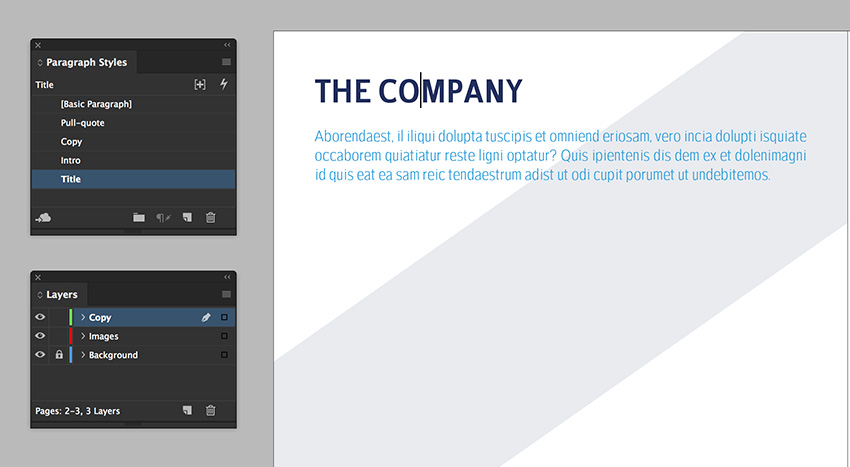
Head over to Window > Styles > Paragraph Styles to open the Paragraph Styles panel. On the main menu, select New Paragraph Style, and set the Style Name to Title. Select the Basic Character Formats option from the left side menu. Use the following settings:
- Font Family: Ardent Sans
- Font Style: Extra-Bold
- Size: 30 pt
Select the Character Color option from the left side menu. Set the color to the Dark Blue swatch. Click OK.

Create a New Paragraph Style, set the Style Name to Intro. Set the Basic Character Formats option to the following:
- Font Family: Ardent Sans
- Font Style: Book
- Size: 14 pt
- Leading: 20 pt
Select the Character Color option from the left side menu. Set the color to the Light Blue swatch. Click OK.
Create a New Paragraph Style, and set the Style Name to Copy. Set the Basic Character Formats option to the following:
- Font Family: Ardent Sans
- Font Style: Book
- Size: 8 pt
- Leading: 12 pt
- Tracking: 10 pt
Select the Indents and Spacing option from the left side menu. Set the Space Between Paragraph Using Same Style to 0.2 cm.
Click OK.
Create a New Paragraph Style, and set the Style Name to Pull-quote. Set the Basic Character Formats option to the following:
- Font Family: Ardent Sans
- Font Style: Regular
- Size: 30 pt
- Leading: 33 pt
Select the Character Color option from the left side menu. Set the color to the [Paper] swatch. Click OK.

2. Setting Up Master Pages for Your InDesign Portfolio Template
Step 1
Head over to the Pages panel (Window > Pages) and double-click on the A-Master pages.
Go to Layout > Create Guides. In the Create Guides option window, use the following settings:
- Columns Number: 3
- Columns Gutter: 0.5 cm
- Fit Guides to: Margins
Click OK.

Step 2
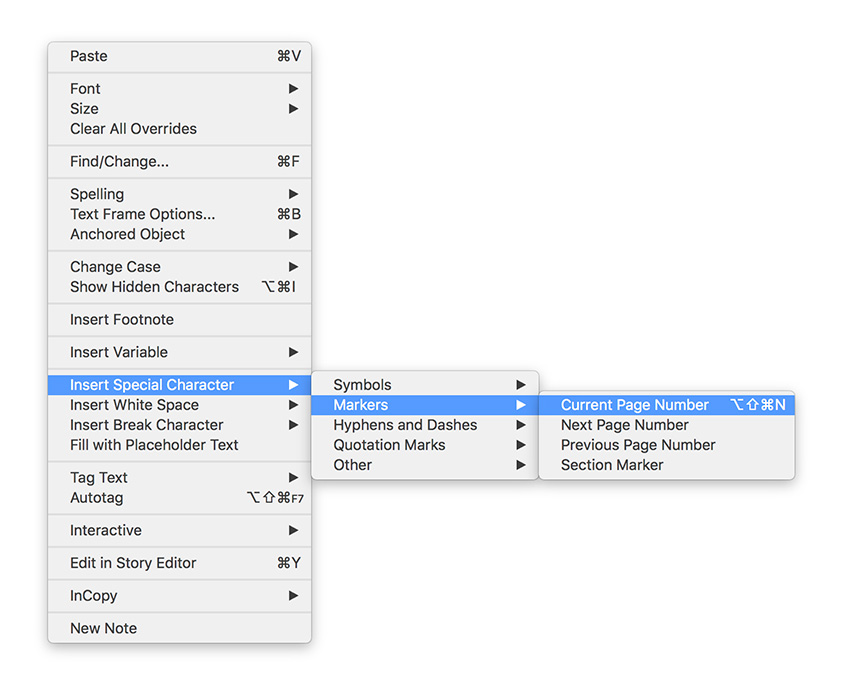
On the Layers panel, select the Copy layer to create a folio. The folio is the page number indicator.
Using the Text Tool (T), create a text frame and add content. To add a page number, right-click while in the text frame, and select Insert Special Character > Markers > Current Page Number.
Place the text frame in the bottom left corner of the left page.
Step 3
Using the Character panel (Window > Type & Tables > Character), format the frame with the following settings:
- Font Family: Ardent Sans
- Font Style: Extra-Bold
- Size: 7 pt
On the Swatches panel, select the Dark Blue swatch.

Step 4
Select the folio and press Option-Shift and drag towards the right page. Option will duplicate, while Shift will maintain the same horizontal position of the object.
Using the Paragraph panel (Window > Types & Table > Paragraph), set the text frame to align right. Move the page number towards the outside of the spread for consistency.

3. Designing the Cover for Your InDesign Presentation Template
Step 1
Before we start working on the cover page, we need to delete the folio that was created on the A-Master page. Press Shift-Command as you click on the folio and press Delete. This will override the item to either delete or customize it.
On the Layers panel, select the Background layer.
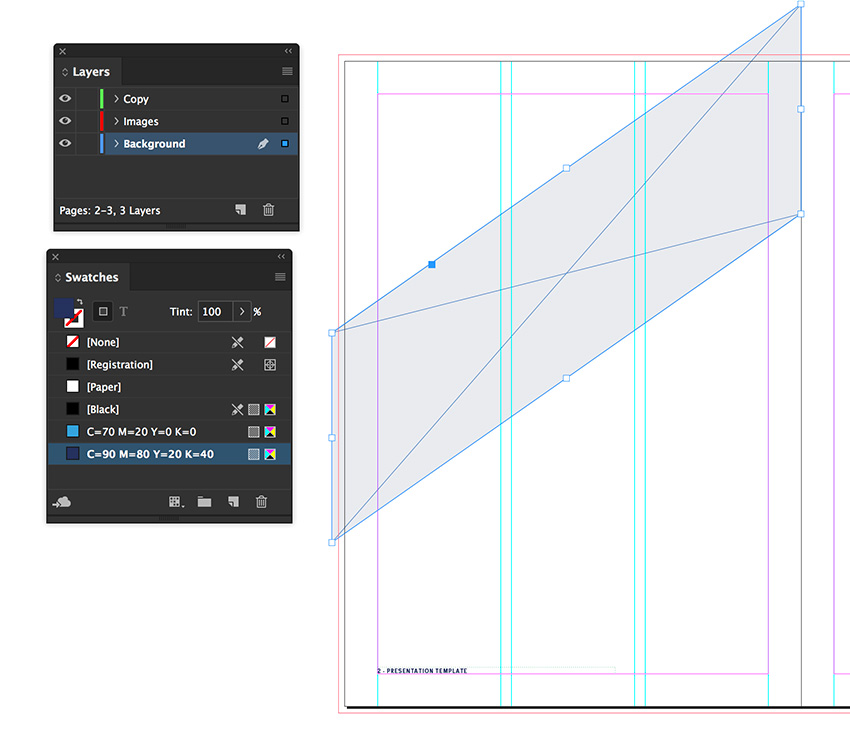
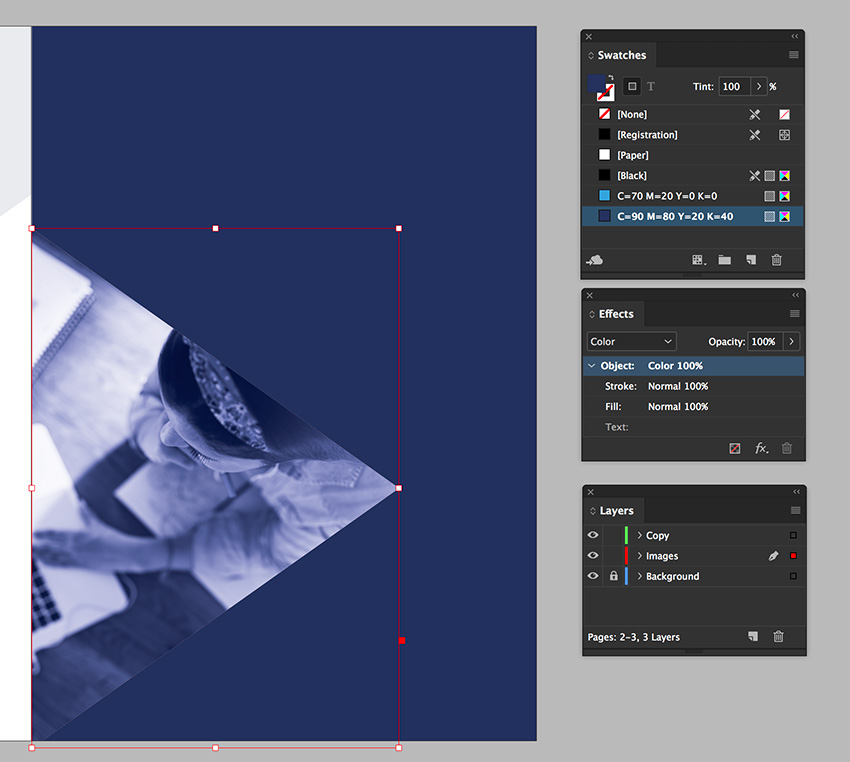
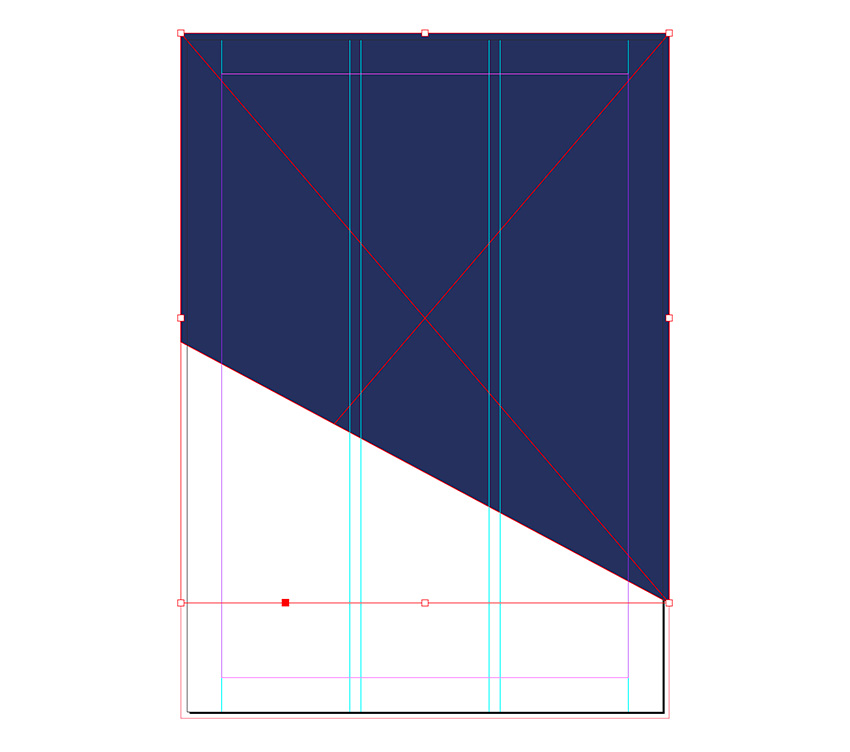
Using the Rectangle Tool (M), create a rectangle that measures 12.6 cm in Width and 20 cm in Height. I am setting the color to the Dark Blue swatch so you can see the changes easily.
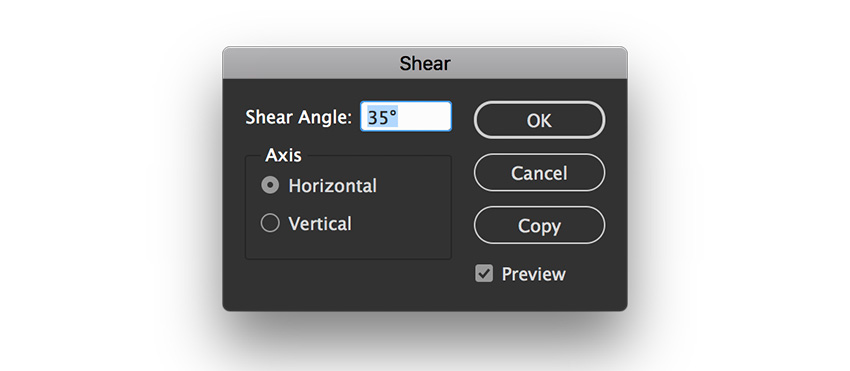
Select the object and head over to Object > Transform > Shear. On the Shear window, set the Shear Angle to 35°. Select the Vertical Axis and click OK.
Position the object towards the top of the page, leaving a small gap at the bottom.

Step 2
Select the object and press Command-D to Place an image. Navigate to the Smiling Arabic entrepreneur and click Open.
On the Control panel, set the Scale X and Y percentages to 55%.

Select the object and press Command-C to Copy and Option-Shift-Command-V to Paste in Place. Using the Direct Selection Tool (A), delete the image in the frame.
On the Effects panel (Window > Effects), set the Blending Mode to Color.
Step 3
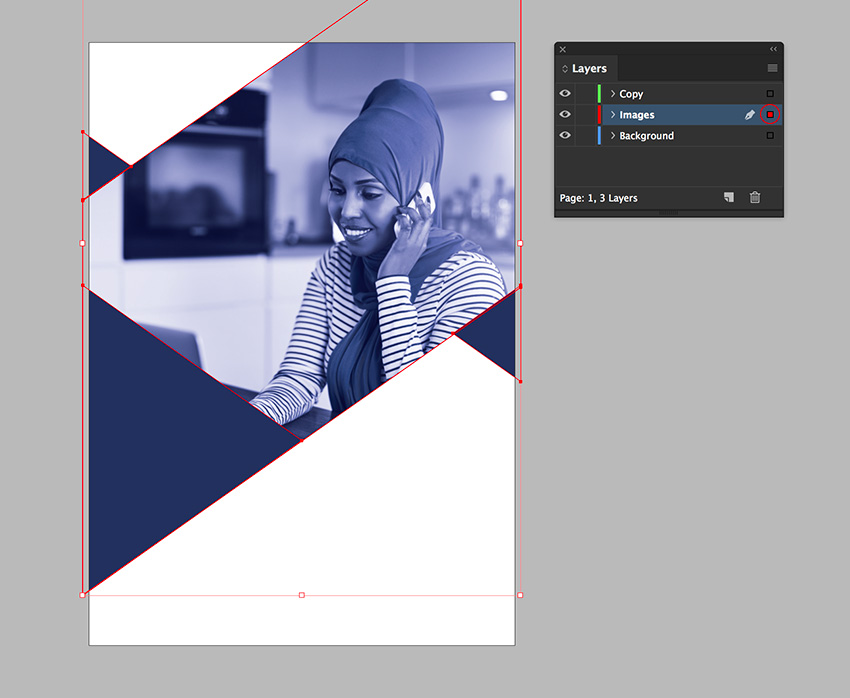
Select the Polygon Tool from the toolbar. Click on the board to open the Polygon options window. Under Options, set the Width to 10.8 cm and the Height to 7.63 cm.
Under Polygon Settings, set the Number of sides to 3. Click OK.

On the Swatches panel, set the color to Dark blue.
Head over to the Control panel and set the Rotation Angle to -90°.
Place the rectangle on the lower left side of the image. Resize evenly as you need by pressing Shift and dragging from any of the points.

Below, I added a couple more triangles to create a balanced composition.

Select all the objects on the page and head over to the Layers panel. If you’ve been working on the wrong layer, you can move the objects to a different layer. Drag the square on the right side of the highlighted layer to the layer you want to move the objects to.
Step 4
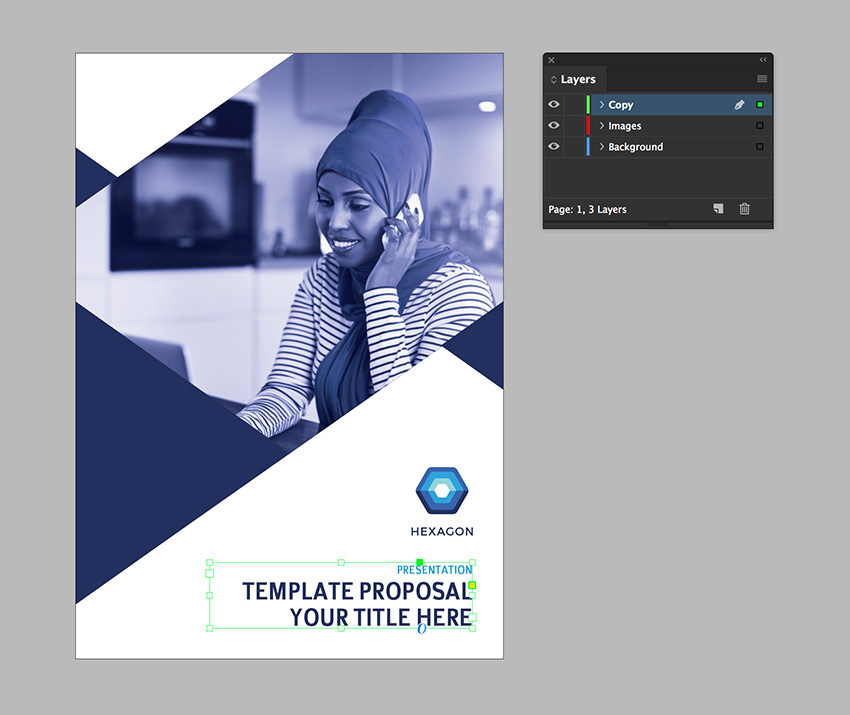
Press Command-D to Place a logo of your choice, placing it on the right side of the page.

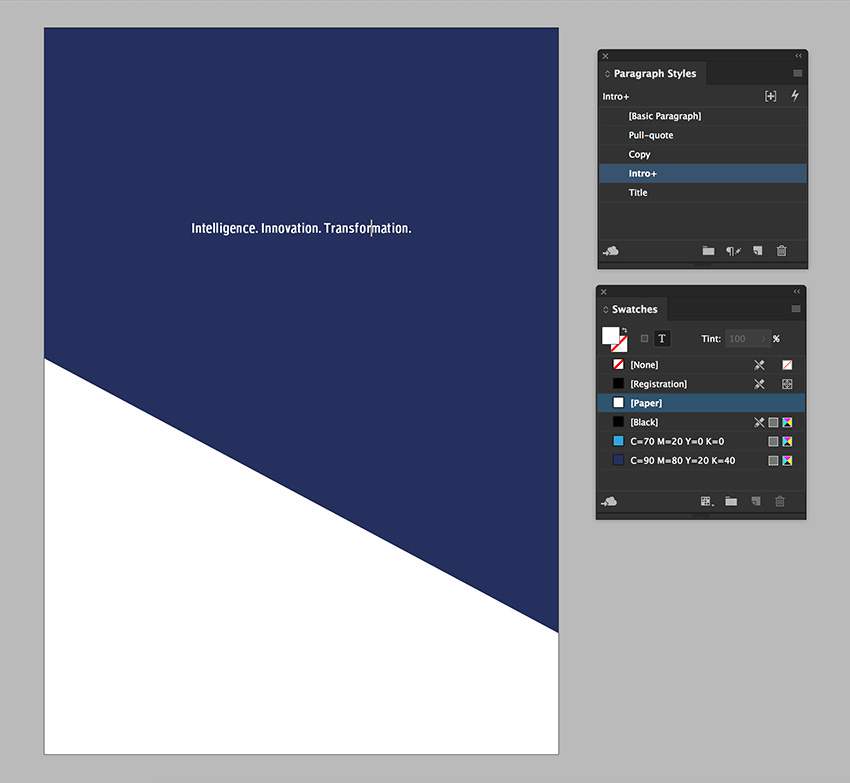
Using the Text Tool (T), create a text frame under the logo to add a title. Use the Paragraph Styles to format the text. In this case, I used the Intro style for ‘Presentation.’ On the Control panel, change the Font Family to Extra-Bold.
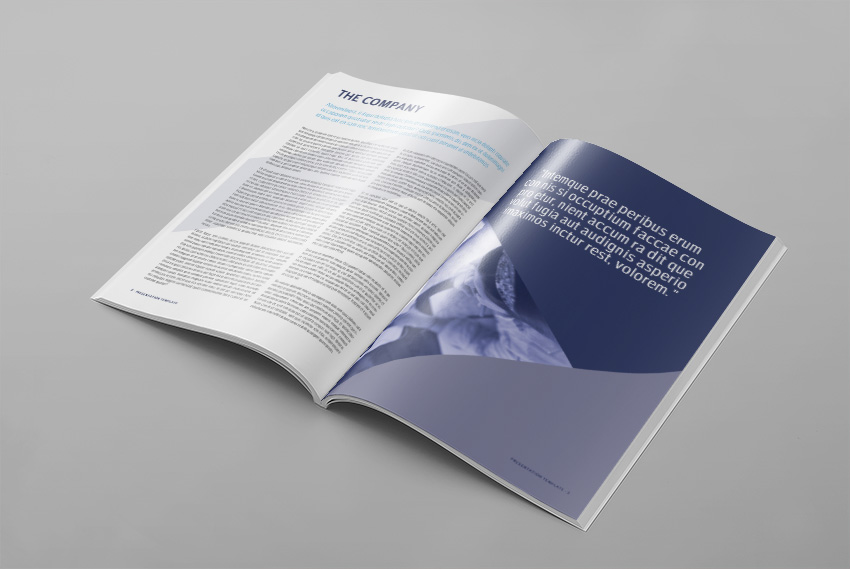
4. Designing the Inside Spreads of Your InDesign Presentation Template
Step 1
On the Layers panel, select the Background layer.
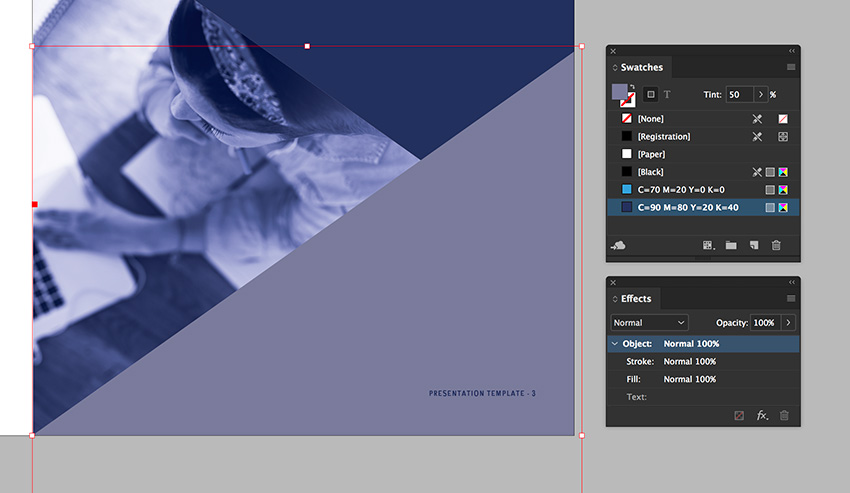
Select the sheared object from the cover and Copy and Paste it to the inside spread. Using the Selection Tool (V), make the object shorter by dragging the top or bottom middle point.
On the Swatches panel, set the color to Dark Blue. On the Control panel, lower the Opacity to 10%.
Lock the Background layer and select the Copy layer.
Step 2
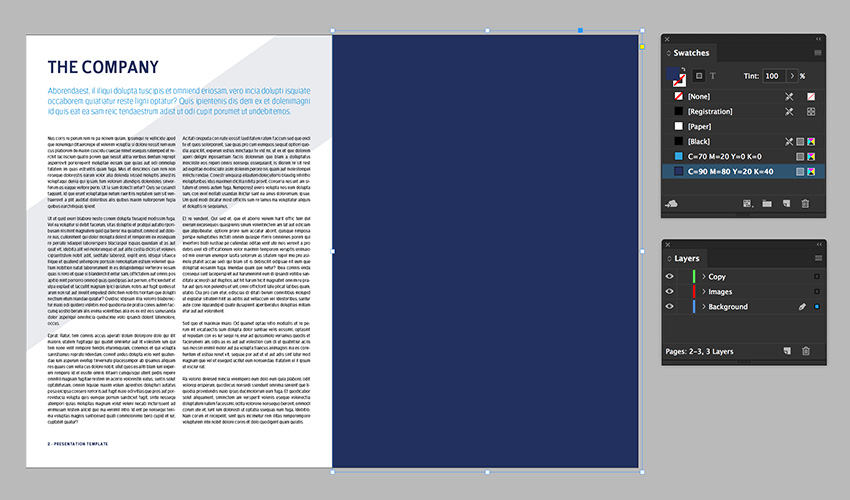
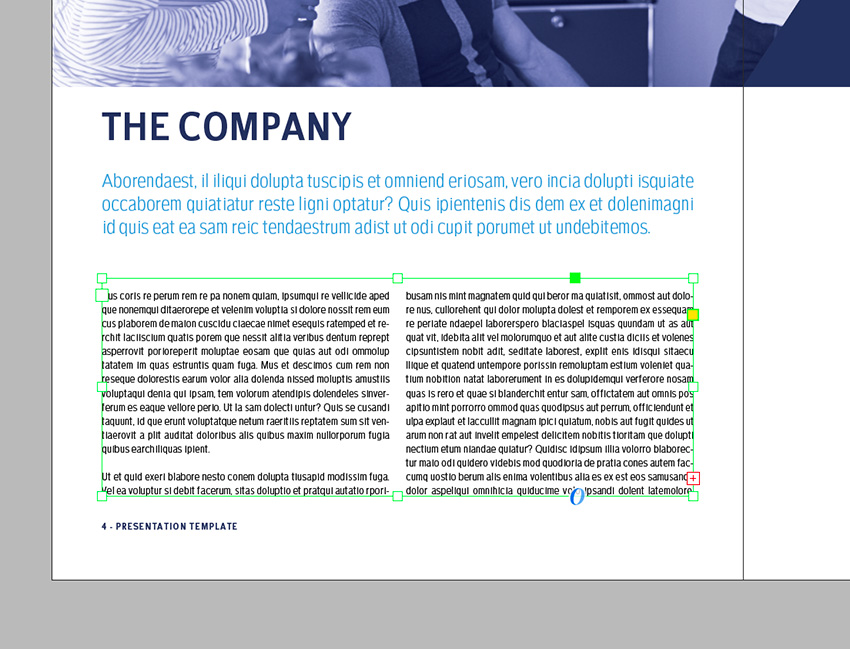
Select the Text Tool (T) from the toolbar. Draw a text frame that covers the width of the page. Add content and use the Paragraph Styles panel to format the text. Use the Title and Intro styles.
Step 3
Create a second text frame for the body copy. Add copy and use the Paragraph Styles panel to format the content to Copy.
While selecting the text frame, press Command-B to open the Text Frame Options window. Set the Number of Columns to 2 and click OK.

Step 4
Using the Rectangle Tool (M), create a rectangle that covers the right page on the spread.
Using the Swatches panel, set the color to Dark Blue.
Move this to the Background layer. Lock the Background layer.
Step 5
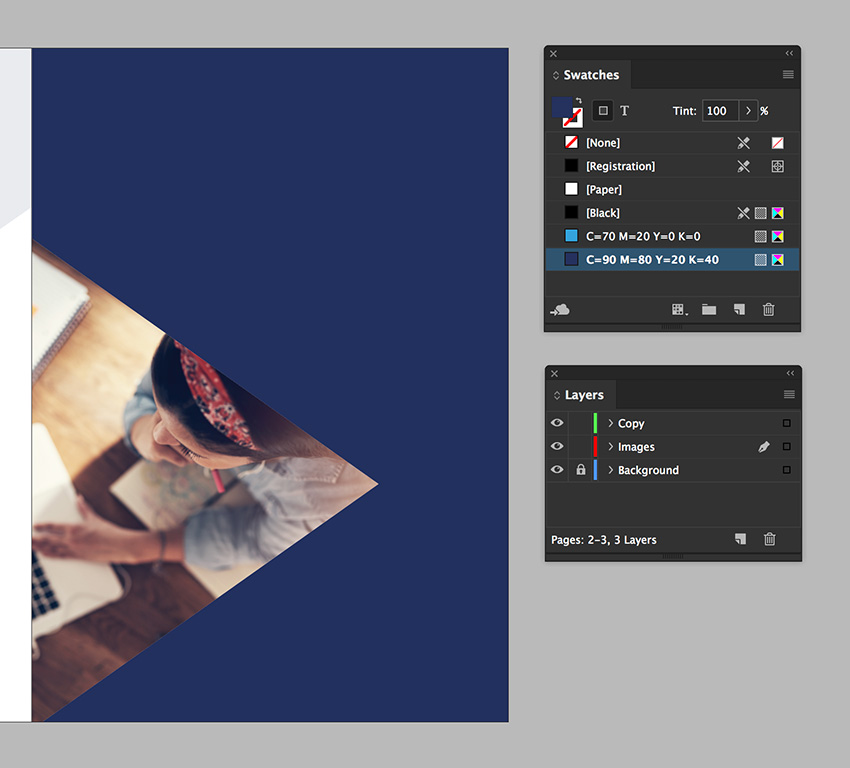
Duplicate the triangle from the front cover by pressing Command-C to Copy and Command-V to Paste.
Resize the rectangle, and feel free to add your own spin. Press Shift to resize the triangle proportionally.
While selecting it, press Command-D to Place an image. Navigate to the Thoughtful young businesswoman image and click Open.
Using the Direct Selection Tool (A), select the image and head over to the Control bar. Set the Scale X and Y Percentage to 45%. Set the Rotation Angle to -35°.
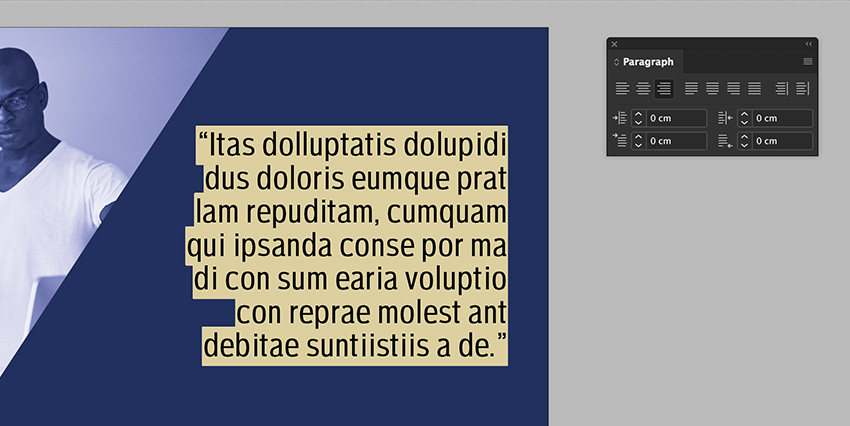
Duplicate the triangle and, using the Direct Selection Tool (A), delete the image. Set the color of the new triangle on the Swatches panel to Dark Blue. On the Effects panel, set the Blending Mode to Color.
Duplicate the triangle once more. Head over to the Control bar and set the Rotate Angle to 90°. On the Swatches panel, set the color to Dark Blue and Tint to 50%. On the Effects panel, make sure the Blending Mode is set to Normal.
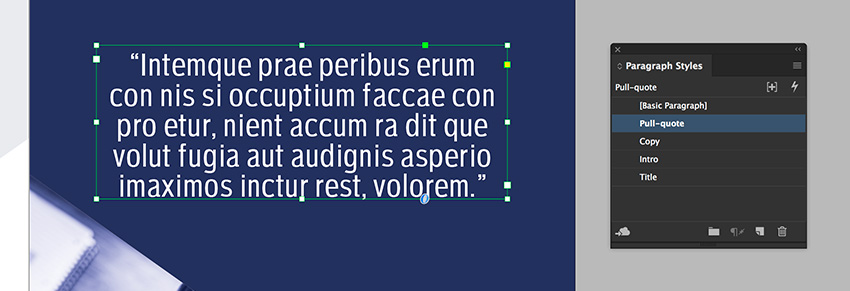
Select the Copy layer on the Layers panel.
Using the Text Tool (T), create a text frame and add copy. Using the Paragraph Styles panel, format the text frame to the Pull-Quote style.
Step 6
On the Layers panel, select the Images layer.
Using the Rectangle Tool (M), draw a rectangle that measures 28 cm in Width and 15 cm in Height.
Using the Direct Selection Tool (A), select the two points on the right. Head over to Object > Transform > Shear. In the Shear option window, set the Shear Angle to 35° and the Axis to Horizontal. Click OK.
Step 7
Press Command-D to place an image within the object. Navigate to the Group of young entrepreneurs image. Select the image with the Direct Selection Tool (A) and head over to the Control panel. Set the Scale X and Y Percentage axis to 60%.

Duplicate the object by pressing Command-C to Copy and Command-C to Paste. On the Swatches panel, set the color to Dark Blue. On the Effect panel, set the Blending Mode to Color.
Step 8
Duplicate the shape once more. This time, set the Blending Mode to Normal.
Head over to the Control panel, and select the Flip Horizontal and Flip Vertical buttons.
On the Layers panel, lock the Images layer and select the Copy layer.

Step 9
Select the text frames from page 2. Press Command-C to Copy and Command-V to Paste the two frames on page 4. Shorten the two-column frame.
You will notice that the text frame now has a red plus sign on the bottom right corner. Click on it and proceed to draw a text frame on page 5.
While selecting the new frame, press Command-B to open the Text Frame option window. Set the Columns Number to 2.

Duplicate the pull-quote from page 3 onto page 5. Place it next to the top image. Using the Paragraph panel, set the text to align Right.
Step 10
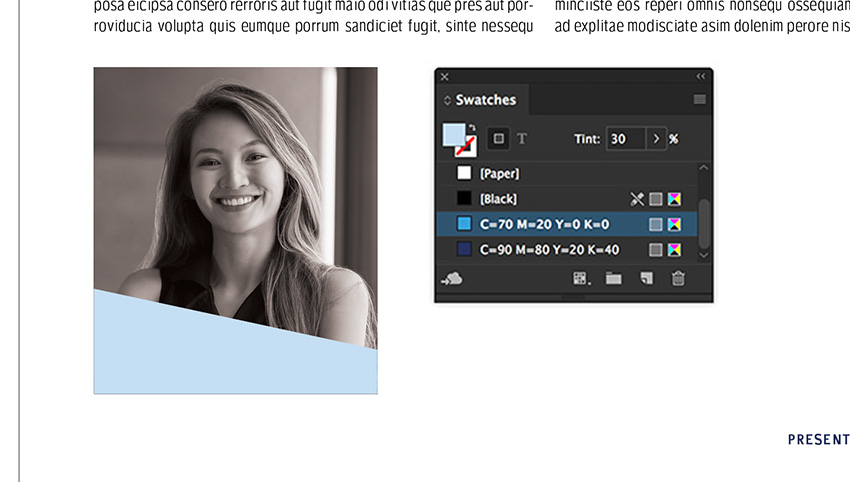
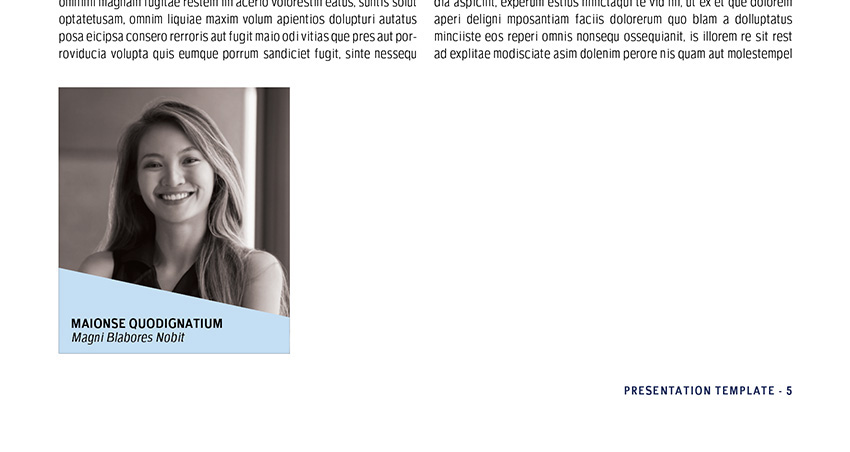
Using the Rectangle Tool (M), create a rectangle that measures the Width of the column and 6.5 cm in Height.
Press Command-D to Place an image. Navigate to the Young Asian businesswoman image and click Open. Select the image with the Direct Selection Tool (A) and resize evenly by holding down Shift and dragging from any of the points.

Duplicate the rectangle and set the color to [Black] from the Color Swatches.

Duplicate one of the sheared shapes used on the top portion of the page by pressing Command-C to Copy and Command-V to Paste. Rotate the shape with the Rotate Tool (R) until the shear/angle is at the top. Resize the shape with the Selection Tool (V) to fit the width of the profile picture.
On the Swatches panel, set the color to Light Blue and the Tint to 30%.
Step 11
Create a text frame with the Text Tool (T) and add copy. Use the Paragraph Styles panel to style the text frame to the Copy style. On the Control panel, set Font Family of the first line to Extra-Bold and the second line to Regular Italic.
Duplicate the three objects by selecting all three, pressing Option-Shift, and dragging towards the right.
Select each additional profile and press Command-D to Place new images. Navigate to the Portrait of a black woman and Portrait of a young African American woman images. Click Open.

5. Designing the Back Cover of Your InDesign Portfolio Template
Step 1
Press Shift-Command to override the page number and press Delete.
Duplicate the sheared shape from the previous spread. On the Control panel, set the Rotation Angle to 180°. Use the Selection Tool (V) to resize the shape.
Step 2
Using the Text Tool (T), add a text frame over the blue background.
Format the text using the Paragraph Styles panel, and select the Intro style. On the Control panel, set the Font Family to Extra-Bold.
On the Swatches panel, set the color to [None].
Create a text frame with the Text Tool (T). Place this frame on the bottom left corner of the page. Add copy and format the text with the Copy style from the Paragraph Styles panel.

6. How to Export a File for Printing
When you are done designing your presentation template, you might want to export it for professional printing. Take a look around all the edges to make sure all the images and vectors bleeding out are touching the bleeds.
Step 1
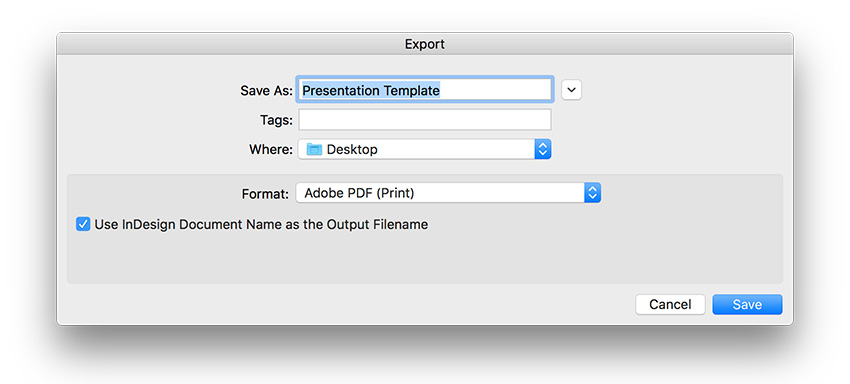
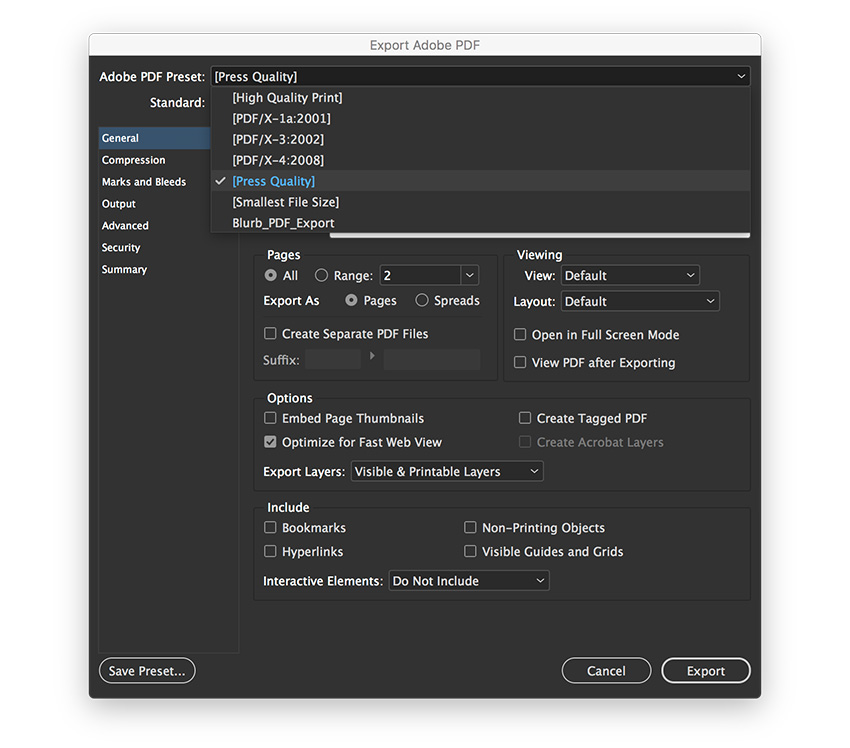
To export the file, go to File > Export. Name the file Presentation Template and choose Adobe PDF (Print) from the Format dropdown menu. Click Save.
Step 2
In the Export Adobe PDF window, set the Adobe PDF Preset to Press Quality.
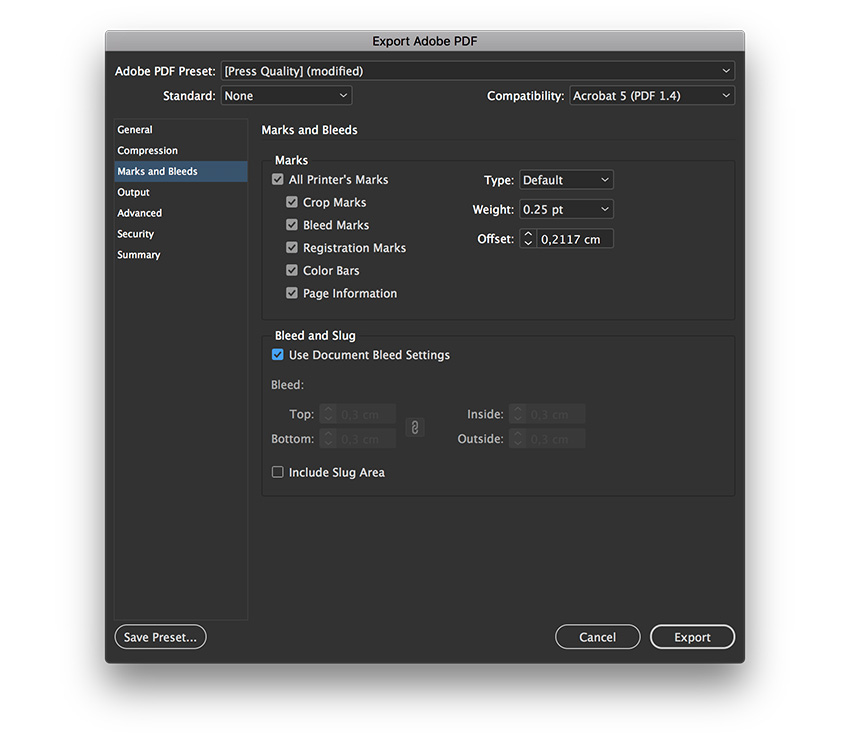
On the left side of the panel, select Marks and Bleeds. Check All Printer’s Marks and Use Document Bleed Settings. Click Export. You will have a ready-to-print PDF file.
Great Job! You’ve Finished This Tutorial!
In this tutorial, you learned how to make an InDesign presentation template. We covered key tools that will help anyone edit a template quickly and easily. Today, you learned to:
- set up a ready-to-print InDesign file
- organize a file with multiple layers
- add color swatches
- use paragraph styles to format text
- format text frames into multiple columns
If you are new to InDesign and need InDesign templates right away, head over to Envato Elements and GraphicRiver. We’ve got many options to explore!
If you liked this tutorial, you might like these: