In this tutorial, we’ll look at different ways of drawing cartoon noses. We’ll start with the nose’s construction, and then use this in the context of experimenting with stylistic renditions of this part of the face.
When in doubt, I recommend looking at references, even when drawing stylistically! They can be a valuable resource not only in observing how parts of the face “work”, but also in discovering how you might experiment with your interpretation. Remember to make sure your references are properly sourced!
1. Understanding Cartoon Nose Basics
Step 1
Even when creating a cartoon nose drawing, it’s still important to understand how the nose itself works. Before we focus on stylizing this part of the face, let’s observe the basic shapes that compose the nose. Think of this like reviewing the rules, so we can more effectively break them.
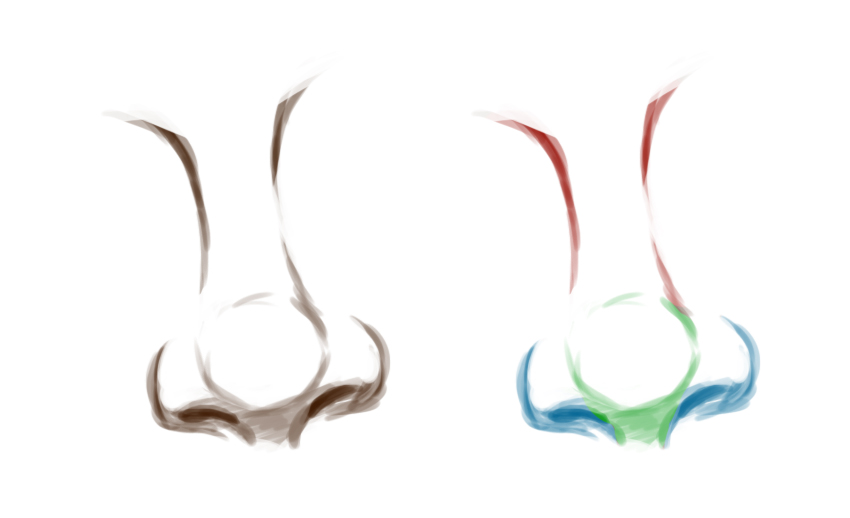
I like to think about the nose in three parts: the bridge (in red), the ball (in green), and the nostrils (in blue). Let’s start by looking at the nose from the side or profile view.

Step 2
Now, let’s look at the nose from a different perspective. Instead of drawing shapes on the nose, the different parts are indicated in the same color key.
Step 3
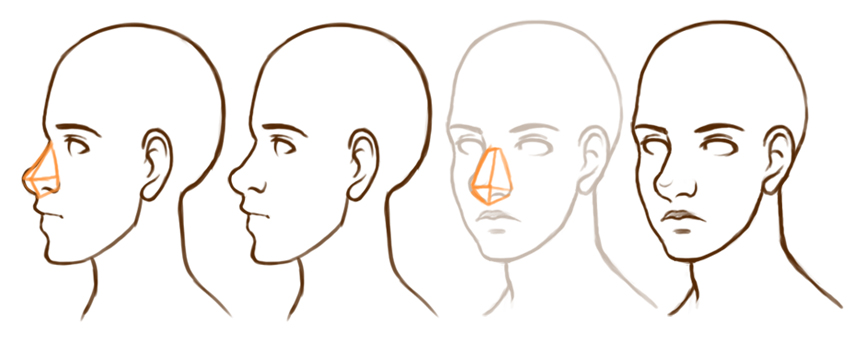
When looking at the nose from a realistic perspective rather than stylized, you’ll notice that these regions aren’t necessarily flat—they have depth. To help visualize and understand this, it can be helpful to think about the shape of the nose in terms of planes.
As an example, let’s break down our example nose.

Step 4
Most of us typically don’t draw noses independently—we draw them on a face! Let’s take a look at how the nose typically relates to the face, in terms of proportions.
Generally speaking, the nose tends to fall about two-thirds of the way down the face. I like to use the other parts of the face as visual references.

Step 5
Keep in mind, however, that noses can come in a variety of shapes and sizes. This can mean the depth of the bridge, the size of the ball, the width of the nostrils, and more! When in doubt, take some time to look at references. Remember to use references that are properly sourced, or even take some reference photos of your own!
Step 6
Finally, let’s take a look at perspective in relation to the nose on the face. Notice that the premise from earlier still stands—we still need to keep those planes in mind. Here’s how I visualize these planes when looking at the face from different angles.
2. How to Draw a Simplified Cartoon Nose
Step 1
Cartoon styles often simplify features, including cartoon noses. This can include things like simplified contours or even complete omission of parts of the nose. How, then, does the viewer know that it’s the character’s nose, if it deviates from what a human nose actually looks like? A stuffy nose cartoon or a cartoon character with a long nose likely isn’t true to life, but we still make the association.
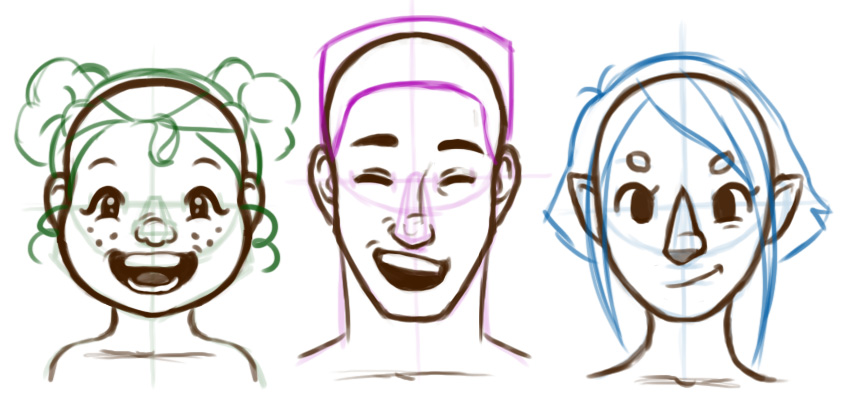
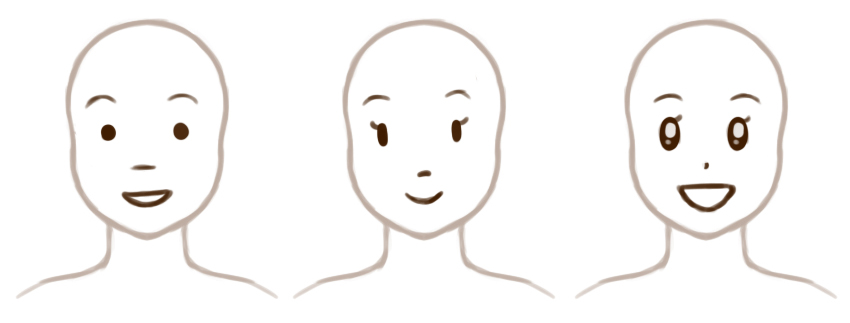
Let’s take a look at three different characters, each with a simplified depiction of the character’s nose. Notice that, even though they are simple and stylistic, they still visually “read” as the character’s nose.

Step 2
I like to think that a key part of this is our viewer’s preconceived ideas. We all have an idea of how noses work, how they look, and where we expect to see a nose on a human face. We can use the preconceived ideas of our audience to make visual associations and communicate ideas, even if they aren’t true to realism.
For example, let’s try some unusual shapes on the face that aren’t true to realistic contours or proportions. By association, they still generally and visually read as the character’s nose.

Step 3
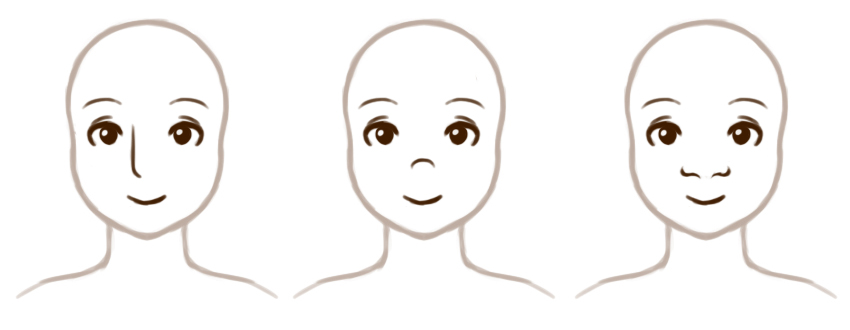
Let’s try simplifying even further, with some highly simplified examples. These noses fall below the eyes, yet above the mouth. While they might be abstract, they’re still generally associated with the nose area of the face.
Step 4
But what happens when we break too many rules—can we? I like to think that this is a key question to consider, when experimenting with things like abstraction and simplification.
If you’re trying to find or develop a stylistic means of illustrating the nose and face, I’d recommend experimenting—and doing so a lot! Don’t be afraid to break the rules, but also keep in mind how things might communicate to your audience.
Here are some simple yet abstracted examples—have fun with them! While they use unnatural themes and shapes, they still generally communicate that they are faces.

3. How to Draw a Stylized Cartoon Nose
Step 1
However, drawing a cartoon nose often involves more than simplifying the nose’s features. Exaggeration and artistic interpretation can also be utilized to our advantage. For example, we could do so to accentuate features or push an expression further.
Let’s take this premise and specifically apply it to the different parts of the nose that we discussed earlier: the bridge, the ball, and the nostrils. We could place emphasis on one or more of these parts and indicate them with stylized lines.
Step 2
We could also focus our exaggeration on the proportions of the nose and face. For example, we could greatly elongate both the bridge and the entire skull—or we could squish them.

Step 3
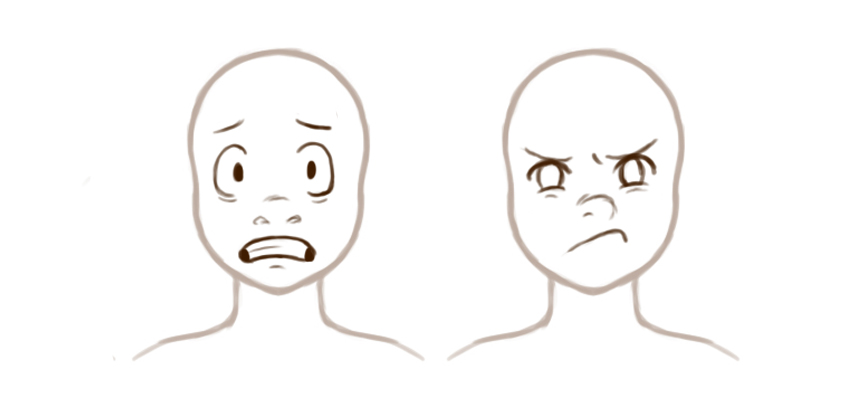
The nose might not necessarily be one of the most expressive parts of the face—but it’s still subjected to the “squash and stretch” we might see on the human face as expressions change. For example, frowning might result in the “wrinkling of one’s nose”. Nostrils can be flared. Scenarios like these could be emphasized with exaggeration or communicated in a stylized way.
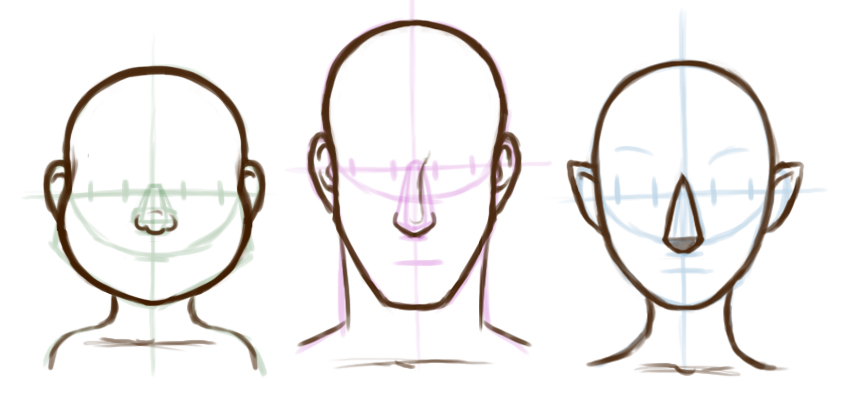
4. Bringing It All Together
Step 1
Let’s take everything we’ve covered and put it together in a step-by-step example.
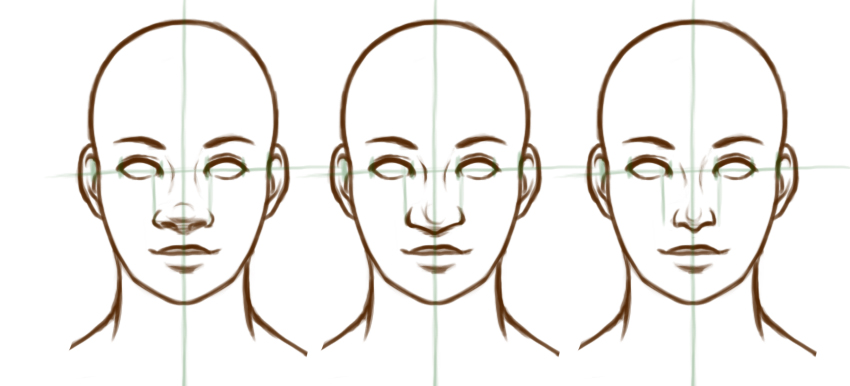
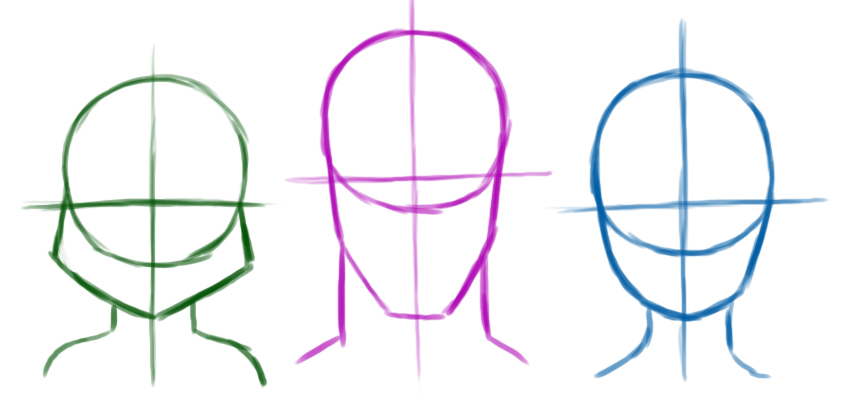
First, begin by laying out the basic proportions of the face. We’re going to take a stylized approach, so these proportions do not have to be true to real life. Included are three different examples, with three different example proportions.
Step 2
Even though the proportions are varied, each considers the features in a way that generally associates with preconceived ideas about the human face.

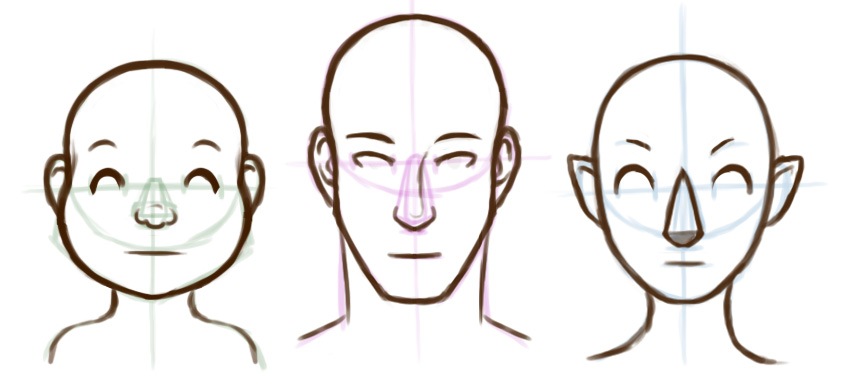
Step 3
Remember to think about the area that the nose occupies in terms of three-dimensional space.
I don’t necessarily draw out simplified geometric shapes every time I draw a cartoon nose—this is just an example—but breaking things down into basic shapes can also be great practice!

Step 4
Using the foundation that we’ve built, let’s experiment with which aspects of the nose we’d like to include, which we might like to exaggerate, and which we might omit. For example, perhaps you’d like to focus on the nostrils and ball of the nose, but leave the bridge implied.
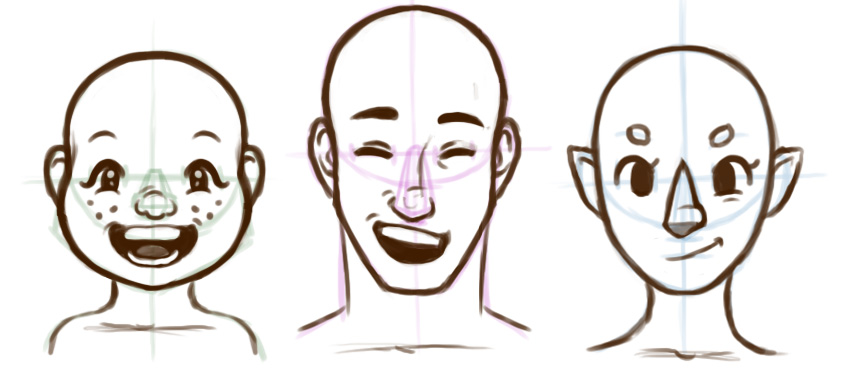
Step 5
Finally, refine your work, keeping the other parts of the face in mind.
Step 6
I would not normally draw the nose first (or exclusively)—that’s just for the sake of example, in this tutorial. As mentioned earlier, I often like to use the different parts of the face as units of measurement and/or visual guidance. Here’s an example of how one might continue to push these faces further.

Step 7
As an additional example, building on this premise, remember: the nose, and all the other parts of the face, are not independent. They work together! So, for example, a smirk might squish the cheeks to one side, and the nose might just nudge along with it.
And There You Have It!
We’ve looked at multiple ways you might approach drawing a cartoon nose. Remember, when in doubt, take a look at references—they are not a resource exclusive to realism. They can be great for inspiration and guidance when drawing stylistically too! Good luck and happy drawing!

If you enjoyed this tutorial, here are some others you should check out!