Step 1 – The Background

Step 2 – Font & Typing
Time to type out our text. I will go with the name of this site Minervity. You can go ahead and type whatever you like, the tutorial is not dependant on it. The font we are going to use is Ashcan BB from 1001fonts.com and can be downloaded here: Ashcan BB – Download
Make sure you use the color #A0A0A0 for your text as this is crucial for the effect later on.
I am using font random font sizes for each letter when I type my text. One really important thing here is to make sure you’re just not typing out what you want to type. We need to mix it up a bit to make it look more realistic in it’s appearance. We can do this by typing one letter at a time each in it’s own layer. Why you might ask. Well, cause we want the possibility to rotate and mess around with the letters so they really look like they are finger painted using the water on the pane.
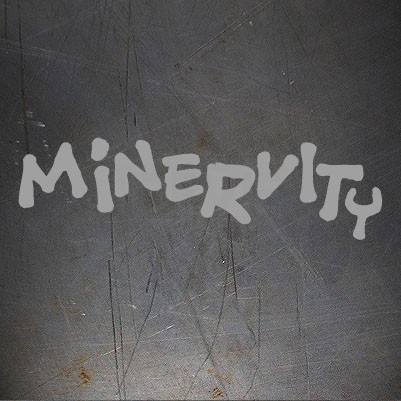
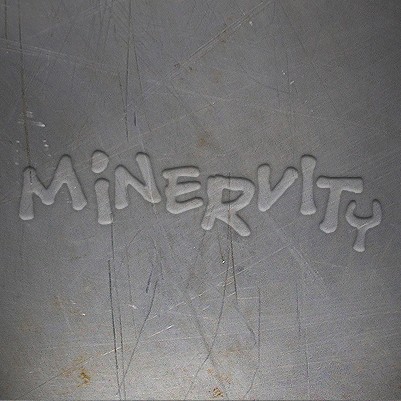
So, when typing make sure you work with the text and imagine how it would look if it was raining outside and you could play with the water droplets to form your desired text. This is how I typed it:
Step 3 – Effects
Time to add some effects to the text layers to make it look like water. The effect in itself is really easy but it?s the massive randomness that makes the picture really. The more you work with the picture the more alive it will get. I will tell you how to do it later on in this tutorial. Now, let’s add those layer blending effects.
So, select the text layer, and change the Blending Mode for the layer to Overlay.
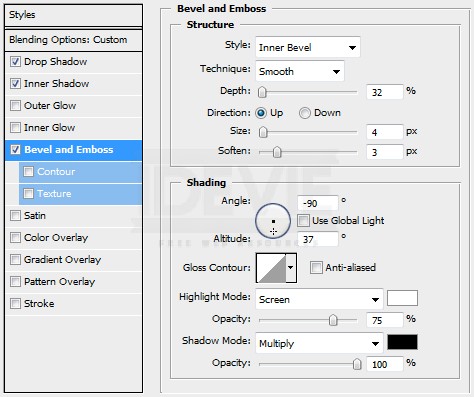
With our layer still selected, open up the Blending Options panel by either right clicking the layer or choosing Layer -> Layer Style -> Blending Options
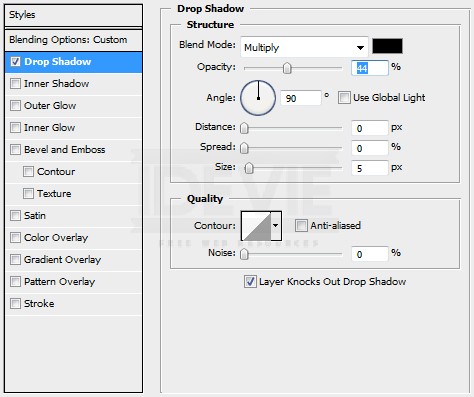
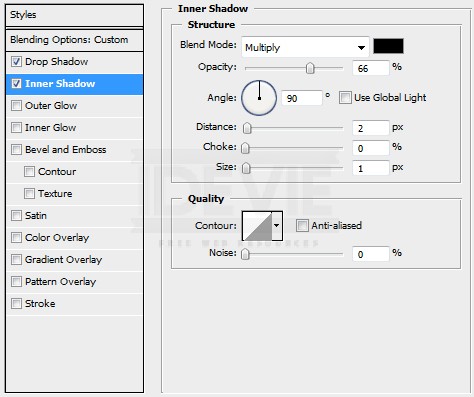
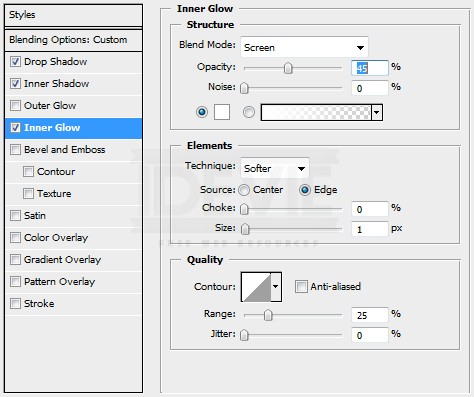
There three Tabs we are going to work with here. First select the Drop Shadow tab and insert these settings:
Step 4 – Additional Water Droplets & Streams
We still have to add some elements in order for it to look really believable. We can accomplish that by adding a new layer. Call it Rain to more easily distinguish it from the Text layer.
Select our Text layer and right click. Select Copy Layer Style. Now select the ?Rain? layer and right click on it. Select Paste Layer Style. Now we have copied all the Text layers attributes and effects into our new layer and we are ready to start adding new elements to our new layer. Here you can be really creative. You will be able to play with Rain in a way. It’s going to look like you are anyways. Try to mimic real drops of rain laying on a flat pane but also add some streams in various sizes and shapes. You can also play around a bit with the Text layer to make the text look a bit more naturally drawn in water.
Simply select the Brush tool and start drawing. Remember to pick different sizes of your brush to make it more random. Also remember to draw with the color #A0A0A0 This is how I made my additional elements:
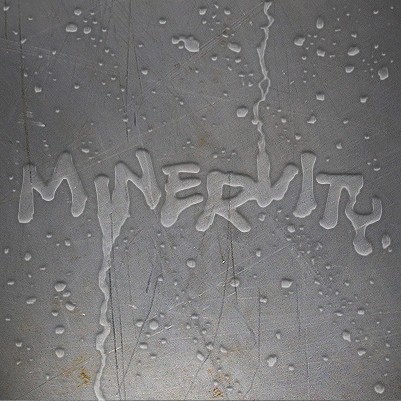
So, once you are satisfied with you water layout take off the effects on the upper layer and then merge it with the one underneath. All should be OK now.
Step 5 – Adding Condense

Now our condense is a little bit more fuzzy in it’s appearance. But we are not done yet. If you have condense going directly underneath your text or streams make sure to delete those particular parts by using the Polygon Selection Tool once again and delete what you select.
After doing that we need to set the Opacity of the Condense layer to make it not so dominant in the picture. So, with the Condense layer selected set it?s Opacity to 15%. Now it should blend in really nicely making it look like real condense.
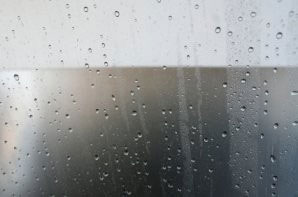
After applying the condense to our image it should now look something like this: