


In the following tutorial, you will learn how to add effects to text and how to make holographic stickers in Adobe Illustrator.
If you don’t have the time to learn how to make holographic stickers, then Envato is the solution. This subscription-based marketplace has over 2,000 Illustrator add-ons you can download without restrictions!
What you’ll learn in this tutorial
- How to create a holographic rainbow using a gradient mesh
- How to create a holographic effect
- How to create a holographic sticker
What you’ll need
You will need the following font to complete this holographic sticker project:
1. How to create a new document and set up a mesh
Step 1
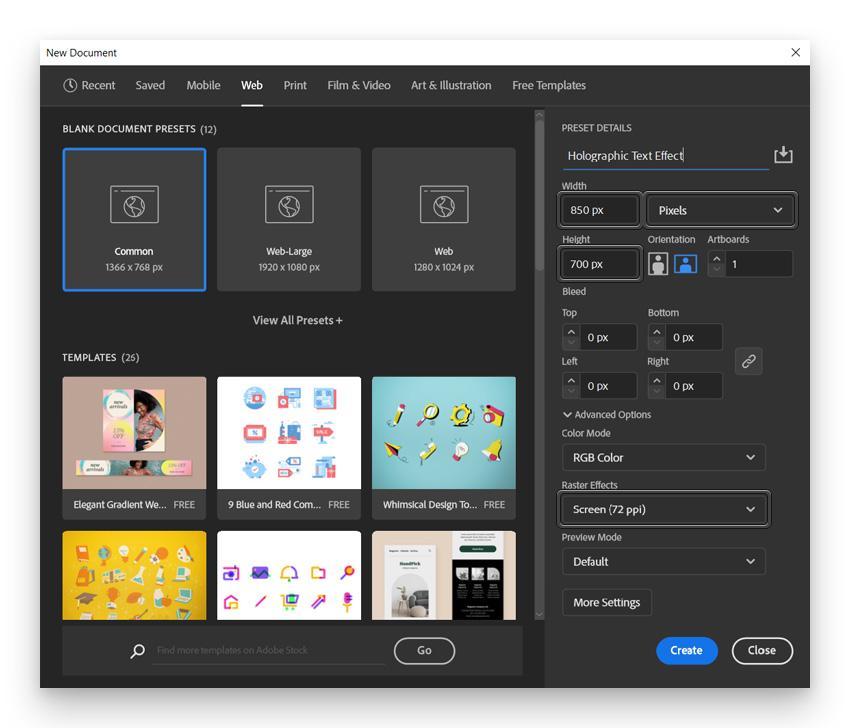
Hit Control-N to create a new document. Select Pixels from the Units drop-down menu, set the Width to 850 px and the Height to 700 px, and then click that Advanced Options button. Select RGB for the Color Mode and set the Raster Effects to Screen (72 ppi), and then click the Create button. Now that you’re set, let’s start work on our holographic sticker.

Step 2
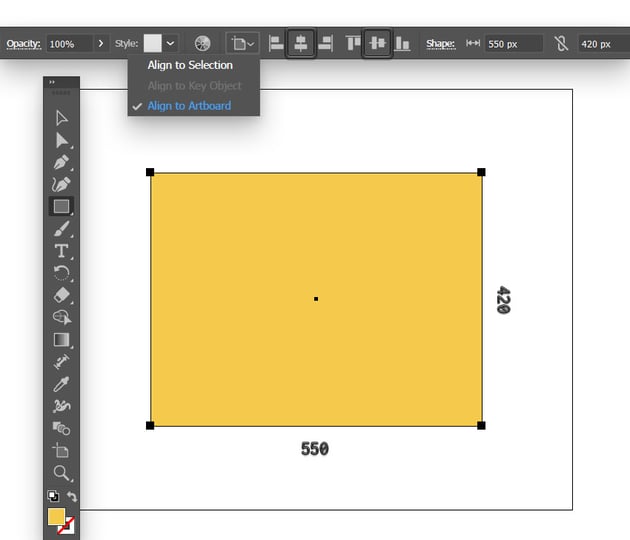
Focus on your Toolbar, set the Fill color to R=244 G=202 B=75 and remove the Stroke color, and then pick the Rectangle Tool (M).
Simply click on your artboard to open the Rectangle window. Set the Width to 550 px and the Height to 420 px, and then click that OK button to create your rectangle.
Keep it selected and focus on the Control bar. Make sure that the alignment is set to Artboard, and then click the Horizontal Align Center and Vertical Align Center buttons. This will move your rectangle to the center of the artboard.


Step 3
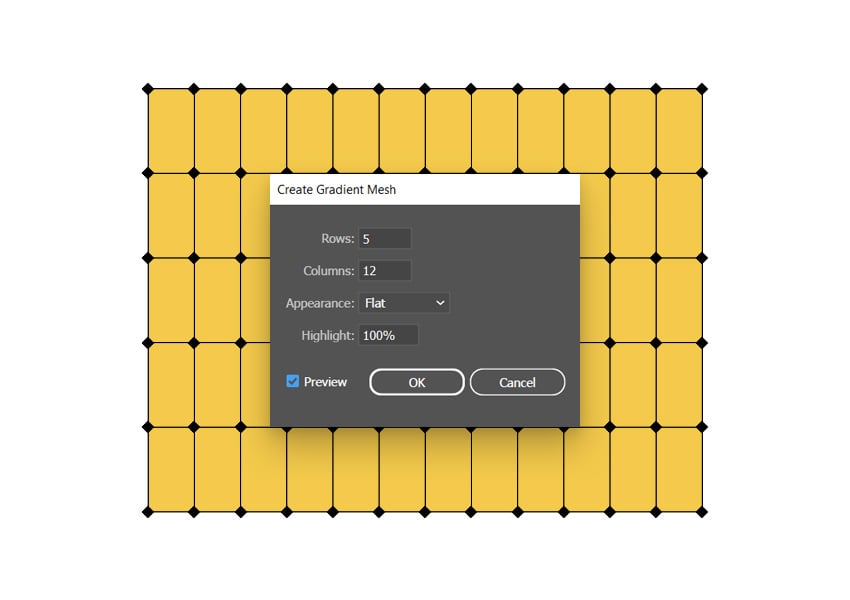
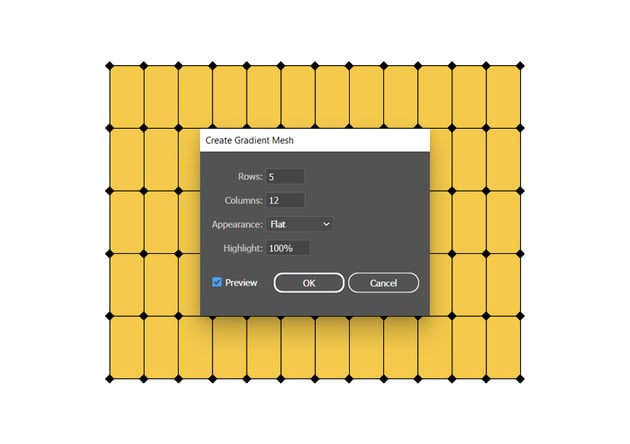
Make sure that your rectangle is still selected and go to Object > Create Gradient Mesh. Set the number of Rows to 5 and the Columns to 12, and click OK.
Step 4
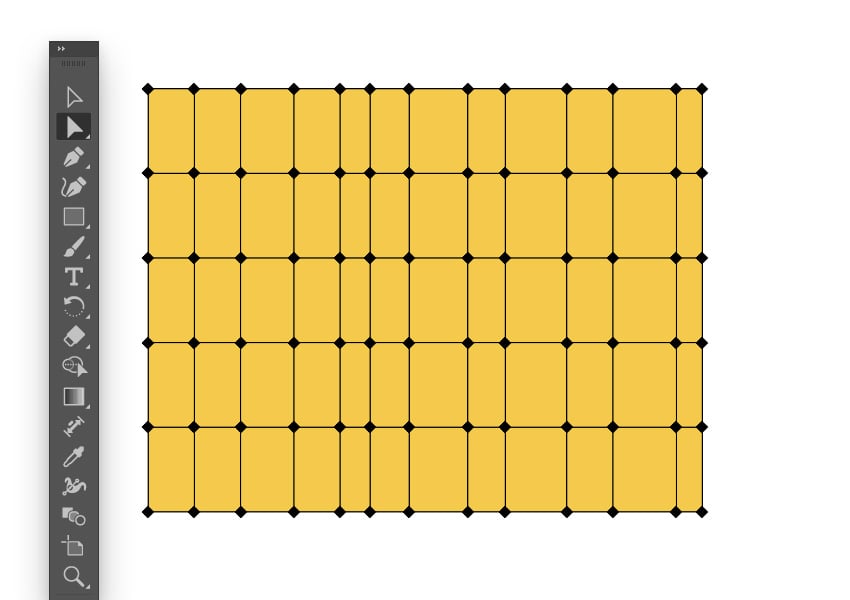
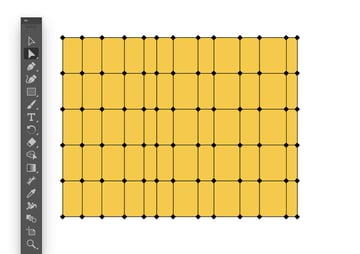
Use the Direct Selection Tool (A) to select mesh point columns from your gradient mesh. Then press the left and right arrow keys to move your selected mesh point columns. Don’t bother to make it exactly as shown below, but aim to break that even spacing between each column of mesh points.
Step 5
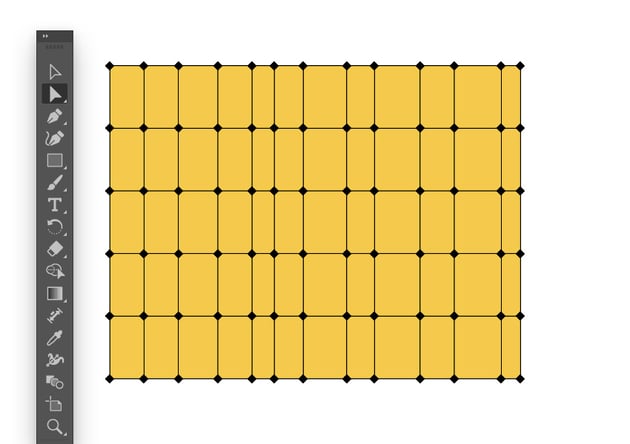
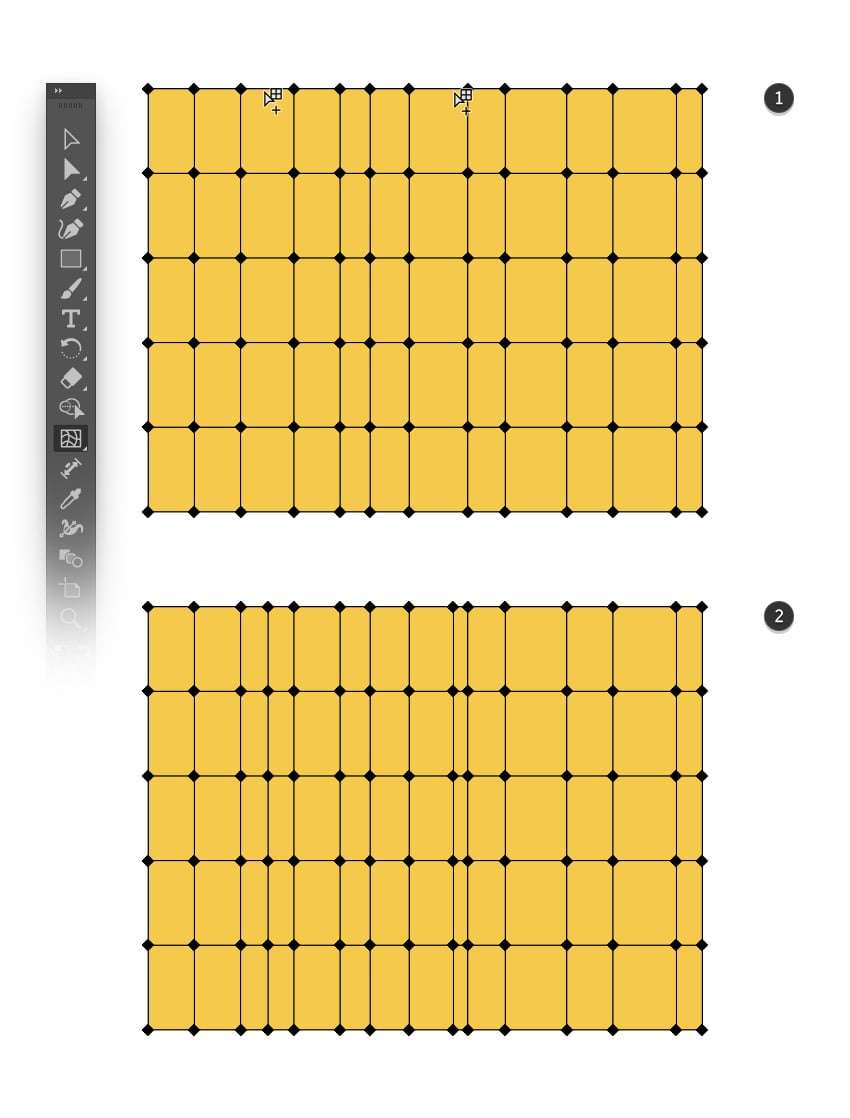
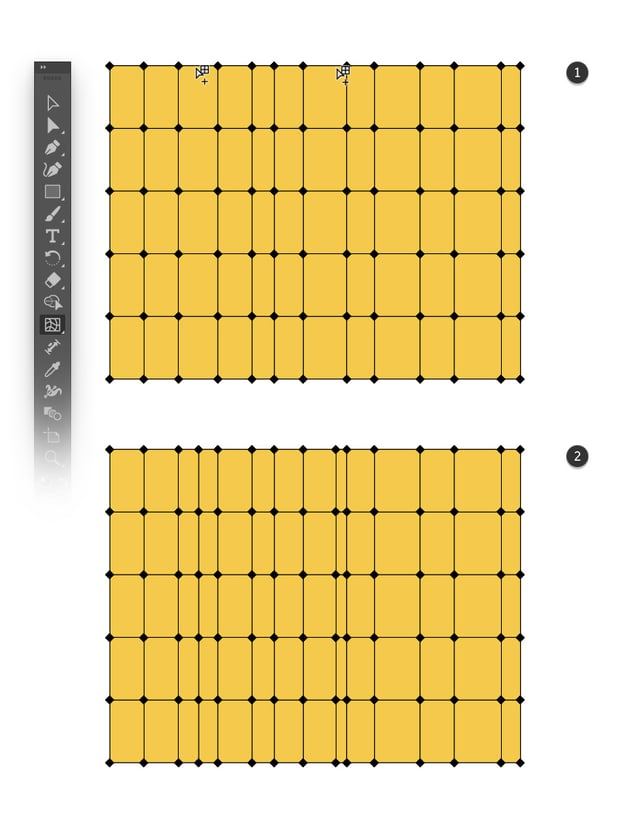
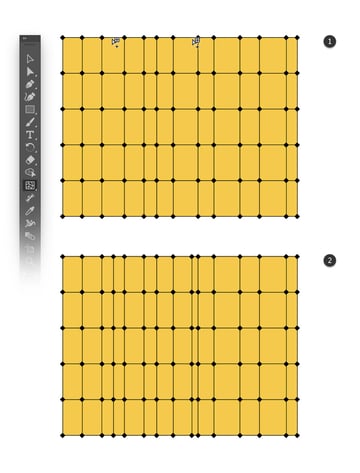
Keep your mesh selected, and pick the Mesh Tool (U). With a simple click you can add new mesh columns, as shown in the second image. Try to have 15 mesh columns in the end.
2. How to create a holographic rainbow
Step 1
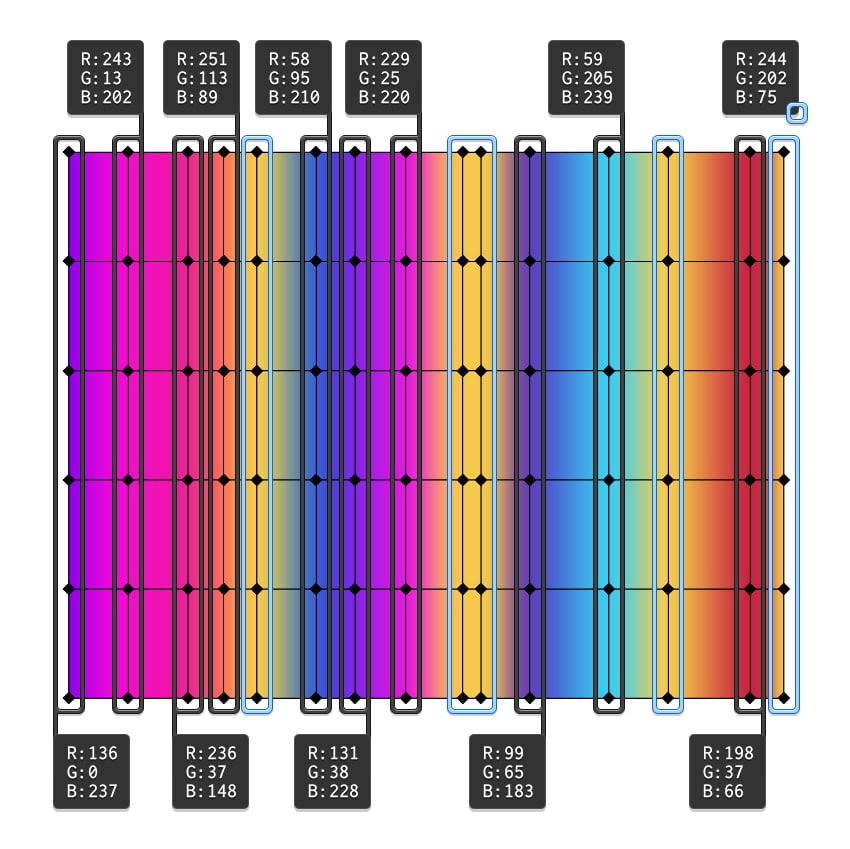
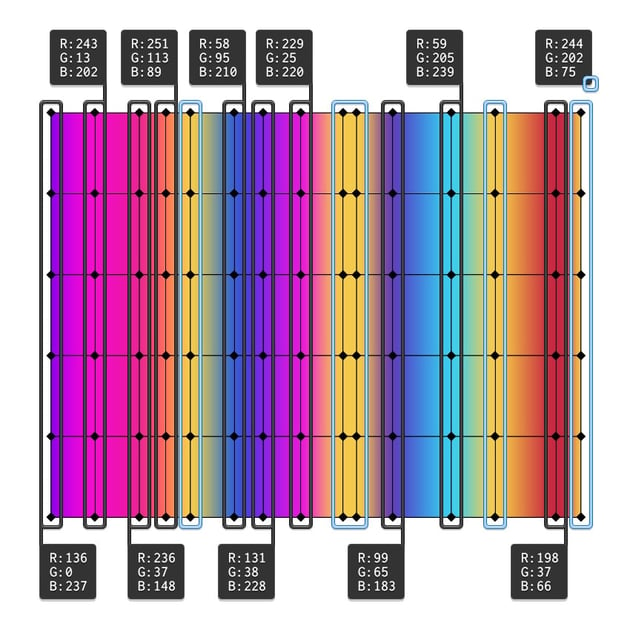
Using the Direct Selection Tool (A), select your mesh point columns one by one and set the colors as shown below. Skip the mesh points highlighted with blue—we’ll keep the existing yellow (R=244 G=202 B=75).
Step 2
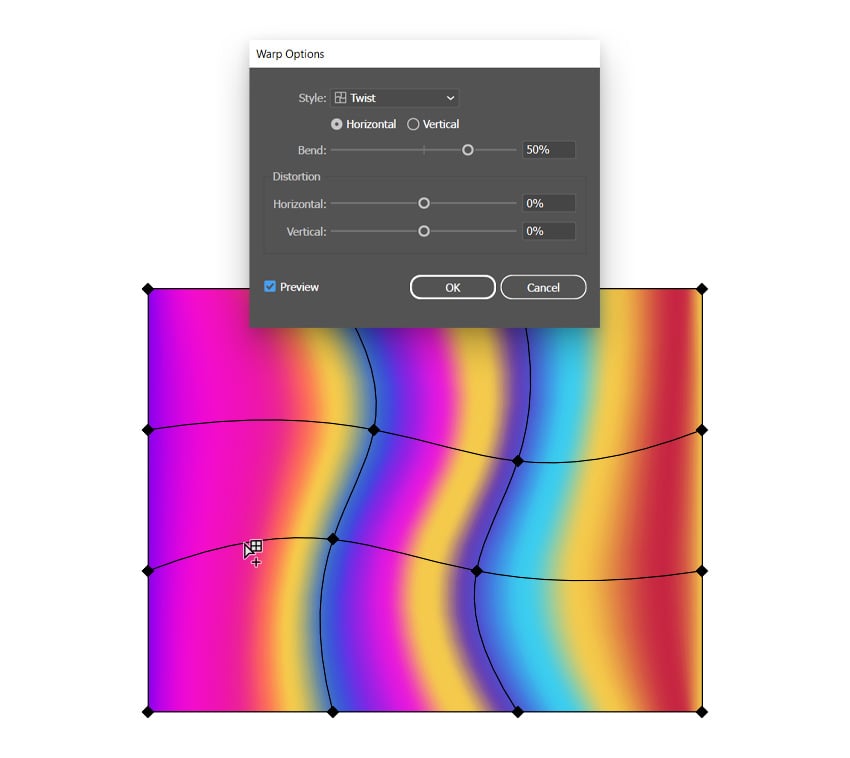
Select your mesh and go to Object > Envelope Distort > Make with Warp. Select Twist from the Style menu, check the Horizontal box, drag the Blend slider to 50%, and click OK.


Step 3
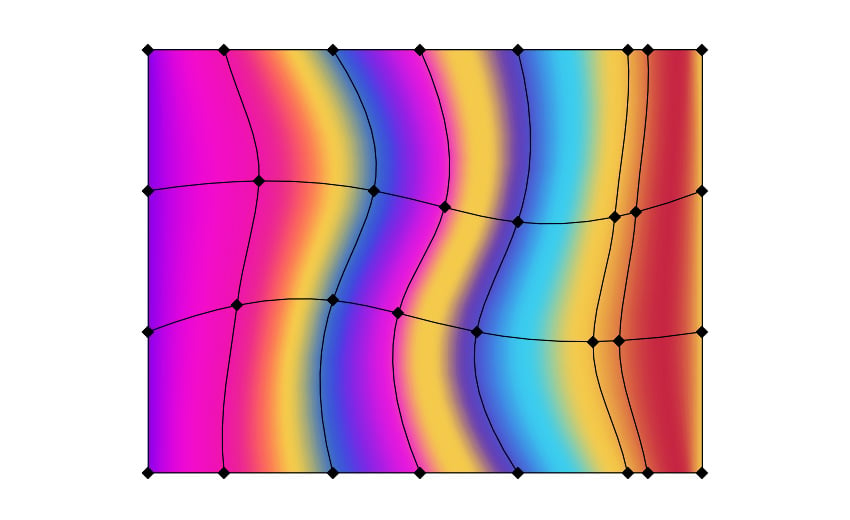
Reselect the Mesh Tool (U) and add some extra mesh points, as shown in the following image.

Step 4
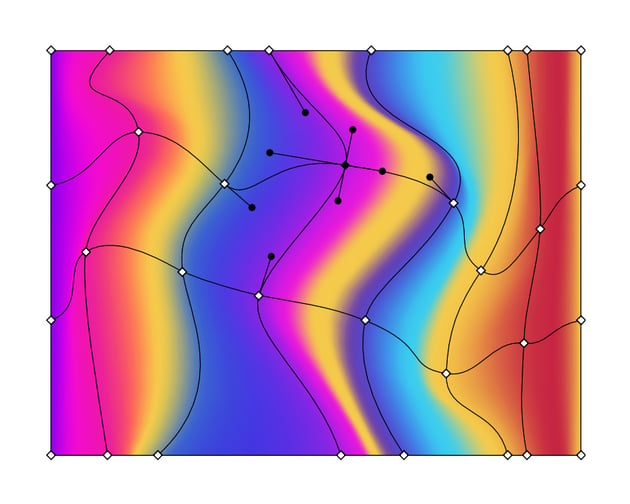
Now pick the Direct Selection Tool (A) and go wild! Move some of the mesh points and adjust the handles to create your own holographic effect.


Step 5
For the final touches, let’s return to the main mesh. Select your warped mesh, focus on the Control bar, and click that Edit Contents button to access the starting mesh points.
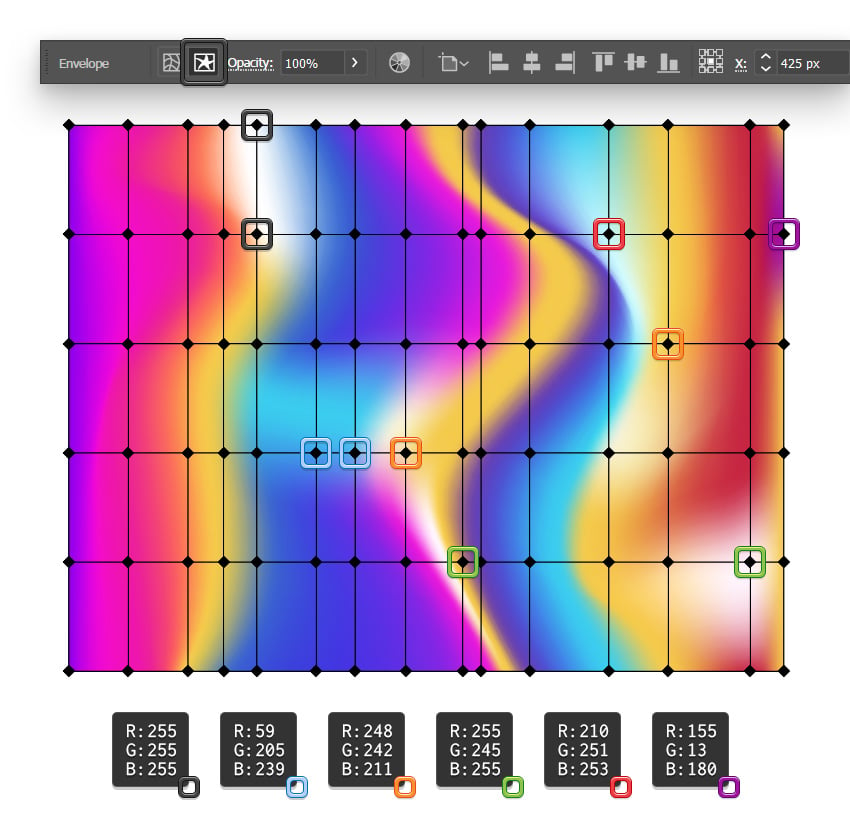
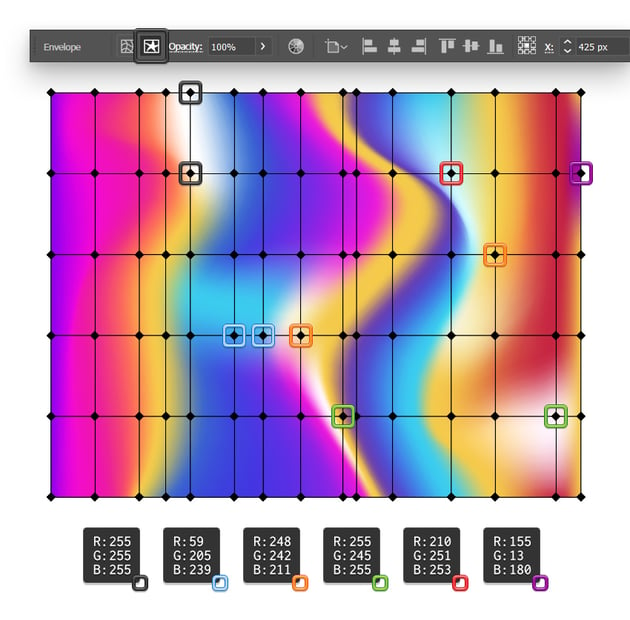
Again, use the Direct Selection Tool (A) to select the mesh points highlighted in the following image and replace the existing colors with the ones indicated below. This will be your final holographic effect.

Step 6
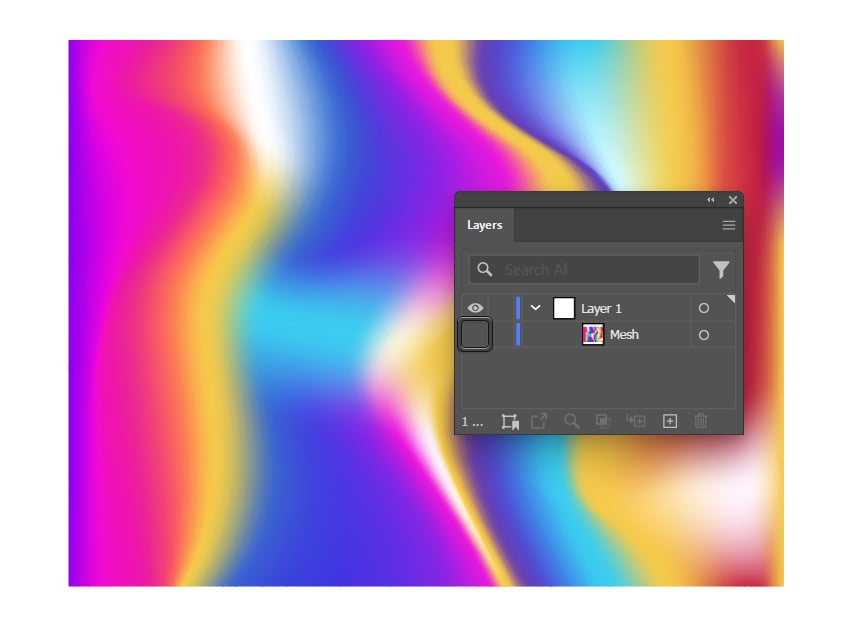
Now that you’ve got your holographic effect, you can make it invisible (Window > Layers) for a few minutes so we can focus better on the text that we’re about to add.

3. How to add the text
Step 1
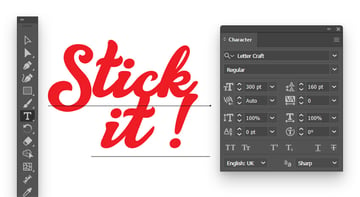
Pick the Type Tool (T) and focus on the Character panel (Window > Type > Character) to set the settings for the text that you’re about to add.
Select the Letter Craft font, setting the size to 300 pt and the leading to 160 pt. Now click on your artboard and type in your text. Make it red.


Step 2
Make sure that your text is still selected, and go to Type > Create Outlines to turn your text into vector shapes.
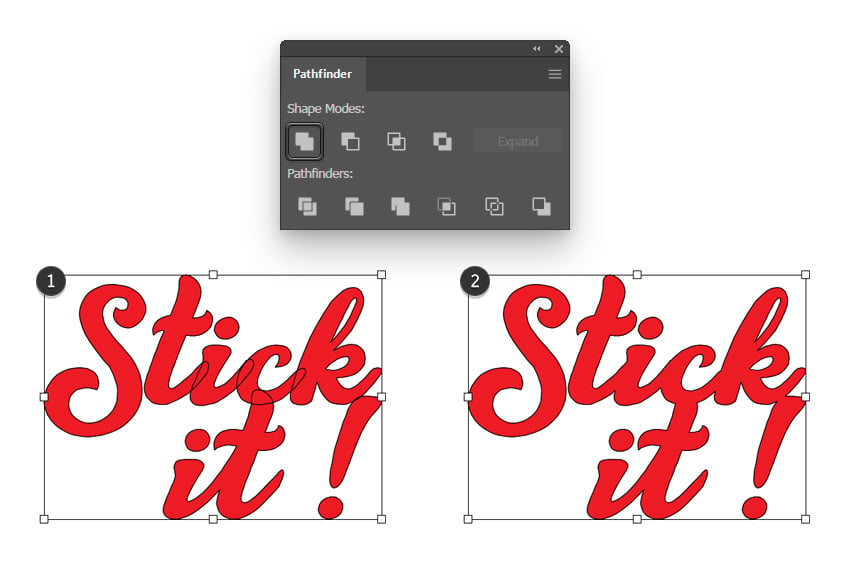
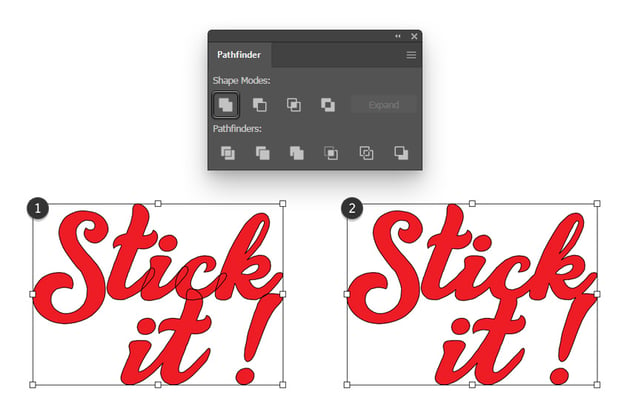
Merge the resulting group of shapes using the Unite button from the Pathfinder panel (Window > Pathfinder), and then turn your selection into a single compound path (Object > Compound Path > Make or Control-8). Keep the fill color set to red.
Step 3
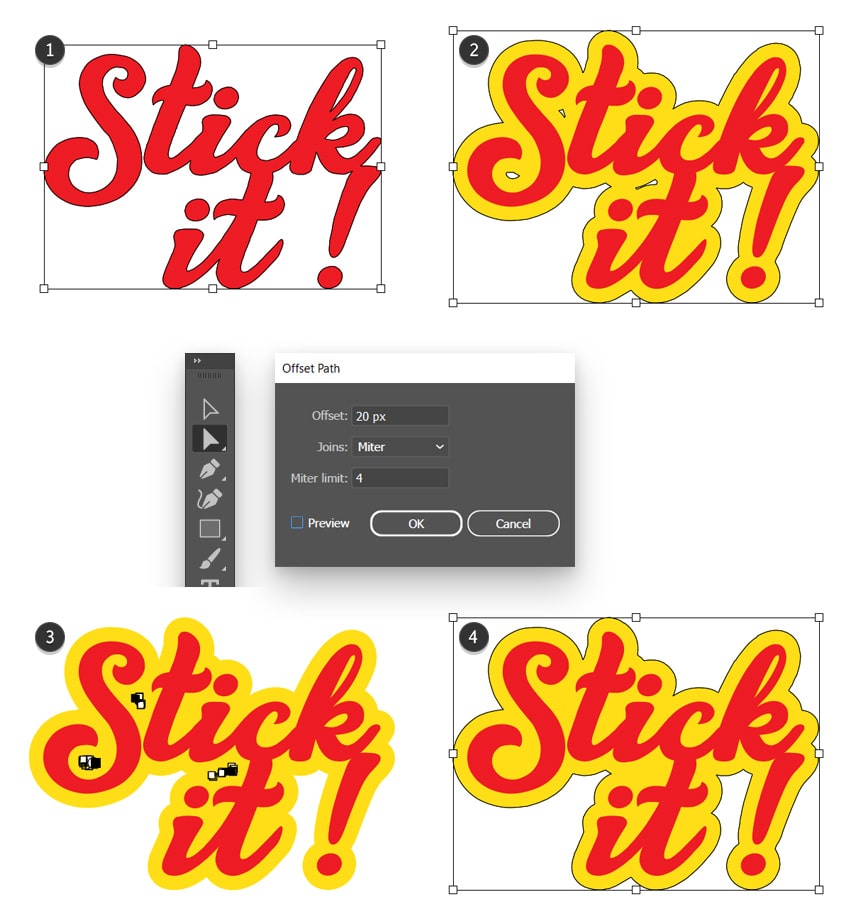
Select your red compound path and go to Object > Path > Offset Path. Set the Offset to 20 px and click OK. Fill the new compound path with yellow.
Now, depending on the text that you choose to use, there might be some gaps inside this yellow path. Let’s remove them. Pick the Direct Selection Tool (A) and just click on one of the points that make up the gap sections. Press the Delete key once to remove that single point and a second time to remove the entire path.
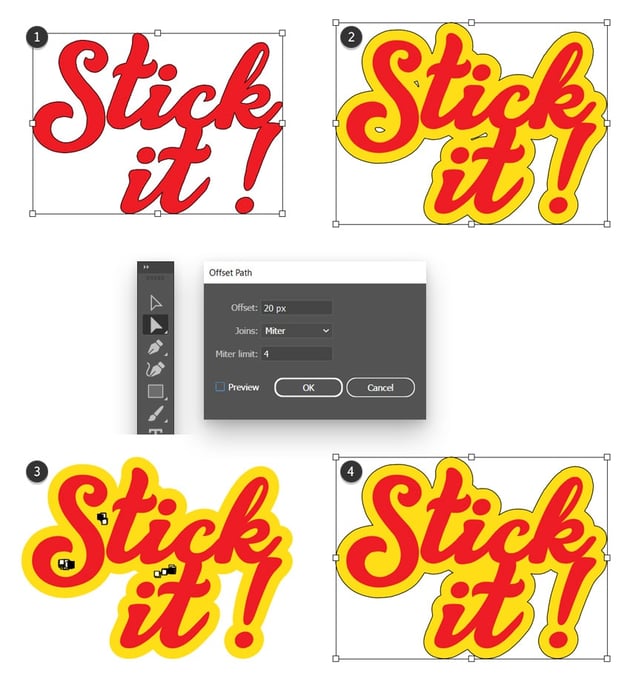

Step 4
Select your yellow path and go back to Object > Path > Offset Path. Set the Offset to 10 px and click OK. Fill the resulting shape with blue.

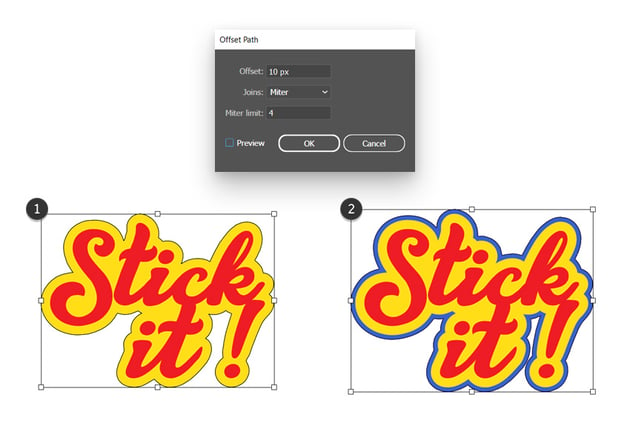

Step 5
Select your yellow path along with the red one and add copies in front (Control-C > Control-F). Keep the copies selected and click the Minus Front button from the Pathfinder panel. Turn the resulting group of shapes into a compound path (Control-8) and set the color to R=10 G=10 B=20.
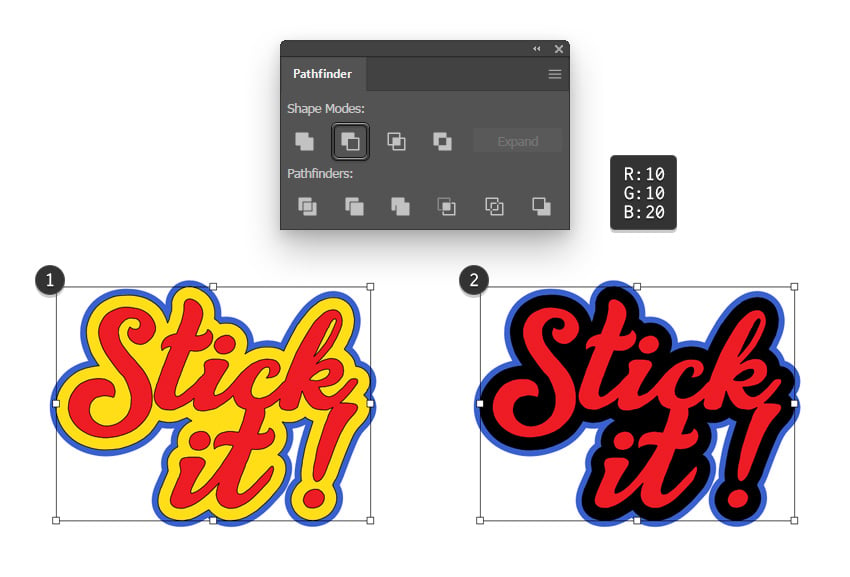
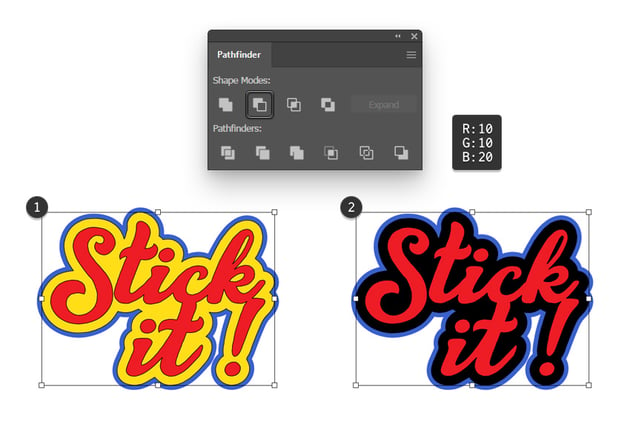

Step 6
Select your blue path along with the black one and add copies in front (Control-C > Control-F). Again, keep the copies selected and click the Minus Front button from the Pathfinder panel. Turn the resulting group of shapes into a new compound path (Control-8) and make it green.
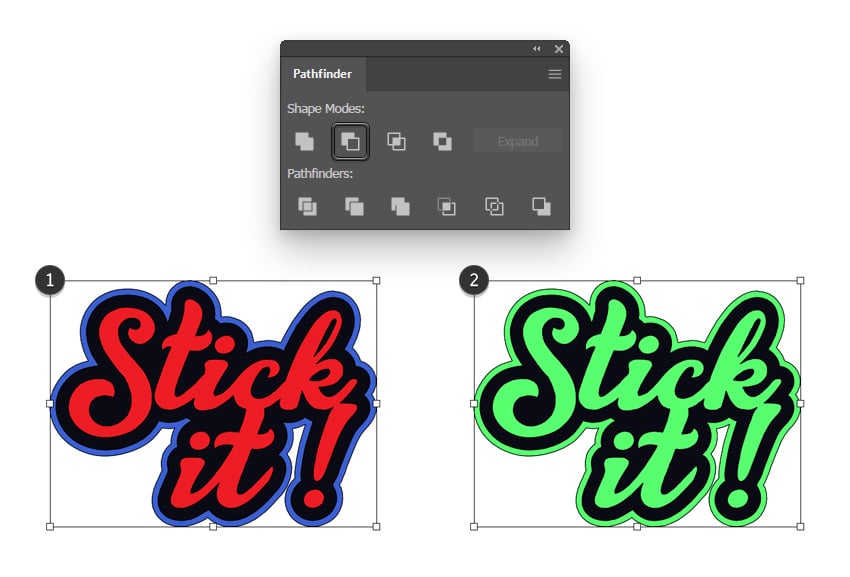


Step 7
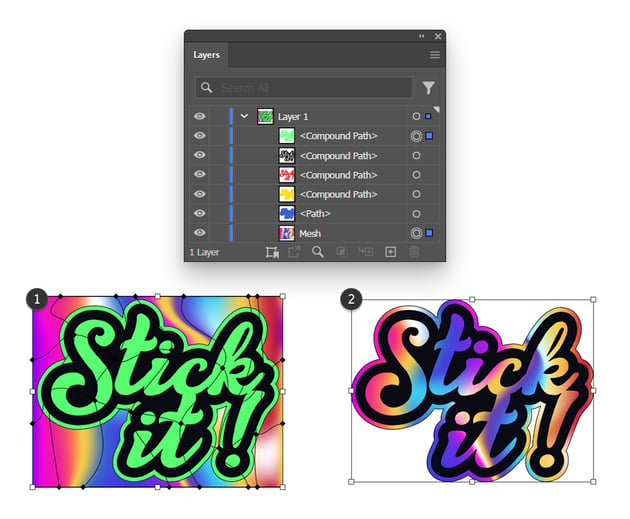
Now you can turn the visibility of your mesh back on. Place it behind your text, roughly as shown below.
Select the mesh along with your green compound path and go to Object > Clipping Mask > Make (Control-7).
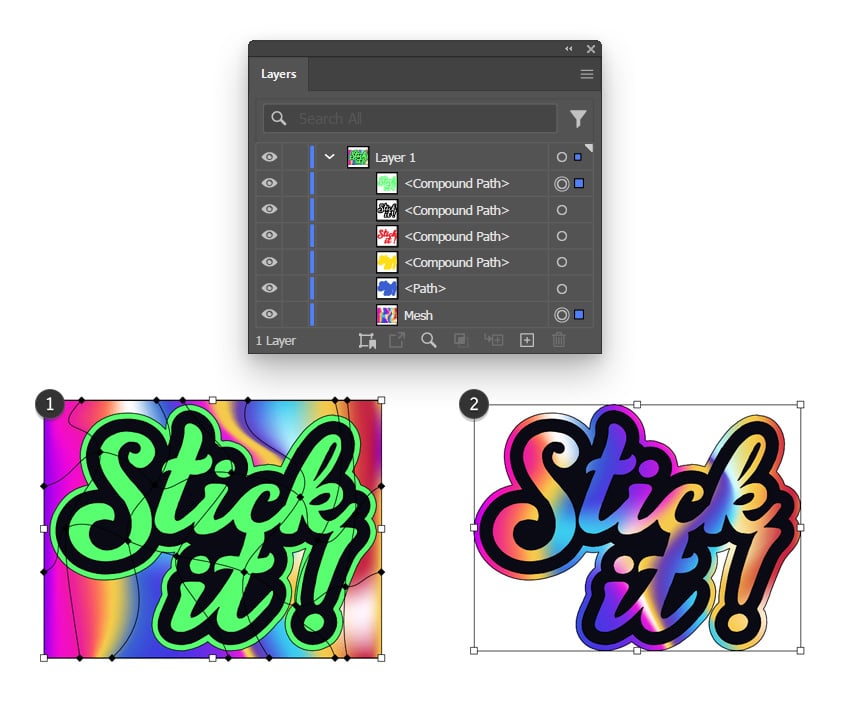

4. How to further stylize your hologram effect
Step 1
Go to the Layers panel and select the blue path that’s still there. Press Control-C to copy it and Shift-Control-V to add the copy in the same place, on top of the entire design.
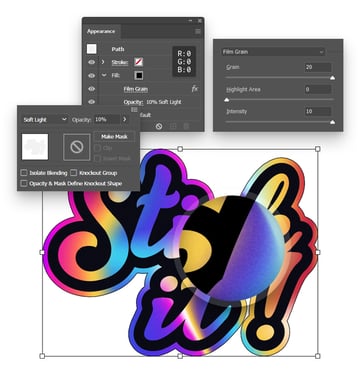
Keep this new path selected and focus on the Appearance panel (Window > Appearance). Select the fill and set the color to black (R=0 G=0 B=0), lower its Opacity to 10%, change the Blending Mode to Soft Light, and then go to Effect > Artistic > Film Grain. Enter the settings shown below and click OK.

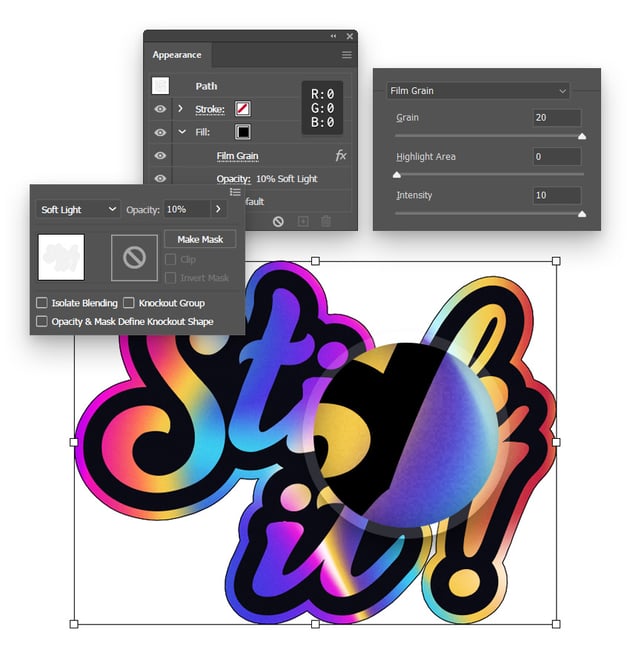
Step 2
Keep focusing on the Appearance panel, and make sure that the path we edited in the previous step is still selected.
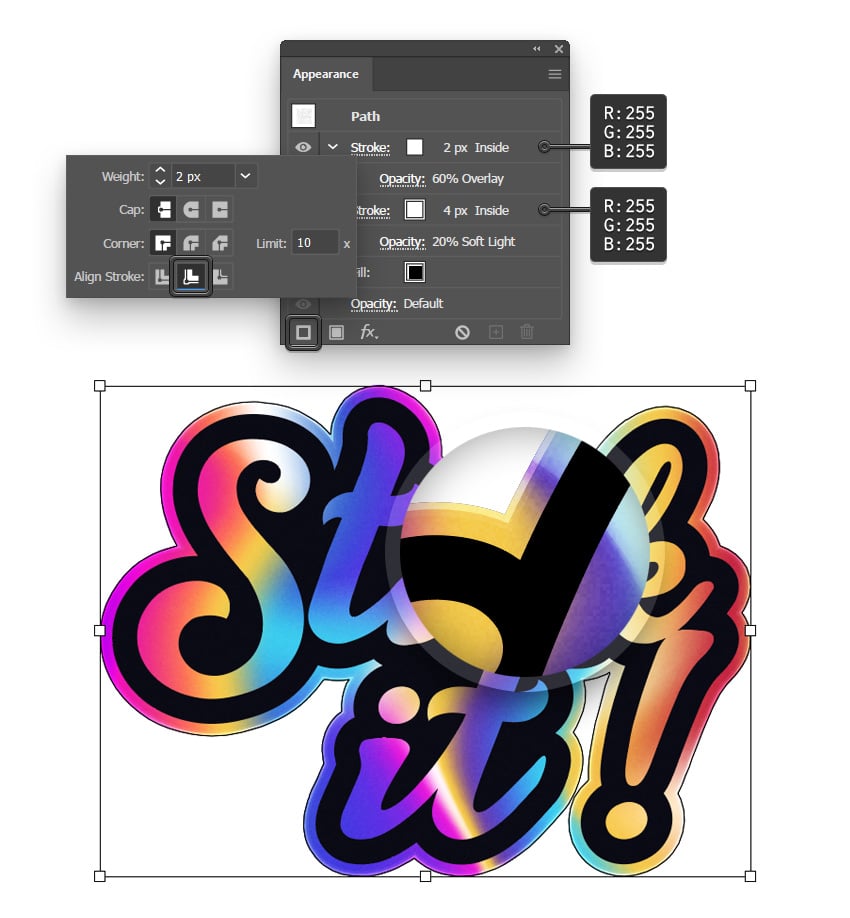
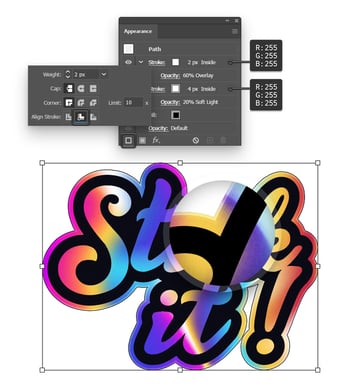
Select the stroke and make it white. Increase the Weight to 4 px and align it to Inside, and then lower the Opacity to 20% and change the Blending Mode to Soft Light.
Use the Add New Stroke button to add a second stroke and select it. Keep it white, lower the Weight to 2 px and align it to Inside, and then lower the Opacity to 60% and change the Blending Mode to Overlay.

Step 3
Return to the Layers panel, and this time select that red compound path that’s hidden behind your text. Press Control-C to copy it and Shift-Control-V to add the copy in front.
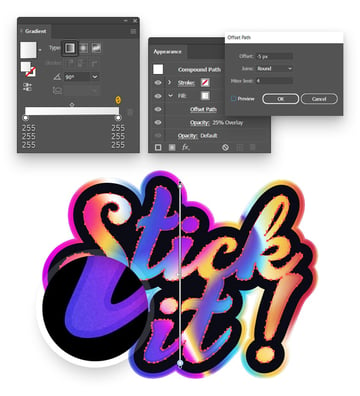
Keep this copy selected, and select the fill from the Appearance panel. Then click the Linear Gradient button from the Gradient panel (Window > Gradient) to easily apply a linear gradient. Set the Angle to 90 degrees and then move to the gradient sliders. Double-click the left one and set the color to white (R=255 G=255 B=255), and then double-click the right one. Add the same color, but lower its Opacity to 0%.
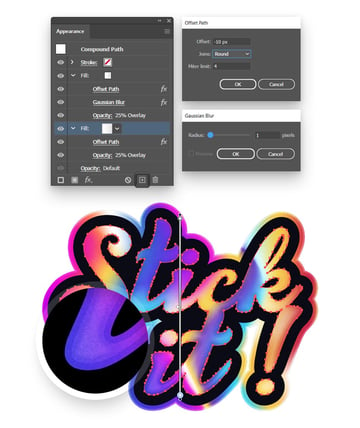
Return to the Appearance panel to lower the Opacity of the fill to 25% and change its Blending Mode to Overlay, and then go to Effect > Path > Offset Path. Set the Offset to -5 px and Joins to Round, and then click OK.


Step 4
Make sure that the path edited in the previous step is still selected, and keep focusing on the Appearance panel. Select the fill and duplicate it using the Duplicate Selected Item.
Focus on the new fill and click the existing Offset Path effect. Lower the Offset to -10 px and click OK, and then go to Effect > Blur > Gaussian Blur. Set the Radius to 1 px and click OK.


Step 5
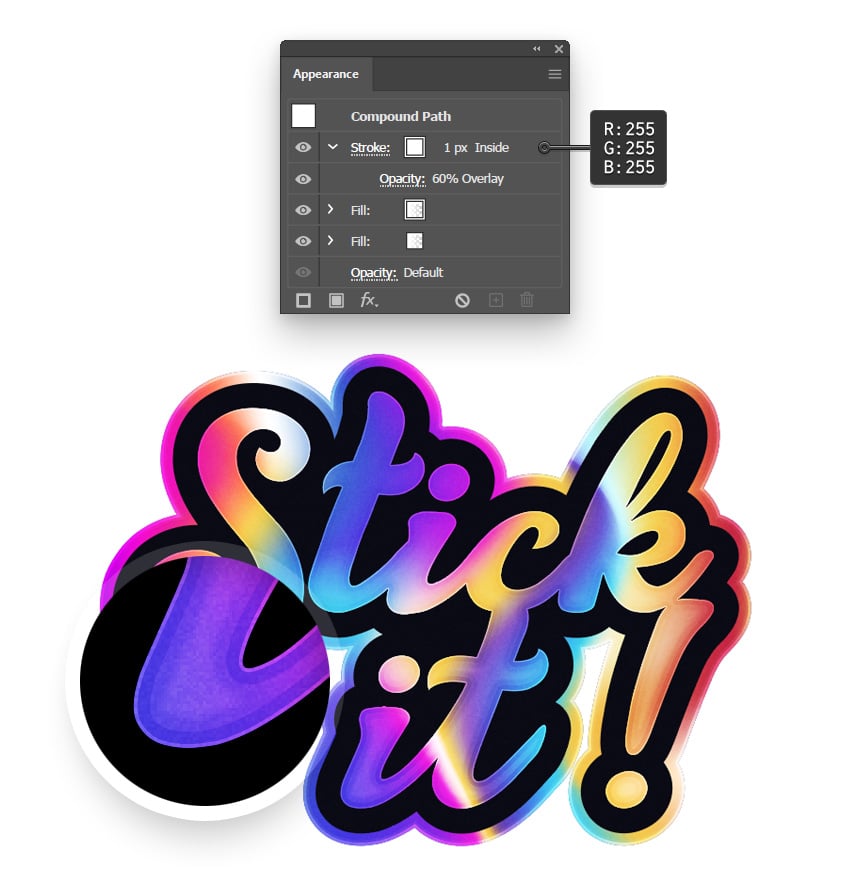
Let’s also add a subtle stroke to the path we edited in the previous step. Set the color to white and align it to Inside, and then lower its Opacity to 60% and change the Blending Mode to Overlay.


Step 6
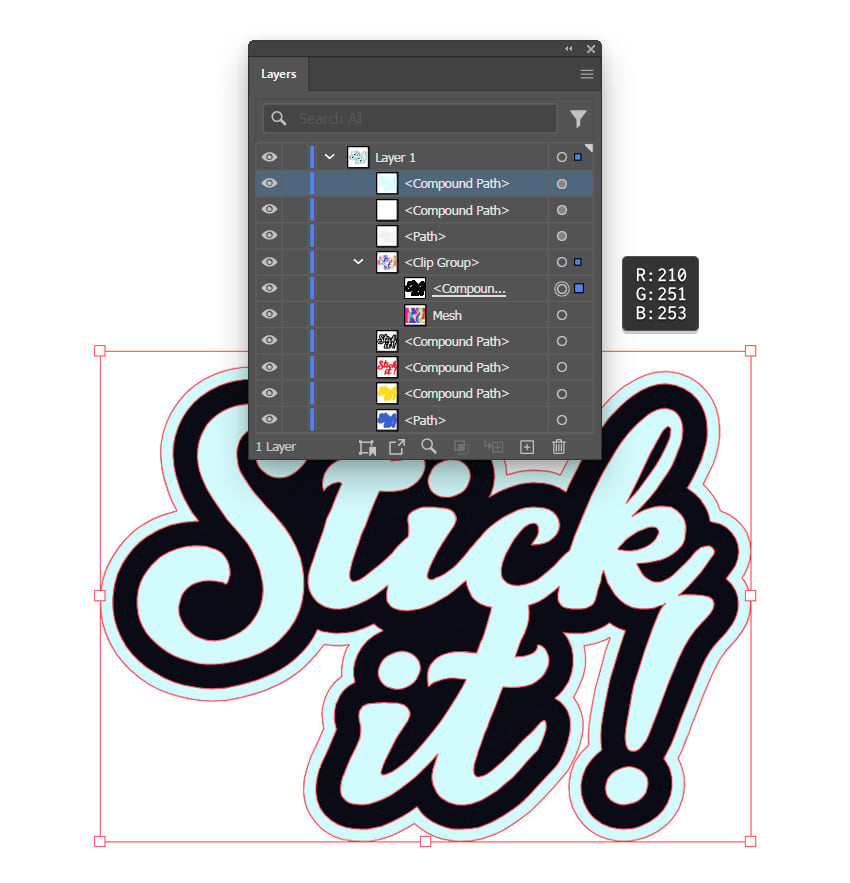
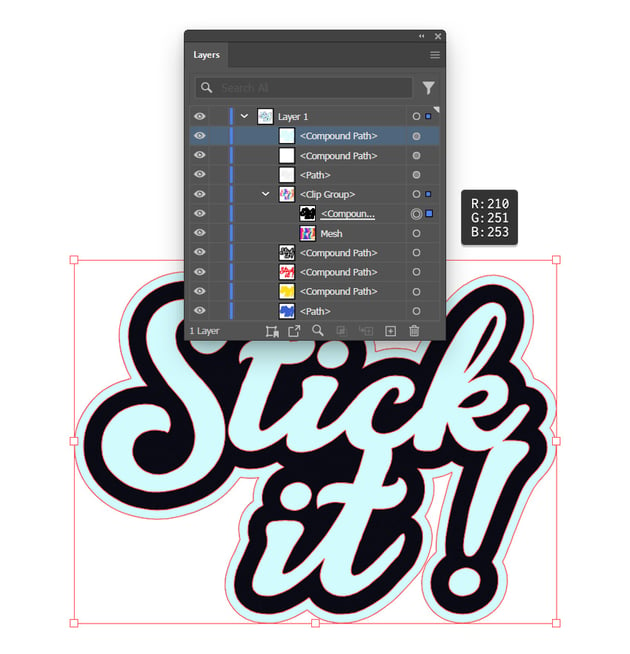
Have a quick look at the Layers panel and open your clip group. Select the compound path that’s used to mask the mesh and press Control-C to copy it. Deselect it and press Control-F to paste the copy in front. Set its fill color to R=210 G=251 B=253.

Step 7
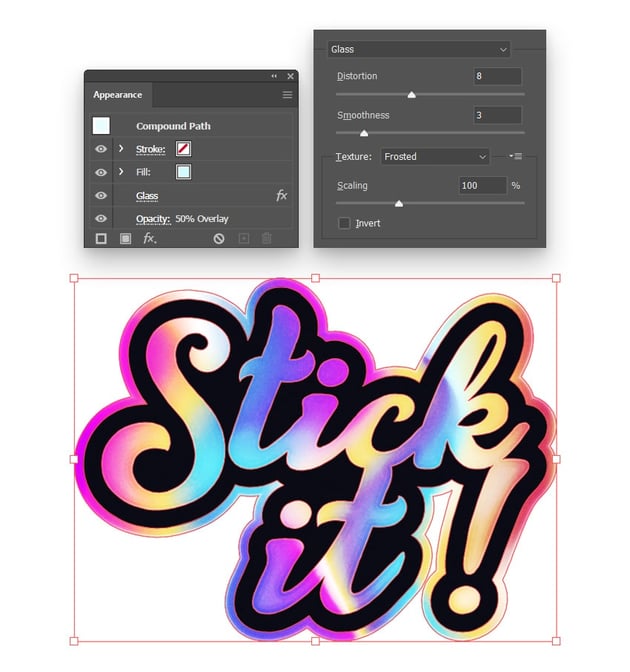
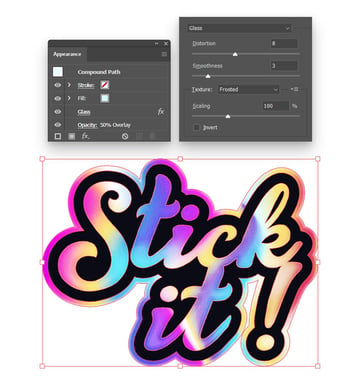
Select the path added in the previous step, lower its Opacity to 50%, change the Blending Mode to Overlay, and then go to Effect > Distort > Glass. Enter the settings shown below and click OK.

Step 8
Go to the Layers panel and reselect that blue path that’s hidden in the back. This time you don’t need to duplicate it—just keep it selected and focus on the Appearance panel.
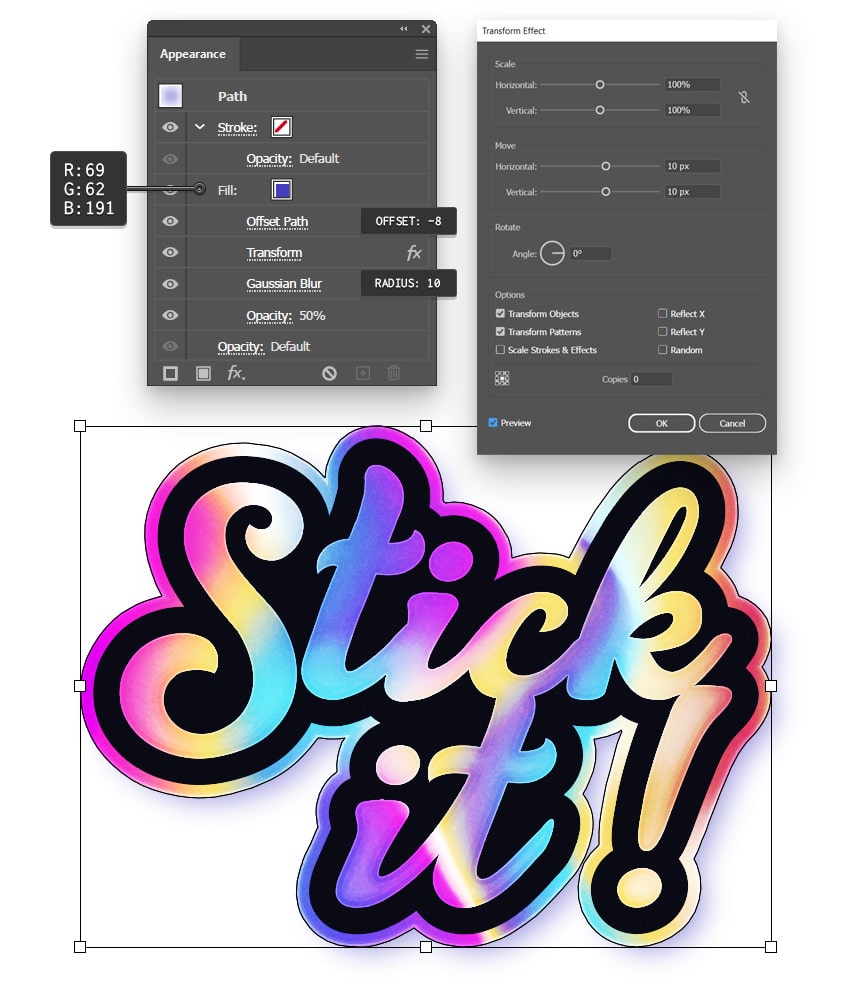
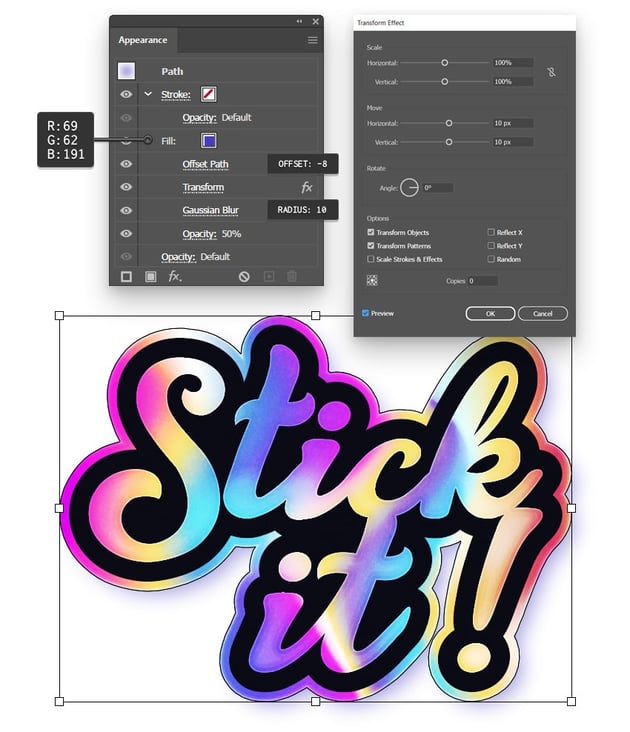
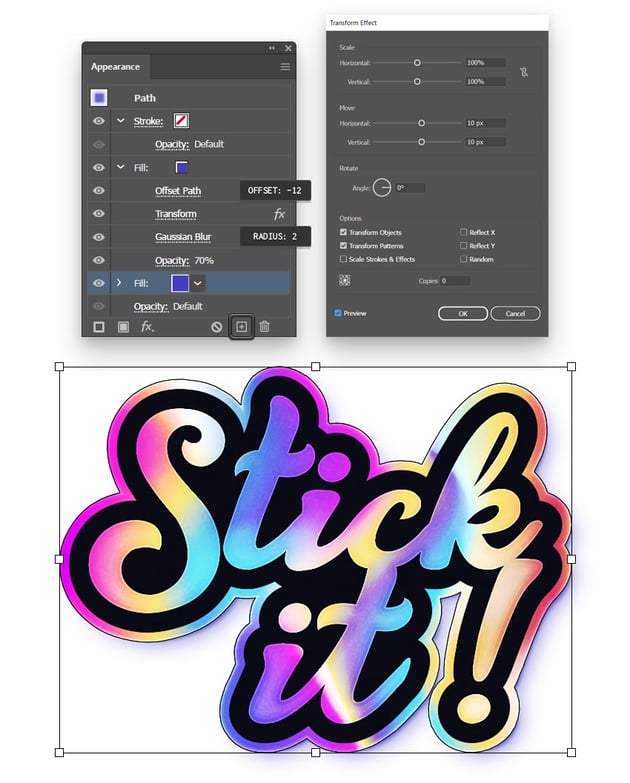
Select the fill and replace the existing color with R=69 G=62 B=191, and then lower its Opacity 50% and go to Effect > Path > Offset Path. Set the Offset to -8 px, click OK, and then go to Effect > Distort & Transform > Transform. Drag both Move sliders to 10 px, which will move your fill 10 px down and 10 px to the right. Once you’re done, click the OK button and go to Effect > Blur > Gaussian Blur. Set the Radius to 10 px and click OK.

Step 9
Make sure that the path edited in the previous step is still selected, and duplicate the existing fill. Select this new fill, increase its Opacity to 70%, and lower the Offset to -12 px and the blur Radius to 2 px.

5. How to create the background
Step 1
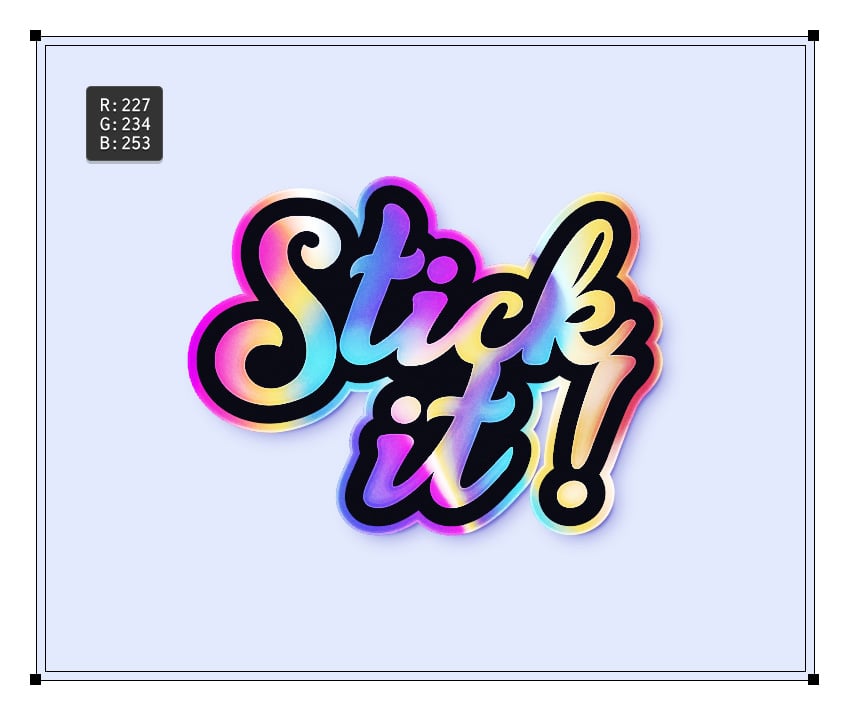
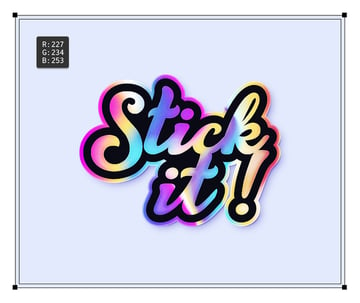
Pick the Rectangle Tool (M) and use it to create a shape that covers your entire artboard. Fill it with R=227 G=234 B=253 and send it to the back (Shift-Control-[).
Step 2
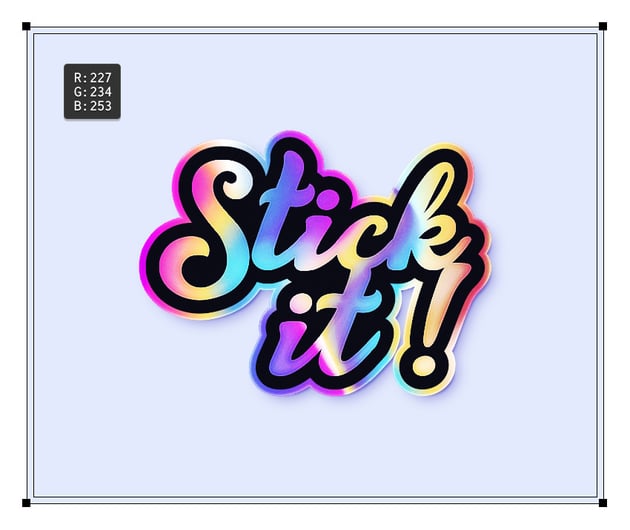
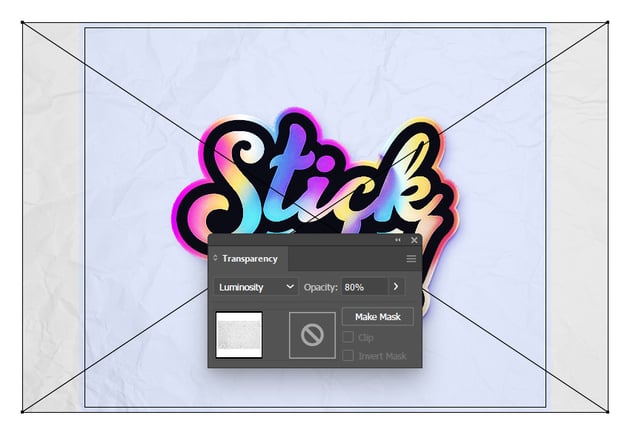
Download this crumpled paper texture and add it to your design. Resize it to fit the artboard, and then lower its Opacity to 80% and change the Blending Mode to Luminosity.


Step 3
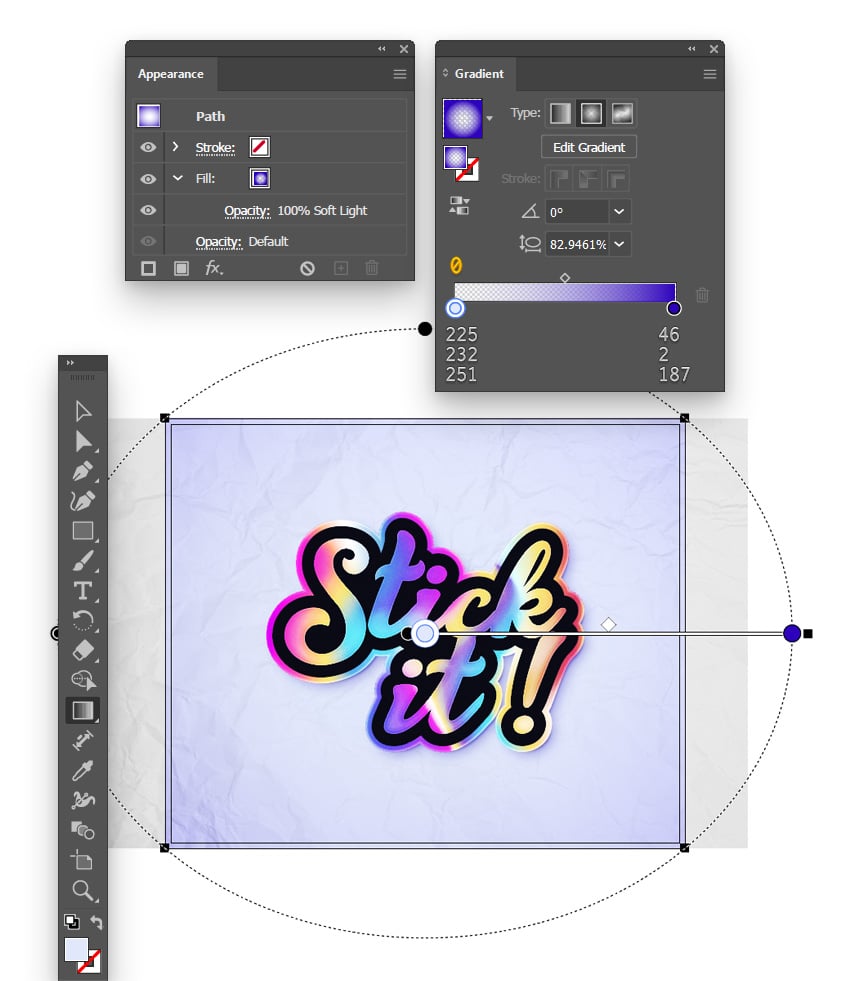
Select the rectangle that you used for the background and add a copy in front (Control-C > Control-F). You can also press Control-] to move it above the paper texture.
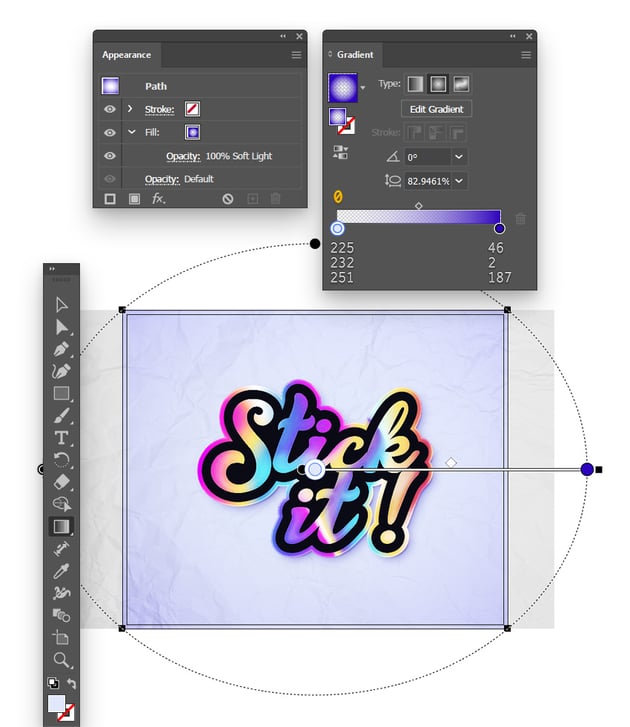
Keep this rectangle selected, fill it with the radial gradient shown below, and change its Blending Mode to Soft Light. Use the Gradient Tool (G) to adjust the gradient as shown in the following image.
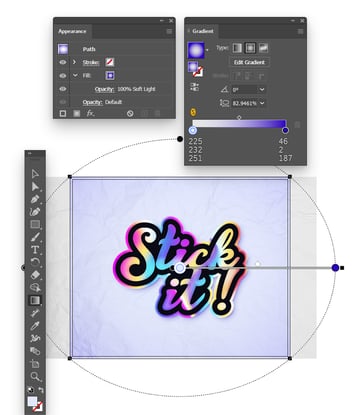
Congratulations! You’re done!
Here is how your holographic sticker should look. I hope you’ve enjoyed this tutorial and can apply these techniques in your future projects.
Feel free to adjust the final holo sticker and make it your own. You can find some great sources of inspiration at Envato, with interesting solutions to help you add effects to text.


Popular Photoshop holographic effects from Envato
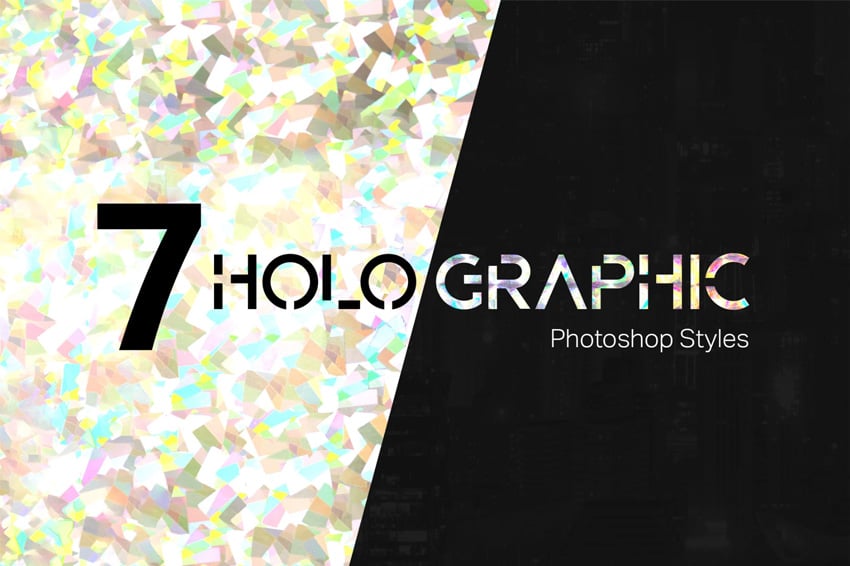
Envato is an excellent resource for holographic effects made in Photoshop. Here’s a short list of some popular Photoshop text effects that you can find.
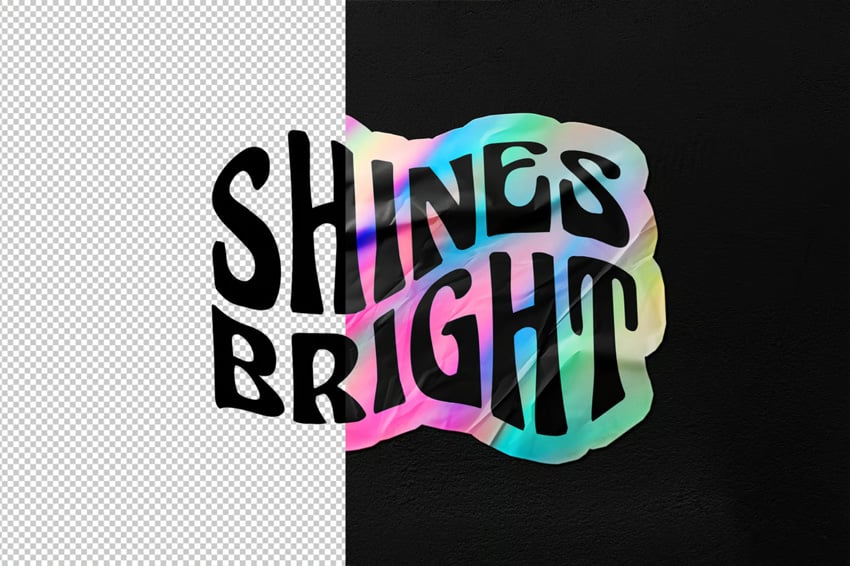
Holographic sticker Photoshop text effect (PSD)
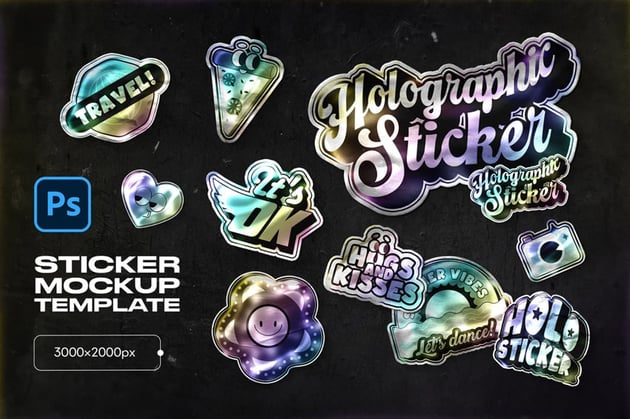
Cut the hassle of learning how to make holographic stickers in Photoshop, and try this template instead. This Photoshop text effect is fully editable and easy to adjust.

Holo stickers (PSD)
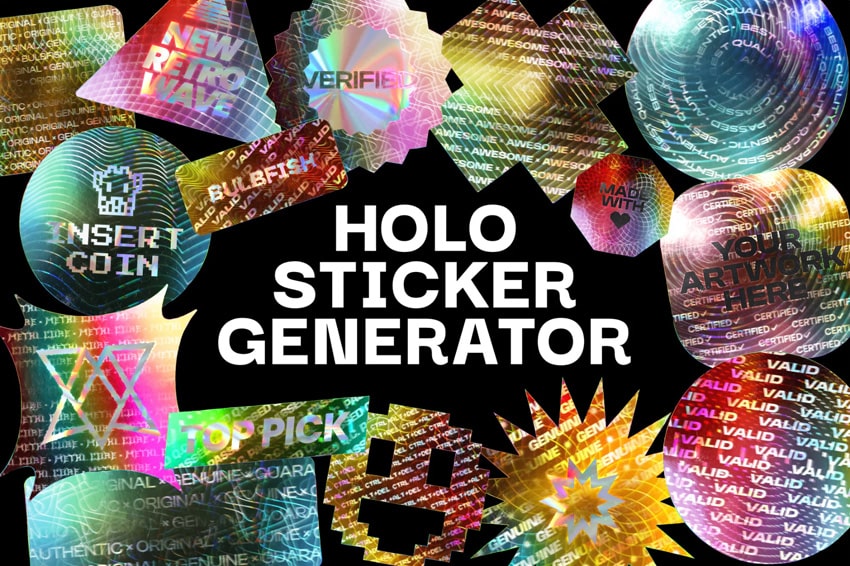
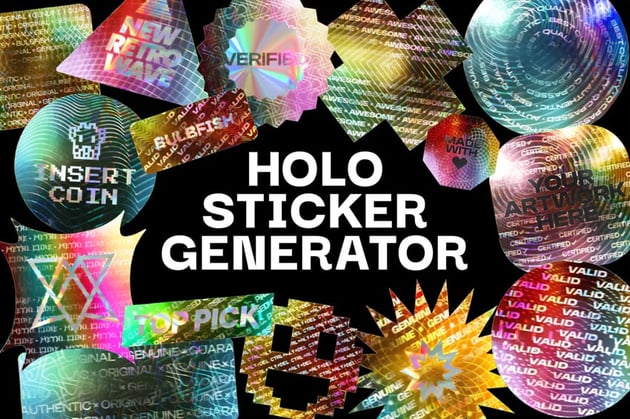
Try the dazzling Holo stickers pack, designed in Photoshop! Each sticker features a stunning holographic effect that catches the light and adds a vibrant pop to your designs.
Y2K holographic stickers (PSD, JPG, PDF)
Here’s a massive set of Y2K holographic stickers featuring bold colors, funky patterns, and iconic motifs that defined a generation. This collection captures the essence of the Y2K aesthetic.

Holographic patterns (ASL)
Transform your designs with this stunning pack of holographic patterns. This collection features a variety of mesmerizing holographic patterns that shimmer, adding depth and intrigue to your projects.
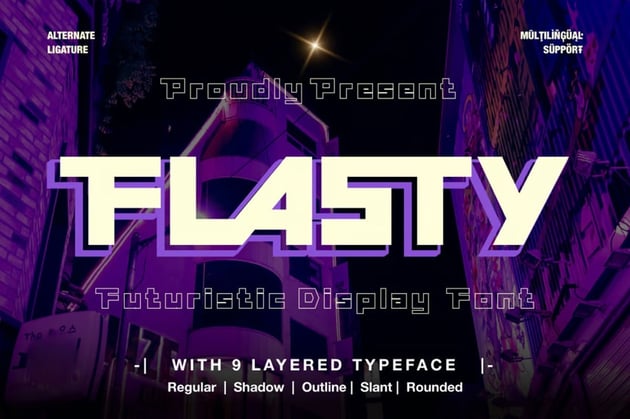
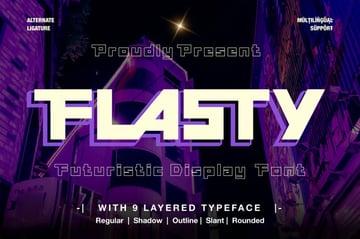
Flasty holographic font
This unique font captures the essence of the holographic aesthetic, bringing a playful yet sophisticated flair to your projects. This will definitely go well with a holographic effect.

Want to learn more?
We have loads of tutorials on Envato Tuts+, from beginner to intermediate level. Take a look!