When it comes to online shopping, one size doesn’t always fit all.
Clothing stores are an obvious example. However, there are countless other eCommerce sites that sell variable products. The same laptop may be available in various screen sizes, or with different amounts of storage.
Even if you’re running a takeaway restaurant, a customer may abandon their order if they cannot add extra toppings to their pizza.
The good news is that WooCommerce has a built-in system of attributes and variables. By combining these elements, you can help customers find the product that’s exactly right for them—whether that’s a laptop with a 10-core CPU or a pizza with extra cheese.
WooCommerce Attributes and Variables: What’s the Difference?
WooCommerce’s variable product system consists of two components: attributes and variables. These two components are closely related, so let’s start by clarifying the subtle differences between them.
Attributes communicate the product’s key characteristics, such as its size, material, or color. For example, a pair of sneakers might have the attribute “size 5” or “black.”
To help shoppers make more informed purchasing decisions, WooCommerce displays these attributes as part of its product pages. The customer cannot interact with these attributes or change them in any way.
If a product isn’t variable, then this is where the story ends. However, if you want to give your customers a choice, you’ll need to create some variables.
In our earlier sneakers example, we listed “black” as an attribute. However, if you stock this product in different colors, then “color” becomes the attribute, and “black,” “grey,” and “white” are the variables.
While there is some overlap between variables and attributes, remember: attributes inform, while variables are a choice.
You can also use attributes as a standalone component. However, you must always use variables in combination with attributes.
WooCommerce Product Options: Site-Wide or Product-Specific
We’re going to assume that you’ve already installed WooCommerce and added some products to your store.
With these pieces in place, it’s time to create some attributes and variables. Often, you’ll use the same options across multiple products. For example, if you run a clothing store, then you might use size, color, and material type for all of your products.
It is possible to create and assign these attributes on a per-product basis. However, this is a time-consuming process, particularly if your site features lots of different goods or services.
For this reason, it typically makes sense to create all of your attributes and variables in WooCommerce’s Products > Attributes section. You can then go through each product in question and assign them the relevant attributes and variables.
Even with these site-wide product options in place, you may occasionally need to create product-specific attributes and variables. To ensure you’re prepared for every situation, I’ll show you how to create site-wide product options. Then, we’ll cover creating unique attributes and variables for a specific product.
1. Set Site-Wide Product Options
Since it’s the most common method, let’s start with site-wide product options.
Step 1
Create a Product Attribute
Many WooCommerce stores use the same variables for multiple products, or even across their entire stock. For example, if you own a clothing company, then you might offer all your products in Small, Medium, or Large.
In this scenario, it makes sense to create all of these attributes and variables in advance.
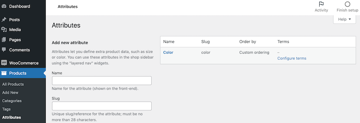
In the WordPress dashboard, navigate to Products > Attributes.
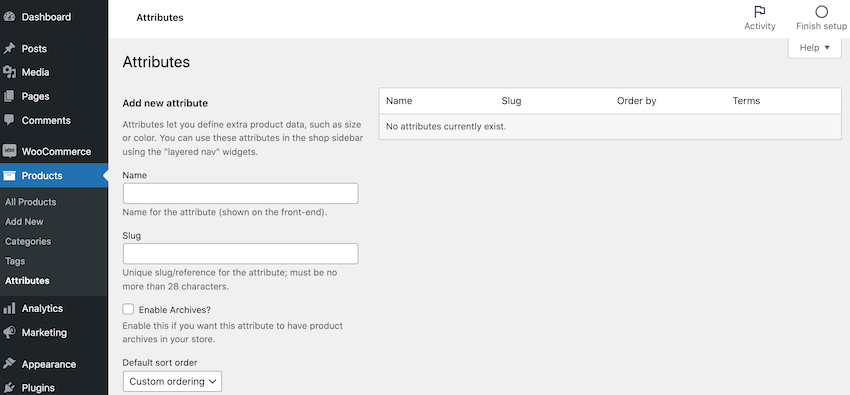
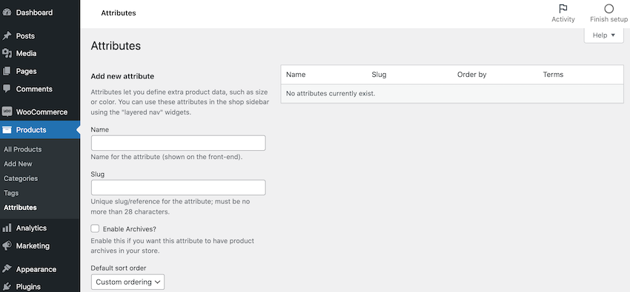
Give this attribute a descriptive name. This will appear on your website’s front-end. For example, if you offer your products in different colors, then you might name this attribute Color.
Next, assign a slug to this attribute. This must be no more than 28 characters. It usually makes sense to use the attribute’s name, but you’re free to create whatever slug you want.
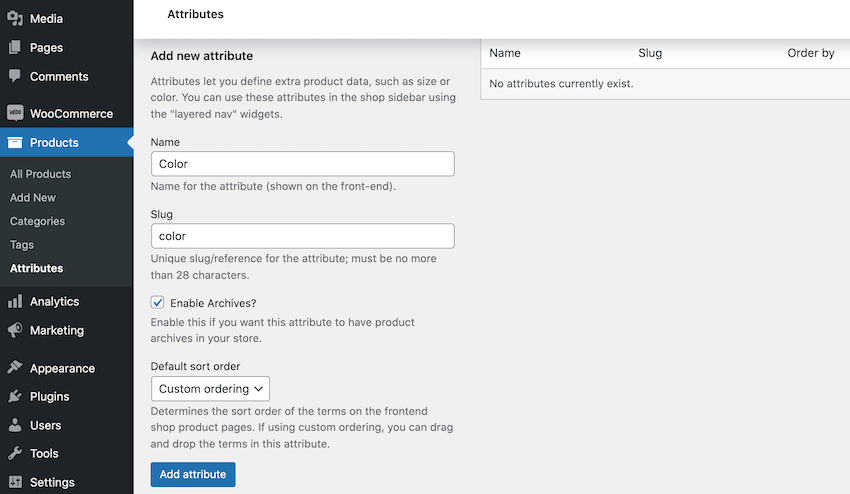
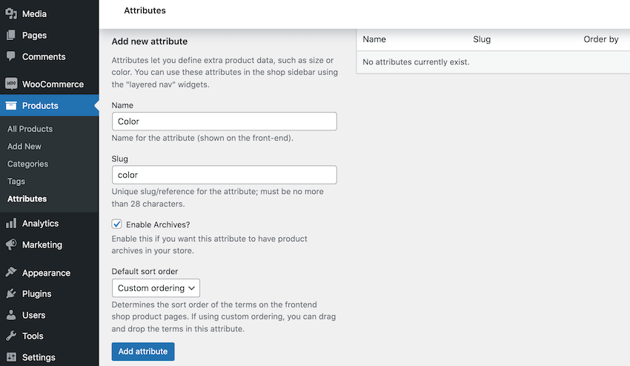
You also have the option to Enable Archives. If you select this checkbox, then WooCommerce will generate an archive page for all of the products that have this attribute.
To view a product archive, append the attribute’s slug to your domain name, followed by the variable. For example, imagine you run www.mystore.com and want to see all products that have the color attribute and blue variable. In this scenario, you’d head over to www.mystore.com/color/blue.
Product archives can be useful for inventory management, as they’re an easy way to view all products that have a specific characteristic. Alternatively, you might incorporate these archives into your store’s search functionality or menus.
There are more options to explore, but this is all you need to create a basic attribute. When you’re happy with the information you’ve entered, click on Add Attribute.
Step 2
Create Your WooCommerce Variables
Now, we need to assign some variables to this attribute. First, click the attribute’s accompanying Configure terms link.
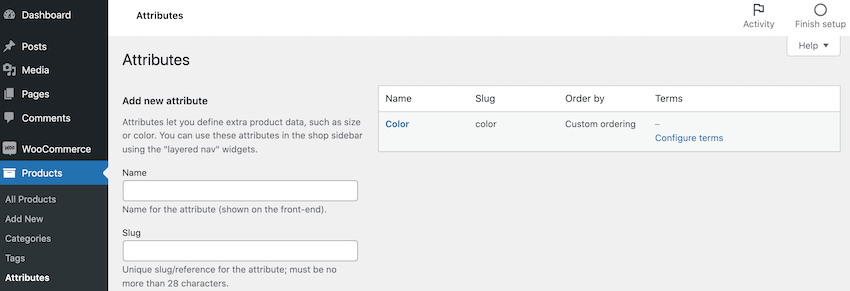
Give this variable a name and assign a URL.
You may also want to enter an optional description. Many WooCommerce themes don’t display this information prominently on their product pages. If you’re considering using variable descriptions, then it’s always worth checking how this information appears on your store—or even when it’s displayed at all.
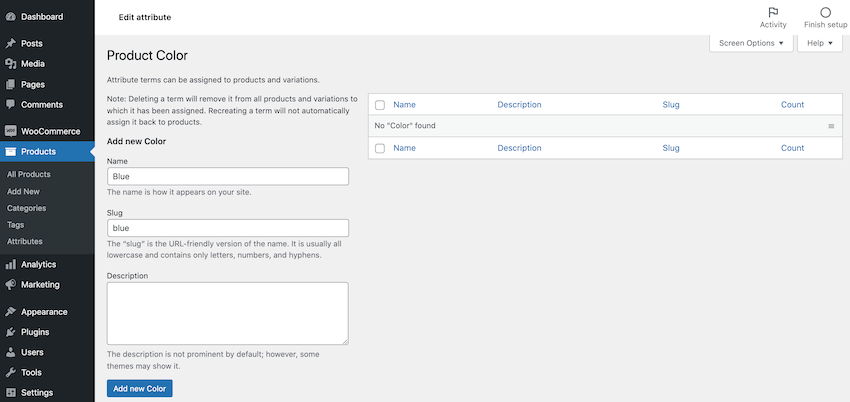
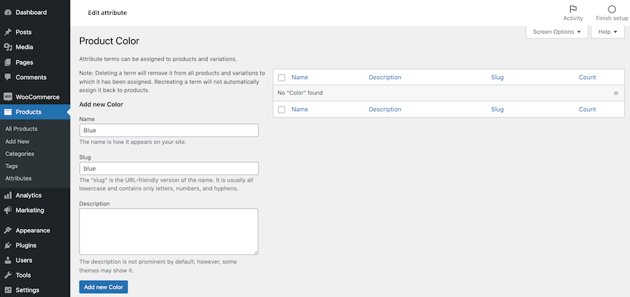
Finally, to create this variable, click on Add New…
You can now rinse and repeat to create all of the variables that you want to use with this attribute.
Step 3
Add These Attributes and Variables to a WooCommerce Product
Now it’s time to assign these attributes and variables to your products. Start by navigating to the product in question, and open it for editing. Scroll to the Product Data section, and open the first dropdown.
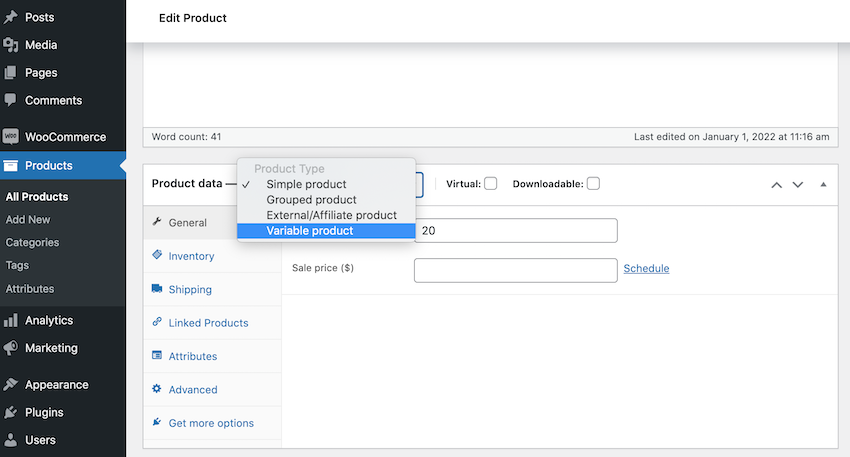

Select Variable Product. You should now have access to some new settings, including an Attributes tab. Give this tab a click.
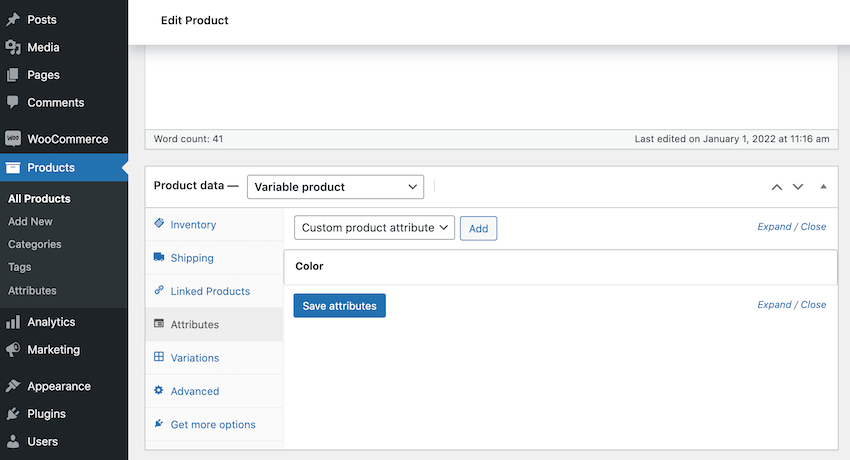
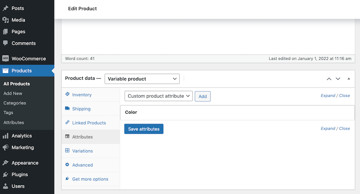
Here, you’ll see all of the available attributes. Find the attribute that you want to assign to this product, and give it a click.
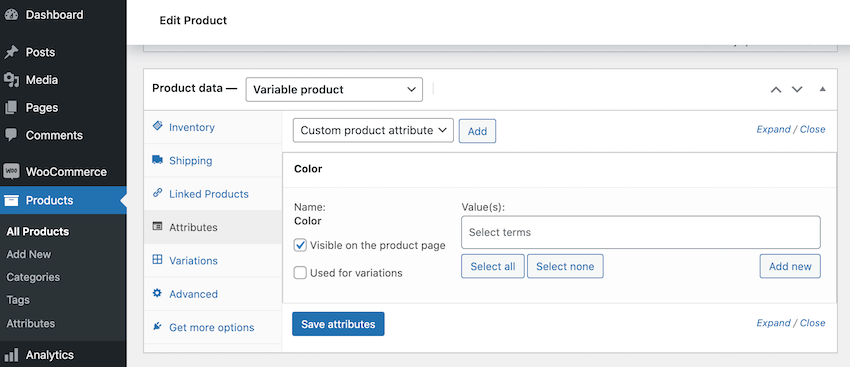
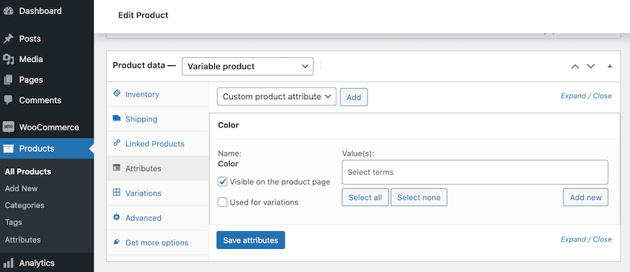
Next, click to open the Values dropdown. This contains all of the variables that you’ve created for this attribute.
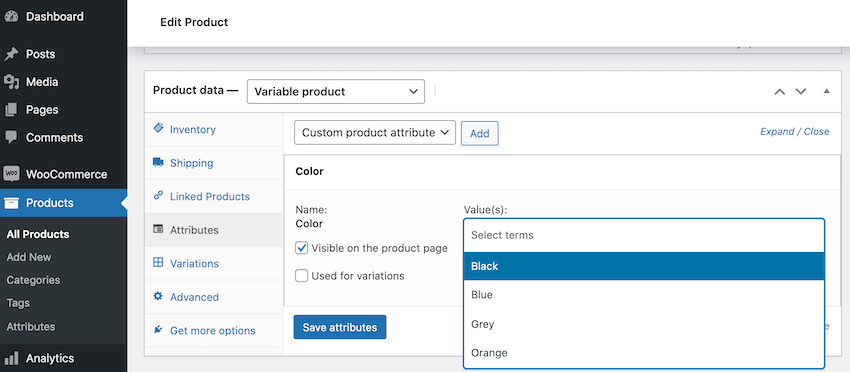
To add a variable to this product, select it from the dropdown. You can repeat this process to add multiple variables to this item.
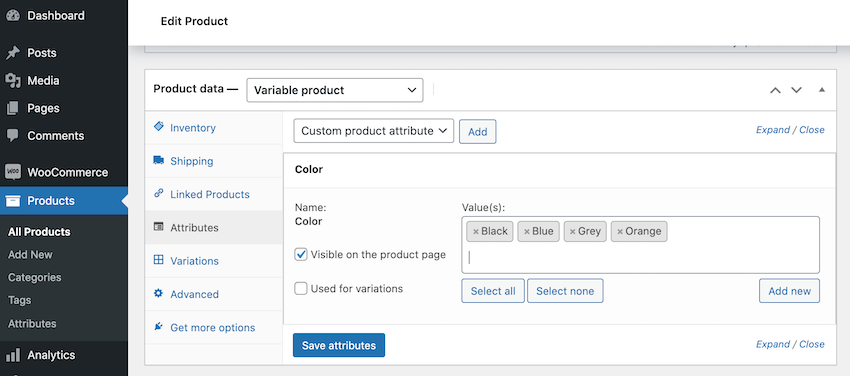
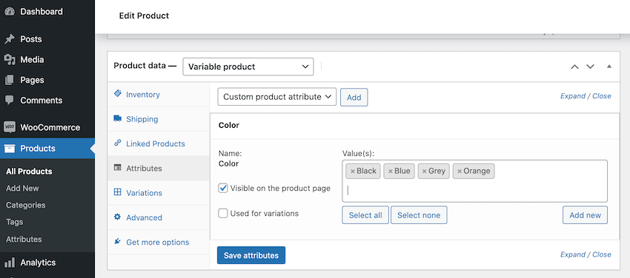
Finally, select the following settings: Visible on the product page and Used for variations.
When you’re happy with the attributes and variables that you’ve assigned to this product, click on Save Attributes.
Step 4
Configure Your Variations
Sometimes, you may want to adjust a product’s information based on the selected variable. For example, you might offer the same laptop with various screen sizes. You’ll typically want to charge more for the 16-inch, compared to the 14-inch.
Alternatively, you might offer an unpopular color at a discounted price, in an attempt to clear unwanted stock.
In this step, you’ll configure your variations. To get started, click on the Variations tab. This screen should contain a single dropdown, with Add Variation already selected.
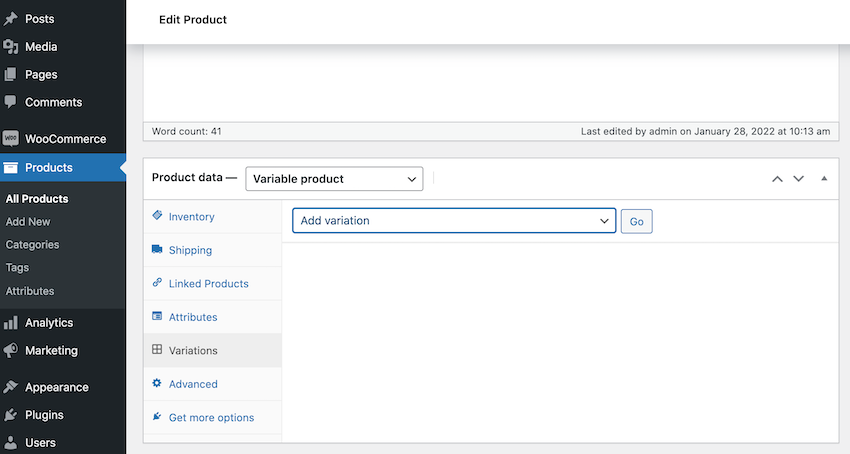
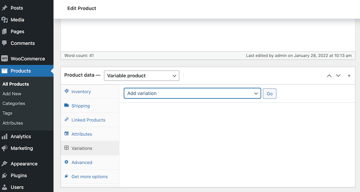
Now, click on the Go button. This adds a dropdown menu containing all of the available variables.
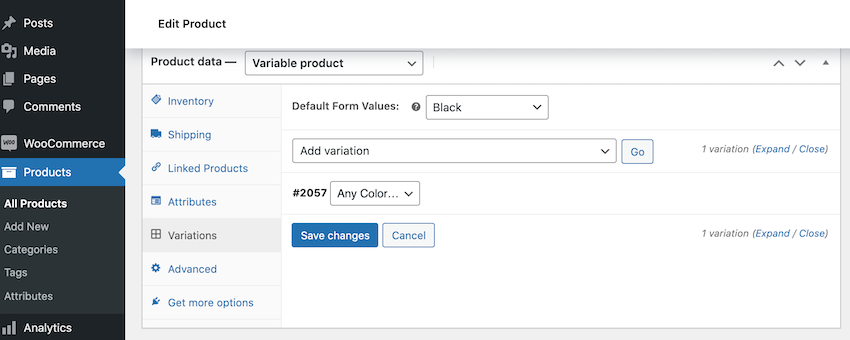
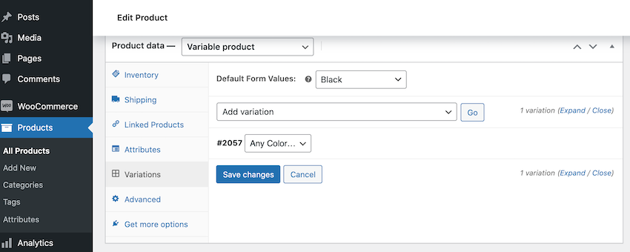
You may not want to use all of these variables. For example, you might be using the Color attribute, but currently only have blue and black T-shirts in stock, rather than the complete rainbow. If this is the case, then click on Add Variation and pick and choose the variables that you want to use with this particular product.
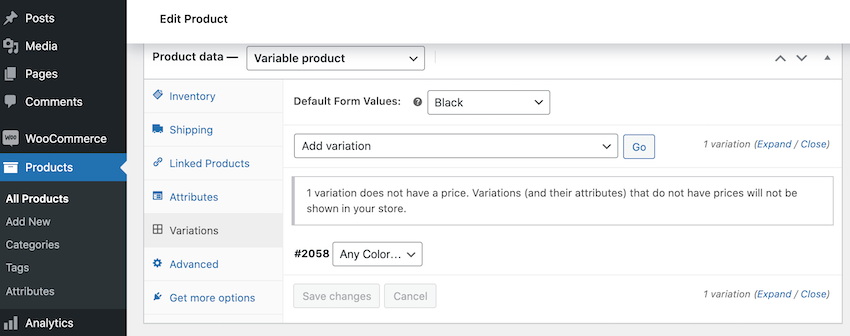
Alternatively, you can add all the available variables, by opening the dropdown and selecting Create variations from all attributes.
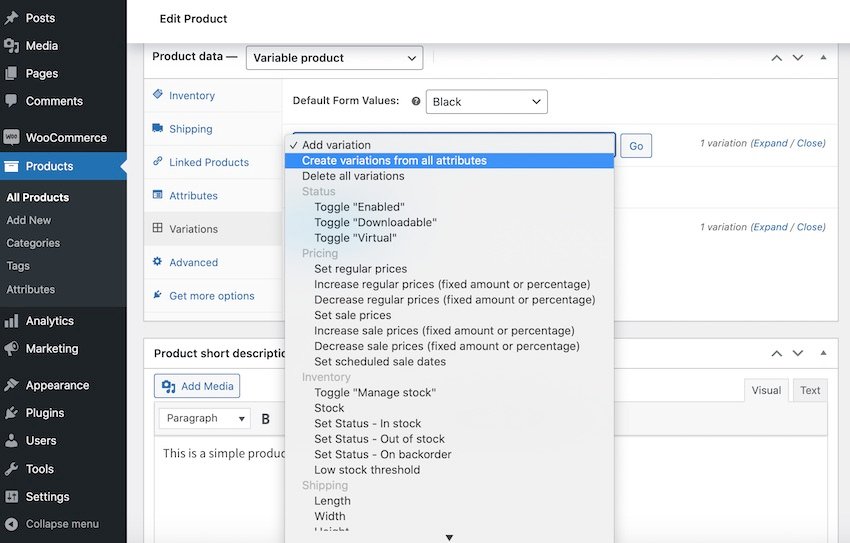
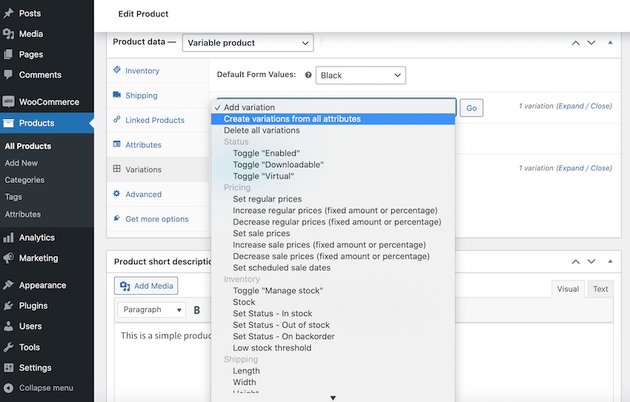
Next, we need to configure each of these variations. This may include setting a unique price, weight, shipping information, or dimensions.
To get started, simply click to expand the variable in question. You’ll now get access to everything you need in order to configure this variation.
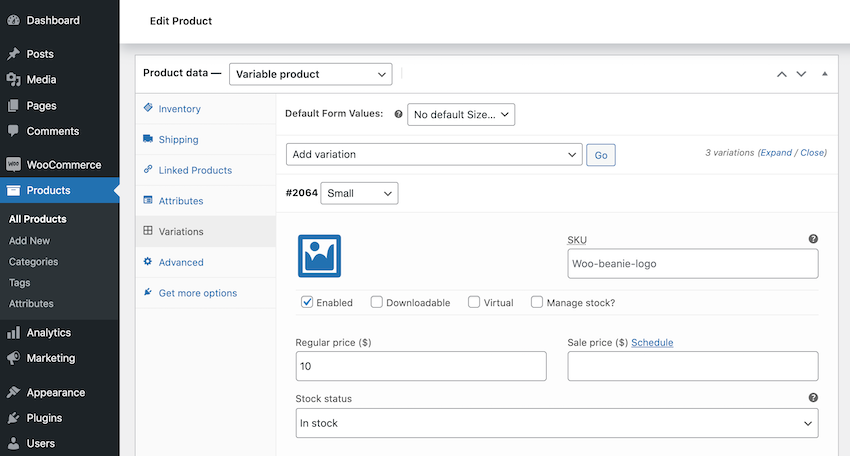
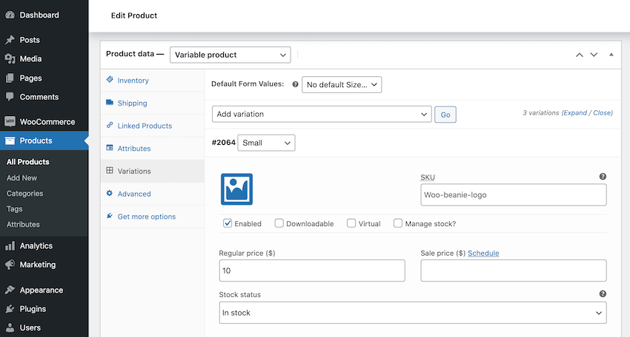
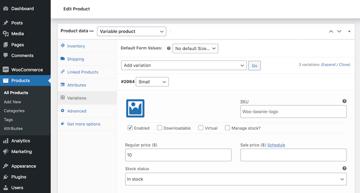
Rinse and repeat for each variation. When you’re ready to go live, either click on Update or Publish, depending on whether you’re working with a live product listing.
Now, whenever a customer visits this listing, they’ll have a few more options!
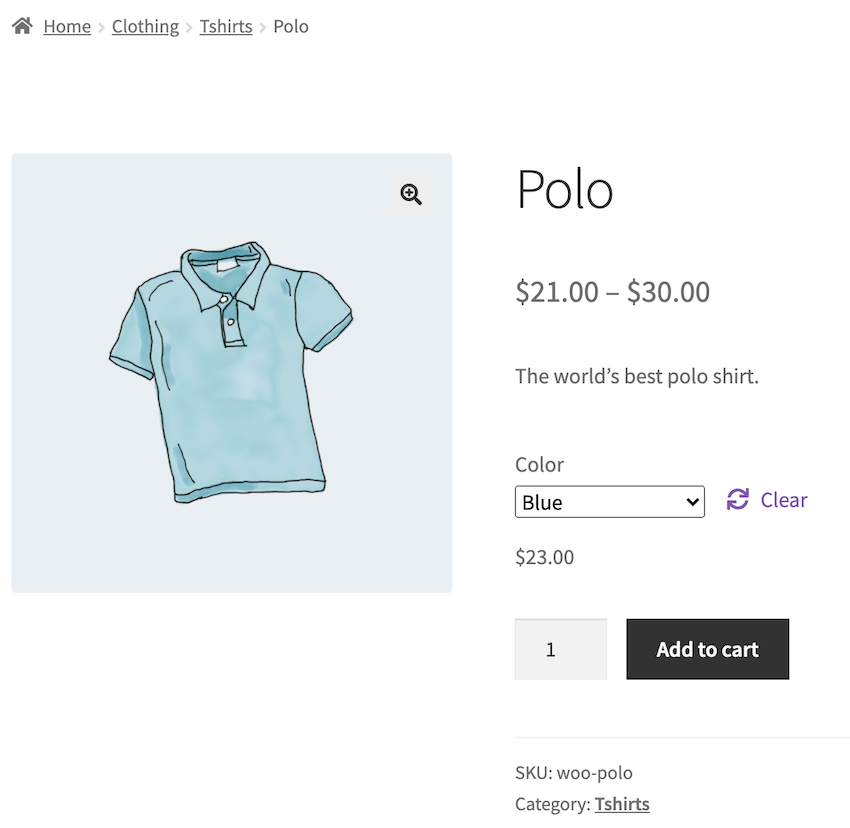
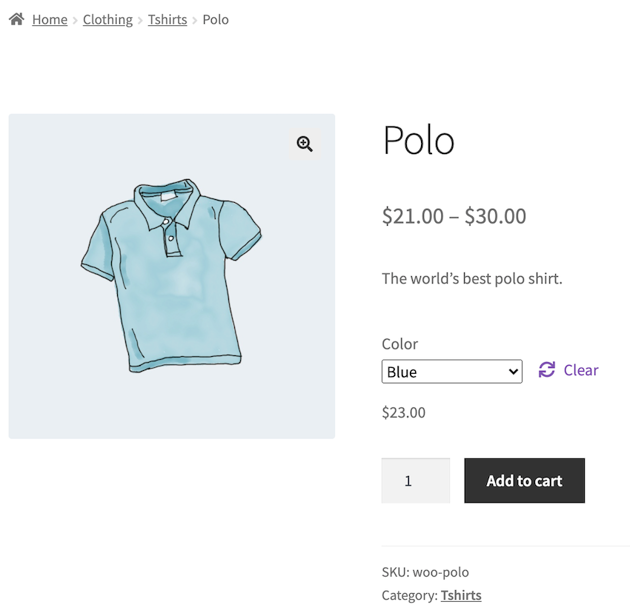
As the customer explores these variations, the product information will update automatically, based on their selection.
2. Create Product-Specific Options
Sometimes, you may need to create unique options for a particular product. In this scenario, you can create these attributes and variables directly from the product’s listing.
Just be aware that any options you create using this method won’t appear in the Products > Attributes menu. You’ll also be unable to assign these attributes and variables to any other WooCommerce items. If you suspect you may need to reuse these options, then it’s always better to create them in the Products > Attributes section.
Step 1
Create Your Attributes and Variables
So you’ve weighed up the pros and cons and decided that you need some product-specific options. The first step is creating these attributes and variables.
Navigate to the product in question, and open it for editing. Scroll to the Product Data section, open the first dropdown, and select Variable product.
Next, open the second dropdown and select Custom product attribute and click on Add.
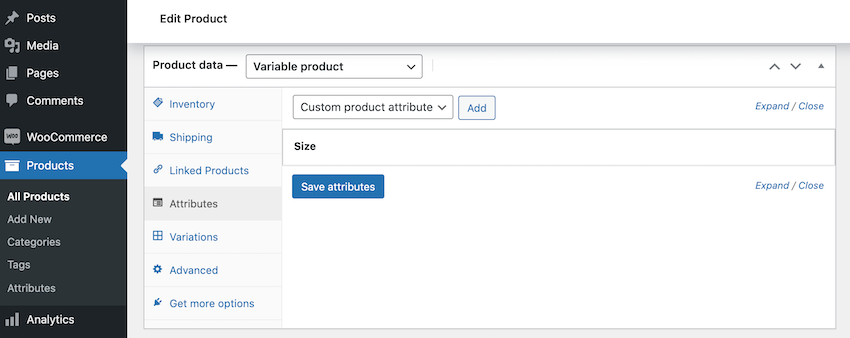
In the next section, give this attribute a descriptive title. Now, you can add all of this attribute’s variables, making sure to separate each variable with the pipe character.
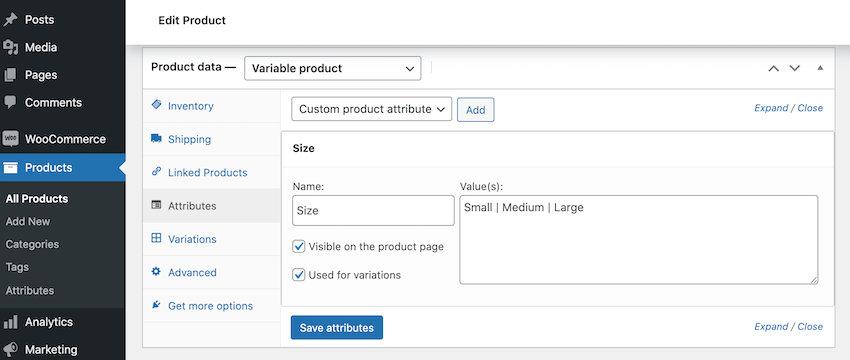
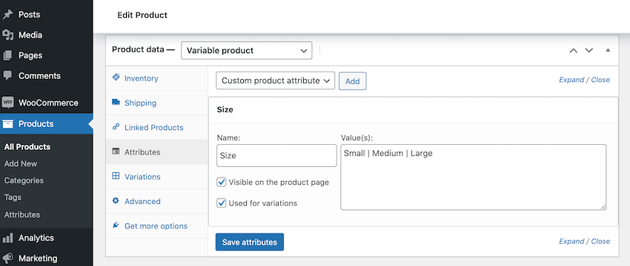
Select the following checkboxes: Visible on the product page and Used for variations.
Once you’re happy with the information you’ve entered, click on Save attributes.
Step 2
Create Your Product-Specific Variations
The next step is assigning your new attributes and variables to the product in question. We’ll also need to configure these different variations.
Select the Variables tab. To apply all of the variables that you just created, open the Add Variation dropdown. Then, select Create variations for all attributes > Go.
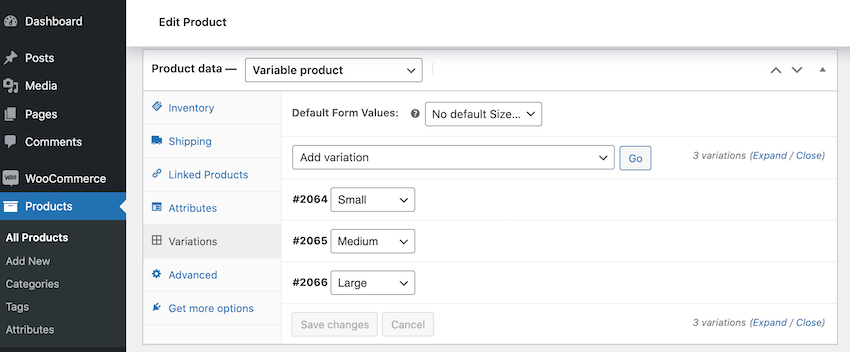
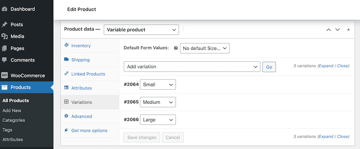
Next, click to expand each of these variables and specify any unique settings that you want to use. For example, you might create different prices or change the shipping methods that are available for each variation.
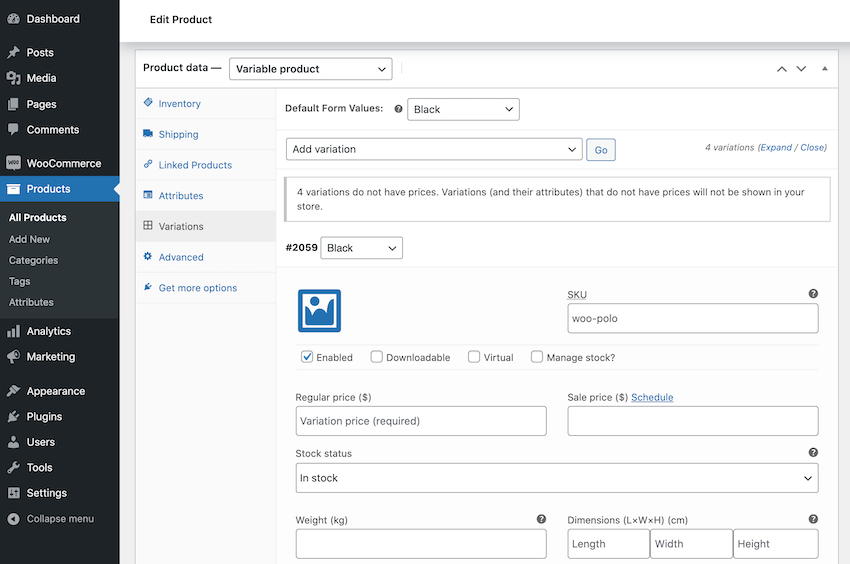
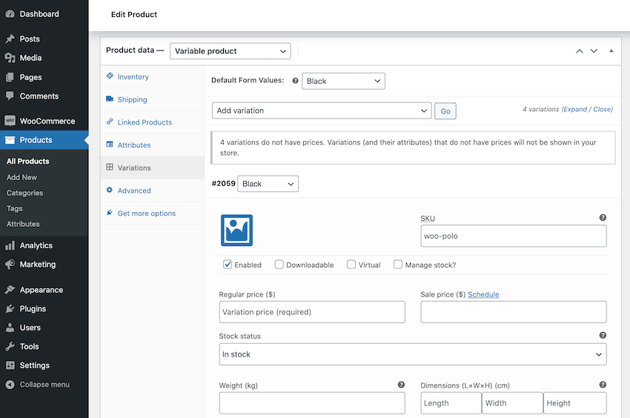
Once you’re happy with the information you’ve entered, click on the Save changes button. You can now either Update this page or Publish it as a new listing, as required.
Now, whenever a customer views this listing, they’ll have access to some unique variables that aren’t featured anywhere else on your site.
3. Add Even More WooCommerce Product Options
Out of the box, WooCommerce has everything you need to create lots of different product variations. However, when it comes to WordPress, there’s a plugin for everything—and WooCommerce product options are no exception!
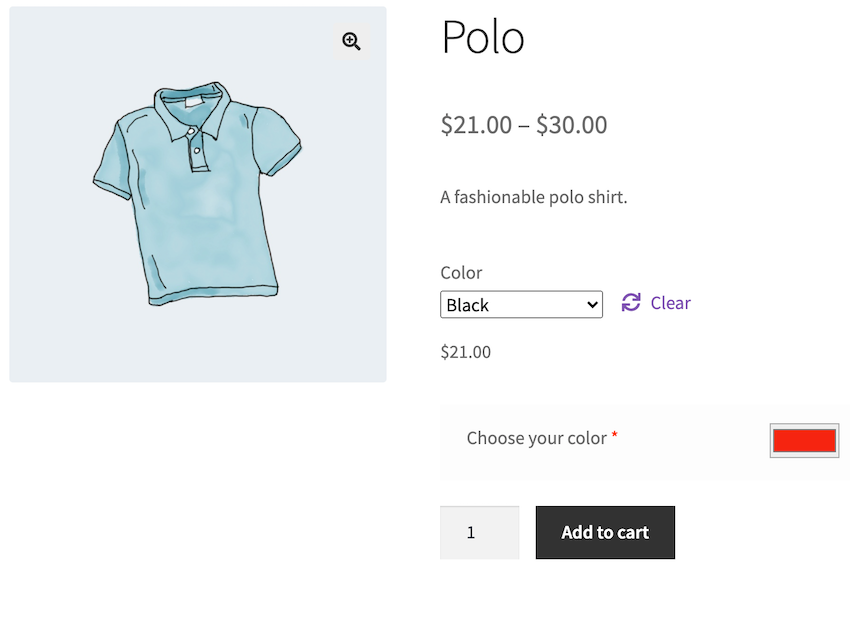
If you feel constrained by WooCommerce’s built-in system of variables and attributes, then you may want to take a look at Extra Product Options. This free plugin promises to help you create more feature-rich product pages by adding custom fields, color pickers, dropdowns, and checkboxes to your listings.
You can use these elements to create some unique product options. For example, a color picker could give shoppers complete freedom to choose their favorite shade:
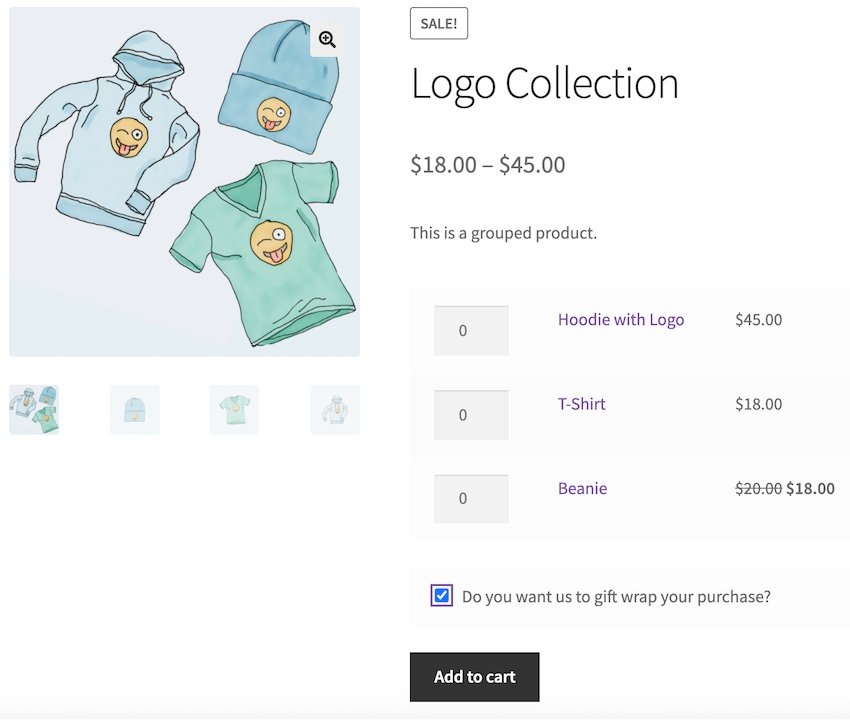
Alternatively, you might use checkboxes to offer an optional gift wrapping service:
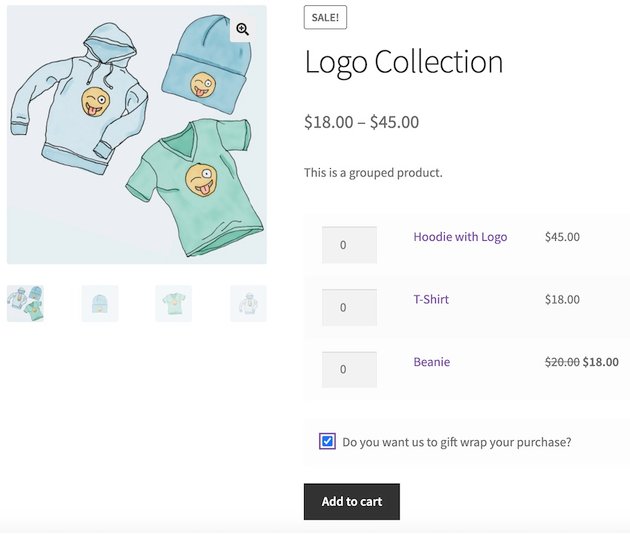
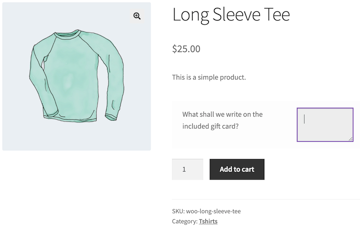
If you want to offer a truly personalized experience, then a text field is a great way to collect information from the customer. This might include a message that you’ll add to the accompanying gift card:
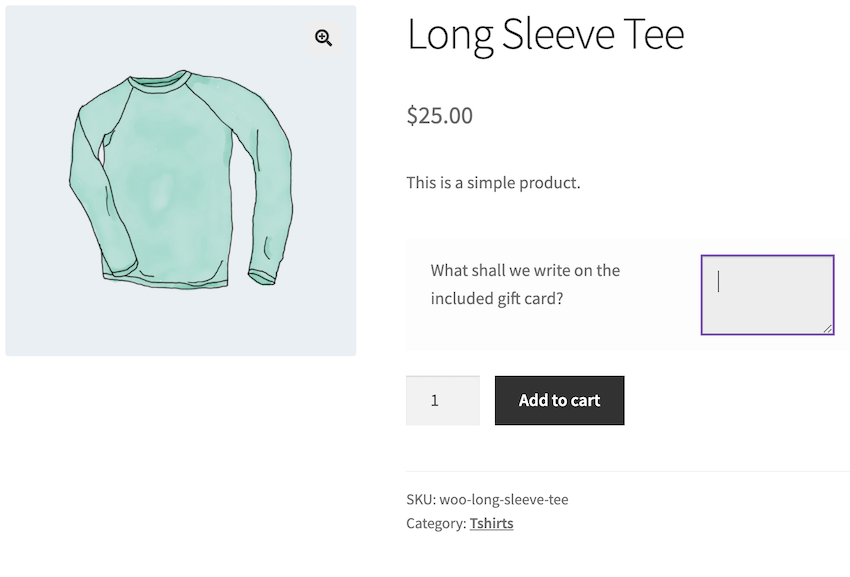
After installing and activating this plugin, navigate to Products > Add Extra Product Option. Then, click on Add new section.
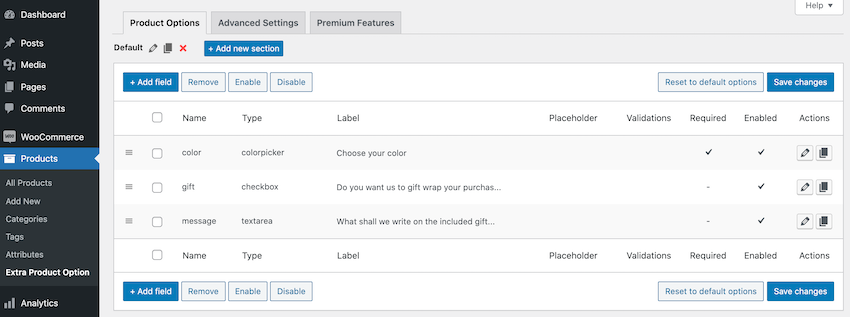
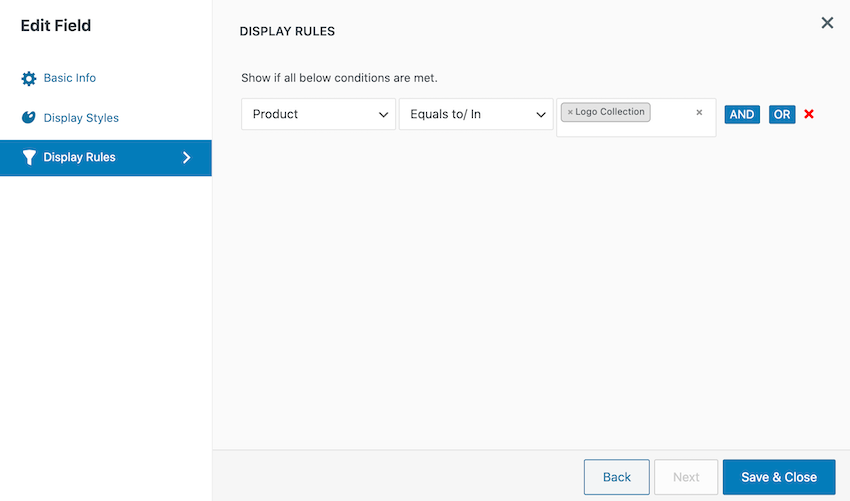
You can now create a custom field by following the onscreen instructions. As part of this process, you can specify the products or categories where you want to display these options.
By experimenting with this plugin, you can create some truly unique product options. This includes plenty of settings that WooCommerce doesn’t support out of the box.
Conclusion
Life would be boring if everyone was the same—and you may want to extend that philosophy to your WooCommerce store!
In this article, we saw how you can offer variable, customizable, and even personalized WooCommerce products. By taking advantage of this plugin’s built-in attributes and variables, you can give your audience more choices. This is great for the customer experience.
Depending on your products, variations may even be a must-have. After all, a clothing store that only sells items in one size is unlikely to win over the masses!