Today, we’ll discuss how you could create thumbnail images in PHP with the help of the GD library.
When you’re working on projects that are related to media, more often than not you will need to create thumbnails from the original images. Also, if you’ve enabled image uploads on your website, it’s essential that you should never display the original images that are uploaded by users. That’s because images uploaded by users could be of large size and will not be optimized for web display. Instead, you should always resize images before they’re displayed on your website.
There are different tools that you can use to resize images in PHP, however we’re going to discuss one of the most popular options among them: GD library. It’s one of the easiest ways to create image thumbnails on the fly.
Prerequisites
In this section, I’ll go through the prerequisites for the example which will be discussed later in this article.
Firstly, you should make sure that the GD library is enabled in your PHP installation. In a default PHP installation, the GD library should already be enabled. If you’re not sure about whether it’s there, let’s quickly check.
Create the info.php file with the following contents.
<?php
phpinfo();
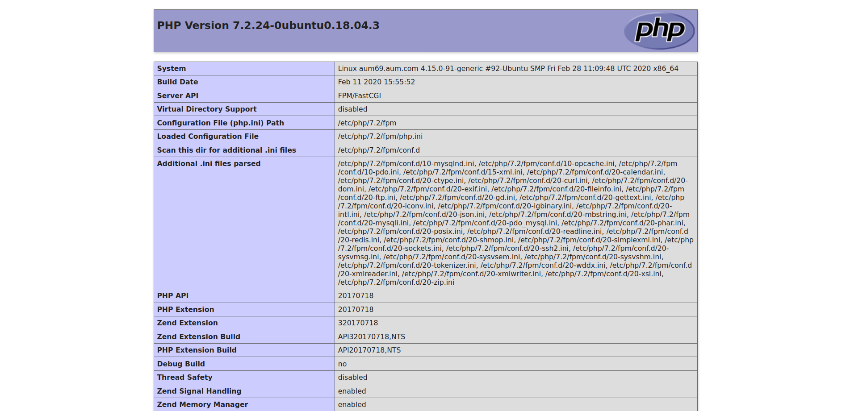
Upload this file to the document root of your website. Next, open the https://your-website-url/info.php URL in your browser and it should display the PHP configuration information as shown in the following screenshot.

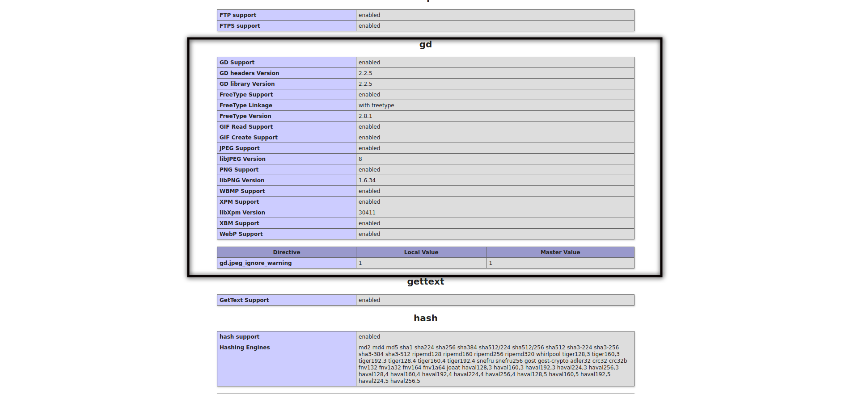
Now, try to find the gd extension section. If it’s installed and configured in your PHP installation, you should be able to find it as shown in the following screenshot.

If you don’t find it, it means that gd is not installed on your server. In this case, you just need to install the gd extension, and you’re good to go. If you want to install it yourself, take a look at my article explaining how to install specific PHP extensions on your server. You’ll need to have root access to your server shell in order to be able to install it yourself.
Once you’ve installed and enabled the gd extension, it’s time to look at the real world example and that’s what we’ll discuss in the next section.
A Real World Example
In this section, we’ll go through a real world example to demonstrate how you could create image thumbnails in your PHP projects.
Firstly, we’ll create the thumbimage.class.php file which contains the ThumbImage class and it holds the logic of creating thumbnail images. Next, we’ll create the example.php file which demonstrates how to use the ThumbImage class.
The ThumbImage Class
Go ahead and create the thumbimage.class.php file with the following contents.
<?php
// thumbimage.class.php
class ThumbImage
{
    private $source;

    public function __construct($sourceImagePath)
    {
        $this->source = $sourceImagePath;
    }

    public function createThumb($destImagePath, $thumbWidth=100)
    {
        $sourceImage = imagecreatefromjpeg($this->source);
        $orgWidth = imagesx($sourceImage);
        $orgHeight = imagesy($sourceImage);
        $thumbHeight = floor($orgHeight * ($thumbWidth / $orgWidth));
        $destImage = imagecreatetruecolor($thumbWidth, $thumbHeight);
        imagecopyresampled($destImage, $sourceImage, 0, 0, 0, 0, $thumbWidth, $thumbHeight, $orgWidth, $orgHeight);
        imagejpeg($destImage, $destImagePath);
        imagedestroy($sourceImage);
        imagedestroy($destImage);
    }
}
Let’s go through the createThumb method in detail to understand how it works.
The createThumb method takes two arguments, the destination image path where the thumbnail image will be saved and the thumbnail width which will be used for resizing. The thumbnail width parameter is optional, and if you don’t pass any value, it’ll take 100 as the default width.
Firstly, we’ve used the imagecreatefromjpeg function which creates the image resource in memory out of the source image path which was initialized in the constructor. It’ll be used later on when we’ll actually create the thumbnail image. It’s important to note that we’ve used the imagecreatefromjpeg function, as we want to resize the jpeg image in our example. If you want to resize png, gif or bmp images, you could use the imagecreatefrompng, imagecreatefromgif or imagecreatefromwbmp functions correspondingly.
Next, we’ve used the imagesx and imagesy functions to measure the width and height of the original image. It’ll be used when we’ll actually resize the original image.
Once we’ve got the width and height of the original image, we use it to derive the thumbnail image height. If you’re aware of how to calculate the aspect ratio, this should look familiar to you. We’re using the aspect ratio to calculate the thumbnail height based on the provided thumbnail width to make sure that the resulting image isn’t distorted. This is one of the most important factors which you should consider while creating thumbnail images: a distorted thumbnail is confusing and unprofessional looking.
Next, we’ve used the imagecopyresampled function which actually does the heavy lifting of creating the thumbnail image. It copies and resizes part of the image with resampling based on the provided parameters and generates the thumbnail image in memory.
imagecopyresampled($destImage, $sourceImage, 0, 0, 0, 0, $thumbWidth, $thumbHeight, $orgWidth, $orgHeight);
In the imagecopyresampled function, initial two arguments are destination and source image resources. The third and fourth arguments are x and y coordinates of the destination point. The fifth and sixth arguments are x and y coordinates of the source point. The next two arguments are used to specify the width and height of the thumbnail image which will be created. And the last two arguments are the width and height of the original image.
Finally, it’s the imagejpeg function which saves the in-memory thumbnail image to the desired path on the disk. The $destImage variable holds the thumbnail image source, and we’ve saved it to the path which is initialized in the $destImagePath variable. You need to make sure that this directory is writable by your web server, otherwise the thumbnail image won’t be saved on the disk.
Again, since we want to create a jpeg thumbnail image, we’ve used the imagejpeg function. If you want to create gif, png or bmp images, you could use the imagepng, imagegif or imagewbmp functions.
Last but not least, it’s necessary to free memory associated with image resources. We’ve used the imagedestroy function to achieve this.
The Example File
Now let’s see how you could use the ThumbImage class to create thumbnail images. Go ahead and create the example.php file with the following contents.
<?php
// example.php
require "thumbimage.class.php";

$objThumbImage = new ThumbImage("/web/uploads/orig.jpg");
$objThumbImage->createThumb("/web/uploads/thumb.jpg", 125);
First, we include the required class file.
Next, we create an instance of the ThumbImage class and assign it to the $objThumbImage variable. It’s important to note that we’ve passed the path of the original image file as the first argument to constructor when we instantiated the ThumbImage class.
Finally, we’ve used the createThumb method to create the thumbnail image. In the createThumb method, the first argument is the thumbnail image path and the second argument is the width of the thumbnail image. Of course, if you don’t pass the second argument, the default width of 100 will be used during resizing.
Go ahead and run the example.php file and it should create the thumbnail image.
If there are any issues, and the thumbnail image is not created, you should check that you have the correct directory permissions in the first place. In most cases, that should fix it. If the problem persists, make sure that the source image exists and you’ve provided the correct path to the ThumbImage class. Of course, you could always reach out to me if you’re facing any specific issues.
Conclusion
So that’s how the GD library allows you to create image thumbnails in PHP. As we discussed earlier, you should never display original images on your website. Generally, you will want to create different versions of images like small thumbnail images for listing pages, medium thumbnail images for the introduction page, and large versions for the zoom feature.
In this article, I demonstrated how you could use the GD library to create thumbnail images in PHP. We also built a real world example to understand the different functions provided by the GD library.
Learn PHP With a Free Online Course
If you want to learn PHP, check out our free online course on PHP fundamentals!
In this course, you’ll learn the fundamentals of PHP programming. You’ll start with the basics, learning how PHP works and writing simple PHP loops and functions. Then you’ll build up to coding classes for simple object-oriented programming (OOP). Along the way, you’ll learn all the most important skills for writing apps for the web: you’ll get a chance to practice responding to GET and POST requests, parsing JSON, authenticating users, and using a MySQL database.

