
Reader caution: this article was posted on April 1st 2016 and should not be taken seriously.
Hi there dear readers, you may recognize me. I’m a frequent
contributor to this site, and it’s time for me to come clean. I’m blowing the
whistle. Today, I’m pulling back the curtain and letting you in on a very well-kept
secret. The majority of Photoshop training available on the internet is part of
a huge conspiracy to keep people from learning the REAL techniques of how to
use this program. Why? So you don’t ever actually figure it out and have to
keep coming back to them for more! Well, I’ve done it, dear readers. I’ve broken the sacred vow and I’m revealing the hoax to you now. I’m
going to share them with you here and I ask you to spread this as far as you
can, as fast as you can. We all know it’s just a matter of time before they
come find me and shut me down for revealing the TRUTH! What you will read below are ten of the best kept Photoshop secrets that they don’t want you to know!
1. Always Edit Directly on the Background Layer
Even though most so-called “experts” agree that this is poor
form, that’s only because they are utter novices who make mistakes as often as
they blindly follow their news media! Once you come to the realization that everything you do to an image will always be an improvement, there will never be any need to go back to its previous imperfect
state. NEVER!
So that menu Layer > New > Create New Layer via Copy, with
its oh-so-snooty Control-J keyboard shortcut? (Do you realize what that “J”
stands for? “JOKE!” That’s what! They are mocking you and me, dear
reader!) Forget it exists! Let it disappear from the public consciousness just
like JFK’s real killer.
Some will contend that using multiple layers
easily creates more flexibility and ultimately a more practical workflow. But
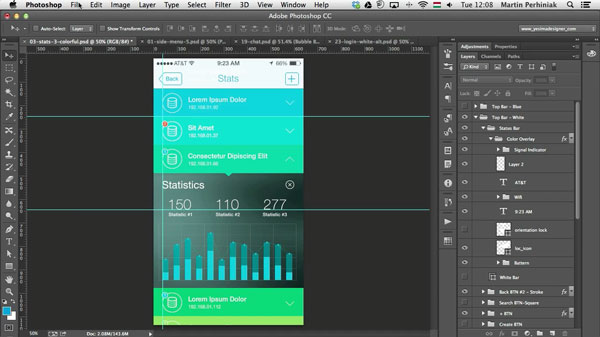
have you ever seen how many layers go into some of these projects!? This one
here is crazy, it’s got dozens of layers.
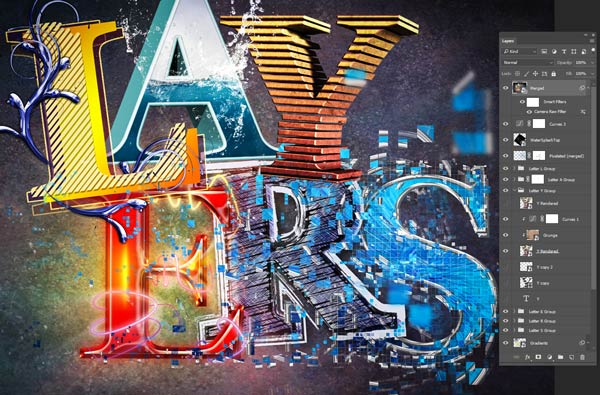
Look how needlessly complicated that
is. If you were to just use a single background layer, you can actually close
the Layers panel and not ever have to worry about it. Doesn’t that sound
simpler? Of course it does, but only to us that haven’t been brainwashed by
the establishment!
2. Stop Using Layer Masks! Use the Eraser!
This is one of those Photoshop myths that
gets perpetuated continuously, sort of like the Illuminati membership. Certain
folks want you to believe that Layer Masks are a good and beneficial feature.

Yet we all know just from our own good and common sense that “masks” are the
opposite of truth. Masks are meant to hide faces, identity, and recognition. Can it be any more obvious that they don’t want you to learn
the truth!? Why else would they be so adamant about using a Mask?
This belief
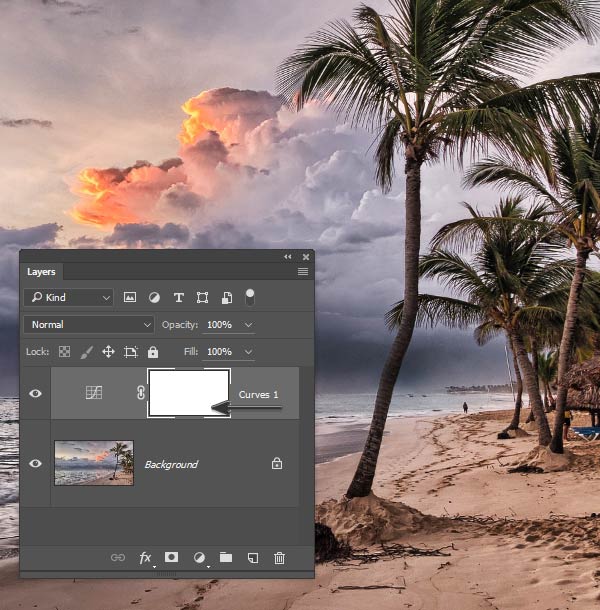
is so pervasive that newly added Adjustment Layers already come pre-masked! Just try for yourself, go to Layer > New Adjustment Layer and pick any adjustment layer to add. Then take a look at the Layers panel, see that little white box next to the adjustment layer? That’s a mask you never asked for!
Folks, think with me just for a moment. When you are using
regular pencil and paper (still the most untraceable media ever invented, by
the way) and you need to remove a part of a drawing, what do you do? Why, you
use the eraser of course! Everybody knows that.
I’m telling you that there’s a
good reason the Eraser Tool (E) is one of the foundation tools for Photoshop.
It’s as natural and honest as the Brush Tool (B). It’s a beautiful tool lacking deceit
of any kind. And refreshingly uncompromising in its use. Erased pixels stay
gone! Not like the layer mask where the layer pixels are never actually
removed, simply hidden depending on the brightness of the mask colors. The
darker (and more sinister) the mask, the more it hides and conceals. Fitting,
isn’t it? It’s a wonder that they think we won’t notice these things.
3. The Magic Wand Is “Magic” for a Reason
This
tool gets so much hate from the Photoshop training establishment, and that
alone should make a person wonder what’s going on behind the scenes. Any time I hear “No,
don’t look at this, look over there,” I immediately wonder what it is that they
want to hide. And that’s the case with this gem of a selection tool. In fact, it’s one of the few tools in
Photoshop that is appropriately named! That “Quick” Selection Tool, really? If
you have ever used that piece of tech you know that it is anything but Quick!
Yet the Magic Wand Tool (W) really is magical. Just one click and Avada Kedavra! A
complete and perfect selection is made, based on pixels similar to the one you
click on.
But what about the tool’s tendency to also select pixelated fringe from other areas of the image? That builds character! It’s good for you!
Why would you ever need any other
selection technique? But just look at the courses and tutorials all wanting you to
forsake the most perfect selection tool and try some other means—they are all
wanting you to look away from where the truth hides. It’s classic misdirection! It’s so obvious they are trying to hide the best selection tool in the program.

4. Keyboard Shortcuts Are Misdirection
If you’ve read through many
Photoshop tutorials, then it is almost certain you’ve come across an instruction
to use a keyboard shortcut to accomplish a specific task. For example,
Control-J creates a new layer the same as the menu item Layer > New >
Layer Via Copy.
This is another classic example of misdirection that hides something important! If you always use the keyboard shortcut and never dig into
that Layer > New menu, you would never even see that there are other options
there. Like Layer Via Cut. This option actually erases the selected pixels from
the current layer and places them on a new layer. That would otherwise be a
two-step operation! Ha! We see what you are up to now, you keyboard-shortcut-loving
zealots!
Did you know that Photoshop even allows you to create your own custom keyboard shortcuts!? Take a look under Edit > Keyboard Shortcuts (Alt-Shift-Control-K). I guess they think you might want to hide things from yourself!
5. The Default Layer Styles Are Perfect
OK, even I won’t deny that layer styles are fantastic! They are as valuable to Photoshop users as that Texas TV studio was to the people who staged NASA’s moon landing.
What they don’t tell you, though, is that there is absolutely no good reason to adjust their default settings. Adobe techs have spent precious development time to hone and refine those default settings, and they are default for a reason. They have even evolved over time—did you know the default color for the Stroke style was red? Do you know what it is now? It’s black! (which just reeks of a cover-up, I know) But here’s the thing, those default layer styles are perfect just the way they are! Sure you could start exploring the endless possibilities provided by the hundreds of sliders, options, and checkboxes. And there is plenty of instruction available to encourage you to that end.


Did you see those tutorials? Did you see how much time can be spent fiddling with those style controls? Think about it this way, every moment they get you to spend finding the perfect light angle for a Drop Shadow is a moment that you are not watching what they are really doing! Don’t fall for their ploys—if you need a drop shadow, just check the Drop Style box on the Layer Styles and move on!
6. Layer Names Are Just a Devious Way to Capture Your Data
If I haven’t fully convinced you to stop
using these infernal layers, at least grant me a favor of not wasting time
giving each and every one a unique name. You might as well just spell it out
for the Graphics Authority exactly what you are doing! When they inevitably
get a hold of your files and your layers are all well organized with color-coded groups and descriptive layer names… it’s like you just drew them a map!
The
program even encourages this. Did you realize that if you are naming one layer,
and push the Tab button, Photoshop automatically puts your text entry in place
to rename the next layer? Go ahead and try it! It’s downright spooky just how
easy they made that. Which has to make you wonder why they are so eager to have
your layers renamed, doesn’t it?!
So here’s my suggestion, dear readers. You
could just leave your layers with their default names of Layer 1, Layer 2, copy
of Layer 2, etc. Or you can intentionally misname them to throw off the Men in
Black Glasses. If you have a headline
text layer, consider naming it “Background Texture.” If you are using a stock
photo, don’t ever include the stock reference name in the layer name, (you might
as well give them the password to your encrypted hard drive too!). Instead,
consider naming it something like “Snorkel Full of Purple Mayonnaise”

Sometimes I even write my layer names backwards just to through off the auto-readers!
7. Long Live the Mouse
What are you using right now to scroll along
this article? Is it the touch screen on your phone? (If so, please don’t be
driving too!) or is it the scroll wheel on your mouse? Maybe it’s the trackpad
on your laptop?
In any of those cases, please carry on—you clearly understand
the basic principles of digital screen navigation. Chances are that you use
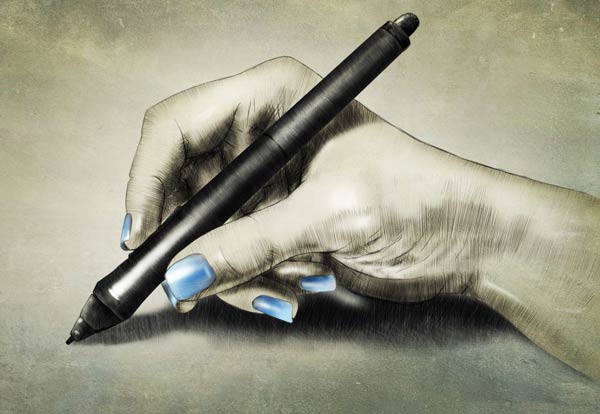
Photoshop with the same input device (with the exception of the phone screen, of course, because that’d just be silly). Were you aware of the alternate form of input that some trainers are
attempting to push on you? The pressure sensitive tablets?

They want you to actually
use a pencil-like stylus, like some kind of barbarian, to try and “draw” in
Photoshop. Can you imagine? You’ve already got the world’s most perfect
pointing device comfortably in the palm of your hand, and they want you to pick
up a plastic pencil thing instead? And
it’s not like the mouse doesn’t work with the brush tools in Photoshop—it
totally does! But they attempt to entice you with hand-painted artwork in hopes
you might be persuaded to release your grip on your mouse and keyboard.
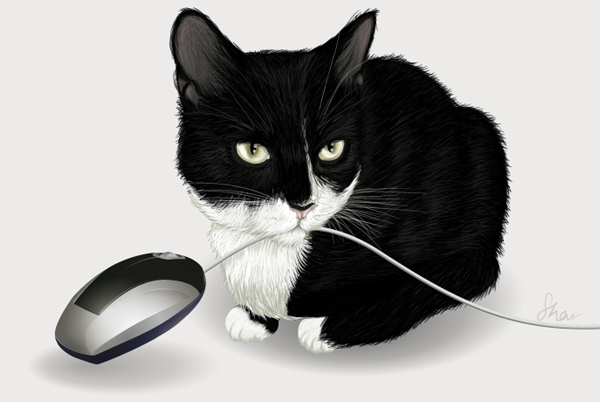
Why would they want you to release your grip on your mouse and keyboard? Because those are
your most fearsome weapons! Those are the tools we have used for years to
assault the establishment and uncover the truth! Be strong and fearsome, internet
warrior, let them take your mouse when they pry it from your cold, dead hands!
8. “High Resolution” Is Just a Distraction
Photoshop as an application is primarily
concerned with images—that’s what it does. And it does it well. But certain “experts”
want you to believe that you can’t just use any image for any purpose. They
will talk ad nauseam about “dpi” and “ppi” and how screen displays are not as “high
resolution” as their dusty old printing technology. They will try to convince
you that you can’t use a regular image from the internet because it’s too small
or “low resolution.”
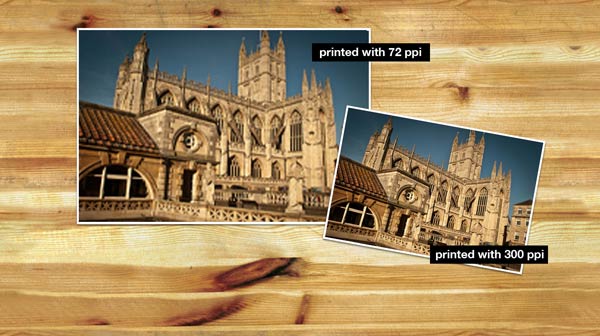
But haven’t they seen almost any TV show or movie? We live in the age of image enhancement. Image resolution is apparently infinite! So why are they working so hard to convince us otherwise? Because they simply want to control the flow of information from the internet, which we know is the Source of All Knowledge, and by convincing you that images found on the internet are flawed in some way, they control the way you use them.
So here’s how to use Photoshop to overcome
their alleged “not high enough resolution” argument.
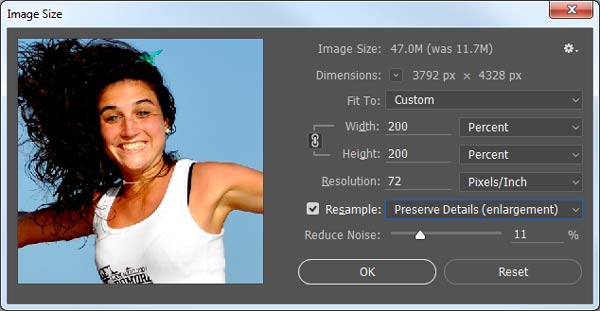
Step 1
Open an image in Photoshop and go to Image
> Image Size. Set the Width and Height size to 200%. Make sure the Resample box is checked and the option is set to Preserve Details (enlargement).
Step 2
Go to Filter > Sharpen > Unsharpen
Mask and adjust the sliders to remove any fuzziness or distortion caused by the
resampling.
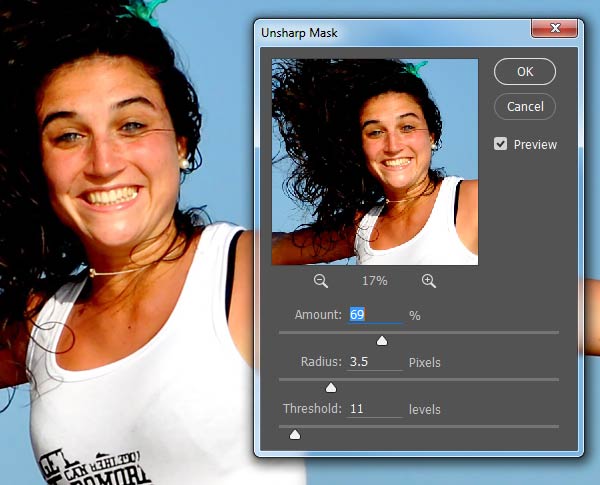
And there you have the same image at twice
the size it was originally! No need for High Resolution!
9. Put Photoshop on a Memory Diet
Did you realize that Photoshop is a huge
consumer of memory? The resources it demands from your machine are massive.
There are entire articles on how to tweak your configuration to give Photoshop
the optimum resource it “needs” to operate properly.

So the question I need you to consider, is
what is this program doing with all that extra memory and CPU power? Obviously,
the clear answer is that it is being used to capture your keystrokes, menu
selections, and screen shots. And then reporting all those things to a
nefarious government agency.
What’s that? You don’t think that Photoshop is
keeping these kind of secrets from you? I can prove to you that Photoshop keeps secrets! There’s even a secret splash screen! Watch this: Close and Launch
Photoshop again. Then hold down the Control key and go to Help > About
Photoshop CC… and behold:
Yes, that’s a hidden splash screen. What other secrets do you think the program is hiding?
So, what can you do about this? It’s quite
simple really, Photoshop can’t perform these clandestine functions without resources.
So go to Edit > Preferences > Performance.
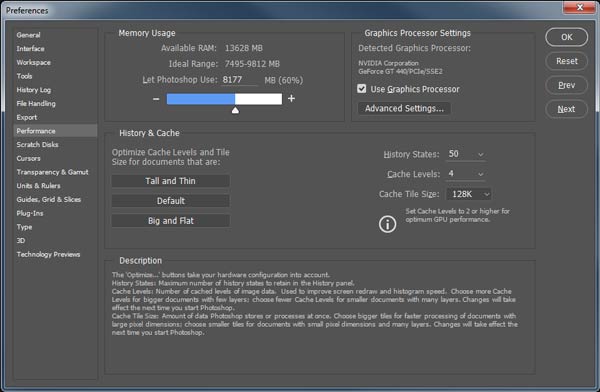
See that slider bar under memory usage? That controls how much memory Photoshop can use. The further to the left you push it, the fewer resources Photoshop has to spy on you!
10. Save File Space by Flattening
Have you ever noticed just how huge your psd files
can be? I’ve worked on some projects that were over a gigabyte in file size.
That’s insane! It takes forever to load and eats up precious space on your hard
drive. And if you want to send it to somebody, you can forget about email!
Putting it on a thumb drive means waiting while a progress bar slowly crawls
across the screen. Ugh!
If you’ve ever
had this problem, I’m happy to tell you that there’s a guaranteed solution that
will cut down your file size to a fraction of its original size. This technique
is so secret that you won’t find it advised by anybody else. You will only see it
here! It’s with a wonderful little feature called “flattening.” This feature removes
all the empty areas from the file and completely flattens it out. Here’s a quick demonstration.
Here’s how this scene looks with its fully layered Photoshop file.

…and here’s that psd file in the file explorer. Notice the 399 MB file size!

But after I open the file in Photoshop, go to Layer > Flatten Layers, and then save the file again, check out the newly reduced file size: 27.8 MB!

That’s a reduction of 93%. And the artwork looks exactly the same! That’s better than any of the compression programs out there, and it’s a feature built right into Photoshop!
That’s It!
Well, dear readers, I’m feeling much better now that I’ve unloaded all that! It’s been eating away at me for a long time. It’s like a weight has been lifted from my shoulders. It’s a beautiful spring day outside and after the winter we just had, I’m happy to see that April is starting out so mild. I’m going to go get some fresh air and breathe easy now that all my secrets are free! I’m sure they will be coming for me soon, so I want to enjoy the air of freedom while I still can.