In the first post in this series, I gave an overview of all of the various types of metadata offered by WordPress, where it’s kept, and what we’re going to be covering throughout this series.
Further, I defined what metadata is; its role within WordPress, and how it’s relevant to us as developers. But the introduction was meant to be just that: a survey of what we’re going to be covering throughout the rest of this series.
Starting in this post, we’re going to begin exploring the WordPress Post Meta API to see why it’s useful, what we can do with it, and how to take advantage of the methods offered via the WordPress application.
A Disclaimer for Everyone
First, if you’re an advanced developer, then it’s not likely this series of tutorials is going to be of much help to you. Instead, it’s geared more towards those who have worked a little bit with themes, perhaps tweaked some plugin code, and are ready to take it a step further by adding some extra information to the posts (or the post types) that compose their project.
Secondly, note that the code examples in this tutorial are not for use in a production environment. Instead, the code we’re going to be looking at is not meant to be used anywhere that anyone has public access to the site.
Right now, I’m planning to cover more advanced techniques for this topic after we work our way through this series. But for now, we’re only going to concern ourselves with working with the API.
Why, though? What’s the delay in covering additional information? Simply put, it has to do with website security. Specifically, whenever we’re writing information into the database, we have to assume that the data is not in a format that’s safe for us to store; we have to sanitize the data.
There’s an entirely different set of APIs for sanitizing data we need to explore that will work in conjunction with the metadata APIs, but this is not the tutorial for doing so.
I know, it may sound a little frustrating to talk about these APIs without being able to leverage them. Remember, though, this is meant to be an introduction to the API. The tutorials should provide enough information for you to get started working with post metadata on your machine, but should also leave enough questions such that we can take a deeper dive into the topic in a future series of articles.
With that said, let’s go ahead and get started with the WordPress Post Meta API. And be warned: This is a long tutorial.
An Introduction to the API
Before we look at the code, it’s important to make sure that you have the necessary tools to browse the database on which your WordPress installation is running. Some of the available tools include:
But feel free to use whatever you like most. As long as you can view the data in the database, you’re ready to go.
Next, let’s understand how WordPress defines post metadata. According to the Codex:
WordPress has the ability to allow post authors to assign custom fields to a post. This arbitrary extra information is known as meta-data.
Meta-data is handled with key/value pairs. The key is the name of the meta-data element. The value is the information that will appear in the meta-data list on each individual post that the information is associated with.
In simpler terms, WordPress allows us to write custom information to the database, associate it with any post we’d like, and then retrieve it as needed. Further, the information is stored using unique key/value pairs.
Writing Our Own Metadata
If this sounds foreign to you, don’t even worry about it. The idea is that for each value that you store, it’s related to a unique key (much like a doorknob has a unique key for unlocking it).
The key is how we can retrieve the value from the post. But this does raise a question: What happens if a post has multiple pieces of metadata associated with it? That is, if any given post can have multiple pieces of metadata stored alongside it, how do we retrieve unique metadata?
As we’ll see when we begin looking at some of the example code below, in addition to using the key used when storing data, we also need to pass the post’s unique ID to the function.
Nothing works better than seeing it in action, though. So assuming that you have WordPress set up on your local machine and that you’re okay with editing functions.php in the core of your default theme, let’s get started.
For Reference
I’ll be using the following tools:
The most important thing is that you’re running both WordPress and the theme mentioned above.
Finally, if you’re more comfortable with another IDE and database front-end, that’s completely fine.
We’ve covered a lot of information in the introduction of this article, but it will come in handy as we begin to look not only at the Post Meta API but the other APIs, as well. So keep this mind. I’ll be referring to this particular article in future articles, too.
Let’s dig into the API.
A Very Important Note
The way we’re going to incorporate the code is not the professional way of making changes to your theme, implementing this functionality, or interfacing with an API. We are doing this for a beginner’s first steps into WordPress development.
In a follow-up series, we’re going to take the work we’ve done in this series and extract it into a more maintainable plugin that also includes a greater focus on maintainability, security, and more.
For now, we’re focusing on the basics of the API.
Preparing the Theme
Remember that I’m using a basic installation of WordPress along with the twentysixteen theme for the demos that we’re going to see throughout this tutorial and the rest of the tutorials in the series.
Secondly, we’re going to be making changes in functions.php. This is usually not the best place to make this change; however, please make sure that you’ve read the note above before proceeding.
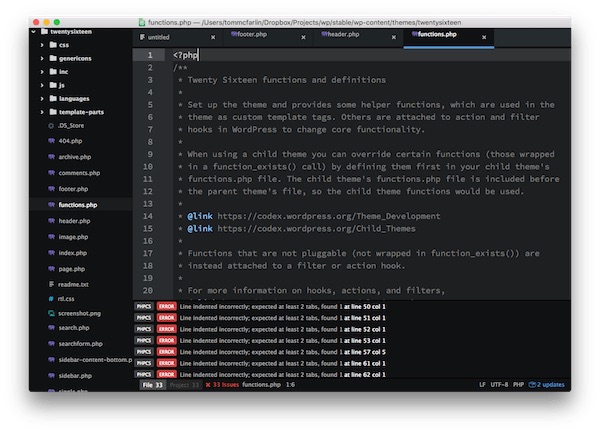
With that said, let’s assume that you have your server running, your IDE up and ready, and functions.php in your editor. Though your screenshot may look a bit different, it should resemble this:
The challenge with working with functions.php is that it’s already full of code that helps power the existing theme. Though we’ll ultimately move our code into a plugin in a future series, let’s at least take the first step in making our file so that we can self-contain our code.
Using your IDE of choice:
- Create a new file in the root directory of the twentysixteen theme.
- Name the file
tutsplus-metadata.php.
Once done, you should have something like this on your file system:

Finally, we need to make sure we include this in functions.php. To do that, add the following line of code just under the opening PHP tag. Reload your browser. If all goes well, you should see the theme exactly as it was before adding your file to functions.php.
Now, let’s get to work.
Getting Started
Recall our earlier discussion that we need three things to add metadata to the database:
- a post ID
- a unique key with which we can identify the metadata
- a value with which we’re going to store that we want to later retrieve
For this tutorial, all we’re concerned with doing is adding metadata that will appear on the default Hello World! post that comes standard in each installation of WordPress.
Let’s say that we want to add some metadata that includes our name. So the meta key we’ll use is my_name and the value that we’ll use is whatever your name is. In my case, it’s “Tom McFarlin”.
The first thing we want to do is to define a function that hooks into the_content. This will allow us to output our text when the function runs. If you’re not familiar with hooks, then please read this series.
Your initial code should look like this:
<?php

add_action( 'the_content', 'tutsplus_metadata' );
function tutsplus_metadata( $content ) {

  if ( 1 === get_the_ID() ) {
    echo "[We are here.]"
  }

  return $content;

}
When you execute this code, the string “[We are here.]” should appear above the post content before anything else, and it should only happen on the Hello World! post. This is because we’re checking to make sure the ID is 1 before we echo the string.
Note that the final version of the code shared at the end of this post will be complete with comments. Until then, I’ll be explaining what the code is doing as we add each new piece to our code.
Adding Metadata
Now let’s add some actual metadata. To do so, add this code in the body of the conditional so that we’re sure that we’re doing so for Hello World. Since we’re already checking for the ID of 1 in the conditional, then we can just remove the code we added in the previous section and update it.
Within the body of the conditional, we’ll make a call to the add_post_meta API function that looks like this:
<?php

add_action( 'the_content', 'tutsplus_metadata' );
function tutsplus_metadata( $content ) {

    if ( 1 === get_the_ID() ) {
	    add_post_meta( get_the_ID(), 'my_name', 'Tom McFarlin' );
	}

	return $content;

}
It’d be nice if we could do something with this information. Before we do that, though, there’s some more information we need to cover. Namely, about updating metadata (and how it differs from adding metadata) along with some nuances you may not expect when dealing with the API.
Updating Metadata
There’s a subtle difference between adding metadata and updating metadata. You know how a key uniquely identifies a value that’s associated with it? Well, that’s partially accurate.
When you call add_post_meta, you’re creating an entry every single time you’re making that call. So in our code above, if you refresh the page three times, then you’re going to see something like this:

Curious, right? Recall what the Codex says:
Note that if the given key already exists among custom fields of the specified post, another custom field with the same key is added unless the $unique argument is set to true, in which case, no changes are made.
Ah, there’s an optional parameter that the function accepts. It’s a boolean called $unique, and it allows us to pass true if we only want to make sure that the value that’s added is unique.
You may want to delete your existing records at this point. If not, that’s fine—just use a different value for the my_name key.
This means we could update our code to look like this:
<?php

add_action( 'the_content', 'tutsplus_metadata' );
function tutsplus_metadata( $content ) {

    if ( 1 === get_the_ID() ) {
		add_post_meta( get_the_ID(), 'my_name', 'Tom McFarlin', true );
	}

	return $content;

}
Now you’re only creating a single entry. Furthermore, if you were to try to change the value of that key in the code, then it would not be overwritten in the database. Once writing the post metadata is complete, it’s stored as it was the first time.
But it doesn’t have to be that way, and that’s where update_post_meta comes into play. In fact, update_post_meta might be used more than add_post_meta, depending on your use case.
Before taking a look at the code, check out what the Codex has to say:
The function update_post_meta() updates the value of an existing meta key (custom field) for the specified post.
This may be used in place of add_post_meta() function. The first thing this function will do is make sure that $meta_key already exists on $post_id. If it does not, add_post_meta($post_id, $meta_key, $meta_value) is called instead and its result is returned.
Did you catch that? It can “be used in place of add_post_meta“, which is useful because this means:
- If the post metadata already exists for a given key,
- If you use
update_post_meta, - You will overwrite the previous value.
At this point, you may want to delete the information you have in your database, or create a new pair of keys and values. This means we can update our code to look like this:
<?php

add_action( 'the_content', 'tutsplus_metadata' );
function tutsplus_metadata( $content ) {

    if ( 1 === get_the_ID() ) {
		update_post_meta( get_the_ID(), 'my_name', 'Tom McFarlin' );
	}

	return $content;

}
This brings some inherent dangers with it, though.
Namely, if you overwrite a value that you never intended to overwrite, then that value is gone, and it can’t be reclaimed (unless you do fancier work that’s outside the scope of this series).
There’s an optional final argument for update_post_meta, though, and that’s the $prev_value argument. That is, you can specify which value you want to overwrite.
Take, for example, the case where you have multiple records with the same key created with add_post_meta and you want to update only one of those records. To update that data, you’d pass in the value corresponding to that one record.
What’s the Difference?
The difference between add_post_meta and update_post_meta may be considered subtle, but it depends on your use case.
I’ll try to break them down as simply as possible here because, although it may seem complicated given the examples that we’ve seen above, it’s more straightforward when you lay it all out.
-
add_post_metais useful when you want to introduce a record into the database. If the value already exists, then the new value may or not be written. If you passtruefor the$uniqueparameter of the function, then only the first record will be created, and nothing will overwrite that exceptupdate_post_meta. -
update_post_metacan be used in place ofadd_post_metaand will always overwrite the previous value that existed. If you’re working with multiple records created byadd_post_meta, then you may need to specify a previous value that you wish to overwrite.
And that’s everything. Of course, we still have to deal with retrieving the records from the database and displaying them on the screen.
Retrieving Metadata
When it comes to retrieving post metadata, there are two main things you need to remember:
- Metadata can be retrieved as a string.
- Metadata can be retrieved as an array.
Sometimes it depends on how you stored the original information; other times it’s based on how you want to work with it.
Before we look at the various ways we can retrieve information, let’s first look at the basic API call for doing so. Specifically, I’m talking about get_post_meta. If you’ve been following along so far, then understanding the API should be relatively easy.
The function accepts three parameters:
- the ID of the post
- the metadata key
- an optional boolean value for if you want to retrieve the value as a string or as an array (where an array is the default value if nothing is specified)
From the Codex:
Retrieve post meta field for a post. Will be an array if $single is false. Will be value of meta data field if $single is true.
Seems easy enough. So given where the last bit of our source code sits right now, I’d say we can retrieve information by making a call such as get_post_meta( get_the_ID(), 'my_name' );.
The code, as it stands above, will return an array.
Multiple Values
Whenever you hear the phrase “multiple values”, it can be helpful to think of an array or some type of data collection in the programming language you’re using.
In our examples, think of when we were storing the same key several times using add_post_meta. As a refresher, here was what the database looked like:
If I were to retrieve the information by its key, what would I get back? Since I didn’t specify that I wanted a string, I would get back an array of all of the records. This would allow me to iterate through each of them.
If, on the other hand, I were to specify true for wanting to get back a string, then I’d only get the first row that was created using add_post_meta.
To that end, if you’re looking to get back multiple values for a given key, then your code would look like this:
<?php

add_action( 'the_content', 'tutsplus_metadata' );
function tutsplus_metadata( $content ) {

    if ( 1 === get_the_ID() ) {
        var_dump( get_post_meta( get_the_ID(), 'my_name' ) );
    }

    return $content;

}
Note that I’m using var_dump to make it easier to see what information is returning from WordPress within the browser; however, I’m more of a fan of using a debugger, which is something that we may discuss in a future post.
Single Values
Now let’s say that you want to get single values stored for one post. In this case, you still need the post ID and the metadata key; however, you’ll also need to provide true as the third parameter to get_post_meta.
As mentioned above, if you’re dealing with a situation in which multiple rows have been created using add_post_meta, then you’re going to get back the first row that was created; however, if you’re using this function alongside update_post_meta then you’ll get back a string value of the data that was stored.
Since we’ve covered the former but haven’t covered the latter, here’s what the code looks like:
<?php

add_action( 'the_content', 'tutsplus_metadata' );
function tutsplus_metadata( $content ) {

    if ( 1 === get_the_ID() ) {
        var_dump( get_post_meta( get_the_ID(), 'my_name', true ) );
    }

    return $content;

}
And then you’ll get back whatever value you saved as the meta value when making a call to the function. It’s pretty simple in comparison to having to work with a set of records and arrays that may or may not contain similar information.
Deleting Metadata
The last bit of working with post metadata has everything to do with being able to delete it. It’s easy, but there are just a few nuances that we need to understand to make sure we’re doing it effectively.
But first, here’s the definition from the Codex:
This function deletes all custom fields with the specified key, or key and value, from the specified post.
Short, sweet, and to the point. The function accepts three arguments:
- the ID of the post
- the meta key
- the meta value
The meta value is optional, but it comes in handy if you’ve been working with add_post_meta and want to delete one of the specific entries created by multiple calls to that function (as we’ve seen elsewhere throughout this tutorial).
Although making a call to delete_post_meta is as simple as passing a post ID, the meta key, and the optional meta value, the function returns a boolean value stating whether or not the data was removed.
Example code for deleting some of the post metadata that we’ve been looking at thus far might look like this:
<?php

add_action( 'the_content', 'tutsplus_metadata' );
function tutsplus_metadata( $content ) {

    if ( 1 === get_the_ID() ) {
        delete_post_meta( get_the_ID(), 'my_name' );
    }

    return $content;

}
However, your implementation may vary. If you’re working with multiple pieces of metadata and if you want to verify that it was a successful deletion, then you may wrap the code in a conditional.
A Final Example of Code
Below you’re going to find a long, documented code snippet that should represent the majority of what we’ve talked about in this tutorial. Note that the functions are hooking into the_content.
This is just for demonstration purposes so that you can easily trigger the firing of these functions whenever you load a particular page.
<?php
/**
 * This file shows how to work with the common Post Meta API functions.
 *
 * Namely, it demonstrates how to use:
 * - add_post_meta
 * - update_post_meta
 * - get_post_meta
 * - delete_post_meta
 *
 * Each function is hooked to 'the_content' so that line will need to be
 * commented out depending on which action you really want to test.
 *
 * Also note, from the tutorial linked below, that this file is used form
 * demonstration purposes only and should not be used in a production
 * environment.
 *
 * Tutorial:
 * http://code.tutsplus.com/tutorials/how-to-work-with-wordpress-post-metadata--cms-25715
 *
 * @version    	1.0.0
 * @author		 Tom McFarlin
 * @package		tutsplus_wp_metadata
 */

add_action( 'the_content', 'tutsplus_add_post_meta' );
/**
 * Determines if the current post is the default 'Hello World' post and, if so,
 * adds my name as the post meta data to the postmeta database table.
 *
 * @param		string $content		The post content.
 * @return	 string $content		The post content.
 */
function tutsplus_add_post_meta( $content ) {

	if ( 1 === get_the_ID() ) {
		add_post_meta( get_the_ID(), 'my_name', 'Tom McFarlin' );
	}

	return $content;

}

add_action( 'the_content', 'tutsplus_update_post_meta' );
/**
 * Determines if the current post is the default 'Hello World' post and, if so,
 * updates my name as the post meta data to the postmeta database table. This
 * is an alternative way of writing post metadata to the postmeta table as
 * discussed in the linked tutorial.
 *
 * @param		string $content		The post content.
 * @return	 string $content		The post content.
 */
function tutsplus_update_post_meta( $content ) {

	if ( 1 === get_the_ID() ) {
		update_post_meta( get_the_ID(), 'my_name', 'Tom McFarlin' );
	}

	return $content;

}

add_action( 'the_content', 'tutsplus_get_post_meta' );
/**
 * Determines if the current post is the default 'Hello World' post and, if so,
 * retrieves the value for the 'my_name' in the format of a string and echoes
 * it back to the browser.
 *
 * @param		string $content		The post content.
 * @return	 string $content		The post content.
 */
function tutsplus_get_post_meta( $content ) {

	// Note: Don't worry about the esc_textarea call right now.
	if ( 1 === get_the_ID() ) {
		echo esc_textarea( get_post_meta( get_the_ID(), 'my_name', true ) );
	}

	return $content;

}

add_action( 'the_content', 'tutsplus_delete_post_meta' );
/**
 * Determines if the current post is the default 'Hello World' post and, if so,
 * deletes the post metadata identified by the unique key.
 *
 * @param		string $content		The post content.
 * @return	 string $content		The post content.
 */
function tutsplus_delete_post_meta( $content ) {

	if ( 1 === get_the_ID() ) {
	    delete_post_meta( get_the_ID(), 'my_name' );
	}

	return $content;

}
Typically, you’ll find metadata functions associated with other hooks such as save_post and similar operations, but this is a topic for more advanced work. Perhaps we’ll cover that in another series later this year.
Conclusion
Every single one of the API functions is available in the WordPress Codex, so if you’d like to jump ahead and do some more reading before the next article in the series, then feel free to do so.
As previously mentioned, this is an introduction to the WordPress Post Meta API. Through the information provided in the Codex, in this tutorial, and in the source code provided, you should be able to begin writing additional content to the database related to each of your posts.
Remember, though, this is meant for demonstration purposes as we have more information to cover. Specifically, we need to examine data sanitization and data validation. Though we have additional topics to cover first (such as user metadata, comment metadata, and so on), we’ll move on to more advanced topics soon.
Ultimately, we’re trying to lay a foundation for future WordPress developers to build from when they go forward and work on solutions for others, for their agencies, or even for their projects.
With that said, I’m looking forward to continuing this series. Remember if you’re just getting started, you can check out my series on how to get started with WordPress, which focuses on topics specifically for WordPress beginners.
In the meantime, if you’re looking for other utilities to help you build out your growing set of tools for WordPress or for code to study and become more well-versed in WordPress, don’t forget to see what we have available in Envato Market.
Remember, you can catch all of my courses and tutorials on my profile page, and you can follow me on my blog and/or Twitter at @tommcfarlin where I talk about various software development practices and how we can employ them in WordPress.
Please don’t hesitate to leave any questions or comments in the feed below, and I’ll aim to respond to each of them.