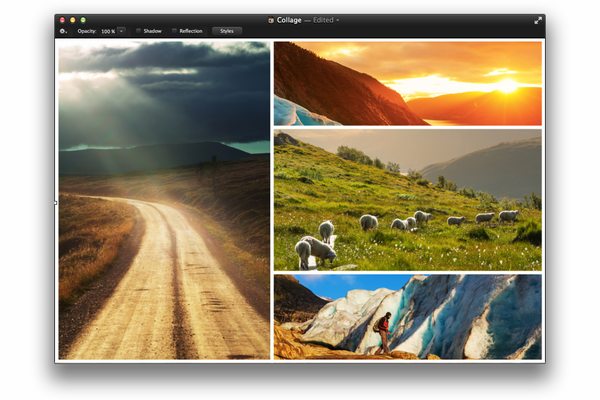
Pixelmator is an easy-to-use, fast, and powerful image editing app for the Mac. In this tutorial, we will dive deeper into the concept of layers by creating a collage made out of four images. Lets get started!
Photos Used
The following photos were used in this tutorial but you can follow along using any photos that you like.
1. Add Images
Step 1
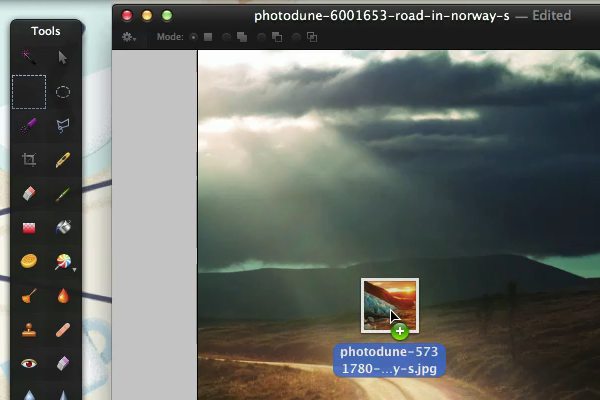
Open the first image that you want to use in your collage (File > Open…). Adding new images to the current document can be done by dragging and dropping them directly from the desktop, or a finder window onto the document window or the layers palette.
Step 2
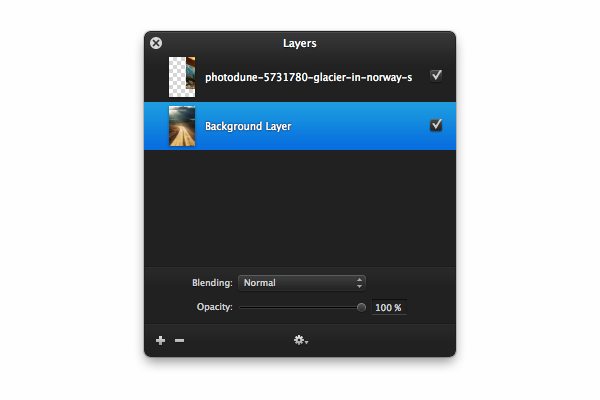
When we look at the Layers Palette we see that the newly added image gets placed on a new layer on top of the original background layer. Use the Move Tool to move the top image to the sides. You’ll notice that the image disappears outside of the borders of our background image. The size of our document, also called the canvas size, is not big enough to put these two images next to one-another.
2. Change the Canvas Size
Assuming we want to place our top image on the right side next to our original image, we need to know how much extra space we have to add to the right side of our current canvas. We can do this by measuring the width of our second image and adding that to the canvas size.
Step 1
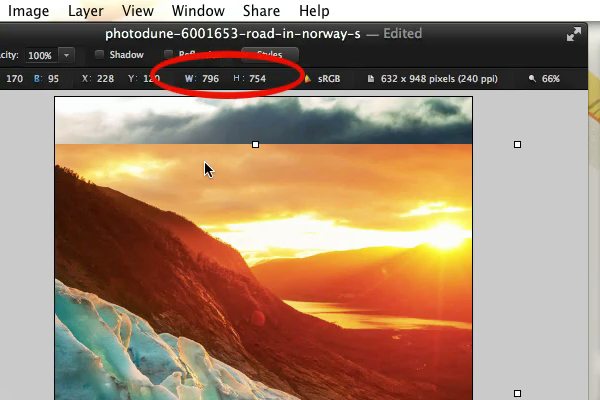
Open the View menu and choose Show Info Bar. An extra bar appears at the top of our document window. When we select the top image with the move tool we get to see the size of the image in the Info Bar. In our case this is 796 x 754 pixels.
Step 2
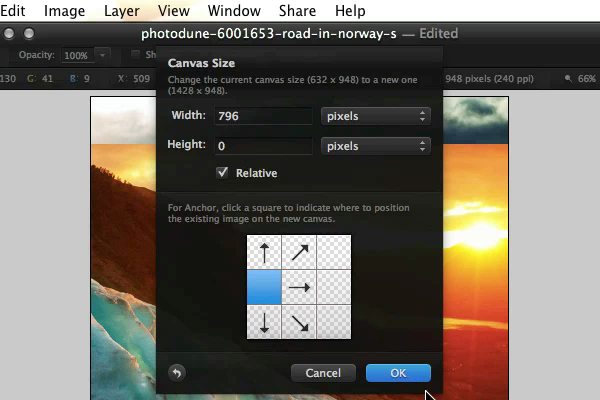
Go to the Image menu and choose Canvas Size…Choose Relative in the Canvas Size menu that appears. This makes it easier to enter the amount of pixels we want to add to the canvas, instead of calculating ourselves how much the total canvas size has to be. Enter the Width of our second image (796 pixels). We’ll leave the Height at 0 since we don’t want to change the height of our canvas. To make sure the canvas only expands to the right side we’ll have to click on the left square in the bottom figure of the Canvas Size menu. By doing this, we indicate where our existing image on the new canvas will be. Your settings for the Canvas Size menu should look like those in the image below. Click on OK to confirm the settings.
Step 3
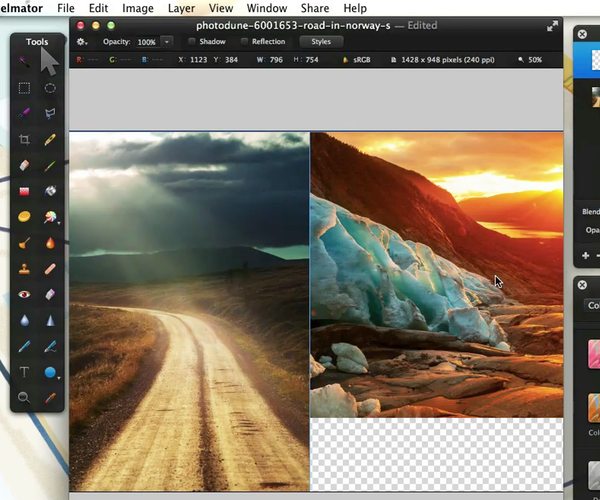
We can now use the Move Tool to move our second image in place. Notice the gray and white checkered pattern on the lower right side of our document. This is how Pixelmator shows us which part of our document is transparent.
3. Re-size Images
Besides adjusting the canvas to make sure that the images will fit into the collage, we can also adjust the image itself.
Step 1
Add a third image to the document by dragging and dropping it directly from the desktop or a finder window, onto the document window or the layers palette.
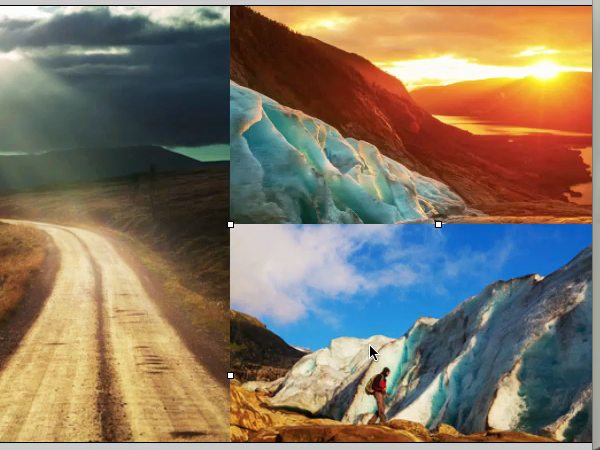
Select the Move Tool from the Tools Palette. White handles will appear around the newly added image. Adjust the size of the image by moving the handles and move the image in place.
4. Mask Images
Step 1
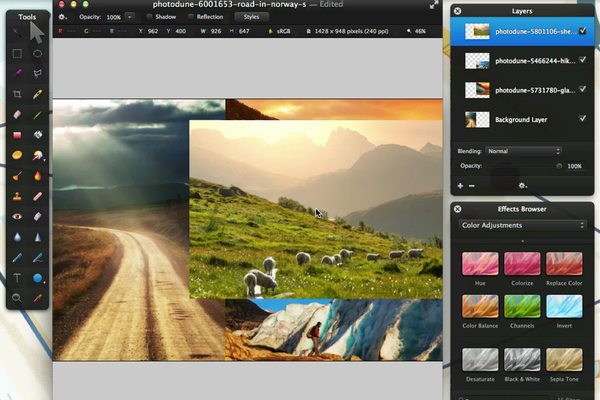
Add the fourth image to the document by dragging and dropping it directly from the desktop or a finder window, onto the document window or the layers palette. Our fourth image is an image with sheep.
Step 2
We want to nudge this image in between the two images on the right hand side, and we want to tuck it under the image of the road. In order to tuck the image under the image of the road we will have to go to the Layers Palette and drag and drop the layer with the image of the road on top of the layer with the image of the sheep. When we release the mouse button the image with the road is on top of all other layers and a part of the left side of the image with the sheep has been hidden from view.
Tip: You can also hide parts of an image by making a selection and deleting it, or by using masks. You should use masks whenever possible, however, as it is non-destructive.
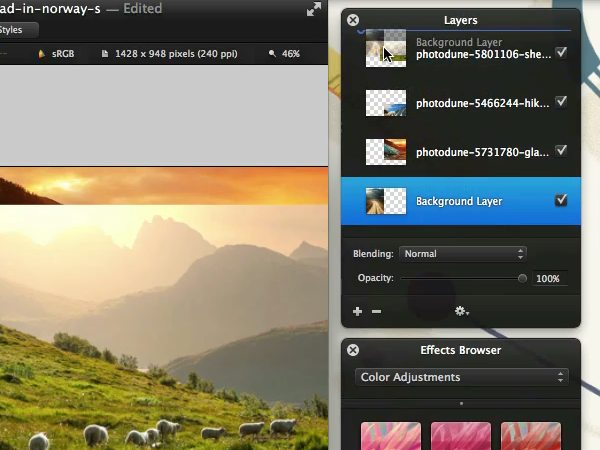
Step 3
Make sure the layer with the image of the sheep is selected and Control-Click on it. Then choose Add Mask from the drop down menu. This will add an extra white thumbnail to the layer.
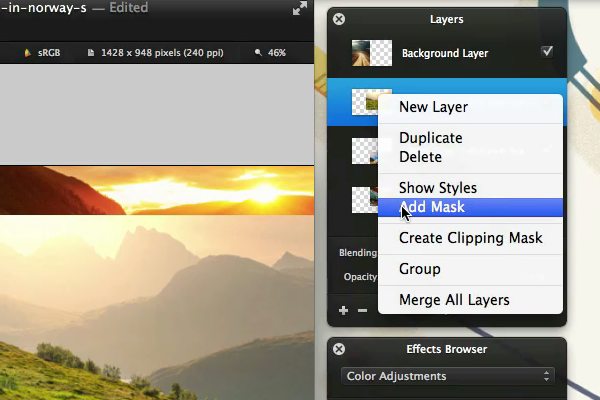
Step 4
We select the Rectangular Marquee Tool from the Tools Palette and make a selection around the part of the image we want to remove. To help us determine which part of the image we want to hide we can lower the Opacity Slider in the Layers Palette. This will make the image slightly transparent so we can see the images on the layers below.
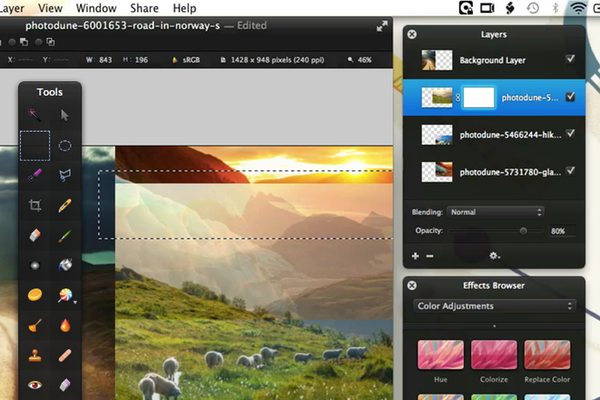
Step 5
Open the Edit Menu and choose Fill…Set the color to black a as shown in the image below. Click on OK when done.
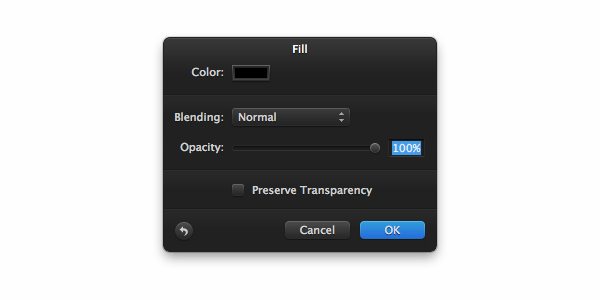
The part that we had selected gets hidden from the document. And when we look at the Layers Palette we see that a black rectangle has appeared in the mask thumbnail. Black on a layer mask means that area will be hidden, white means that area will be visible. The blue border around the mask thumbnail means that we are currently working on the mask. Click on the image thumbnail in the layer to switch to working on the image itself.
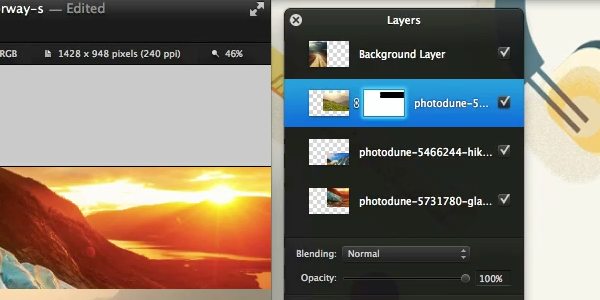
Step 6
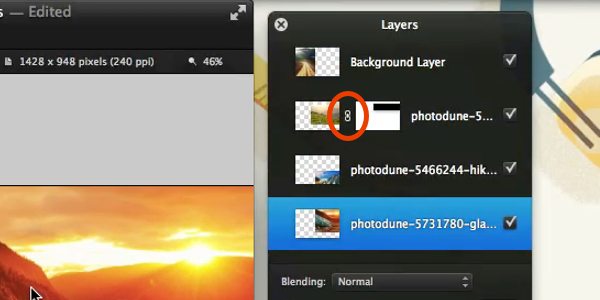
Between the image thumbnail and mask thumbnail there is an icon in the form of a link. When we move the image on the layer around, the mask will always follow. The mask and the image are linked together.
Click on the Link Icon to remove it. Select the image thumbnail and move it around. Then do the same with the mask by selecting the mask thumbnail and moving it around.
Step 7
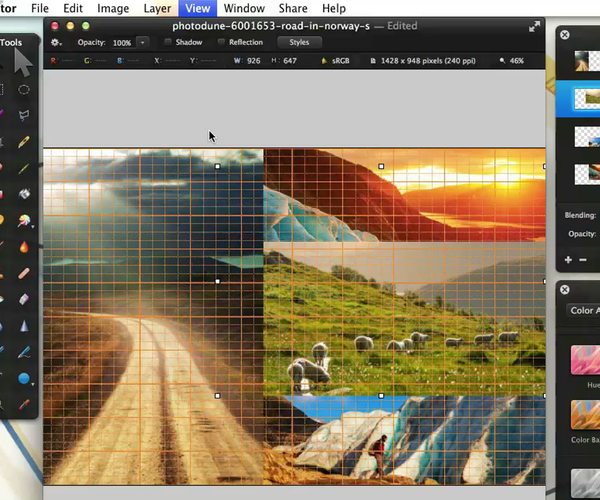
Use the Move Tool to place the final image with the mask in between the two other images on the right side of our collage. To speed things up, you can activate Auto Select from the menu that appears after clicking on the Gear Icon in the Tool Options Bar. To align all images more precisely you can activate the Grid from the View menu.
5. Name and Group Layers
We’ve ended up with quite a lot of layers. To make sure things don’t get too chaotic we can give a more suitable name to each layer and group layers.
Step 1
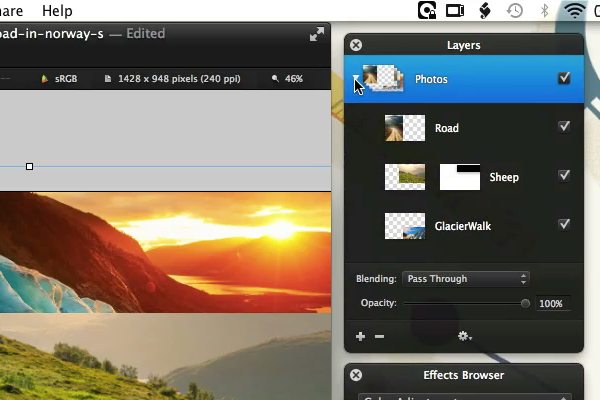
Double click on a layer name and give each layer a name that describes the content of that particular layer.
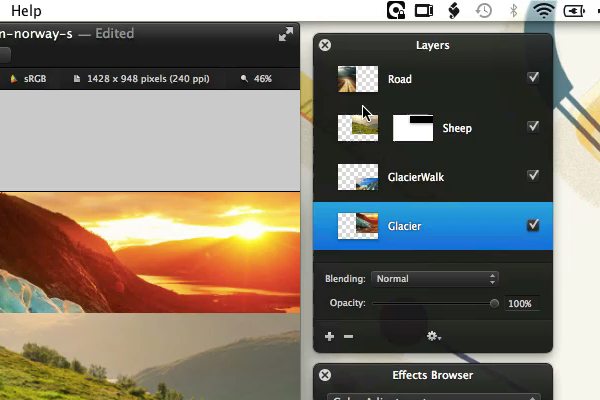
Step 2
Select each layer in the Layers Palette by holding the Shift key or Command key while clicking on each layer. Then Control-click on one of the selected layers and choose Group. Pixelmator creates a sort of folder in the layers palette containing the selected layers. We can name the group Photos, for example, to show that the group contains the photos used in the collage.
6. Create Borders
Our collage is almost done. To make the collage look a little bit more interesting we can create borders around the whole collage and each image.
Step 1
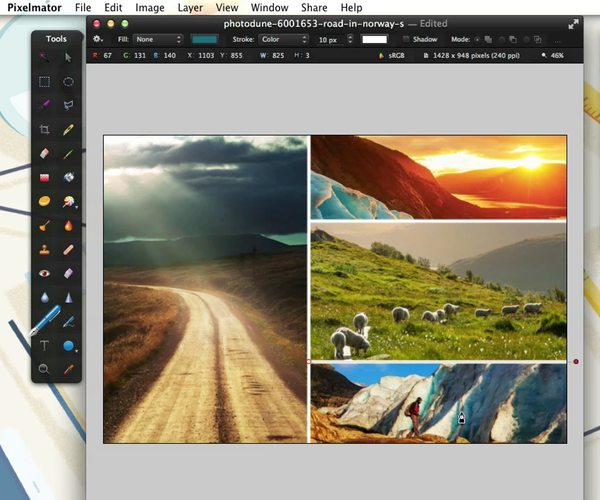
Select the Pen Tool from the Tools Palette. In the Tool Options Bar, set the Fill to None, Stroke to a white color and use a Width of 10 Pixels. You can off course use other settings depending on the size and content of your collage. Finally draw white lines over the borders between the images.
You’ll notice that every time after drawing a line the Move Tool gets activated. This makes it easy to move the line in place more precisely. If you want to keep all the lines on one layer, make sure to set the Pen Tool to Add Mode.
Step 2
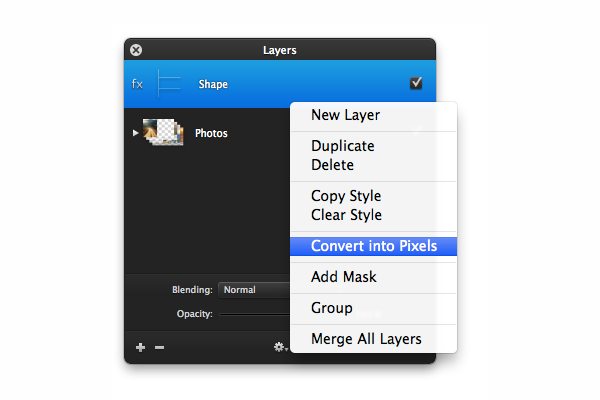
The layer we just have drawn our borders on is not a normal layer like the layers we have pasted our images on. The borders are drawn on a Shape Layer. Shape layers can only contain vector drawings.
Control-click on the Shape Layer in the Layers Palette. Click on Convert Into Pixels. The Shape layer is now converted into a normal, bitmap layer.
Step 3
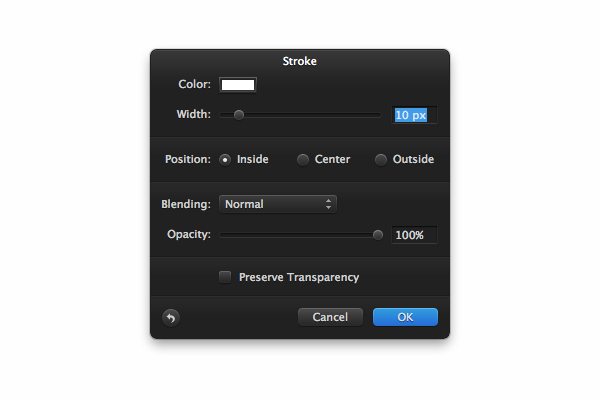
Press Command-A on your keyboard. This will select the whole layer. From the Edit Menu, choose Stroke…. In the Stroke palette, we choose the same settings as we have used for the already created borders. So in our case, a white stroke with a Width of 10. Make sure to set the Position of the stroke to Inside before pressing OK.
Congratulations!
By making this collage we have covered some of the essentials of working with layers. We’ve seen how objects on layers overlap according to the order the layers are stacked in. We’ve aligned objects on different layers and we’ve used a layer mask to hide parts of an object. We’ve also seen how we can move an object and a layer mask separately from one-another. Finally, we’ve grouped and named layers and we’ve seen that Pixelmator supports three different types of layers.
