
Watch the lesson: Adding the final details

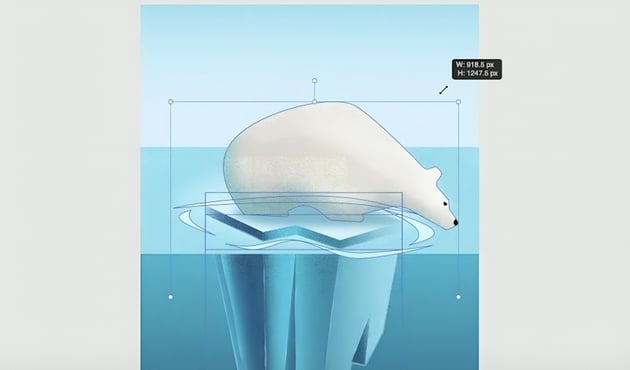
We’ll wrap things up by scaling both the bear and the iceberg down. To select all the right layers easily, follow the steps in this Affinity Designer beginner tutorial.
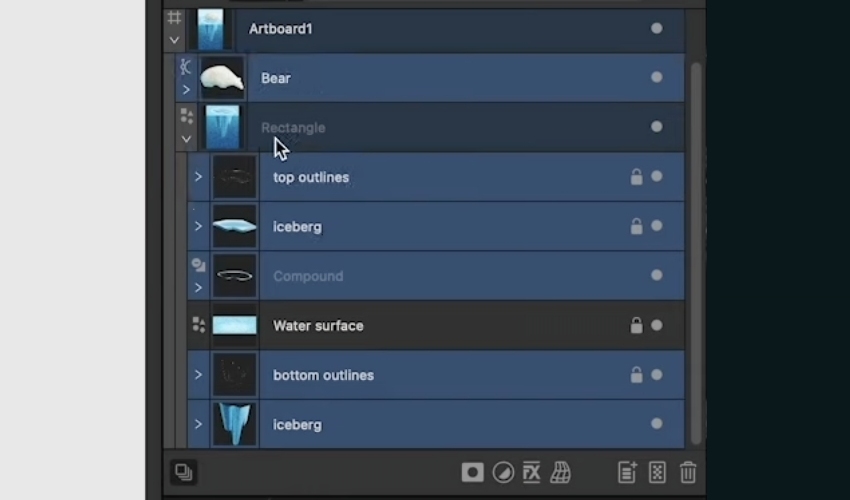
Step 1
On the Layers panel, expand the Rectangle layer. Select the following layers:
- the bear (above the Rectangle layer)
- the top and bottom outlines
- the two iceberg groups
- the compound shapes


Step 2
Right-click and assign these layers a blue tag. Let’s also unlock them.
Step 3
Now, on the menu at the top, go to Select > Select Same > Tag Color.
Step 4
Finally, we’ll use the Move Tool to scale the selected layers down and center them.


Well done! Now you’re all set to export your Affinity Designer project.
Check out the best Affinity Designer tutorials
You’ve learned so much about Affinity Designer! You’re ready to explore new horizons with more of our Envato Tuts+ and Envato Blog tutorials.
If you’d like to start with a professionally designed template, subscribe to Envato. You’ll get access to millions of creative resources!
Here are some other articles and tutorials that’ll help you master the ins and outs of Affinity Designer: