So you’ve decided to start your own YouTube channel, but don’t actually have the required tools or skills to design the actual banner? Well, if that’s the case, don’t worry since I’m going to show you how you can easily make a galaxy YouTube banner using Placeit’s YouTube Banner Maker.
From finding a banner template to customizing it and making it your own, the entire process is as simple as it can get, as we will see in the following moments.
So if you want to learn how to make a banner using the YouTube Banner Creator, you should go through this little tutorial since it will show you everything you need to know in order to get it right.
Follow along with us over on our Envato Tuts+ YouTube channel:
1. What Is Placeit?
Before we begin, I wanted to take a couple of moments and quickly talk about what Placeit is and how it can do all the hard work for you.
If you aren’t a designer yourself, most of the time that means that you won’t have access to the tools and resources that designers usually use, such as Adobe Illustrator, Adobe Photoshop, Affinity Designer, Sketch, etc.
But what if sometimes you actually need to create something yourself, but don’t feel like spending a lot of money on a graphics suite that you probably won’t use all that often?
Well, when this happens, Placeit can prove to be the perfect fit, since it comes with a set of online tools that help you create professional banners, mockups, logos, etc., using just a couple of clicks.
Let’s see how easy it is to create our very own galaxy YouTube banner design using Placeit’s custom banner maker.
2. How to Access the YouTube Banner Maker
Before we can begin working on the actual banner design, we first have to navigate to the correct section of the website in order to be able to access the YouTube Banner Maker.
Step 1
If we take a close look at the horizontal navigation menu found next to the Placeit logo, you’ll quickly notice that we have a main category called Designs.

Step 2
As soon as we click on the link, the website will redirect us to a new page, on the left side of which you’ll find the Design Templates menu. If we go through the different template categories, we’ll quickly spot the one that we’re interested in, which is YouTube Banner Maker. Of course, we can always use the search function, which should bring up all the available banner templates.

Step 3
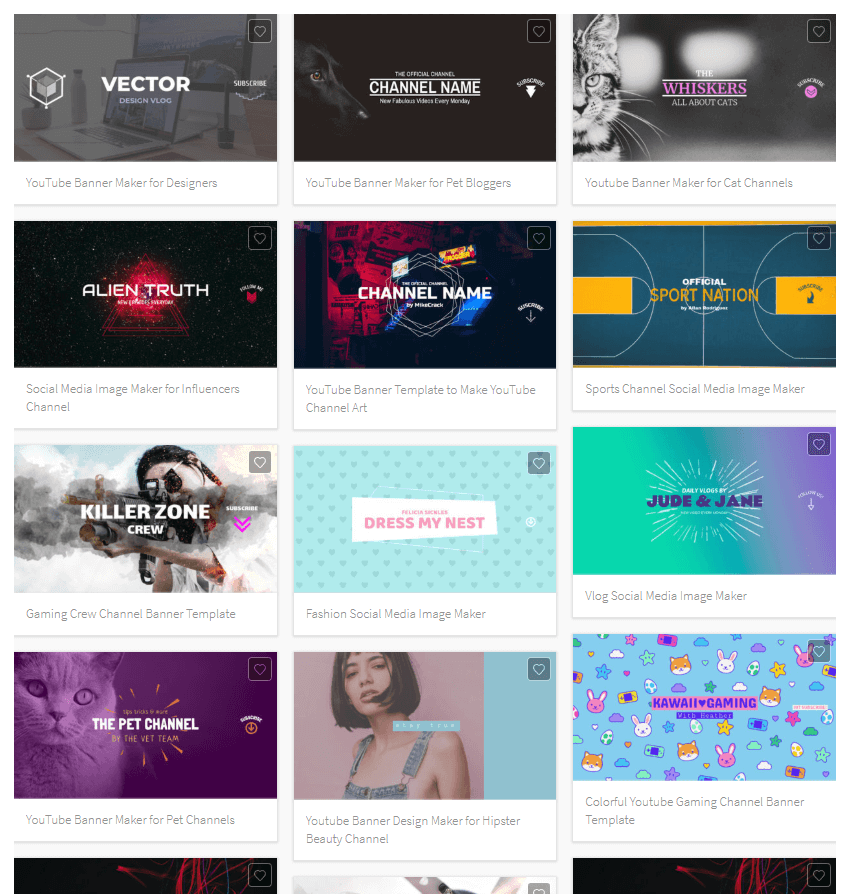
Once we’ve selected the desired category, it will bring up a library of 216 different available YouTube banner templates (at the time of this tutorial), from which we can choose one that we feel fits our channel’s needs.

3. How to Use the YouTube Banner Maker
At this point, let’s say that we’ve found a banner template design that looks good, and we’ve decided to use it on our channel.
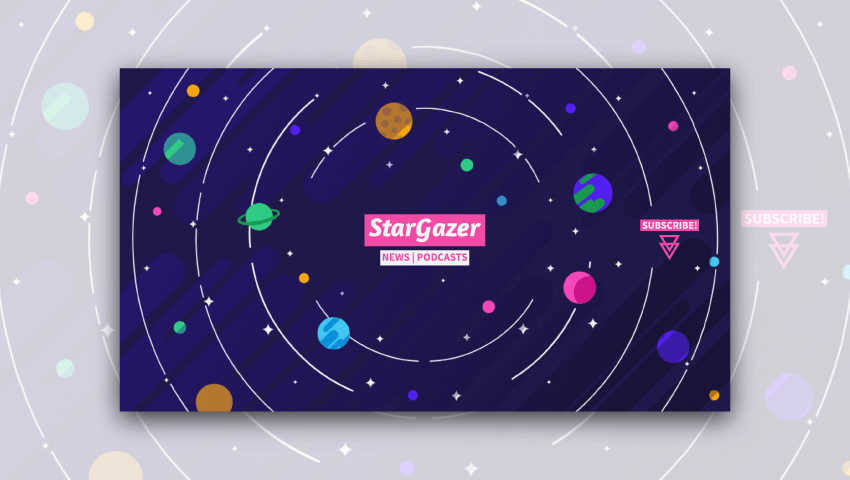
For this tutorial, I’ve decided to go with this illustrated galaxy one, which lets me adjust the look and position of my main elements using interactive editing.
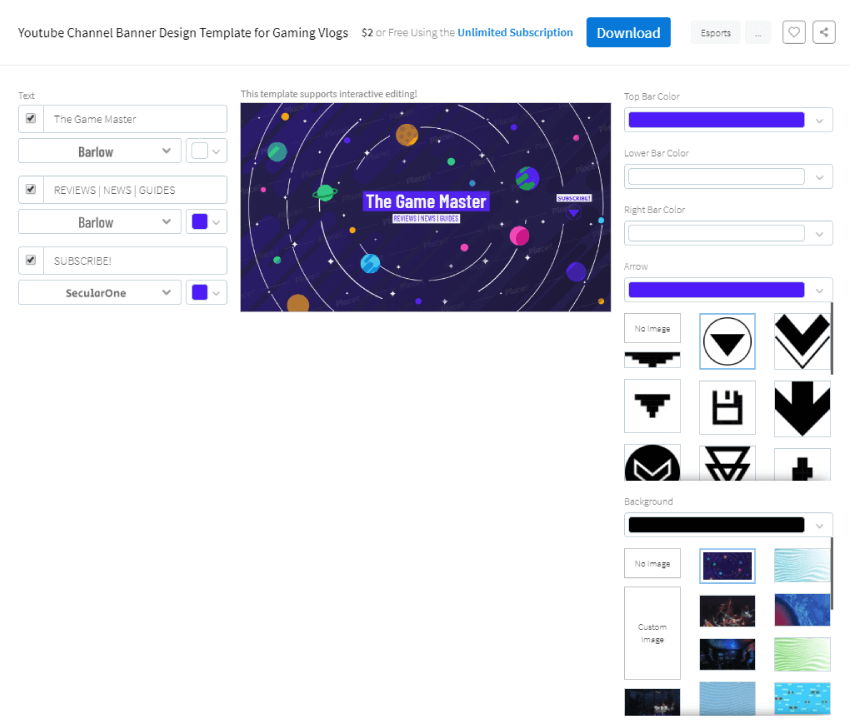
No matter what template we end up using, the editing layout will mostly be the same. On the left side, we’ll have all our text-related controls, while on the right side we’ll find all our background and shape-related ones.
All the changes that we make will immediately be displayed within the banner preview itself, which is front and center.
Step 1
Let’s start by adjusting some of the text elements found within the banner. For example, let’s say that we want to change the channel’s name from “The Game Master” to “StarGazer”.
To do so, all we have to do is select the specified text from within the top-left input box and overwrite it with our own.

Step 2
We can easily change the font by clicking on the dropdown box found underneath and choosing a new one from the included options.

Step 3
If we need to, we can also change the color of the text by clicking on the little dropdown box found next to the font, which will allow us to use either one of the predefined values or a new one of our own once we click on the More button.
For this tutorial, I’m going to go with the default value, since I’m going to adjust the color of the background shape in a few moments.

Step 4
If we need to, we can completely remove the current text field (or any other one) by simply unchecking its little checkbox.

Step 5
Next, I’m going to quickly customize the remaining text-based element, by going through the same process as before.

Step 6
Once we’ve finished adjusting the text-based elements, we can move on over to the right side of the page, where we will find all our background and shape-related ones.
The first three options—Top Bar Color, Lower Bar Color, and Right Bar Color—control the color of the rectangles found behind the actual text segments.
Since I want to get a theme going throughout my banner, I’m going to adjust the color of the top bar from blue to pink, doing the same for the right bar.

Step 7
Next, we have Arrow, which as the name suggests allows us to change the color and look of the subscribe call-to-action button.
Step 8
Finally, we have another option called Background, which allows us to change the image found underneath all our text and shape elements, or use a solid color if we choose to remove the background completely using the No Image button.
If we choose to use a background, we can either choose from the provided ones or upload one of our own using the Custom Image button. For the current example, I’m going to leave all the Background settings as they are since I really like how the current image looks.

Step 9
Since the template supports interactive editing, we can easily adjust the position and size of some of the text and shapes. Simply select them, which will bring up their bounding box, and then click and drag them to another location, or drag the bounding box’s squares either outwards or inwards depending on what we’re trying to achieve.
For the current example, I’m going to quickly enlarge all the boxes to give the text a little more padding.
If for some reason you’re not happy with your changes, you can easily undo them using the Reset Layout button.

Step 10
Once we’re happy with the final banner design, we can easily download it by clicking on the Download button, which will charge us a small fee each time we use the banner template generator, or we can choose to go with a monthly subscription plan, which will get us full access to all the templates.

4. How to Upload the Banner to YouTube
So we’ve finished creating our awesome galaxy banner using Placeit’s online banner creator, but how do we actually go about uploading it to YouTube?
Well, first we need to make sure that we have an account and are already logged in to it. Once we’re inside the account, we need to click on the little profile picture and then go to My Channel.

Here we can click anywhere within the banner section, which will bring up the upload window. As soon as we’ve selected our file, we should get a preview of what the banner design will look like when used across the different supported devices.

Once we’re ready, all we have to do is click on the Select button, which will make our design public to any user who visits our channel.

Awesome Job!
As always, I hope you’ve found this video useful, and if you have any questions, feel free to post them within the comments section and I’ll get back to you as soon as I can!

Expand Your Creative Skills!
Just finished going through this quick tutorial and feel like learning more of what it takes to become a visual tinkerer? Well, if that’s the case then you’re in luck since I’ve put together a little list which should get you up and going in no time!
-
![]()
From file type to file format, we’re going to explore the meaning of these notions and learn what are the most common images that are used right now.
-
![]()
Always wondered what a “mockup” is but never managed to fully figure it out? Well, in today’s video, we’re going to break it down and see how easy it is to…
-
![]()
If you want to know how to use an album cover maker online, to create rap album covers, read on to discover the power of the Placeit Album Cover Maker.
-
![]()
Learn how to make a book cover for a fantasy book by using an online book cover generator: Placeit.
-
![]()
If you want to know how to make a magazine cover from scratch, this article will give you plenty of magazine cover ideas and show you how you can make your…
-
![]()
Need to create a banner design but don’t have the required tools or skills? Well, what if I told you that you can use an online banner maker that comes with…
-
![]()
Creating a Twitch banner design can sometimes prove to be a tedious and difficult task, especially if you’ve never really dabbled with graphic design tools…
-
![]()
Looking for a free mockup to show off your T-shirt design, new iPhone app, or business logo? Well, we’ve got ten gorgeous free mockup templates just for you.
-
![]()
In this tutorial, you’ll learn how to make a bake sale flyer with a flyer creator. Placeit is a flyer generator offering hundreds of flyer templates that you…
-
![]()
If you want to create a realistic mug mockup to test your logo or other designs, this article will show you how to do so quickly and easily and then share…


