Iconic, timeless, and visually appealing. In this tutorial, we show you how to make your own Time magazine cover template.
Time magazine is well known and easily recognisable for its signature cover and its red border. First published in March 1923, this weekly magazine has the world’s largest circulation for a news magazine.
In this tutorial, we’ll pay tribute to the famous Time magazine cover style. The iconic red border has only changed five times since its first issue. Featuring striking photographs on the cover, the magazine has remained intact with just a few design updates. Today, you’ll learn how to create a fake Time magazine cover that will result in a classic design.
For this tutorial, we will be using a striking photograph from Envato Elements, which you can change for one of your own and make it a Time magazine cover person of the year. We will be diving into Layer Masks, Typography, and other essential tools.
If you’re not ready to dive into Photoshop and want to create a magazine cover the easy way, Placeit is a great option. Its Magazine Cover Maker is easy to use, and there are many styles in the library to choose from. Give it a try!
In a hurry? We’ve got amazing magazine templates, magazine cover templates or specific Photoshop magazine templates over at Envato Elements and GraphicRiver. Go check them out!
What You Will Need
You’ll need access to Adobe Photoshop. If you don’t have the software, you can download a trial from the Adobe website. You’ll also need:
Download the assets and make sure the font is installed on your system before starting. When you are ready, you can start to make your own Time magazine cover!
1. Setting Up a Photoshop File for Your Time Magazine Cover Template
Step 1
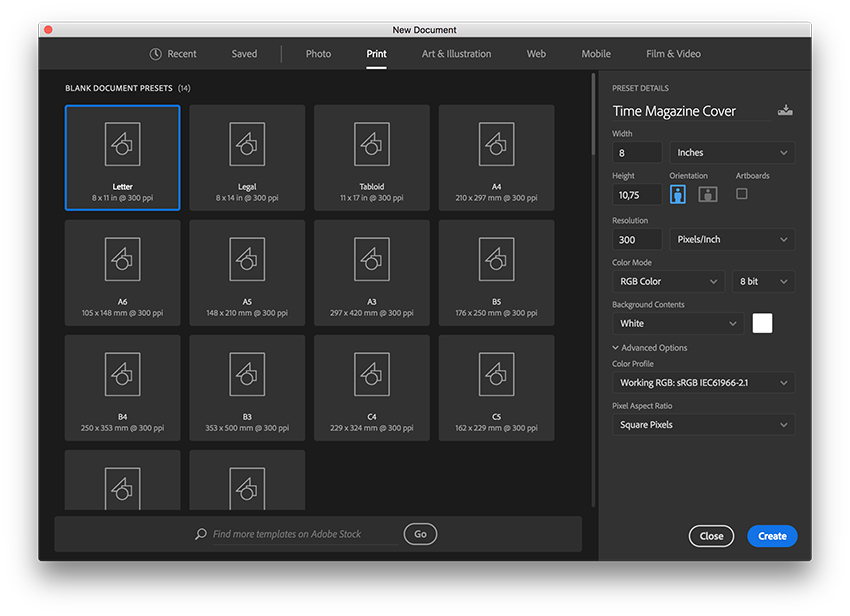
In Photoshop, go to File > New. Name the document Time Magazine Cover. Set the file to the following dimensions:
- Width to 8 in
- Height to 10.75 in
- Orientation to Portrait
- Units to Inches
- Resolution: If you will be using this Time magazine template for print, set the resolution to 300 dpi; if you’ll be using it on screen only, set it to 72 dpi.
- Color Mode: use CMYK if you’ll be printing this magazine cover; use RGB if you’ll be using this on screen.
- Bleeds to 0.125 in (it’s best to seek your professional printer’s preference)
Click Create.
Step 2
We will create margins on the magazine cover template to create the signature red and white borders.
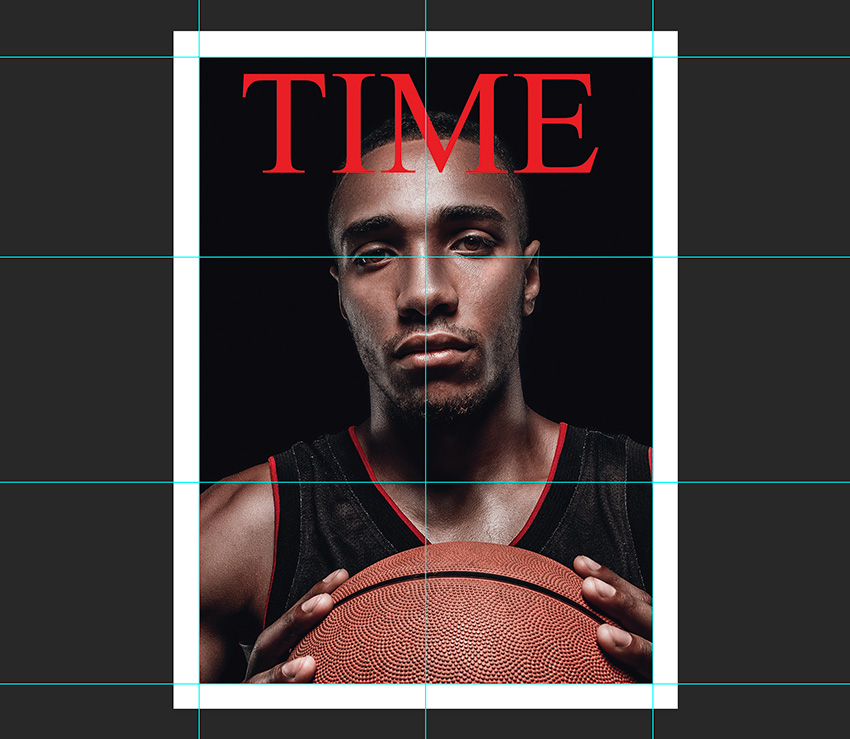
Head over to View > New Guide. In the New Guide option window, set the Orientation to Horizontal. Set the Position to 0.4 in and click OK. Create another horizontal guide and set the Position to 10.35 in.
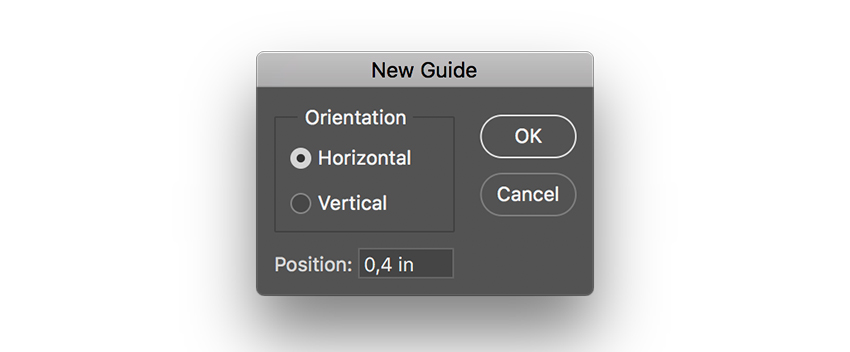
For the vertical margins, set the Orientation to Vertical. Set the position to 0.4 in and 7.6 in.

Step 3
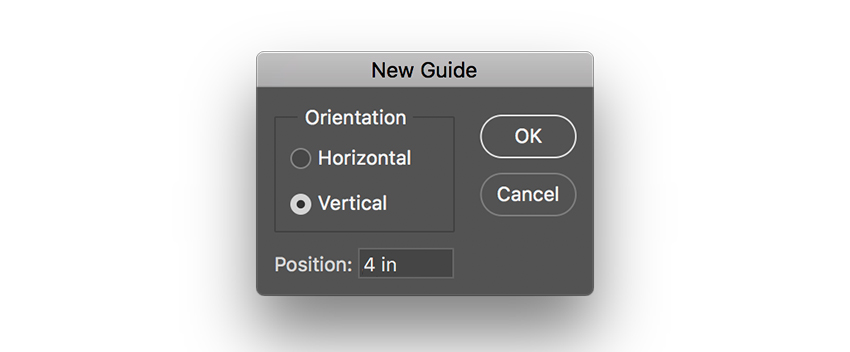
Now we will create vertical guides to help with the layout of the elements on the Time magazine template. Head over to View > New Guide. In the New Guide option window, set the Orientation to Vertical. Set the Position to 4 in.
Step 4
We will divide the magazine cover template into thirds horizontally. Head over to View > New Guide. In the New Guide option window, set the Orientation to Vertical. Set the Position to 3.58 in.
Repeat this step and set the Position to 7.16 in. Hide and show the guides by pressing Command-:.

2. Designing a Time Magazine Template
Step 1
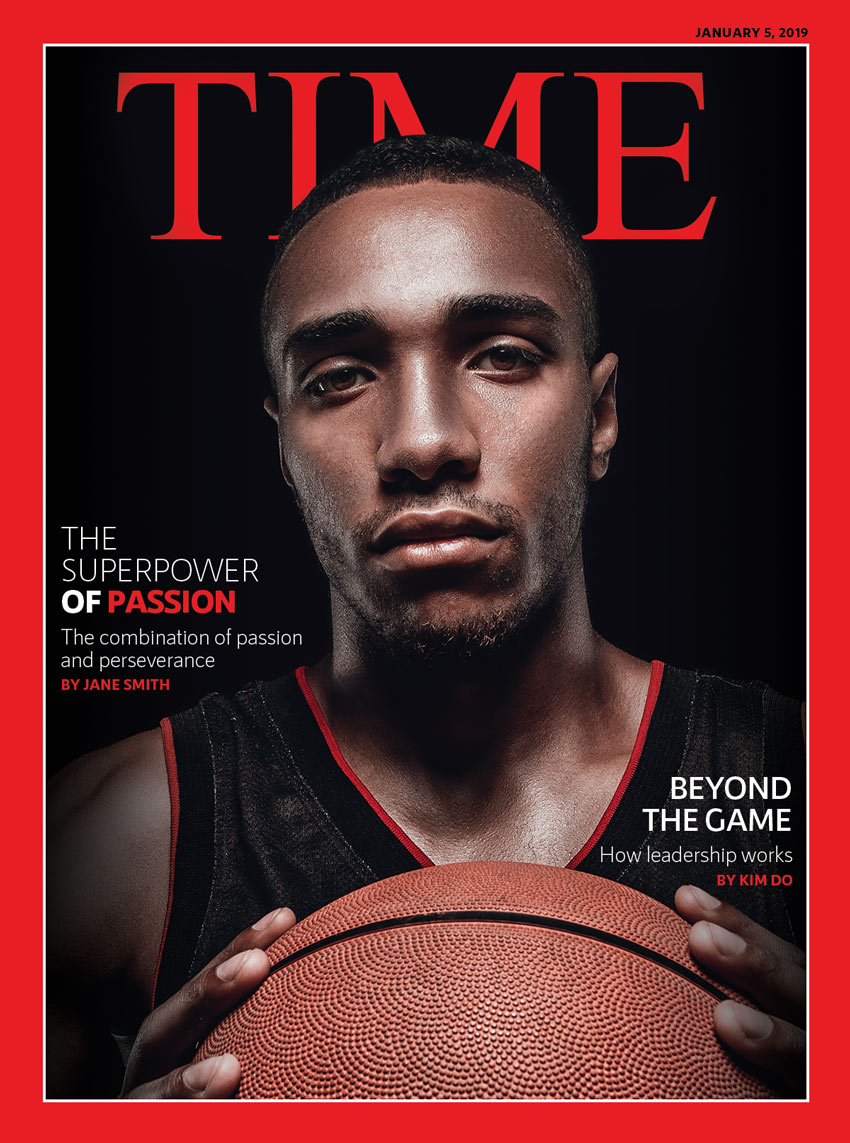
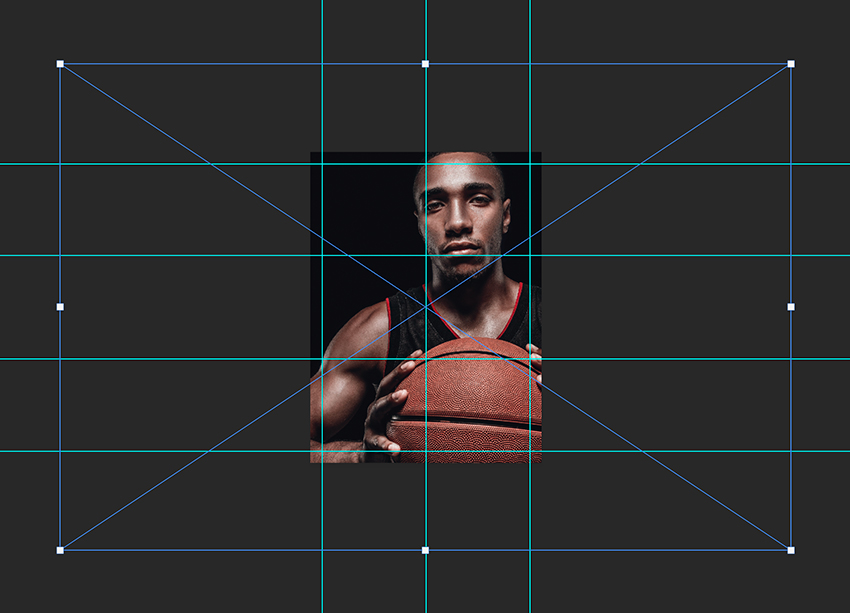
Drop the Portrait of basketball player image into the Photoshop file. Head over to the Control bar and activate the Maintain Aspect Ratio button. Set the Width and Height Percentage to 130%.
Step 2
We will use the guides to help us place the image within the Time magazine template. Press Command-T to transform the image. Use the first horizontal guide to align the eyes of the subject. Use the center vertical guide to center the subject on the page.
Step 3
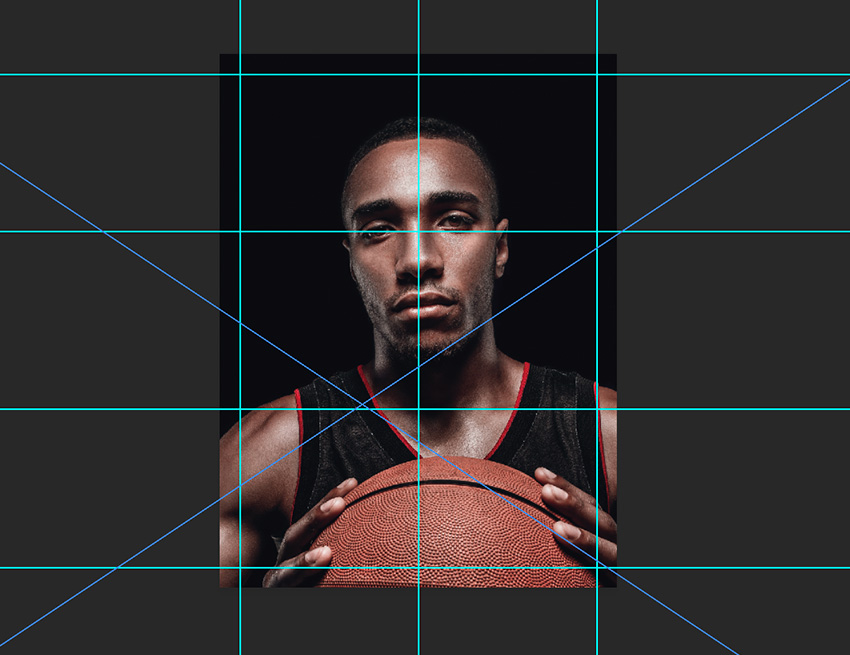
Select the Rectangular Marquee Tool (M) from the toolbar. Draw a rectangle on the margin guides we created.

Step 4
Head over to the Layers panel and click on the Layer Mask button. This should create a layer mask on the image, eliminating the content outside of the margin.

Step 5
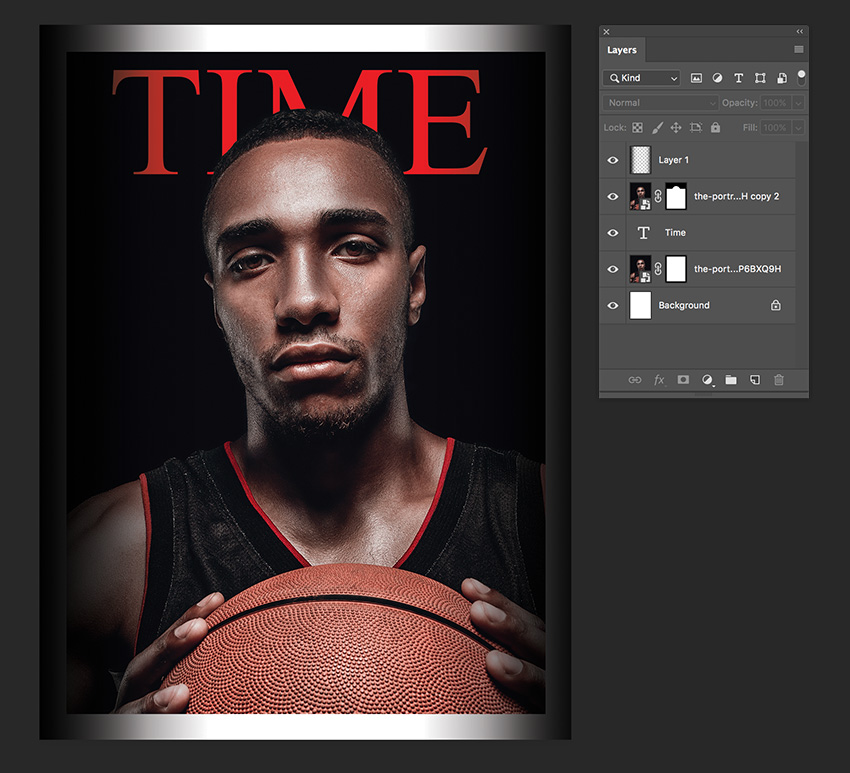
For this tutorial, we want to achieve a superimposed image over the text. In order to create this, we need to ‘sandwich’ the text in between the image.
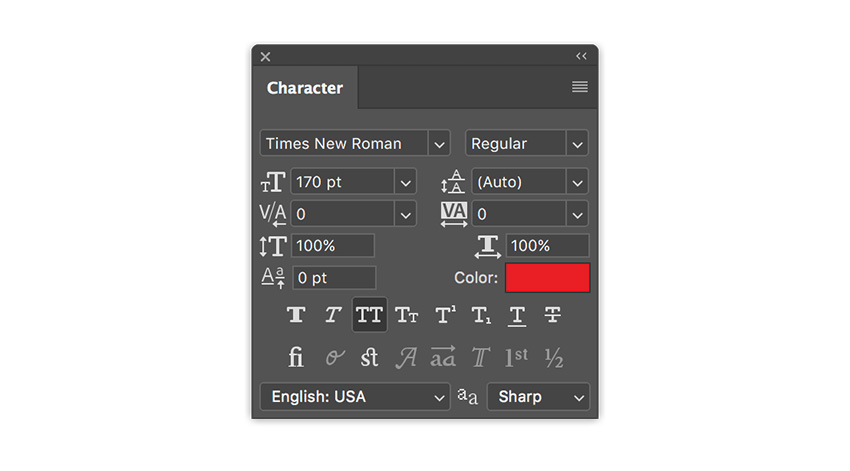
Let’s create the text by selecting the Text Tool (T) from the toolbar, clicking on the document, and typing ‘TIME.’ Head over to the Character panel, and set the Font to Times New Roman and the Size to 170 pt. Click on the color swatch and set the color to #e81e25.
With the help of the vertical center guide, place the text to align with it.
Step 6
On the Layers panel, select the image layer and press Command-J to duplicate the layer. Place the image layer over the type layer.

Step 7
We need to edit the newly duplicated layer to be able to see the text. On the Layers panel, select the Layer Mask thumbnail on the duplicated image. Select the Brush Tool and set the foreground color to black.
Right click on the document to set the size of the brush to 70 px and Hardness to 0%. Close crop the top of the subject’s head—this will help reveal the text on the back. Hide the layers below if necessary.

Step 8
To be able to make the headlines pop, we will darken the sides of the photograph. On the toolbar, select the Gradient Tool (G). Head over to the Control bar and open the Gradient Editor by clicking on the sample swatch.
In the Gradient Editor option window, select the Foreground to Transparent preset. Click OK.

Step 9
On the Layers panel, create a new layer by clicking on the New Layer button. Use the Gradient Tool to create linear gradients that start on the sides and fade into the background. Use the image below as an example.
Step 10
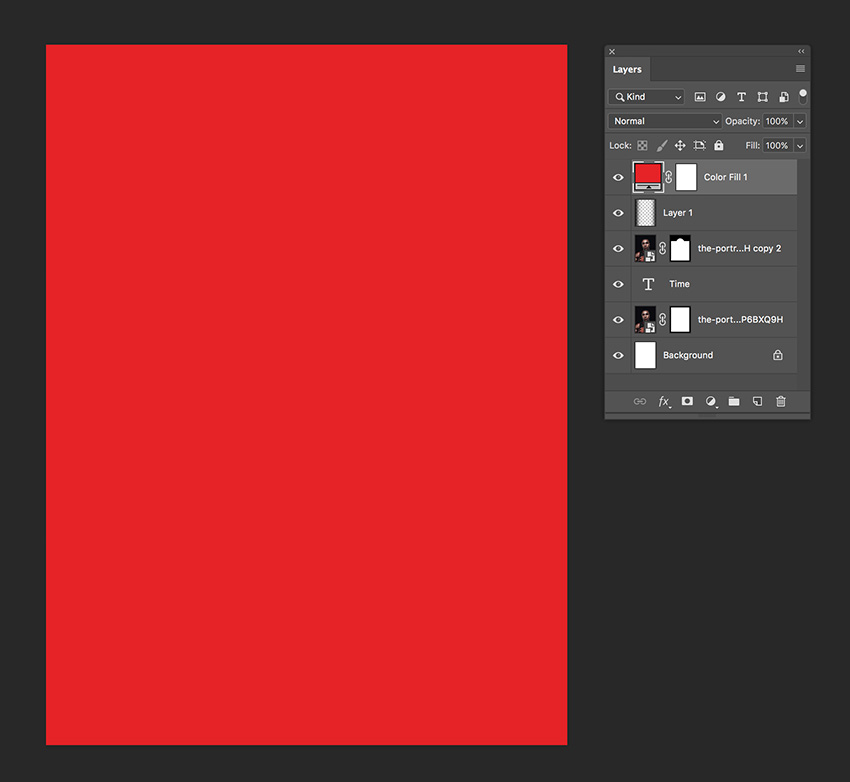
On the Layers panel, add a Solid Color layer by going to Create a New Fill or Adjustment Layer > Solid Color. Use this signature Time magazine red color #e81e25.
Step 11
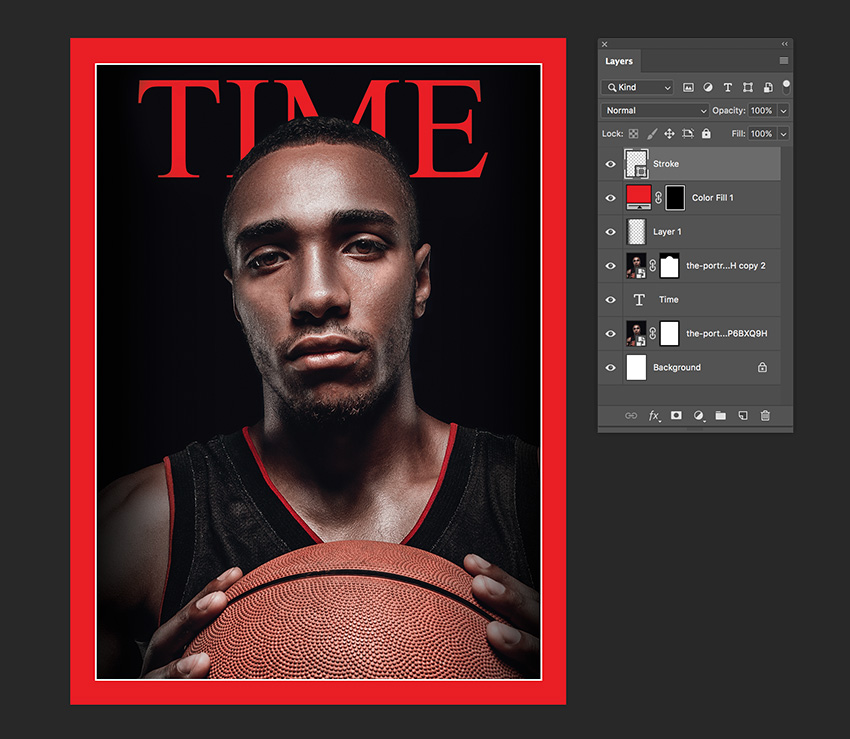
Using the Rectangular Marquee Tool (M) and with the help of the guides, create a rectangle inside the margin. To create the signature red margin, press Shift-Command-I to invert the selection.

Step 12
On the Layers panel, make sure you are selecting the Color Fill layer. Press the Layer Mask button to delete the content inside the margin.

Step 13
Now we need to create the white stroke that’s present between the red margin and the image. On the toolbar, select the Rectangle Tool (U) and draw a rectangle on the margin guides.
Head over to the Control bar and use the following settings:
- Fill to None
- Stroke to White
- Stroke Width to 4 px
3. Adding Cover Lines to Your Time Magazine Cover Template
Step 1
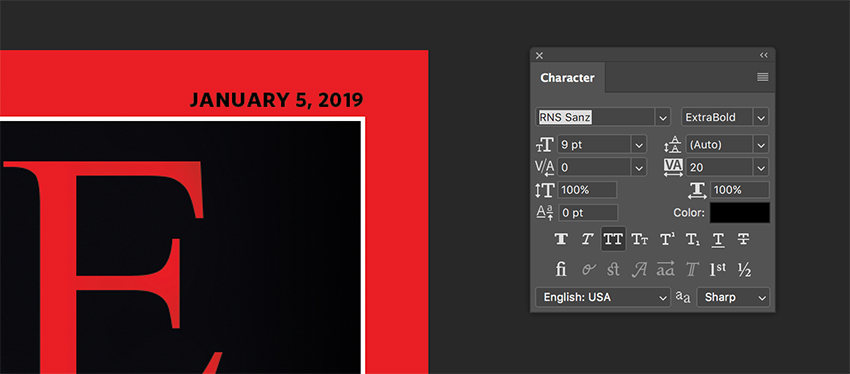
Using the Text Tool (T), add a date to the top right corner, outside of the white stroke.
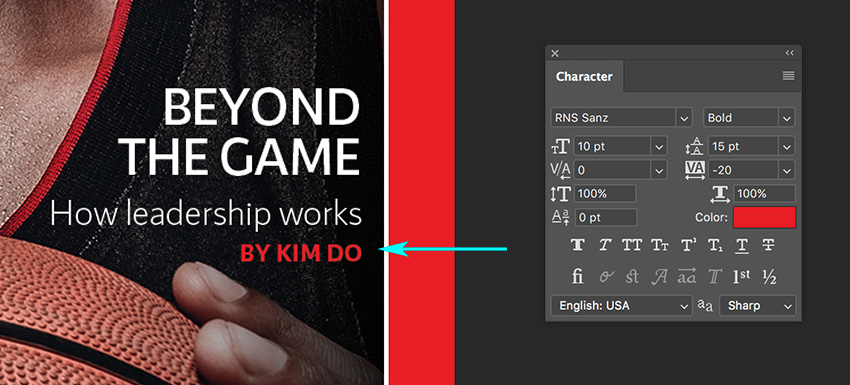
Using the Character panel, set the Font to RNS Sanz, Size to 9 pt, and Tracking to 20.
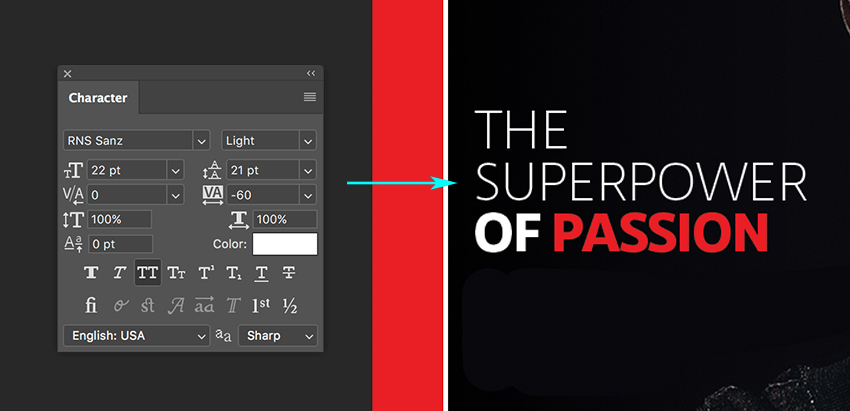
Step 2
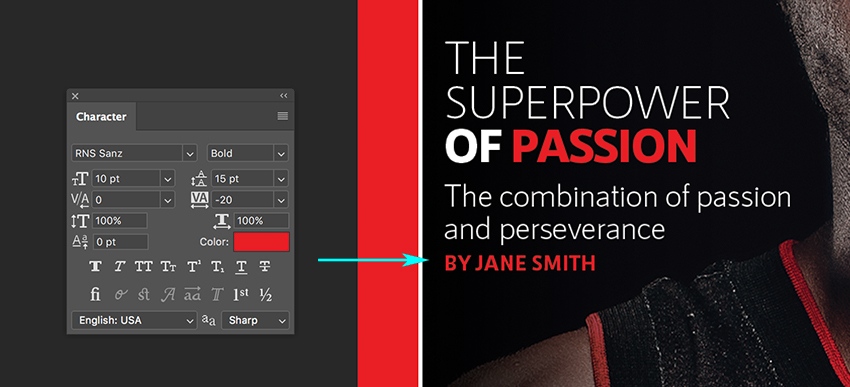
Add a cover line on the left side of the cover, just above the subject’s shoulder. Using the Character panel, format the cover line. I chose to use a combination of the Light and Extra Bold families for the first three lines, as shown in the image below. Feel free to use your own mix!
I also added a small deck following the main cover lines.

Last but not least, I added an author/writer line in the iconic red #e81e25 to create contrast.
Step 3
Add a second set of cover lines on the right side of the magazine cover template. Just below the shoulder and on the shirt is perfect as it provides a near solid black background.
Here, I also used a combination of the Semibold, Light, and Bold families. I used Semibold on the first two lines in order not to distract the viewer from the other set on the left.
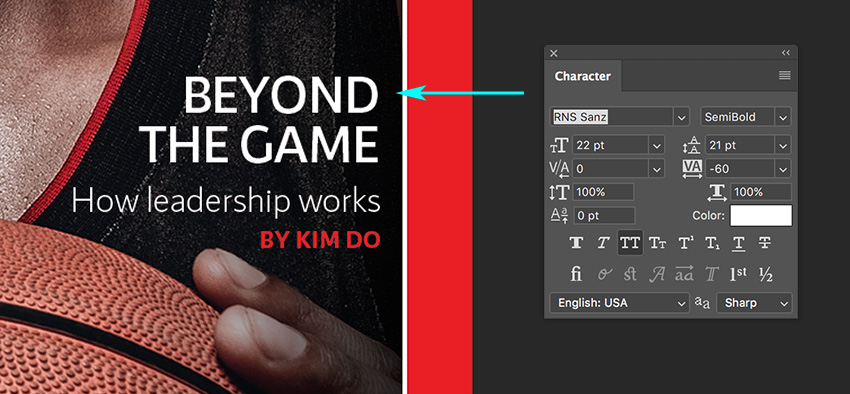
Add a small deck to follow the cover line.

Add an author/writer line, using the red color #e81e25 to help create contrast.
4. How to Save Your Time Magazine Cover Template for Web
Head over to File > Save and save the file as you would normally.
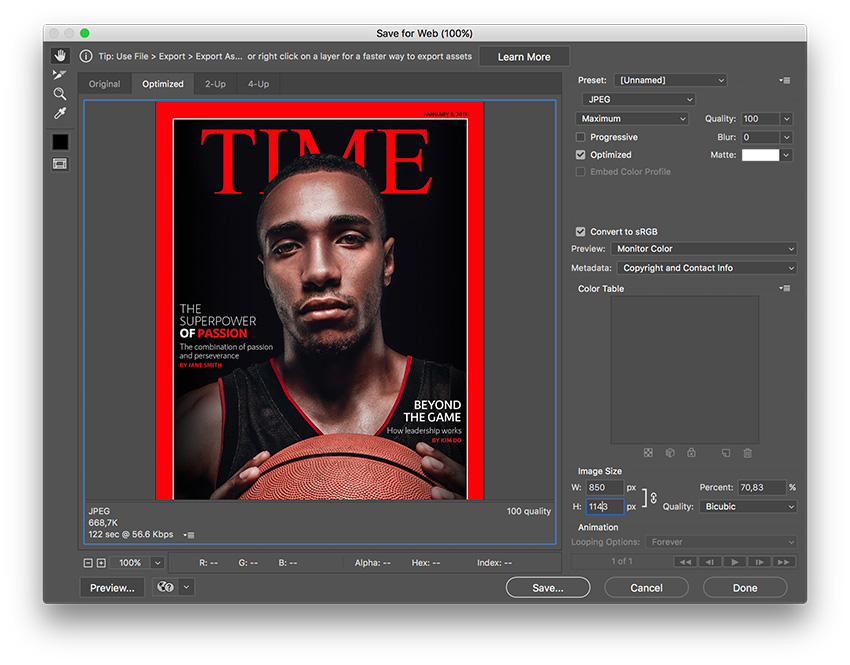
To save a JPEG file for web, head over to File > Save for Web or Shift-Option-Command-S. Select the file type you want to save the document in—I am choosing JPEG—and set 100 for Quality. Under Image size, you can change the pixel size of the image if you have any size constraints.
On the bottom left-hand side, you can see a preview of the file size. This is useful when there are size constraints on a website and you need to lower the quality or the size of the image.
Click on Save… to choose the location in the new window, and click on Save again.
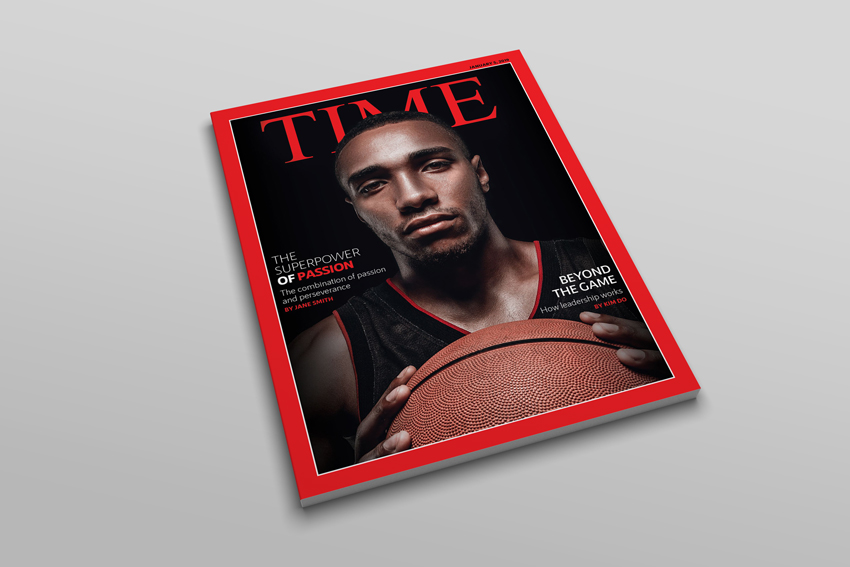
Great Job! You’ve Finished This Magazine Template!
In this tutorial, we learned how to make a magazine cover template. We covered some essential tools that will help you in your future projects. Don’t forget to show us your cover lines experimentation on the comment section! Today, we learned to:
- set up a Photoshop file
- use grids and margins to create a cohesive design
- use Layer Masks to create a superimposed image on text
- use the Character panel
If you are new to InDesign and need magazine templates for printing or promotional marketing templates right away, head over to Envato Elements and GraphicRiver. Or try Placeit’s Magazine Cover Maker. We’ve got many options to explore!
If you liked this tutorial, you might like these: