
In this article, we’ll discuss how you can make a live chat script in PHP. Although there are different ways you could achieve this, we’ll use a socket-based implementation.
If you’re building a community site which involves user engagement, it’s useful to provide a way for users to discuss ideas in real time. When it comes to real-time interaction between users, it’s best to provide a kind of chat-room feature where they can get together and discuss their ideas.
Today, we’re going to discuss how you can implement live chat in your PHP website. As it’s a popular feature, there are a lot of ready-made chat scripts available in the market. You’ll find a mix of both free and premium PHP chat scripts to choose from.
In this article, we’re going to use the Chat Using WebSocket and PHP Socket module, which is built in PHP and is completely open source.
In the next section, we’ll see how to download and configure the Chat Using WebSocket and PHP Socket module.
How to Download and Configure the Chat Using WebSocket and PHP Socket Module
The Chat Using WebSocket and PHP Socket module is available on GitHub, and thus, you can either clone the repository or download the .zip package file.
If you want to clone the Chat Using WebSocket and PHP Socket repository, you can use the following command on your command prompt.
git clone https://github.com/sanwebe/Chat-Using-WebSocket-and-PHP-Socket.git
On the other hand, if you want to download the .zip file, you could download it from the official repo.
The Chat-Using-WebSocket-and-PHP-Socket directory contains the package files. You need to place this directory under the document root of your web server so that you can access it via the browser.
Next, the package contains two PHP files, server.php and index.php, and we need to configure the host value in both files. Open both files in your favorite text editor and replace the localhost value with the hostname of your server. Of course, if you’re working on a local machine for testing purposes, you don’t need to change it.
With these changes, we’re done with the configuration of our module. Before we go ahead and see how to run it, we’ll go through the server.php and index.php files to understand how exactly it works in the next section.
How the Chat Using WebSocket and PHP Socket Module Works
The Chat Using WebSocket and PHP Socket module is based on WebSockets. Let’s quickly see what exactly the WebSocket API is:
The WebSocket API is an advanced technology that makes it possible to open a two-way interactive communication session between the user’s browser and a server. With this API, you can send messages to a server and receive event-driven responses without having to poll the server for a reply. — MDN
Once a browser opens a web socket connection with the web server, it can perform two-way communication with the web server. And thus, it can send data to the web server with the help of the send method, and it can receive data from the web server with the help of the onmessage event handler. So that’s the client-side implementation of WebSockets.
On the server side, we need to use PHP socket functions to open and bind sockets, listen to incoming socket connections, and read and send data to all the available sockets.
Let’s go through the important snippets in both files.
The index.php File
The index.php file is responsible for displaying the chat UI and handling a socket connection with the web server.
Let’s go through the following snippet, which is the most important part in the index.php file.
<script language="javascript" type="text/javascript">
    //create a new WebSocket object.
    var msgBox = $('#message-box');
    var wsUri = "ws://localhost:9000/demo/server.php";
    websocket = new WebSocket(wsUri);

    websocket.onopen = function(ev) { // connection is open
        msgBox.append('<div class="system_msg" style="color:#bbbbbb">Welcome to my "Demo WebSocket Chat box"!</div>'); //notify user
    }
    // Message received from server
    websocket.onmessage = function(ev) {
        var response         = JSON.parse(ev.data); //PHP sends Json data

        var res_type         = response.type; //message type
        var user_message     = response.message; //message text
        var user_name         = response.name; //user name
        var user_color         = response.color; //color

        switch(res_type){
            case 'usermsg':
                msgBox.append('<div><span class="user_name" style="color:' + user_color + '">' + user_name + '</span> : <span class="user_message">' + user_message + '</span></div>');
                break;
            case 'system':
                msgBox.append('<div style="color:#bbbbbb">' + user_message + '</div>');
                break;
        }
        msgBox[0].scrollTop = msgBox[0].scrollHeight; //scroll message

    };

    websocket.onerror    = function(ev){ msgBox.append('<div class="system_error">Error Occurred - ' + ev.data + '</div>'); };
    websocket.onclose     = function(ev){ msgBox.append('<div class="system_msg">Connection Closed</div>'); };

    //Message send button
    $('#send-message').click(function(){
        send_message();
    });

    //User hits enter key
    $( "#message" ).on( "keydown", function( event ) {
      if(event.which==13){
          send_message();
      }
    });

    //Send message
    function send_message(){
        var message_input = $('#message'); //user message text
        var name_input = $('#name'); //user name

        if(message_input.val() == ""){ //empty name?
            alert("Enter your Name please!");
            return;
        }
        if(message_input.val() == ""){ //emtpy message?
            alert("Enter Some message Please!");
            return;
        }

        //prepare json data
        var msg = {
            message: message_input.val(),
            name: name_input.val(),
            color : '<?php echo $colors[$color_pick]; ?>'
        };
        //convert and send data to server
        websocket.send(JSON.stringify(msg));
        message_input.val(''); //reset message input
    }
</script>
Firstly, the new WebSocket(wsUri) call opens a socket connection with the web server. Once a socket connection is open, we’ve defined different event handlers to catch different types of events.
Event Handlers
Mainly, the WebSocket object supports four events: onopen, onmessage, onerror, and onclose. Our script has defined event handlers for all these events.
The onopen event handler is used to display a welcome message to users.
websocket.onopen = function(ev) { // connection is open
    msgBox.append('<div class="system_msg" style="color:#bbbbbb">Welcome to my "Demo WebSocket Chat box"!</div>'); //notify user
}
Next, the onmessage event handler is used to display messages that are received from the web server. Basically, it parses the JSON data received from the server, prepares the HTML code, and appends it to the chat box.
websocket.onmessage = function(ev) {
    var response         = JSON.parse(ev.data); //PHP sends Json data

    var res_type         = response.type; //message type
    var user_message     = response.message; //message text
    var user_name         = response.name; //user name
    var user_color         = response.color; //color

    switch(res_type){
        case 'usermsg':
            msgBox.append('<div><span class="user_name" style="color:' + user_color + '">' + user_name + '</span> : <span class="user_message">' + user_message + '</span></div>');
            break;
        case 'system':
            msgBox.append('<div style="color:#bbbbbb">' + user_message + '</div>');
            break;
    }
    msgBox[0].scrollTop = msgBox[0].scrollHeight; //scroll message

};
You can use the onerror event handler to handle errors and display appropriate error messages to users.
websocket.onerror = function(ev){ msgBox.append('<div class="system_error">Error Occurred - ' + ev.data + '</div>'); };
Finally, the onclose event handler is used to notify that the connection is closed.
websocket.onclose = function(ev){ msgBox.append('<div class="system_msg">Connection Closed</div>'); };
The send Method
If event handlers are used to listen and react to server-side events, the send method allows you to send data from a browser to the web server.
In the index.php file, we’ve defined the send_message function, which is called when users click on the Send button or press the Enter button. The send_message function handles the logic of sending data to the web server.
function send_message(){
    var message_input = $('#message'); //user message text
    var name_input = $('#name'); //user name

    if(message_input.val() == ""){ //empty name?
        alert("Enter your Name please!");
        return;
    }
    if(message_input.val() == ""){ //emtpy message?
        alert("Enter Some message Please!");
        return;
    }

    //prepare json data
    var msg = {
        message: message_input.val(),
        name: name_input.val(),
        color : '<?php echo $colors[$color_pick]; ?>'
    };
    //convert and send data to server
    websocket.send(JSON.stringify(msg));
    message_input.val(''); //reset message input
}
As you can see, we’ve called the websocket.send method to send data to the web server.
The Server.php File
The server.php file is responsible for listening to incoming socket connections, reading data, and sending it to all the clients. In this section, we’ll discuss important snippets in the server.php file.
The first thing is to create a socket connection by using the socket_create function.
$socket = socket_create(AF_INET, SOCK_STREAM, SOL_TCP);
Next, we’ll bind a socket on the specific port and start listening for a connection on that socket.
socket_bind($socket, 0, $port);
socket_listen($socket);
Also, we’ve initialized the $clients variable, which holds different socket connections from different users.
$clients = array($socket);
Finally, there’s the while loop, which is endless, and it does two important things, as explained below.
Firstly, it checks for any new socket connection. If there’s a new socket connection, it’s added to the global $clients variable. It also notifies other clients about this new connection. Basically, other users are notified when a new user joins the chat room.
//check for new socket
if (in_array($socket, $changed)) {
    $socket_new = socket_accept($socket); //accept new socket
    $clients[] = $socket_new; //add socket to client array

    $header = socket_read($socket_new, 1024); //read data sent by the socket
    perform_handshaking($header, $socket_new, $host, $port); //perform websocket handshake

    socket_getpeername($socket_new, $ip); //get ip address of connected socket
    $response = mask(json_encode(array('type'=>'system', 'message'=>$ip.' connected'))); //prepare json data
    send_message($response); //notify all users about new connection

    //make room for new socket
    $found_socket = array_search($socket, $changed);
    unset($changed[$found_socket]);
}
Next, it loops through all the connected sockets and checks for any incoming data. If there’s any data received on any socket, it reads that data by using the socket_recv function. The received data is in the JSON format, and thus we need to decode it in the first place. Finally, the send_message function is called, which sends this data to all the connected sockets.
//loop through all connected sockets
foreach ($changed as $changed_socket) {

	//check for any incomming data
	while(socket_recv($changed_socket, $buf, 1024, 0) >= 1)
	{
		$received_text = unmask($buf); //unmask data
		$tst_msg = json_decode($received_text, true); //json decode
		$user_name = $tst_msg['name']; //sender name
		$user_message = $tst_msg['message']; //message text
		$user_color = $tst_msg['color']; //color

		//prepare data to be sent to client
		$response_text = mask(json_encode(array('type'=>'usermsg', 'name'=>$user_name, 'message'=>$user_message, 'color'=>$user_color)));
		send_message($response_text); //send data
		break 2; //exist this loop
	}
    ...
    ...
}
The send_message function looks like this:
function send_message($msg)
{
    global $clients;
    foreach($clients as $changed_socket)
    {
        @socket_write($changed_socket,$msg,strlen($msg));
    }
    return true;
}
If any user is disconnected, the following code is responsible for removing the socket client associated with that user from the $clients variable. All connected users are notified about this event as well.
$buf = @socket_read($changed_socket, 1024, PHP_NORMAL_READ);
if ($buf === false) { // check disconnected client
    // remove client for $clients array
    $found_socket = array_search($changed_socket, $clients);
    socket_getpeername($changed_socket, $ip);
    unset($clients[$found_socket]);

    //notify all users about disconnected connection
    $response = mask(json_encode(array('type'=>'system', 'message'=>$ip.' disconnected')));
    send_message($response);
}
As the while loop is endless, it continuously checks for any new connections and messages, and thus, all users are instantly notified about it.
So that’s the server-side implementation of sockets. In the next section, we’ll see how to run this module.
How to Run the Chat Using WebSocket and PHP Socket Module
Firstly, we’ve got to start the socket server so that it can start listening to incoming connections.
Go ahead and run the server.php file on the command line, as shown in the following snippet. It should start the socket server.
$php -q server.php
Now, you need to visit the index.php file in your browser. As you’ve placed the Chat-Using-WebSocket-and-PHP-Socket-master directory under the document root, you should be able to access it via https://localhost/Chat-Using-WebSocket-and-PHP-Socket-master/index.php.
You should see the following UI.
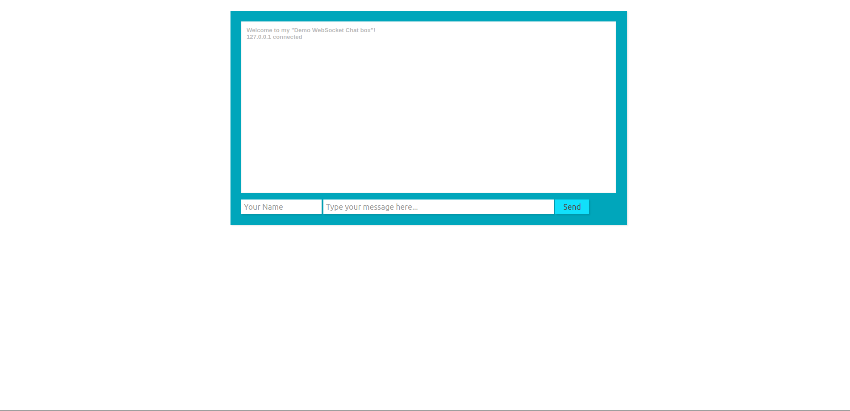
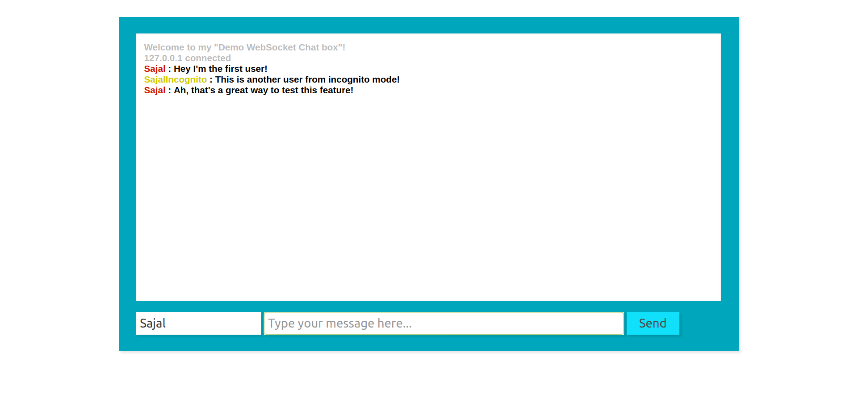
You can open the http://localhost/Chat-Using-WebSocket-and-PHP-Socket-master/index.php URL from another browser to simulate a multi-user experience. You’ll be notified about the new user connection.
Start messaging in both screens, and you’ll be notified instantly.
As you can see, it’s fairly easy to implement a socket-based PHP chat module on your website. There are other ways as well, like an AJAX-based chat module which continuously polls a server to get new messages from it, but the socket-based implementation is more efficient and doesn’t generate as much traffic to your server, so it is preferred.
Conclusion
Today, we discussed how you can implement live chat in PHP with the help of the Chat Using WebSocket and PHP Socket Module. It’s a socket-based implementation, and we’ve discussed important parts of this module throughout the article.
You can also read about the premium PHP chat scripts available on CodeCanyon.
