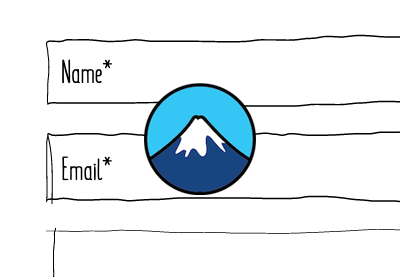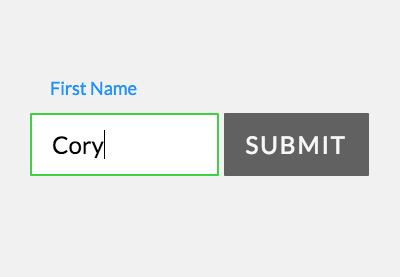
You might have seen forms where the placeholder text is animated when you start typing into that input. This pattern isn’t new, yet still remains a popular trend in UX form design.
Today, we’ll learn the steps needed for adding this behavior into a form built with Contact Form 7 (CF7), one of the most popular WordPress contact form plugins available.
What We’ll be Building
Here’s a quick video demo of the WordPress form in action:
Note: This tutorial assumes that you are somewhat familiar with WordPress and Contact Form 7.
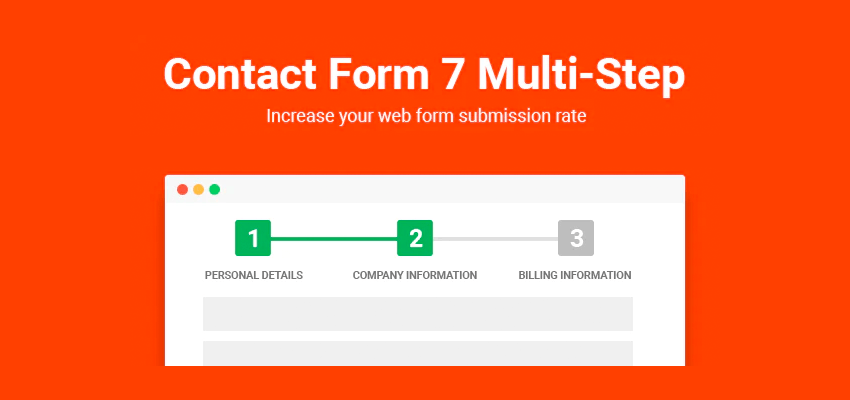
Contact Form 7 Plugins on Codecanyon
Interested in extending your Contact Form 7 quickly and easily? Codecanyon is home to loads of scripts and plugins to take your CF7 forms to the next level. For example, Multi Step for Contact Form 7 Pro is a great way to improve the UX of your long forms:
With that said, assuming that you’ve installed Contact Form 7 to a WordPress project, let’s get back into the tutorial and discuss the steps needed for animating our CF7 form labels.
1. Remove Unnecessary Tags
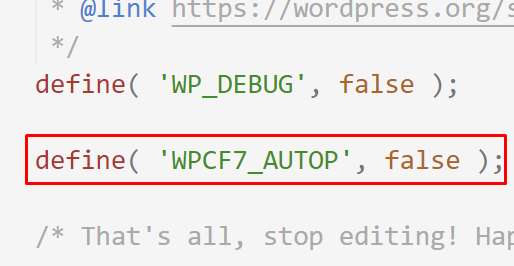
The first step is to remove the extra tags that Contact Form 7 throws in the form.

To do this, we’ll set the value of the WPCF7_AUTOP constant to false in the wp-config.php file, like this:
2. Create the Contact Form
The second step is to create the form from the WordPress dashboard.
We’ll use a combination of Contact Form 7 shortcodes along with some custom HTML.
The form will consist of two input elements, a textarea element, and a submit button. Also, we’ll associate each of the input and textarea elements with a label element. Each label will behave as a placeholder.
Here’s the code that we have to add to the Contact Form 7 editor:
<h1>Contact Us</h1>
<ul>
  <li class="form-wrapper">
    [text* your-fullname id:your-fullname]
    <label for="your-fullname">Full Name</label>
  </li>
  <li class="form-wrapper">
    [email* your-email id:your-email]
    <label for="your-email">Email</label>
  </li>
  <li class="form-wrapper form-textarea-wrapper">
    [textarea* your-message id:your-message]
    <label for="your-message">Message</label>
  </li>
  <li class="form-wrapper form-submit-wrapper">
    [submit "Submit"]
    <svg width="24" height="24" viewBox="0 0 24 24">
      <path d="M24 21h-24v-18h24v18zm-23-16.477v15.477h22v-15.477l-10.999 10-11.001-10zm21.089-.523h-20.176l10.088 9.171 10.088-9.171z"/>
    </svg>
  </li>
</ul>
3. Add the CSS Form Styles
Moving on, we’ll enqueue a new CSS file in the functions.php file of our project, like this (your destination folder may differ though):
wp_enqueue_style( 'custom', get_template_directory_uri() . '/assets/css/custom.css' );
Inside it, we’ll place a bunch of styles:
- We’ll start with some reset (generic) ones. Just to make the form a little more attractive, we’ll use a custom Google Font. Be sure to enqueue this font if you want to use it in your project.
- Next, we’ll define the main styles for our form. As we’ll see later, the form will receive the
form-with-animated-labelsclass. This will help us isolate it and avoid conflicts with other styles. - Finally, we’ll customize a little bit the appearance of some of the CF7 response messages.
Most importantly, have a look at how we style the labels. These are absolutely positioned elements and vertically centered inside their .form-wrapper parent. As we’ll see in a bit, when their related form element receives focus, they will be moved on top of it via the focused class.
Here are all the required styles:
/* RESET RULES & INITIAL SET UP
–––––––––––––––––––––––––––––––––––––––––––––––––– */
:root {
    --white: #fff;
    --black: #222;
    --brown: #9f4631;
    --gray: #9a9a9a;
    --lightgray: #f2f3f5;
}

* {
    padding: 0;
    margin: 0;
    box-sizing: border-box;
    border: none;
    outline: none;
}

input,
textarea {
    font-family: inherit;
    font-size: 100%;
}

[type="submit"] {
    cursor: pointer;
}

textarea {
    resize: none;
}

ul {
    list-style: none;
}

body {
    font: 20px/24px "IBM Plex Sans", sans-serif;
}

form {
    max-width: 600px;
    padding: 0 15px;
    margin: 100px auto;
}

h1 {
    font-size: 60px;
    line-height: 78px;
    margin-bottom: 50px;
}


/* FORM ELEMENTS
–––––––––––––––––––––––––––––––––––––––––––––––––– */
.form-with-animated-labels .form-wrapper {
    position: relative;
}

.form-with-animated-labels .form-wrapper + .form-wrapper {
    margin-top: 40px;
}

.form-with-animated-labels [type="text"],
.form-with-animated-labels [type="email"],
.form-with-animated-labels textarea {
    width: 100%;
    padding: 15px 10px;
    border: 1px solid transparent;
    border-radius: 5px;
    color: var(--black);
    background: var(--lightgray);
    font-size: 18px;
}

.form-with-animated-labels textarea {
    height: 150px;
}

.form-with-animated-labels [type="text"]:focus,
.form-with-animated-labels [type="email"]:focus,
.form-with-animated-labels textarea:focus {
    border-color: var(--brown);
}

.form-with-animated-labels label {
    position: absolute;
    top: 50%;
    left: 10px;
    font-size: 18px;
    transform: translateY(-50%);
    color: var(--gray);
    transition: all 0.25s ease-in-out;
}

.form-with-animated-labels .form-textarea-wrapper label {
    top: 10px;
    transform: none;
}

.form-with-animated-labels label.focused {
    top: -22px;
    transform: none;
    font-size: 13px;
    font-weight: bold;
    color: var(--black);
}

.form-with-animated-labels [type="submit"] {
    min-width: 160px;
    padding: 20px 4px;
    border-radius: 10px;
    width: 100%;
    font-size: 22px;
    font-weight: bold;
    text-transform: uppercase;
    box-shadow: 0 5px 15px rgba(0, 0, 0, 0.08);
    color: var(--white);
    background: var(--brown);
}

.form-with-animated-labels .form-submit-wrapper svg {
    position: absolute;
    top: 0;
    left: 0;
    transform: rotate(40deg);
    opacity: 0.75;
    fill: var(--white);
    width: 60px;
    height: 60px;
}

.form-with-animated-labels .wpcf7-form-control-wrap {
    position: static;
}

.form-with-animated-labels .wpcf7-not-valid-tip {
    position: absolute;
    bottom: 100%;
    right: 10px;
    font-size: 12px;
}


/* OUTPUT MESSAGES CF7
–––––––––––––––––––––––––––––––––––––––––––––––––– */
.wpcf7 form .wpcf7-response-output {
    font-size: 18px;
    padding: 10px;
    margin: 0;
}

.wpcf7 form.invalid .wpcf7-response-output,
.wpcf7 form.unaccepted .wpcf7-response-output,
.wpcf7 form.sent .wpcf7-response-output {
    border-color: var(--brown);
}
Note: For this example, I’m using a vanilla theme. Depending on your theme though, some of these styles may be overridden. Given that fact, if the form doesn’t appear as expected in your project, be sure to check your theme styles and make the necessary changes.
Tip: You can use conditional tags to load this CSS file only on the pages that include the form.
Why a CSS-Only Approach Won’t Work
Before moving on, let me clarify one thing.
You have probably seen many CSS-only implementations for creating floating labels on the web. These mainly take advantage of the “CSS checkbox hack technique”. Indeed, it’s a very handy technique which we have discussed many times in the past.
Unfortunately in this case, we cannot use it. If you inspect the markup that is generated from Contact Form 7’s shortcodes, you’ll notice that all form controls are wrapped within a span element.

As a result, the controls and their associated labels aren’t siblings and a style like this won’t have any effect:
.form-with-animated-labels [type="text"]:focus + label {
  // styles for the animation here
}
4. Add the JavaScript
As a next step, we’ll enqueue a new JavaScript file in the functions.php file of our project, like this (your destination folder may differ though):
wp_enqueue_script( 'custom', get_template_directory_uri() . '/assets/js/custom.js', array(), '', true );
Inside it, we’ll perform the following actions:
- Loop through all the
.form-with-animated-labelsforms. - For each form, we’ll grab its target controls (
inputs,textarea). In your case, these may differ. - Then, for each control, we’ll listen for the
focusandblurevents. These events will be responsible for animating the labels by toggling thefocusedclass which we defined earlier. - Lastly, we’ll use one of CF7’s AJAX events to bring back the labels to their initial position. Feel free to use any of those events according to your needs.
Here’s the corresponding JavaScript code:
const formsWithAnimatedLabels = document.querySelectorAll(
    ".form-with-animated-labels"
);
const focusedClass = "focused";

for (const form of formsWithAnimatedLabels) {
    const formControls = form.querySelectorAll(
        '[type="text"], [type="email"], textarea'
    );
    for (const formControl of formControls) {
        formControl.addEventListener("focus", function () {
            this.parentElement.nextElementSibling.classList.add(focusedClass);
        });

        formControl.addEventListener("blur", function () {
            if (!this.value) {
                this.parentElement.nextElementSibling.classList.remove(
                    focusedClass
                );
            }
        });
    }


    form.parentElement.addEventListener("wpcf7mailsent", function () {
        const labels = document.querySelectorAll(".focused");
        for (const label of labels) {
            label.classList.remove(focusedClass);
        }
    });
}
Tip: You can use conditional tags to load this JavaScript file only on the pages that include the form.
5. Call the Contact Form
Last but not least, we’ll include the generated Contact Form 7 shortcode in the desired part of our project:
[contact-form-7 404 "Not Found"]
Notice the class added via the html_class attribute. This is our familiar form-with-animated-labels class.
Conclusion
And we’re done, folks! In this short tutorial, we discussed a simple method for customizing the look and feel of a Contact Form 7 form by adding floating labels. I’m sure there will be other effective solutions as well, yet this one seems to do its job! Hopefully you will give it a try in one of your upcoming WordPress projects.
Have you ever created such an effect with Contact Form 7? Have you managed to come up with a CSS-only solution? Share your thoughts in the comments below.
As always, thanks a lot for reading!
More Contact Form 7 Customization and Floating Labels
If you are curious to learn how to build a responsive handmade SVG form with Contact Form 7, or would like to dive deeper into floating labels, take a look at these tutorials: