


In the following tutorial, we will celebrate the start of 2025, Year of the Snake, by making a golden snake text effect in Adobe Illustrator.
If you’re wondering what the Year of the Snake is, it’s the name given to the year 2025 in the Chinese zodiac. Besides 2025, years of the snake include 2025, 2013, 2001, 1989, 1977, 1965, and 1953.
If you don’t have the time to create text effects in Adobe Illustrator from scratch, then Envato is the solution. This creative platform has over 2,000 Illustrator add-ons you can download without restrictions! Give it a try and you’ll find plenty of Illustrator text effects to inspire you.
What you’ll learn in this tutorial
- How to create a snake pattern brush
- How to use warp effects
- How to use transform effects
- How to use the Brush Tool
- How to use the Gradient Tool
- How to use the Width Tool in Illustrator
- How to use opacity masks in Illustrator
What you’ll need
You’ll need the following set of textures in order to complete this Adobe Illustrator text effect:
1. How to create a new document and set up a grid
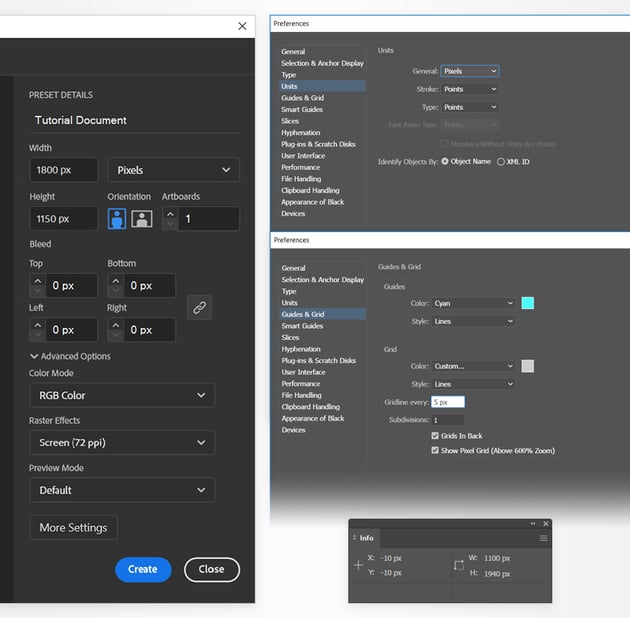
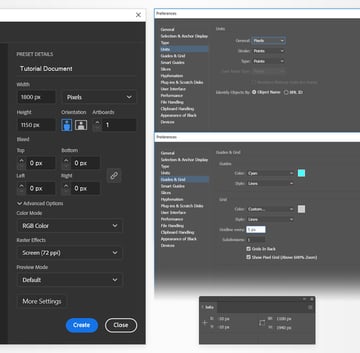
Hit Control-N to create a new document. Select Pixels from the Units drop-down menu, set the Width to 1800 px and the Height to 1150 px, and then click that Advanced Options button. Select RGB for the Color Mode and set the Raster Effects to Screen (72 ppi), and then click the Create button.
Enable the Grid (View > Show Grid or Control-“) and the Snap to Grid (View > Snap to Grid or Shift-Control-“). For starters, you will need a grid every 5 px, so simply go to Edit > Preferences > Guides & Grid, enter 5 in the Gridline every box and 1 in the Subdivisions box. Try not to get discouraged by all that grid—it will make your work easier, and keep in mind that you can easily enable or disable it using the Control-“ keyboard shortcut.
You should also open the Info panel (Window > Info) for a live preview with the size and position of your shapes. Don’t forget to set the unit of measurement to pixels from Edit > Preferences > Units. All these options will significantly increase your work speed.

2. How to create the main body shapes
Step 1
Pick the Rectangle Tool (M) from your toolbar, and then focus on the color settings. You can press Shift-X to easily swap the existing fill and stroke settings. Select the Stroke and remove the color, and keep the Fill color set to black.
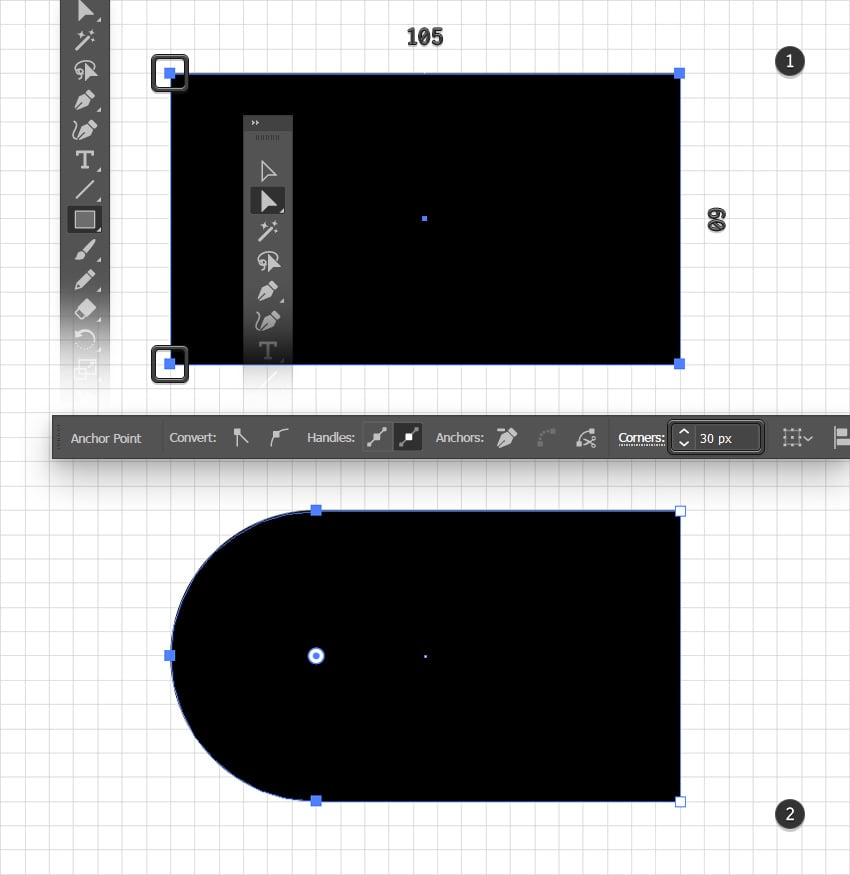
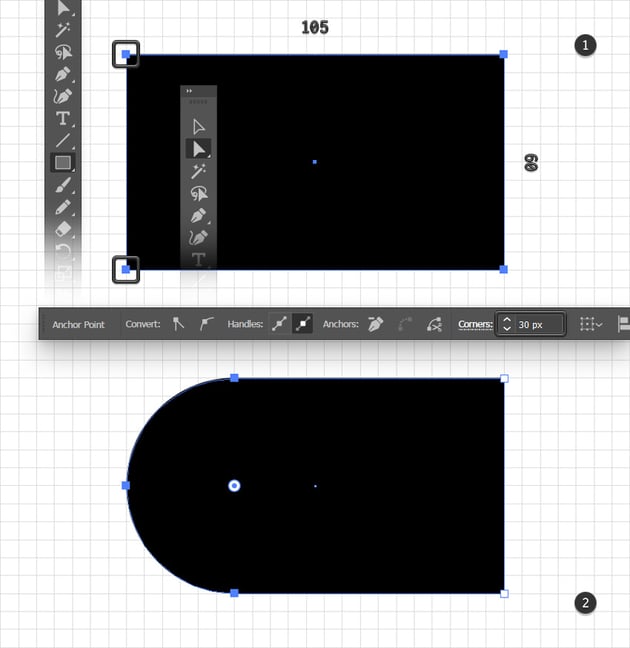
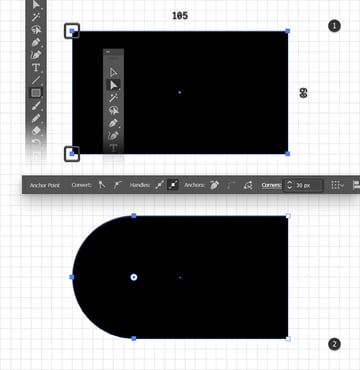
Move to your artboard and simply create a 105 x 60 px shape—the grid and Snap to Grid should make it easier.
Switch to the Direct Selection Tool (A) and use it to create the left anchor points, and then move to the Control panel to set the Radius to 30 px.
Step 2
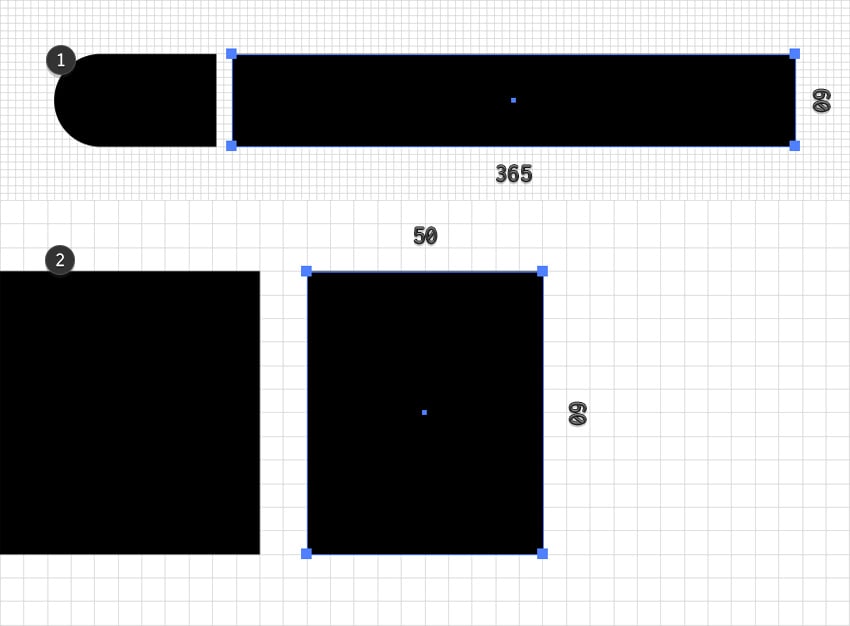
Reselect the Rectangle Tool (M) and use it to create a 365 x 60 px shape. Place it as shown in the first image, and then add a 50 x 60 px shape as shown in the second image.

Step 3
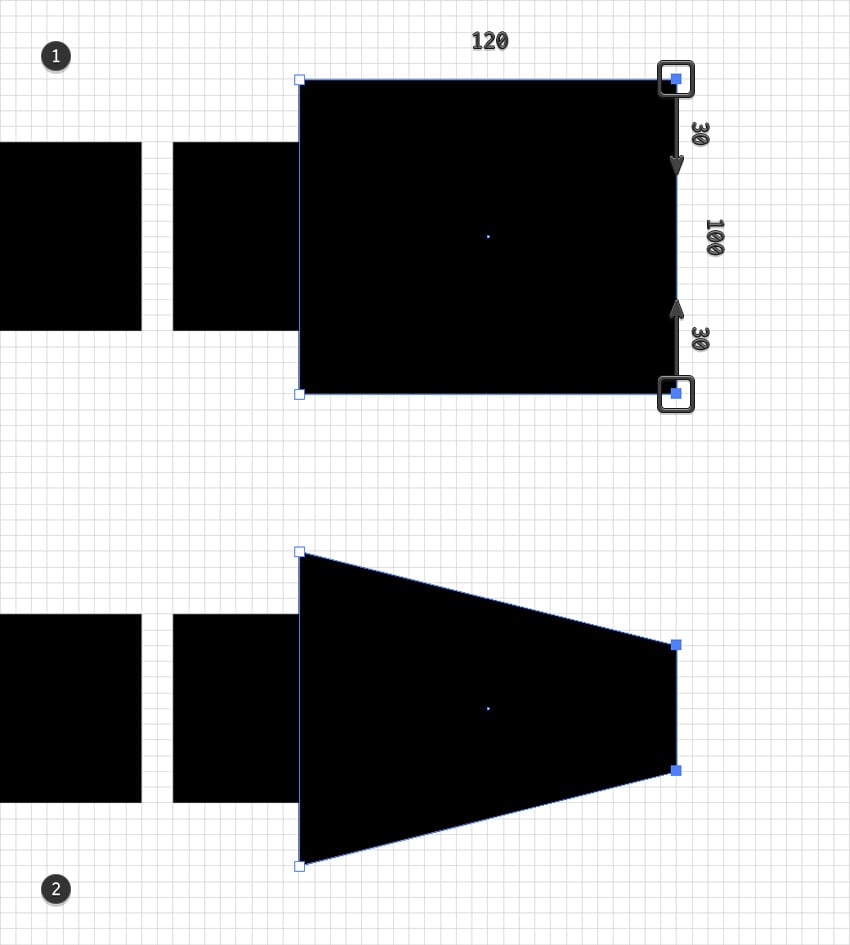
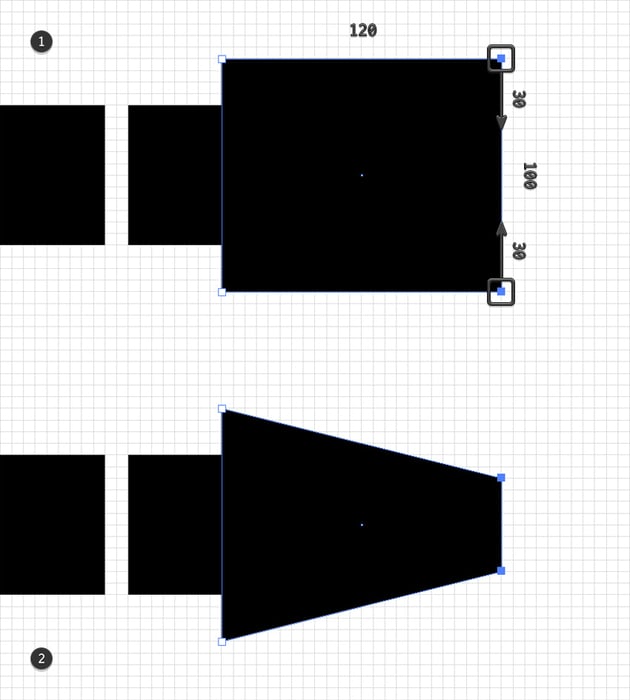
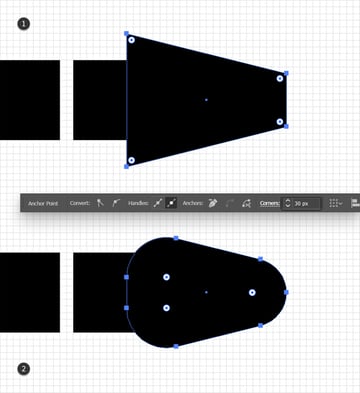
Continue with the Rectangle Tool (M) and add a 120 x 100 px shape, as shown in the first image.
Focus on the right side of this new rectangle and pick the Direct Selection Tool (A). Select the top anchor point and move it 30 px down, and then select the bottom anchor point and move it 30 px up.
Step 4
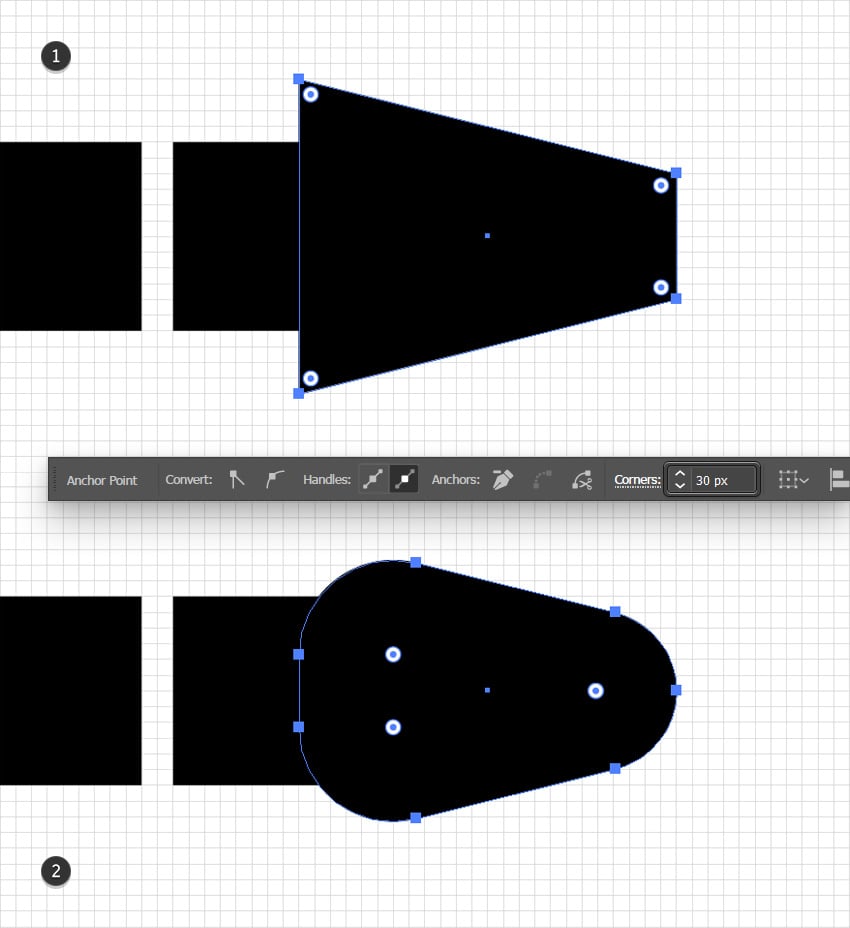
Select your entire trapezoid shape, make sure that the Direct Selection Tool (A) is active, and set the Corners to 30 px.
Step 5
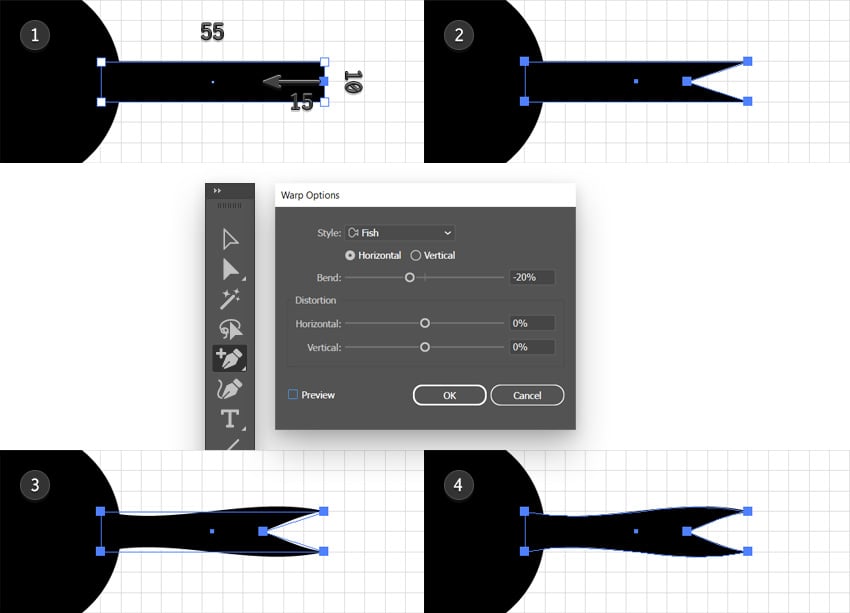
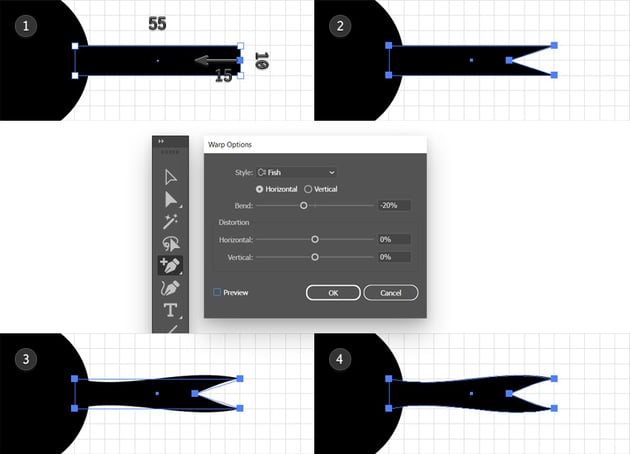
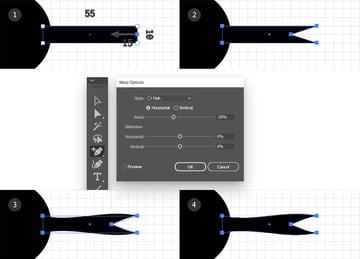
Using the Rectangle Tool (M), create a 55 x 10 px shape and place it as shown in the first image. Focus on the right side of this new rectangle and use the Add Anchor Point Tool (+) to add a third anchor point between the existing ones.
Use the Direct Selection Tool (A) to select this newly added anchor point, and move it 15 px to the left.
Select this entire shape and go to Effect > Warp > Fish. Enter the settings shown below and click OK, and then go to Object > Expand Appearance.
Step 6
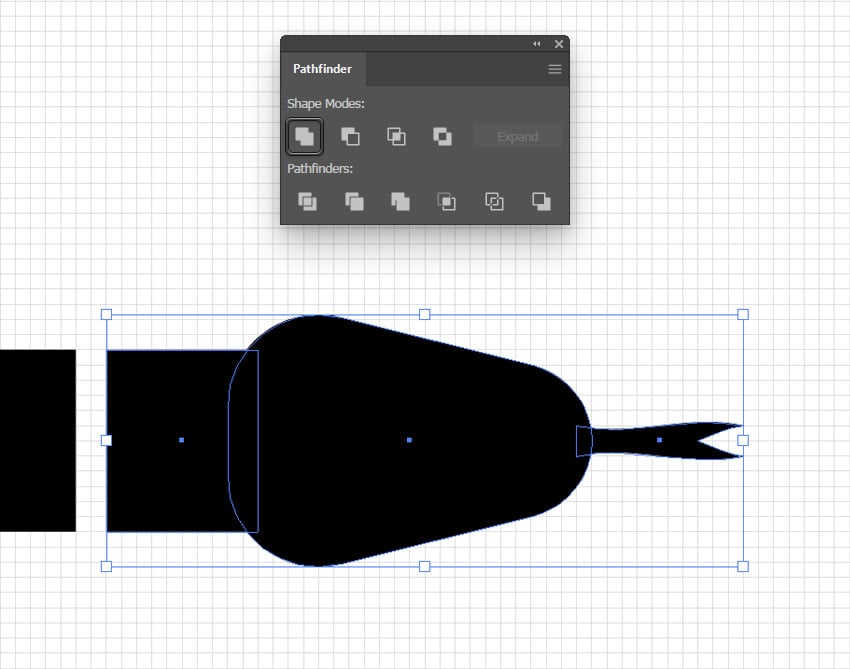
Select the three shapes that make up the head of your snake and merge them using the Unite button from the Pathfinder panel (Window > Pathfinder).
3. How to stylize the head of the snake
Step 1
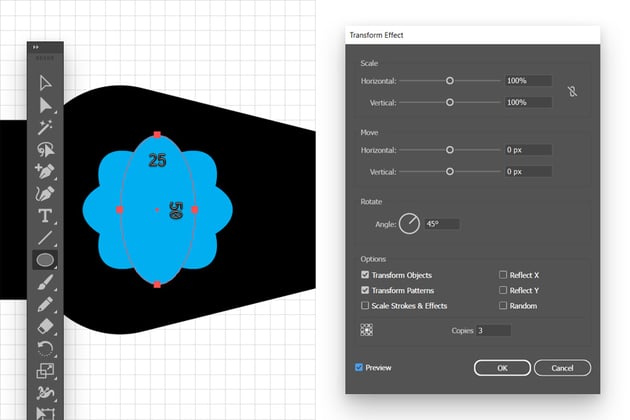
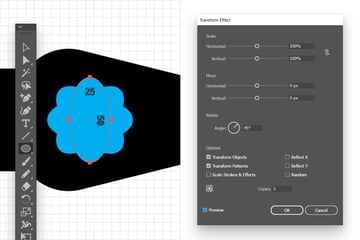
Using the Ellipse Tool (L), create a 25 x 50 px shape and place it roughly as shown in the following image. Make it blue, keep it selected, and go to Effect > Distort & Transform > Transform. Increase the number of Copies to 3, set the Angle to 45 degrees, and then click OK.

Step 2
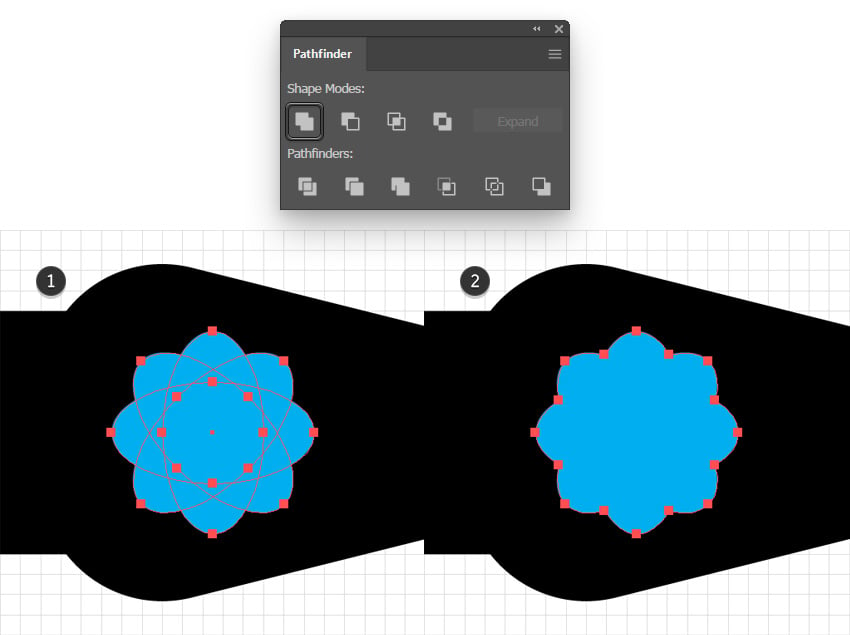
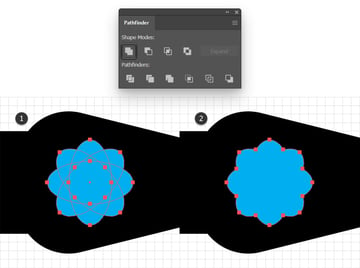
Make sure that your blue shape is still selected, go to Object > Expand Appearance, and then click the Unite button from the Pathfinder panel.

Step 3
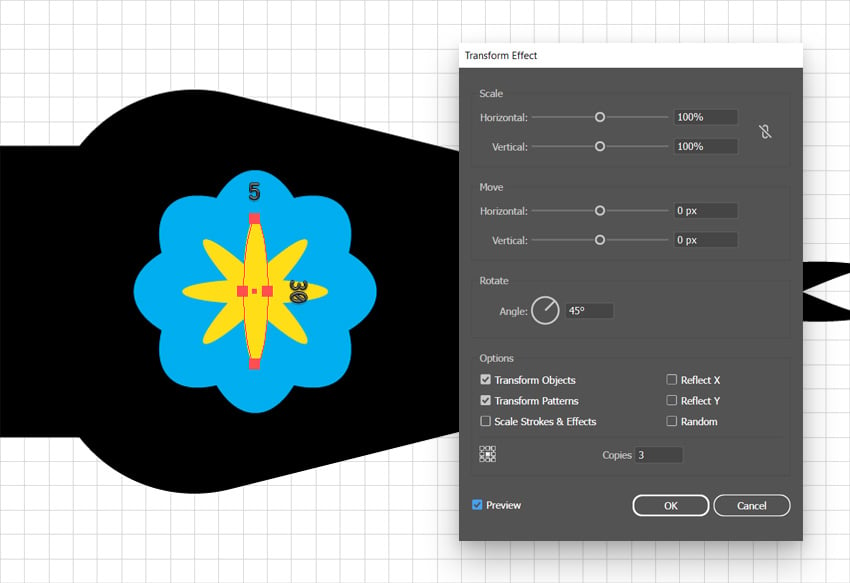
Using the Ellipse Tool (L), create a 5 x 30 px shape and place it roughly as shown in the following image. Make it yellow, keep it selected, and go to Effect > Distort & Transform > Transform. Again, increase the number of Copies to 3 and set the Angle to 45 degrees, and then click OK.
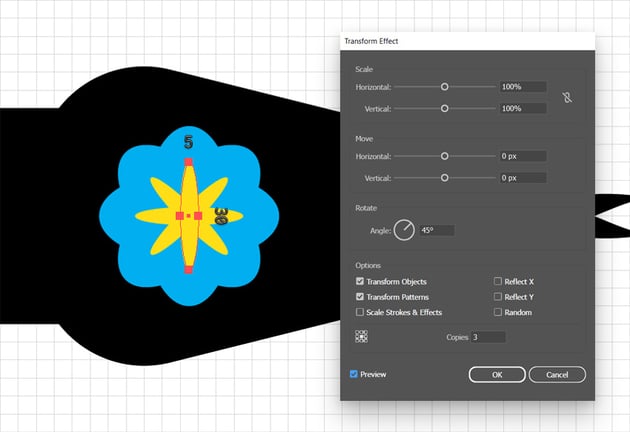
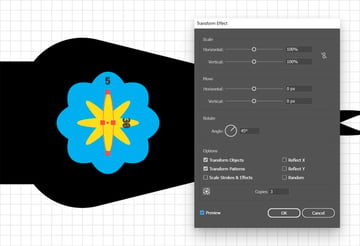
Step 4
Make sure that your yellow shape is still selected and go to Object > Expand Appearance, and then click the Unite button from the Pathfinder panel.
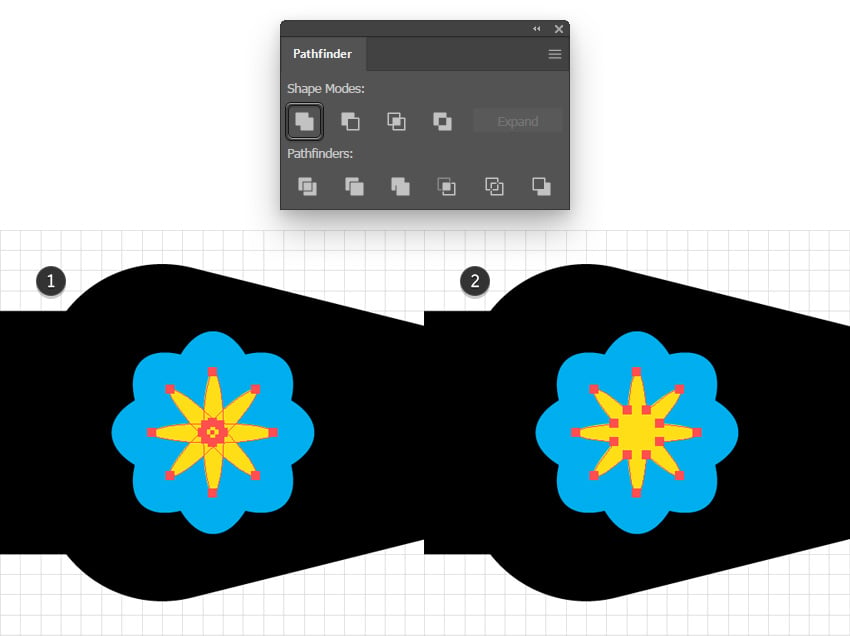
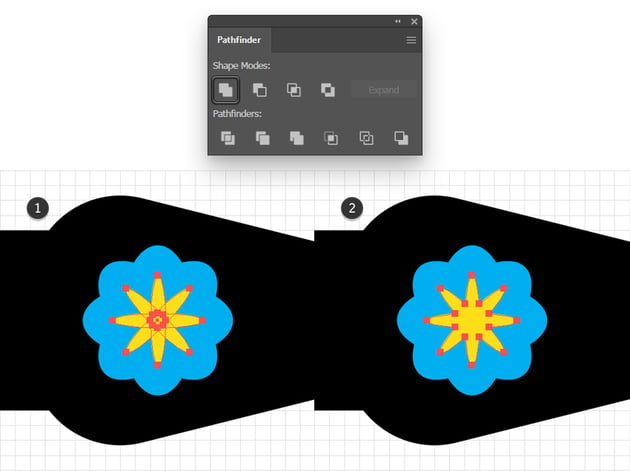
Step 5
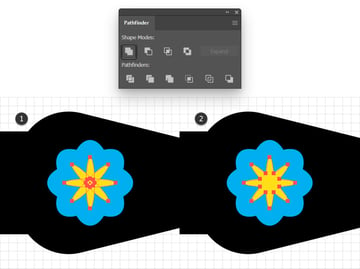
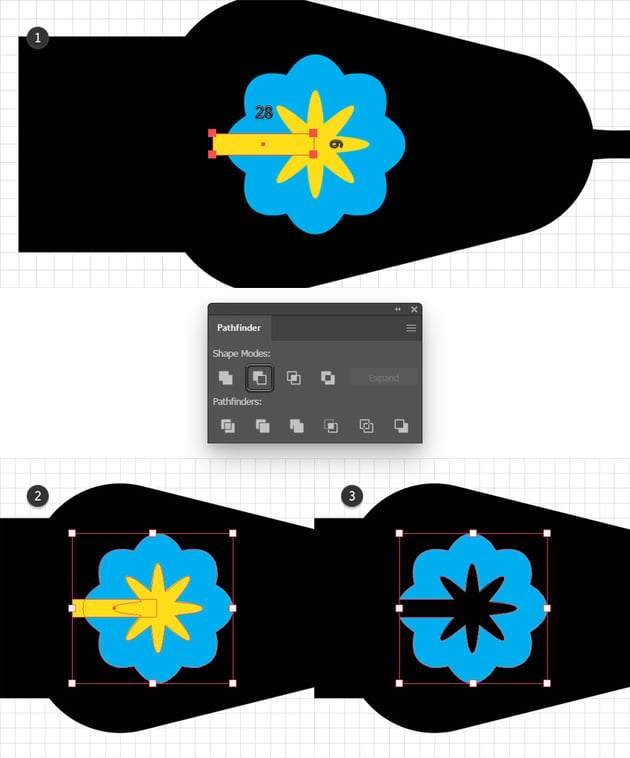
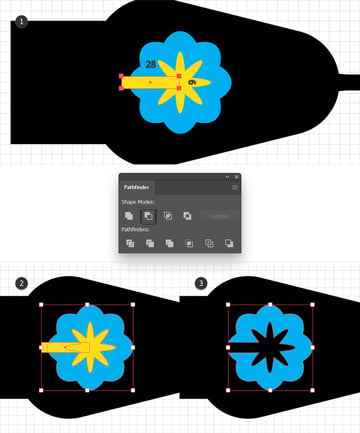
For this step, you’ll need a gridline every 1 px. Go to Edit > Preferences > Guides & Grid and simply enter 1 in that Gridline every box. Using the Rectangle Tool (M), create a 28 x 6 px shape and place it as shown in the first image.
Select both of your yellow shapes along with the blue one, and click the Minus Front button from the Pathfinder panel.

Step 6
Return to gridlines every 5 px. Go to Edit > Preferences > Guides & Grid and enter 5 in the Gridline every box.
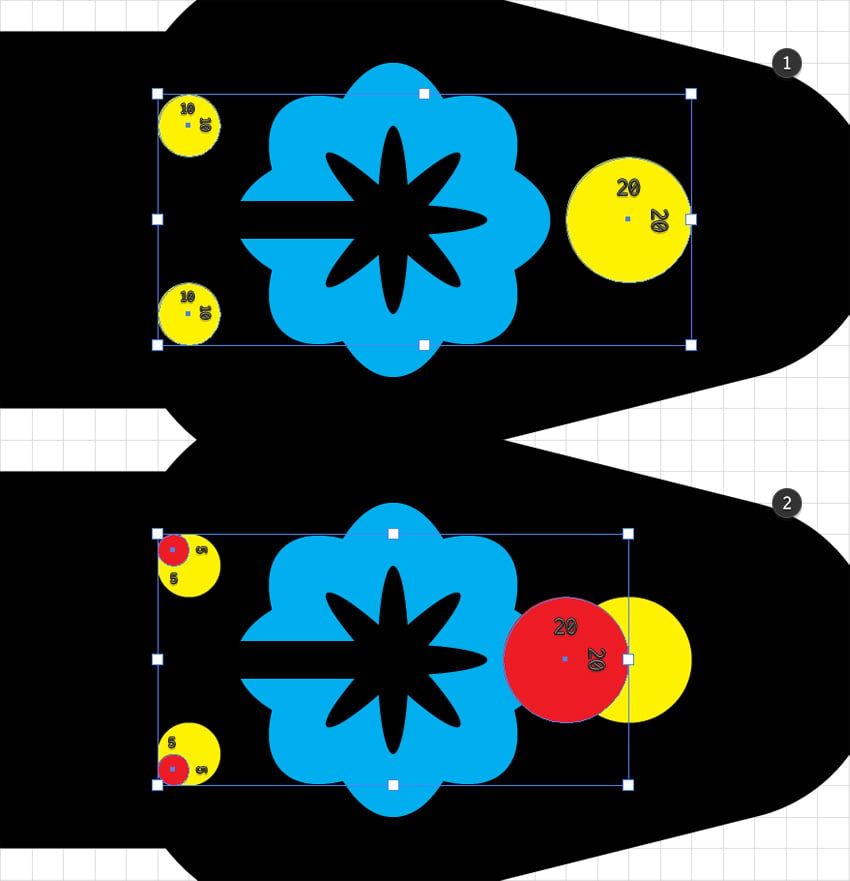
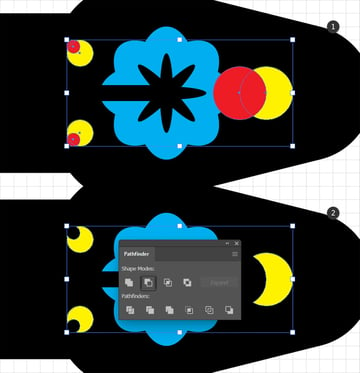
Using the Ellipse Tool (L), create a 20 px circle and two 10 px circles. Make them yellow and place them as shown in the first image. Select all three circles and turn them into a single compound path (Object > Compound Path > Make or Control-8).
Reselect the Ellipse Tool (L) to create another 20 px circle and two 5 px circles. Make them red and place them as shown in the second image. Again, select all three circles and turn them into a single compound path (Object > Compound Path > Make or Control-8).


Step 7
Select your red and yellow compound paths, and then click the Minus Front button from the Pathfinder panel.


4. How to stylize the body of the snake
Step 1
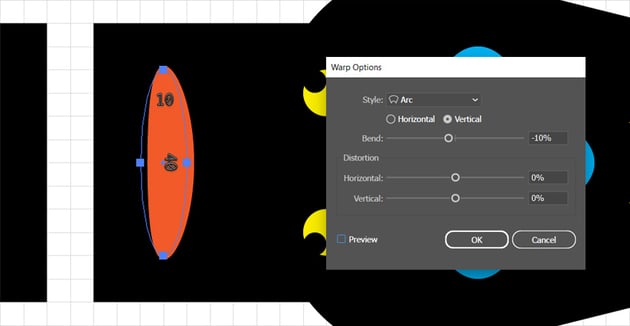
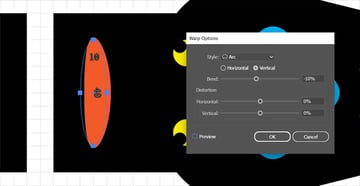
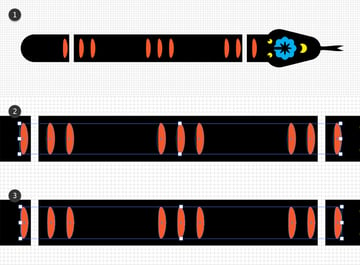
Using the Ellipse Tool (L), create a 10 x 40 px shape and place it as shown in the following image. Keep it selected as we’re about to add a warp effect. Simply, go to Effect > Warp > Arc. Enter the settings shown below and click OK.

Step 2
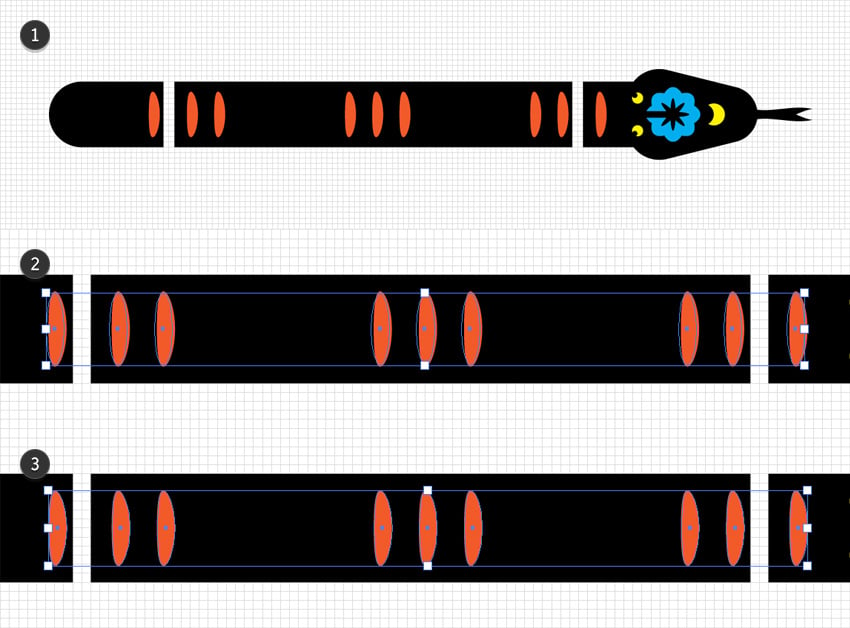
Duplicate the ellipse made in the previous step (Control-C > Control-V) and spread the copies as shown in the following image.

Step 3
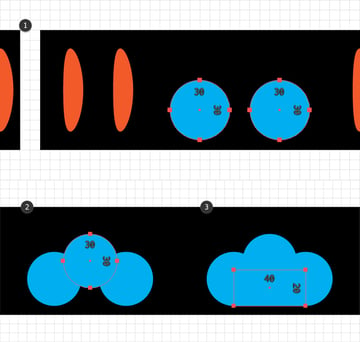
Using the Ellipse Tool (L), add three 30 px circles as shown below. Continue with the Rectangle Tool (M), using it to create a 40 x 20 px shape and placing it as shown in the third image.


Step 4
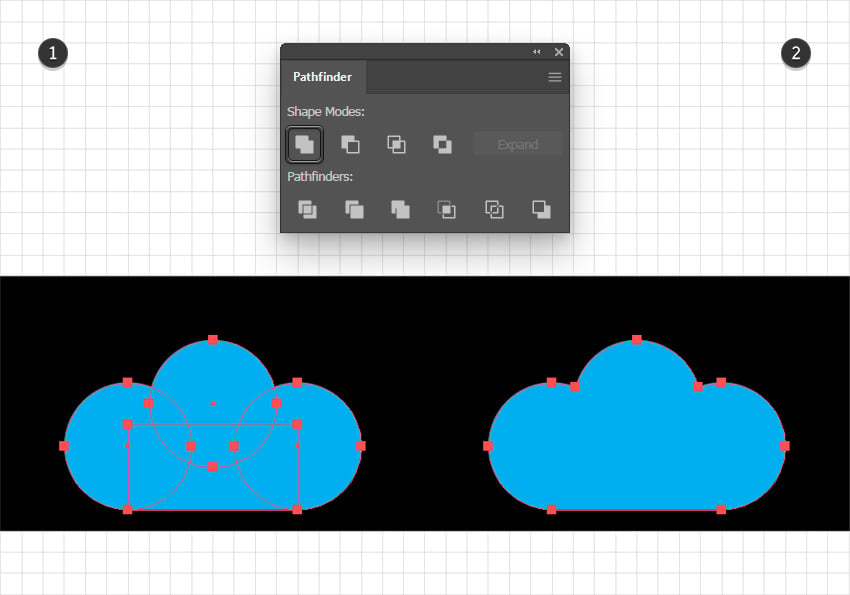
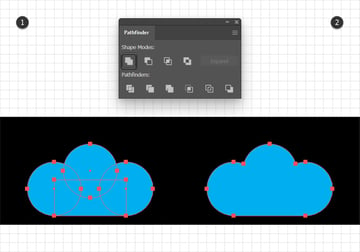
Select the four shapes added in the previous step and merge them using the Unite button from the Pathfinder panel.

Step 5
Again, for this step you’ll need a gridline every 1 px. Go to Edit > Preferences > Guides & Grid and simply enter 1 in that Gridline every box.
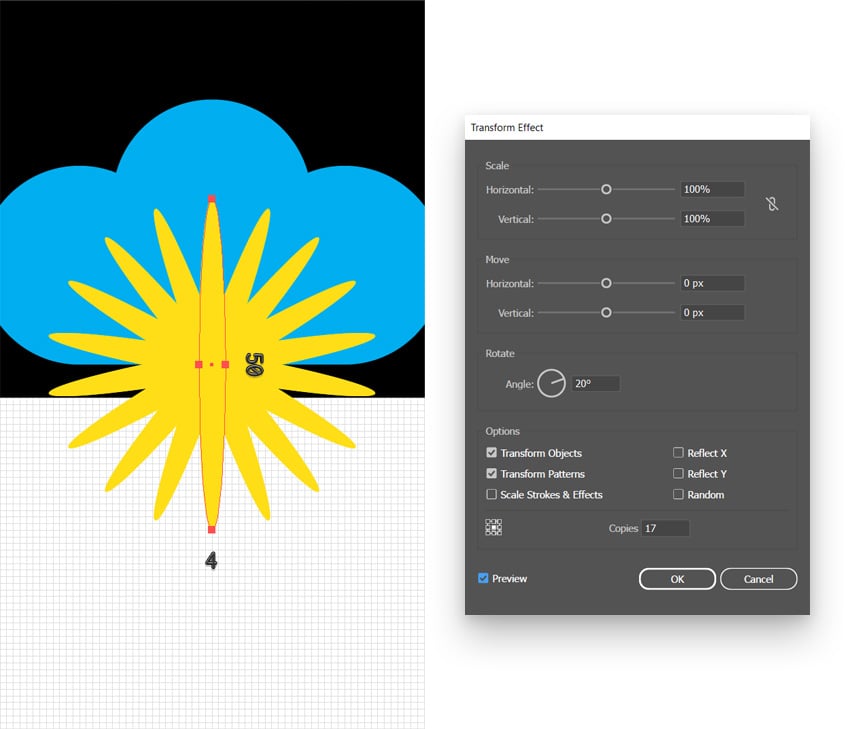
Using the Ellipse Tool (L), create a 4 x 50 px shape and place it roughly as shown in the following image. Make it yellow and keep it selected as we’re about to add a Transform effect. Just go to Effect > Distort & Transform > Transform. Increase the number of Copies to 17 and set the Angle to 20 degrees, and then click OK.
Step 6
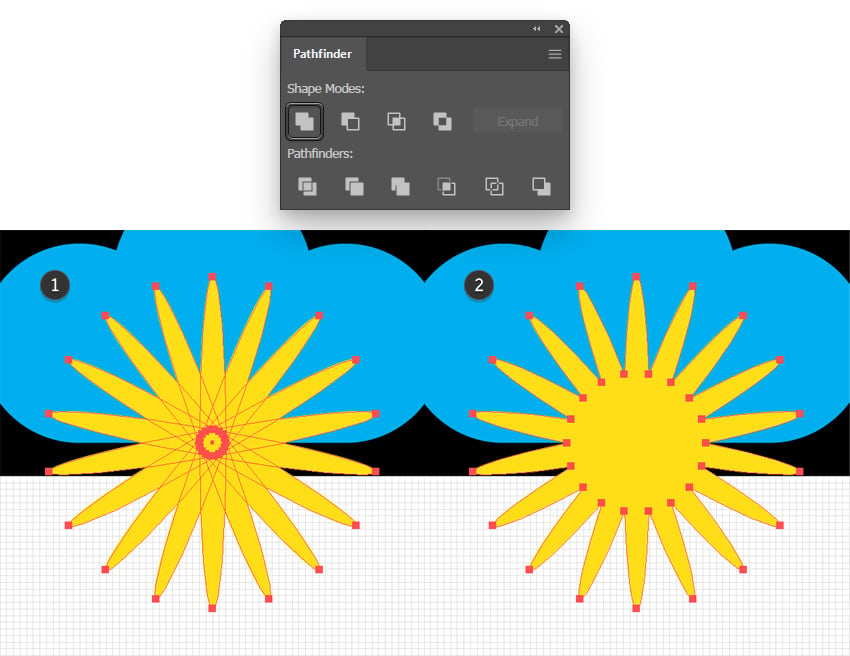
Make sure that your yellow shape is still selected and go to Object > Expand Appearance, and then click the Unite button from the Pathfinder panel.
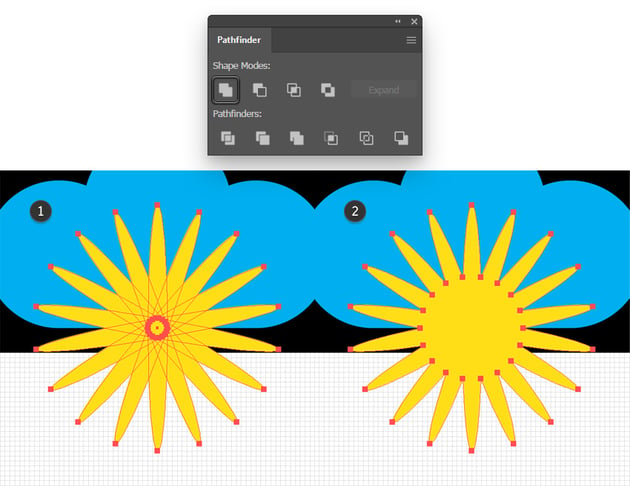

Step 7
Select your yellow shape along with the blue one, and click the Minus Front button from the Pathfinder panel.

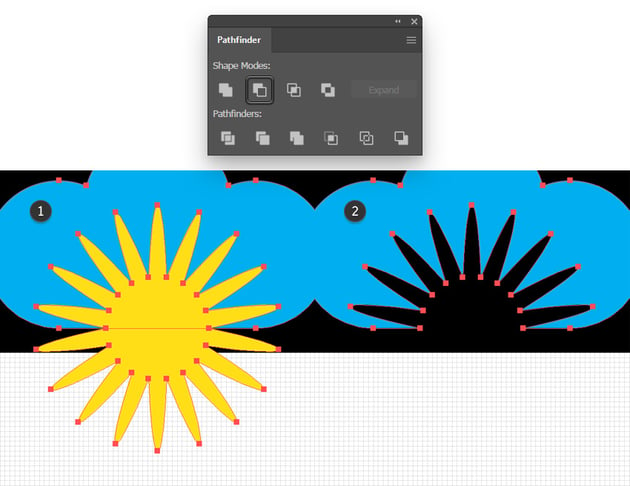

Step 8
Return to gridlines every 5 px. So go to Edit > Preferences > Guides & Grid and enter 5 in that Gridline every box.
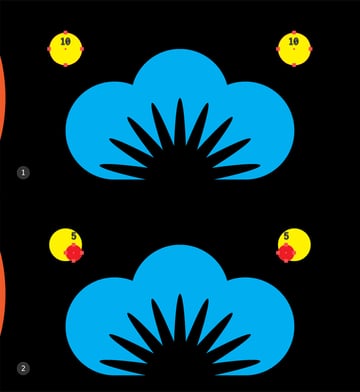
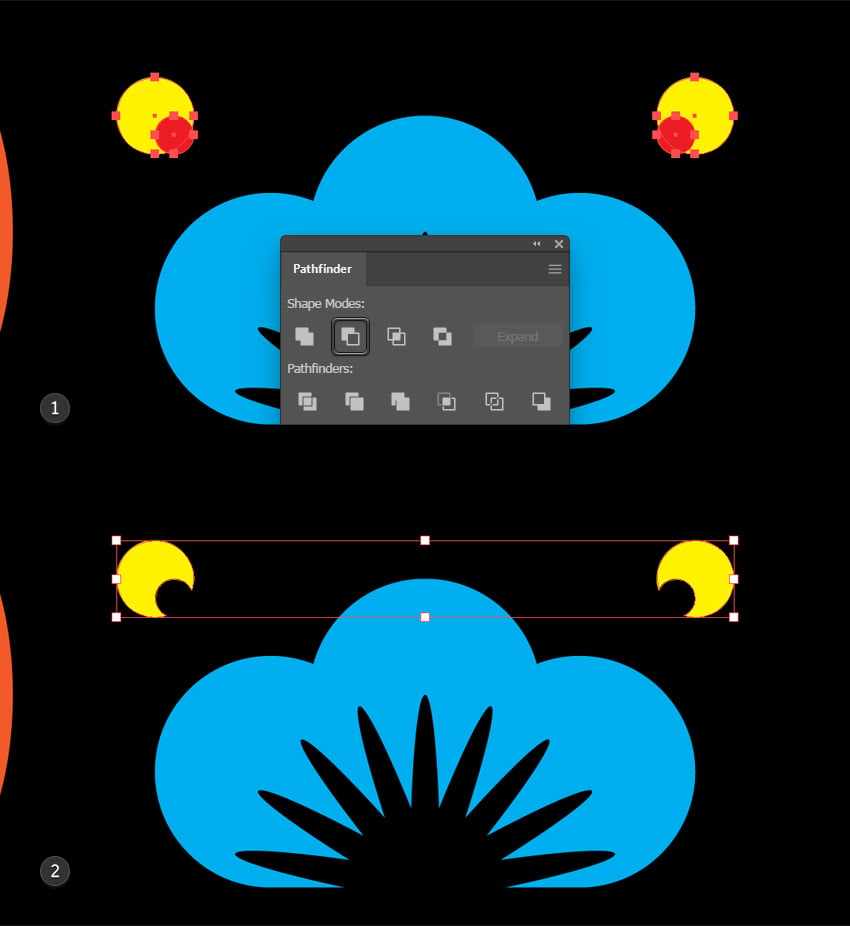
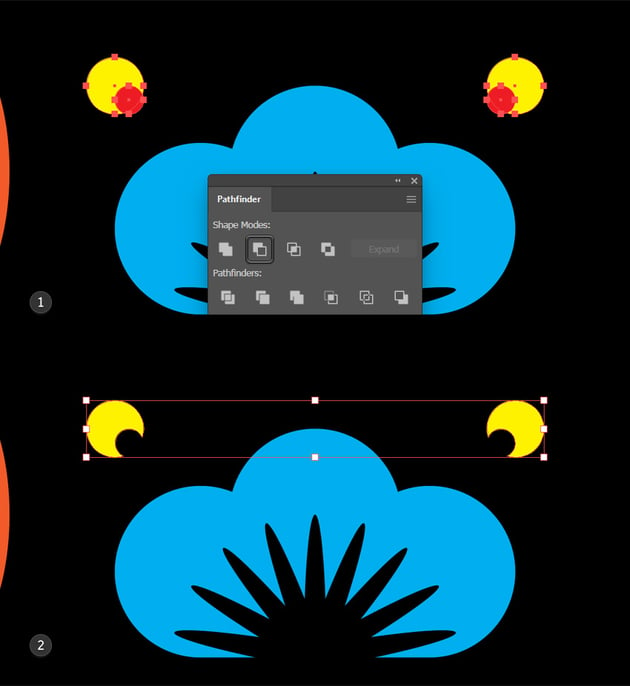
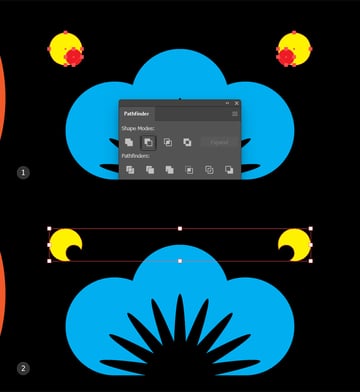
Using the Ellipse Tool (L) and create two 10 px circles. Make them yellow and place them as shown in the first image. Select both of these circles and turn them into a single compound path (Object > Compound Path > Make or Control-8).
Reselect the Ellipse Tool (L) and create two 5 px circles. Make them red and place them as shown in the second image. Select both of these circles and turn them into a compound path (Object > Compound Path > Make or Control-8).
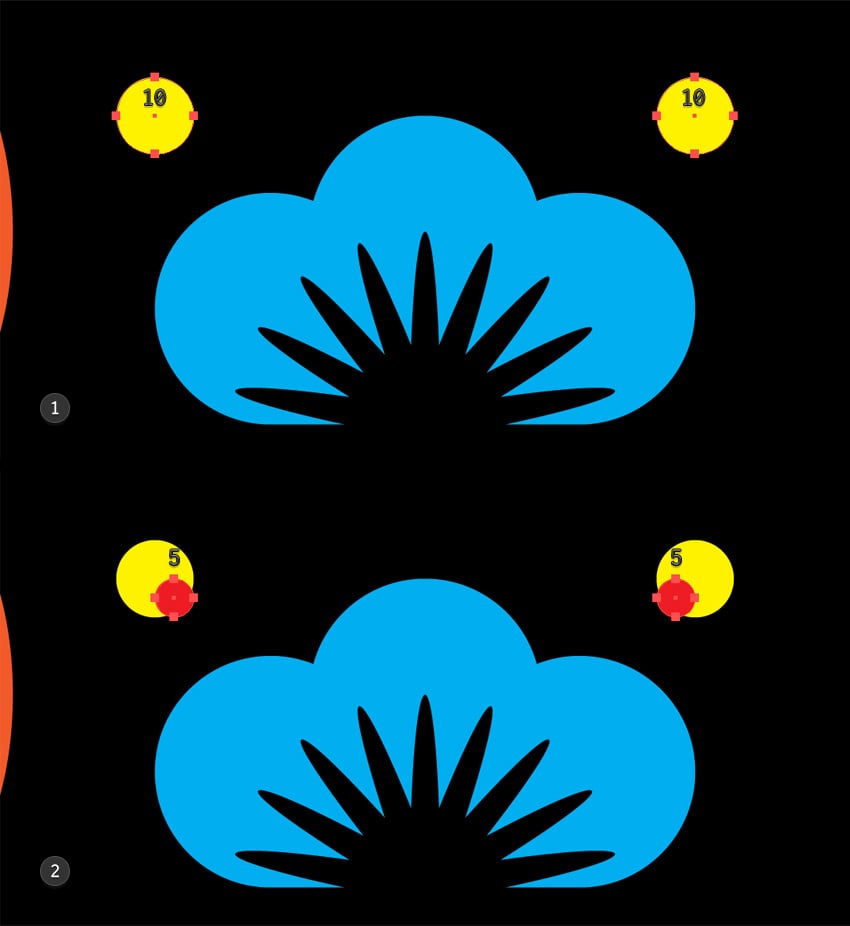

Step 9
Select the two compound paths added in the previous step and click the Minus Front button from the Pathfinder panel.
Step 10
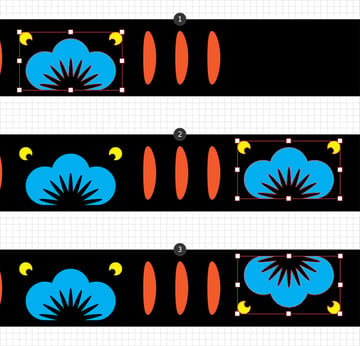
Select your blue and yellow shapes and duplicate them (Control-C > Control-V). Place the copies as shown in the second image and flip them horizontally using the Move Tool (V) or the Reflect Tool (O).


5. How to create the main components of the snake pattern brush
Step 1
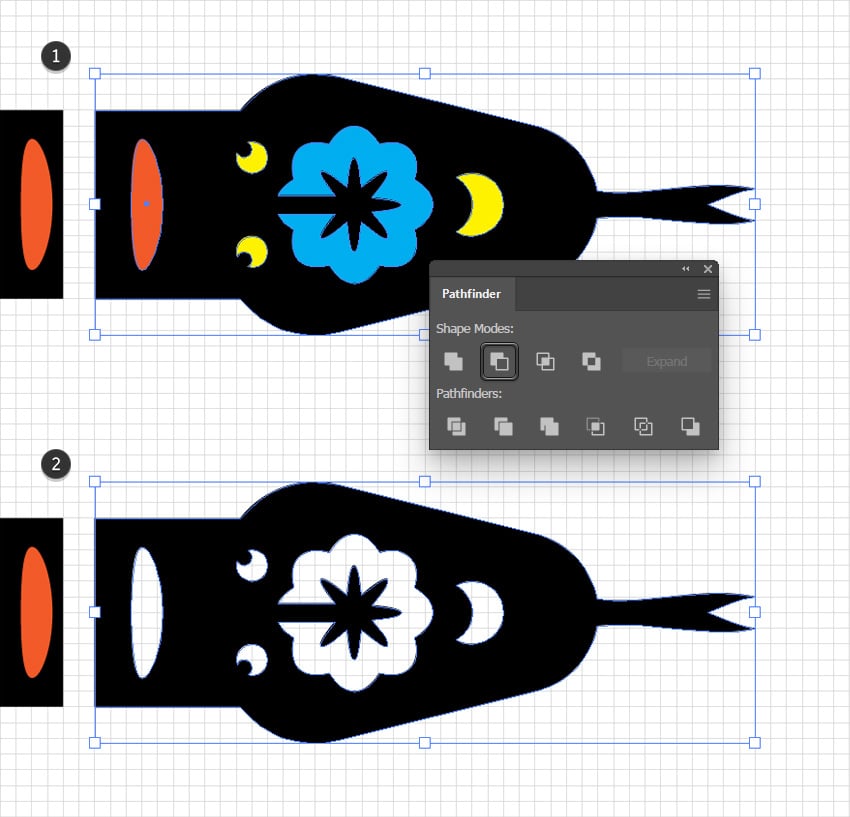
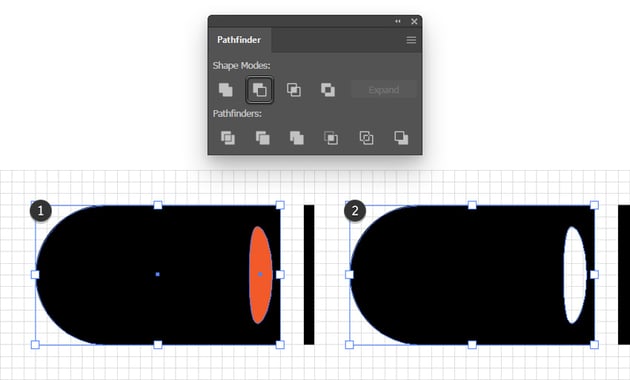
Select all the shapes that make up the head of your snake and click the Minus Front button from the Pathfinder panel.
Step 2
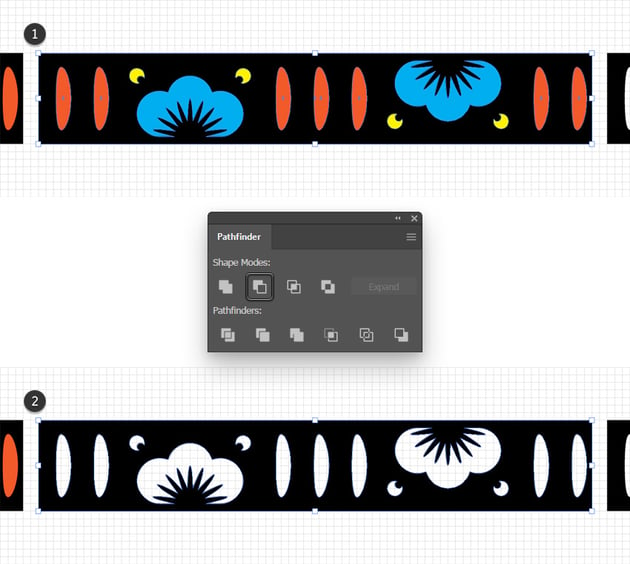
Select all the shapes that make up the body of the shape and click the Minus Front button from the Pathfinder panel.

Step 3
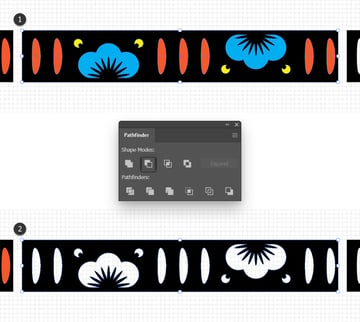
Select both shapes that make up the snake’s body and click the Minus Front button from the Pathfinder panel.


Step 4
Select all of your shapes and make them white (R=255 G=255 B=255).
Using the Rectangle Tool (M), create a shape that covers your entire artboard and set its color to R=182 G=3 B=25. Send it to the back (Shift-Control-[) and then press Control-2 to lock it. This way, you won’t select or move it by accident.



6. How to save the snake pattern brush
Step 1
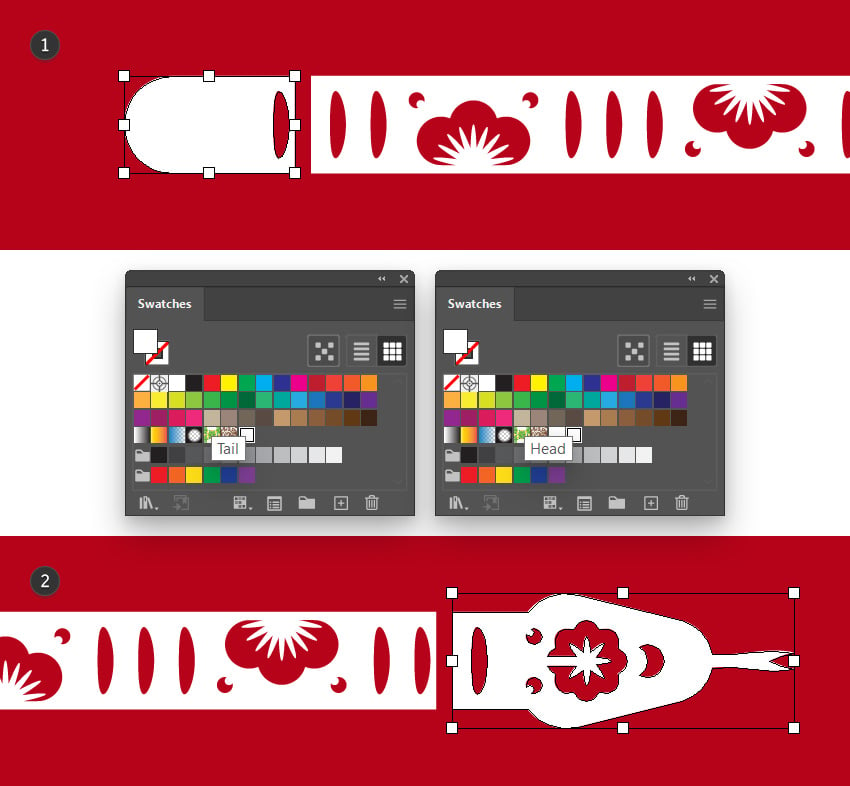
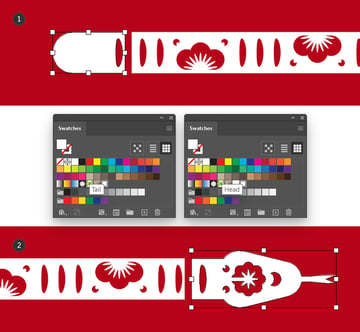
Select the shape that makes up the snake’s tail and drag it into the Swatches panel (Window > Swatches) to save it as a pattern. Do the same with the head shape.
To rename these patterns, you can either double-click them or you can select them and go to Swatch Options in the fly-out menu of the Swatches panel.

Step 2
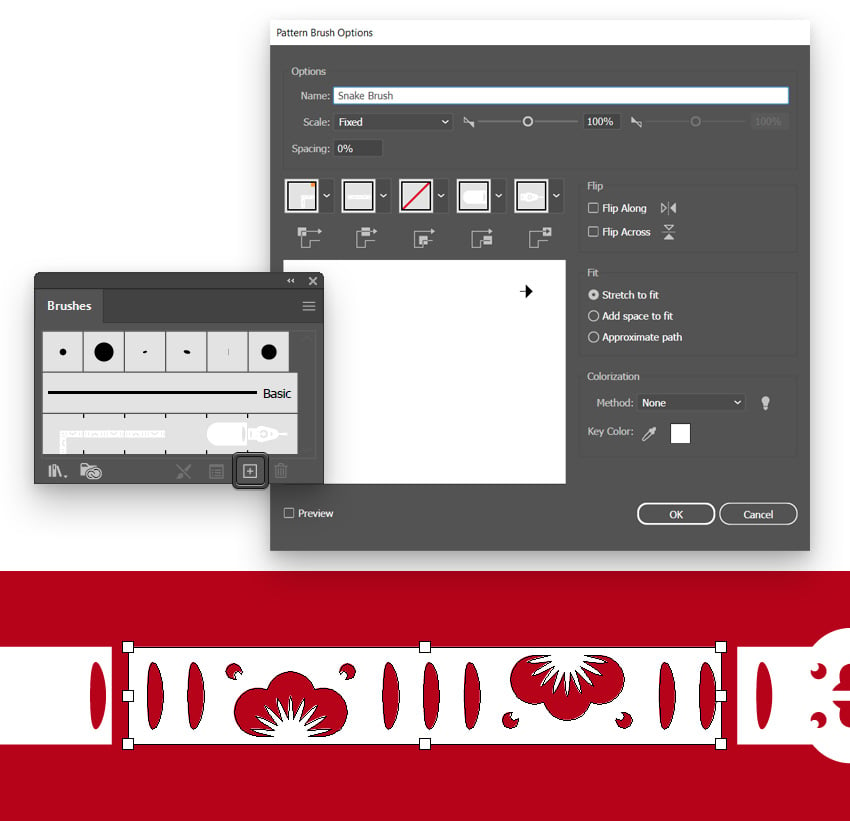
Select the snake body shape and click the New Brush button from the Brushes panel (Window > Brushes). Check the Pattern Brush box and click OK.
Open the Start Tile drop-down window and add the “Tail” pattern from your list, and then open the End Tile drop-down window and add the “Head” pattern. Finally, click OK, and you should find your new pattern brush in the Brushes panel.
Once your brush is saved, feel free to delete the three white shapes. You can also disable the Grid (View > Show Grid or Control-“) and Snap to Grid (View > Snap to Grid or Shift-Control-“).

7. How to use your snake pattern brush
Step 1
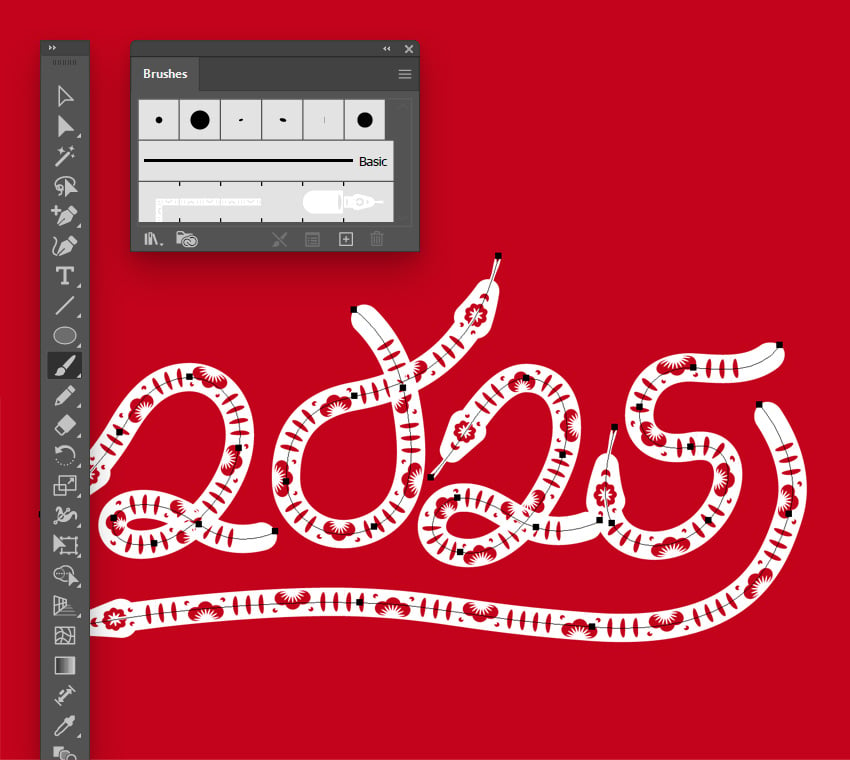
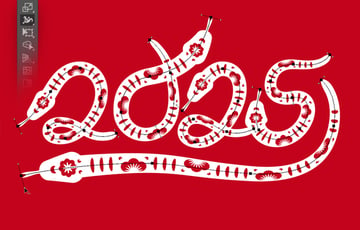
Pick the Brush Tool (B) and select your snake pattern brush, and then use it to draw some text roughly as shown in the following image. Once you’re done, let’s continue and see how you can adjust the width of these snakes using the Width Tool in Illustrator.

Step 2
Select your paths one by one and use Illustrator’s Width Tool (Shift-W) to adjust the width of your snakes, roughly as shown in the following image.


8. How to expand your pattern brush and merge the shapes
Step 1
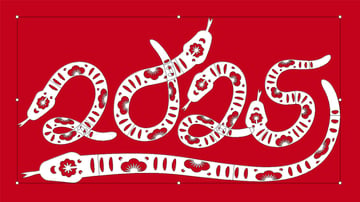
Select all your snakes and expand them by going to Object > Expand Appearance.


Step 2
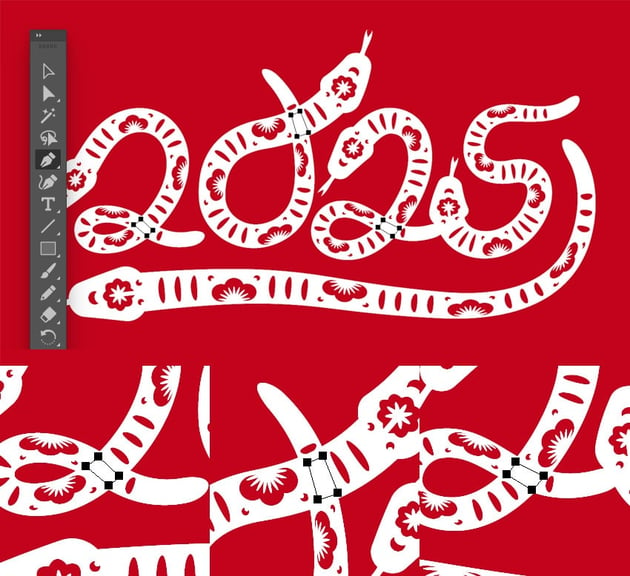
Grab the Pen Tool (P) and use it to add some small patches that cover the sections where your snake paths overlap.


Step 3
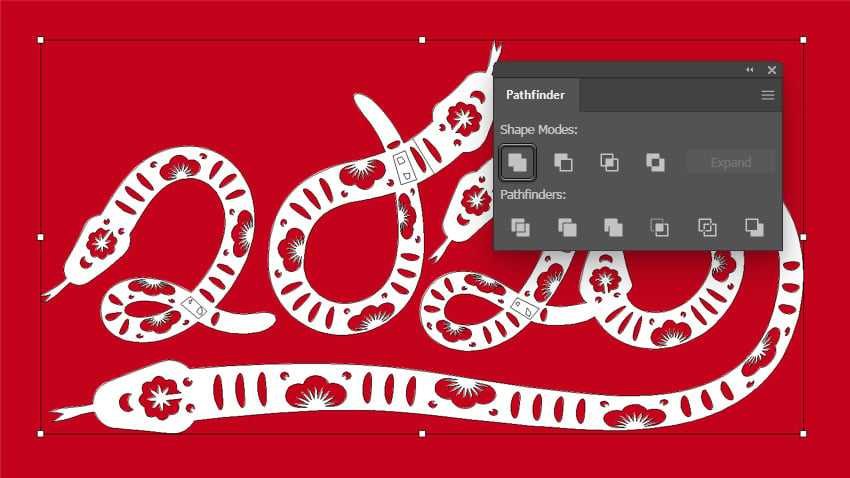
Reselect all your shapes and merge them using the Unite button from the Pathfinder panel, and then turn them into a single compound path (Control-8).

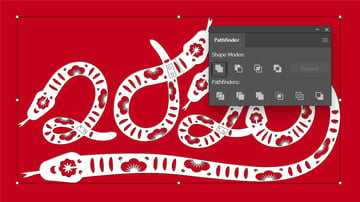
Step 4
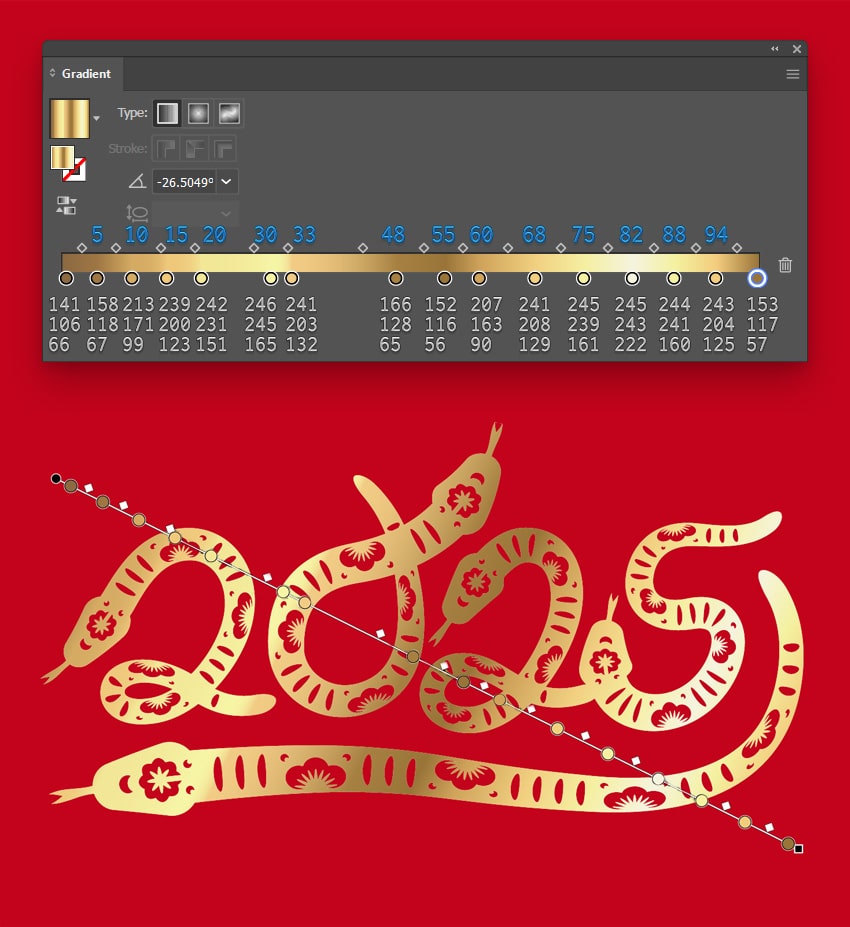
Make sure that your compound path is selected and open the Gradient panel (Window > Gradient). Simply click the gradient thumbnail to replace the white fill with a black-to-white linear gradient.
Double-click the left gradient slider and replace the existing color with R=141 G=106 B=66. Click on the gradient bar to add a new gradient slider, set its Location to 5%, and replace the existing color with R=158 G=118 B=67. Continue to add the rest of the gradient colors shown in the following image. Use the Gradient Tool (G) to stretch the gradient as shown in the following image.
Once you’re done, just press Control-C to copy this compound path as you’ll need several copies in the next steps.


9. How to use an opacity mask in Illustrator
Step 1
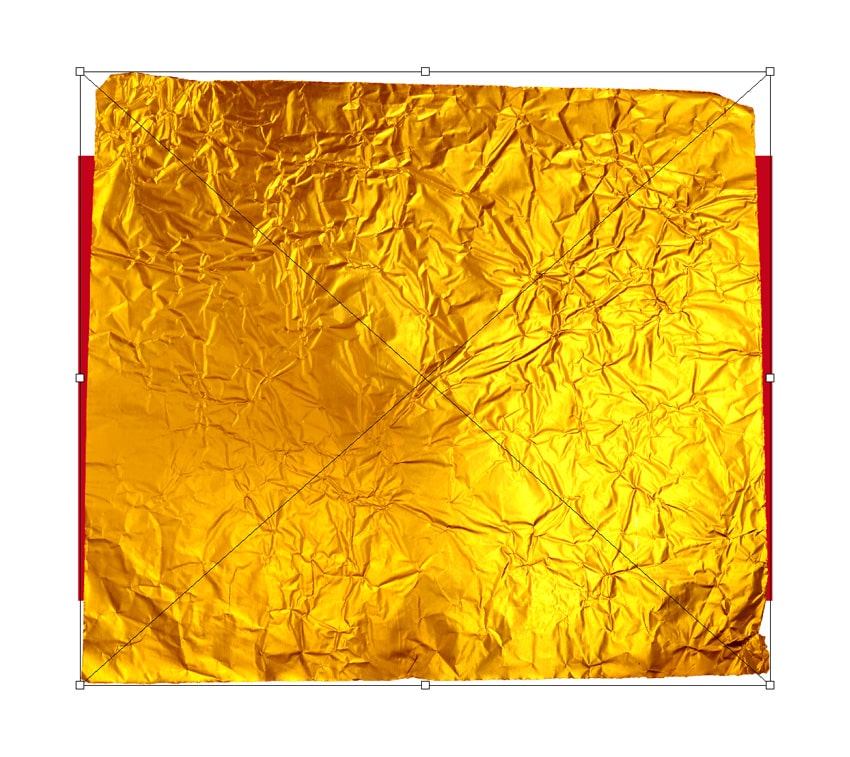
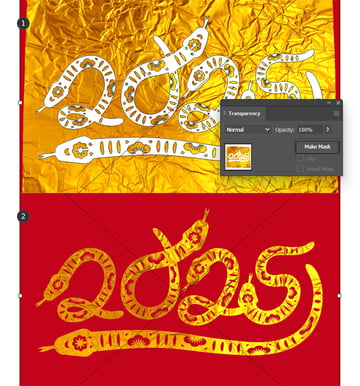
Download this Set of Gold Textures and add Texture #5 to your design, as shown in the following image.


Step 2
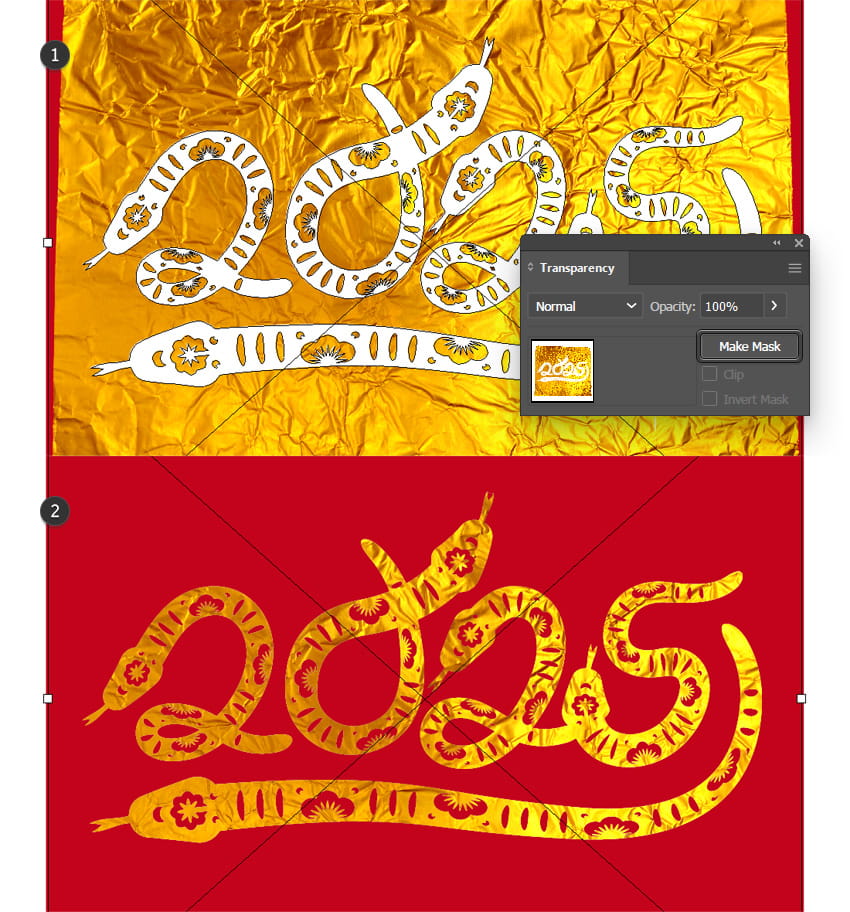
Press Control-F to paste a copy of your compound path in the same place. Make it white and select it along with the gold texture, and then open the Transparency panel (Window > Transparency) and click the Make Mask button.

Step 3
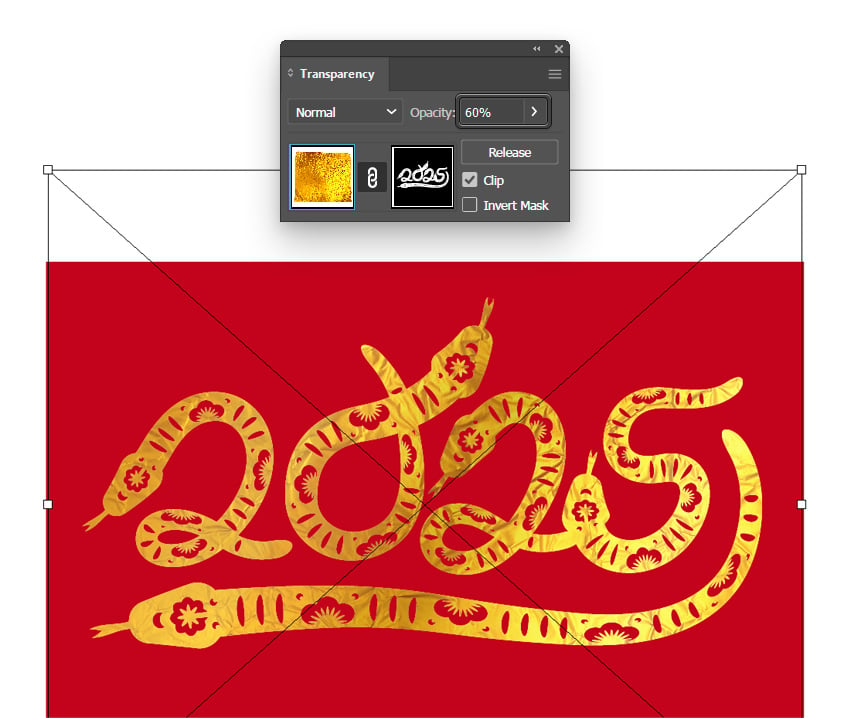
Lower the Opacity of your masked photo to about 60%, and then you can lock it (Control-2).


10. How to create a subtle highlight and add a drop shadow
Step 1
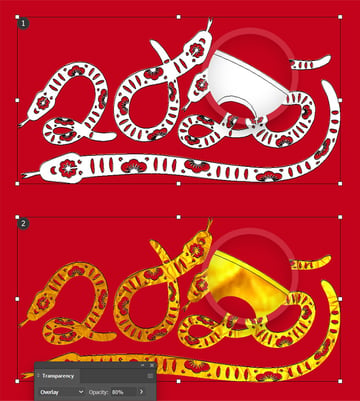
Press Control-F twice to add another two copies of your compound path. Select the top copy and press the Down Arrow key twice to move it 2 px down.
Reselect both copies and click the Minus Front button from the Pathfinder panel. Turn the resulting group of shapes into a compound path (Control-8), make it white, lower its Opacity to 80%, and change the Blending Mode to Overlay.


Step 2
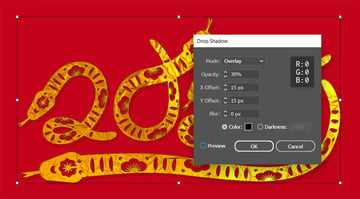
Open the Layers panel to select your main compound path (the one filled with the linear gradient). Go to Effect > Stylize > Drop Shadow, enter the settings shown below, and click OK.


Step 3
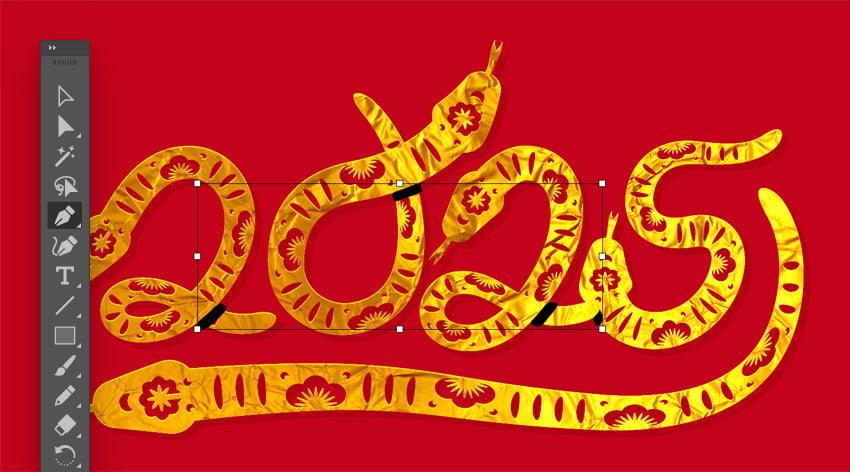
Finally, let’s add some extra shading to the areas where your snakes overlap. Pick the Pen Tool (P) and use it to draw some simple paths roughly as shown below. Turn them into a single compound path (Control-8).


Step 4
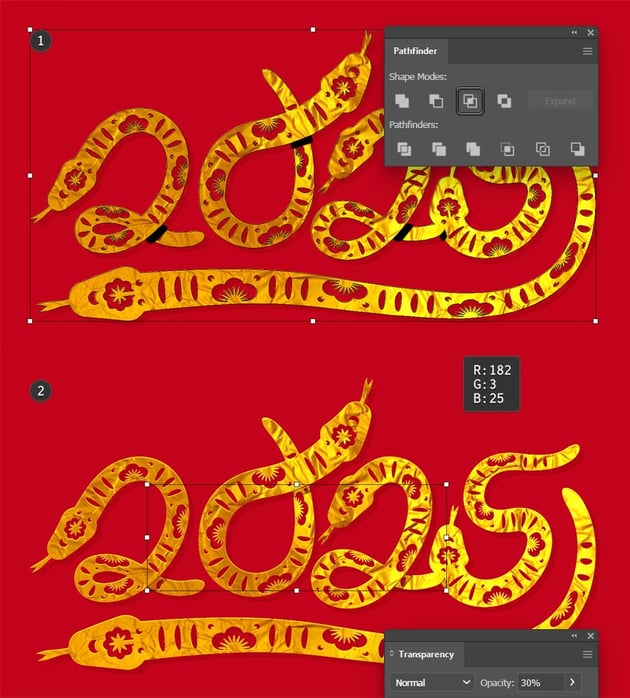
Duplicate your main compound path (Control-C > Control-F), select it along with the one made in the previous step, and click the Intersect button from the Pathfinder panel.
Turn the resulting group of shapes into a new compound path, set its color to R=182 G=3 B=25, and lower its Opacity to 30%.


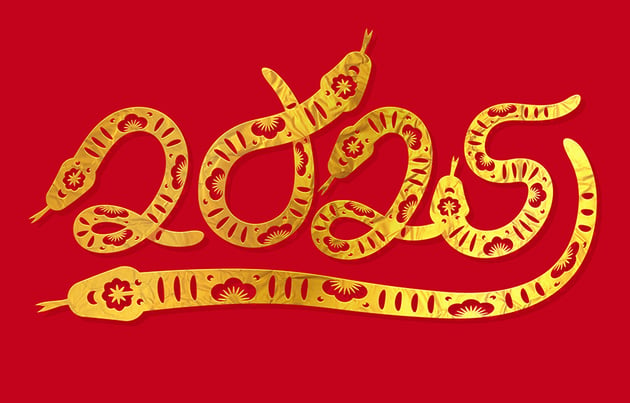
Congratulations! You’re done!
Here’s how your Illustrator text effect should look. I hope you’ve enjoyed this tutorial and can apply these techniques in your future projects.
Feel free to adjust the final Adobe Illustrator text effect and make it your own. You can find some great sources of inspiration at Envato, with interesting solutions to improve your Adobe Illustrator text effects.


Popular Illustrator text effects from Envato
Envato is an excellent resource for Illustrator text effects. Here’s a short list of some of the most popular Adobe Illustrator text effects that you can find.
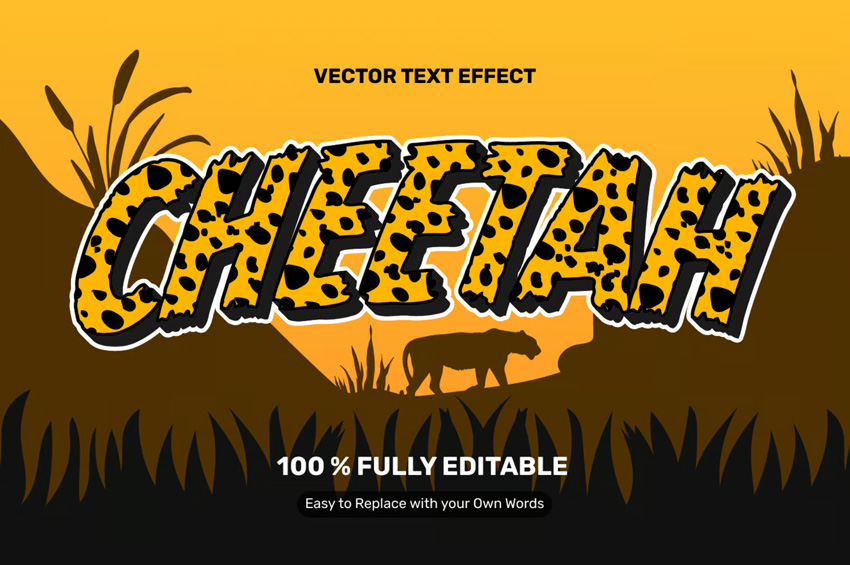
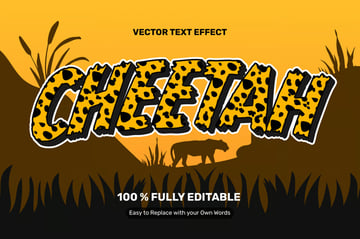
Cheetah Illustrator Text Effect (AI, EPS, PDF)
Turn your text into a masterpiece inspired by the fastest animal on land! This cheetah text effect in Illustrator combines bold textures, dynamic patterns, and vibrant colors to bring your text to life with the raw power and grace of a cheetah.

Snake Mascot (AI, EPS, JPG, PDF, PNG)
Here’s a bold and dynamic Snake Mascot to celebrate the 2025 Year of the Snake! Snakes symbolize wisdom, agility, and mystery, making them the perfect choice for a striking mascot design that stands out in gaming, sports, or branding.

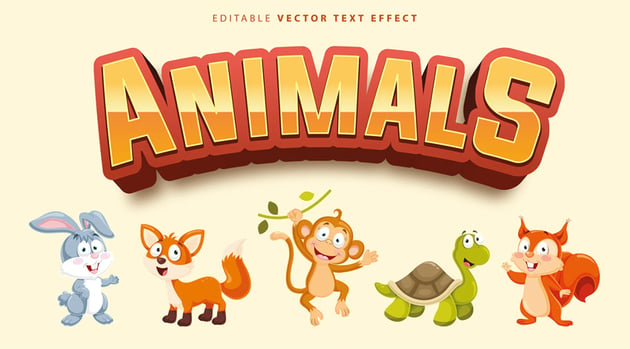
Fully Editable Animal Text Effect in Illustrator (EPS)
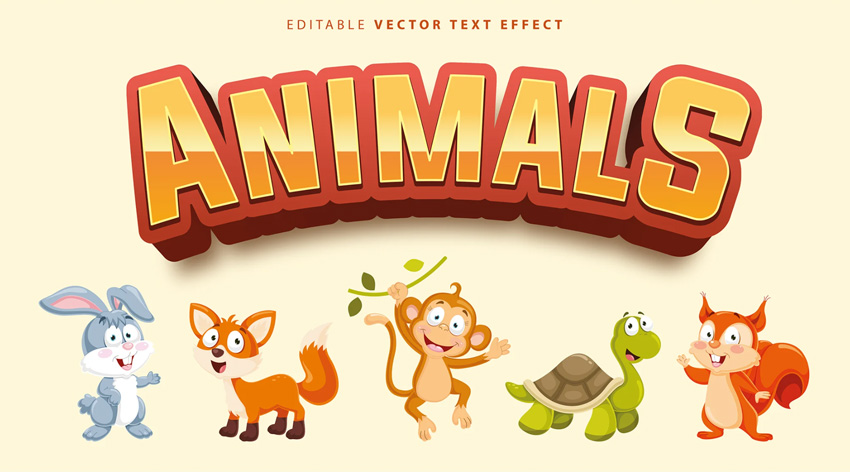
Bring your designs to life with this animal text effect. The warm colors and smooth outlines will make for a perfect add-on.

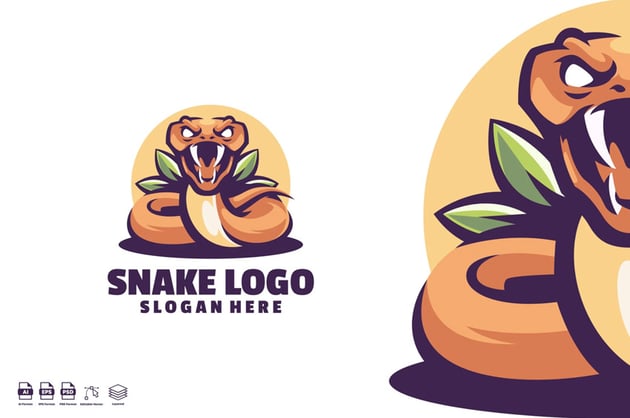
Snake Logo Template (AI, EPS, JPG, PDF, PNG, PSD)
Strike the perfect balance between boldness and sophistication with this ready-to-use snake logo template. Whether you’re creating a new brand identity or enhancing your visual style, this Snake Logo Template will make a lasting impression.


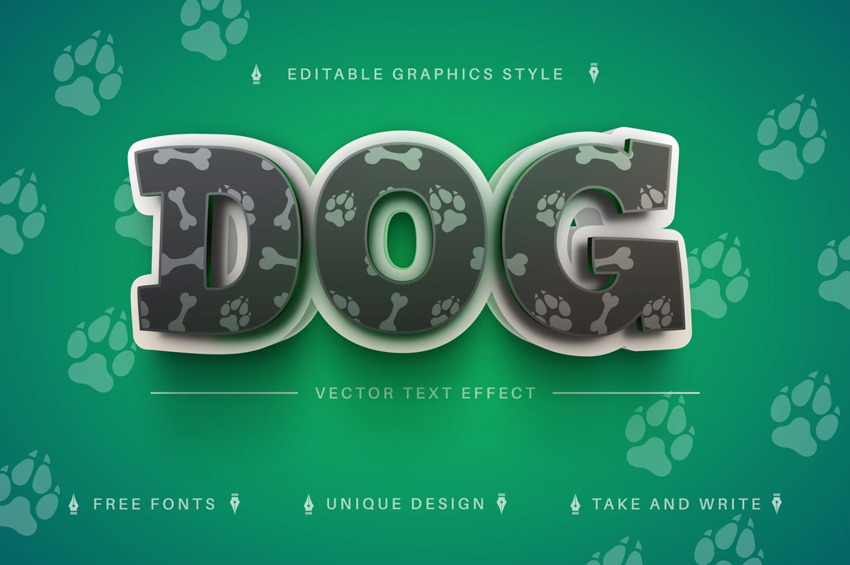
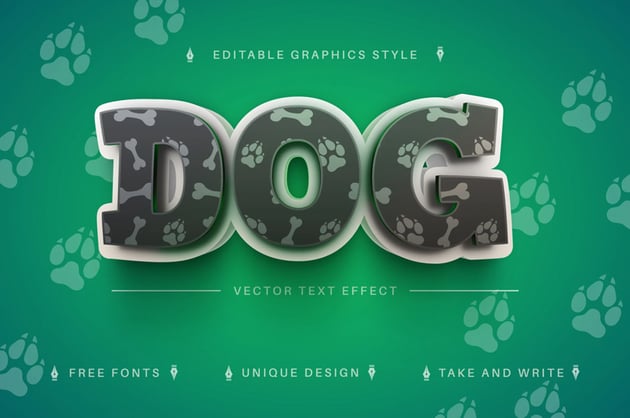
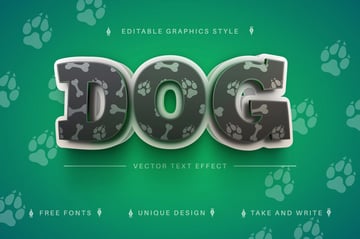
Adobe Illustrator Dog Text Effect (AI, EPS)
If you’re in a hurry or you simply can’t be bothered to learn how to create a dog text effect in Illustrator, this pet-themed project will bring warmth and charm to every word.
Want to learn more?
We have loads of tutorials on Envato Tuts+, from beginner to intermediate level. Take a look!