The Pebble smartwatch has been around since its very successful Kickstarter campaign in 2012 and is a popular choice amongst smartwatch users. This is due to its excellent battery life, low price, various models to choose from, and compatibility with both iOS and Android.
Pebble has had a developer SDK since day one, encouraging developers to build interesting and innovative applications for the Pebble platform. The SDK has always been kept up to date, with new features being added over time.
Pebble applications have traditionally been coded in C, but, recently, Pebble has taken on JavaScript and opened up the world of app development on their platform to even more developers. In this introduction to Pebble development, I walk you through some of the basics of getting started with Pebble development using the SDK and the Pebble.js library by building an application and submitting it to the Pebble application store.
Owning a Pebble or any previous knowledge of the C language is not required for this tutorial.
1. Setting Up the Project
There are currently two environments in which you can build Pebble applications. CloudPebble makes it possible to develop Pebble apps in the browser. This is great if you’re on Windows or using a less powerful machine.
The other option, and the option that this tutorial is going to follow, is to have the development workflow locally. This allows you to work offline and use an editor of your choice. Let’s first get the Pebble tool and SDK installed.
Currently, there is no official support for the Pebble tool and SDK on Windows so the following section walks you through the steps to install the Pebble tool and SDK on OS X and Linux. Pebble recommends that you use CloudPebble for development on Windows, but you can also use a Linux virtual machine.
The easiest way to install the Pebble tool on OS X is through Homebrew. If you don’t have Homebrew installed, you can get the installation instructions on the Homebrew website. With Homebrew installed, you can install the Pebble tool with the following command:
brew install pebble/pebble-sdk/pebble-sdk
There are a few additional steps to take to install the Pebble tool and SDK on Linux. Pebble has a detailed guide available that you can follow. Once you have installed the Pebble tool, you will have the pebble command available to you from the command line. Running pebble --version shows the version information.
$ ~ pebble --version

Pebble Tool v4.2.1
The pebble command line interface includes several convenient commands. You can list these commands by running pebble --help or pebble -h. One of the commands sets up a new project with some boilerplate code. Create a new directory and run the following command in the root of the new directory:
pebble new-project hello-pebble
If this is the first time you are creating a Pebble application, you are prompted to accept the terms of use and Pebble developer license. Once you have accepted these, the latest Pebble SDK (3.11.1 at the time of writing) is downloaded and installed.
After installing the Pebble SDK, a basic Pebble project is set up in the current directory. To build, install, and run your app, you need to do the following. First, ensure that you are in the root of your Pebble project. In this case, we are in the root of the hello-pebble directory.
Next, run the pebble build command. When the code is compiled, you should see the message 'build' finished successfully and a number of new files in the build directory. The only file we need to worry about right now is hello-pebble.pbw. This is your app that will be installed on the watch.
To run the app, we use the Pebble emulator that comes with the Pebble SDK. Pebble uses the open source QEMU emulator. Currently, there are three generations of Pebble that are available to develop for. Pebble and Pebble Steel are the original generation of Pebble. The Pebble Time supports 64 colors and uses the slightly newer 3.x version of the operating system.
The Pebble Time Round is almost identical to the Pebble Time with the exception of the circular and larger display. Pebble uses platform names to differentiate the three generations of Pebble smartwatches.
- Aplite is the platform name used for the Pebble and Pebble Steel.
- Basalt is the platform name for the Pebble Time.
- And Chalk is the platform name for the Pebble Time Round.
We can launch any of these emulators using the --emulator flag after the pebble install command, passing the platform we want to target. For example, if we wanted to run our app on the platform for the Pebble Time, we would run the following command in the root directory of the Pebble project:
pebble install --emulator basalt
This command launches the emulator, starts the selected platform, and installs the .pbw file stored in the build directory. This is what you should see in the emulator:
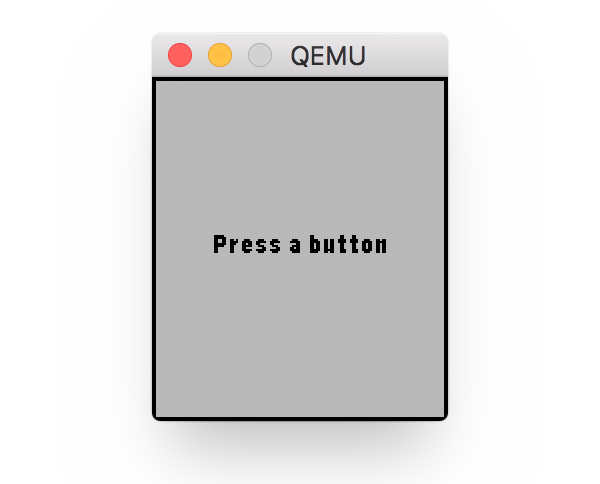
The Pebble watch does not have a touchscreen and comes with four buttons, up, down, select, and back. These are emulated with the up, down, right, and left keys on your keyboard respectively. By pressing these keys, you are able to navigate the app you created.
If we open the source code of the project, you see that it is written in C. In order to use Pebble.js for the project, we are going to use a template that can get us started quicker. Pebble.js is still in beta at the time of writing so some things can still change in the future.
Leave the project directory, create a new directory, and clone the GitHub repo as shown below.
mkdir hello-pebblejs

cd hello-pebblejs

git clone https://github.com/pebble/pebblejs .
Once you have cloned the repo, open it in a text editor, and take a look around. The source code of the application can be found in the src directory. Inside that directory, you have three other directories, js, simply, util, and a main.c file.
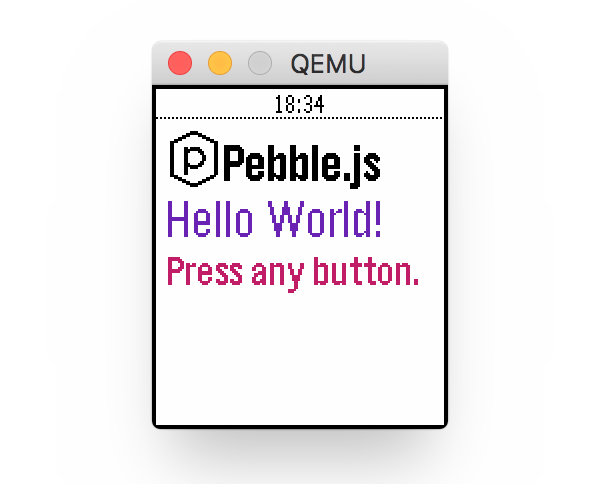
The js directory is where we put the application code. The simply directory is where the native code is that the JavaScript functions access and the util directory contains more native code that we don’t need to touch. The entry point for the application is going to live in js/app.js. If we build and run this application, you should see the following result in the emulator:
Open js/app.js, have a look around, and then delete this file. We are going to start from scratch.
2. Let’s Build an App
The first thing we need to learn is how to display text on the screen. Pebble.js has a user interface framework for instantiating Elements. With this framework, you can create Elements, such as text, rectangles, and images. Add the following line to app.js to require the framework.
var UI = require('ui');
The first Element we will use in this tutorial is Window. Windows are the main building blocks of Pebble applications. There are three types of windows.
- A
Cardcan be used to display text in a preformatted way, such as a title at the top, a subtitle below it, and a body area for some text. - A
Menuis used to display a list of options. - A
Windowis the most flexible and allows you to add various Elements to it.
In order to add text to a Window, we also require Vector2, a module for drawing 2D vectors and one that you would be familiar with if you’ve done anything with three.js or any other vector drawing library.
Our first goal is to create a Window, create and append text to that window, and display it to the user. The following snippet is the minimum required to display text on the screen.
var UI = require("ui");
var Vector2 = require("vector2");
// This is our main window
var main = new UI.Window();

// This is our text content
var textfield = new UI.Text({
    size: new Vector2(144, 60),
    text: 'Hello PebbleJS'
});

//add the text to the window
main.add(textfield);

//show the window
main.show();
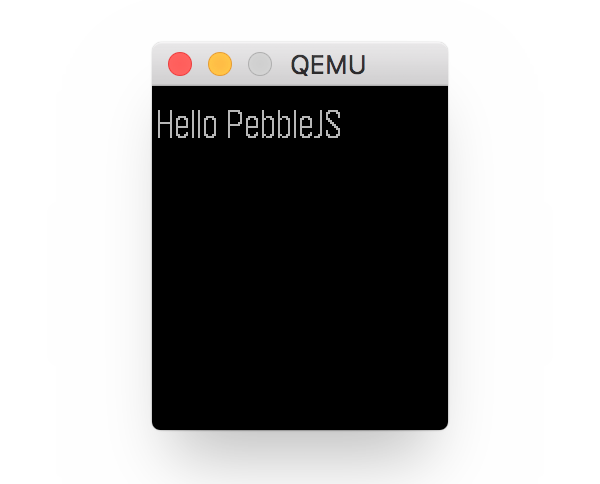
Build the project and install the application to see the result. Rather than do both steps separately, I prefer to chain the commands together and run the following command:
pebble build && pebble install --emulator basalt
If you want to test on all three platforms simultaneously, you can add the install commands for each emulator:
pebble build &&
pebble install --emulator basalt &&
pebble install --emulator aplite &&
pebble install --emulator chalk
You will notice that aplite and basalt look almost identical whilst chalk doesn’t look too good. This is because of the round screen and the screen’s dimensions. We will discuss platform detection in a moment. For now, we move forward with some of the basic functionality.
In the above code snippet, we create a Text element using the the Text() method. The instantiation of Text() takes an object as its parameter to configure the Text element. The size key defines the size of a rectangle (defined by a Vector2 instance) in which the Text element is drawn. The value of the text key contains the string we want to display. We then add the Text element to the Window before we call show() on the window to display it.
So far your app is using the default settings for Window and Text. However, we have the option to customize them. We have the control to change position, color, and font size. There are a few system fonts available and you even have the option to load custom fonts you can use in your app.
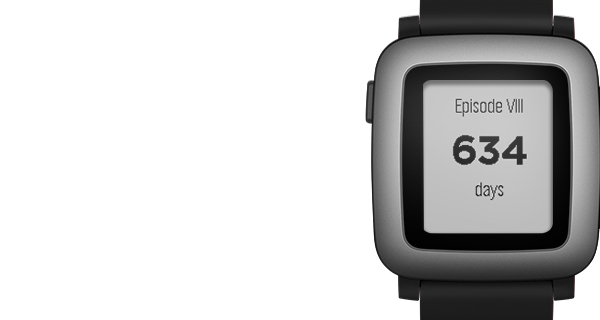
Our app is going to count down to a certain date. When the app starts, we want it to take the today’s date and calculate how many days it is until a particular date in the future. Let’s say, for example, I wanted an app that told me how many days it was going to be until Star Wars, Episode VIII is here.
I know that I want to create my main Window when the app starts, calculate the number of days remaining until December 15, 2017, and then add that number to my screen in the center. Nothing too fancy.
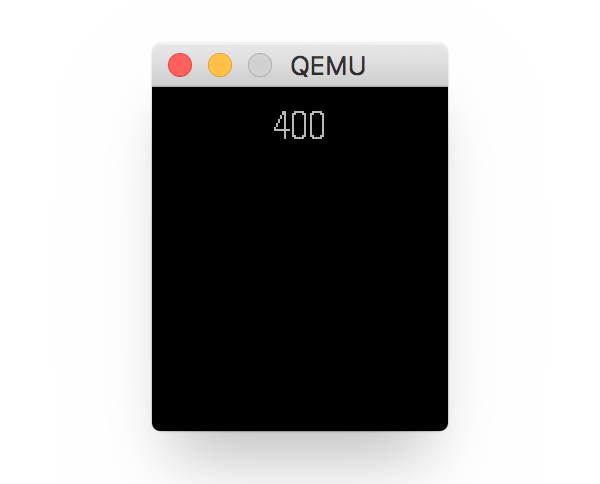
Let’s start with showing a static number, not too different from the current “Hello PebbleJS” code we wrote. Instead, we use a variable as the value of the text key and add a new key, textAlign, to center the text.
var UI = require('ui');
var Vector2 = require('vector2');
var daysRemaining = "400";

var main = new UI.Window();

var text = new UI.Text({
    size: new Vector2(144, 168),
    text:daysRemaining,
    textAlign:'center'
});

//add the text to the window
main.add(text);

//show the window
main.show();
Running the app gives you the output shown below.
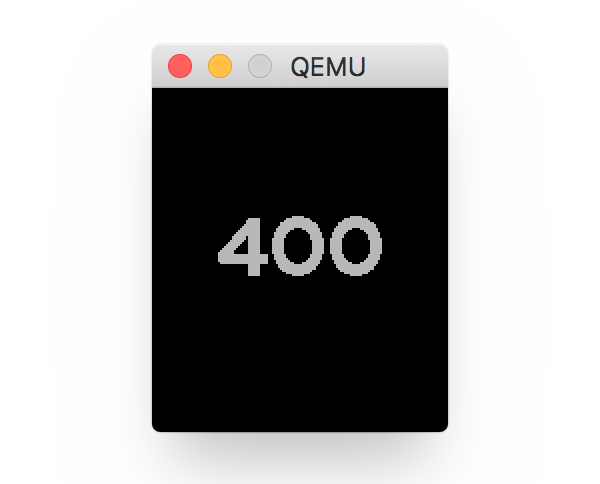
As I explained earlier, there are a number of system fonts available. For this tutorial, we will stick with one of the system fonts, Bitham 42 Bold, and position it a bit closer to the center of the screen, both horizontally and vertically. The font option takes the string of the font that you want to use as referenced in the documentation. The position is determined by another Vector2 instance, which defines the Text‘s horizontal and vertical position.
Change the Text‘s configuration like this:
var text = new UI.Text({
    size: new Vector2(144, 168),
    text:daysRemaining,
  textAlign:'center',
  position: new Vector2(0, 50),
    font:'BITHAM_42_BOLD'
});
You should now have something looking like the following:
Let’s replace the hard-coded value with the correct number of days. When we cloned the project from GitHub, we got all the necessary files to access the device APIs and various other utilities to create a Pebble app with JavaScript. One of these utilities is the moment.js library, which you can find in the vendor directory. This will make the calculation easier.
Require moment.js into the app and set the daysRemaining variable to a function with the following implementation:
var moment = require('vendor/moment');

var daysRemaining = function(){
    var eventdate = moment("2017-12-15"); // This is the date we're counting down to - December 15
    var todaysdate = moment(); // A moment instance of todaysdate
    return eventdate.diff(todaysdate, 'days'); // calculate the difference in days.
}
Next, change the reference to daysRemaining to a function call like this:
var text = new UI.Text({
    size: new Vector2(144, 168),
    text:daysRemaining(), // This is now a function call
    textAlign:'center',
    position: new Vector2(0, 50),
    font:'BITHAM_42_BOLD'
});
If you compile and run app, you should see the correct number of days until Star Wars, Episode VIII is released. We could leave this here and have an app that simply shows the number of days until the event we want to track, but why not take the opportunity to add a few features to the app.
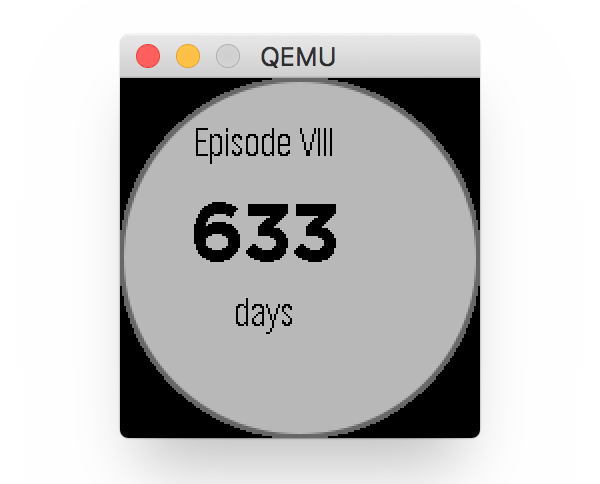
First, let’s change the background color of the Window and the color of the text so that the background is white and the text is darker.
var main = new UI.Window({
    backgroundColor:'white'
});

var text = new UI.Text({
    size: new Vector2(144, 168),
    text:daysRemaining(),
    textAlign:'center',
    position: new Vector2(0, 50),
    font:'BITHAM_42_BOLD',
    color:'black'
});
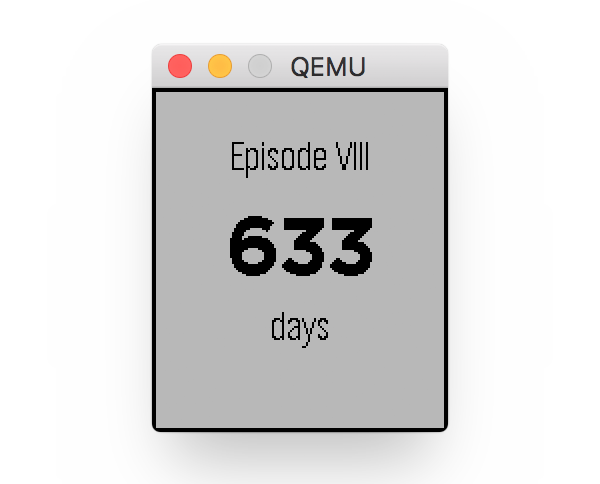
And let’s add another Text element to indicate what the number represents. We create a new Text element and pass it options for size, position, font, etc.
var eventDetail = new UI.Text({
    size: new Vector2(144, 168),
    text:'Episode VIII',
    textAlign:'center',
    position: new Vector2(0, 15),
    font:'GOTHIC_24',
    color:'black'
});
Next, we add the Text element to the main window after we add the text object.
main.add(text)
main.add(eventDetail);
Finally, let’s add a third Text element to indicate that the countdown is in days.
var daysText = new UI.Text({
    size: new Vector2(144, 168),
    text:'days',
    textAlign:'center',
    position: new Vector2(0, 100),
    font:'GOTHIC_24',
    color:'black'
});

main.add(daysText);
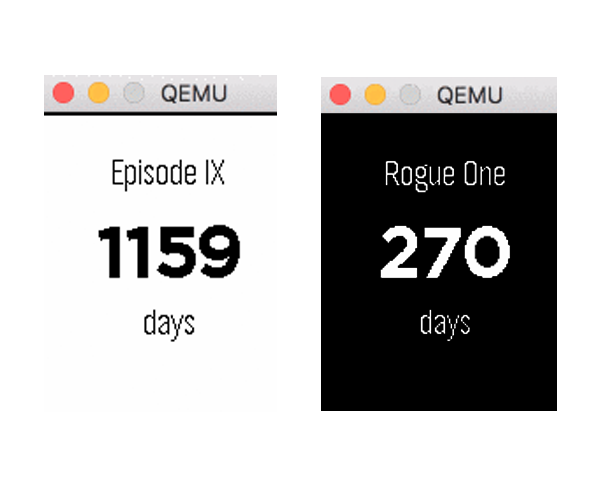
To navigate, Pebble uses hardware buttons as opposed to a touch screen, found on most other smartwatches. We can add the ability to allow the user to dive deeper into our application using these inputs. Let’s say, for example, we wanted to also show the release date for the other upcoming films in the Star Wars franchise. Rogue One is released this year and there is already a release date for Episode IX.
The interaction with the buttons triggers events that we can subscribe to. When an event is detected, we can decide what action needs to be taken. If the user clicks down, we could build a new Window to hold the release date for Rogue One and display the number of days until the release of that movie.
Let’s subscribe to the down button and build a new Window. The on() method takes three parameters, the action, the button, and a handler. As mentioned before, the possible values of the second parameter are up, down, select, or back. The action is usually click, but you also have the option to use longClick.
main.on('click', 'down', function(){
    var ro = new UI.Window();
    console.log('Down Clicked');
    ro.show();
});
Run the application and you’ll notice that you get a black screen when you click down. You might be asking yourself how you can get access to the console to see the Pebble logs.
When the app is running, we can attach another console to it and get the logs by running pebble logs --emulator basalt. Replace the emulator name if you are using one of the other emulators. You can now see that the console logs Down Clicked when the down button is clicked.
pebble logs --emulator basalt
[06:33:11] javascript> Down Clicked
[06:33:11] javascript> (+) [window 2] : [window 1],[window 2]
Like we did before, let’s calculate the number of days until the release and display this information to the user. In order to make use of the date calculation function, I’m going to pass in the date as a parameter. We don’t want to duplicate code.
var daysRemaining = function(dateString){
    var eventdate = moment(dateString);
    var todaysdate = moment();
    return eventdate.diff(todaysdate, 'days');
}
main.on('click', 'down', function(){
    var ro = new UI.Window();
    console.log('Down Clicked');

    var ro = new UI.Window();

    var roCount = new UI.Text({
        size: new Vector2(144, 168),
        text:daysRemaining("2016-12-16"),
        textAlign:'center',
        position: new Vector2(0, 50),
        font:'BITHAM_42_BOLD',
        color:'white'
    });

    var eventDetail = new UI.Text({
        size: new Vector2(144, 168),
        text:'Rogue One',
        textAlign:'center',
        position: new Vector2(0, 15),
        font:'GOTHIC_24',
        color:'white'
    });

    var roDays = new UI.Text({
        size: new Vector2(144, 168),
        text:'days',
        textAlign:'center',
        position: new Vector2(0, 100),
        font:'GOTHIC_24',
        color:'white'
    });

    ro.add(roCount);
    ro.add(roDays);
    ro.add(eventDetail);
    ro.show();

    ro.show();
});
If you want to, you can add a screen for Episode IX as well. I’ll leave that as a challenge for you to try yourself.
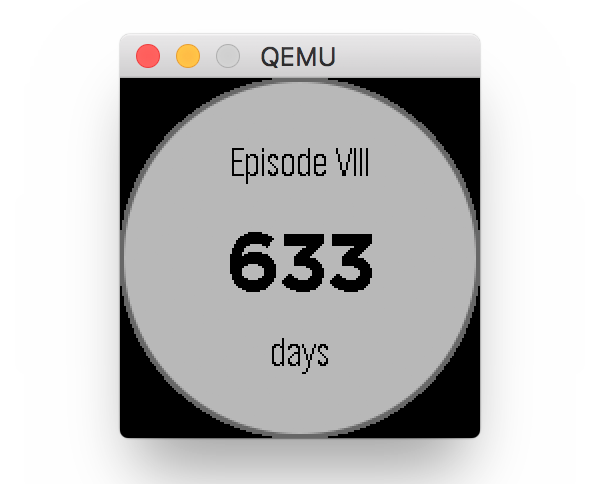
We should fix the display issue for users with a Pebble Time Round. In order to do this, we need to detect what platform they are on and update the user interface accordingly.
In your app, you have access to a global object, Pebble. This object has a few functions that we can use, one of them being getActiveWatchInfo(), which returns an object with the platform runtime information.
We can get the platform name using the platform key. If the platform is equal to chalk, we need to make some adjustments to the user interface.
At the top of app.js, we fetch the action watch information and check whether the current platform name is equal chalk.
var info = Pebble.getActiveWatchInfo(); // Returns watch info
var platform = info.platform; // Returns a string of the platform name
var isChalk = platform === 'chalk';
If you run your app on the Chalk platform, you should see the following:
Anywhere we size and position user interface elements, we need to make small changes to accommodate for the round screen of the Chalk platform. As a start, we create a variable that holds the width of the screen.
var sWidth = isChalk ? 180 : 144;
Pebble Time Round has a 180px x 180px display. This means that we need to modify the X coordinate of the Vector objects. We create three variables to help us with this.
var countPosition = isChalk ? 65 : 50;
var daysPosition = isChalk ? 120 : 100;
var titlePosition = isChalk ? 25 : 15;
The final code will look something like this:
var UI = require("ui");
var Vector2 = require("vector2");
var moment = require("moment");

var info = Pebble.getActiveWatchInfo();
var platform = info.platform;
var isChalk = platform === "chalk";
var sWidth = isChalk ? 180 : 144;
var countPosition = isChalk ? 65 : 50;
var daysPosition = isChalk ? 120 : 100;
var titlePosition = isChalk ? 25 : 15;

var daysRemaining = function(dateString) {
    var eventdate = moment(dateString); // This is the date we"re counting down to - 24th April
    var todaysdate = moment(); // A moment instance of todaysdate
    var difference = eventdate.diff(todaysdate, "days");
    return difference
};

var main = new UI.Window({
    backgroundColor: "white"
});

var text = new UI.Text({
    size: new Vector2(sWidth, 168),
    text: daysRemaining("2017-12-15"),
    textAlign: "center",
    position: new Vector2(0, countPosition),
    font: "BITHAM_42_BOLD",
    color: "black"
});

//Event Detail Text

var eventDetail = new UI.Text({
    size: new Vector2(sWidth, 168),
    text: "Episode VIII",
    textAlign: "center",
    position: new Vector2(0, titlePosition),
    font: "GOTHIC_24",
    color: "black"
})


//Event Detail Text

var daysText = new UI.Text({
    size: new Vector2(sWidth, 168),
    text: "days",
    textAlign: "center",
    position: new Vector2(0, daysPosition),
    font: "GOTHIC_24",
    color: "black"
})

//add the text to the window
main.add(text);
main.add(eventDetail);
main.add(daysText);

//show the window
main.show();


//ROGUE 1 window

main.on("click", "down", function() {

    var ro = new UI.Window();

    var roCount = new UI.Text({
        size: new Vector2(sWidth, 168),
        text: daysRemaining("2016-12-16"),
        textAlign: "center",
        position: new Vector2(0, countPosition),
        font: "BITHAM_42_BOLD",
        color: "white"
    });

    var eventDetail = new UI.Text({
        size: new Vector2(sWidth, 168),
        text: "Rogue One",
        textAlign: "center",
        position: new Vector2(0, titlePosition),
        font: "GOTHIC_24",
        color: "white"
    })

    var roDays = new UI.Text({
        size: new Vector2(sWidth, 168),
        text: "days",
        textAlign: "center",
        position: new Vector2(0, daysPosition),
        font: "GOTHIC_24",
        color: "white"
    });

    ro.add(roCount);
    ro.add(roDays);
    ro.add(eventDetail);
    ro.show();

    ro.on("click", "down", function() {
        var nine = new UI.Window({
            backgroundColor: "white"
        });

        var nineCount = new UI.Text({
            size: new Vector2(sWidth, 168),
            text: daysRemaining("2019-05-24"),
            textAlign: "center",
            position: new Vector2(0, countPosition),
            font: "BITHAM_42_BOLD",
            color: "black"
        });

        var eventDetail = new UI.Text({
            size: new Vector2(sWidth, 168),
            text: "Episode IX",
            textAlign: "center",
            position: new Vector2(0, titlePosition),
            font: "GOTHIC_24",
            color: "black"
        })

        var nineDays = new UI.Text({
            size: new Vector2(sWidth, 168),
            text: "days",
            textAlign: "center",
            position: new Vector2(0, daysPosition),
            font: "GOTHIC_24",
            color: "black"
        });

        nine.add(nineCount);
        nine.add(nineDays);
        nine.add(eventDetail);
        nine.show();
    });

});
I’m sure you agree that there is ample room for improvement. We are duplicating code in various places, which isn’t a good practice. That said, I hope you now have a basic understanding of how you can create apps for Pebble using JavaScript and the Pebble SDK.
In the last section of this tutorial, I would like to show you how to upload our app to the Pebble app store.
3. Uploading to the Pebble App Store
Before we upload the app, there is one thing we need to take care of. As we started this app from a template, there are a few details in appinfo.json, the manifest for our application, that we need to change. You can find this file in the root of the project. Open appinfo.json and change the companyname, shortname, and longname values.
The last thing we need is a UUID (Universally Unique Identifier). The manifest already contains one, but when you try to upload the .pbw file to the app store, you will get an error because this UUID is already in use.
The easiest way to get one is to take it from the original hello-pebble app we created at the start of this tutorial, because we won’t upload that app to the app store. If you deleted the project, create a new project and copy the UUID from that project. Once that’s done, create a new build.
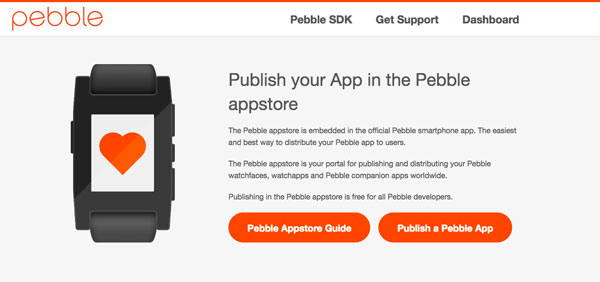
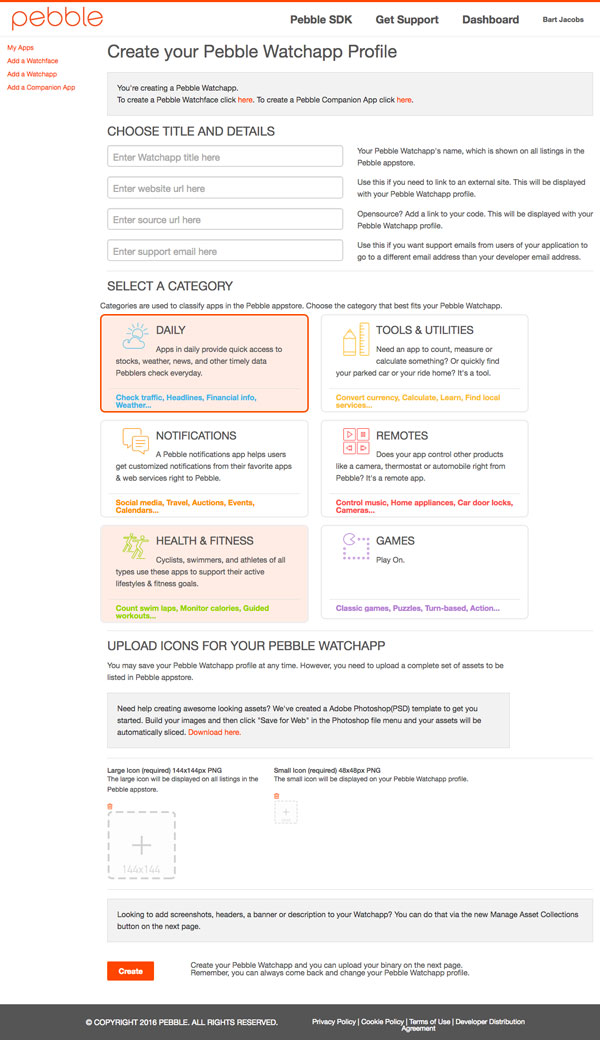
We now have an application that is ready for upload to the Pebble app store. Head over to the Pebble developer portal and register for an account or sign in if you already have one. Once you are signed in, click the link that says Publish a Pebble App.
On the next page, choose Create a Watchapp at the bottom.
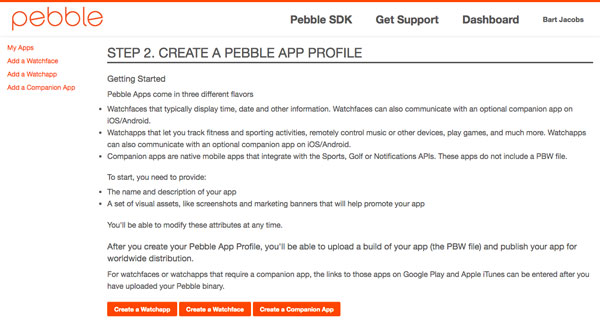
The form on the next page looks a bit daunting, but the fields are pretty self-explanatory. To complete the submission, you need to upload at least two assets, both of which are icons for your app.
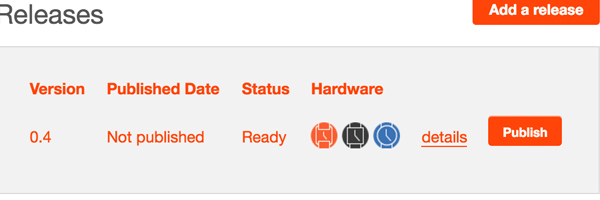
After this step, you are taken to the app store preview with some application data on the right hand side. It is required that you add a release date for your app. To do this, click Add a release and upload the .pbw file, which you can find in the build folder of your project.
Once this is done, you return to the overview screen and the .pbw file is verified. This usually only takes a few seconds. Once verified, the app is ready for publication. If you run into any problems here and the verification fails, you are presented with a helpful message that explains why the verification failed.
Before you go ahead and hit the Publish button, you may want to add some screenshots for your so people can see what to expect after installing it. These images are shown in the app store preview.
The Pebble CLI tool has a great and easy method for taking screenshots. Running pebble screenshot FILENAME take a screenshot of the current running emulator and saves it in the current directory.
After uploading the screenshots and filling out the description for the various platforms, you are ready to publish your first Pebble app.
Conclusion
In this article, you have learned how to install and set up the Pebble SDK, how to use some of the basic Pebble CLI commands, and how to build a basic application using JavaScript. It goes without saying that we only scratched the surface in this tutorial. There is a lot more to learn, not only about writing Pebble apps with JavaScript, but also about Pebble development in general and the tools available to you.