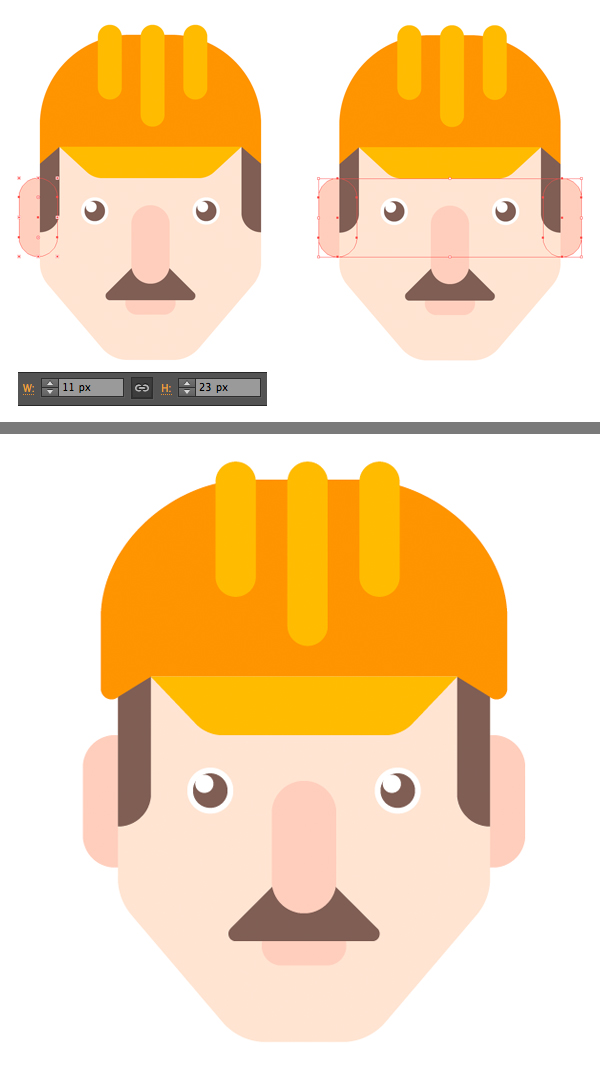
Step 10
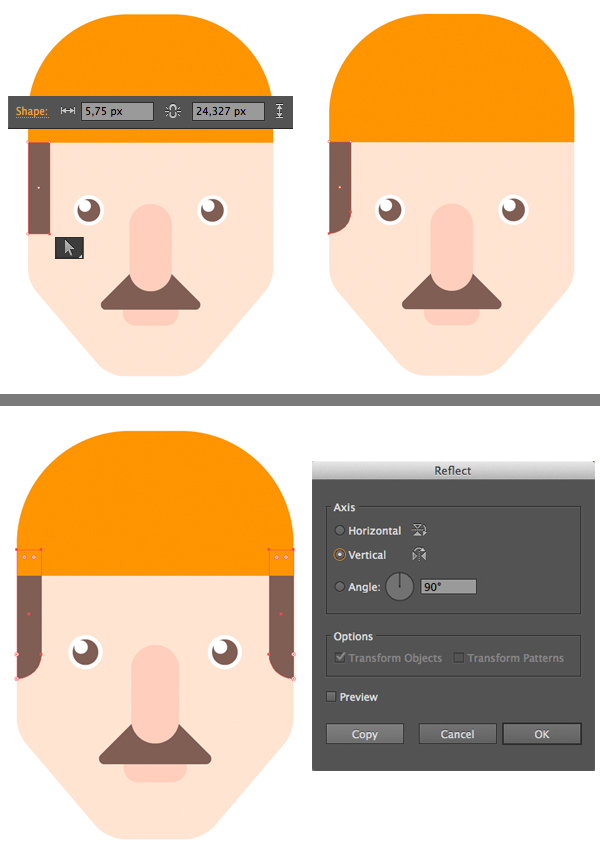
Now let’s add the hair. Take the Rectangle Tool (M) and make a narrow vertical stripe at the left side of the face for the sideburn. Select the bottom right anchor point with the Direct Selection Tool (A) and make the corner rounded.
Keeping the sideburn selected, double-click the Reflect Tool (O) and flip the shape over the Vertical Axis. Click the copy button and stick the second sideburn to the right side of the face.
Step 11
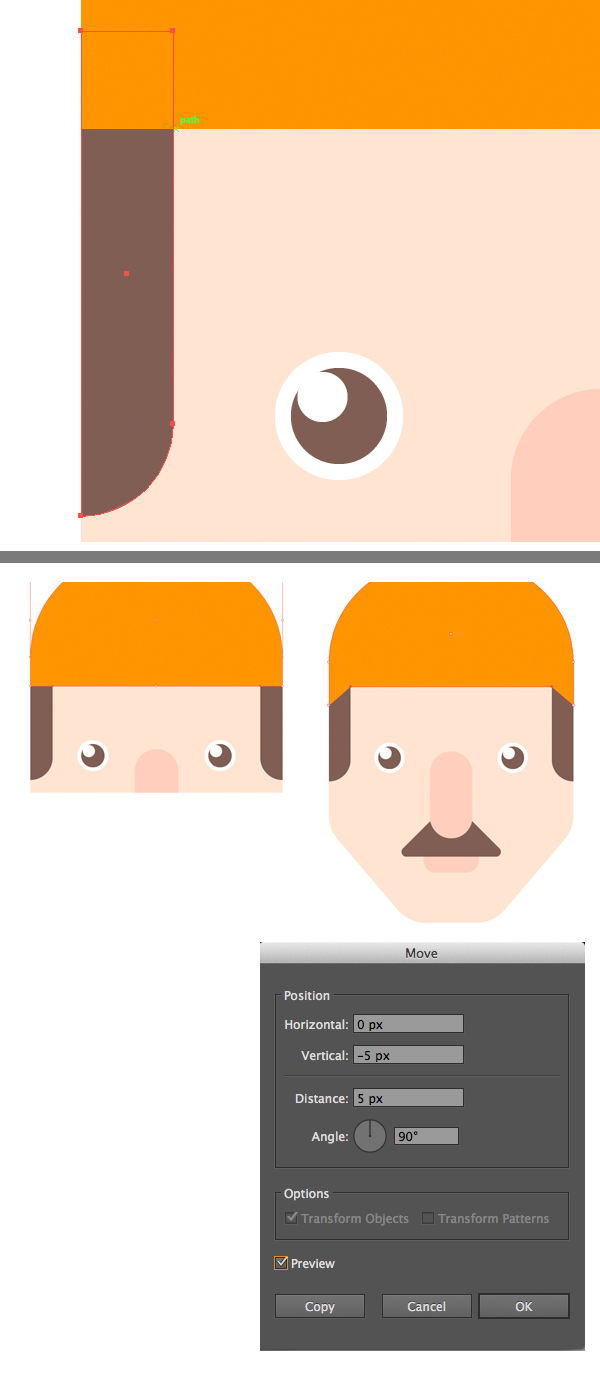
Let’s modify the bottom side of the helmet, so that we’ll be able to add a peak. Find the spot where the sideburn crosses the bottom line of the helmet, and use the Pen Tool (P) to make a new anchor point. Do the same for the right sideburn. You can turn on the Smart Guides (View > Smart Guides), which will mark the intersection point.
Finally, select both newly created anchor points with the Direct Selection Tool (A) and press Enter to open the Move window. Set the Horizontal value to 0 px and Vertical value to -5 px, moving the anchor points up.
Step 12
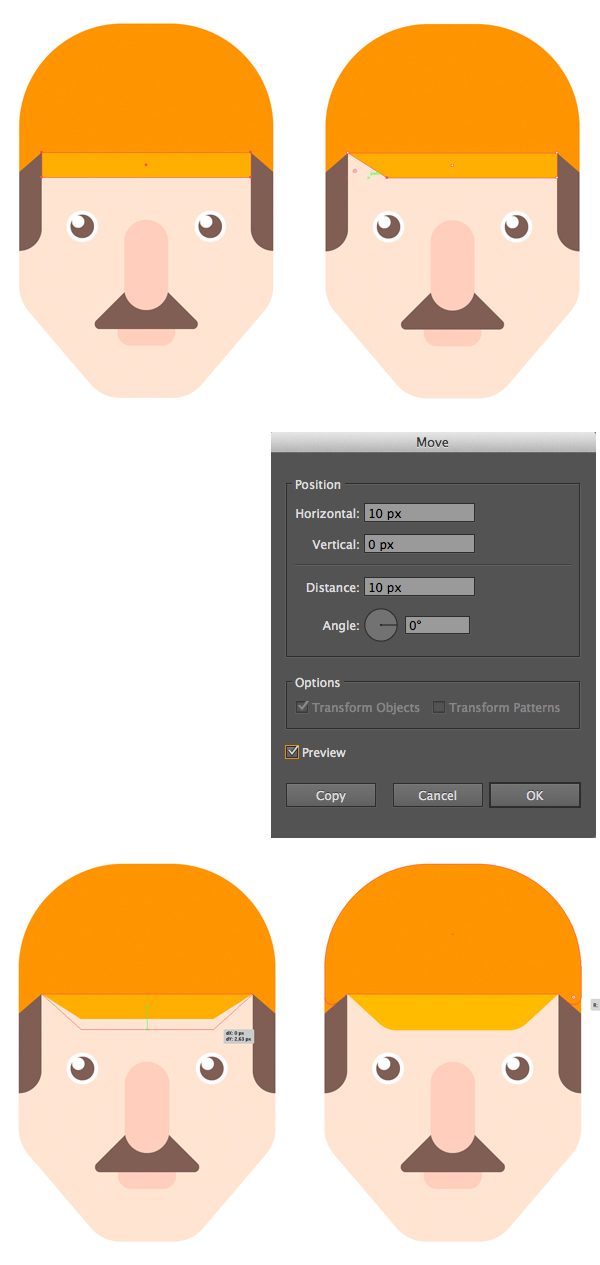
Now let’s add a peak to the helmet. Make a lighter-orange narrow rectangle and attach its upper anchor points to the helmet. Smart Guides (View > Smart Guides) can be really helpful at this step.
Select the bottom left anchor point and use the Move function to move it to the right by setting the Horizontal value to 10 px and Vertical value to 0 px. Repeat the same for the opposite bottom anchor point, but this time move it to the left. And finally, drag the bottom anchor points down a bit if you want to make the peak wider. Use the Live Corners feature to make the bottom corners slightly rounded.
Step 13
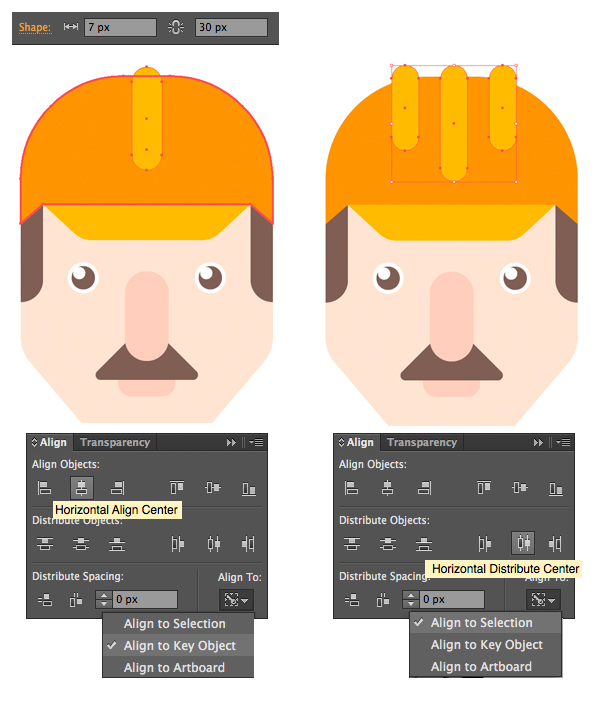
Take the Rounded Rectangle Tool and make a narrow vertical shape of 7 x 30 px on top of the helmet. Align it to the helmet, using the helmet as the Key Object.
Add two shorter stripes on both sides of the first stripe, and let’s use the Align panel to make the gaps between the stripes even. Select the stripes and click Align to Selection in the Align panel. Then click Horizontal Distribute Center, and there you have it!
Step 14
Take the Rounded Rectangle Tool, and this time let’s shape the ears. Make an 11 x 23 px pink shape at the left side of the head and Send it to Back (Shift-Control-[). Press Alt-Shift and drag the ear to the opposite side of the head, making a copy.
