In this tutorial we’ll be making a set of flat-style portraits, depicting people of different professions and occupations. Such images can be used as avatars for social networks or as design elements for your website, depicting various categories. Or you can even draw yourself, using such flat-style portraits for your business card.
If you want to go further and make a larger set of professions or you need some other types of portraits, feel free to find your inspiration directly at Envato Market by browsing flat design avatars or flat design portraits. And now, let’s move to our tutorial.
The basic shapes and tools of Adobe Illustrator are great for creating flat vector graphics, and we’ll go through the full process, discovering new tips and tricks, using the Pathfinder panel, Clipping Masks and some other features and functions of Adobe Illustrator. You can follow this tutorial with ease even if you don’t use a graphics tablet. Let’s begin!
1. Make a Construction Worker Avatar
Step 1
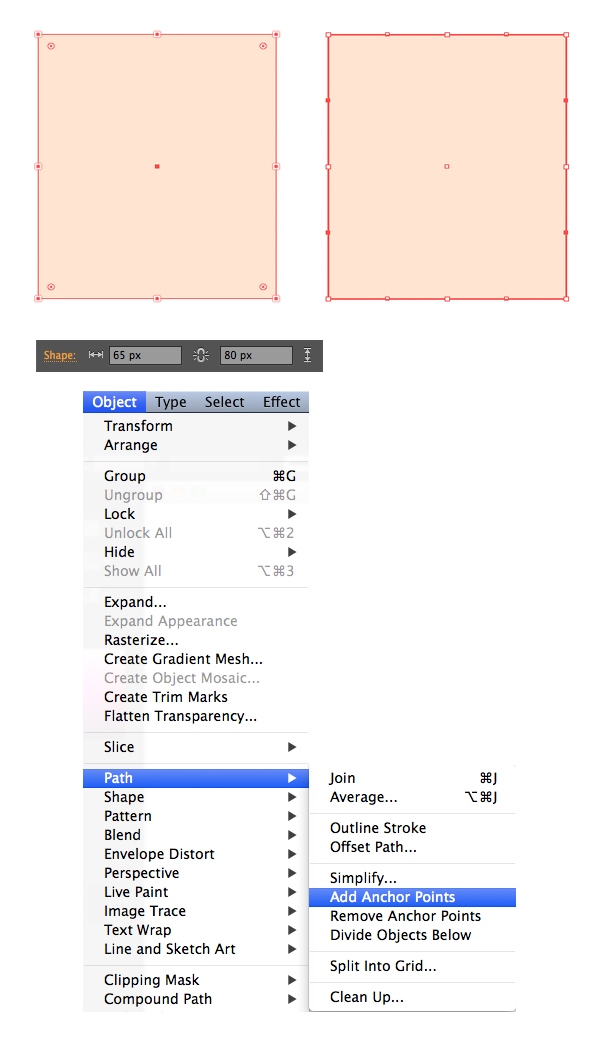
We’ll start by making the head of our first character. Let’s take the Rectangle Tool (M) and make a 65 x 80 px shape of a light-pink skin tone. Keeping our shape selected, go to Object > Path > Add Anchor Points. You will notice additional anchor points appear in the middle of each side of the rectangle.

Step 2
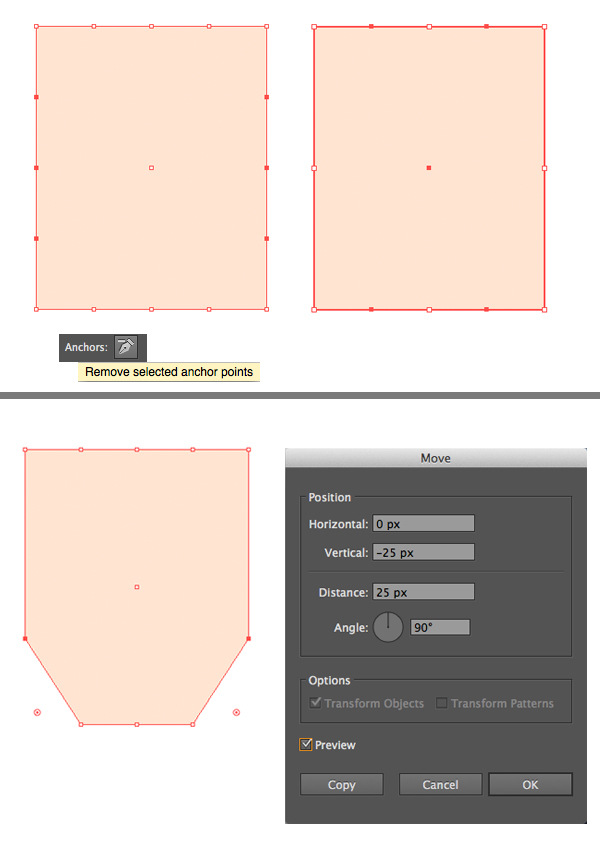
Go to Object > Path > Add Anchor Points again, adding two more points for each side. As a matter of fact, we don’t need all of the created anchor points, so let’s delete the unwanted ones. Take the Direct Selection Tool (A) and select three points on the left side of the rectangle and three on the right. Head to the control panel on top and click the Remove selected anchor points button.
Now let’s shape the face. Select two extreme anchor points in the bottom corners of the rectangle and click Enter to open the Move window. Set the Horizontal value to 0 px and Vertical to -25 px to move the anchor points 25 px up, shaping the chin. Click OK.

Step 3
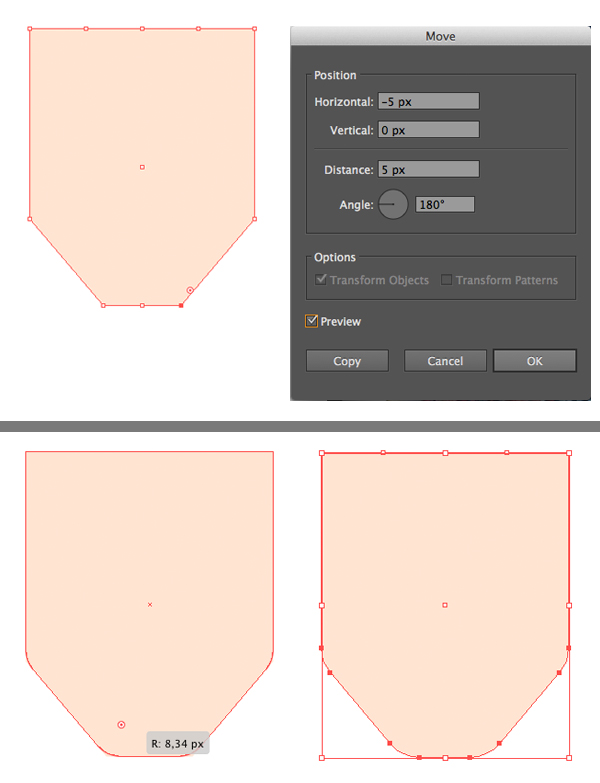
If you want to make the chin wider or narrower, select one of its anchor points and hit Enter again, opening the Move window and moving the point horizontally to the left or right. For example, move the right point to the left by setting the Horizontal value to -5 px and then move the left point to the right, setting the Horizontal value to 5 px. This way we’ve moved the points closer to each other.
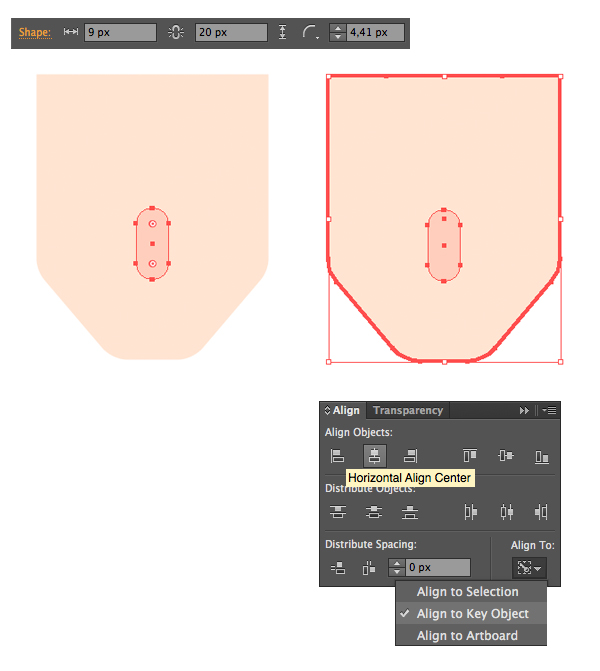
Use the Live Corners feature to make the face a bit more smooth and rounded by selecting it with the Direct Selection Tool (A) and pulling any of the circle markers a bit closer to the center.
If you’re using older versions of Adobe Illustrator, which don’t have the Live Corners feature, that’s totally fine! You can get the same result if you go to Effect > Stylize > Round Corners. The only difference is that you can’t choose just one corner—it will make all the corners rounded. But you can always fix this with the Eraser Tool (Shift-E).

Step 4
Let’s add the nose! Take the Rectangle Tool (M) and make a 9 x 20 px pink shape. Make the corners rounded or use the Rounded Rectangle Tool to create the entire shape.
Let’s make sure that the nose is perfectly aligned to the face. Select both the face and the nose with the Selection Tool (V), hold Alt and click the face. You will see a thick selection stroke around it, indicating that this is now the Key Object, which means that all other objects will be aligned to it. Now head to the Align panel and click Horizontal Align Center. Awesome! Now the nose is right in the center of the face.

