
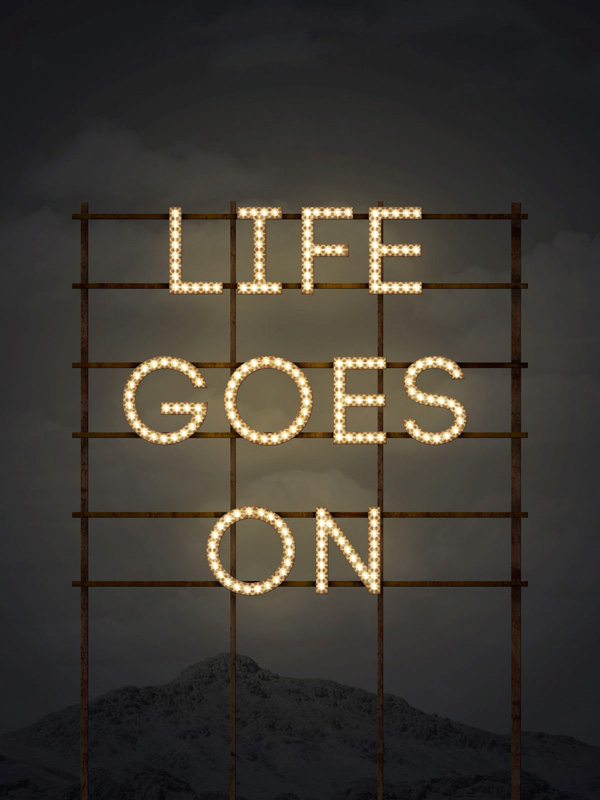
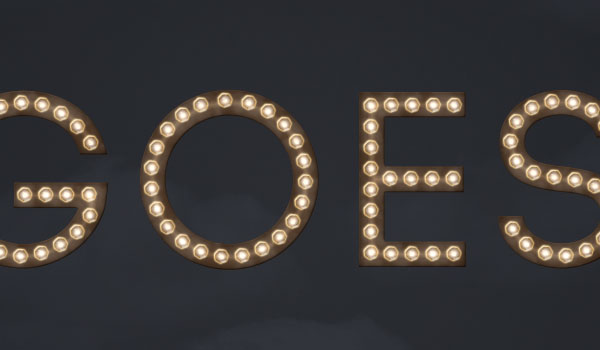
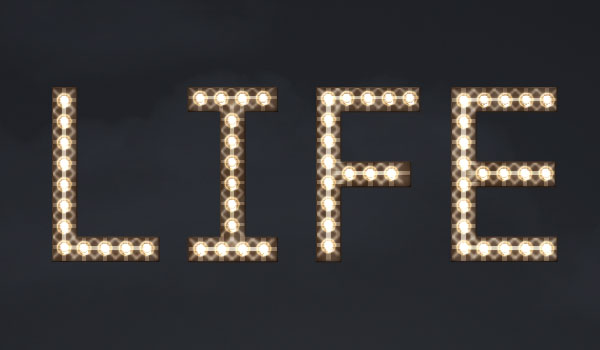
In this exclusive tutorial we will instruct you how to create a illumated text effect with user-friendly photoshop tools
Tutorial Assets
The following assets were used during the production of this tutorial.
- Code Bold font.
- LandscapeArid0006 by Jonas De Ro.
- RustPaint0147 by Thierry Hof.
Before You Begin: Loading Presets
For more information about loading presets, see this tutorial about the Preset Manager in Photoshop.
- Open the RustPaint0147 image in Photoshop then go to Edit > Define Pattern in order to add the texture as a pattern to the Patterns preset.
- To load the Contours, go to Edit > (Presets) > Preset Manager, and choose Contours from the Preset Type drop down menu. Then, click the little arrow to the right of the Preset Type drop down menu, and click Contours near the bottom of the pop-up menu. When the dialog box appears after that, click Append.
- To load the Patterns, go to Edit > (Presets) > Preset Manager, and choose Patterns from the Preset Type drop down menu. Then, click the little arrow to the right of the Preset Type drop down menu, and click Patterns near the bottom of the pop-up menu. When the dialog box appears after that, click Append.
1. Create the Background and the Text
Step 1
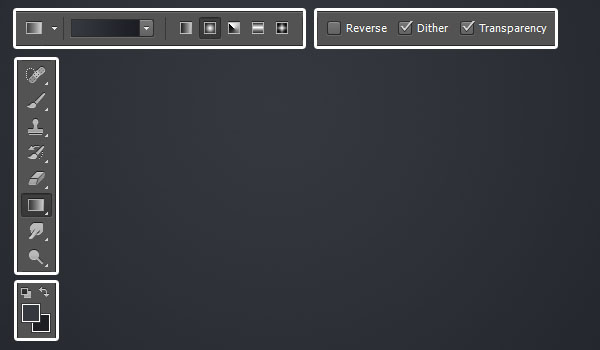
Create a new 1200 x 1600 px document and use the Resolution value of 300. Set the Foreground color to #35383f and the Background color to #1d1e23. Pick the Gradient Tool, choose the Foreground to Background gradient fill, click the Radial Gradient icon, and check the Dither box to get a smoother result.
Then, click and drag from the center of the document to one of the corners to create the background gradient.
Step 2
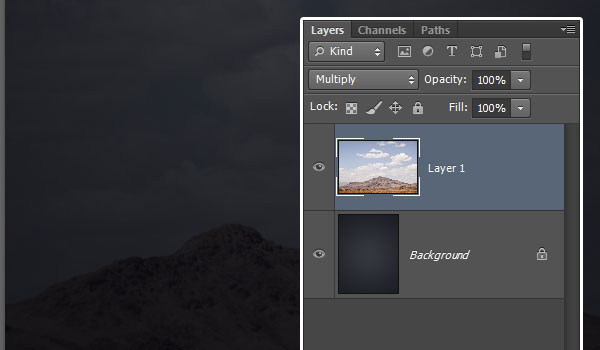
Place the LandscapeArid0006 image on top of the Background layer, then move it so that the mountaintop is near the bottom of the document. Change the image layer’s Blend Mode to Multiply.
Step 3
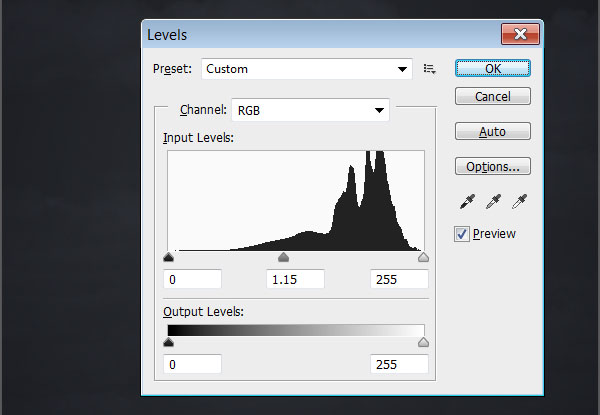
Go to Image > Adjustments > Desaturate, then go to Image > Adjustments > Levels, and change the Gamma value to 1.15.
Step 4
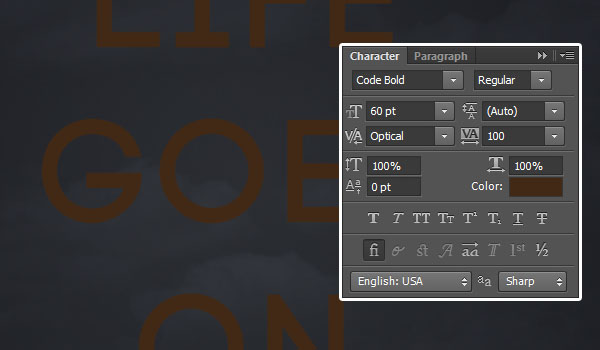
Create the text using the font Code Bold. The font and font size used are crucial for this text effect, as they determine the brush settings used later in the tutorial. So make sure to use the same values, or to change the brush settings to go along with any other font family or size you use.
The Size here is 60pt, the color is #422915, the Tracking value is 100, and the Kerning is set to Optical.
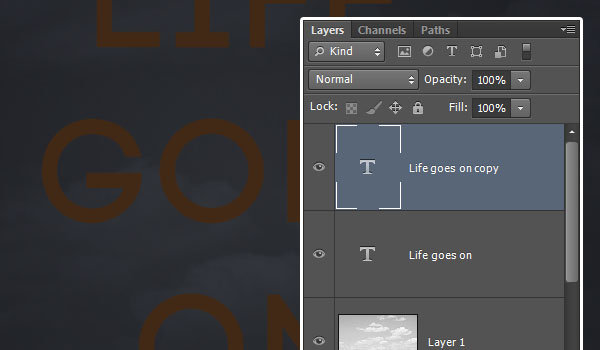
Step 5
Duplicate the text layer.
2. Style the Text
Double click the copy text layer to apply the following Layer Style:
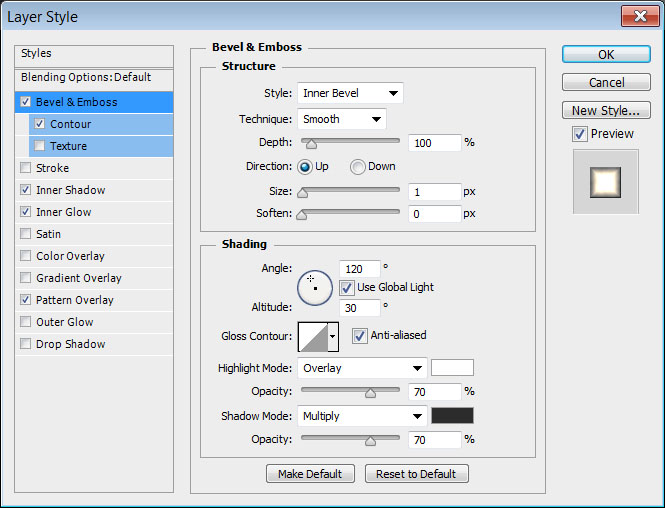
Step 1 – Bevel and Emboss
- Size: 1
- Check the Anti-aliased box
- Highlight Mode: Overlay
- Opacity: 70%
- Shadow Mode > Opacity: 70%
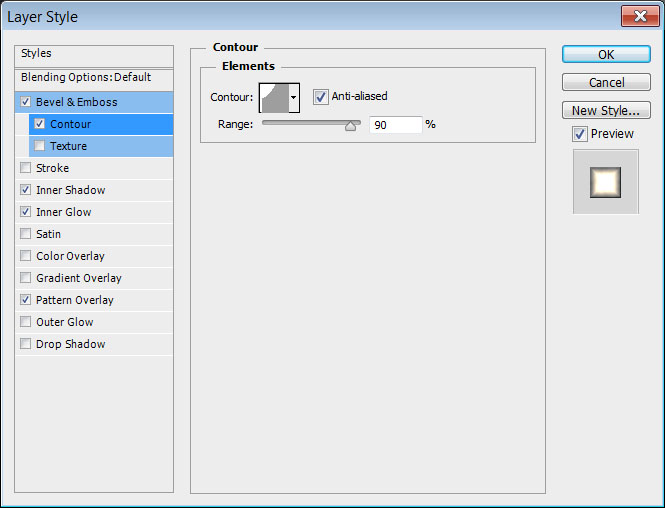
Step 2 – Contour
- Contour: Cove – Shallow
- Check the Anti-aliased box.
- Range: 90%
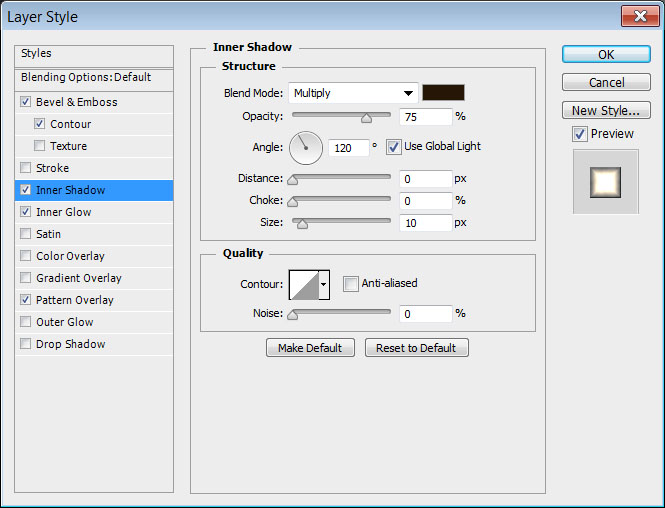
Step 3 – Inner Shadow
- Distance: 0
- Size: 10
Step 4
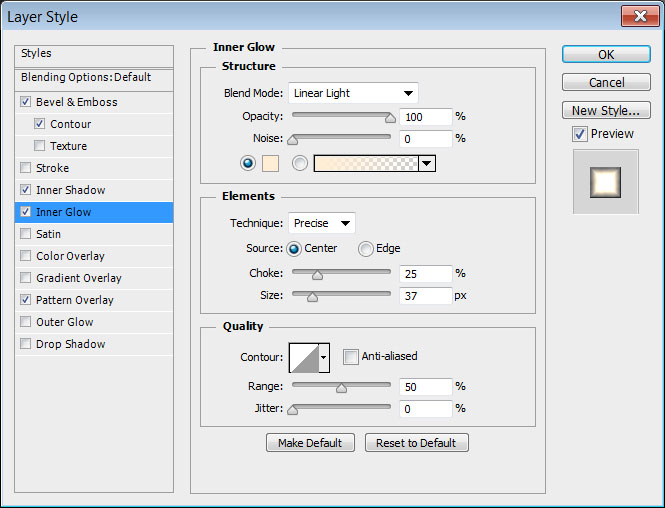
– Inner Glow
- Blend Mode: Linear Light
- Opacity: 100%
- Color:
#ffeed5 - Technique: Precise
- Source: Center
- Choke: 25
- Size: 37
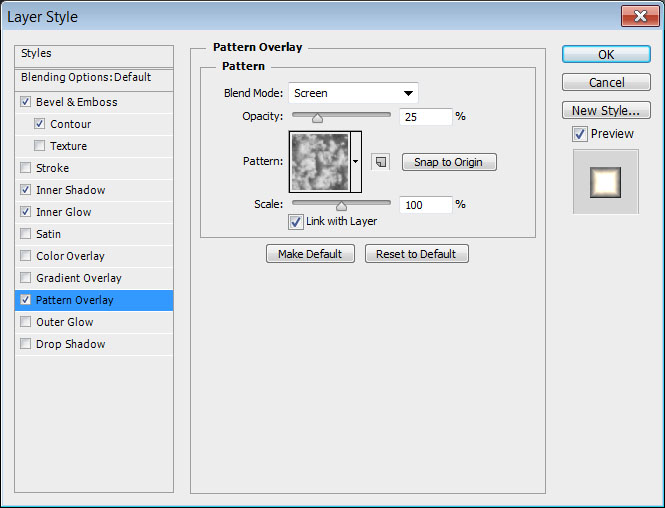
Step 5 – Pattern Overlay
- Blend Mode: Screen
- Opacity: 25%
- Pattern: Clouds
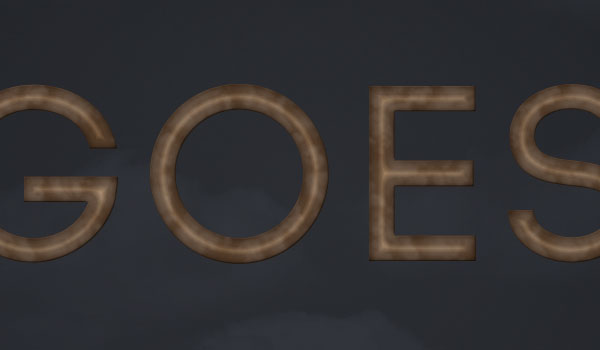
Step 6
This will style the text with the basic glow effect. The Pattern Overlay will help create some brightness variations, while the Inner Glow will intensify the light in the center of the text, as well as work as a guide for adding the brush and work paths next.
3. Create the Brush Tip
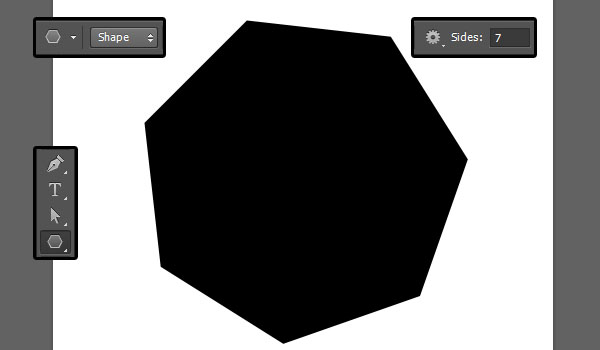
Step 1
Create a new 500 x 500 document. Pick the Polygon Tool, change the number of Sides to 7, and create a 320 x 320 black Heptagon.
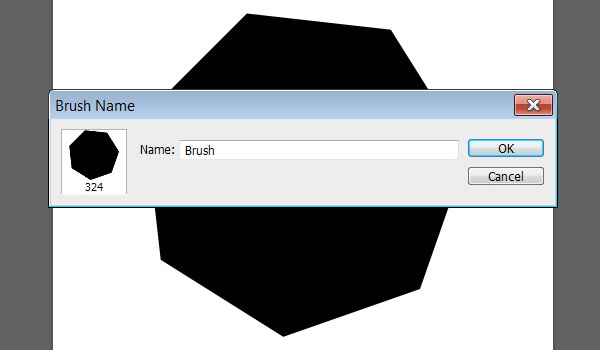
Step 2
Go to Edit > Define Brush Preset, and type in Brush for the Name. You can then close this document and go back to the original one.
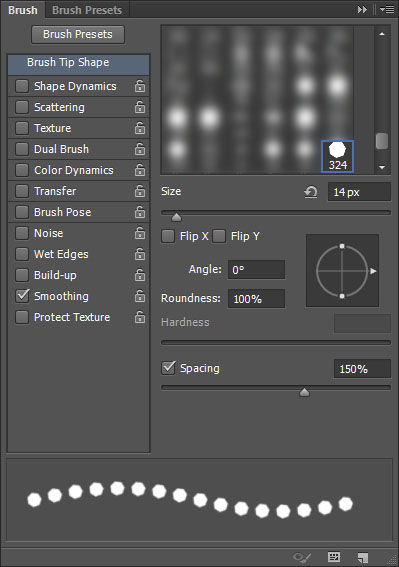
Step 3
Pick the Brush Tool and open the Brush panel (Window > Brush). Pick the brush tip you’ve just defined, then change its settings as shown below:
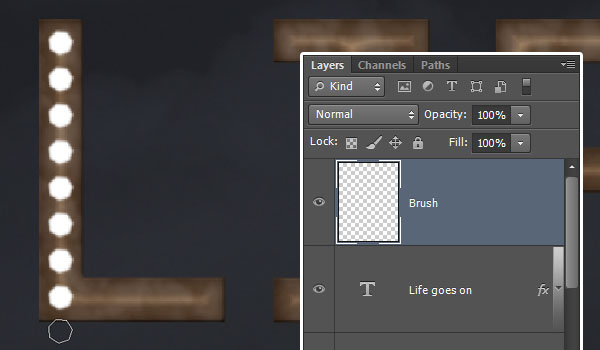
Step 4
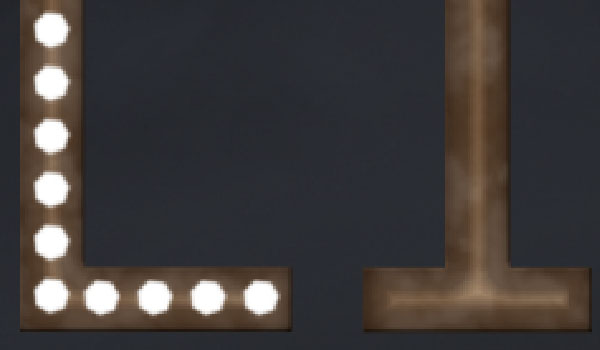
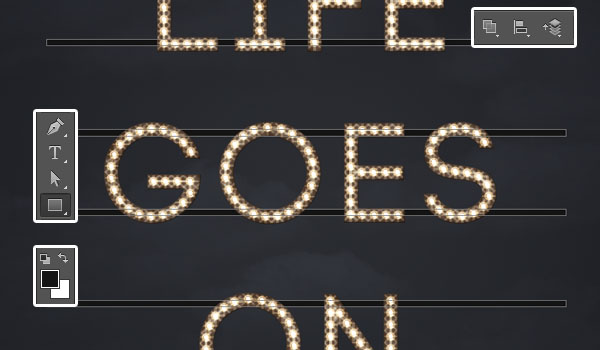
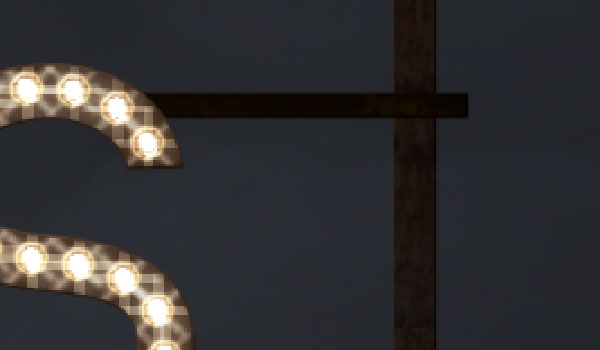
Create a new layer on top of all layers and call it Brush, and set the Foreground color to White. What you’ll need to do next, is fill the straight and diagonal parts of the text with the modified brush.
To fill the vertical and horizontal parts, click where you want the line to start, press and hold the Shift key, then drag the line to where you want it to end and release all.
To fill the diagonal parts, click once where you want the line to start and release, press and hold the Shift key, then click one more time where you want the line to end, and release all.
Always click before pressing the Shift key to prevent the lines from getting connected together.
Step 5
You can always undo any line you don’t like and recreate it. This step might take some time, but it gives a more accurate result.
4. Fill the Remaining Letters
The rest of the letters are going to be filled by stroking work paths.
Step 1
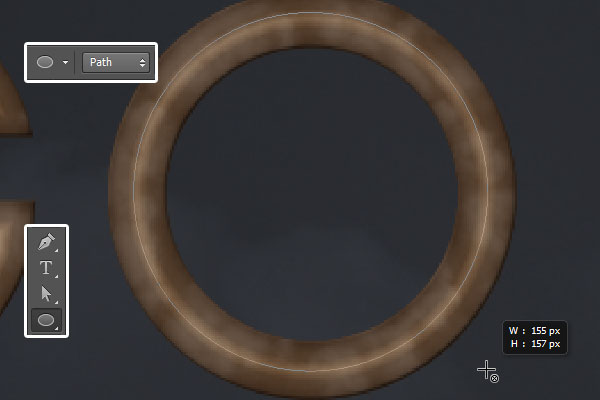
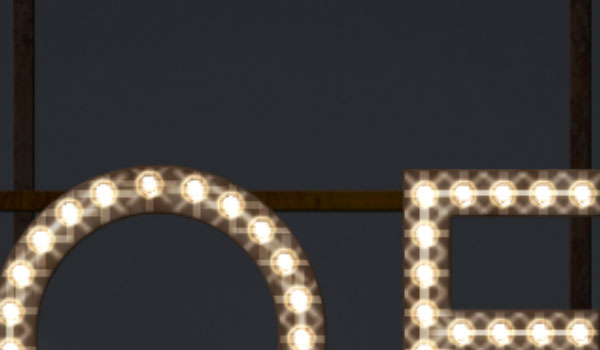
For the letter O, you can simply use the Ellipse Tool, with the Path option selected in the Options bar, to create a work path in the center of the letter.
Step 2
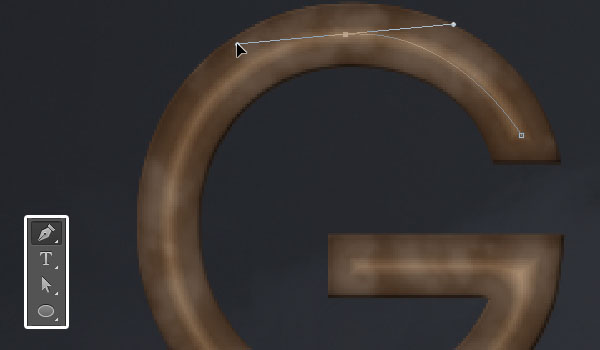
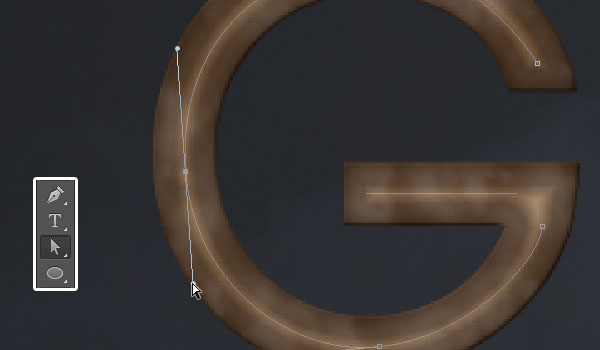
For the other letters, you’ll need to use the Pen Tool (with the Path option selected) to create the work paths.
Click once to add anchor points, and click and drag to create curves. You can use the Inner Glow of the letters as a reference to add the path. You don’t have to make it perfect as we’ll work on it some more next.
Step 3
An important thing to pay attention to when creating the work paths is to create them all (for all the needed parts of the text) before stroking any of them. The work paths created now will be used again later in the tutorial. So they should all be created at the same time.
To be able to separate the work paths, press and hold the Command/Ctrl key and click once outside each path when you’re done creating it. This will separate the work path you created from the one you’re going to create next.
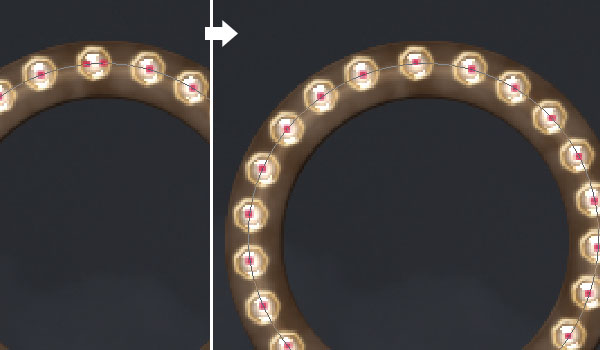
Step 4
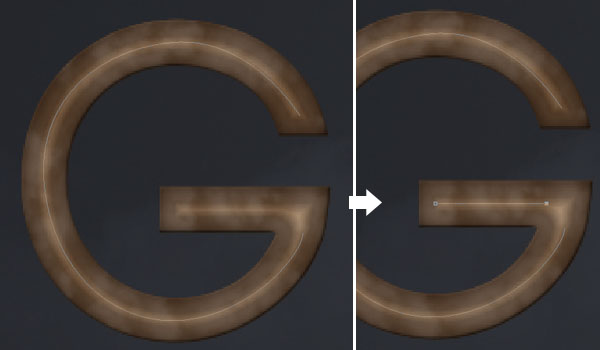
After creating all the work paths, pick the Direct Selection Tool, then start modifying them.
You can click and drag an anchor point to move it around, or you can click the Direction Points at the end of the two Direction Handles, then move them around to change the orientation of the curve, or drag them outwards and inwards to make the curve wider or narrower.
You can use the Add/Delete Anchor Point Tool(s) if needed as well.
Step 5
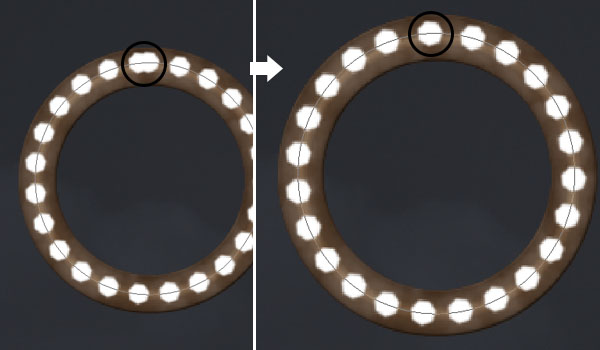
When you like how the paths look, pick the Brush Tool again, make sure that the Brush layer is selected, then hit the Enter/Return key to stroke the work paths.
Then, use the Eraser Tool to get rid of any unwanted/overlapping parts, and replace them by re-adding the heptagons using the Brush Tool.
You can get rid of the work path by selecting the Direct Selection Tool and hitting the Enter/Return key.
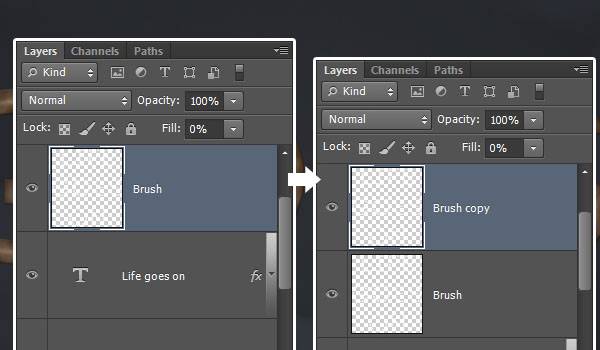
Step 6
Once you’re done modifying the stroke, change the Brush layer’s Fill value to 0, then duplicate it.
5. Styling the Bulbs
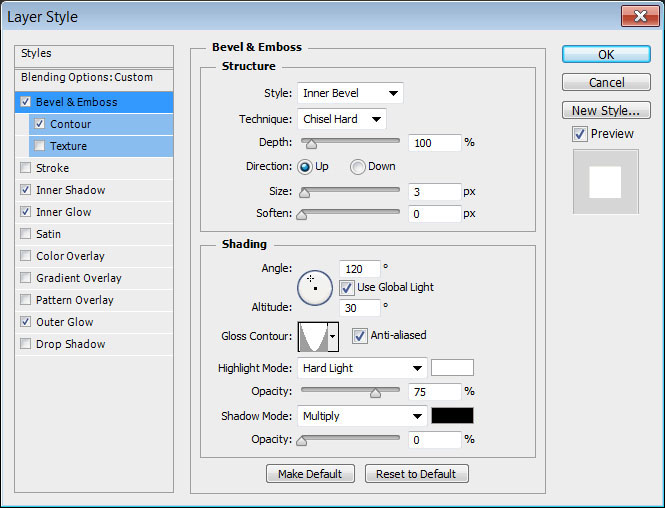
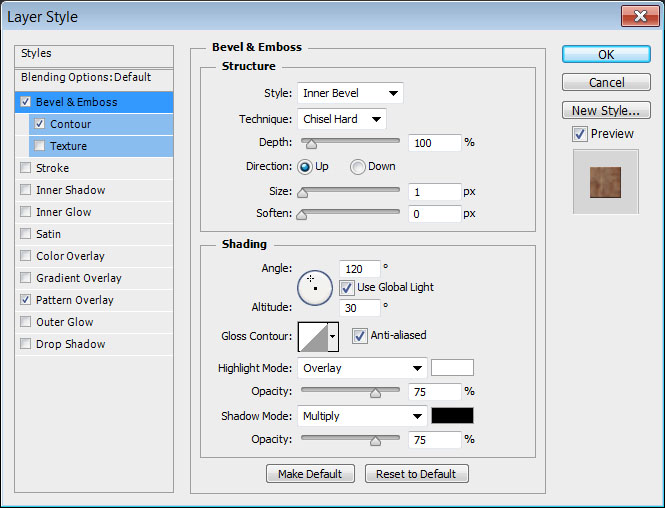
Step 1 – Bevel and Emboss
Double click the Brush layer to apply the following Layer Style:
- Technique: Chisel Hard
- Size: 3
- Gloss Contour: Cone – Inverted
- Check the Anti-aliased box
- Highlight Mode: Hard Light
- Shadow Mode – Opacity: 0%
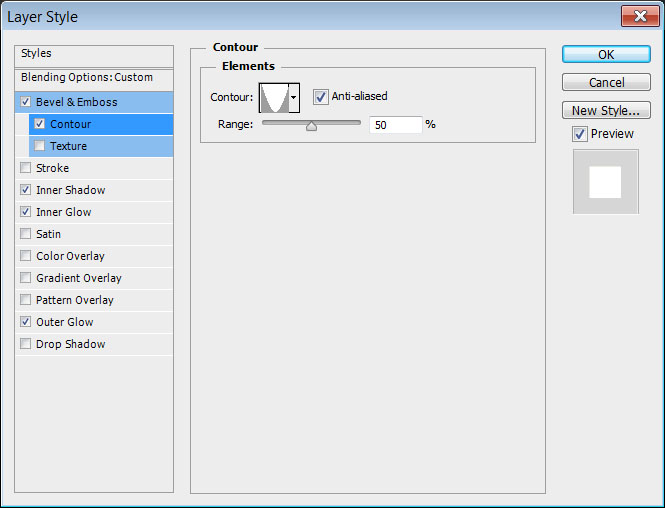
Step 2 – Contour
- Contour: Cone – Inverted
- Check the Anti-aliased box.
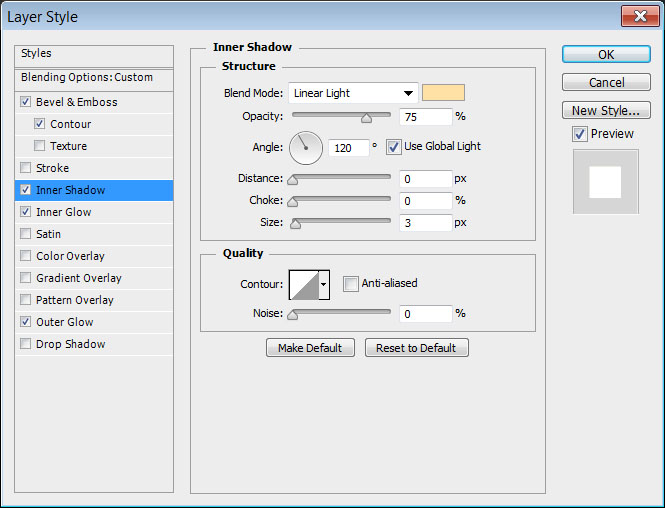
Step 3 – Inner Shadow
- Blend Mode: Linear Light
- Color:
#ffe1a5 - Distance: 0
- Size: 3
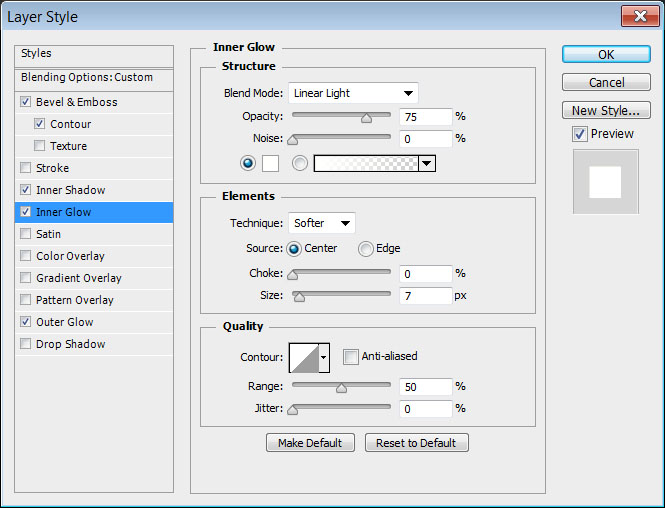
Step 4 – Inner Glow
- Blend Mode: Linear Light
- Color:
#fffffd - Source: Center
- Size: 7
Step 5 – Outer Glow
- Blend Mode: Hard Light
- Opacity: 100%
- Color:
#ffeac7 - Size: 1
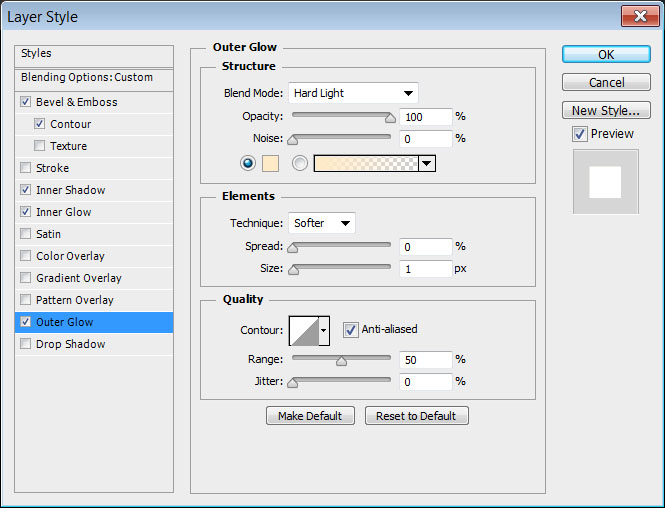
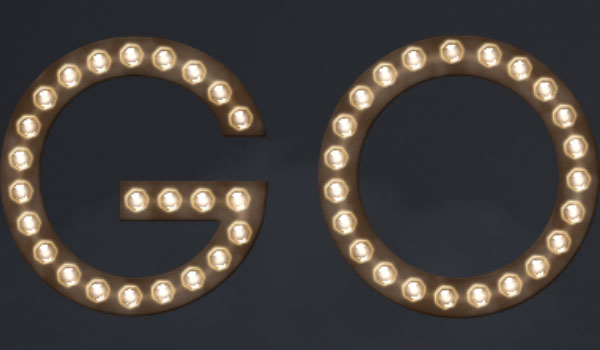
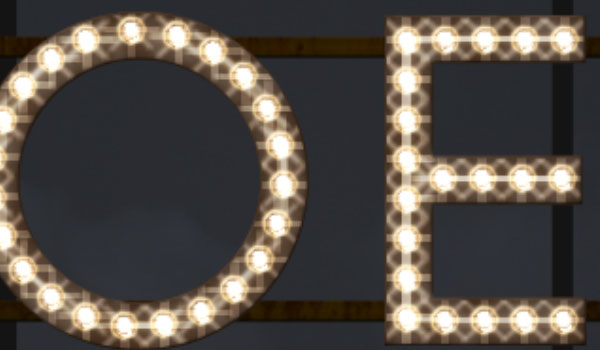
Step 6
This will style the glowing part of the light bulbs (heptagons).
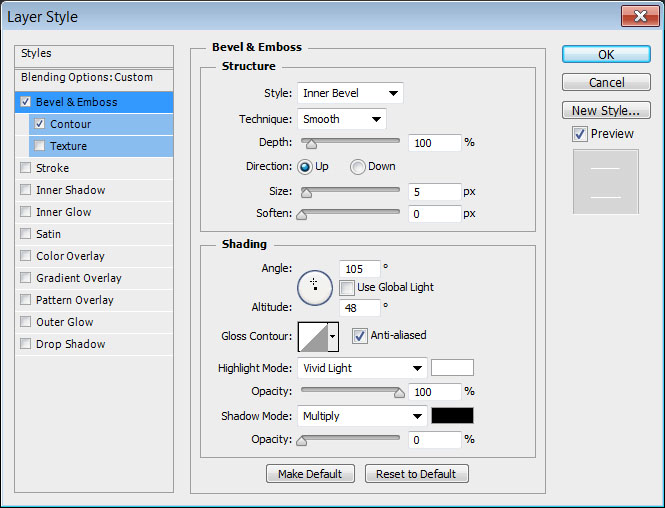
Step 7 – Bevel and Emboss
Double click the copy Brush layer to apply the following Layer Style:
- Uncheck the Use Global Light box
- Angle: 105
- Altitude: 48
- Check the Anti-aliased box
- Highlight Mode: Vivid Light
- Opacity: 100%
- Shadow Mode – Opacity: 0%
Step 8 – Contour
- Contour: Cone – Inverted
- Check the Anti-aliased box.
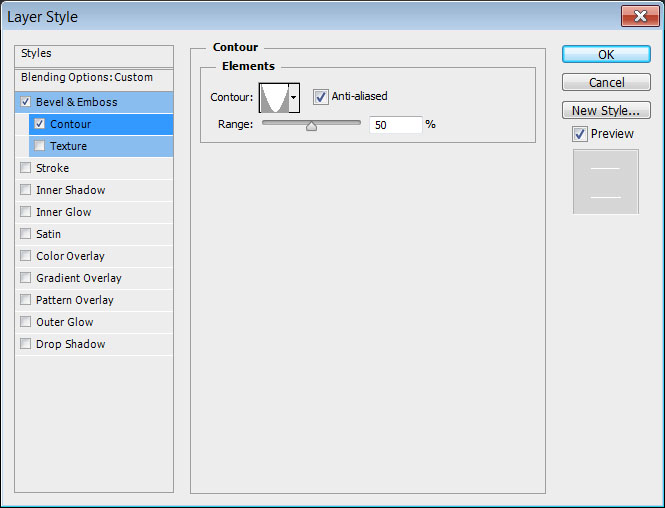
Step 9
This will create the bulbs’ glass.
6. The Reflection Brush
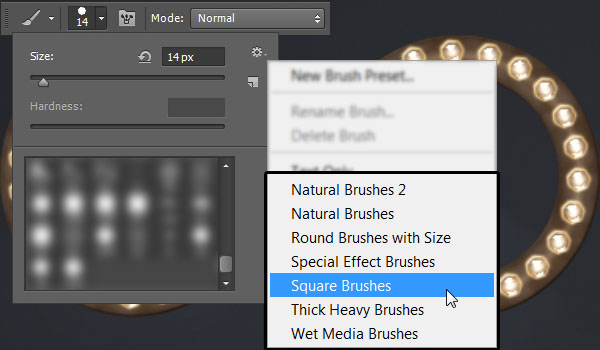
Step 1
Pick the Brush Tool, then open the Brush Preset picker and click the pop-up menu icon to its top right corner. Choose the Square Brushes preset down the menu and click Append to add it to the other brushes you have.
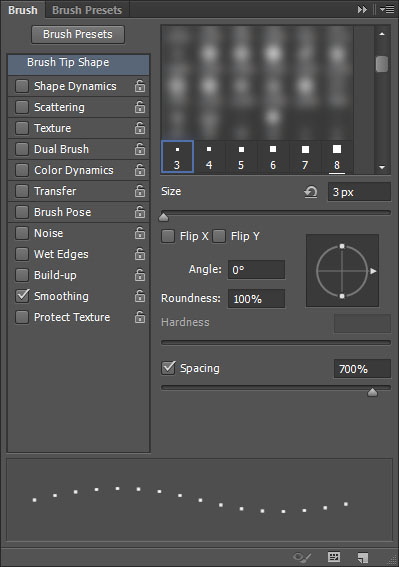
Step 2
Pick a 3px square brush and modify its settings in the Brush panel as shown below. This might be a bit tricky as we need the square brush to be added to the center of each heptagon. So the Spacing value needs to be adjusted until the result is achieved.
For this tutorial, the value used for that is 700. But you can definitely try other values if this one doesn’t work for you.
Step 3
Create a new layer on top of all layers and set the Foreground color to a bright red one. After that, follow the same steps used for the heptagon brush tip to fill the text with the square tip.
Just make sure to place the brush tip in the center of the heptagon when you click to add it before dragging.
Step 4
To get the work path back and stroke the work path letters, open the Paths panel (Window > Paths), and click the Work Path tab.

Step 5
Go back to the Layers panel and stroke the work path, then fix any issues just like you did for the heptagon brush tip.
Step 6
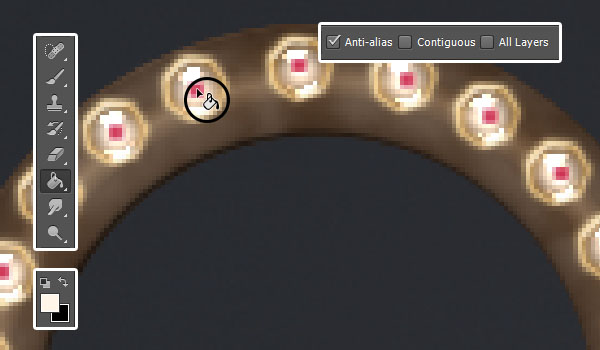
When you’re done adding the square tips, set the Foreground color to #fff5e9, pick the Paint Bucket Tool, un-check the Contiguous box in the Options bar, place the mouse cursor inside one of the squares, and click to fill them with the Foreground color.
This is not a precise way to change the color, but it will create some variations because of that.
If you want a more precise result, you can apply a Color Overlay effect using the same color (#fff5e9), then rasterize the layer after that.
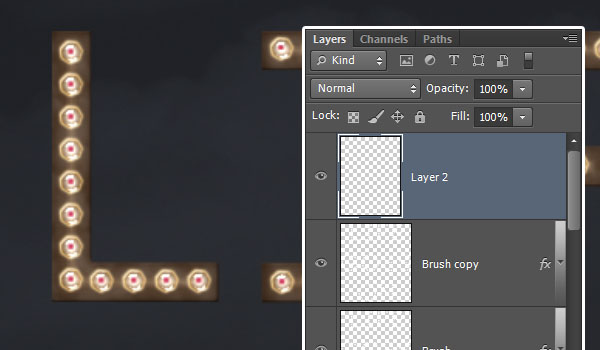
7. Create the Reflections
Step 1
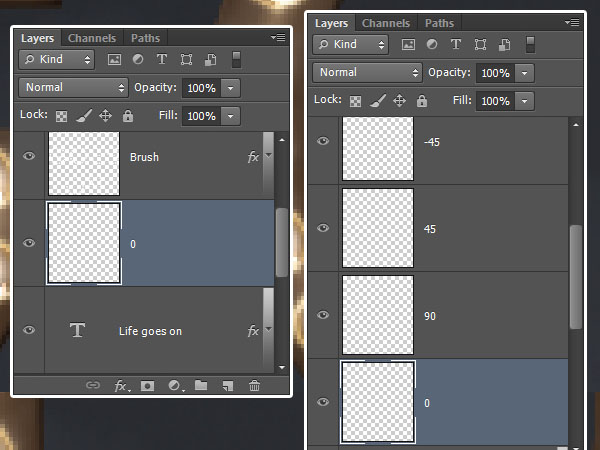
Drag the square brush layer right below the Brush layer, then rename it to 0. Create 3 more copies of that layer, and rename them to 90, 45, and -45. The names represent the values that will be used for the Motion Blur’s Angle value for each layer.
Step 2
Select the 0 layer and go to Filter > Blur > Motion Blur. Change the Angle to 0 and the Distance to 30.
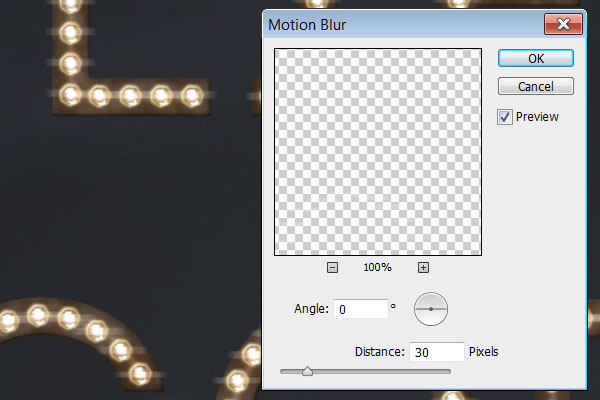
Step 3
Do the same for the other layers, but make sure to use the Angle value of the selected layer’s name.
Then select all four Motion Blur layers and go to Layer > Merge Layers. Rename the merged layer to Light.
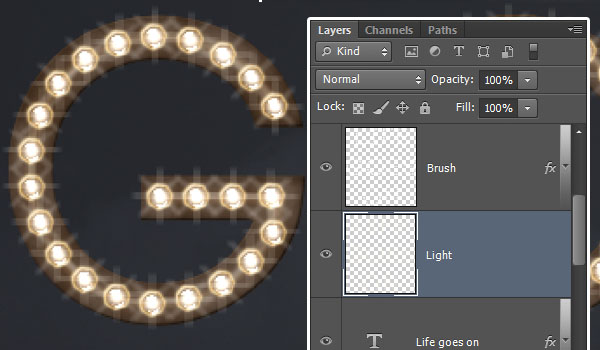
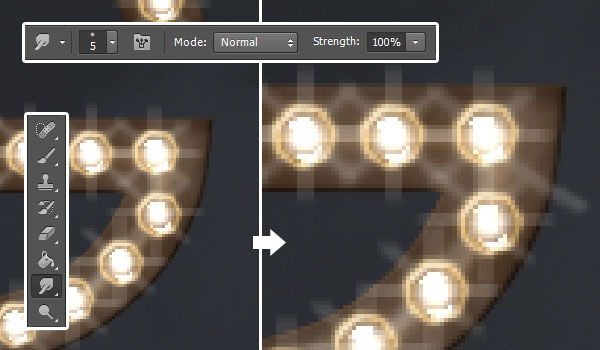
Step 4
Pick the Smudge Tool, choose a 5px soft round brush, and set the Strength value to 100. Click and drag the lines to fill any empty corners.
Step 5
Command/Ctrl-click the text layer’s thumbnail to create a selection.
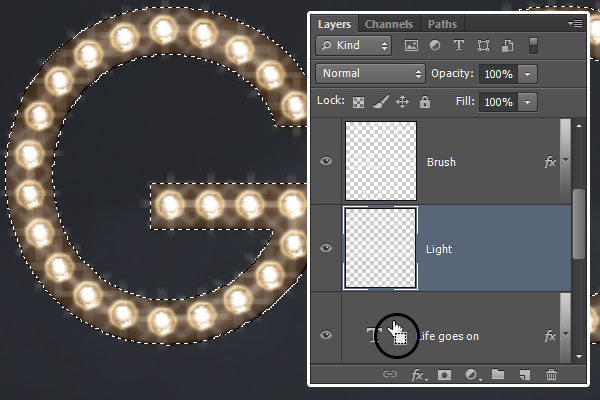
Step 6
Go to Select > Modify > Contract and type in 1. This will contract the selection 1 pixel.

Step 7
Go to Select > Inverse, then hit the Delete button, and go to Select > Deselect to get rid of the selection.
Step 8
Duplicate the Light layer and change the copy’s Blend Mode to Overlay, then duplicate the copy layer.
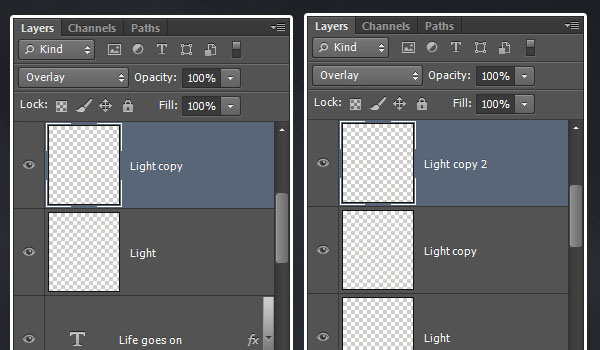
Step 9
This will intensify the light reflections.
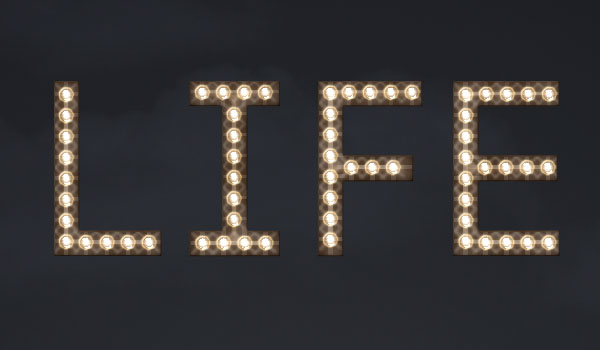
8. Create the Metal Bars
Step 1
Set the Foreground color to #151414, pick the Rectangle Tool, and create 11-px-high rectangles behind the text. Each line of text should have two rectangles behind it: One near the top and one near the bottom. The lines should extend outside the right and left sides of the text.
Make sure to choose the Combine Shapes option in the Options bar to create all the rectangles in one layer.
Step 2
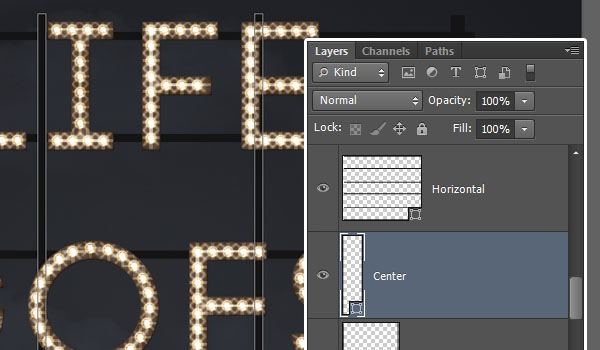
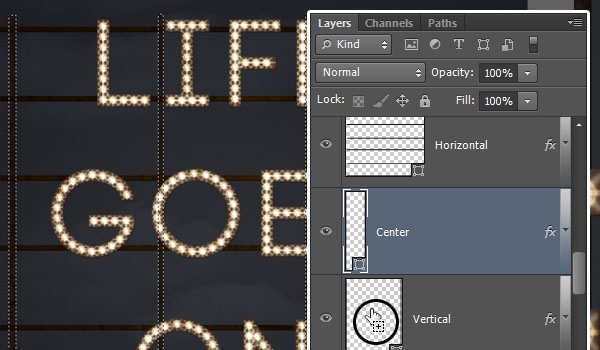
Rename the rectangles’ layer to Horizontal and make sure to place it below the text layer, then create a new layer below it and rename it to Vertical.
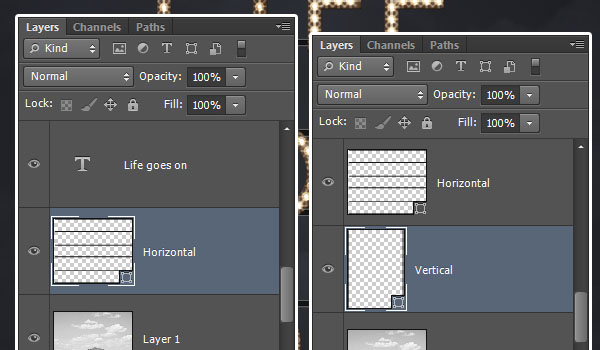
Step 3
Create two 15-px-wide vertical rectangles near both ends of the horizontal lines, and make sure to drag their bottom sides to the bottom of the document.
Step 4
Create another new layer between the Horizontal and Vertical Layers, call it Center, and add two more 11-px-wide rectangles near the middle of the horizontal ones.
9. Style the Metal Bars
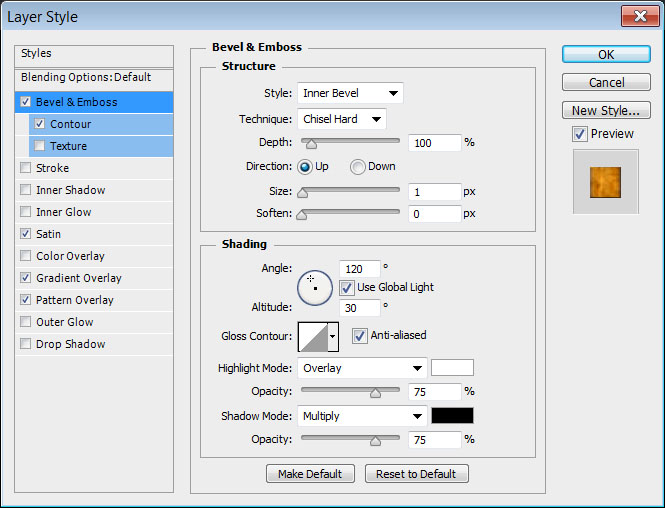
Step 1 – Bevel and Emboss
Double click the Horizontal layer to apply the following Layer Style:
- Technique: Chisel Hard
- Size: 1
- Check the Anti-aliased box
- Highlight Mode: Hard Light
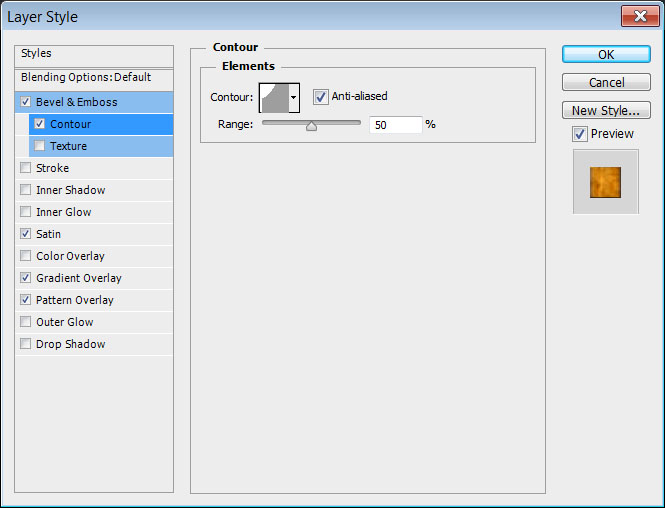
Step 2 – Contour
- Contour: Cove – Shallow
- Check the Anti-aliased box.
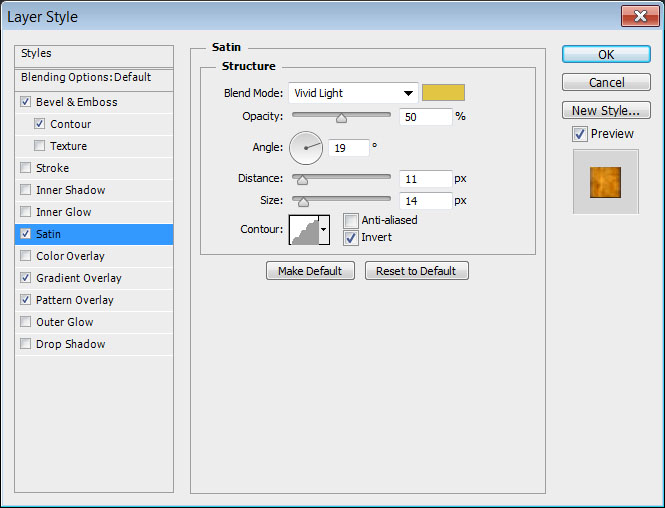
Step 3 – Satin
- Blend Mode: Vivid Light
- Color:
#e1c543 - Contour: Rounded Steps
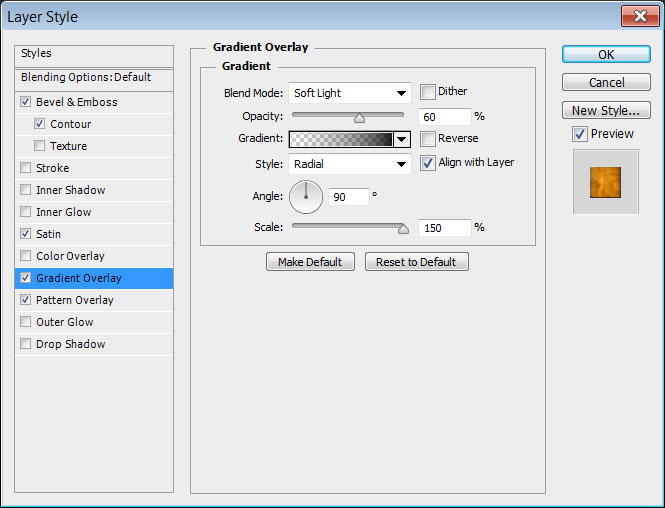
Step 4 – Gradient Overlay
- Blend Mode: Soft Light
- Opacity: 60
- Style: Radial
- Scale: 150%
- Use a Transparent to Black gradient fill (with the color Black on both sides of the gradient).
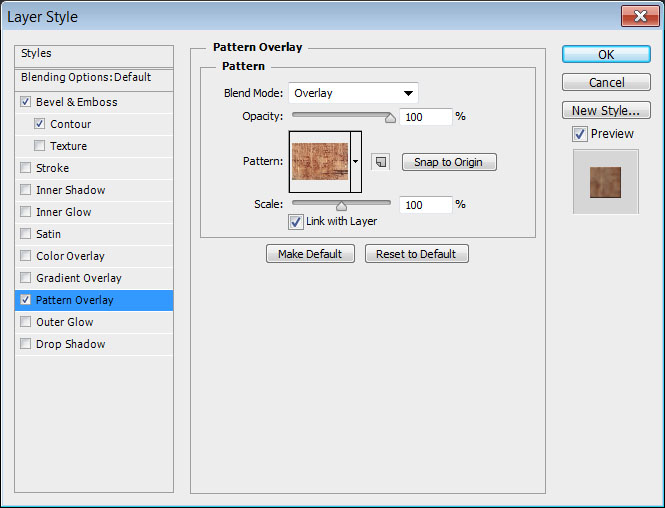
Step 5 – Pattern Overlay
- Blend Mode: Overlay
- Opacity: 100%
- Pattern: RustPaint0147

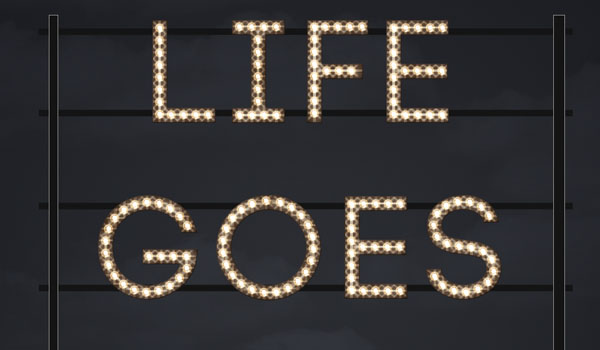
Step 6
This will style the horizontal bars.
Step 7 – Bevel and Emboss
Double click the Vertical layer to apply the following Layer Style:
- Technique: Chisel Hard
- Size: 1
- Check the Anti-aliased box
- Highlight Mode: Overlay
Step 8 – Contour
- Contour: Cove – Shallow
- Check the Anti-aliased box.

Step 9 – Pattern Overlay
- Blend Mode: Overlay
- Opacity: 100%
- Pattern: RustPaint0147
Step 10
Right click the Vertical layer and choose Copy Layer Style.
Step 11
Right click the Center layer and choose Paste Layer Style.
10. Add the Shadows
Step 1
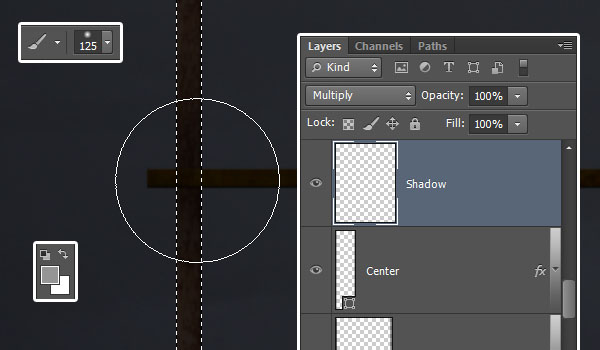
Command/Ctrl-click the Center layer’s thumbnail to create a selection, then Command/Ctrl–Shift-click the Vertical layer’s thumbnail to add it to the selection.
Step 2
Create a new layer on top of the Center layer, call it Shadow, and change its Blend Mode to Multiply. Set the Foreground color to #959595, pick the Brush Tool, and choose a 100 – 125 px soft round tip.
Click once to add shadow wherever the vertical and horizontal lines meet. When done, go to Select > Deselect.
Step 3
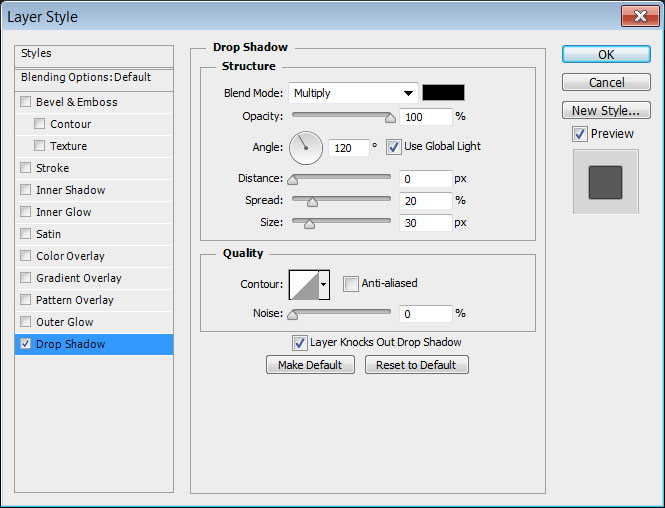
Double click the original text layer and apply a Drop Shadow effect:
- Opacity: 100%
- Distance: 0
- Spread: 20
- Size: 30
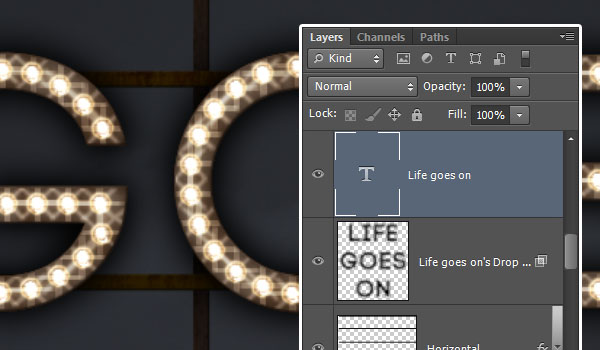
Step 4
Go to Layer > Layer Style > Create Layer. This will place the drop shadow effect in a separate layer. Delete the original text layer.
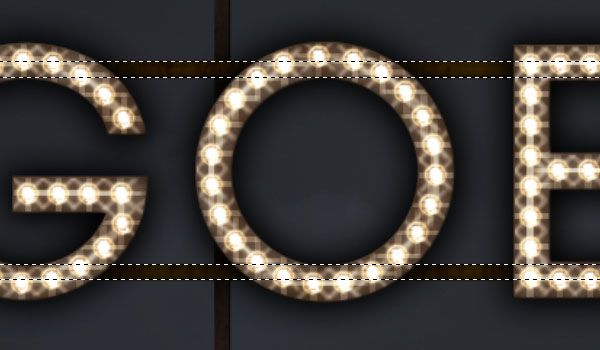
Step 5
Command/Ctrl-click the Horizontal layer’s thumbnail to create a selection, make sure that the drop shadow layer is selected, go to Select > Inverse, then hit Delete to get rid of the shadow outside the horizontal lines.
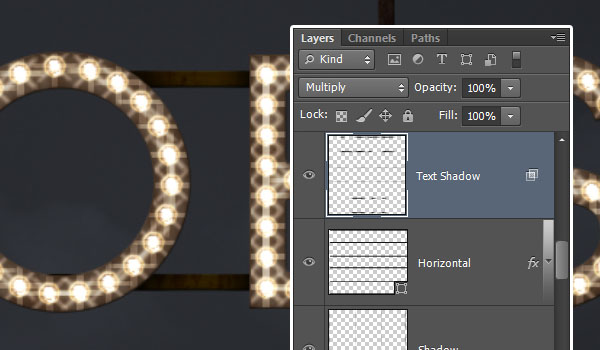
Step 6
Go to Select > Deslect, and rename the drop shadow layer to Text Shadow.
11. Add Lights
Step 1
Create a new layer below the Text Shadow layer and call it Text Light. Change its Blend Mode to Soft Light and its Opacity to 50%. Set the Foreground color to #c0b99d.
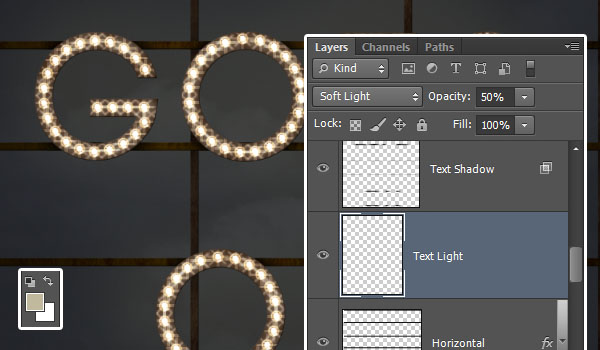
Step 2
Pick the Brush Tool, and use a 250 px soft round brush to add some light behind the text.
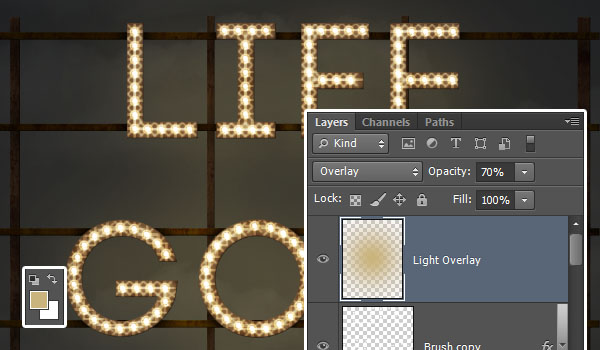
Step 3
Change the Foreground color to #c9b47d, and the brush Size to a really big value (1800). Create a new layer on top of all layers and call it Light Overlay. Change its Blend Mode to Overlay and its Opacity to 70%.
Then, click once in the center of the document to add the light. This will enhance the color and the brightness of the final result, and make the details and textures pop a bit more.
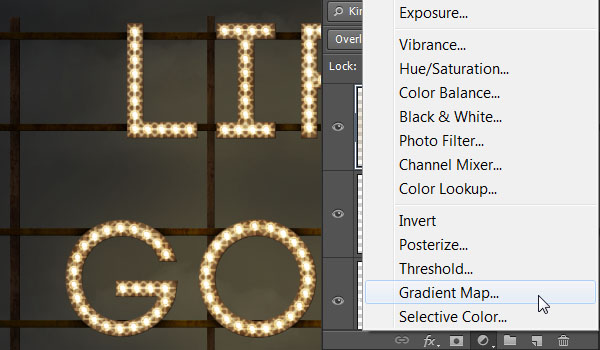
Step 4
Click the Create New Fill or Adjustment Layer icon down the Layers panel and choose Gradient Map.
Step 5
Change the adjustment layer’s Blend Mode to Overlay and its Opacity to 20%.
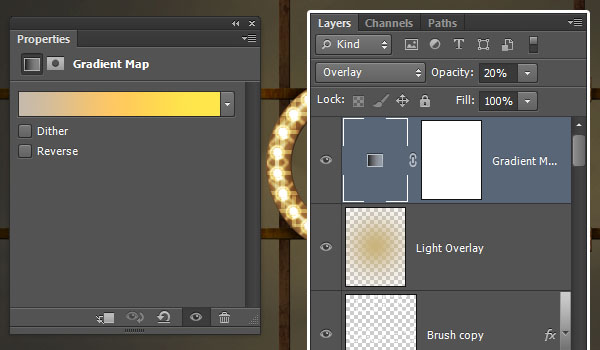
Step 6
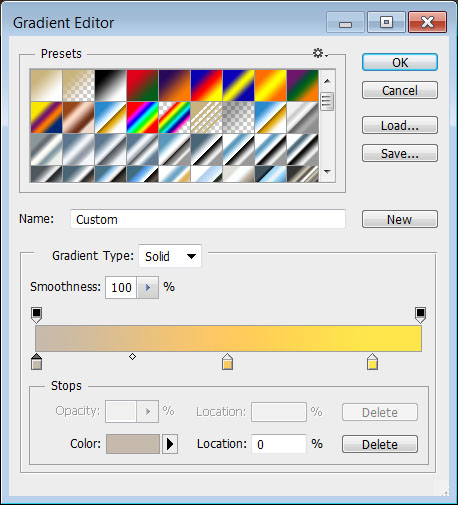
To create the Gradient, use the following Color and Location values:
#c6baac– 0#ffc960– 50#ffe64b– 88
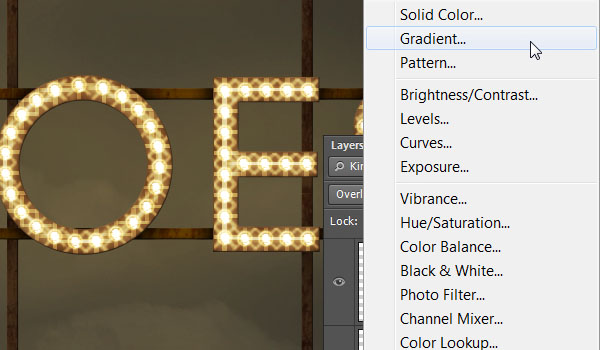
Step 7
Once again, click the Create New Fill or Adjustment Layer icon, but this time, choose Gradient.
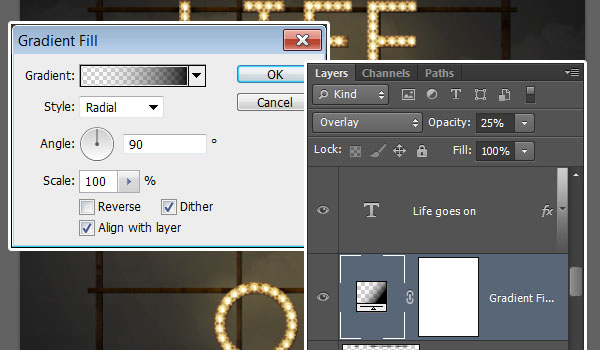
Step 8
Use a Transparent to Black gradient fill, with the colors White to the left and Black to the right, change the Style to Radial and check the Dither box.
Place the adjustment layer right below the text layer, change its Blend Mode to Overlay and its Opacity to 25%.
Congratulations! You’re done.
In this tutorial, I showed you how to create an illuminated text effect using several techniques in Photoshop. I hope that you learned something from this tutorial and can use the techniques that I demonstrated on text effects of your own.


