Without the right tools, creating professional-looking static pages for a WordPress site is hard, even for an experienced web developer. It involves tasks such as designing responsive layouts, finding appropriate creative assets, and acquiring the right licenses to use them. If you’ve ever tried doing all these tasks on your own, I’m sure you understand how time-consuming and expensive they can get.
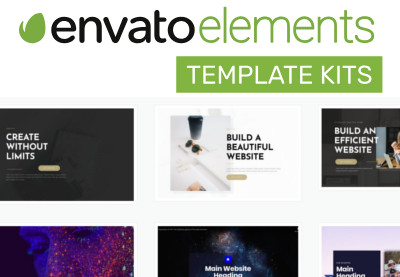
With the Envato Elements WordPress Plugin, you’ll be able to perform all the above tasks with just a few clicks. This unique plugin gives you immediate access to hundreds of free template kits and over 700,000 premium royalty-free photos right inside your WordPress admin panel. By using it alongside a page builder plugin such as BeaverBuilder or Elementor, you can create stunning pages for your site in minutes.
In this tutorial, I’ll show you how to use the Envato Elements WordPress plugin and the Elementor page builder plugin to create a compelling, responsive home page for your site.
Prerequisites
To make the most of this tutorial, you’ll need:
If you need help installing the plugins, refer to the following tutorial:
1. Initialize a New Page
Log in to your WordPress admin dashboard and create a new page by going to the Pages section and pressing the Add New button.
If you see WordPress’s default page editor open, click on the Edit with Elementor button to switch to the Elementor page builder user interface.

Next, click on the gear icon near the bottom left corner of the screen to open the Page Settings tab. Here, change the layout of the page to Elementor Canvas.
At this point, you have a blank white page you can start adding blocks to.
2. Add the First Block
The Envato Elements plugin currently offers over 600 free block templates, all of them neatly organized into intuitively named block kits. Each block template is designed to not only blend seamlessly with several other block templates, but also to look good on all screen sizes.
To add a block to your blank page, all you need to do is click on the green Envato button.
In this tutorial, we’ll be creating a home page for a fictional web-hosting business named “Purple Tech”.
The first block kit we’ll be working with is the Hero kit, which currently has 54 blocks. Open it, scroll down to find the following template, and press the Add Block to Page button:
It’s a good idea these days to follow a mobile-first approach. So I suggest you now switch to the mobile view by pressing Ctrl + Shift + M in your browser.
The template’s first content box is a heading displaying the name of the business. Click on it and type in the name in its Title field. Optionally, you can make it clickable by filling in the Link field.
Similarly, change the Hero Heading content box so it displays some catchy slogan.
The template also contains two text boxes, which appear next to each other on wide screens. We can use them to briefly talk about what the company has to offer. When you click on them, you’ll see that a text editor opens up.
In the first text box, use the intuitive rich-text editor to create a bulleted list that looks like this:
We’ll use the second text box to talk about starting prices and special offers. By default, the text alignment here is set to Justified. I suggest you change it to Left by switching to the Style tab and modifying the Alignment field. In this tab, you can also change the text’s font family, its size, and color.
If you press the Preview Changes button now, your page should look like this on a large screen:

3. Change the Background Image
You don’t have to limit yourself to changing only the text contents of the Envato Elements blocks you use. You can change details such background images and colors too.
To change the hero template’s background image, open the Navigator and select the first Section it displays.
Next, in the Edit Section panel, switch to the Style tab and click on the current background image.
You’ll now be taken automatically to the Envato Elements tab of the Insert Media dialog, which gives you easy access to over 700,000 premium royalty-free photos. Note that unlike the template and block kits, these photos are not free, so you need an active Envato Elements subscription to be able to use them.

After selecting the photo you prefer, you may have to change the background overlay to make it more visible. To do so, switch to the Background Overlay tab and experiment with the Color and Opacity fields.
4. Add a Features Block
As the second block of our page, we’ll be adding a block that can, in more detail, enumerate the services the website offers.
So click on the Envato button again, select the Features and Benefits block kit, find the following template, and press the Add Block to Page button:
This template too starts with a heading. Leave its text unchanged, but change its color to a shade of purple by going to the Style tab and modifying the Text Color field.
In the text area that’s below the heading, replace the placeholder text with something meaningful. For inspiration, you can try visiting a few popular web hosting services.
Next, this block has a new type of content box called Icon Box. As its name suggests, it displays an icon, along with a title and a description.
Let’s say our fictional website offers managed WordPress hosting and we want to talk about this. So click on the icon box and change the Icon field to wordpress. By default, the icon is shown framed inside a circle. You can change this by modifying the View and Shape fields.
Once you’re satisfied with the looks of the icon, add appropriate text to the Title and Description fields.
Lastly, we need to change the background color of the icon box. It’s blue by default, and we want it to be purple. So open the Navigator, expand the second Section, and select Inner Section > Column. Then switch to the Style tab of the Edit Column panel and update the Color field.
This template has three more icon boxes. After you update them all, your second block should look like this on a large screen:

5. Add a Pricing Block
The Envato Elements WordPress plugin has a Pricing Table block kit currently containing 15 free blocks. Using any of them, you can quickly display the packages a business offers and the services they include.
Let’s say our example site offers three different hosting packages. To display them, we’ll be using the following block:
It’s worth mentioning that the Envato Elements plugin also offers a Pricing Menu block kit. This is more suited for pages that need to display the prices of individual items or services. As such, it’s ideal for websites of restaurants and grocery stores.
Our pricing block is very similar to the features block we added in the previous step. It has three icon boxes, which you’re already familiar with. So we can start modifying their contents right away.
You may have noticed that the font this block uses is different. To fix this, switch to the Style tab and open the Typography dialog. Here, set the Family field to Quicksand, the font family the features block used.

Below each icon box is a heading box. After changing its text, switch to the Advanced tab and open the Background section. Here, you’ll be able to change the background color so it matches our color scheme.
Using the Navigator is a great way to understand the internal structure of the blocks you add to your page. With it, you’ll see that our current block contains a new type of box called an Icon List box.
This box is meant to display a list of items, and allows you to edit each item inside it separately. Compared to a text box, which can only display lists with basic styles, an icon list box gives you much more control over the look and feel of your list items. For instance, it allows you to easily assign a different icon to each item of a list.
For now, click on the list items and change their text contents until you have a pricing table that looks like this:

6. Add a Footer
As the last block of our page, we’ll be adding the following footer, which is available inside the Footer block kit.
The only new element in this block is the Social Icons box, which is almost identical to an icon list box, except that it limits the icons you can use to only the brand icons of popular social platforms, such as Facebook and Twitter.
After replacing the placeholder text in the About Us, and Pages sections, your footer should look like this:

The page is ready. You can now go ahead and press the Publish button to make it available on your WordPress site.
Conclusion
In this step-by-step tutorial, you learned how to use the free block kits and premium stock photos offered by the Envato Elements WordPress plugin to create a polished, responsive home page for a web-hosting business. You now know enough to start using the Envato Elements and Elementor plugins productively.
Envato Elements, is a massive repository of creative digital assets. By subscribing to it, you gain access—with unlimited downloads and commercial rights—to over a million premium themes, templates, plugins, stock images, videos, and other handy items that facilitate website development.
Visit Envato Elements to learn more about all the exciting digital assets it offers for a low cost monthly subscription!