Today, social media is one of the most effective ways to market your WordPress website, earning you invaluable word-of-mouth promotion, boosting your SEO, and helping you build a closer relationship with your audience.
So why make it difficult for visitors to connect with you on Facebook, Twitter, Instagram, and all of the major social media platforms?
Many WordPress themes come with built-in social media buttons, but what if your favourite WordPress theme doesn’t provide this essential feature? Or perhaps you’re not happy with how the built-in social sharing buttons are styled, and want to replace them with icons that don’t clash with the rest of your website?
In this tutorial, I’ll show you how to add essential social media features to your WordPress website. By the end of this article, you’ll have made it easy for visitors to follow you across all the major social networks, by adding icons that link through to your website’s social media profiles.
In addition to following you on social media, you’ll want to encourage visitors to share your latest blog post with their friends and family, potentially earning you hundreds of extra click-throughs and comments and generating that all-important social media buzz. To help you reap the benefits of social sharing, I’ll also show you how to add social sharing icons to your website, including a floating bar that follows visitors as they scroll up and down the screen, ensuring that your social sharing buttons are always within easy reach.
Does Your Theme Already Provide a Social Menu?
Are there any social media profiles associated with your website? Perhaps you’ve created a Twitter or Instagram where you share your latest blog posts, or maybe you want to include a link to your personal Twitter, so your audience can get to know the person behind the website?
In this section, I’ll be covering various ways that you can link to your social media profiles from your website. These social media links are typically represented as icons—for example, in the following screenshot, I’ve added links to my Twitter, Facebook, and Instagram profiles.
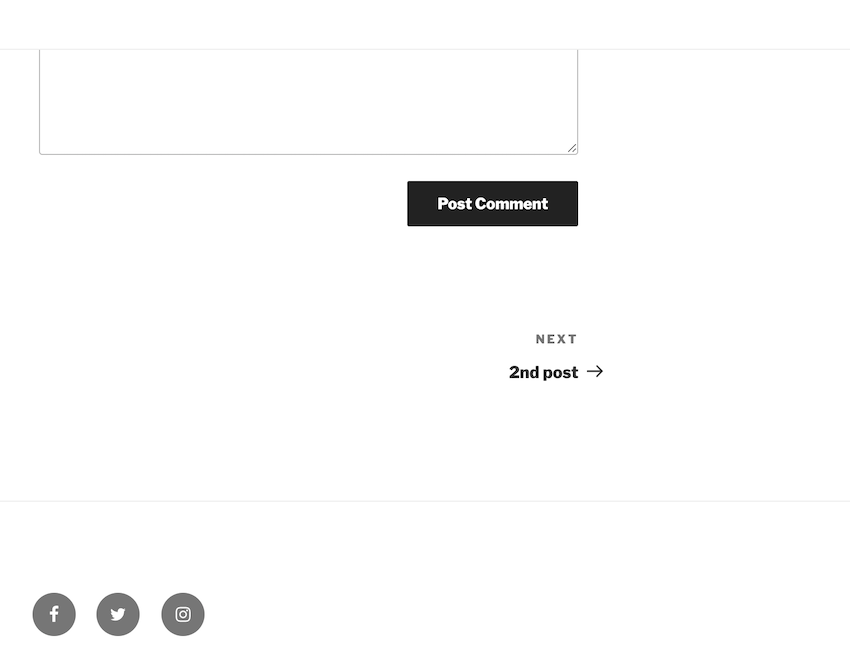
Whenever someone clicks any of these icons, they’ll be taken to the associated social media profile—perfect for turning one-off visitors into loyal followers!
There are several ways that you can add social icons to your website, but one of the easiest is to use a theme that provides a ready-made social links menu. If you’re unsure whether your current WordPress theme supports the social links feature, then head over to the Themes Showcase, which displays a list of social media-savvy WordPress themes.
Although the social links menu is one of the easiest ways to promote your social media accounts, each theme supports a specific set of icons, which you cannot customize. If you’re not a fan of your theme’s icons, then you’ll either need to switch to a different theme or use one of the alternative methods covered in this tutorial.
To activate the social links menu:
- Log in to your WordPress account, if you haven’t already.
- In WordPress’s left-hand menu, select Appearance > Customize.
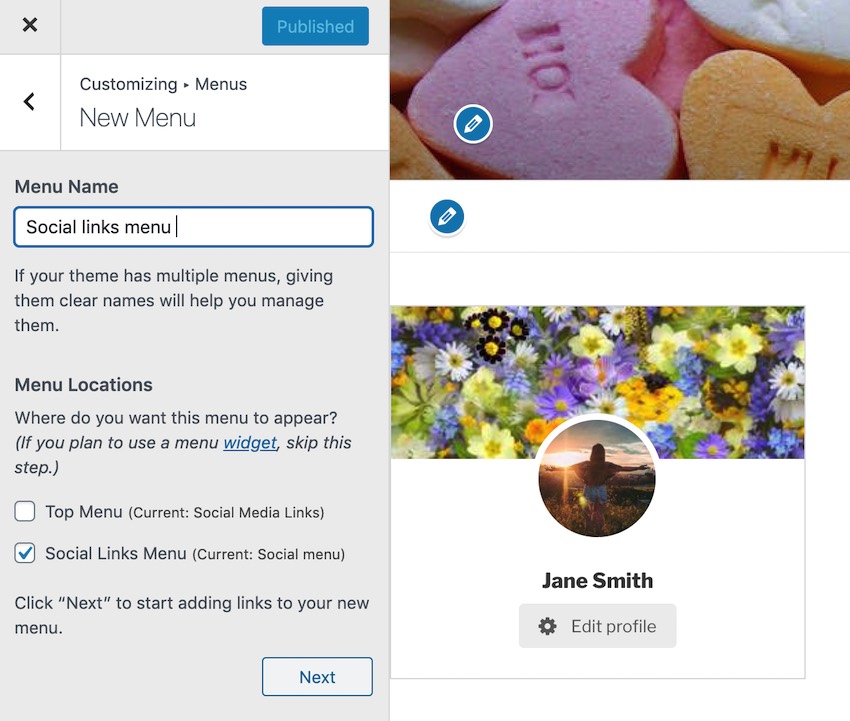
- Select Menus > Create New Menu.
- Give your menu a descriptive name.
- Select the Social Links Menu checkbox, and then click Next.
To add the first icon to your menu, click Add Items, and then click to expand the Custom Links section.

In the URL field, type the address of your social media profile, for example https://www.facebook.com/MyWebsite or https://twitter.com/JessicaThornsby.
When you’re happy with the information you’ve entered, click Add to Menu. Rinse and repeat for every social media profile that you want to include in your menu. Once you’ve added all your social media profiles, you’re ready to make this menu live, by clicking Publish.
Head over to any page of your website—all of your social media profiles should now be displayed as part of a new menu.
How to Create Your Own Social Links Menu
If your theme doesn’t provide a social links menu, and changing your theme isn’t an option, then one alternative is to use a plugin. In this section, I’ll show you how to use Social Icons Widget to add social buttons to any widget area.
To set up this free WordPress plugin:
- Log in to your WordPress account, if you haven’t already.
- In the left-hand menu, select Plugins > Add New.
- In the Search bar, start typing Social Icons Widget by WPZOOM. When the correct plugin appears, click its accompanying Install Now button.
- When the Activate button appears, give it a click.
Your plugin is now ready to go! Let’s use it to create some links to our social media profiles:
- In WordPress’s left-hand menu, select Appearance > Customize.
- In the left-hand menu, select Widgets.
- Select the widget area where you want to display your social icons, for example Blog Sidebar or Footer 1.
- Select Add a Widget.
In the Search widgets section, start typing Social icons by WPZoom and then select the plugin when it appears. In Title, enter any title text that you want to display, in bold, above all of your social icons, for example Follow us on social media!
In the Text above icons section, you can add some optional text that’ll appear above your social media icons. This is rendered in the style of a subheading, which will appear below any Title text that you add to the widget area.
You now have the option to Show icon labels. If you scroll to the Icons section towards the bottom of this menu, then you’ll find the default label for each social network and can customize it if required. While you’re here, you can also decide which social media accounts you want to include in your menu.
To add a social network, click Add more and then enter the URL for one of your social media accounts, such as https://www.instagram.com/mywebsite or https://www.pinterest.co.uk/example. The plugin should identify the network based on the URL and display the correct icon automatically.

Choose whether clicking one of your social icons should launch a new tab, or whether the link will be opened in the current tab. You can now style your icons.
Most of these options are fairly self-explanatory. For example, you can use the Icons Alignment dropdown to choose where these icons appear within the selected area, and whether your buttons should feature a colourful icon with no background or a white icon with a colourful background. It’s worth exploring these settings in detail, as you can create some interesting and unique effects.
When you’re happy with your configuration, click Apply, and links to all of your social media profiles will be added to your website.
Generating a Social Media Buzz With Simple Share
Your social media accounts are a powerful tool for promoting your website. However, you can reach an even wider audience by encouraging visitors to share your content via their own social media accounts.
Not only can social sharing introduce your website to an entirely new audience, but people are more likely to pay attention to content that’s shared organically by a third party, rather than by the person who created that content. If you make it easy to share your content, then you may find that a chunk of your website’s traffic comes from third parties!
By adding social sharing buttons to your website, you can allow visitors to share your content with just a few clicks. In this section, I’ll be adding these quick and convenient social sharing buttons to my website, using Simple Share Buttons Adder.
This free plugin allows you to choose exactly where your social sharing buttons appear. For example, you might restrict these buttons to specific webpages, or embed them in the middle of your blog posts so visitors don’t have to scroll to the very bottom of the page in order to share your content.
You could even choose to hide the social sharing buttons on certain webpages, which might be handy if you’ve monetized your website by creating an Amazon affiliate store, but would prefer visitors to share your website’s unique content, rather than Amazon’s products.
In this section, I’ll show you how to set up Simple Share Buttons Adder and then use it to create a row of social share buttons.
After we’ve created this simple row, I’ll be exploring some other ways that you can display these buttons, such as embedding them in your content using a shortcode or transforming them into a floating share bar.
To create a row of share buttons:
In WordPress’s left-hand menu, select Plugins > Add New. Search for the Simple Share Buttons Adder plugin, and when it appears, select Install Now. When prompted, click Activate. In WordPress’s left-hand menu, select Settings > Simple Share Buttons.
You can now create a lineup of all your favourite social networks, using drag and drop.
Now it’s time to specify exactly where these buttons should appear on your website. You can use the sliders to restrict these buttons to specific categories of content, such as Pages, Posts, and the Homepage. Alternatively, it may be quicker to specify where these buttons shouldn’t appear, by typing the name of each page into the Hide On These Pages field.

Simple Share Buttons Adder gives you lots of different ways to style your sharing buttons, so click to expand the Styling section and spend some time exploring the available options. As you experiment with these settings, WordPress will display a live preview, so you can monitor how these buttons will eventually appear on your website.
At this point, you may also want to add a live counter, which will display how many times this particular piece of content has been shared via social media. To add a live counter, click to expand the Counters section and then drag the Share Count slider into the On position.

When you’re happy with your settings, click the retro floppy-disc icon.
Your chosen social sharing buttons will now appear on your website. If you click any of these buttons, then it’ll automatically launch a popup that contains all the information you need to post this content to your chosen social media platform.
Embed Social Sharing Buttons Anywhere on Your Website
Alternatively, once you’ve set up your social sharing buttons, you can embed them in any location, using the automatically generated shortcode. For example, you could encourage visitors to share your blog post, by displaying your sharing buttons immediately after your blog’s most compelling paragraph.

To embed your social media sharing buttons anywhere on your website:
- In WordPress’s left-hand menu, select Settings > Simple Share Buttons.
- Scroll to the Shortcode section, and click to expand. This should reveal a shortcode.
- Click the shortcode’s accompanying Copy button.
- Navigate to the page, post, or any other item where you want to display your sharing buttons, and open that item for editing.
- Find the exact location where you want to display these buttons, and paste the shortcode into this section.
Your social sharing buttons will now appear at this exact location.
Create a Floating Sharing Bar
You can encourage visitors to share your content, by ensuring that your social sharing buttons are always within easy reach. Using this plugin, it’s possible to create a floating sharing bar, which will follow visitors as they scroll around the page.

To create this floating bar:
- Navigate to Settings > Social Share Buttons.
- Select the Share Bar tab.
- Find the Share Bar slider and push it into the On position.
You can now configure your share bar in exactly the same way you configured your original social sharing buttons.
Conclusion
In this tutorial, I showed you how to encourage visitors to follow you across all the major social networks and share your content via their own social media accounts. I also covered a number of ways that you can customize the default social media buttons, based on the look and feel of your website, and how to change where these icons are displayed.
Do you have any tricks or tips for encouraging people to interact with you on social media? Or a favourite social media plugin that we didn’t mention? Let us know in the comments below!
The Best WordPress Themes and Plugins on Envato Market
Explore thousands of the best WordPress themes ever created on ThemeForest and leading WordPress plugins on CodeCanyon. Purchase these high-quality WordPress themes and plugins and improve your website experience for you and your visitors.

Here are a few of the best-selling and up-and-coming WordPress themes and plugins available for 2020.