Let’s create a fully functional currency converter application using HTML, CSS, and vanilla JavaScript. By the end of this tutorial, we will have a responsive currency app that fetches real-time data with the Exchange Rate API and presents it in a user-friendly interface.
HTML Structure
Our currency application will have a simple interface containing :
- An input field for the amount to be converted.
- A drop-down to select the from Currency value
- A second drop-down to select the to currency value
- A convert button
- A
<p>tag to show the converted amount - A
<p>tag to show any errors that might occur during the conversion process.
The HTML code will look like this:
1 |
<div class="container"> |
2 |
|
3 |
<div class="currency-container"> |
4 |
<h1>Currency converter</h1> |
5 |
<div class="input-box"> |
6 |
<label for="amount">Enter amount</label> |
7 |
<input type="text" id="amount" placeholder="100" required/> |
8 |
</div>
|
9 |
<div class="currency"> |
10 |
<div class="box"> |
11 |
<select
|
12 |
class="select-option" |
13 |
name="from-currency" |
14 |
id="fromCurrency" |
15 |
>
|
16 |
<option value="USD">United States Dollar</option> |
17 |
</select>
|
18 |
</div>
|
19 |
<div>
|
20 |
<span>TO</span> |
21 |
</div>
|
22 |
<div class="box"> |
23 |
<select class="select-option" name="to-currency" id="toCurrency"> |
24 |
<option value="USD">United States Dollar</option> |
25 |
</select>
|
26 |
</div>
|
27 |
<button class="convert">Convert</button> |
28 |
<p class="result"></p> |
29 |
<p class="error"></p> |
30 |
|
31 |
</div>
|
32 |
</div>
|
33 |
</div>
|
Currently, we are using the option value as a placeholder. We will replace and add more option data dynamically with JavaScript.
Styling With CSS
Let’s start with some basic styles. We’ve pulled in the rather excellent Bricolage Grotesque font from Google fonts too:
1 |
* { |
2 |
margin: 0; |
3 |
padding: 0; |
4 |
box-sizing: border-box; |
5 |
font-family: 'Bricolage Grotesque', sans-serif; |
6 |
}
|
7 |
|
8 |
h1 { |
9 |
font-size: 5em; |
10 |
font-weight: bold; |
11 |
text-align: center; |
12 |
margin: .5em 0; |
13 |
line-height: .8; |
14 |
}
|
15 |
|
16 |
.container { |
17 |
margin: auto; |
18 |
min-height: 100vh; |
19 |
background-color: #202020; |
20 |
padding: 2em 0; |
21 |
color: #040203; |
22 |
display: flex; |
23 |
flex-direction: column; |
24 |
align-items: center; |
25 |
justify-content: center; |
26 |
}
|
27 |
|
28 |
.currency-container { |
29 |
height: fit-content; |
30 |
background-color: #7cb889; |
31 |
padding: 3em; |
32 |
border-radius: 40px; |
33 |
}
|
For the input and label (including the placeholder in the input) they will have the following styles:
1 |
.input-box { |
2 |
display: flex; |
3 |
flex-direction: column; |
4 |
align-items: center; |
5 |
justify-content: center; |
6 |
text-align: center; |
7 |
}
|
8 |
|
9 |
label { |
10 |
font-size: 1.5em; |
11 |
margin-bottom: .4em; |
12 |
}
|
13 |
|
14 |
#amount { |
15 |
width: 300px; |
16 |
padding: 20px; |
17 |
border-radius: 30px; |
18 |
font-size: 3em; |
19 |
border: 3px solid black; |
20 |
background: transparent; |
21 |
color: black; |
22 |
|
23 |
}
|
24 |
#amount:focus { |
25 |
border: 3px solid white; |
26 |
outline: none; |
27 |
}
|
28 |
|
29 |
::placeholder { |
30 |
color: rgba(0,0,0,0.6); |
31 |
opacity: 1; /* Firefox */ |
32 |
}
|
Next, we will apply styling to the box elements containing the From and To currency drop-downs. The drop-down elements will be arranged in a column layout using Flexbox and centered vertically and horizontally. We also have a gap between the box elements, some padding, and a border radius.
1 |
.currency { |
2 |
margin-top: 50px; |
3 |
padding: 20px 20px; |
4 |
display: flex; |
5 |
align-items: center; |
6 |
justify-content: center; |
7 |
flex-direction: column; |
8 |
gap: 1.5rem; |
9 |
}
|
10 |
|
11 |
.box { |
12 |
display: flex; |
13 |
align-items: center; |
14 |
justify-content: center; |
15 |
}
|
The select-option will have the following styles
1 |
.select-option { |
2 |
font-size: 16px; |
3 |
color: #333; |
4 |
padding: 20px; |
5 |
display: block; |
6 |
font-weight: 700; |
7 |
line-height: 1.3; |
8 |
width: 100%; |
9 |
max-width: 100%; |
10 |
margin: 0; |
11 |
outline: none; |
12 |
border-radius: 20px; |
13 |
border: 3px solid black; |
14 |
}
|
Finally, the convert button, the result, and the error message elements will have the following styles:
1 |
button { |
2 |
width: 100%; |
3 |
height: 100px; |
4 |
padding: 10px; |
5 |
border-radius: 30px; |
6 |
border: none; |
7 |
font-size: 1.5em; |
8 |
align-items: center; |
9 |
background-color: black; |
10 |
color: #fff; |
11 |
margin-top: 30px; |
12 |
}
|
13 |
.result { |
14 |
color: black; |
15 |
font-size: 2.5em; |
16 |
}
|
17 |
.error { |
18 |
color: #800020; |
19 |
font-size: 12px; |
20 |
}
|
JavaScript Functionality
The JavaScript functionality will have two parts:
- Getting the currency code, currency name, and flag from the REST countries API
- getting conversion rate from the Exchange Rate API
REST Countries API
The REST countries API provides an API with the endpoint https://restcountries.com/v3.1/all where you can filter results by providing the fields you are interested in. In our case, we want the country flag, currency name, and currency code and the endpoint will look like this:
1 |
https://restcountries.com/v3.1/all?fields=currencies,flag |
The resulting sample data will look like this:
1 |
{
|
2 |
"name": {
|
3 |
"common": "Eritrea", |
4 |
"official": "State of Eritrea", |
5 |
"nativeName": {
|
6 |
"ara": {
|
7 |
"official": "دولة إرتريا", |
8 |
"common": "إرتريا" |
9 |
}, |
10 |
"eng": {
|
11 |
"official": "State of Eritrea", |
12 |
"common": "Eritrea" |
13 |
}, |
14 |
"tir": {
|
15 |
"official": "ሃገረ ኤርትራ", |
16 |
"common": "ኤርትራ" |
17 |
} |
18 |
} |
19 |
}, |
20 |
"currencies": {
|
21 |
"ERN": {
|
22 |
"name": "Eritrean nakfa", |
23 |
"symbol": "Nfk" |
24 |
} |
25 |
}, |
26 |
"flag": "🇪🇷" |
27 |
}, |
To make it easier to display our currencies, we will fetch the data and store it in a JavaScript file. The script for fetching the data will look like this:
1 |
const url = |
2 |
"https://restcountries.com/v3.1/all?fields=name,currencies,flag"; |
3 |
fetch(url) |
4 |
.then((response) => response.json()) |
5 |
.then((data) => { |
6 |
|
7 |
const result = []; |
8 |
data.forEach((country) => { |
9 |
if (Object.keys(country.currencies).length >0) { |
10 |
result.push({ |
11 |
countryname: country.name.common, |
12 |
name: Object.values(country.currencies)[0].name, |
13 |
code: Object.keys(country.currencies)[0], |
14 |
flag: country.flag, |
15 |
});
|
16 |
}
|
17 |
});
|
18 |
|
19 |
result.sort((a, b) => a.code.localeCompare(b.code)); |
20 |
const jsonString = JSON.stringify(result, null); |
21 |
console.log(jsonString); |
22 |
|
23 |
});
|
The code above does the following:
- We use the
fetch()method to make an HTTP request to the REST countries API. - Then, we convert the response to JSON format and start processing the data.
- From the response JSON, we first check if each country has a currency code since not all countries have a currency code.
- If a country has a currency, we create an object with its name, code, and currency name and push it to the empty result array.
- Then we sort the currency code alphabetically.
- Finally, we convert the result to JSON and print the stringified data to the console.
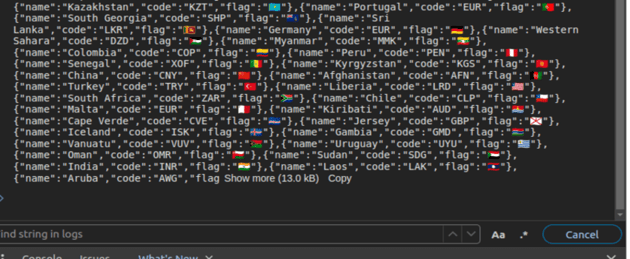
When you run the script in a browser environment, you should be able to copy the data to your JavaScript file. The data looks like this:

Alternatively, add this link to your script using the src attribute.
Next, let’s get the select elements.
1 |
let fromCurrency = document.getElementById("fromCurrency"); |
2 |
let toCurrency = document.getElementById("toCurrency"); |
Since we have the data in an array, it’s now easier to append the currencies to the option elements of the fromCurrency and toCurrency select elements.
Create a function called addCurrency(). Inside the addCurrency() function, we use the forEach() function to loop through the currencies array; for each iteration, we want to add the currency code to the option element and append the option element to both the select elements.
1 |
const result = currencies.forEach((currency) => { |
2 |
|
3 |
const optionFrom = document.createElement("option"); |
4 |
optionFrom.classList.add("select-option"); |
5 |
optionFrom.value = currency.code; |
6 |
if (currency.code === "USD") { |
7 |
optionFrom.selected = true; |
8 |
}
|
9 |
optionFrom.text =`${currency.flag} ${currency.code} - ${currency.name}`; |
10 |
|
11 |
fromCurrency.appendChild(optionFrom); |
12 |
|
13 |
const optionTO = document.createElement("option"); |
14 |
optionTO.classList.add("select-option"); |
15 |
optionTO.value = currency.code; |
16 |
if (currency.code === "EUR") { |
17 |
optionTO.selected = true; |
18 |
}
|
19 |
optionTO.text =`${currency.flag} ${currency.code} - ${currency.name}`; |
20 |
toCurrency.appendChild(optionTO); |
21 |
});
|
In the code above, we use the ForEach() function to iterate on each the currencies array data and do the following:
- Extracts the currency key from the currencies array for each currency
- gets the flag
- gets the currency name
- Creates an HTML option element for the “
fromCurrency” select dropdown . - sets the option value to the currency code
- Sets the option text to a combination of the flag, the currency name, and the currency code
- Appends the created option element to the “
fromCurrency” select dropdown. - Creates another option element for the “
toCurrency” select dropdown with the same data as thefromCurrency - Appends the created option element to the “toCurrency” select dropdown.
- Finally we invoke the
addCurrency()function to apply the functionality.
The option value will be the currency code, and the option text will be the currency flag, currency code, and currency name separated by a hyphen.
We also set the default currency in the fromCurrency option element to USD and the default currency for the toCurrency option element to EUR.
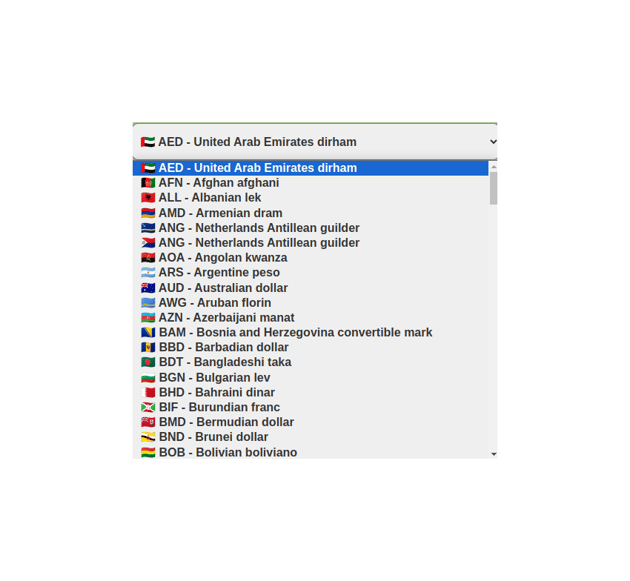
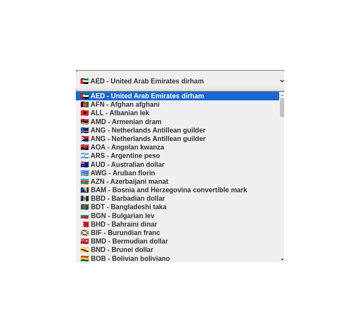
Now our drop down are showing the currencies.

Code Refactoring
From the addCurrency() function you can see that we are repeating the same code to add the option values. Let’s create another function for generating the options for each currency element.
The function will look like this:
1 |
function createOption(country, defaultCode, element ){ |
2 |
// console.log(country);
|
3 |
const option = document.createElement("option"); |
4 |
option.classList.add("select-option"); |
5 |
option.value = country.code; |
6 |
if (country.code === defaultCode) { |
7 |
option.selected = true; |
8 |
}
|
9 |
option.text = `${country.flag} ${country.code} - ${country.name}`; |
10 |
element.appendChild(option); |
11 |
|
12 |
|
13 |
}
|
The createOption() function takes three parameters: the country object, the default code, and the element where the options will be appended.
Next, update the addCurrency() function as follows:
1 |
function addCurrency() { |
2 |
const result = countries.map((country) => { |
3 |
createOption(country, "USD", fromCurrency ); |
4 |
createOption(country, "EUR", toCurrency ) |
5 |
|
6 |
});
|
7 |
}
|
The function is now easier to read since we don’t have any repetitive code.
Currency Conversion
We will use the ExchangeRate API for currency conversion. The ExchangeRate API provides currency conversion rates for 161 currencies.
The API allows developers to convert currencies by providing a pair of currency codes in the request. For example, if you want to convert USD to EUR, your API call will look like this:
1 |
https://v6.exchangerate-api.com/v6/24faec6b42da4a96ceea41d3/pair/USD/EUR |
The endpoint will give us the following result.
1 |
{
|
2 |
"result": "success", |
3 |
"documentation": "https://www.exchangerate-api.com/docs", |
4 |
"terms_of_use": "https://www.exchangerate-api.com/terms", |
5 |
"time_last_update_unix": 1703721602,
|
6 |
"time_last_update_utc": "Thu, 28 Dec 2023 00:00:02 +0000", |
7 |
"time_next_update_unix": 1703808002,
|
8 |
"time_next_update_utc": "Fri, 29 Dec 2023 00:00:02 +0000", |
9 |
"base_code": "USD", |
10 |
"target_code": "EUR", |
11 |
"conversion_rate": 0.9015
|
12 |
}
|
Since we already have the codes in our select options, we will pass the values in the API and multiply the conversion rate by the amount to get the result.
Create a function called convertCurrency() function. In the function:
- get the display element
- get the values from the selected options
- Store the url in a variable.
1 |
const BASE_URL = `https://v6.exchangerate-api.com/v6/${apiKey}`; |
2 |
const fromCurrrencyCode = document.getElementById("fromCurrency").value; |
3 |
const toCurrencyCode = document.getElementById("toCurrency").value; |
4 |
const result = document.querySelector(".result"); |
5 |
const error = document.querySelector(".error"); |
Ensure you supply your API key from the Exchange Rate API. You can obtain one for free here.
In the convertCurrency() function, we first check if a valid amount has been entered, and if true, we perform a GET request to the exchange rate API with the currency pairs.
The response will contain the conversion rate. Finally we update the result with a formatted converted amount
1 |
function convertCurrency() { |
2 |
const BASE_URL = `https://v6.exchangerate-api.com/v6/${apiKey}`; |
3 |
|
4 |
const fromCurrrencyCode = document.getElementById("fromCurrency").value; |
5 |
const toCurrencyCode = document.getElementById("toCurrency").value; |
6 |
const result = document.querySelector(".result"); |
7 |
const error = document.querySelector(".error"); |
8 |
|
9 |
console.log(fromCurrrencyCode); |
10 |
console.log(toCurrencyCode); |
11 |
|
12 |
const amount = input.value; |
13 |
|
14 |
if (amount !== "" && parseFloat(amount) >= 1) { |
15 |
const url = `${BASE_URL}/pair/${fromCurrrencyCode}/${toCurrencyCode}`; |
16 |
console.log(url); |
17 |
fetch(url) |
18 |
.then((resp) => resp.json()) |
19 |
.then((data) => { |
20 |
console.log(data.conversion_rate); |
21 |
|
22 |
const conversionResult = (amount * data.conversion_rate).toFixed( |
23 |
2
|
24 |
);
|
25 |
const formattedResult = conversionResult.replace( |
26 |
/B(?=(d{3})+(?!d))/g, |
27 |
"," |
28 |
);
|
29 |
|
30 |
result.innerHTML = `${amount} ${fromCurrrencyCode} = ${formattedResult} ${toCurrencyCode}`; |
31 |
amount.innerHTML = " "; |
32 |
})
|
33 |
.catch(() => { |
34 |
error.textContent = "An error occured, please try again later "; |
35 |
});
|
36 |
} else { |
37 |
alert("Please enter an amount"); |
38 |
}
|
39 |
}
|
If an error occurs, we display a message to the user, letting them know something went wrong.
For the conversion to work, let’s add an event listener to the convert button and invoke the convertCurrency() function, as shown below.
1 |
const convertBtn = document.querySelector(".convert"); |
2 |
convertBtn.addEventListener("click", () => { |
3 |
convertCurrency(); |
4 |
});
|
Final Result
Here is the final result!
Conclusion
This tutorial has covered how to build a currency converter that fetches real-time data from the Exchange Rate API. Ensure you get your free API key from the ExchangeRateAPI, and have fun building things!