In this advanced tutorial, you’ll learn how to create a magical bottle scene set against the backdrop of a surreal landscape by compositing and blending several stock images together using techniques of layer masks, adjustment layers, dodge & burn.
I’ll also explain how to work with shadows and lighting as well as with the Camera raw filter to enhance the details and achieve a dramatic result.
I’ll also show you how to extract the bottle from its background and make it transparent by using different blend modes.
You’ll also be learning effective techniques for adding ivies on the bottle to add a surreal & magical feel to the whole scene.
So, let’s get started!
Final Results
Tutorial Resources
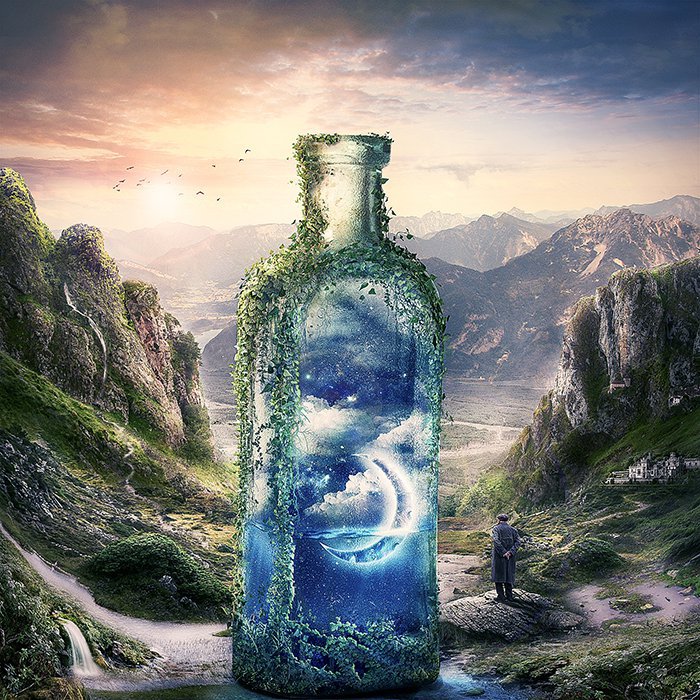
Preview of the Final Result:
This is the final image that we will be creating.

Step 1
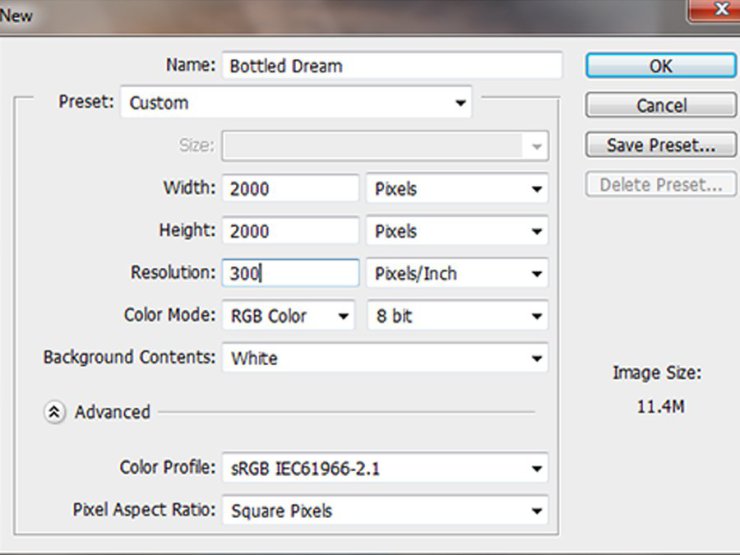
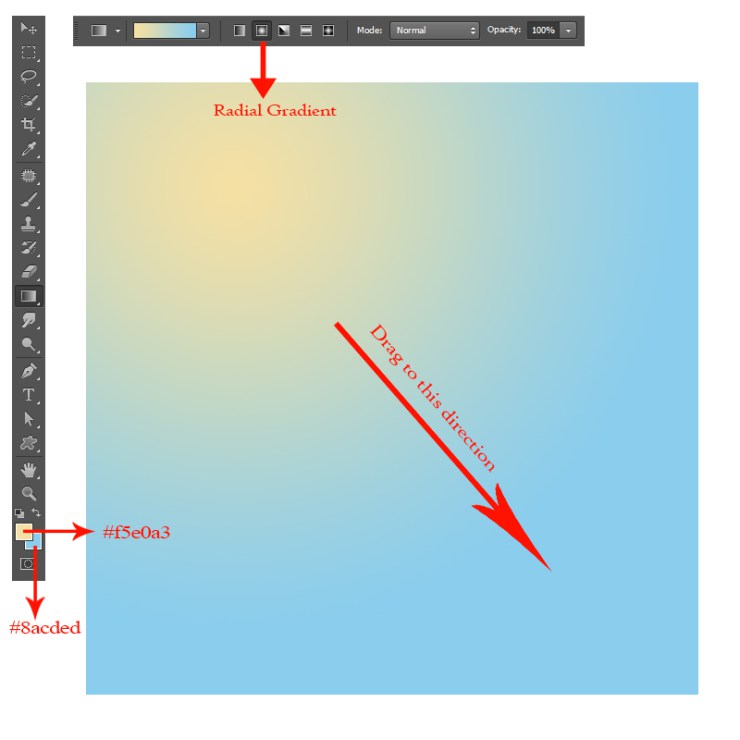
Create a new document with size 2000 x 2000 pixel. Activate the Gradient Tool by hitting G on the keyboard and choose Radial Gradient. Set the Foreground colour to #f5e0a3 and #8acded for the background.
Start to fill the document with the radial gradient by clicking, holding and dragging the tool to the direction as shown in the red arrow:
Step 2
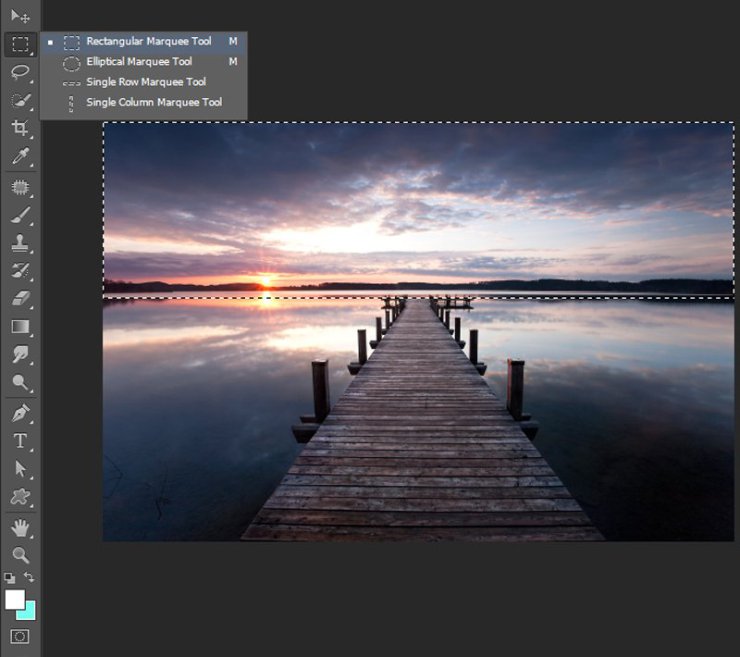
Now we will add the skies stock.
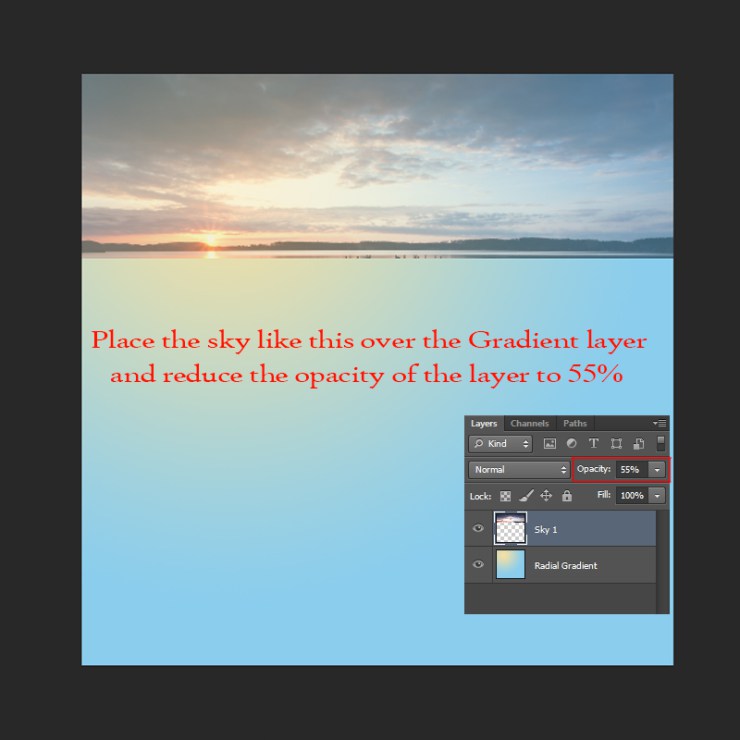
Open sky 1 and using a rectangular marquee tool (M) select the shown part below. Copy (C) and Paste (V) it on the main document above the gradient layer as shown below:
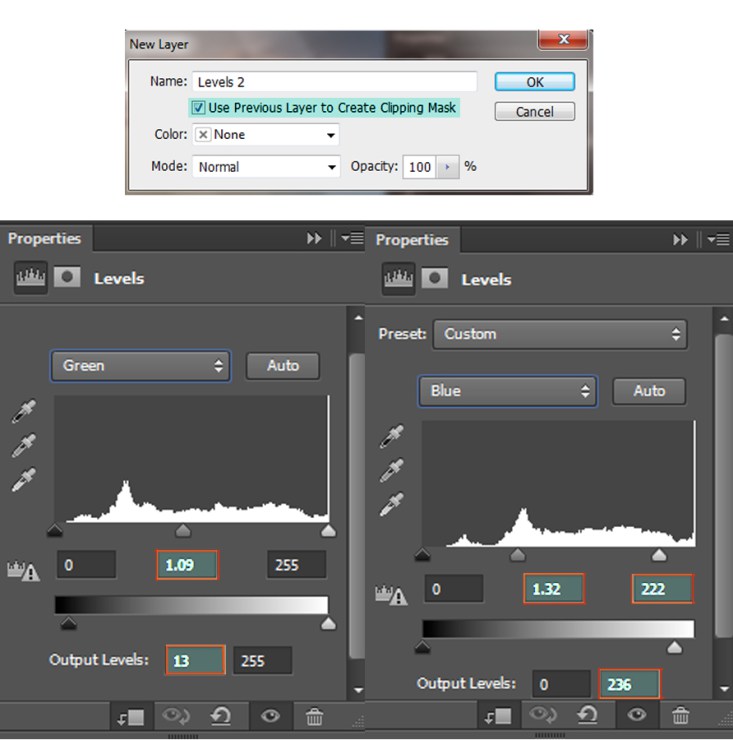
Then, to brighten the sky a bit and apply a bluish tone, go to Layer > New Adjustment Layer > Levels and creating a Clipping mask apply the following values to the Greens and the Blues channel:
Step 3
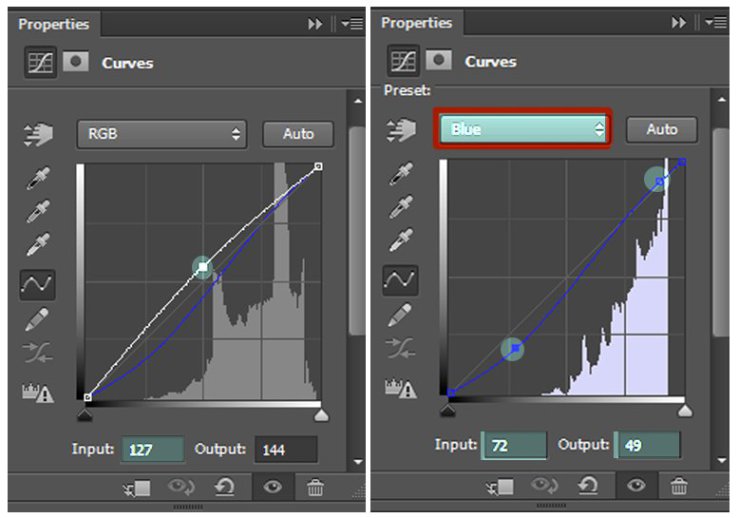
Next, apply a curves layer to further brighten the whole sky. Go to Layer > New Adjustment Layer > Curves, this time without apply clipping mask and apply the following values as shown below:
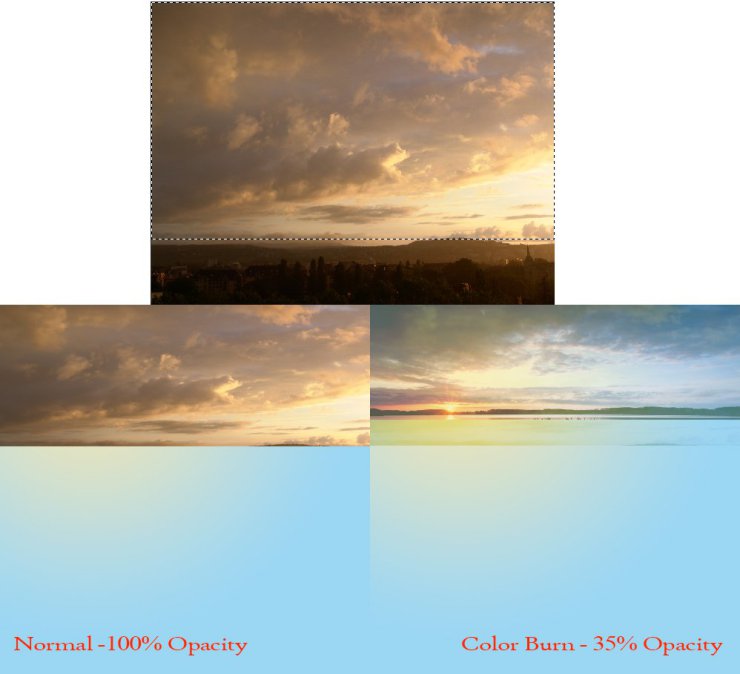
Open Sky 2 and select the following portion of the sky using a Rectangular Marquee Tool (M) and paste (V) it over sky 1.
Then change the blending mode to Color Burn and reduce the Opacity to 35% as shown in the preview below:
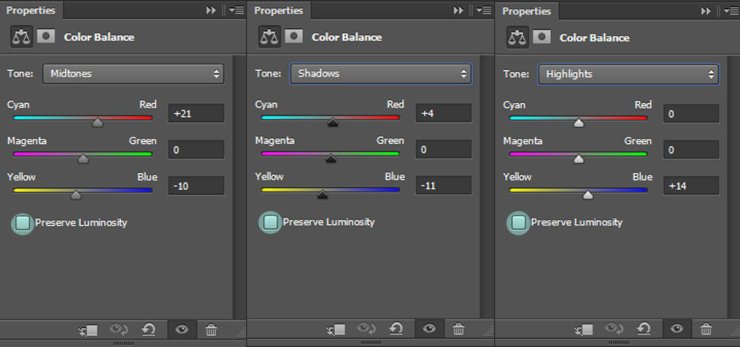
After this apply a color balance adjustment layer over both the skies. Uncheck the ‘preserve luminosity’ and change the blend mode of this layer to Luminosity.
Step 4
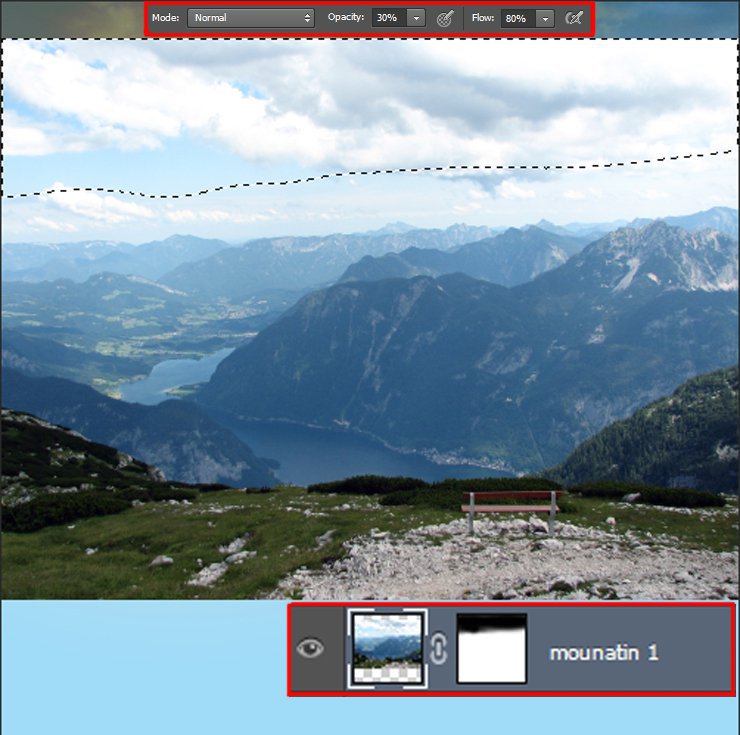
Open the Mountain 1 background stock and copy it (C) and paste it (P) over the skies backgrounds.
Apply a Free Transform tool (Cmd/Ctrl+T), flip horizontally and transform it into the scene. Then apply a layer mask to it and using a low opacity brush of around 30-40%, mask the sky part as shown in the section below:
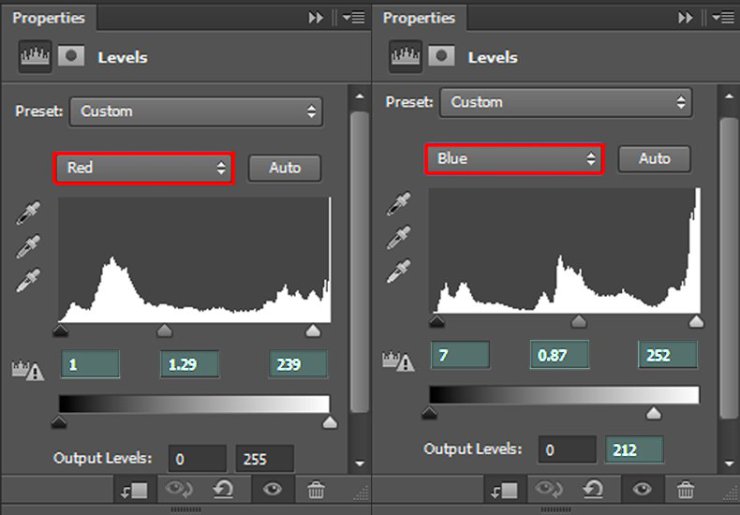
Add a levels adjustment layer in clipping mask. Go to Layer > New Adjustment Layer > Levels and apply the following values:
Step 5
Now open the second mountain stock and copy (C) it over the main document as a top most layer. Apply a free transform tool (Cmd/Ctrl+T) and scale it to fit into the main scene.
Add a layer mask to it and mask the area using a soft brush (B) with a low opacity brush of around 40-45% as shown in the selection below:
Create a Levels adjustment layer using a clipping mask to brighten and change the colour of the mountain background. Apply the following values shown below: