
The effect is inspired by photographs taken from an inexpensive Russian camera called the Lomo LC-A. The photos produced by Lomo carry high-contrast, increased saturation, and unique coloring due to “improper” color reproduction and dark blurry edges with a sharp center. Of course, what’s “improper” is up for interpretation in this case; these unusual features add to the charm and distinctiveness of lomography and raised the demand for creative, unorthodox photos.
Today, I’ll show you how you can recreate the “lomo” effect in Photoshop. We’ll try to tweak every aspect to achieve the perfect lomo look. So, let’s get started!
Resources:
Final result:
(Downloaded the finished, layered PSD file.)
Step 1
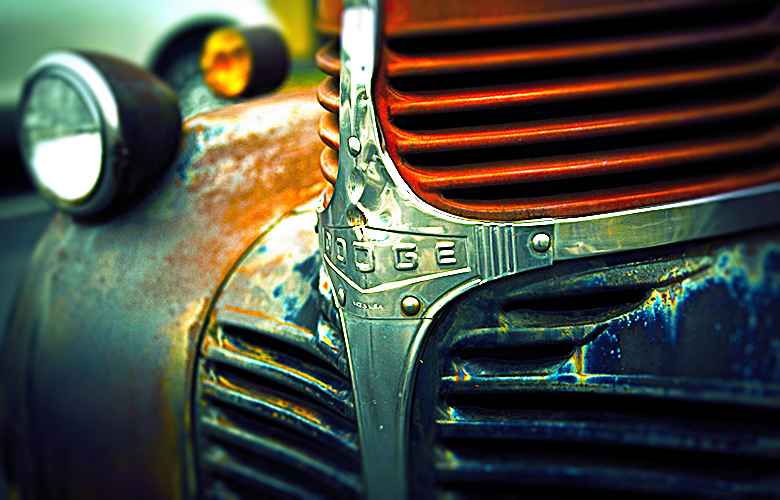
Load the chosen image in Photoshop to apply the lomo effect. I am going to use gorgeous photograph by Karen Carleton referenced in the resources above for this tutorial.

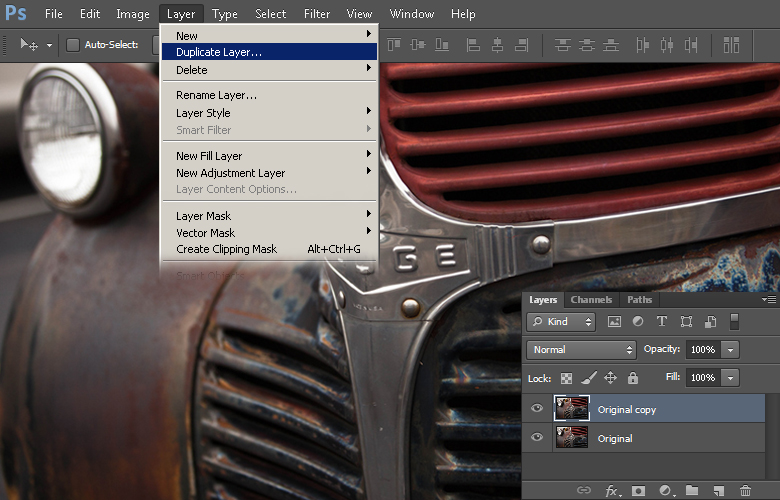
Step 2
Duplicate the image by selecting “Layer” > “Duplicate Layer.” We’ll affect this copy to preserve the original.
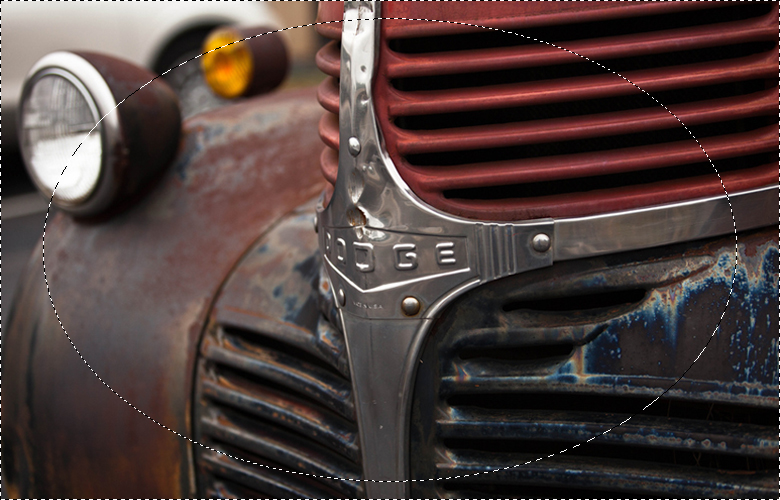
Step 3
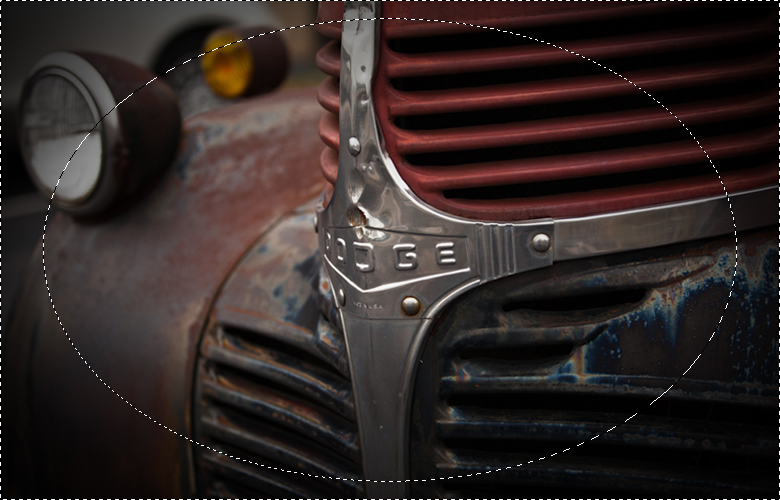
Now, we’ll create the vignette effect. Select the elliptical marquee tool and set a 100px feather within the top properties bar. Select the central part of image as shown below. A 100px feather will prevent any hard edges of selection.
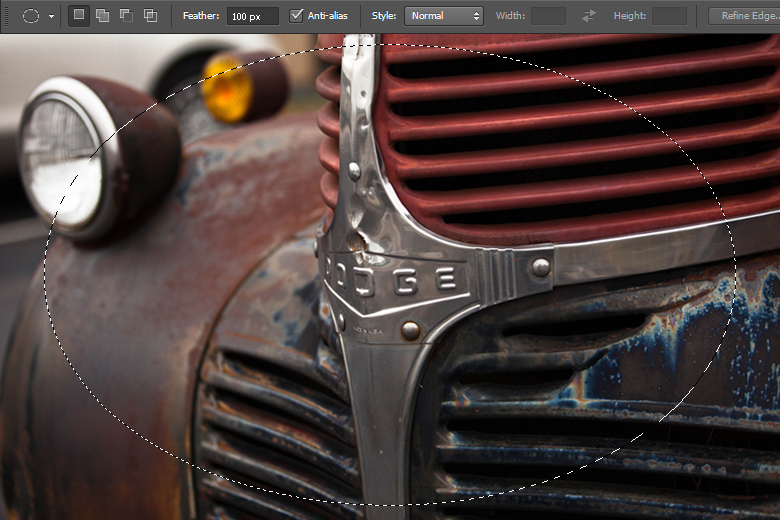
Now, go to “Select” > “Inverse” to invert the selection.
Step 4
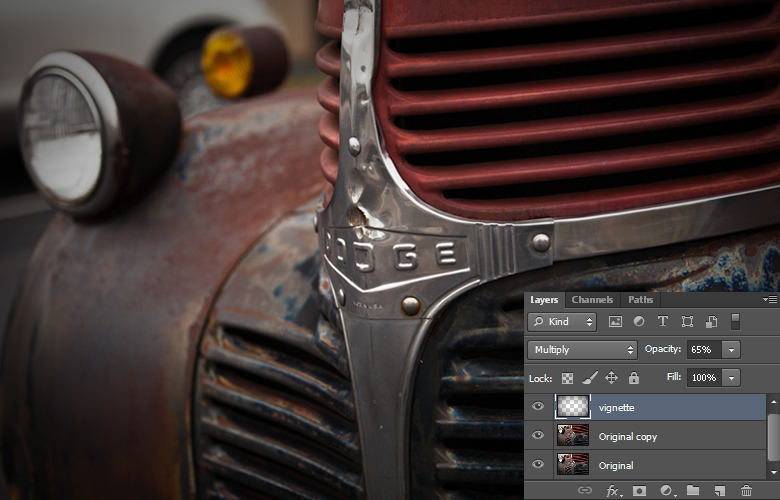
While the selection is still active, press “D” to pick default colors and create a new layer by going to “Layer” > “New” > “Layer.” Then, fill the selection with black using the paint bucket tool (“G”). Label this layer as “Vignette.”
Change the blending mode to “Multiply” and adjust its opacity to “65%”. This will leave you with a nice vignette with a brighter center. However, you can keep the vignette opacity at 100% if you want a stronger impact.
Step 5
As Lomo images have extremely high contrast, we’ll recreate this aspect using the “Levels” adjustment. Click on the icon to “Create new fill or adjustment layer” at the bottom of layers panel and choose the “Levels” option. Apply the following settings here.

Step 6
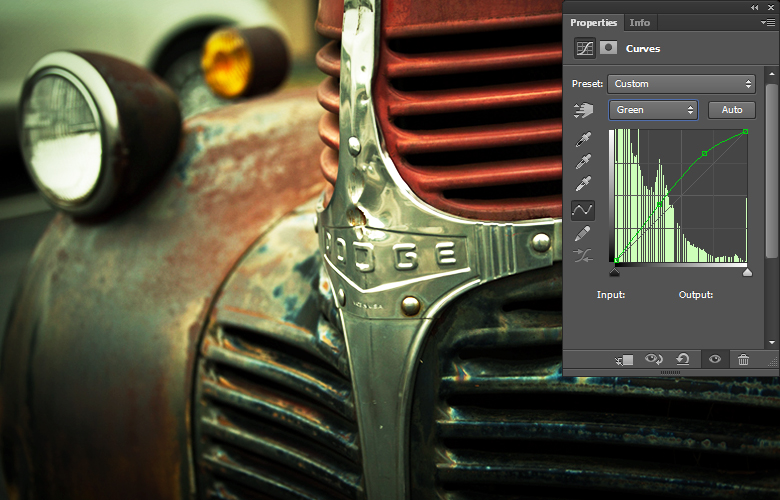
Next, we’ll adjust the color tones of the image. To achieve this, let’s create a curves adjustment layer by clicking once again on the icon to “Create new fill or adjustment layer”. There are no particular rules to adjust the curves. It depends on the image you are using and colors you wish to enhance. We will modify the RGB channels separately. Select the “Red” channel and adjust the curve to enhance the red tone of the image. My settings are shown below.

Step 7
Select the “Green” channel now and play with its curve to achieve the desired effect.
Step 8
Lastly, pick the “Blue” channel and adjust its curve to resemble mine. The result is shown below.


Step 9
Another characteristic of lomo photographs is their distinctive blurry edges. To craft those edges, we’ll apply the “Iris Blur” filter over the edges. We need to merge the image to apply this filter, so select all the layers except the original image by pressing “Shift” key and selecting “Layer” > “Merge Layers” (Ctrl + “E”).

Step 10
To apply the Iris Blur filter, select this merged layer and go to “Filter” > “Blur” > “Iris Blur” and adjust the path near the edges and blur them by 5px.

Step 11
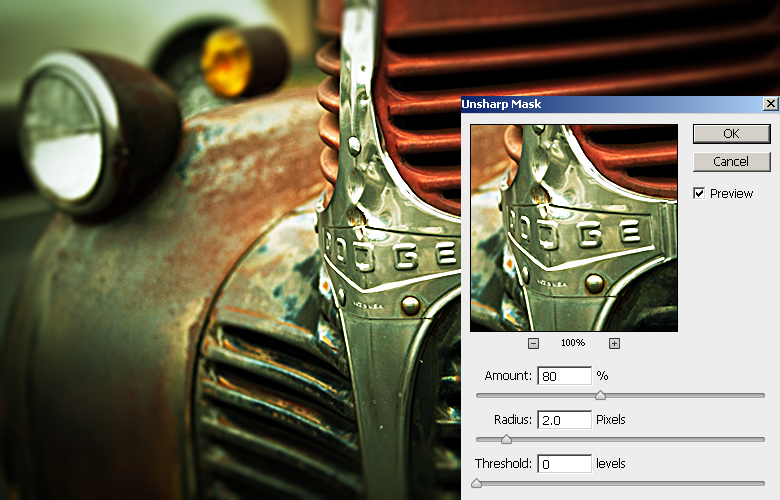
We’ll sharpen the image now. Select the newly-merged layer and go to “Filter” > “Sharpen” > “Unsharp Mask”. Use 80% for Amount, 2px for Radius, and 0 for Threshold here.
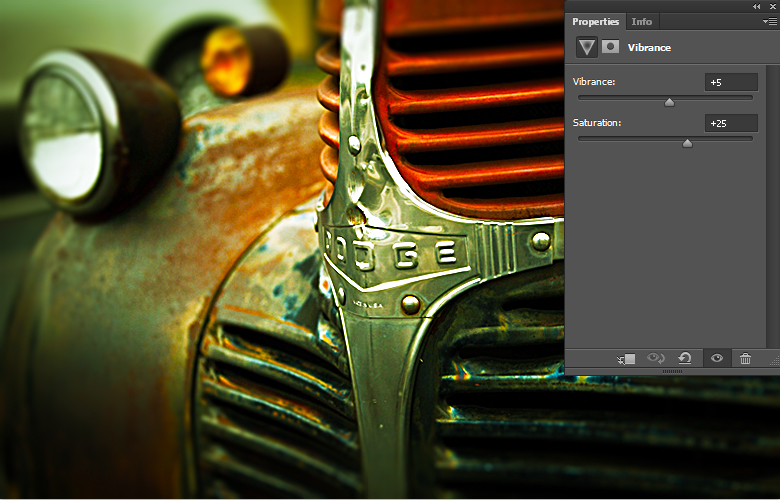
Step 12
Next, we’ll enhance the color saturation of the image. Click on the icon to “Create new fill or adjustment layer” and select “Vibrance”. Use +5 for Vibrance and +25 for Saturation.
Step 13
To brighten the image, select the “Levels” adjustment by clicking the icon to “Create new fill or adjustment layer” and dragging the right-hand slider towards the left.

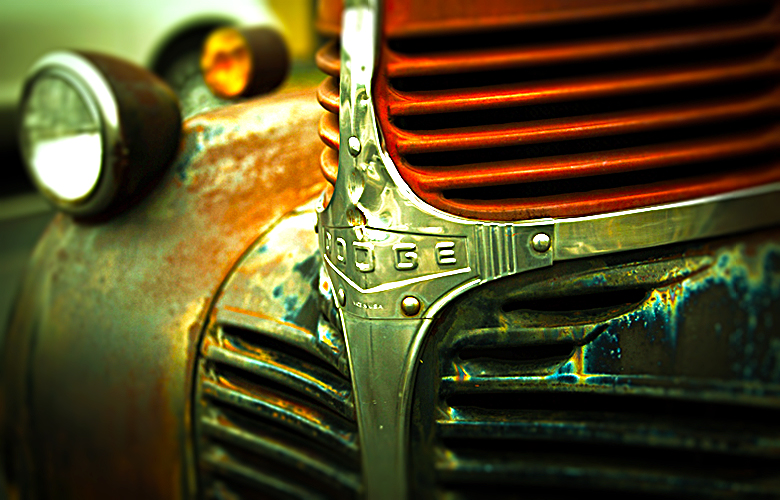
Have a look at the original image.
Here is how it looks with the lomo effect that we’ve applied so far.
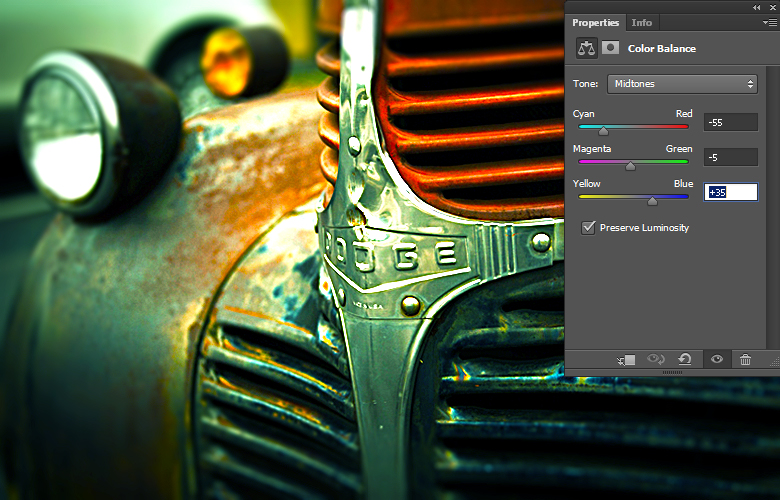
Step 14
We have almost achieved the lomo look. These next steps are going to further enhance the effect. To give your image a bluish tone, click on the icon to “Create new fill or adjustment layer and select “Color Balance”. Now, apply the provided settings for “Midtones”.
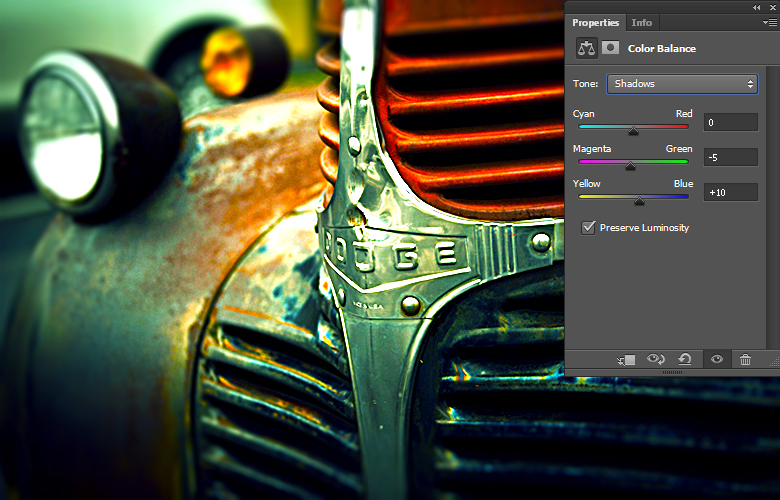
Step 15
Use the following values for the “Shadows” Color Balance.
Step 16
Apply the settings below for the “Highlights” Color Balance.
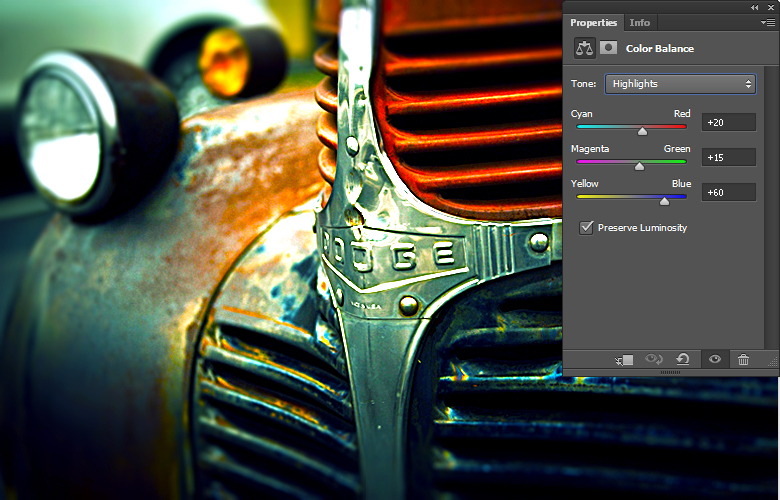
Step 17
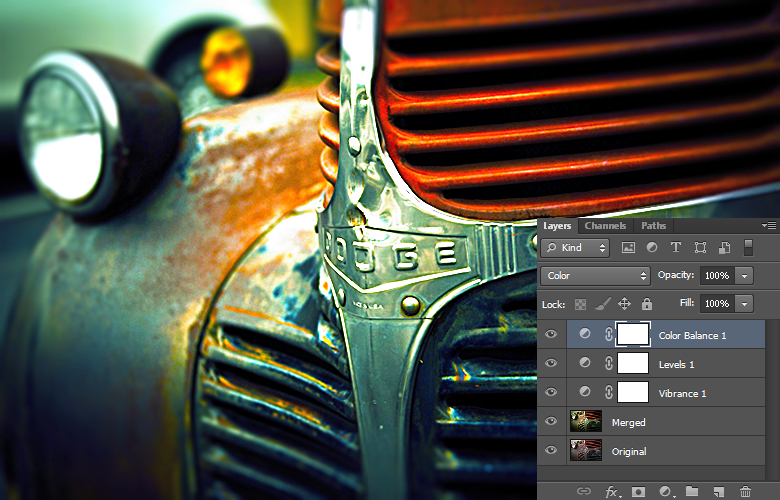
Once you are done, change the blending mode of the “Color Balance” layer to “Color”.
Step 18
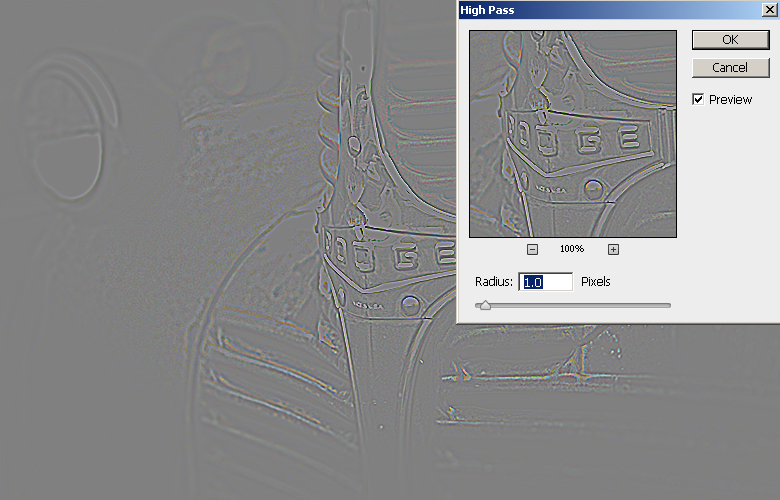
Lastly, we’ll apply the “High Pass” filter on the image. Merge all if these layers together by selecting them and pressing Ctrl + “E”. Duplicate the merged layer and select “Filter” > “Other” > “High Pass”. Enter 1px for your radius in the high pass window and press “OK”.
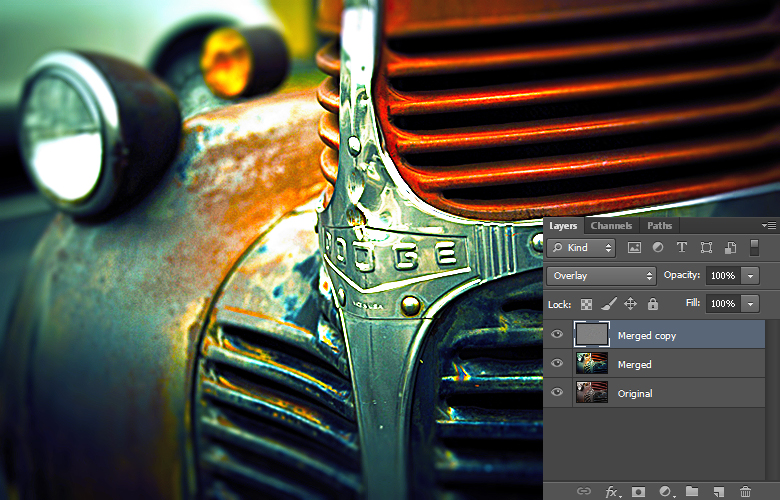
Change the blending mode of the “High Pass” layer to “Overlay”.
Final result:
That’s it guys, hope you enjoyed the recreation of the lomo photography effect. What do you think of the lomographic style?