
So, now that we have a child theme set up we’re ready to get make some changes to the look and feel of our site.
What You’ll Need
- Web browser – I’m using Chrome
- Text editor – I’m using Text Wrangler
- FTP Client – I’m using FileZilla which we have set to use Text Wrangler as its text editor
- A working knowledge of HTML and CSS
Before We Start
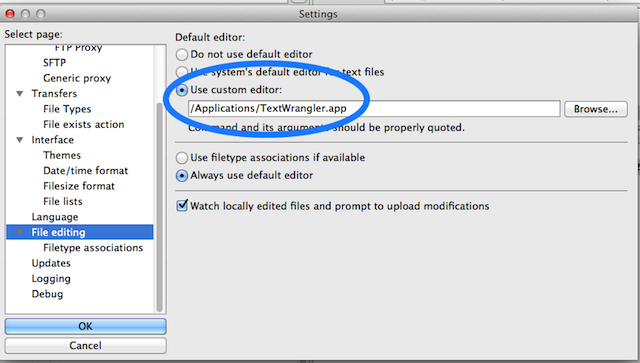
Before we get into the body of the tutorial we need to set up our editing system, and one of the useful things about modern FTP clients is that in their preferences we can set the software we want to use to edit files. That way we can choose edit when selecting a file on the server, have it download to a temporary directory on our local system, edit it, then when we save it have it automatically be uploaded back to the server. It’s an easy automated system, but requires a little bit of safeguarding as we’re editing live, so if we make a mistake, our live site will be affected. However, before we get to that set your default text editor.
Navigate to FileZilla > Preferences > File editing and browse to your Applications or Programs directories and choose your text editor (as I mentioned, I’m using Text Wrangler, so you can see in the example that Text Wrangler is set as my default editor).
Ok, we’ll come back to that…
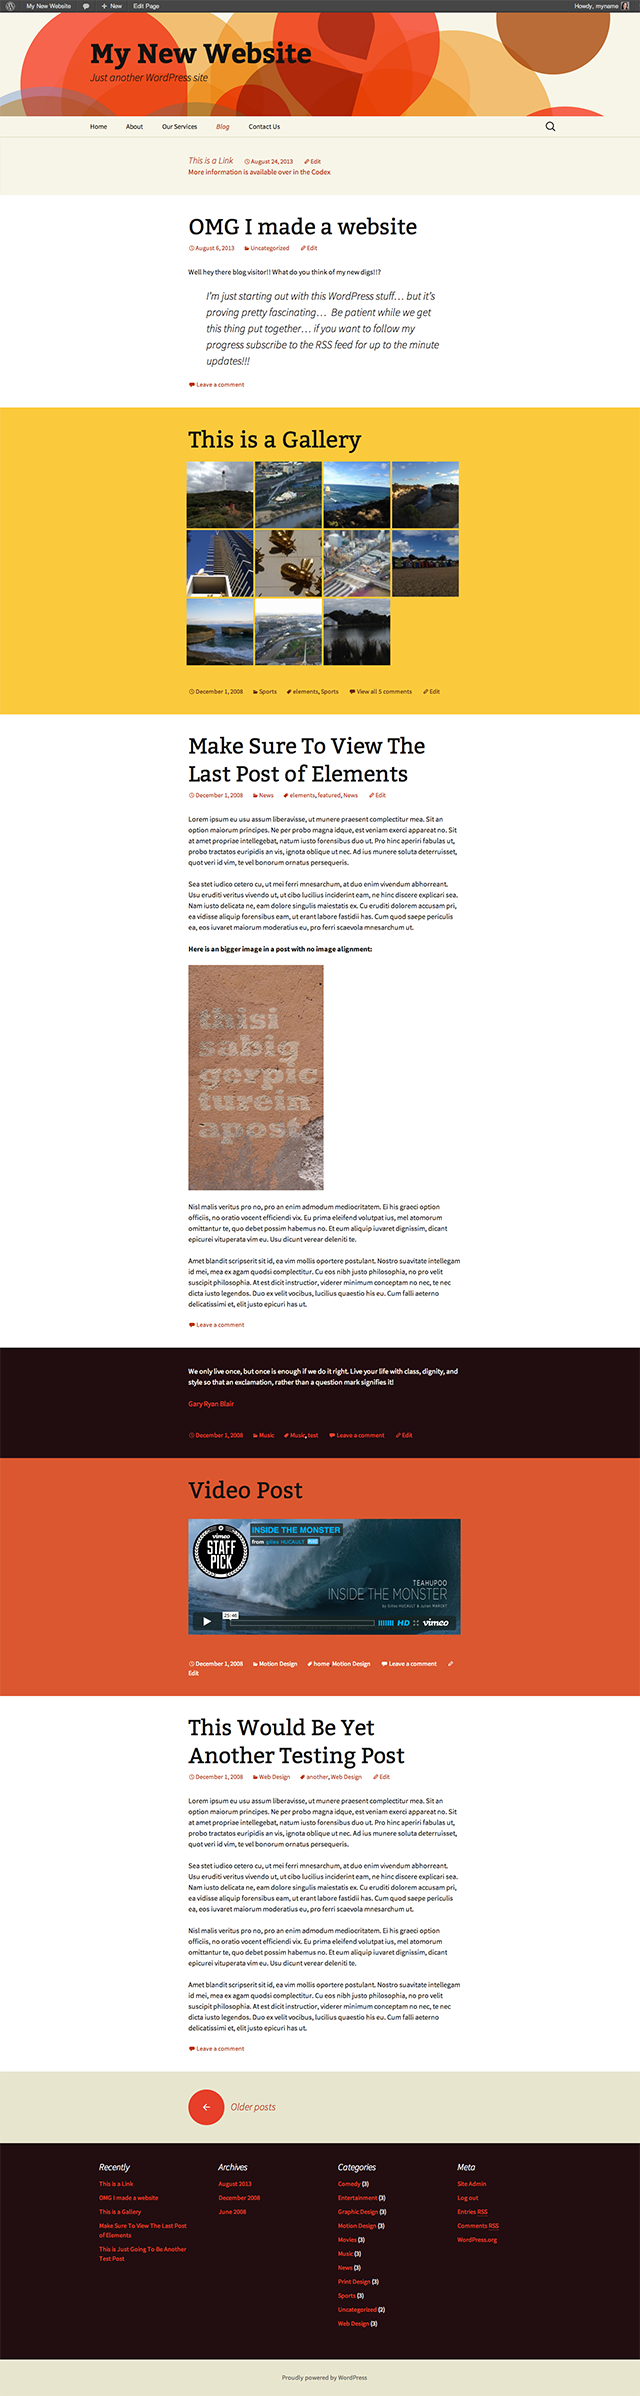
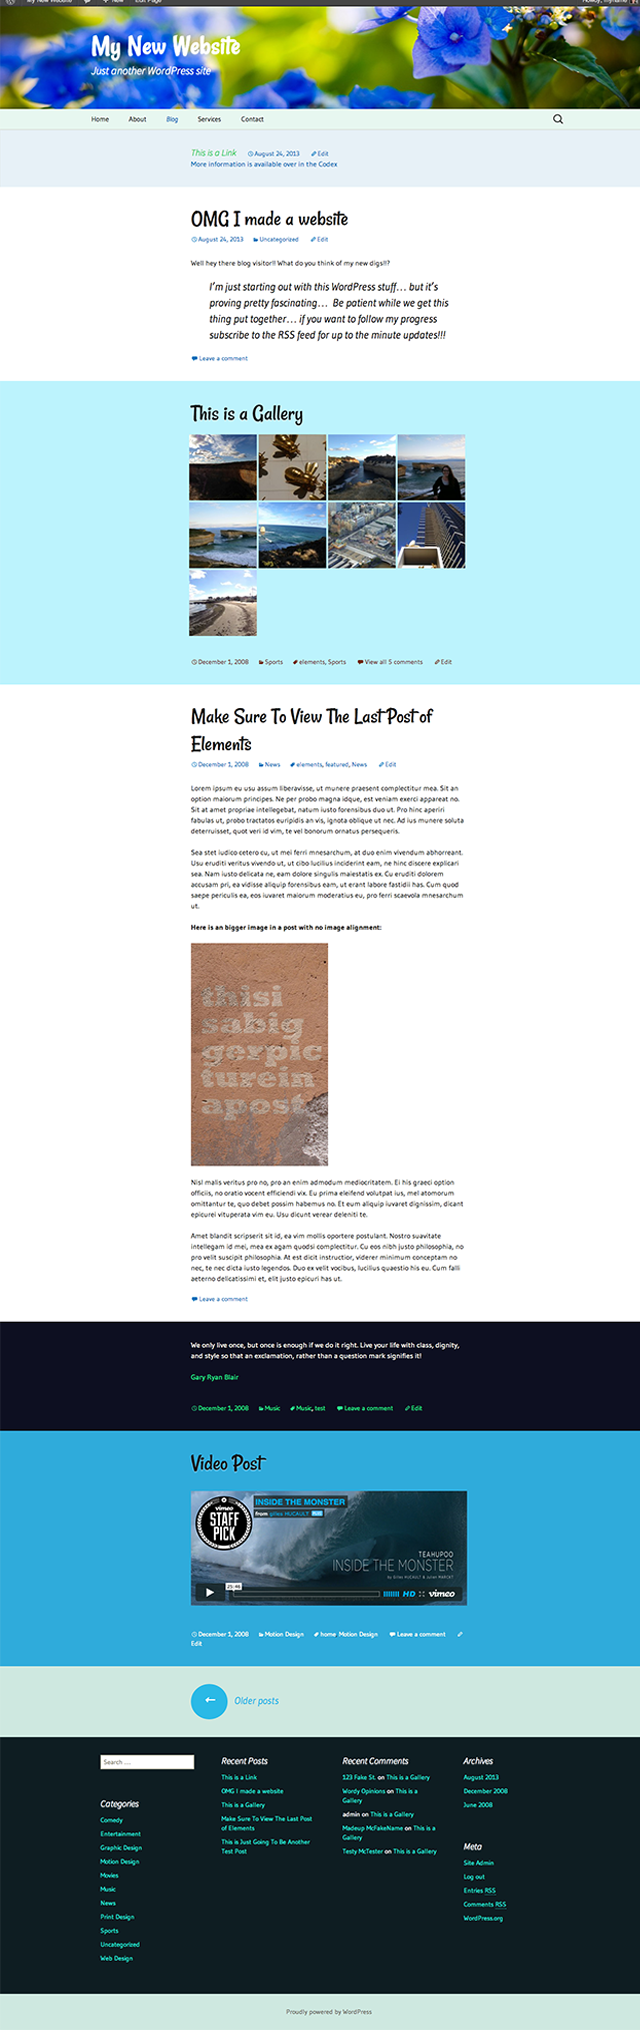
Secondly, before we get to tweaking the theme (this is your ‘here’s one I’ve prepared earlier’ moment) I have also created a few new posts on our blog and differentiated them using post formats so we can see where some of the changes will be reflected on our published site – you can see these in the first image, identified by different coloured backgrounds. The first is a link, followed by a standard post, then a gallery, another standard, a quote, and then a video. Twenty Thirteen changes the style of each of these posts, so we’re going to have to edit a few parts of our site’s stylesheet to make our site look different from the original.
Changing Your Site’s Styles
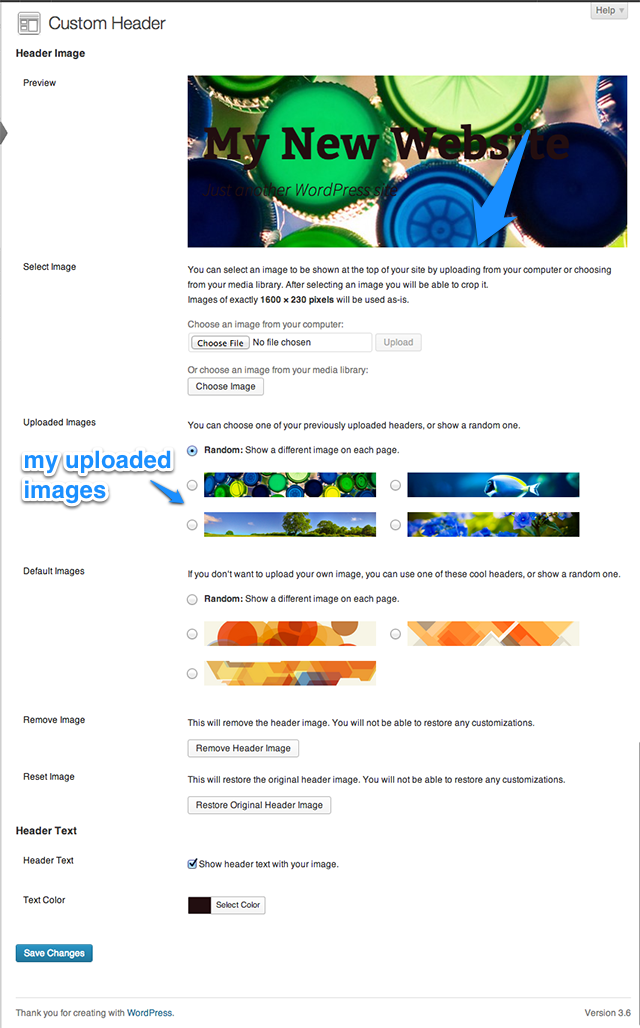
Right, the first style change I’m making doesn’t require any code, I simply updated the header images.
Twenty Thirteen has three orange geometric patterned images installed by default, we’re putting in four new blue/green ones, by going into the Appearance > Header settings and uploading some new header images. There’s no sense in changing a header in the CSS when the theme itself provides us the means to change that, so find yourself some new header images for your new colour scheme, and go ahead and upload them…
I’ll wait right here.
Ok, found them? Great, load them up and let’s move on to the next thing.
Tweaking the Theme Using Stylesheets
To give you a little bit of background/refresher on stylesheets, a website is made up of 3 layers. The first, at the base is the content layer, the part of the site that organises your content into meaningful structure in your site. This structure is created using code called HTML (Hypertext Markup Language) with which you tag the various parts of the content. Here’s some HTML as an example.
<h1>This is a Level One Heading</h1>
<p>This is the first Paragraph of text.</p>
<!-- This is comment text... put in to help tell you what's what, and it's the beginning of the Unordered list--> <ul>
	<li>This is the first item in an unordered list</li>
 	<li>This is the second item in an unordered list</li>
</ul>
<!-- this is the end of the unordered list -->
<article class="format-gallery">This is an article, a stand alone block of text content with a class of format-gallery</article>
HTML itself doesn’t style anything. HTML only structures the content. To make changes to the style of the content we move up to the middle layer of the site, the presentation layer. One of the great things about this age of website building is the separation of the presentation from the content. It’s this very system that makes it so easy to change your website’s look just by switching it out with a new theme (which at its most basic is, in effect, swapping one stylesheet for another).
The language that speaks to this presentation layer is CSS (Cascading Style Sheets) and it’s the CSS that we’ll be tweaking to make the style changes to our Twenty Thirteen theme.
Whenever we look at the structure of CSS as a language we can see three things:
selector { property: value; }
So if we’re wanting to tweak something like the first level heading, the h1 tag is our selector like so:
h1 { property: value; }
The next thing is the property, and in this case the property we want to change is going to be the colour – also, in CSS we use American spelling. So while I write colour in the content, when I’m writing in the code, it uses color.
h1 { color: value; }
Finally we’ll set the value. Now in the case of colours we can write the colour in three ways:
- Colour names
- Hexadecimal code
- RGB colour values
For the most part we’ll be using hexadecimal, if you want to find out about the other values you can find a reference here. In this case we’re changing our text to white, which in hexadecimal is #FFFFFF.
h1 {color: #FFFFFF; }
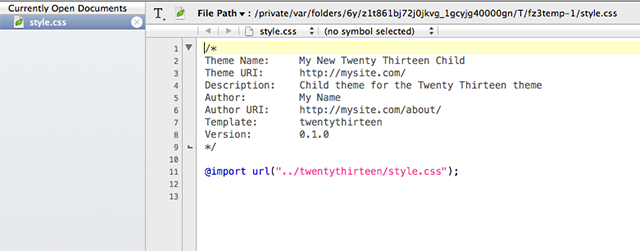
So, with that in mind, and to start getting our theme looking a little more like ‘our own’ we’re first going to change the font of the text in both the heading and the body content. So start by opening FileZilla and navigating in the remote window to your child theme’s stylesheet, then right click on the style.css file and choose View/Edit.
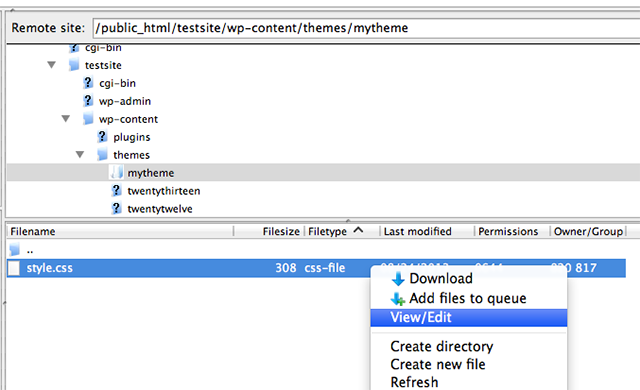
Click and you’ll find that the file opens up in your text-editor.
IMPORTANT
Before we go any further, we’re going to save a copy of our stylesheet onto our desktop as a backup. This is because we’re editing the live server we want to have a fall back if we do something to break our code.
So, before you do anything else, in Text Wrangler with your file hit CMD + A to select all the text. Hit CMD + C to copy it and open a new file in Text Wrangler (CMD + N). Paste in your copied text into the new document (CMD + V) and save that file as a backup on your desktop. This way, if something does go wrong you can always copy it back into the file that was edited last and save it to the server, restoring the site to the last working version.
Follow this process above and save this file each time you’ve made a change (a change that’s worked as expected), this way the file is always your latest version. (There are a lot of amazing and more complicated ways to take care of this version control. For the absolute beginner, this is a pretty good start, if you remember to keep it up)
Right, now we’re ready to get creative!
Changing Fonts
To change the fonts in a site we have to have access to hosted font files. This gets around the fact that not every computer out there will have the same fonts loaded on their system that we do. So, one of the great things we have access to these days is some nice looking hosted web fonts, freely provided by Google Web Fonts. For our site we’ve found two fonts that work together really well, Rancho for the headings, and Gudea for the body text.
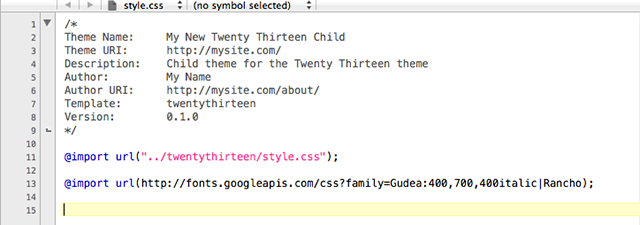
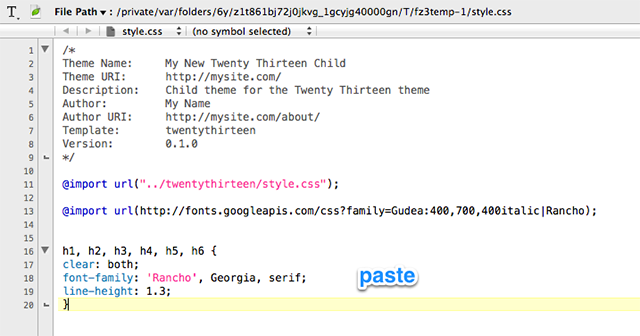
So, in the Google Fonts site, add these two fonts (Rancho and Gudea, or any two of your choice) to a collection; hit the Use tab and then the @import tab to grab the following code to paste it into our stylesheet:
@import url(http://fonts.googleapis.com/css?family=Gudea:400,700,400italic|Rancho);
This tells our theme where to find the font. We’ll next tell our stylesheet where to display it by editing a couple of selectors – but how do we know which elements we want to work on or even which selectors we can tweak?
Using Developer Tools
One of the cool things about modern browsers is the sheer number of tools available to help developers. In Chrome they’re called Developer Tools and you can access them by right clicking on the element on the webpage you want to inspect, and choose Inspect Element. In Firefox the dev tool of choice is called Firebug and you can get that by installing it as an extension (Firefox does have its own dev tools built in too), in Safari they come built in, but you have to turn them on (Preferences > Advanced > Show develop menu in the menu bar).
Anyway, let’s inspect the site header. Right click on the header text itself and then choose Inspect Element
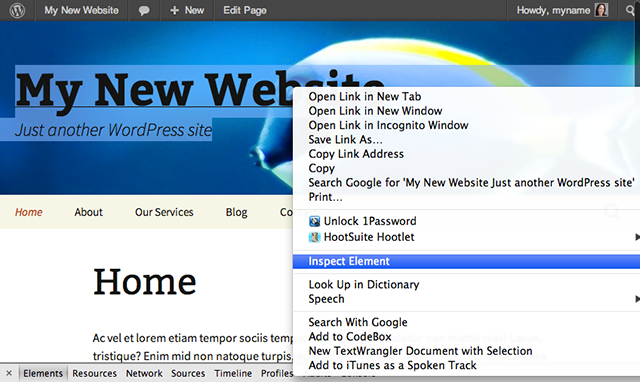
Click that, which will bring up the tools panel at the bottom of the page we’re on.
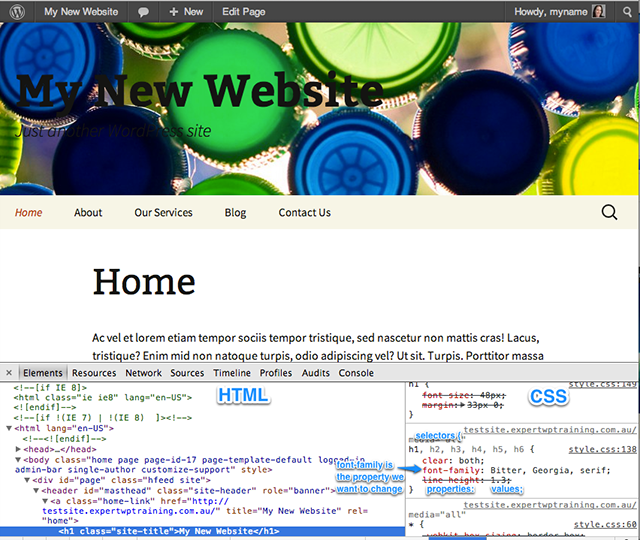
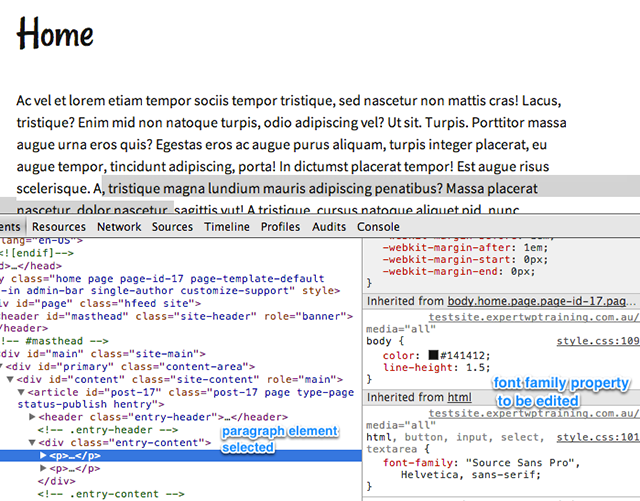
In the left of the panel is the HTML elements section with our selected element highlighted. On the right is the CSS. Having selected the <h1> element in the HTML we can scroll through the CSS on the right to find all selectors that are operating on this HTML. If you scroll down just a few lines you’ll find a sequence of heading selectors with a property called font-family.
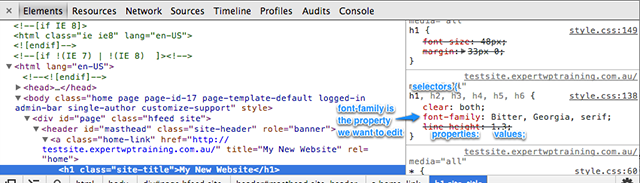
One of the neat things about the developer tools is that you can edit these properties and see your changes simulated live without any actual effect on your live site for other users, and when you’ve got the selector looking how you want, you can copy it into your child stylesheet. So put your cursor over the property (starting with the word Bitter) and, because we’ve already saved the Rancho font into our stylesheet using the @import selector we can change the current font Bitter in the inspector to ‘Rancho‘ to see our fonts change live.
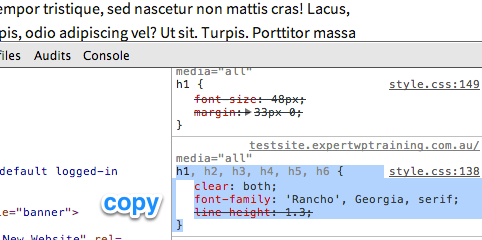
If we’re satisfied with this new font we can copy the CSS from the Inspector and paste it into our stylesheet.
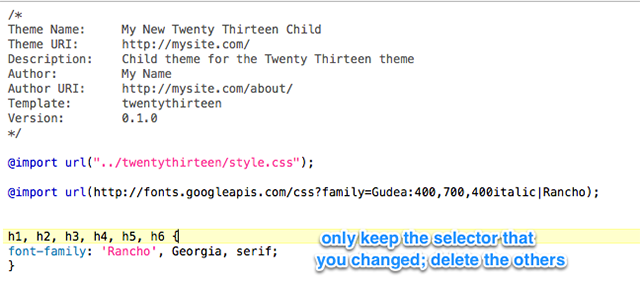
Select the code all the way from the selectors beginning at h1 down to the closing brackets, and copy it.
Then paste the code into your stylesheet.
The nature of stylesheets is that they cascade. If there are multiple selectors in a stylesheet for a particular HTML element, the one at the bottom of the page is the one with primacy in the hierarchy and thus displayed by the browser.
In our case, we’re importing the stylesheet at the top of our child theme here, so all the new code we’re writing now comes at the end of existing code in the parent theme. As a consequence, our code is the code that will be actioned when the site is displayed. Furthermore, because the code we pasted contains lines we’re not changing, and therefore keeping these lines would in effect duplicate existing code (it’s the same in the parent so we don’t need to use it again in the child), we’ll delete the lines above and below the font-family property, as they’re not needed.
Now hit save on our stylesheet, then jump across to FileZilla where we should see this alert:
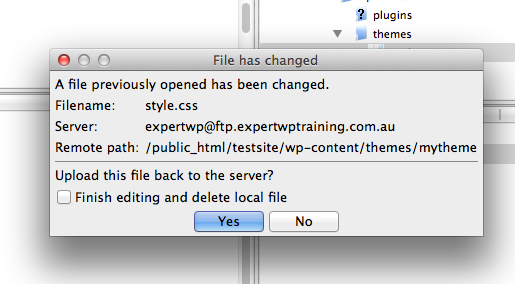
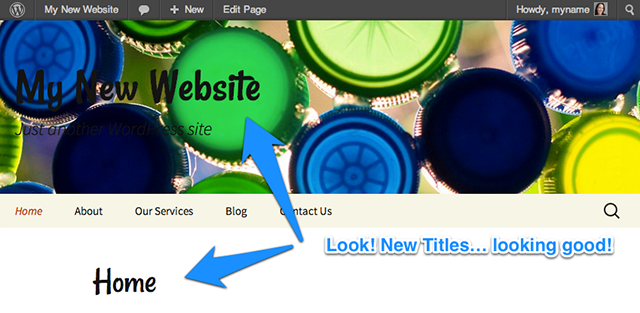
If you’re happy with your changes, have a backup on your desktop, and are ready to go, hit Yes to overwrite the file on the server. Then head over to your site to refresh the page and see your changes published.
Once we’ve done that to the header fonts, we’ll do the same to the body copy. So with your site open, right click on a bit of the body text and choose Inspect Element. In the CSS inspector, navigate to find the font-family selector in your CSS panel and then change the Source Sans Pro value to ‘Gudea‘. It should be pointed out at this juncture that the selector we’re editing isn’t actually a p (for paragrah) selector as you might expect, actually the selector that’s affecting the pagragraphs in this case is the html selector (you can tell that in the inspector as it’s the dark one, the greyed out ones in that selector array aren’t affecting this particular bit of text), in this case html is a parent selector that affects ALL the elements descended from it on the page.
Anyway, copy that text, from selector to closing bracket, just as we did above, into your stylesheet. In this case, no need to strip any unused selectors as the font-family is the only one. Save and upload your file.
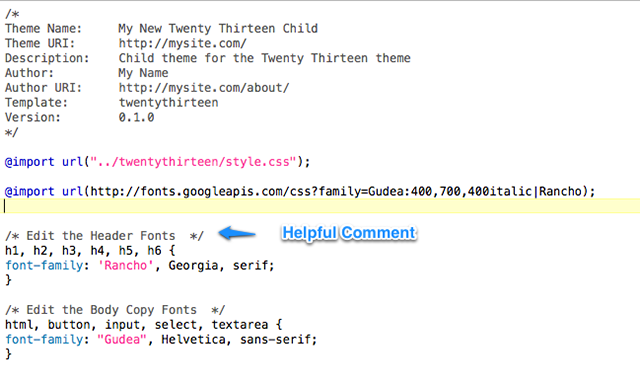
You can see in the code above I’ve added a couple of lines as comments, wrapped in the following characters /* to open them and then, */ to close them. I suggest that you make a habit of leaving yourself notes in this way so later you can easily find what you did in your code.
The next thing I’m doing is to start going over the existing site with my Inspector and choosing all the elements whose colours I want to change… and there’s quite a list.
 /* First, the site Heading Colour*/
.site-header .home-link {
 color: #ffffff; }
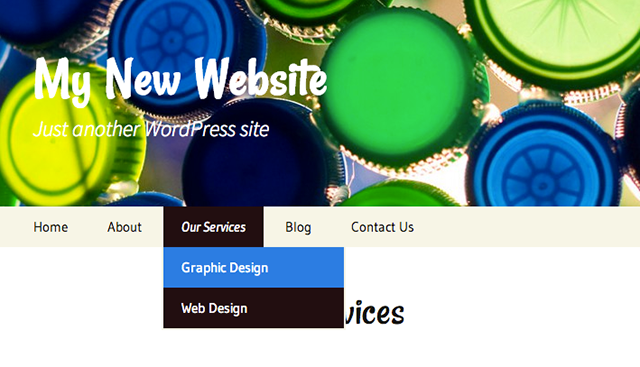
Next, the navigation bar and links
/* Nav Section Header edits */ .nav-menu .current_page_item>a,.nav-menu .current_page_ancestor>a,.nav-menu .current-menu-item>a,.nav-menu .current-menu-ancestor>a {
		color:#0A6EBC;
	/*Link Colour */
}
.toggled-on .nav-menu li:hover>a,.toggled-on .nav-menu .children a {
		color:#121314;
	/* Active Link Colour */
}
.toggled-on .nav-menu li a:hover,.toggled-on .nav-menu ul a:hover {
		background-color:#2e51dc;
	/* Hover Link Colour */
}
navigation a {
		color:#2AB9E6;
	/* Link Colour */
}
.navigation a:hover {
		color:#2091B4;
	/* Hover Colour */
}
ul.nav-menu ul a:hover,.nav-menu ul ul a:hover {
		background-color: #2e7fdc;
	/* Hover Background*/
}
Ok, so now that you’ve got the basics of what’s possible you can systematically go through the published site, seek out the selectors you want to edit and play with them in your inspector, adjust the settings, copy them and paste your new changes into the child theme’s stylesheet!
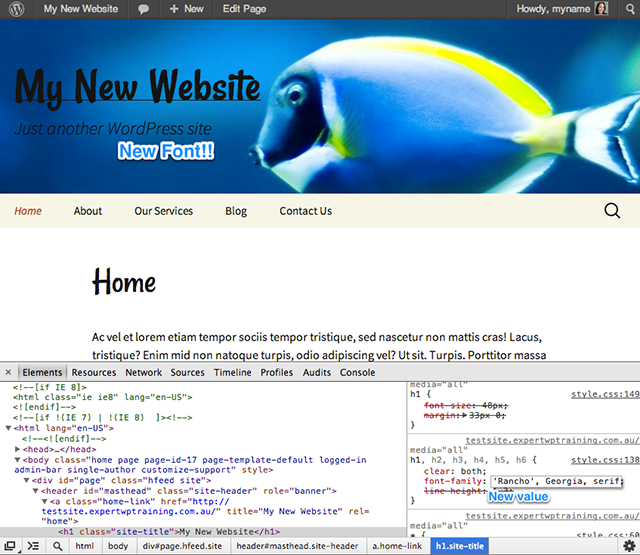
I could give you a list of all the changes I’ve made to the stylesheet to get Twenty Thirteen looking as it does in this example image, but where’s the fun in that?
Conclusion
While looking at a site’s code in Developer Tools it can be pretty overwhelming. But as you get familiar with how CSS relates to, and acts on, HTML elements you’ll begin to see just what the possibilities are. It’s a challenging and exciting world to explore! So, spend some time playing around with the theme this week and see if you can get it looking like the blue picture above.
Next week, before we post the next lesson I’ll give you the stylesheet which made Twenty Thirteen this lovely shade of blue.
P.S. If you’re still feeling a little flummoxed by HTML and CSS remember, you can check out 30 Days to Learn HTML and CSS: a Free Tuts+ Premium Course