In this tutorial I will be taking you through the steps of how to animate a character walking in place. Basically you will be creating a walk that loops infinitely, so if you were to incorporate a walk like this into a movie, perhaps the background would be scrolling from right to left behind the character to give the illusion of forward movement.
A walking character is one of the most important things to learn as an animator. Animation is all about creating the illusion of movement. One of the things that characters do the most to get around and move is walking! So let’s get to it!
1. Draw Our Main Walking Poses
Step 1
Start by drawing the floor guidelines. When I animate a
walk, I like to draw a guideline for each foot so that the footfalls are consistent. We are animating a simple side view walk, but the foot that is farthest
from us will be slightly further back
than the foot that is closest to us. In order to make this illusion convincing, the character can’t be floating all over the place. The character needs to be grounded.

Step 2
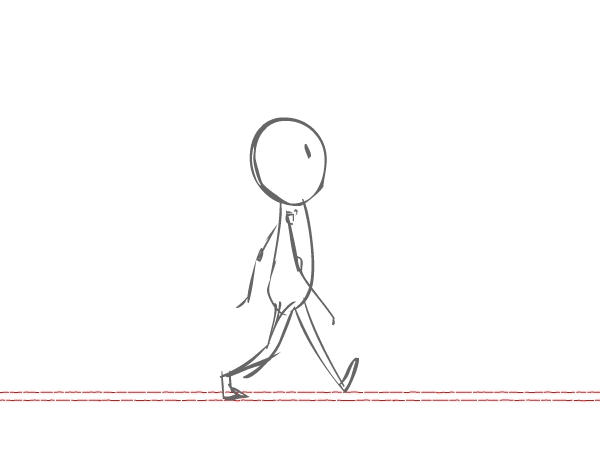
Draw our first pose/extreme. I like to start with the character
in mid-step. The leg closest to us (the right leg) is making contact with the ground. We are working rough, and our walking
character is a simple automaton with a round head, so I’ve only indicated the eyes
with dots. We will only animate the legs and body; the arms we will animate
later. Let’s concentrate on getting the legs right first.

Step 3
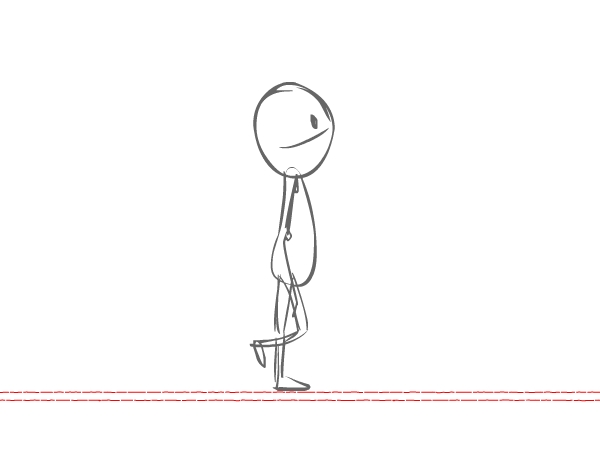
Draw our second extreme, in which the leg in the back is
passing the leg in the front. The foot closest to us (the character’s right foot) is flat and grounded and is sliding back. Of course, he’s not actually sliding, but to give the illusion of walking in place, the feet “slide”.

Notice how the body is higher up now. In most cases, people do not stay the same height as they walk—they bob up and
down as one leg passes the other. Even though the leg farthest from us
is partially blocked by the front leg, let’s make sure the leg
“attaches” correctly to his hip on the side farthest from us. Don’t be afraid
to work rough and sketch through the body to work out where the leg attaches.

Step 4
Let’s draw our third extreme pose. Now the back leg
is forward and the front leg is back. Don’t forget to keep lining up those
tootsies to the floor guidelines!
The top of the character’s body should be at the same level
as the first extreme. It’s pretty much the same pose as our first extreme, except the legs are reversed.

Step 5
Let’s draw our fourth extreme. Now the character’s body is higher up because the front leg is passing the back leg—the body is at the same level as our second extreme.

Let’s see how our walk looks so far! Looking good! Now let’s sweeten it and add some in-betweens!

2. In-Between Our Poses
Step 1
Let’s add an in-between between extreme 1 and 2. Notice how that back foot
is starting to come up and that front foot is making first contact with the
ground. You don’t want the back leg to start to come up before the front foot
makes contact with the ground, or the character would fall on his face. No matter
what drawing you are at, in-between or extreme, the character should always be
balanced!

Step 2
Now add an in-between between our second and third extreme. Keep checking that the feet are not floating and that the character looks grounded.

Let’s take a look at that in-between in relation to our second and third extremes. When I animate an in-between, I like to favor the drawing
that I am animating towards.

Step 3
Now let’s add an in-between between our third and fourth extreme.

Step 4
Finally, let’s add an in-between between our fourth extreme and our first extreme. This makes our first drawing our
last drawing, making it a true animation cycle that loops infinitely. Wow, that’s a lot of walking!

Let’s see how it looks so far! Nice! It’s just missing one thing…

3. Animate the Arms
We still need arms! Now that we have the feet and body looking good and moving well,
let’s add the arms. It depends on your animation—the character may be carrying
something and the arms wouldn’t have to move, or maybe your character is cold and
his hands are in his pockets. In this case, I’m going to show you a simple walk
with the character’s arms swinging with the walk.
We’ll add arms to the extremes one through four first, and then add the arms to our in-betweens, in the same order in which we drew them.
The arms usually swing opposite to the legs: the right arm
swings forward as the left leg moves forward and so on.
Step 1
Add arms to the first extreme. The arm closest to us is swinging
back, and the leg farthest from us is moving back.

Step 2
Add arms to the second extreme. The arms are in mid-swing. I “cheated” the arm farthest from us so we can see it peeking from behind the body, but normally the arm would probably be directly behind the body and would be blocked altogether.

Step 3
Add arms to the third extreme.
Step 4
Add arms to the fourth extreme. The arms are in mid-swing.
Step 5
Now add arms to the drawing between your first and second
extreme.

Step 6
Now go ahead and add your arms to the rest of your
in-betweens, making sure you in-between the arms’ swinging action. Don’t forget
to work rough and not get bogged down with making it look perfect. It is important
that you get the animation to work and look convincing before you worry about
adding detail.
Let’s take a look… Looks great!

4. Tighten Up Our Animation Drawings
Now that we have our animation looking sweet, we can lose the red floor guidelines and start tightening up the line for our walking character. I’m still working lose with an ink line, but making things neater such as neatening up the roundness of the head, making sure the eye looks good in all frames, fixing the thickness of the arms and legs, etc…
I left my rough line in light grey and am inking my final line in dark green so we can see the line against the grey.

Keep cleaning up your animation frames. Make sure those feet still look grounded!

Keep going—we’re almost done! Looks great!

Awesome Work, You’re Now Done!
Looking great! Congrats! You animated a great walk! Remember, practice makes perfect. Keep animating!
