In this article, I will review a few new AI tools that Figma recently introduced.
https://medium.com/media/bd5872bb7c297a17ab1e0a646a348f86/href
Note: You should have Figma paid plan to use AI tools.
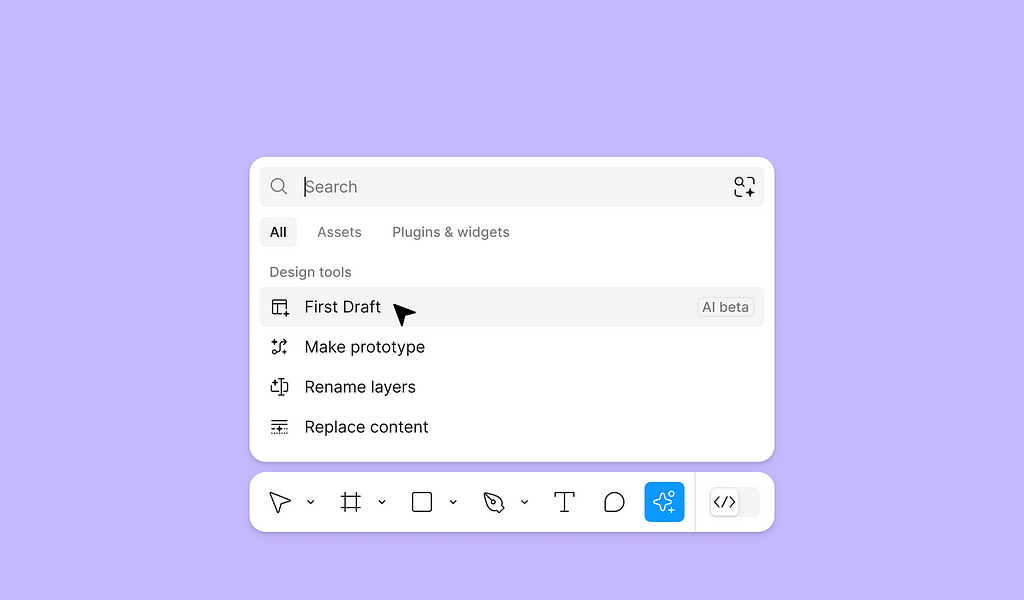
First Draft
First Draft is a fancy name for a UI design generator. To use it, click Actions and select First Draft.

You submit a prompt describing what you want to build, and Figma generates a UI design for you. You have the option to choose a design for a Basic app, Website, or wireframes for a mobile app or site.

There are two great things about this tool:
First, it offers a ready-to-use collection of 6 visual styles that you can apply to a generated design in real-time to see whether they work for you or not.
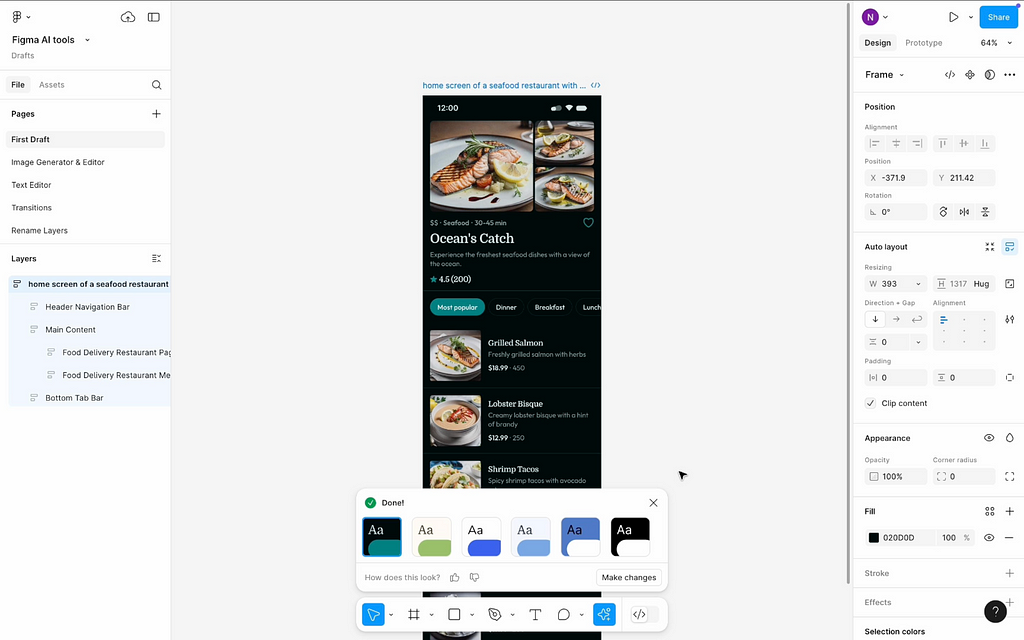
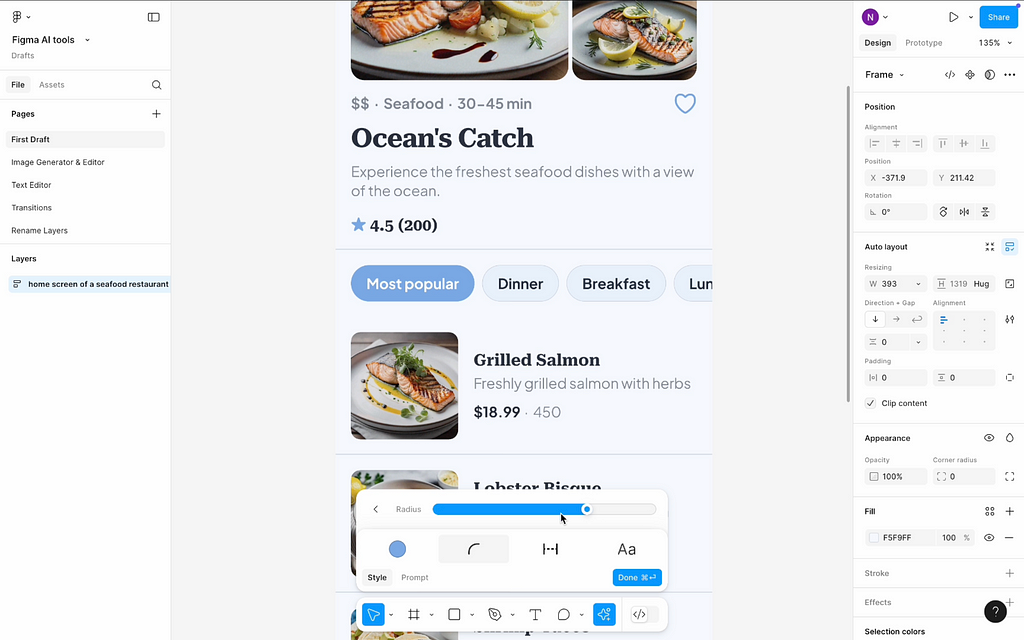
You have gradual control over the visual attributes such as corner radius, spacing, and font family.
Second, Figma generates a design with an auto-layout applied right from the box. It means that all elements in your design — from small to large sections — will have an auto layout. This makes the design more robust.
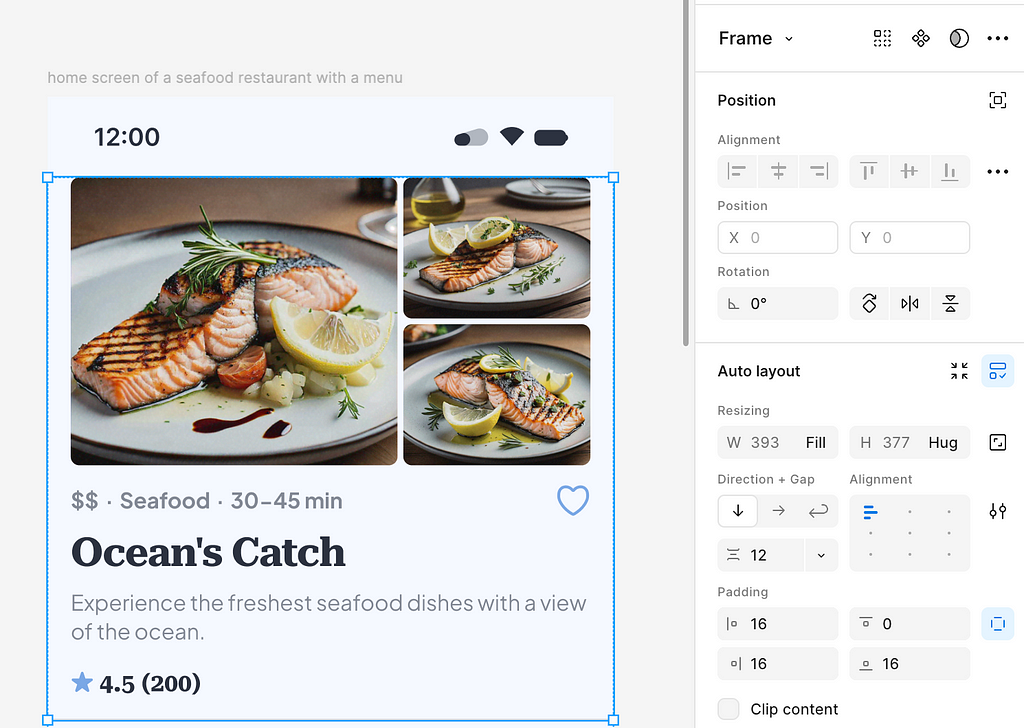
Image generation & editing
Figma AI now takes care of image generation and editing. Instead of using 3rd party tools like Midjourney to generate images, you can do it natively in Figma — you can click Actions, select Make an image and provide a prompt, and Figma will generate an image for you. A generated image will be in a resolution of 1024 x 1024, which is okay for general use.

A quick note about image generation speed: Image generation is a not very fast operation. In my experience, it takes around 30sec to generate an average image. This is something that you need to consider when planning your time.
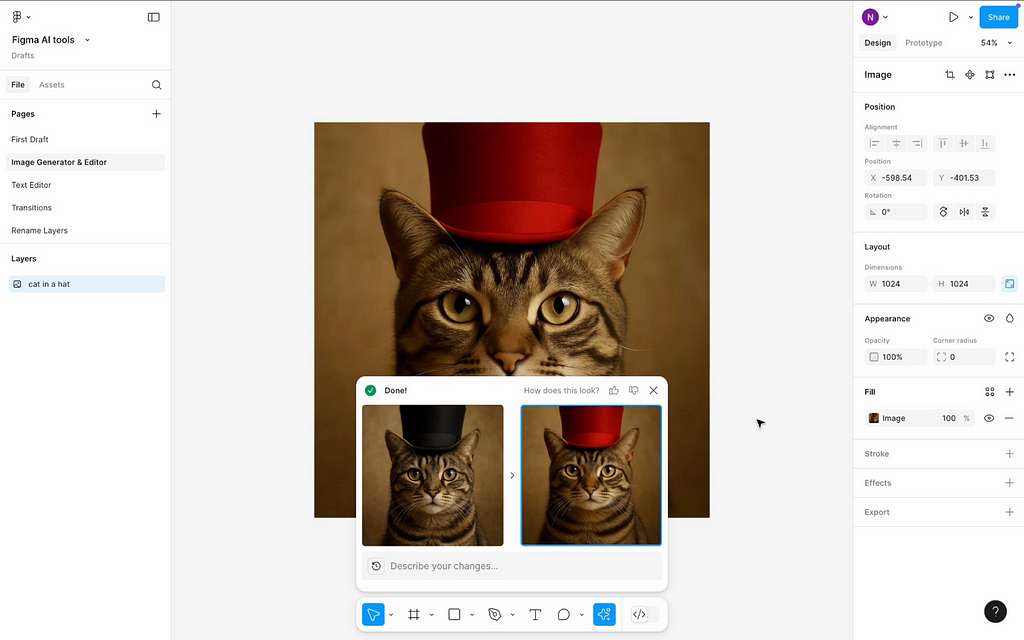
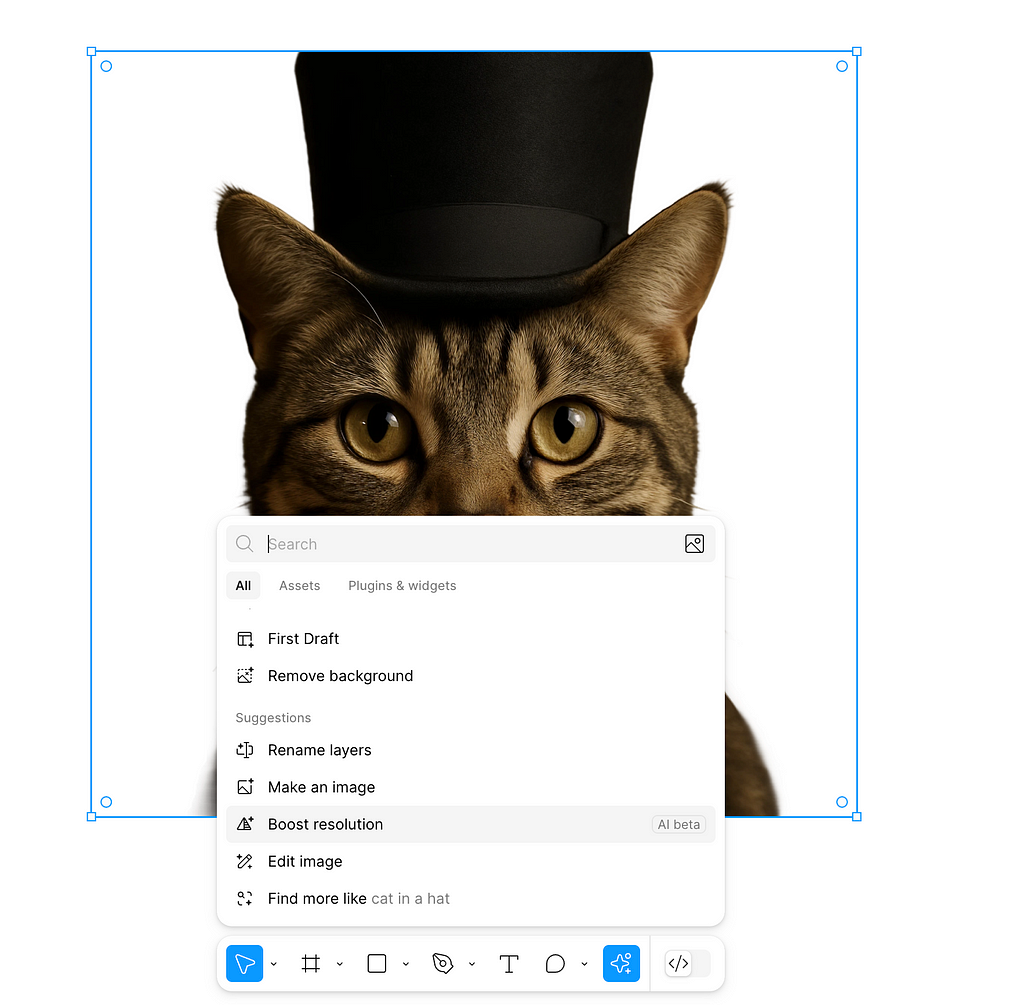
Three great image editing features:
- Modifying the attributes of the image. For example, you can change the color of some elements (like a hat in my example). The great thing is that Figma provides a side-by-side comparison for you so you can easily evaluate the result of the AI generator.
2. Background remover for all image. Works both for simple and busy backgrounds.

3. Quality enhancer. You can enhance the quality of an image — increate its pixel density. Select Boost resolution and choose the image you want enhance.
Text editing
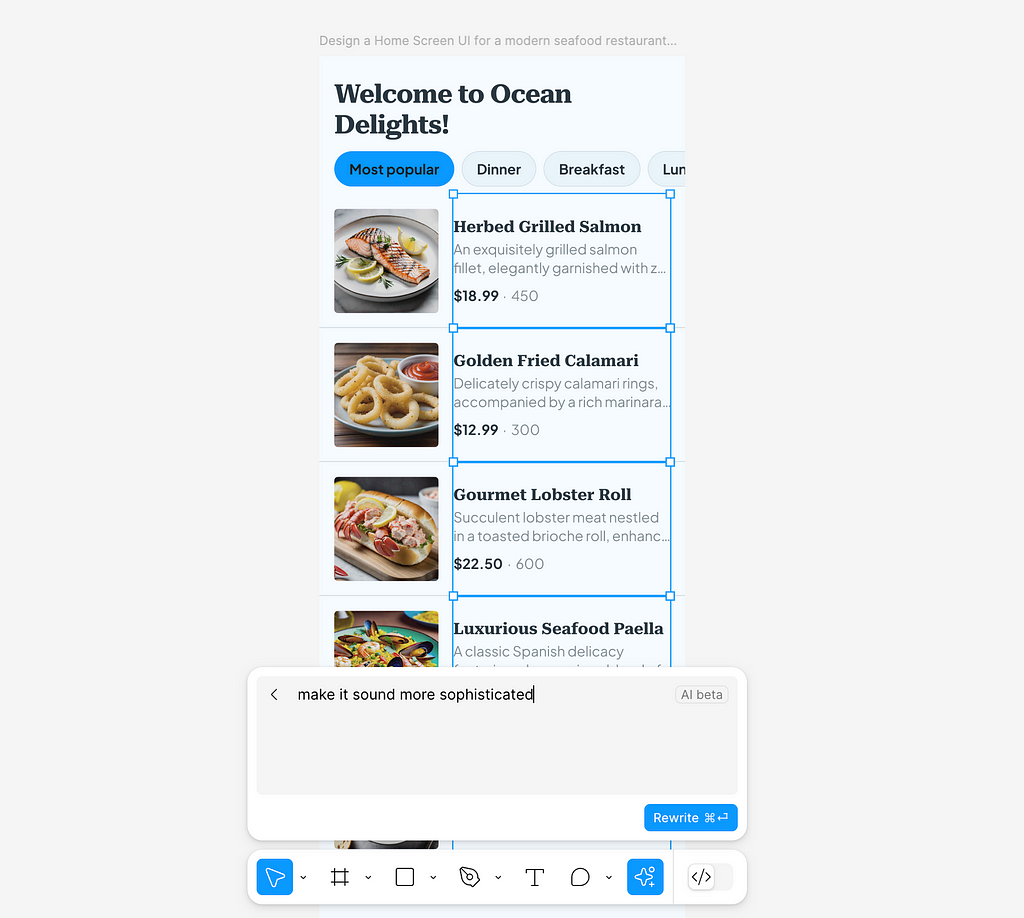
Figma makes it possible to quickly change text content. All you need to do is select the text you want to change, select action Rewrite this and specify what exactly you want to do.
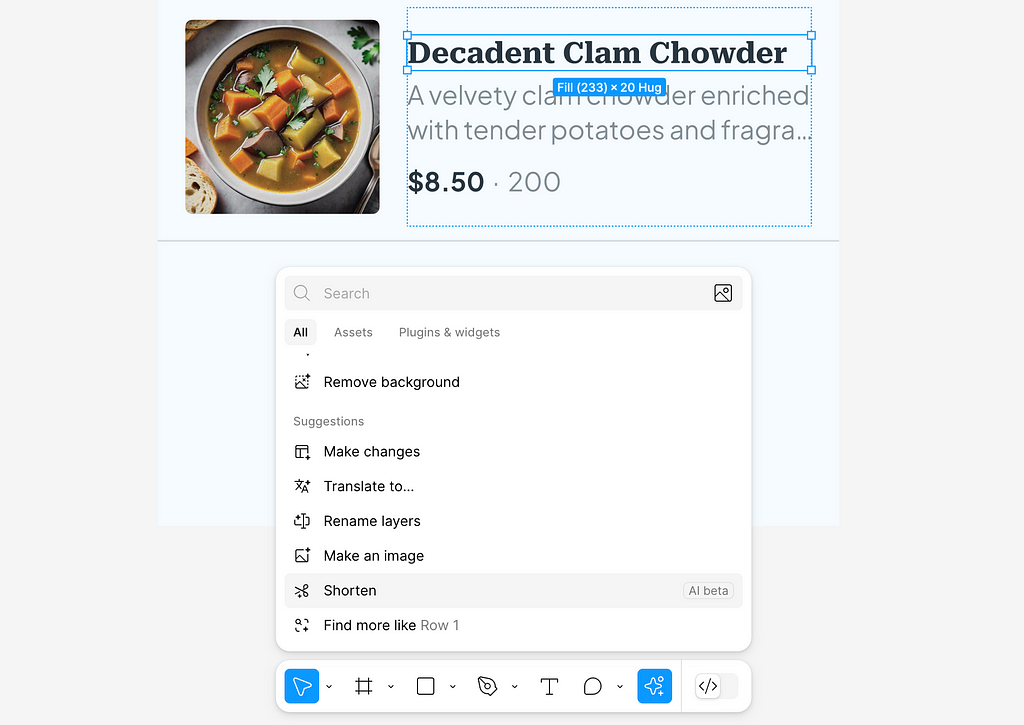
One little but very helpful text editing feature that Figma AI offers is called Shorten. If you have text truncation, and want to get rid of it, you can select a truncated text and activate this feature. Figma AI will rewrite this text to make it shorter.
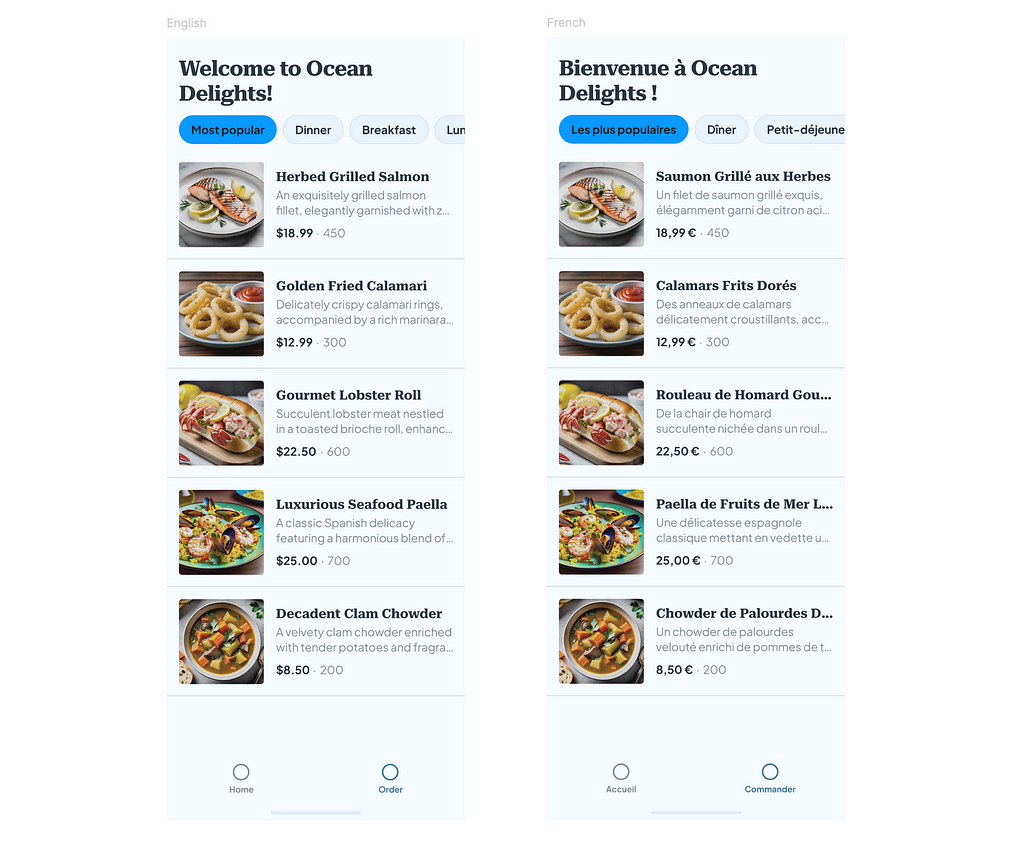
Translation
If you design a product for multiple markets, you will likely know how painful the location process can be. Text translation is one of the steps of location, and it typically takes a lot of time. Figma makes it possible to do translation in real-time. Simply choose your screen, select Translate to action, and choose a language you want to have — Figma will do the heavy lifting for you.
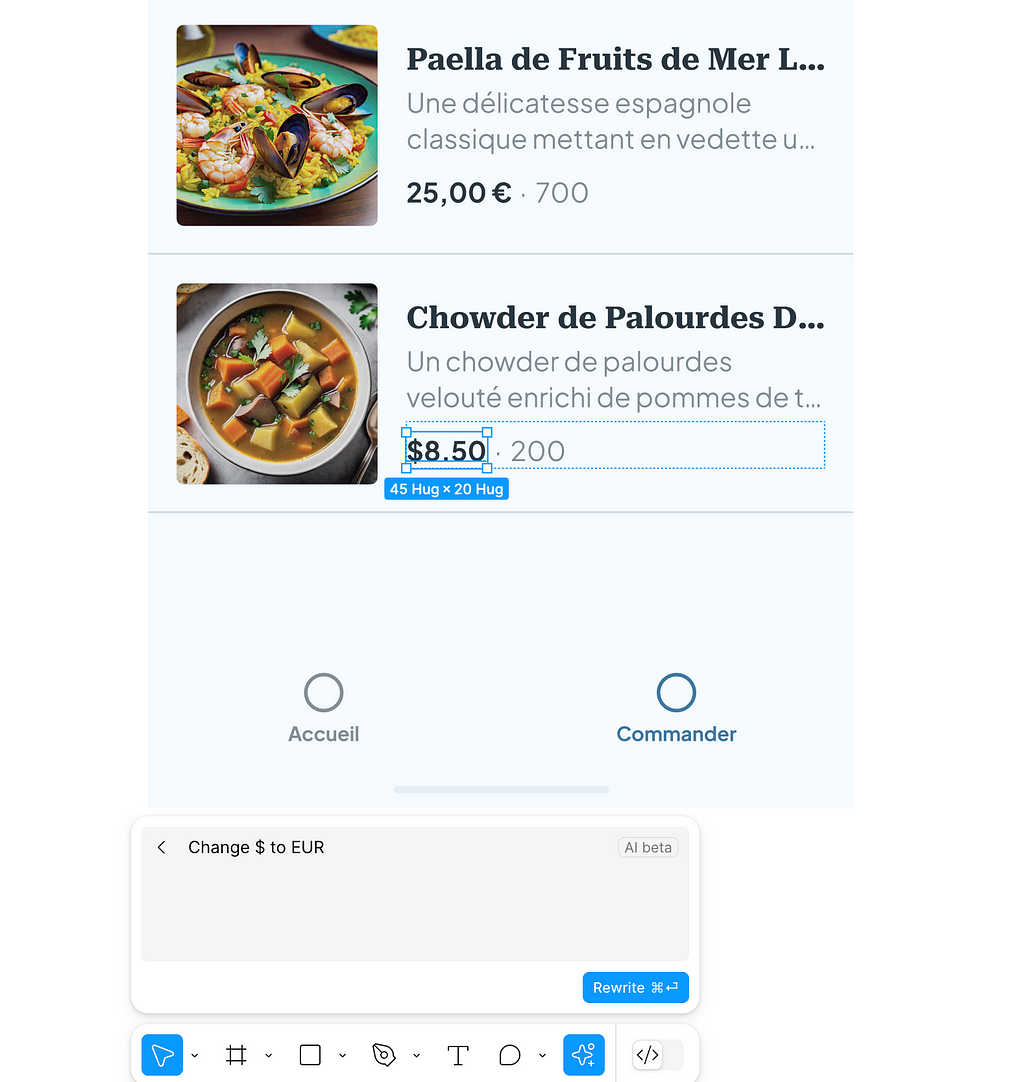
Design is in the details. When it comes to localization, it’s relatively simple to miss important nuances such as local currency. Figma can help you with that too. If you need to adapt our US product to the EU market, you can use a feature called Rewrite to to change the currency.
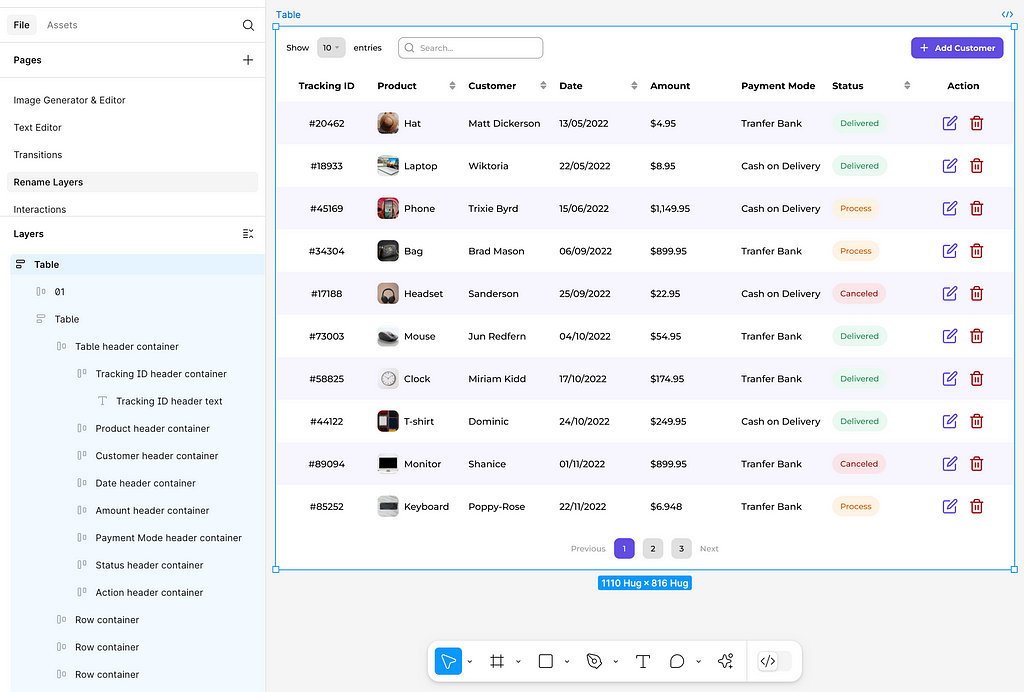
Rename layers
Honestly, I think that layer naming is more like a nice extra rather than a practical exercise that every designer should practice. But if you’re one of the designers who want to make everything perfect and also want to save precious time, then Rename Layers feature is for you. Instead of renaming Frames manually, you can select your design and choose Rename Layers. Figma AI will analyze your design and will do all the work for you.
Interactions
If you plan to put together a series of screens as a prototype, you can use Figma AI instead of doing this manually. Simply select the frames with your screens and choose action Add interactions.
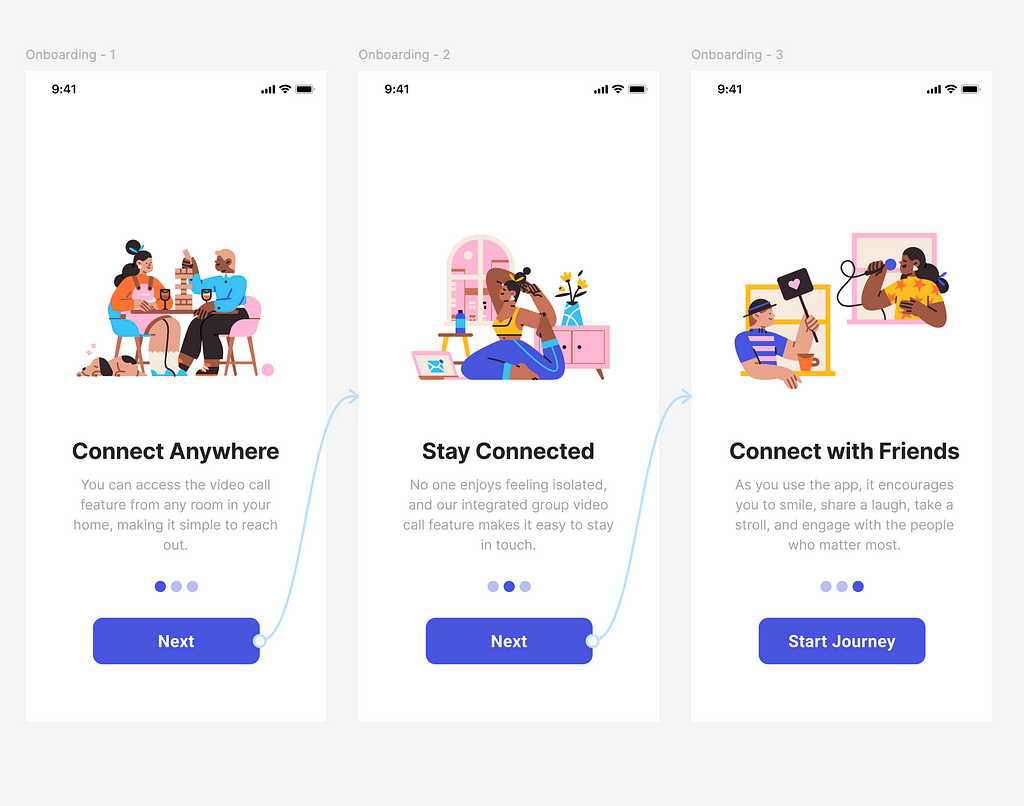
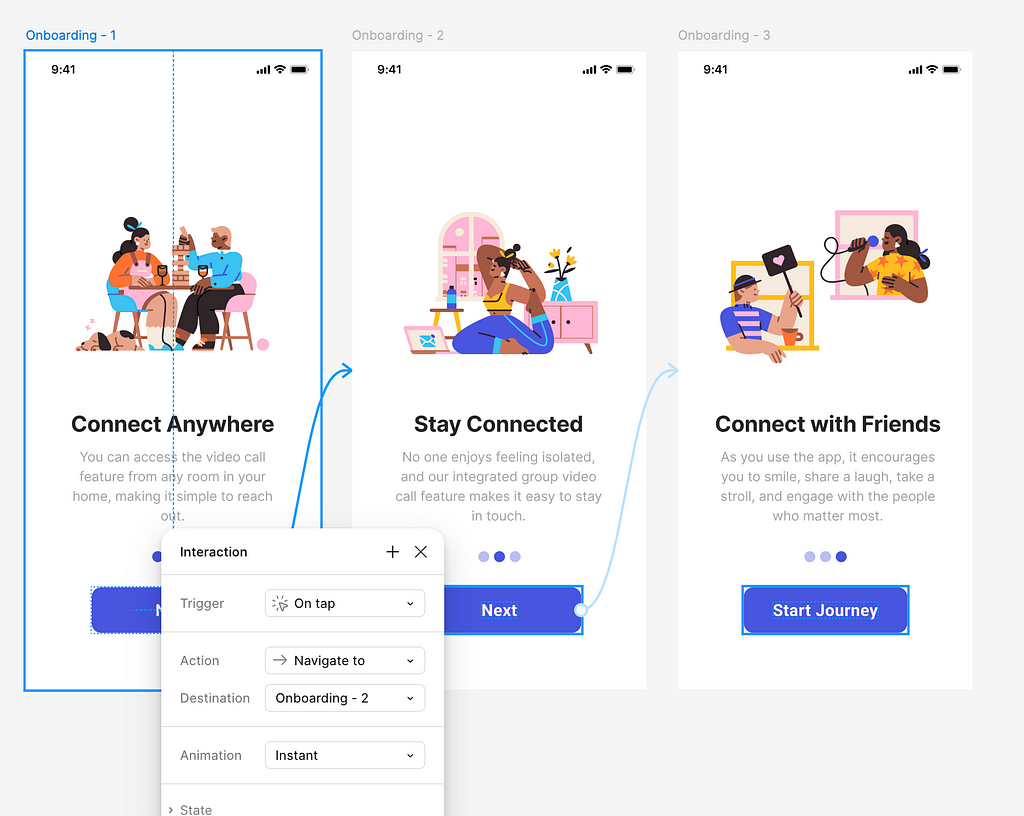
Figma will analyze your design and will create transitions between screens. If you have a simple design (like the one from my example), you will likely see a simple On click — Navigate to transitions. But for a more complex design, you will see back-and-forth transitions between states.
Want To Master Product Design?
Try Interaction Design Foundation. It offers online design courses that cover the entire spectrum of product design, from foundational to advanced level.
This post contains affiliate link(s)
![]()
Figma AI Tools was originally published in UX Planet on Medium, where people are continuing the conversation by highlighting and responding to this story.