Trying to guess things like color, contrast, and saturation by eye when working in Photoshop isn’t the best option. Instead, create “color check” layers that simplify your image so you can pinpoint and adjust the different settings more precisely, without having to guess.
Step 1
Create a new layer at the top of your layer stack and go to Edit > Fill > 50% Gray.
Step 2
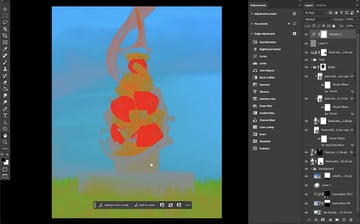
Change the Layer Mode to Luminosity, which will show the colors of your image.
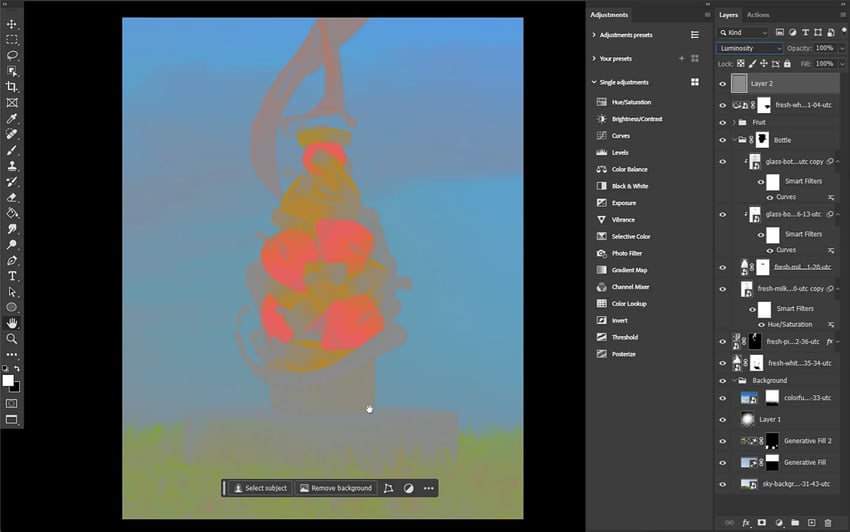

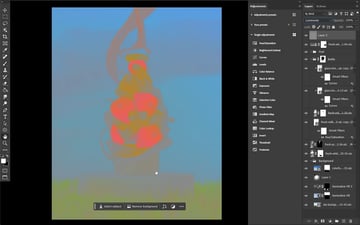
In this example, some aspects of the milk are red, while other aspects have a lot of blue in them, and others still, like the middle batch, have touches of both red and blue. The milk bottle, on the other hand, is very yellow.
Step 3
To get an even clearer picture, go to the Adjustment panel and create a Vibrance Adjustment Layer. Move it above the gray layer and set it to 100% Saturation. Now we can clearly see the different hues.


Step 4
Group these two layers using Control/Command-G. You can also lock this layer by hitting this icon so that you can freely click on your different layers without this one getting in the way. This is a good idea for all your check layers.
Step 5
Now let’s fix this milk situation. There are many different options for adjusting colors. This time, let’s choose Image > Adjustment > Hue and Saturation in Photoshop. Because milk is white, any color it has would be the colors being reflected from its environment for the most part.
Step 6
When turning an image into one consistent color, check Colorize. That’s what it does. Now dial in the hue setting so that the blue shade matches the blue in the sky, which is what that milk would be reflecting. Lower the saturation because milk is a white object. Repeat this step with each milk splash and the bottle of milk, turning them all into a consistent shade of blue.
Step 7
Now use this layer to dial in any other color. For instance, the bananas in our example are leaning towards red, so tweak those using a Hue/Saturation layer to bring in a bit more yellow.
Step 8
Use a Selective Color adjustment layer to make the grass greener, which will play off of the reds and the strawberries. Selective Color is a great adjustment when you want to pinpoint and tweak a very specific use in an image.