
Looking on the internet, it’s fairly simple to find articles and information on creating a book—from how to do layout to character design, writing your own story, and so on. In my travels I found that unless you sat down with an experienced illustrator over a cup of coffee, you would not perhaps find out what I like to call “soft skills”.
The name of soft skills does not imply that these skills are in any way unimportant; far from it. This is how you would approach a publisher or an author to do work, dealing with basic human nature, and how to deal with rejection. That rejection could be perceived—they perhaps haven’t acknowledged the gorgeously designed postcard you’ve sent them—or actual rejection, whereby your style doesn’t fit either the book or the market for which you have set your sights on creating.
This article will give you encouragement and examine what goes on beneath the surface of the children’s book illustrator’s daily life.
In this article I will be covering:
- my personal experience of being a freelance children’s book illustrator
- how to get commissions
- what to do when you’ve got a book commission
- the process of creating a book
- artwork handover
- invoicing
1. My Personal Experience of Being a Freelance Children’s Book Illustrator
My experience covers almost ten years of being a freelance illustrator, and to put my experience into perspective, I came into the illustration business knowing nothing. I could draw, but I had zero soft skills. I didn’t know how to approach publishers, and I barely had a portfolio.
In short, I had no business getting into the illustration business! I rub my temples and think “What was I doing?!” but you learn from your mistakes, and hopefully through this tutorial I’ll help you avoid having as many moments of cringe in a few years time.

2. I Want to Create Books for a Living. How Do I Get Commissions?
Sorry, folks, this isn’t going to be a textbook “If you follow all these steps, you’ll go from doodling on napkins to having a contract with Penguin for the next 10 years.” Each job and each application to a job is purely chance.
Think of it as creating a garden. Every seed you sow has the opportunity to be a healthy, thriving plant, but we all know that’s not the case. You can sow your tomato seeds in the perfect compost, keep them at the perfect temperature, give them the ideal amount of light and water them to the exact drop, yet aphids come along and eat them down to stumps.

That’s life. That’s illustration.
Your website could be perfect, your postcards are beautifully laid out with the targeted artwork to the company you are wanting to work for, all your contact details are on there, your portfolio is a dream that so much work has gone into, and it shows. You post off the card to the correct person at the correct address, and you skip off home to put your feet up and stare at your inbox.
The email never comes. You blame yourself. Was my art not good enough? How could they not love what I sent them? I should wipe all my art off the internet, change my name, and move to a remote Scottish island.
Blame the aphids—metaphorical aphids, that is.
Many things can happen. Primarily, art directors (ADs) and publishers are, for the most part, human. They are very busy, they are forgetful, they can’t be bothered, they are on holiday. The reason why one person got the job or even just an email from them may have been as simple as the fact that their postcard got seen first. I’m not going to say it’s luck whether or not you get chosen, but chance—what you need to do is give yourself that chance and try to create as many opportunities as possible.
It’s a fine balancing act of keeping yourself in the publisher’s or AD’s focus and not becoming a pest.
Self-reflection is good, and looking at your artwork and considering what could be improved is a must. Learning is good and should be an ongoing process. We all beat ourselves up that we are “not good enough”, and you know what? That’s okay. Maybe we are not good enough for one particular job—we can’t all be the best at everything.
For example, my forte is animals, but my weakness is architecture. I’m okay with that. I doubt an AD looking for someone to recreate the London skyline is going to look at my folio of silly animals and say, “They are PERFECT to do lots of nice straight lines.” That’s all okay.
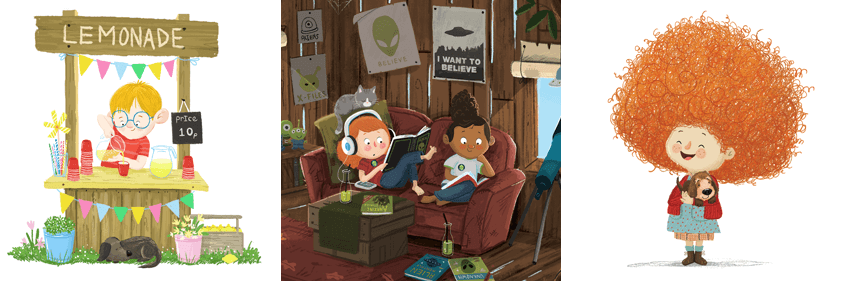
Be known for your strength. I want art directors to say, “We need silly animals, and the perfect person for that is Rowena Aitken.” Own it. Yes, you do have to have some versatility, but look at these illustrators below.
Louise Forshaw: Dinosaurs and Young Children
Twitter: @Munkey_Pants | Website: http://www.munkeypants.com/
Louise has a style that’s ideal for young children—characters with large, friendly eyes, soft faces, and some texture especially in scales and hair.

Tim Budgen: Mood & Personality
Twitter: @timbudgen | Website: https://timbudgen.com/
Tim’s work is really wholesome, and the characters are full of personality.
Chantal El-Bikai aka Captain Chants: Gorgeous Fifties Styling!
Captain Chants creates a gorgeous, clean fifties style with a comic-book touch. All the right curves in all the right places!
Twitter: @CaptainChants | Website: http://www.captain-chants.net/

Grace Sandford: Bold & Fun
Grace’s style is bold artwork with strong lines, which feels soft and adorable at the same time.
Twitter: @GraceSandford | Website: https://www.gracesandford.com/

Trevor Fraley: Cartoon Style With Simple Shading
Trevor’s style is modern and crisp with fun use of coloured lines, especially in the last character’s hair.
Twitter: @illustrevor | Website: http://www.trevorfraley.com/

Looking at other illustrators in your field is incredibly important. Finding your style is not easy, and developing that is a career-long process. Do artwork that you enjoy, and analyse your art—make improvements and ask fellow illustrators for critiques. The creative industry is usually incredibly friendly, but be polite and respect that they may be incredibly busy.
3. You’ve Got a Book Commission: Now What?
Congratulations on that gig! Once the initial WOOHOO has worn off, you are hit with “Now I have to do the actual work.” Here I’ll talk about what skills you’ll need on a daily basis.
Working With Publishers and Authors
What you should have from your publisher and/or author is a manuscript and/or an illustration brief. You may have a brief that says, “We need 4 spot illustrations, dimensions are 500px x 500px, CMYK” and a short description of what needs to be in each illustration. Sometimes, you will get a brief where the client wants you to extrapolate from the text.
A Picture Book Brief: Full Page Illustration
Here’s a sample from The Kilted Coo which I Illustrated.

Very straightforward. The page sizes were set out beforehand, so I knew the dimensions I needed to work with. The text in italics describes the scene. Lots of free rein here—this image needed to be of Drew (a Highland cow) chewing on some cloth.
This illustration actually did not make it into the final book. This can happen as either the client changes their mind or the illustrator suggests something that might be more fitting. In this case, I spoke with the publisher and decided we needed to not have Drew chewing on fabric. The final scene showed Drew in a field with other cows (moos!).
Don’t be afraid to approach clients if you feel there could be a better way of showing an image. However, it is very important to not take any criticism personally. My work has had many amendments from initial sketch to final piece, and the work always improves.
Here’s another brief style. In this case, it was for an education publication where spot illustrations had to fit around text that was provided by the client. Here we see the required file name 6CR_18_04, if the illustration is full colour, black and white or greyscale, and the size of the desired artwork. Next to that is a description of what has to be in the scene.
An Educational Brief Sample: Spot Illustration

These are fairly typical brief styles and, as always, if you are unsure of anything, please speak to your client for clarification!
4. So What’s the Process of Creating a Book?
The process of creating a book is in some senses quite simple but tricky in others. Here are some areas you may not have considered outside of drawing and design.
Commission and Contracts
I cannot stress this enough: sign a contract. Either create your own contract or have your client provide one. A great resource for contracts is The AOI (The Association of Illustrators), which offers online resources and a great book on the business of illustration—I recommend checking that out.

This is necessary so that you both know what is expected from each other, how much you will be paid, and what your royalties and copyright status are.
If your client provides a contract, read it. It sounds silly, but read it and question anything that you need clarification on. If there’s anything you don’t like the sound of, please discuss it with them. If you have any concerns they cannot answer, please speak to a lawyer or the AOI.
Read a synopsis of the story and ask any questions if unclear, such as age range, what does the character look like, do they have a style in mind?
How will you be paid? Will it be a lump sum on completion, or will there be payment landmarks—for example, when sketches are approved and when final artwork is signed off? Find out as much information as you can for any eventuality.
Once you’ve got all the legal things out of the way, now you’re ready to move on to planning the book.
What Information You Will Need to Plan a Book
Information you need to get started from a publisher includes:
- Number of pages.
- Size of pages.
- Text for pages.
- Colours and/or mood desired.
- What’s on each page—characters and scenery. The authors I’ve worked with via publishers have provided page-by-page illustration notes and the number of pages.
- Font—is this something the illustrator has to find, or do they have a font in mind? Ensure that the publisher has the rights to use this font or the font is free to use for commercial purposes.
- Age range of readership.
- Style notes—occasionally, clients will send links or images to works they like the style of or show you what other illustrators have done for the range so your work fits in.
Pro tip: Don’t be afraid to put forward ideas that could improve the artwork or book. It is appreciated, but make sure you can back up your idea with a sketch or reference images.
Character Sheets
Character sheets are designs that show turnarounds of the character. These can include line-ups against other characters, props, vehicles, and so on.
Here’s an example of character development where the client and I discussed appropriate colour palettes for the characters. This artwork was supposed to be very childlike—the characters for this project were animated, and you can see the final result on the [wideopenspace] Our Big Box website.

Character sheets can also look like this:
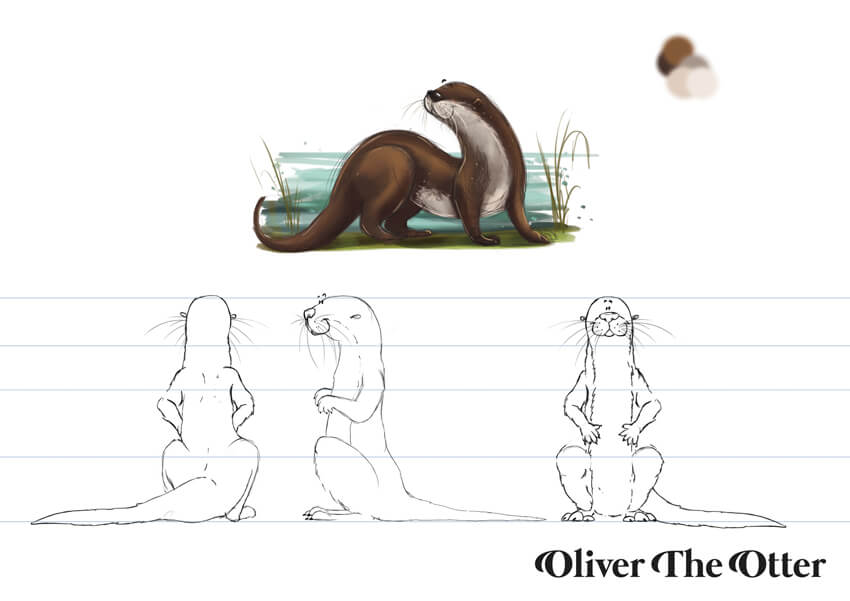
This shows Oliver The Otter from Ruan The Little Red Squirrel. He only appears on one page in the book, but I felt it was important to treat all the characters equally to ensure the style was consistent. Model sheets ensure you know what your characters look like from all angles and make your job easier.
Pro tip: Have swatches of colours for your characters on the model sheets so you can colour pick their colours quickly.
For a great tutorial on creating character sheets, look at Sara Berntsson’s Create a Comic Character: Making a Character Sheet in Adobe Illustrator.
Text Layout: Is This Something I, the Illustrator, Should Provide?
For most of the books I have worked on, I have offered the service of layout, which is a great way to have full creative control over your work (with the say of the client, of course!). This can be a bonus to a client who does not have to hire separate freelancers to create the book. This can also create extra income!
Some publishers will provide you with the text layout, and you have to fit illustrations around it.
Layout can be done in Adobe InDesign, Adobe Illustrator, and occasionally Adobe Photoshop. Here’s a link to a tutorial I created on How to Design a Children’s Book: Cover and Internal Pages to show a snapshot of my process.

Next we go on to talk about handover of the artwork to the client.
5. Artwork Handover
What Happens When You Talk to a Client?
This stage of the process is the all-important handover of artwork. Sometimes this stage can be a long, drawn-out process (pardon the pun), so it’s important that in your contract you allow a certain number of amendments to artwork after each stage (sketches, colour roughs, and “final” artwork). Note in the contract that any amendments, especially in the final stages of the project, are charged at £x per amendment.
Delivery
Once you have confirmed with the client that they are happy with everything you have done (make sure you get this in a written format just in case!), it’s time to send the artwork to your client.
Depending on the client, they will want the files in one of the following formats:
- .ai (Adobe Illustrator)
- .eps files
- .jpg
- .tiff
- .psd (Adobe Photoshop)
- .pdf (either as individual PDFs for the artwork or all the files in the same document)
- .indd package (Adobe InDesign)
This should be confirmed either in the contract or with the client prior to dispatch.
Posting Physical Artwork
Most of the work I do is digital, so postal delivery is a rare occurrence. Make sure for physical artwork that, if possible, you get a high-quality scan or photograph of the artwork. If that artwork goes missing or is lost, you need to have a backup.
Package that artwork in sturdy packaging that can’t be easily bent, twisted, or crushed. Parcels are not always treated with the utmost care, so little things like reinforcing corners and adding some layers of card make a difference.

Postage costs should be paid by the client and should be included in your quote. Either this will be an upfront payment or you can expense it at a later date. Postage should be recorded delivery, with adequate levels of insurance depending on the value of the artwork.
Finally, always get proof of postage and a receipt. Let your client know if there is a tracking number and when it was sent. Check in with them to make sure they have received the work—it’s the little things like that which clients appreciate.
6. Invoicing
This is the final part of the job. With regard to sending the client the artwork, you may have in your terms that you receive payment before they get the art or you send the art and receive your payment at a later date—usually 30 to 60 days, although this can vary.
Your invoice design will vary according to your needs, but here’s an example of my invoice design.

Key header information should include:
- Your address
- Your contact telephone number
- Your business email address
Information your client will require:
- Your Invoice Number: this is a numbering system for your own records so you can match up payments when you do your accounts.
- The Date the Invoice Was Sent: so you can track payments and if they go over any contractual deadline periods.
- Client’s Name: to verify that you have sent this to the correct person
- Client’s Address: to verify that you have sent this to the correct person
- Cost: with details such as number of illustrations and job name. If the job has a payment landmark such as “payment on delivery of sketches” then add this info here.
- Payment Details: I cannot stress this enough, make sure these details are correct! I will admit that once I typo’d an account number and my client did not have a fun time trying to sort that out. The methods of payment are usually bank transfer or PayPal, but if you are being paid in cake, retailer vouchers, or some other method, then note that here!
This section is one that I use when dealing with an agent or proxy using information given to me on a purchase order.

This usually includes, but is not limited to:
- Purchase Order Number: The tracking details provided to you by the client/agent/proxy.
- Date of Order: The date on the purchase order.
- Job Number: Provided to you by the client/agent/proxy.
- Customer Name: If not working directly with the client.
- Title of Project: To ensure the paperwork matches up.
- Designer/Contact: Agent or proxy you are working with.
A nice touch is to add a personalised header and your website at the bottom of the invoice. A benefit of this is that if your invoice is in a pile of paperwork, it will make it easier to find, and you can get your hands on that cold, hard cash/cake/vouchers sooner.
If you need some help with creating a professional looking invoice then check out Melody Nieves‘s article showcasing 35 Invoice Templates for Corporations & Small Businesses.
Conclusion
I hope this tutorial has given you some insight into how a children’s book illustrator works and the ups and downs of the business. I wish you all the luck in the world in your endeavours!
For more tutorials relating to creating children’s books, join Grace Fussell in this learning guide on How to Create a Children’s Picture Book in Adobe InDesign.